Fitting Coilovers
With thanks to forum member "R11ysf" (Rhys), we have this handy guide for fitting coilovers. Here goes, it's hopefully easy to follow.
Tools you will need:
Parts you will need:
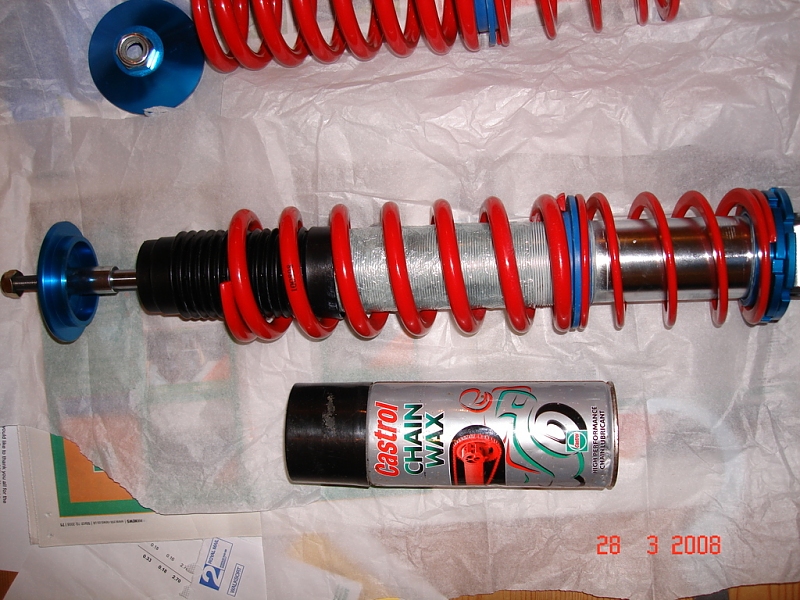
I decided to spray mine in Castrol chain Wax. Ordinary chain lube is too thin and drips off. I've also gone belt and braces and covered in cling film and duck tape but that's just me!
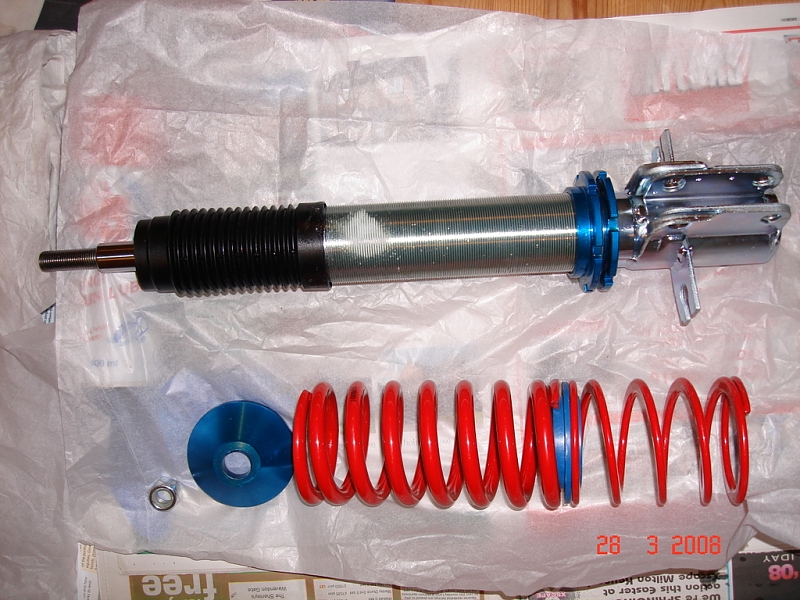
On the Table
Your new shock with a touch of wax
Now covered and re-assembled
After spraying, fit new top mounts to your front shocks. Everyone seems to suggest this.
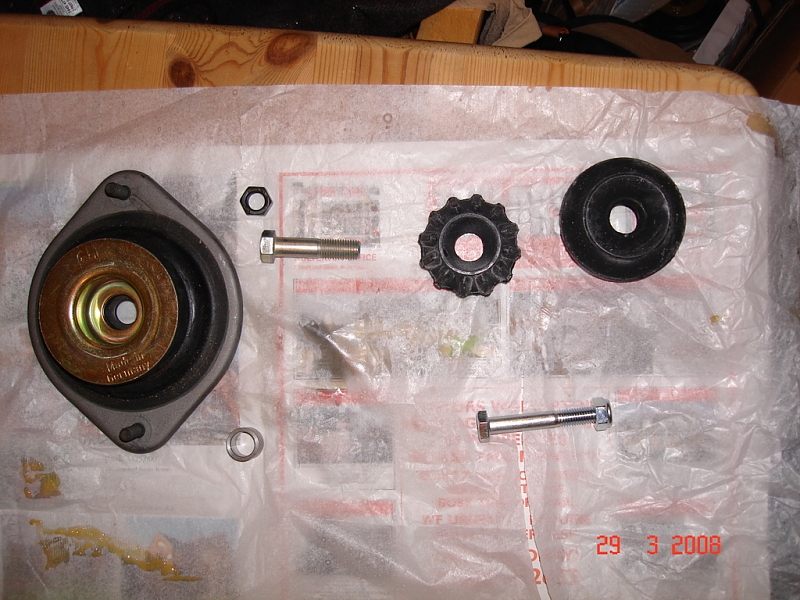
New top mounts, spacer, lower bolt & nut, rear rubber bearings and rear bolt & nut.
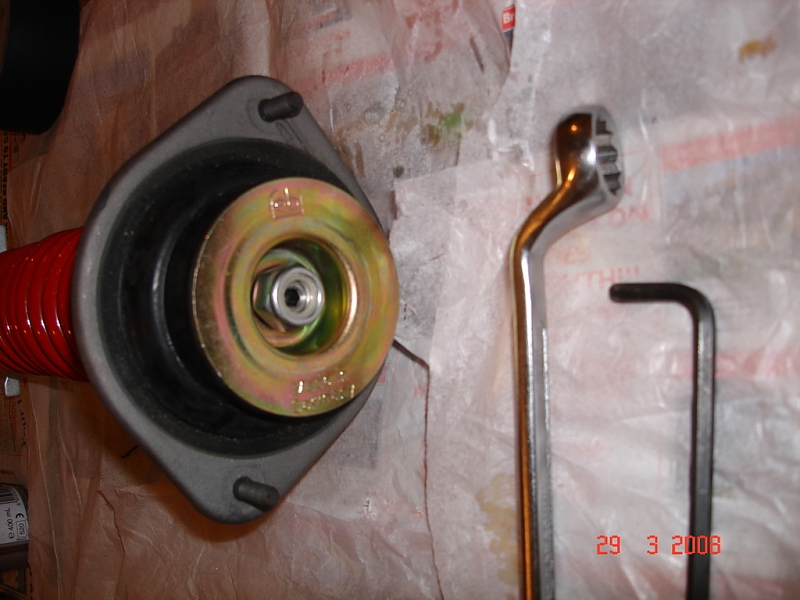
Slacken the coilovers right off so they are sitting at the very bottom. Then place the top mount on to the top of the shock and insert the new spacer. Now screw on the nut, this will have a nylon locking thread. When the thread starts to bite place your swan neck spanner around it and an allen key (9mm on mine) through the centre. Now you can tighten until there is no vertical movement in the mount. There will be some wobble but the mount shouldn't lift up and down.
Now using your C-spanner wind the coilovers up at least 5 cm but probably 10, otherwise the car will be so low you won't be able to get your jack out!!
Construct the rears by winding the coils down and screwing on the nut whilst holding the flat of the strut with some water pump pliers.
Rears First
On the Car measure height from centre of wheel to arch. This will let you know how far you've dropped at the end.
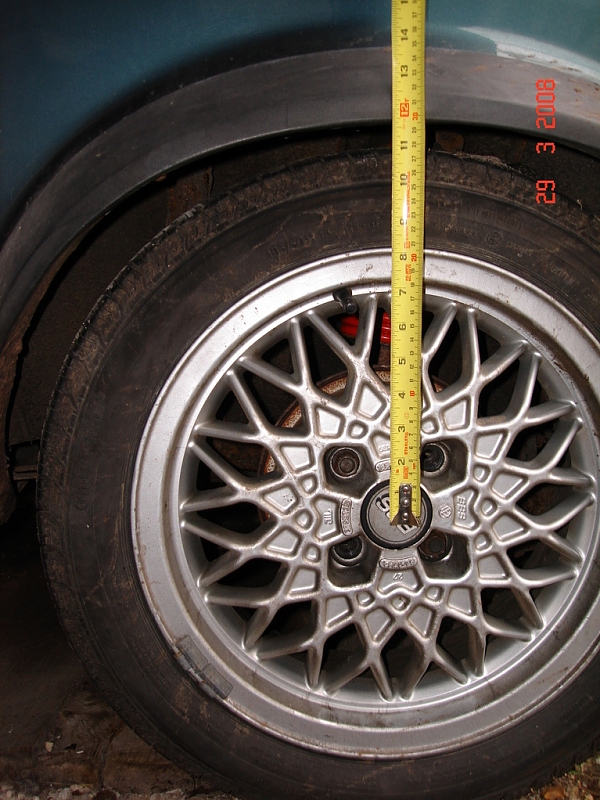
Loosen wheel bolts. Jack up the car really high with your jack under the rear cross member and then put axel stands (with a block of wood) under the rear jacking points of the car ON THE BODY. Make sure they are NOT on the beam as this needs to swing down when you remove the jack. When securely on axel stands take off rear wheels.

There is one bolt at the bottom of each shock. Chances are these will be seized and rusted solid. Undo or cut off as you see fit. NB: Hitting these with a hammer if seized is pointless as they are sitting in a rubber housing which absorbs the blow. Slacken off these bolts but don't take them out yet. Place a jack under one side of the rear axel and pump it to almost pressure to take the weight.
Inside the boot there is a cap at the top of each inner wing. There is a nut here that needs to be undone. Remove it and the metal washer and upper rubber bearing.
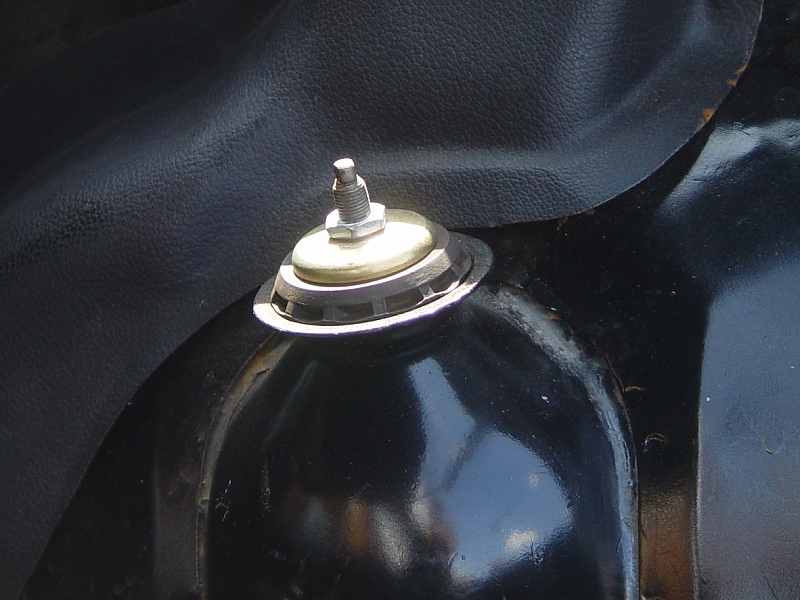
Now the weight of the rear axel is resting on the jack. Lower it slowly to stop you hubs slamming down. Now remove the lower bolts. The shocks will now pull free. Replace with the shiny new ones!
Mine hub lowered onto bricks.
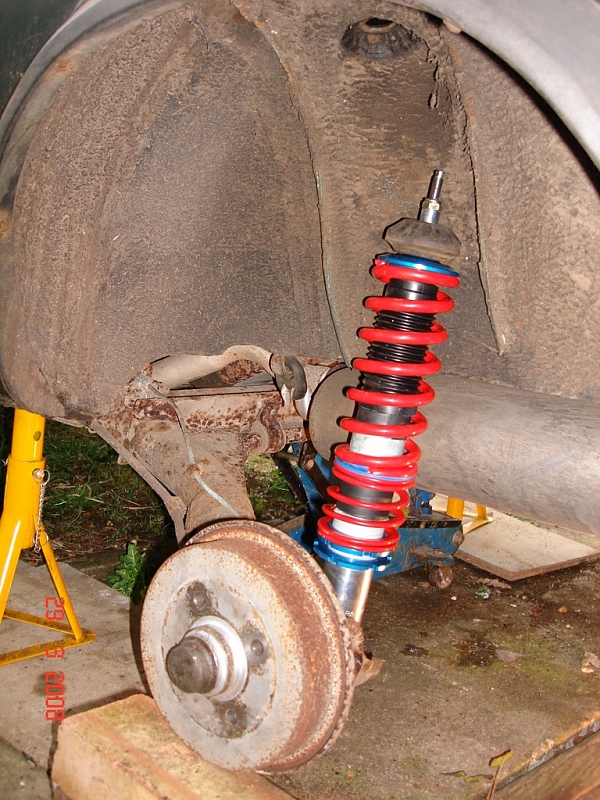
Out with the old and on with the new! Look at the difference between the old and new rubbers.
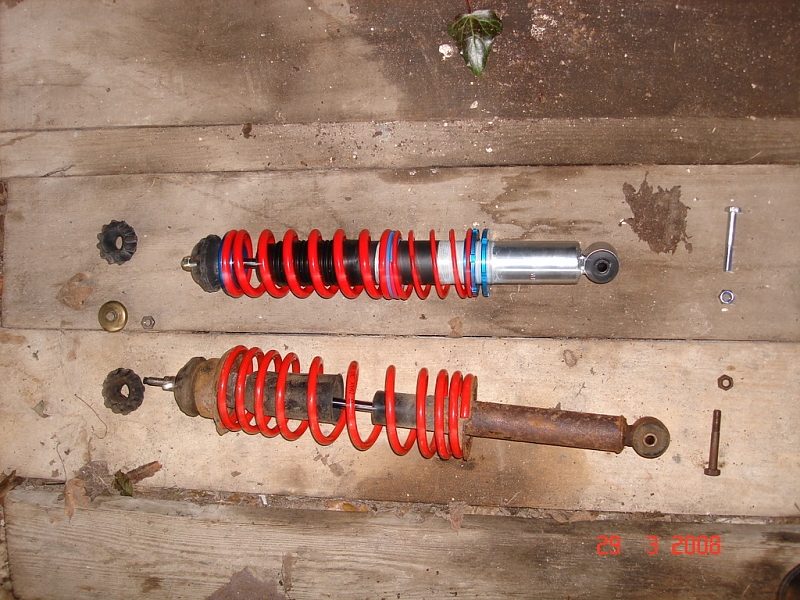
Now fit back together. The torque measurements are in haynes (60 ftlbs I think) but they need to be tight but not ridiculous.
Fronts
Measure from wheel centre to wing top (or arch) and note.
Undo wheel bolts, jack up and axel stands under the body, remove wheels.
If you have one place a camber gauge on the brake disc and note the angle.
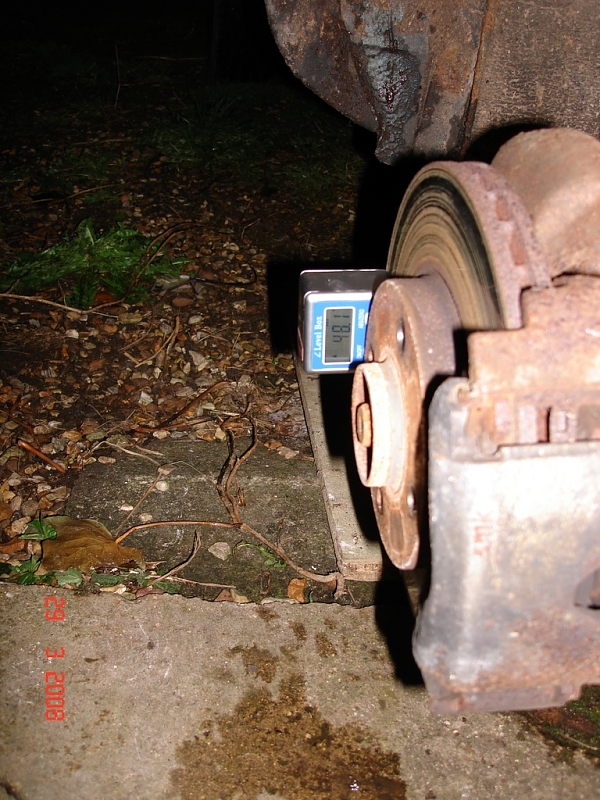
Break the torque on the two bottom bolts. The bottom is a bolt holds the shock leg on, the other is the camber adjustment.
Mine covered in WD40
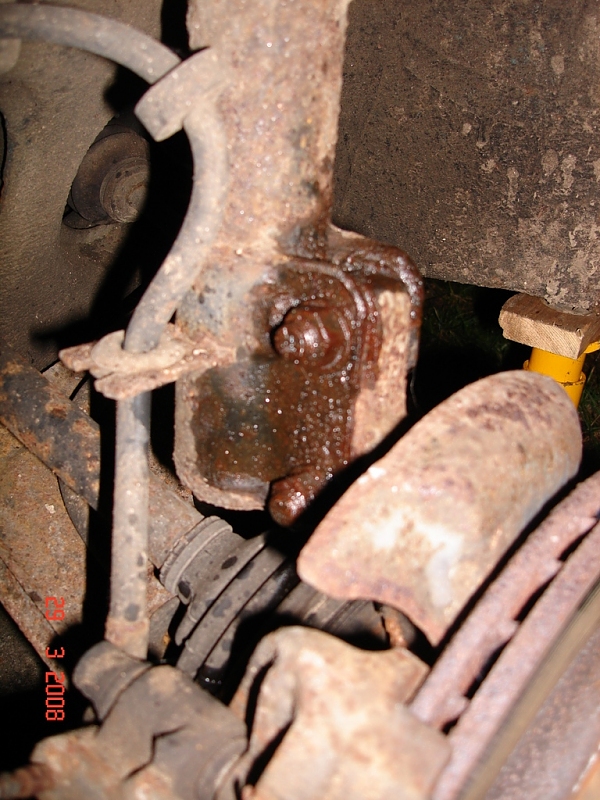
Now go under the bonnet and undo the screws holding the top mount in.
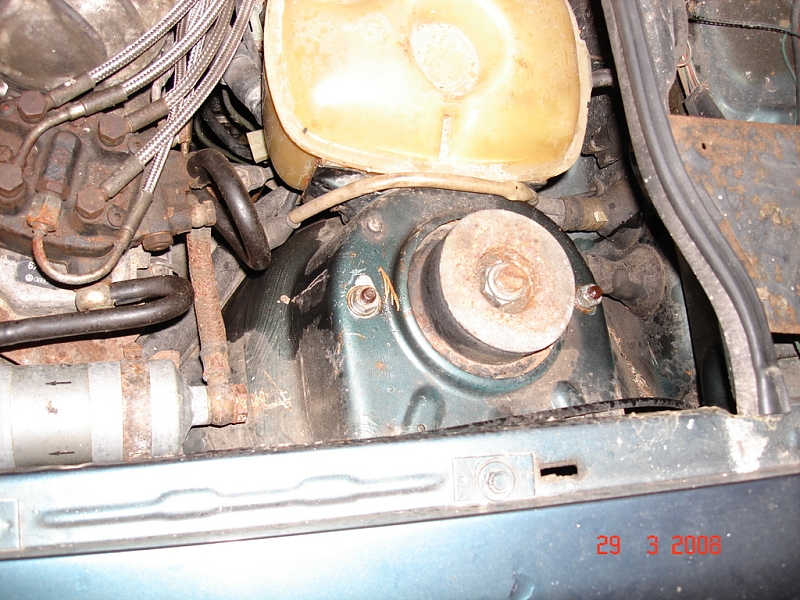
The whole leg should drop down. Now undo the bolts and remove leg. Replace with new one and loosely tighen bottom bolts and then tighten in new mounts. Now adjust the camber bolt to get back as close to the original camber measure as possible and tighten. Then tighten bottom bolt. Replace wheels and lower carefully (in case it's too low for your jack!)
NB: It has been suggested you should always get camber and tracking done after any changes so if you are unsure get a good garage to set it up for you.
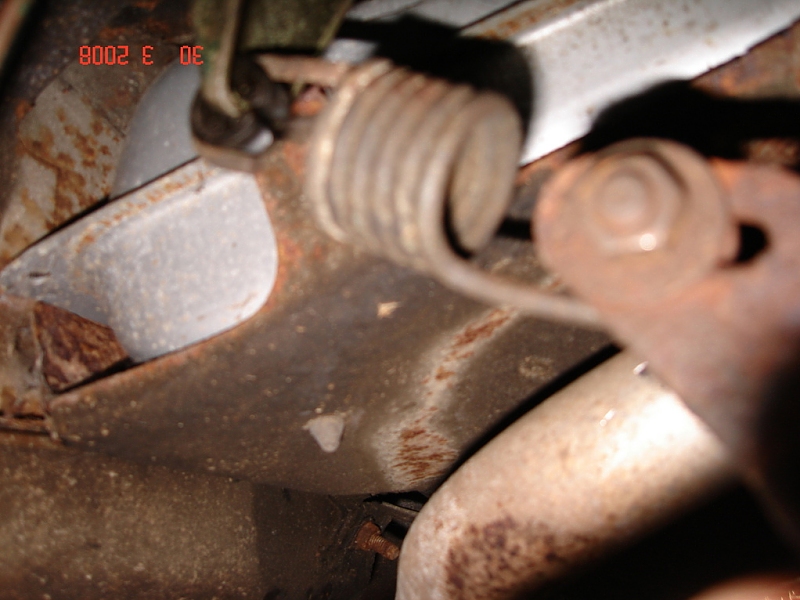
Now finally because your car is lower you need to adjust the rear brake compensator. This is just in front of the rear near side wheel.
With the car on level ground slacken off the bolts (13mm) and adjust so that it is roughly half-way along the travel of its stroke. This means if you get a fat bloke in the back it will allow more breaking to be done on the back by pulling the spring tight. Also, if you brake hard and the rear lifts it will shut off and let more breaking be done at the front.
Sorry not the best photo but the nut tightens up, the other end is attached to the brake compensator lever.
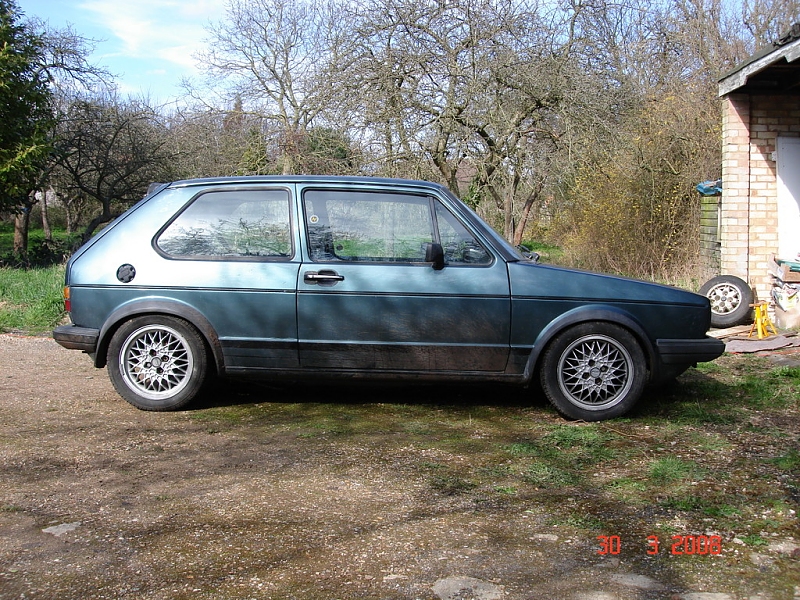
Voila, you now have a (dirty!) lowered Dub.
This is using the Hot-Tuning Ebay coilover kit. Coils are wound up 6.5cm from bottom of threads. Some clearance issues, I think I'll have to go up another cm.
Tools you will need:
- 13mm spanner and socket
- 17mm spanner and socket
- 22mm "swan neck" spanner
- C-spanner
- Tape measure
- Water pump pliers (or mole grips)
- Allen Keys
- Magnetic camber measure (not necessary)
Parts you will need:
- Coilovers
- New top mounts (Febi seem to be the best)
- New top mount spacers (Not necessary but cost pennies)
- New rear bolts and nuts (probably but not always)
- Motorbike chain WAX (Castrol is good)
I decided to spray mine in Castrol chain Wax. Ordinary chain lube is too thin and drips off. I've also gone belt and braces and covered in cling film and duck tape but that's just me!
On the Table
Your new shock with a touch of wax

Now covered and re-assembled

After spraying, fit new top mounts to your front shocks. Everyone seems to suggest this.
New top mounts, spacer, lower bolt & nut, rear rubber bearings and rear bolt & nut.

Slacken the coilovers right off so they are sitting at the very bottom. Then place the top mount on to the top of the shock and insert the new spacer. Now screw on the nut, this will have a nylon locking thread. When the thread starts to bite place your swan neck spanner around it and an allen key (9mm on mine) through the centre. Now you can tighten until there is no vertical movement in the mount. There will be some wobble but the mount shouldn't lift up and down.
Now using your C-spanner wind the coilovers up at least 5 cm but probably 10, otherwise the car will be so low you won't be able to get your jack out!!
Construct the rears by winding the coils down and screwing on the nut whilst holding the flat of the strut with some water pump pliers.

Rears First
On the Car measure height from centre of wheel to arch. This will let you know how far you've dropped at the end.

Loosen wheel bolts. Jack up the car really high with your jack under the rear cross member and then put axel stands (with a block of wood) under the rear jacking points of the car ON THE BODY. Make sure they are NOT on the beam as this needs to swing down when you remove the jack. When securely on axel stands take off rear wheels.

There is one bolt at the bottom of each shock. Chances are these will be seized and rusted solid. Undo or cut off as you see fit. NB: Hitting these with a hammer if seized is pointless as they are sitting in a rubber housing which absorbs the blow. Slacken off these bolts but don't take them out yet. Place a jack under one side of the rear axel and pump it to almost pressure to take the weight.
Inside the boot there is a cap at the top of each inner wing. There is a nut here that needs to be undone. Remove it and the metal washer and upper rubber bearing.

Now the weight of the rear axel is resting on the jack. Lower it slowly to stop you hubs slamming down. Now remove the lower bolts. The shocks will now pull free. Replace with the shiny new ones!
Mine hub lowered onto bricks.

Out with the old and on with the new! Look at the difference between the old and new rubbers.

Now fit back together. The torque measurements are in haynes (60 ftlbs I think) but they need to be tight but not ridiculous.
Fronts
Measure from wheel centre to wing top (or arch) and note.
Undo wheel bolts, jack up and axel stands under the body, remove wheels.
If you have one place a camber gauge on the brake disc and note the angle.

Break the torque on the two bottom bolts. The bottom is a bolt holds the shock leg on, the other is the camber adjustment.
Mine covered in WD40

Now go under the bonnet and undo the screws holding the top mount in.

The whole leg should drop down. Now undo the bolts and remove leg. Replace with new one and loosely tighen bottom bolts and then tighten in new mounts. Now adjust the camber bolt to get back as close to the original camber measure as possible and tighten. Then tighten bottom bolt. Replace wheels and lower carefully (in case it's too low for your jack!)
NB: It has been suggested you should always get camber and tracking done after any changes so if you are unsure get a good garage to set it up for you.
Now finally because your car is lower you need to adjust the rear brake compensator. This is just in front of the rear near side wheel.
With the car on level ground slacken off the bolts (13mm) and adjust so that it is roughly half-way along the travel of its stroke. This means if you get a fat bloke in the back it will allow more breaking to be done on the back by pulling the spring tight. Also, if you brake hard and the rear lifts it will shut off and let more breaking be done at the front.
Sorry not the best photo but the nut tightens up, the other end is attached to the brake compensator lever.

Voila, you now have a (dirty!) lowered Dub.
This is using the Hot-Tuning Ebay coilover kit. Coils are wound up 6.5cm from bottom of threads. Some clearance issues, I think I'll have to go up another cm.

There are no pages beneath this page
There are no posts yet


