Brake Upgrade
Servo and Master Cylinder Upgrade
Upgrading the servo and master cylinder is a popular brake upgrade to the Mk1 Golf. The larger servo means that less brake pedal effort is required. The larger (diameter) master cylinder means that the pedal travel is less, for a given amount of braking applied to the wheels.It goes without saying that brakes are an important safety-critical component of a car, so you should only by tackling this type of job (indeed, any work on safety critical aspects of the car) if you're competant and methodical. Various people have made errors during this conversion which has resulted in braking to only 2 wheels, no brake lights, brakes gradually applying themselves of their own accord, etc. Also this falls into the "modifiication" category in that its not just bolt on - there's one area you need to cut off the end thread of the servo; and you will need to reroute brake lines and possibly make up (or have made up) a couple of extra short connecting pieces.
These instructions assume you have a RHD Mk1 Golf with a servo and master cylinder (some low-spec or early cars didn't have a servo) and that you've obtained both master cylinder and servo from a suitable car, eg Mk2 Golf GTI 16V, 80-90s Passat, etc. (See step 4). Note that later models have a different fitting on the master cylinder and are thus incompatible with the Mk1 Golf's linkage.
1. Check your brake bleeding nipples! You will need to bleed the entire braking system at the end of the job, if your nipples are rusted solid, or already snapped off, you'll need to replace the calipers or wheel cylinders; or arrange for some 'engineering' to be done to remove and replace the offending parts.
Remove other parts which are in your way, for example airbox, inlet trunking, battery, etc. depending on your model.
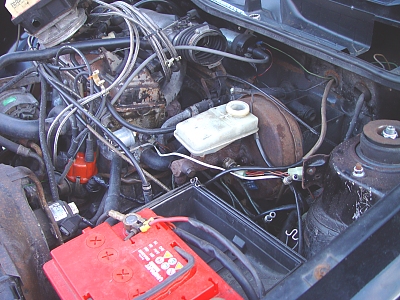
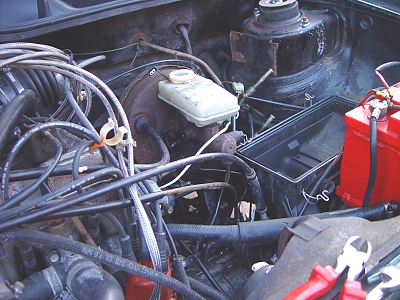
2. Remove stock master cylinder. The master cylinder bolts onto the servo (2x M8 nuts) and the brake lines are 11mm (?) nuts too. These may be incredibly tight, meaning you risk rounding them off or worse. Its advisable to spray penetrating fluid and let it soak beforehand; and use a brake pipe spanner which is an open spanner (to go over the brake line) but grips on more sides of the nut than the regular spanner. If you're brake lines are being replaced at the same time, you can always simply cut them off and then use a socket over the remaining fitting.
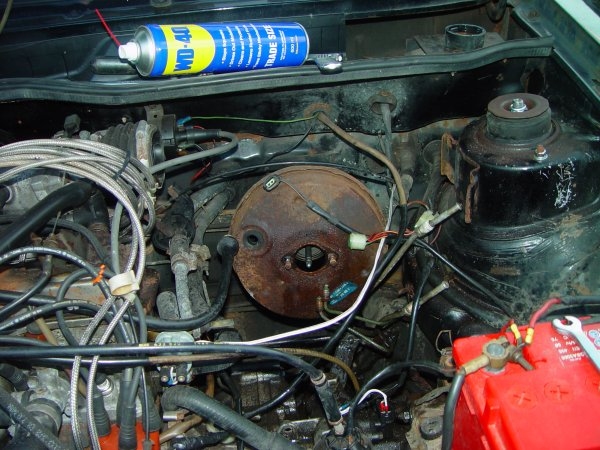
3. Remove servo. The servo is held in place with 4x M8 nuts, which are behind/inside the bracket and thus make their removal tedious. The servo is attached to the cross bar mechanism by a clevis and pin. There is a clip on the bottom of the pin, which is also difficult to disconnect. Lastly there is a return spring which is securely clipped into the clevis pin (use thin-nosed pliers or similar, to disconnect). Also don't forget to carefully disconnect the vacuum line.
4. Compare the old and new servo and master cylinder. You'll notice that:
a) The thread on the 16V servo is around 10mm longer than the stock servo. This will need cutting down, because you need to use the clevis pin fitting from the original part, to clip the return spring back into.
b) The length of the rod on the 16V master cylinder (which goes into the servo) is very different to the stock item, meaning that both servo and master cylinder must be swapped as a pair.
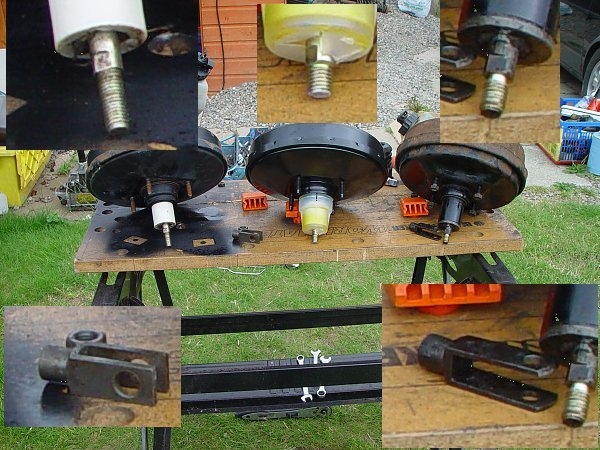
5. Cut down the thread on the 16V servo to match the length of the stock servo
6. Unscrew the clevis pin fitting from the stock servo and screw it into the 16V servo (after having removed its own fitting).
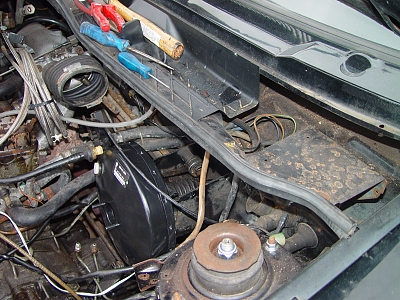
8. Carefully push the vacuum hose into the new servo. Don't be too hasty with this, its possible to knock the rubber seal into the body of the servo and the only way to retrieve it is to remove the servo and wiggle it out!
9. If you are doing this modification as part of a 16V conversion, note that the brake fluid reservoir is very close to the distributor. If you prize off the reservoir and refit it the other way round, you can just about retain the original 16V distributor cap. But there are other options, for example using a different cap which exits the leads from the side or top. See pic below for an example.
10. Now, there's a few variations on the 16V master cylinders you can refit. Essentially it comes down to '2 outlet' or '4 outlet'. Also if you're doing a 16V conversion, you can use the 4 outlet master cylinder but use blanking plugs, so there are 2 outlets on the left (the 2 outlet 16V master cylinder has pipe connections on the right). Bearing in mind the original master cylinder has 4 or 5 outlets (there are 1 or 2 hydraulic brake light switches and possibly a T piece underneath the cylinder) you may need to use extra T-pieces to provide all the connections. For each T piece you introduce, you'll also need a short solid brake pipe (say, 4 inches long) with 2x male fittings (they are a standard, M10x1). It should be possible to bend the existing pipes to reach the new master cylinder (or T pieces). Remember that the braking on a Mk1 Golf is diagonally split, ie the front section of the master cylinder supplies diagonally opposite front and rear wheels; the rear section the others. However you work out the piping, you need to retain this for safety.
Below is one way of routing the pipework for a 2 outlet master cylinder, into an 8V GTI
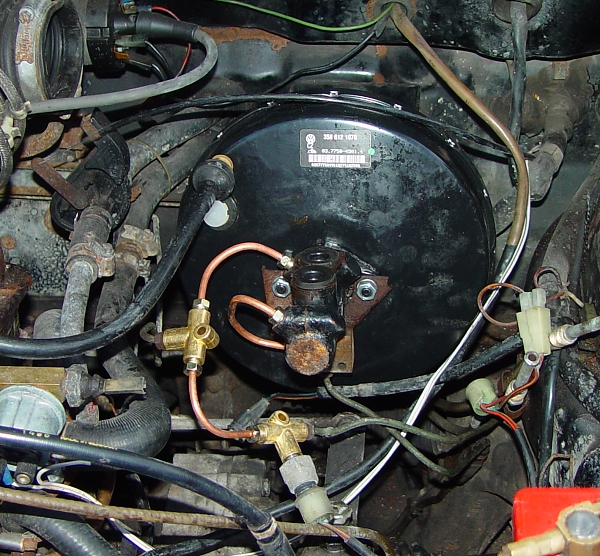
Using a 4 outlet master cylinder, with the right pair of outlets blocked off (left in the pic, since we're looking to the rear of the car) and the fluid reservoir reversed
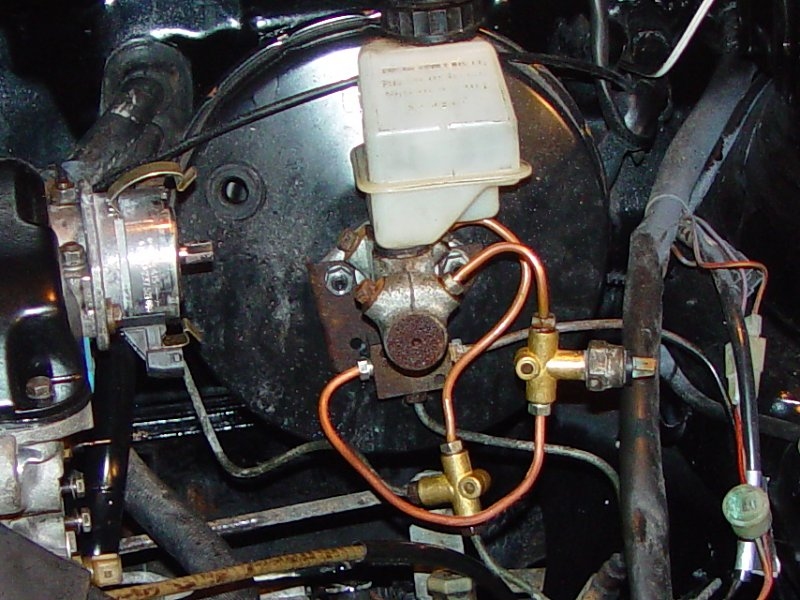
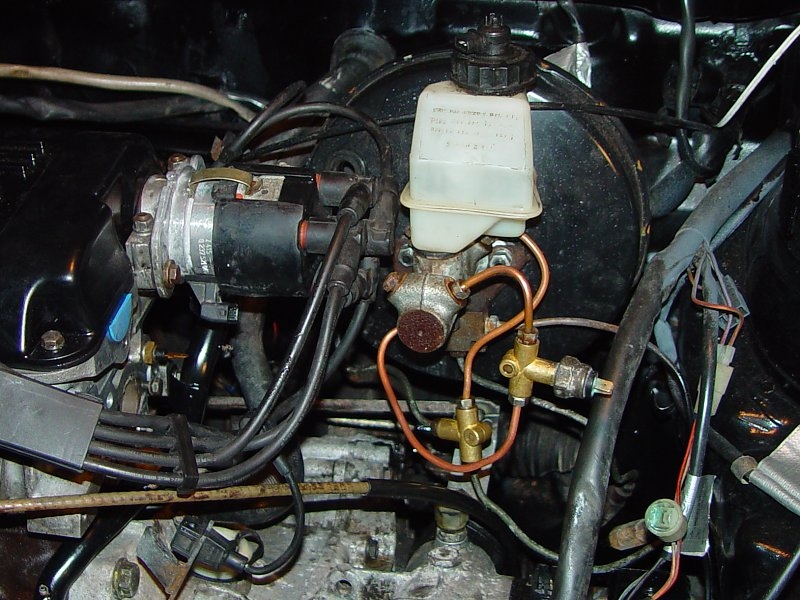
Note there's just enough clearance with the standard 16V distributor cap fitted. Also once fitted, the coolant reservoir just about fits alongside the brake fluid reservoir.
11. Some people have used a Scirocco brake light switch (its a mechanical switch mounted on the pedal box, instead of a hydraulic switch on the master cylinder) but since you have the system bled and are doing pipework, its easy enough to add an additional T piece and reuse one of the hydraulic switches. It saves rerouting wires too.
12. Once you have sorted out your pipework (and probably mock fitted the new master cylinder in place), fit it proper, including tightening all hydraulic lines, the nuts to the servo and re-check all other disconnections you've done. If you stripped any other parts out the way to gain better access (eg airbox, battery), refit these.
13. Bleed the brakes. You're completely filling the system with hydraulic fluid so you'll need around 2l or more. Also, you need to make sure any T pieces don't trap air. To ensure this, I loosen both relevant nipples to bleed 2 circuits simultaneously. Others have claimed success with an "Easybleed" style of brake bleeder which connects to your brake fluid reservoir cap and is supplied with cair under pressure from a spare tyre. But I don't like this method, I prefer to do it the traditional way using one way valves and gently stroking the brake pedal (nice and slow, to around 70-80% of its travel). This way avoids having to fiddle with the load compensator (if your car has one), brake pedal pressure can easily overcome the pressure reduction it gives, while the Easybleed struggles and is slow. Also - if your master cylinder seals are going to fail, I'd much rather it happens in the workshop!
14. Job done! If it all went okay, you'll be amazed at the difference this makes!
There are no pages beneath this page
There are no posts yet


