Changing your oil and inspecting your oil pump.
Submitted with thanks by JSeaman.
Oil is the most important fluid in an engine and performs several tasks including:
- Lubrication of moving parts
- Provides a reduced-friction surface
- Transfer of heat away from engine internals
- Protects bearings and prevents metal-to-metal contact
If you run out of coolant you overheat, run out of oil and your engine will be destroyed. Needless to say the oil system shouldn't be neglected.
You should change your oil and filter regularly (at least every 12 months) and check for leaks at least once a month. Preferably get in the habit of checking your oil weekly and chack for any signs of leaks at the same time. By the time your oil warning light comes on it may already be too late so don't neglect this.
Step 1 - First, jack the car up. It doesn't have to be too high, just give yourself enough room to crawl under and wield a spanner. Put a couple of axle stands under to be safe
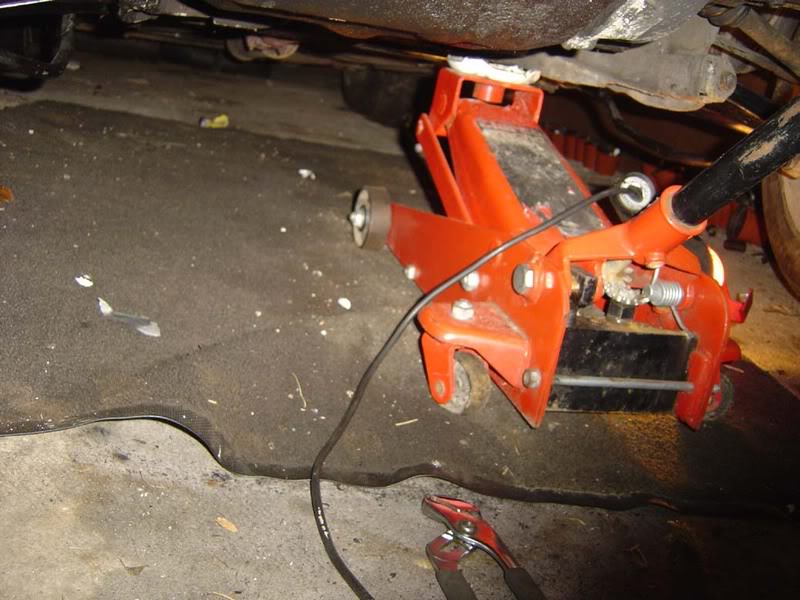
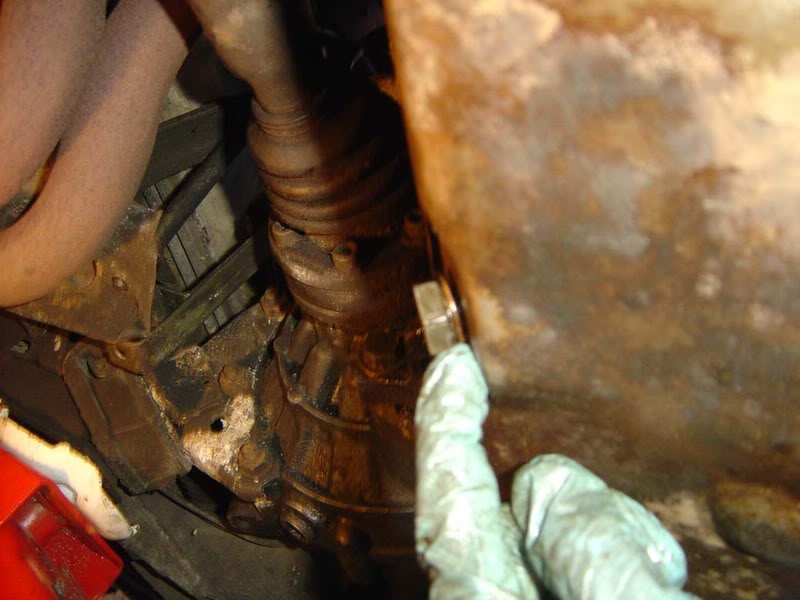
Step 2 - Use a 19mm spanner to 'crack off' the sump nut but don't do more than a turn or so
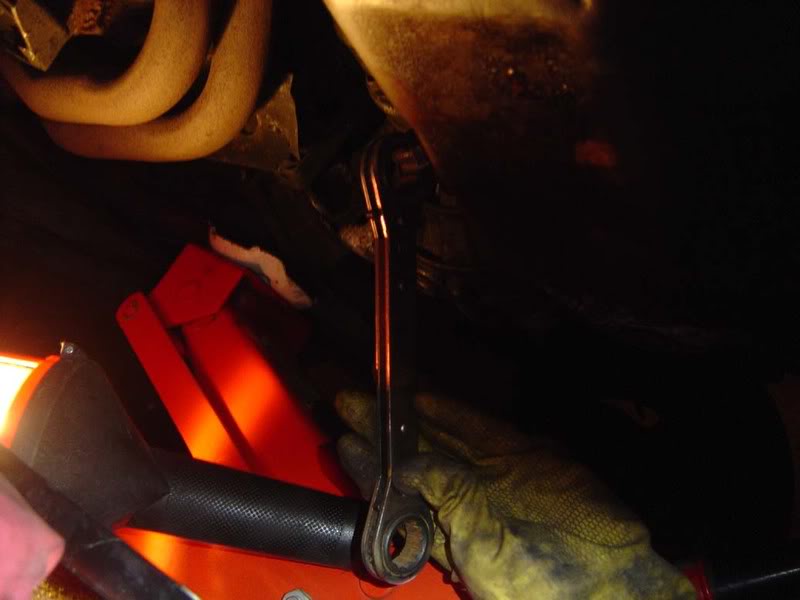
Step 3 - Slide a container into place ready to catch the oil and you should be able to remove the nut by hand (the joy of lubrication). The trick is to hold onto th enut as the oil comes pouring out of the sump so you don't end up fishing it out of a pan of dirty oil
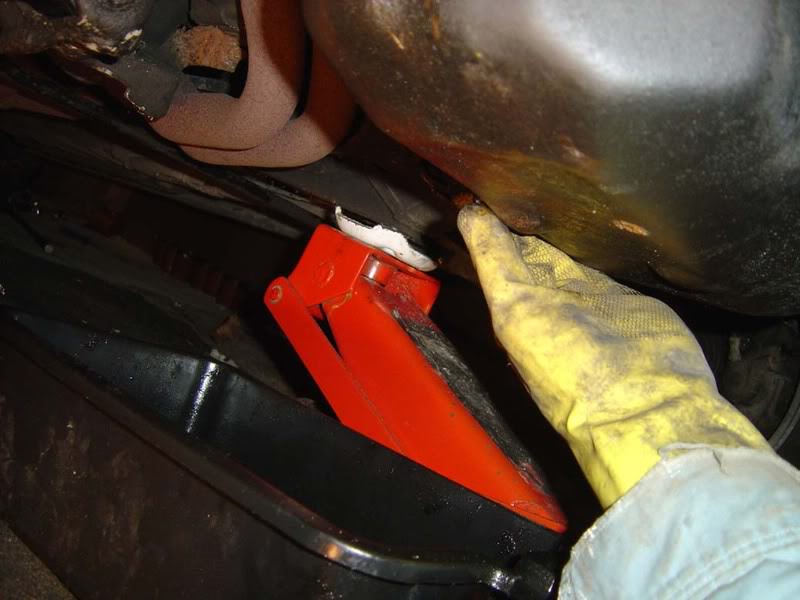
Step 4 - Let the oil flow into the container and it will quickly slow down to a constant trickle. Move the container accordingly as the flow changes direction
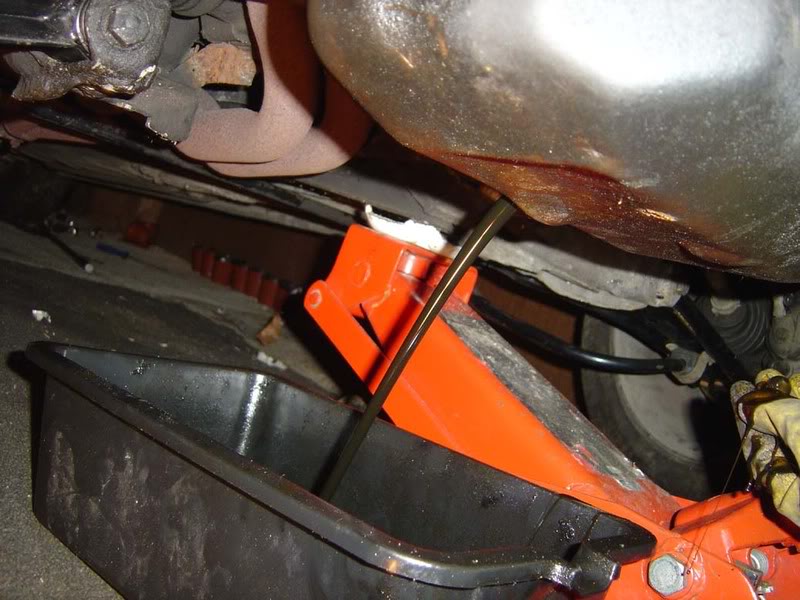
Step 5 - While the oil is draining from the sump you can move onto the filter. You'll find this by looking up between the front of the car and the engine from underneath. Ths filter should be hand tight so hopefully you'll be able to turn it free (if not, see steps 6 and 7)
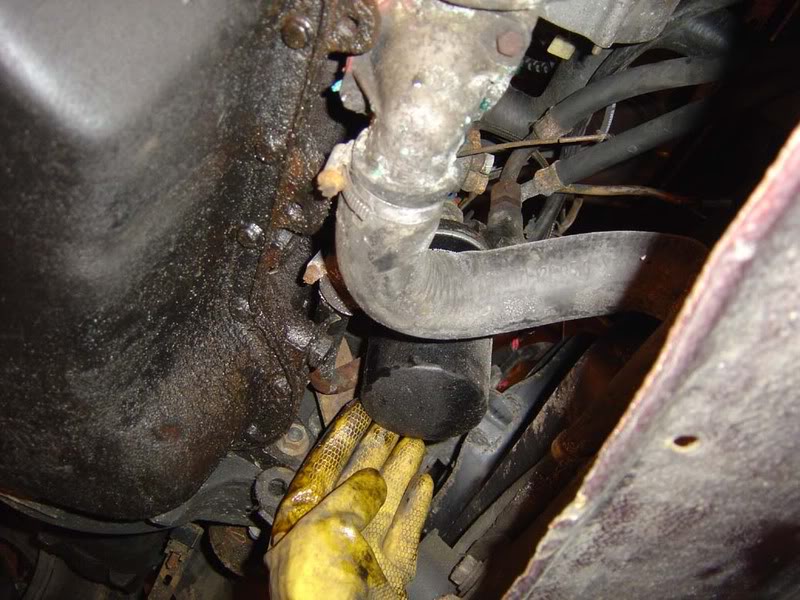
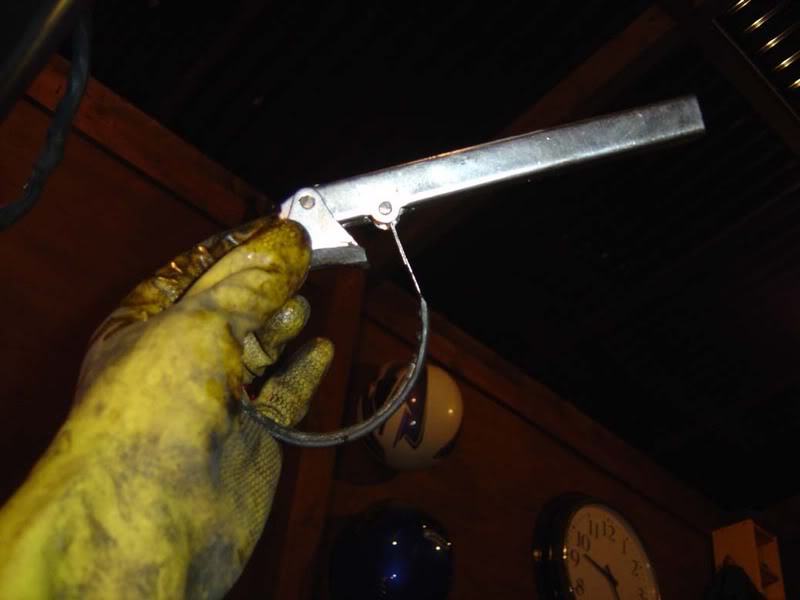
Step 6 - If your filter is stuck you can get a filter wrench (such as that shown in the first picture), which slides over the housing (picture 2) and allows you to free it off.
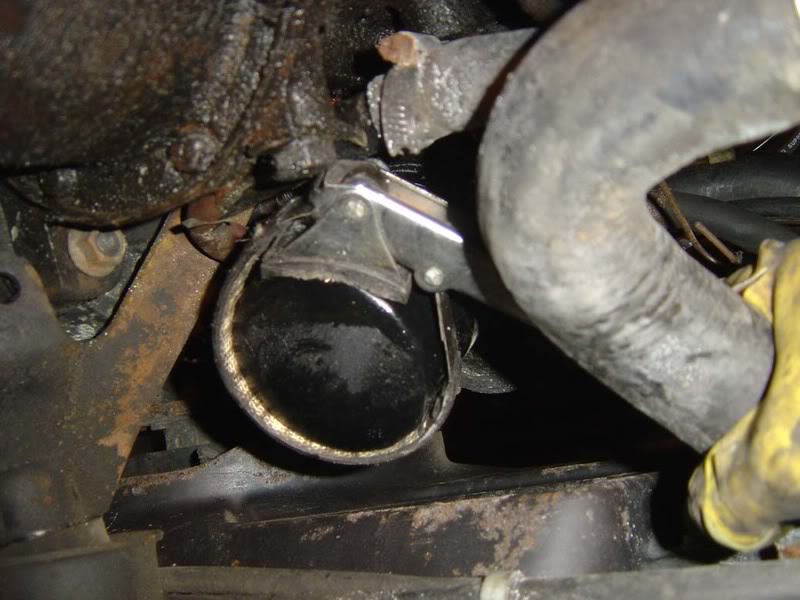
Step 7 - If you don't have a filter wrench a chisel can do the same job as shown in the 2 pictures
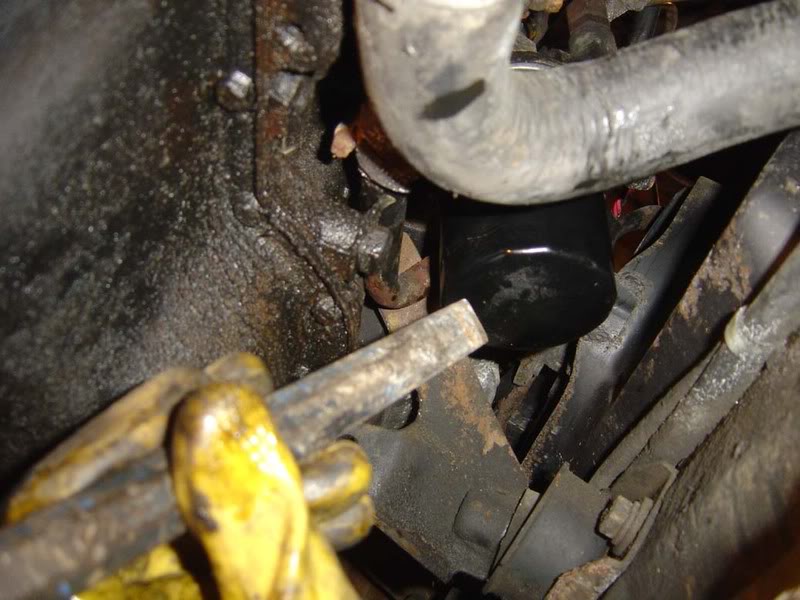
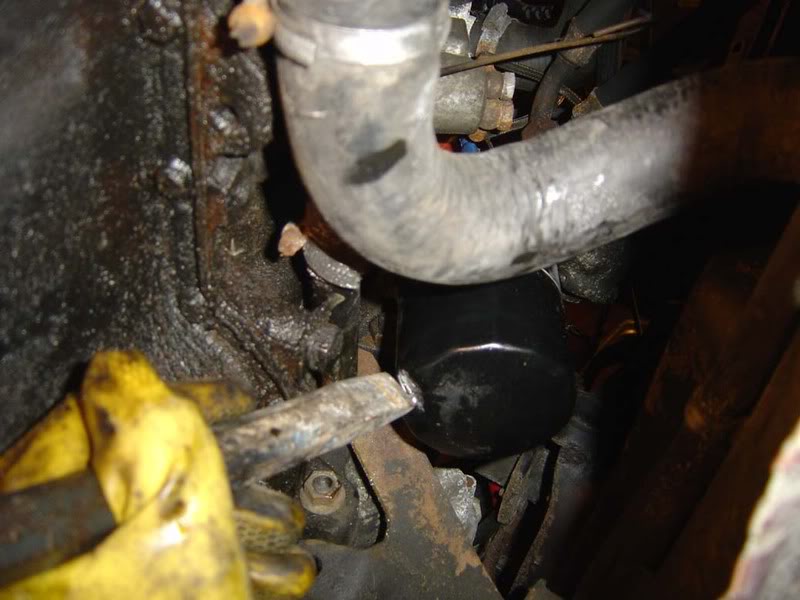
Step 8 - Wait until the oil from the sump drops to a very light stream (see picture)
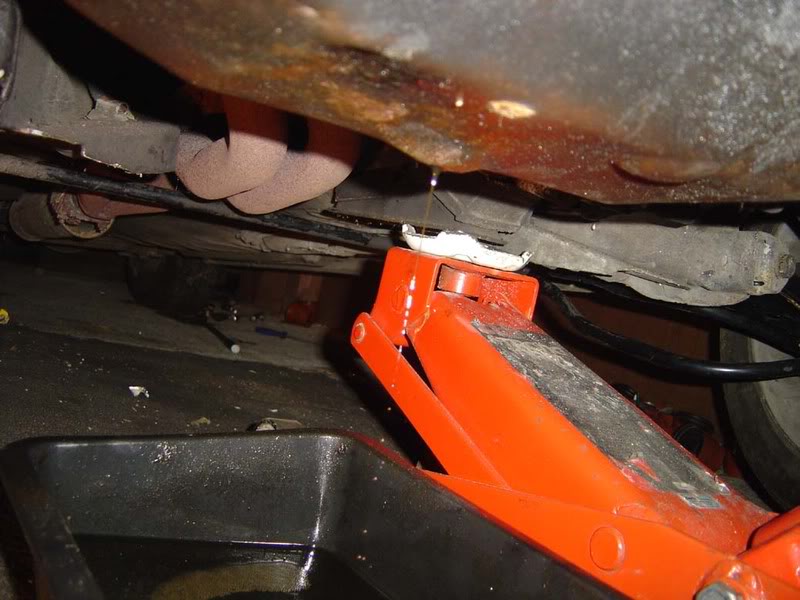
Step 9 - Now you can pop the sump nut back in and loosely fit it
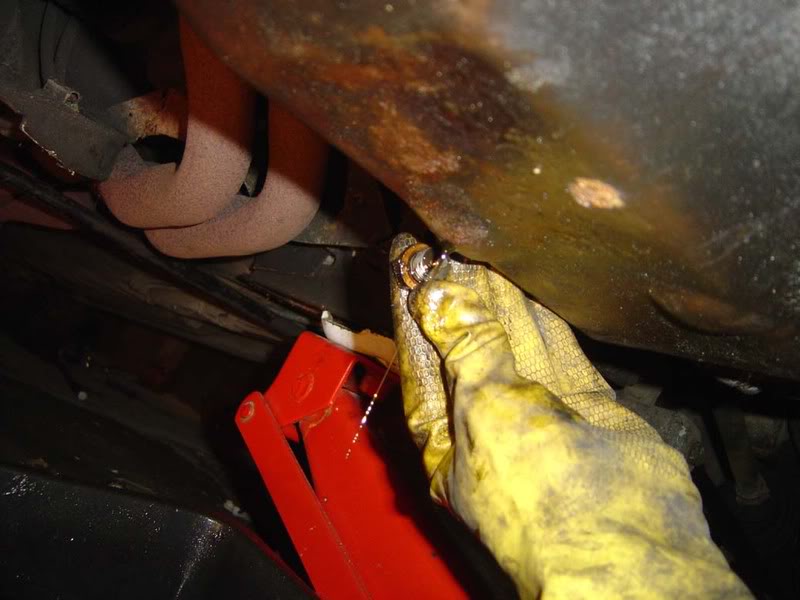
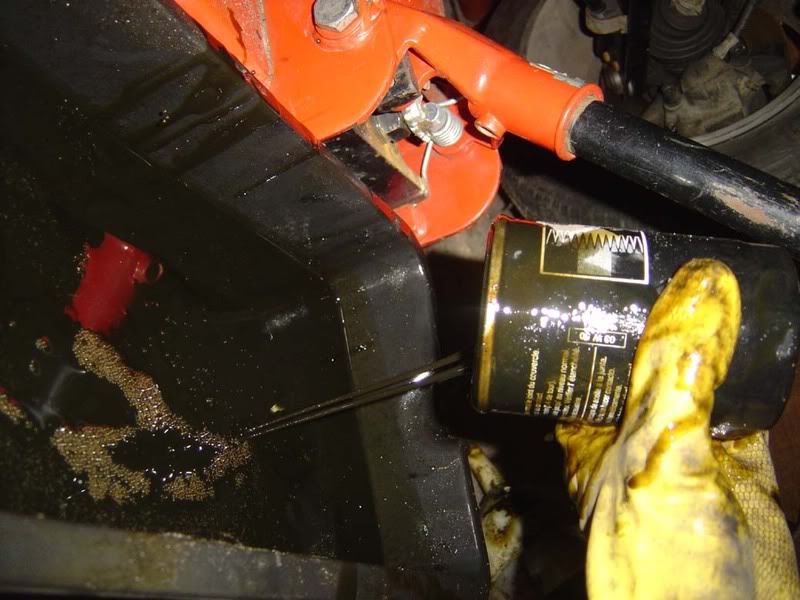
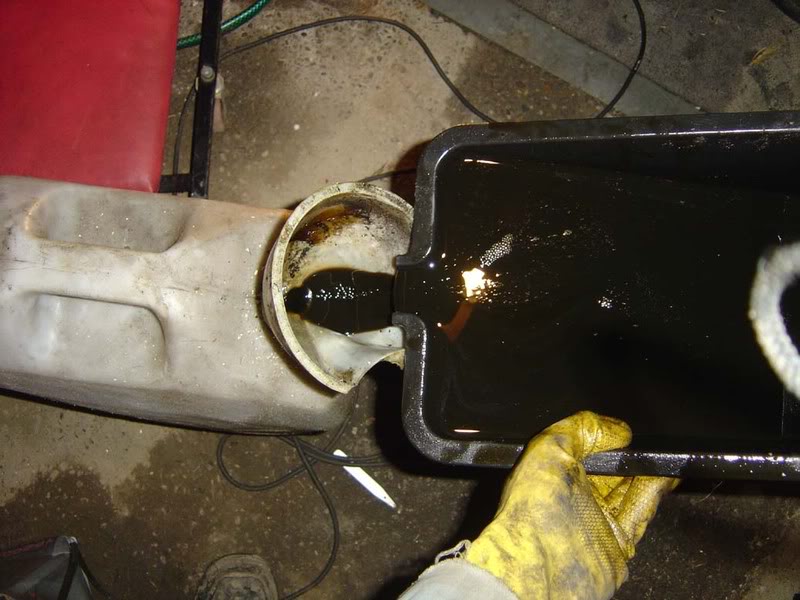
Step 10 - Remove the filter completely and keep it upright, there is still quite a bit of oil in the filter body itself. Pour this into the oil pan with your oil from the sump then dispose of the old filter
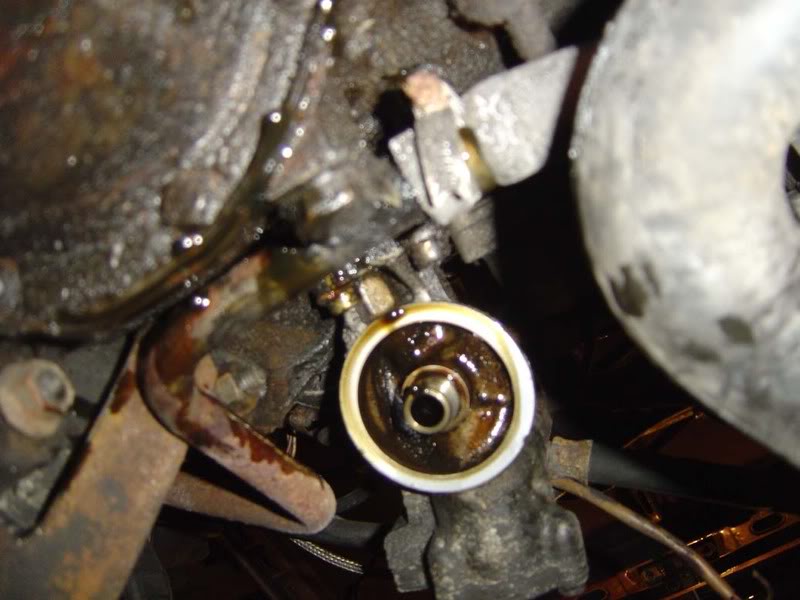
Step 11 - Looking up at the flange where you removed the oil filter, give this a clean with some rag or kitchen towel
Step 12 - Empty the oil you've gathered into a suitable container and dispose of it at your local garage/refuse site. Whilst you pour the oil, inspect closely for any signs of metal or grit which could point to internal problems.
Step 13 - The golf's sump is relatively easy to remove (ordinarily you may have to remove subframes or pull the engine to do this), so it is worth inspecting the oil pump and especially the pickup pipe every now and then. This is not a job you need to do regularly but seeing as it costs about ?7 and can potentially save your engine I'd make the effort. If you don't want to do this then skip to step 44. If you do decide to take it on then go for the 10mm bolts all the way round the sump (Do this in stages at alternating ends of the engine to reduce stresses and prevent warping)
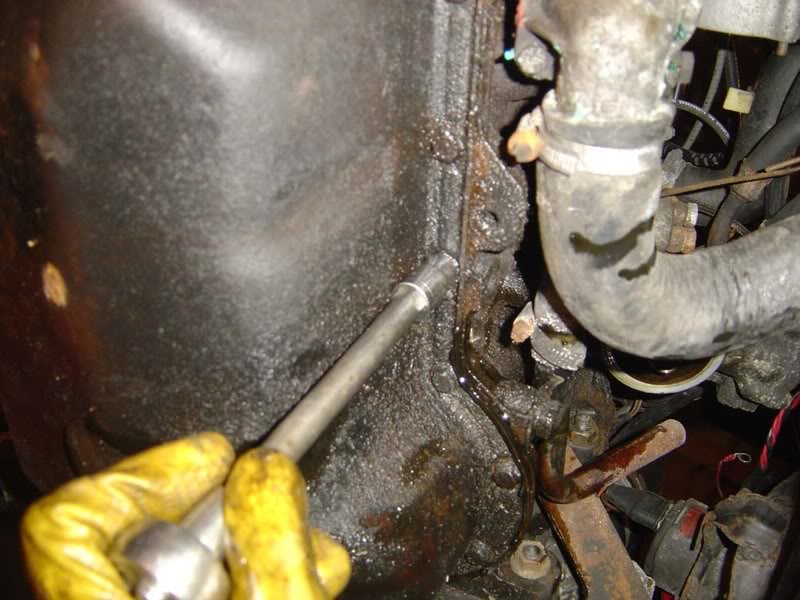
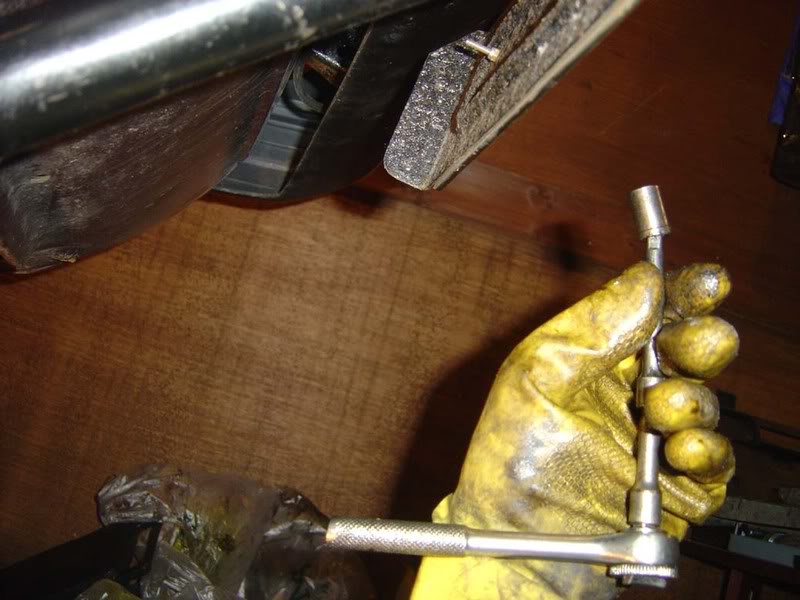
Step 14 - There are a couple of awkward bolts so I suggest you start with them. They are found where the engine meets the bell housing (gearbox) and there are 4 bolts. The two nearest the perimeter of the engine are OK to get to with a 1/4" drive ratchet and extension bars (1/2" will be tight so get a small wrench) but the inner ones are a little more awkward. The way I dealt with them was to get the 1/4" ratchet and rest the socket on top of the extension bar but not click it into place (picture 1). Slide this up over the nut and use a flatblade screwdriver to encourage it into place (picture 2). Then you can attack the nut at an angle and shoudl be able to remove it OK.
Alternatively buy a tool with a bendy extension on it and the job would be a lot easier!
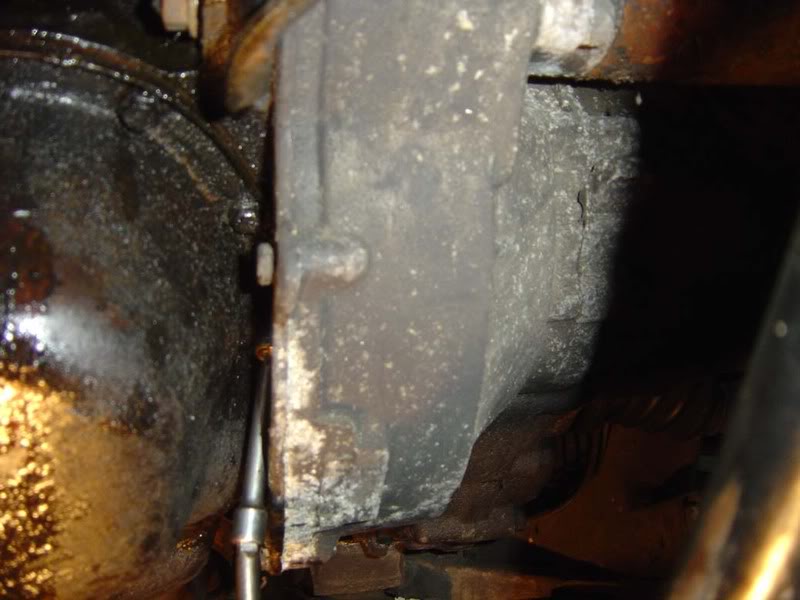
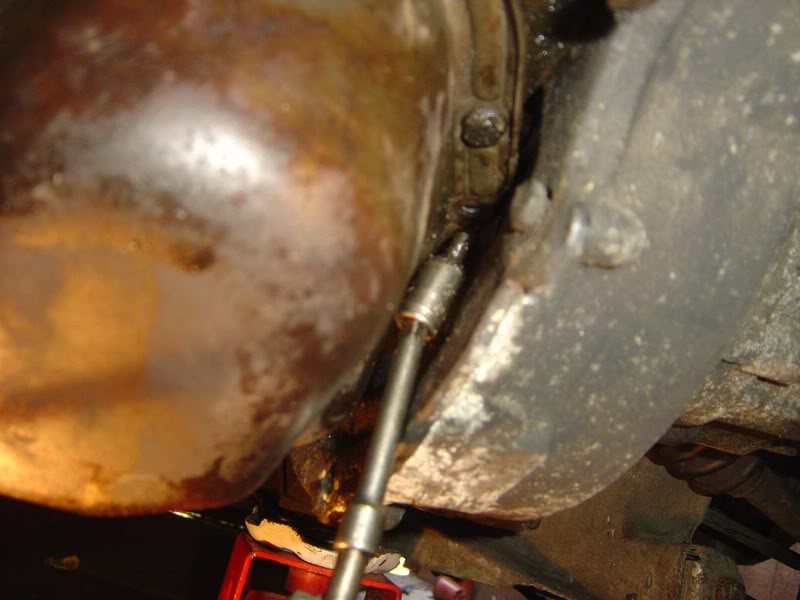
Step 15 - Make sure you don't let the sump drop when you remove the bolts - pop a jack or something similar underneath whilst removing the bolts. Once you've removed all the bolts lower the sump down (it might need a little bit of a tug to break the seal)
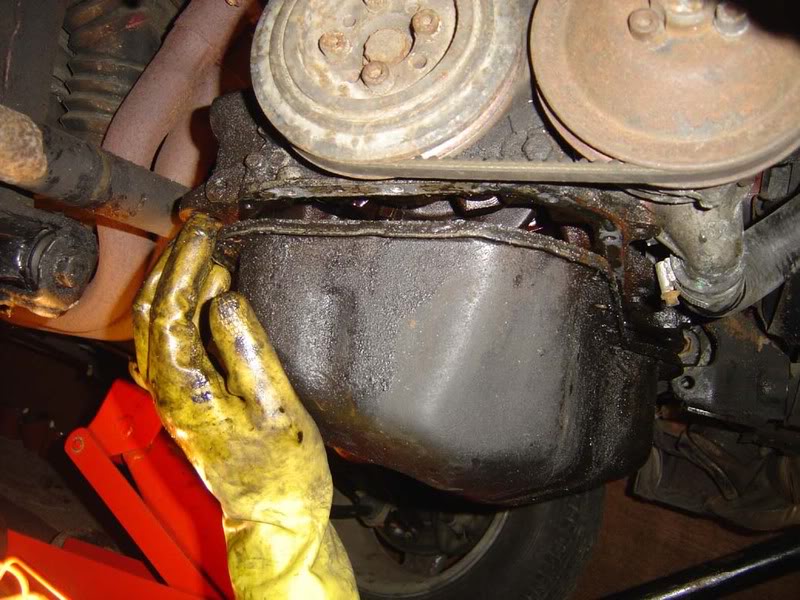
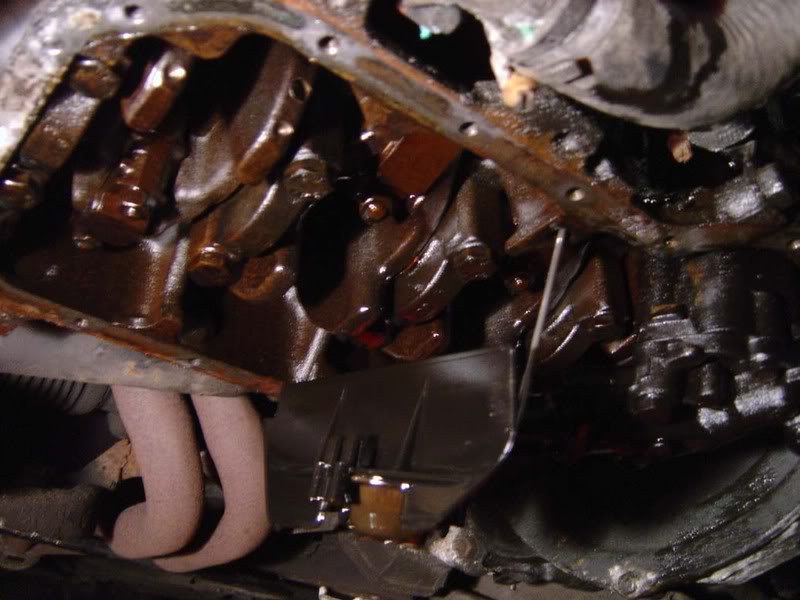
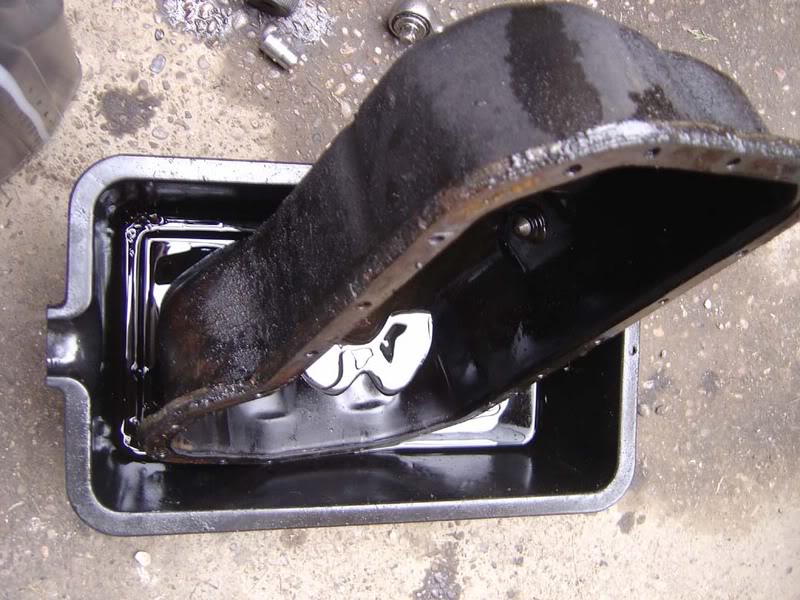
Step 16 - With the sump lowered you should find there is still some oil remaining (bottom left of the pic). You never change all the coil (there's still some in the engine too) so regular changes are the only way to refresh it all.
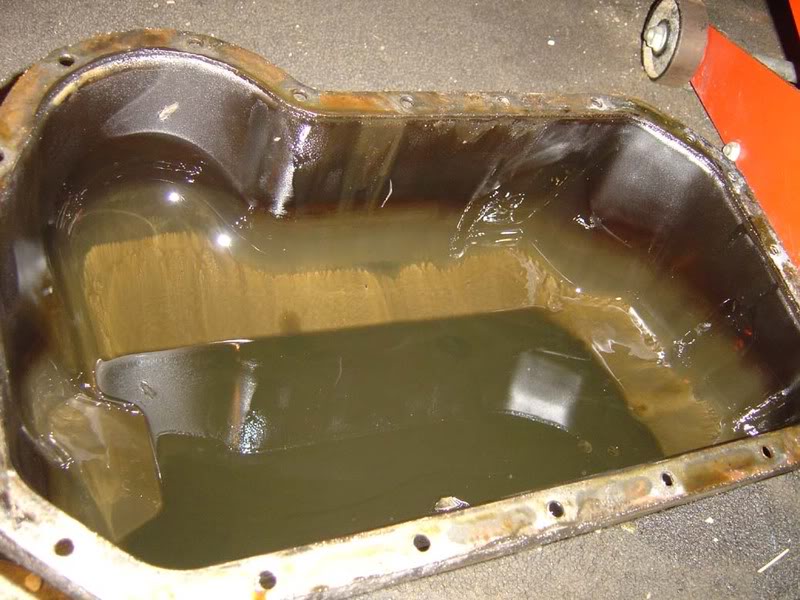
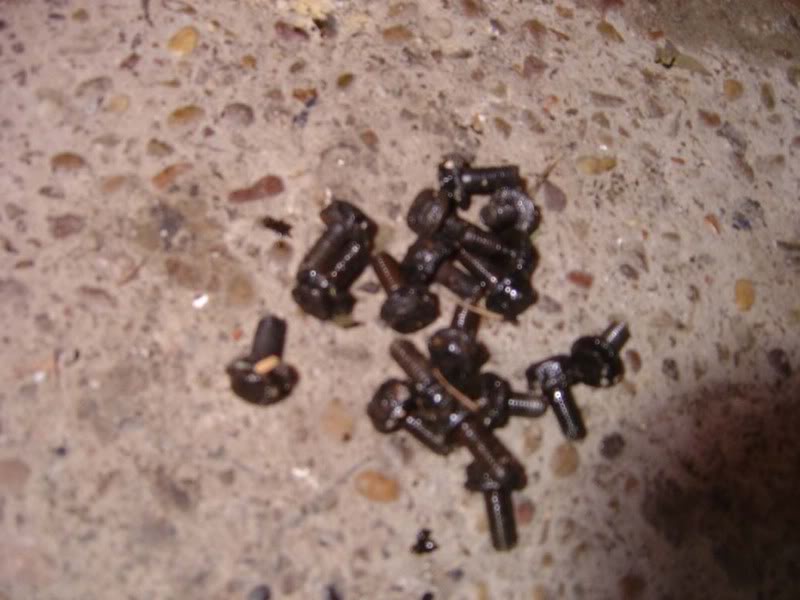
Step 17 - Put your pile of sump bolts to one side somewhere safe and then have a look up into the bottom of your engine. From here you can see the main bearings, con rods (the 'big ends'), oil pump, bottom of the dipstick etc. If it's your first time, take a moment, enjoy
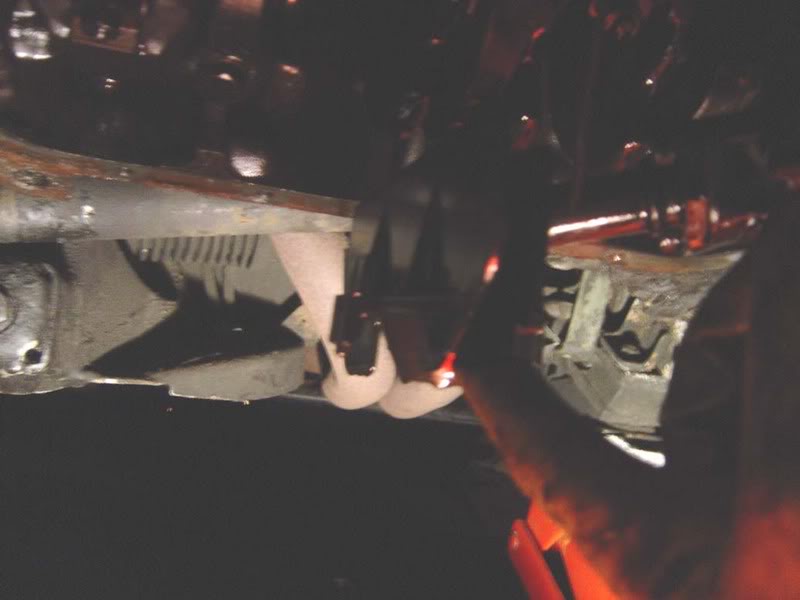
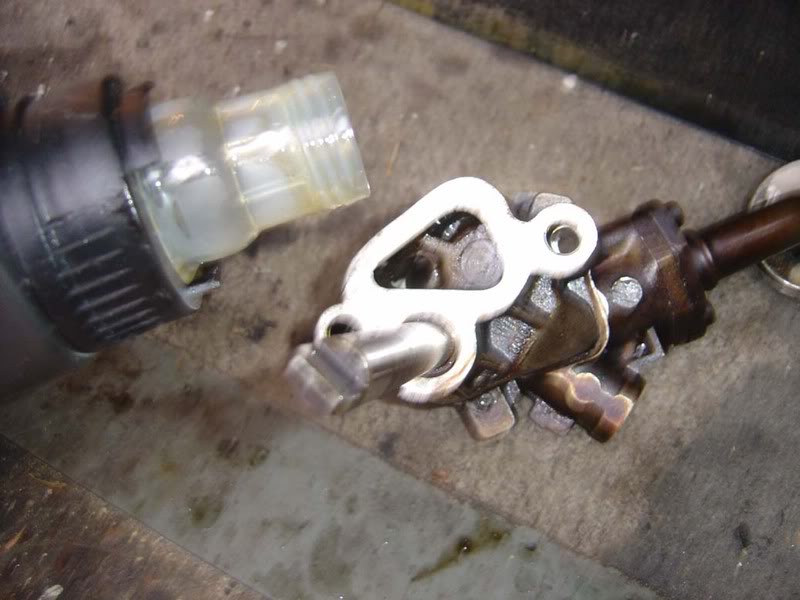
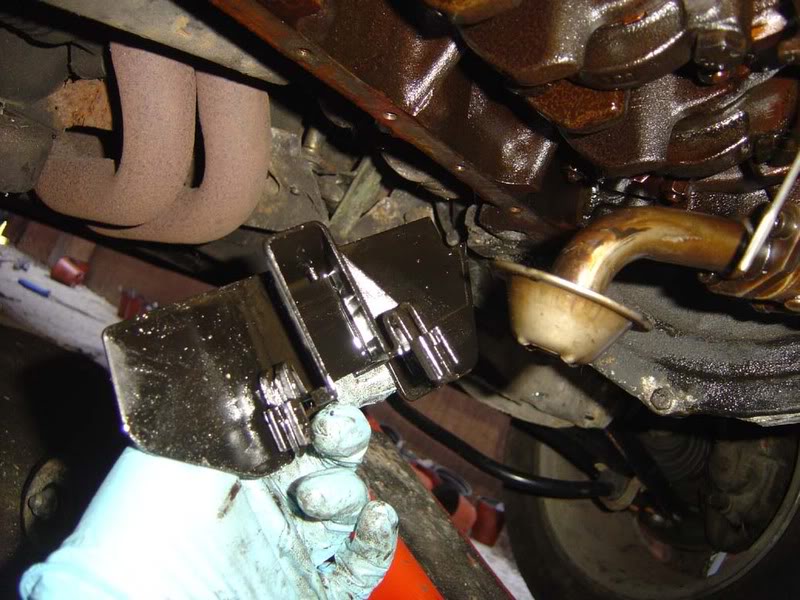
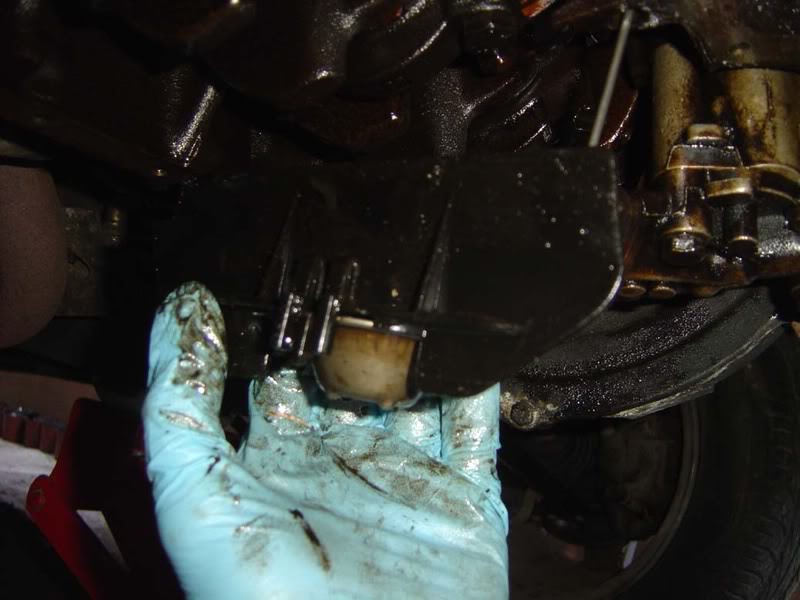
Step 18 - There is a plastic cover on the oil pump strainer which acts as a baffle. This is removed be pressing the plastic clips outwards (the pictures are very bad but look to step 39 c and d for better shots)
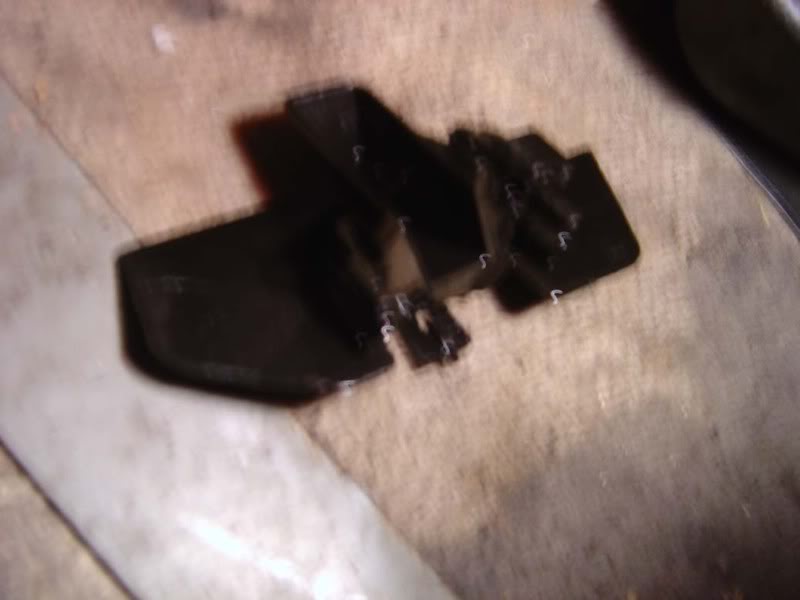
Step 19 - With the cover removed you have good access to the strainer and pickup tube. You could just clean this up (assuming there's any gunge blocking the gauze) but I suggest full pump removal and inspection
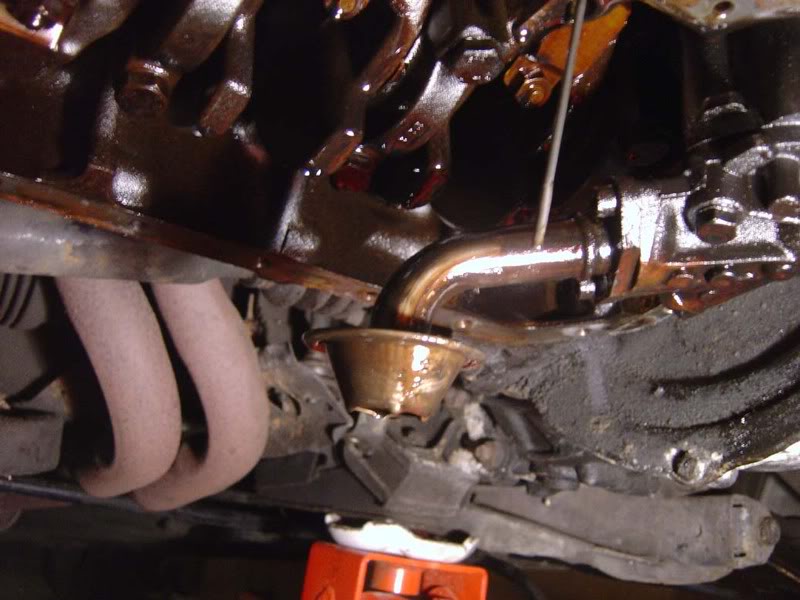
Step 20 - Slacked the two 13mm bolts holding the pump to the block, again do these in stages then remove the pump completely
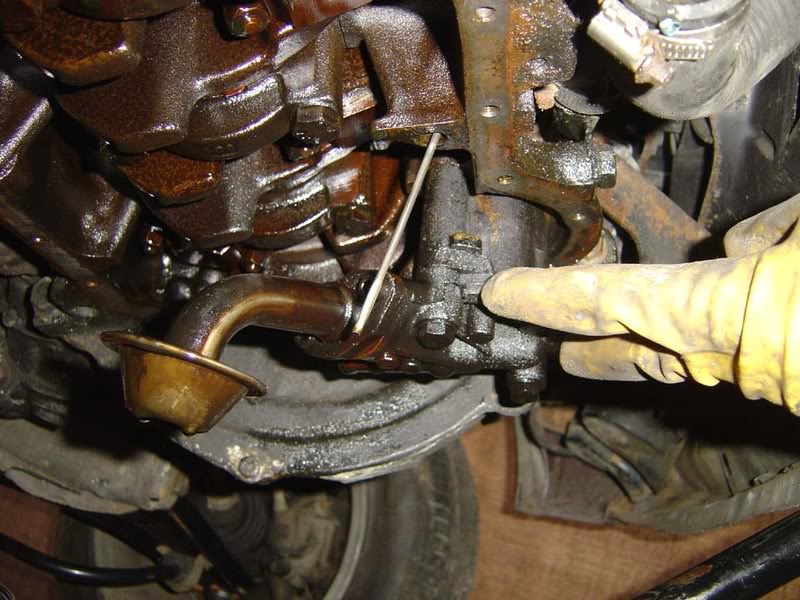
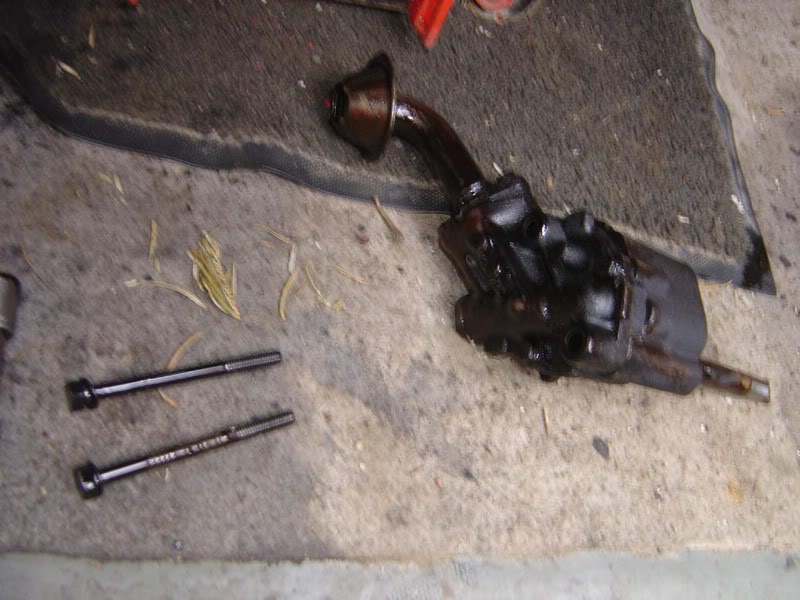
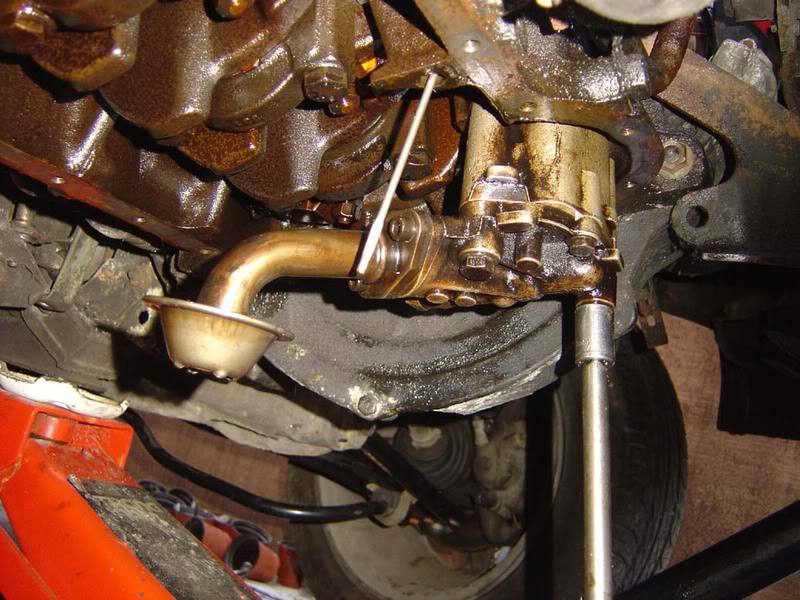
Step 21 - There will still be oil in the pump so work over a bucket or some card etc to prevent runing your garage/drive. Note the allen key in place (see next step)
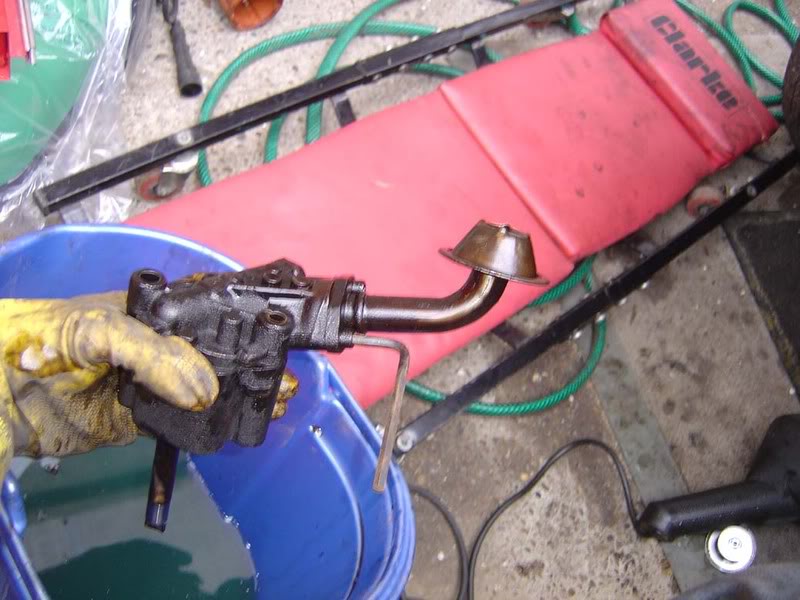
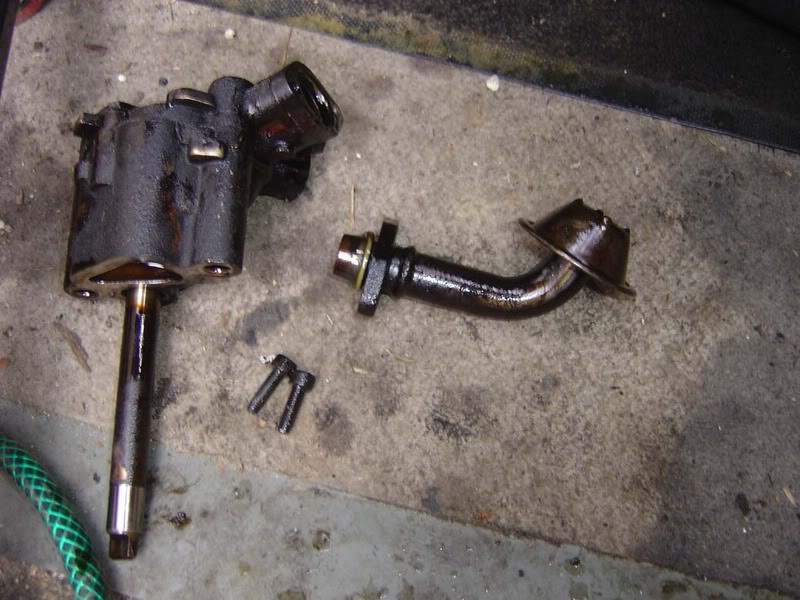
Step 22 - There are two (5mm I think) allen key bolts holding the pickup onto the housing, remove these and separate the tube. There is an o ring that seals the two parts, replace if necessary
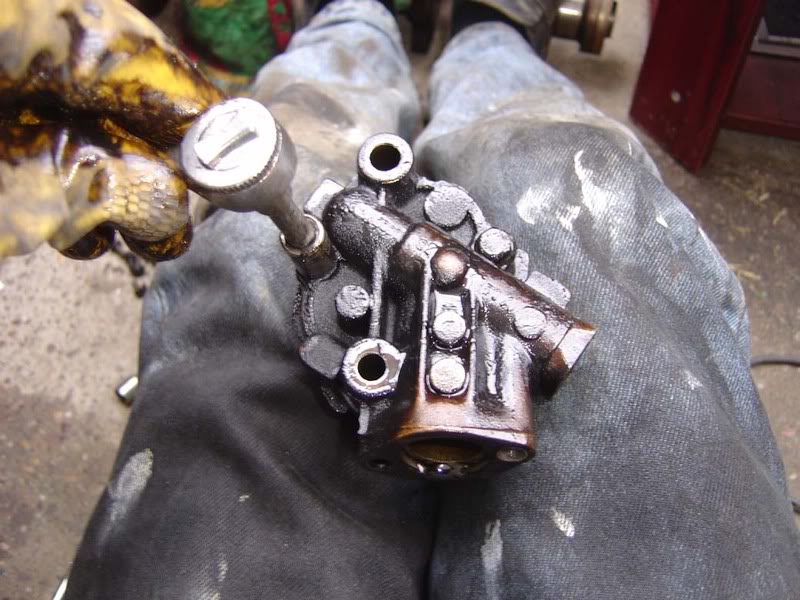
Step 23 - Two 10mm bolts hold the housing together, loosen these and separate the two parts of the pump
Step 24 - Pull away the face plate from the pump housing
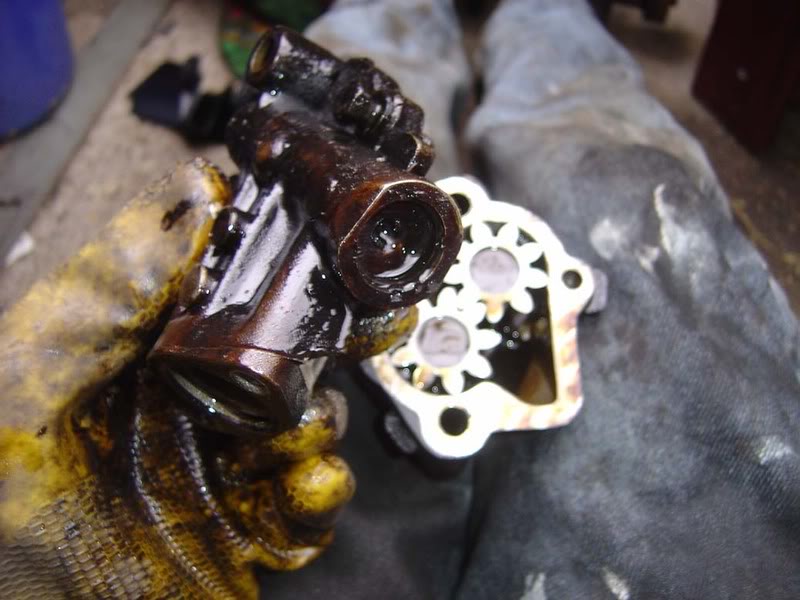
Step 25 - The golf's pump is a 'gear type' whereby a spindle goes to the engine and drives one of the cogs (the top one in the picture) which forces the second cog to also spin. As the gears mesh together they spin round and pick up the oil which feeds from the right hand side's inlet port. This is pushed round the housing (there is a very small clearance between the housing wall and the gear teeth) and pushed out of the outlet port where it is pumped around the engine.
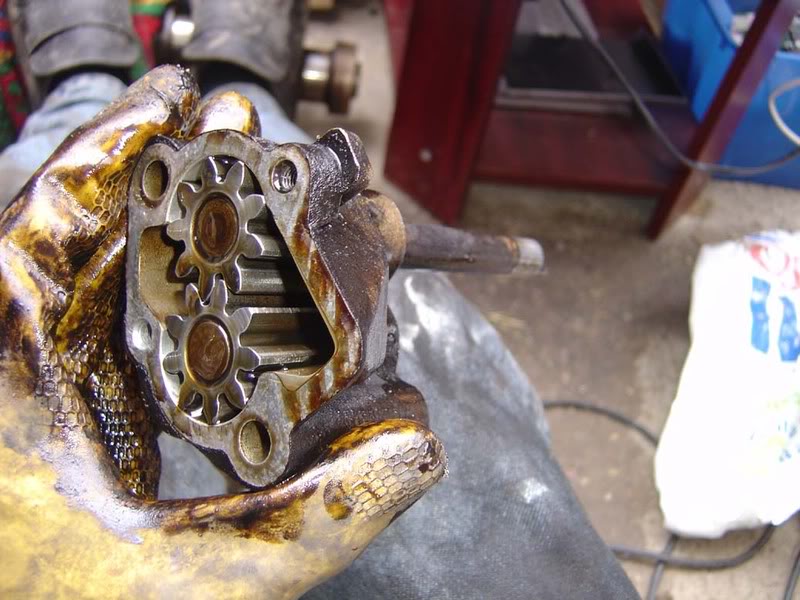
Step 26 - Remove the idler gear which simply slides out the pump
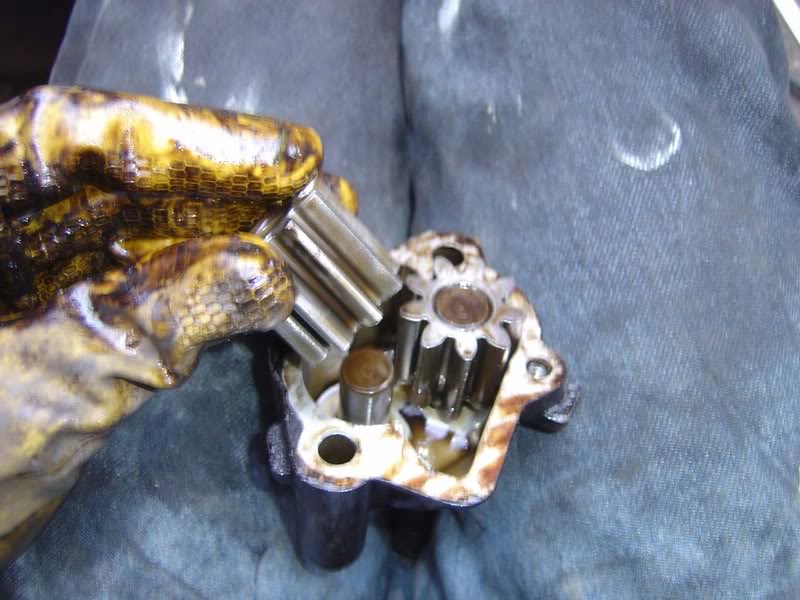
Step 27 - If you slide the driven gear up you will see two oilways which I assume lubricate the gears themselves
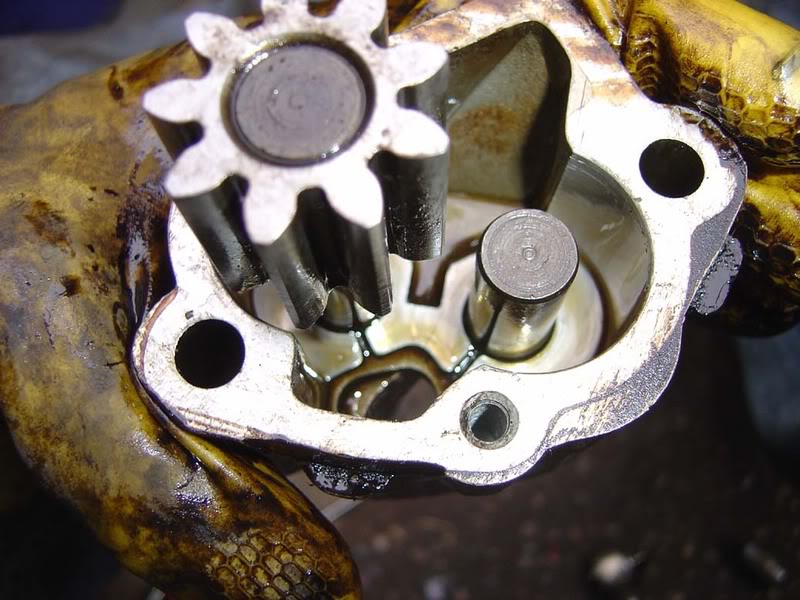
Step 28 - Clean up the pump housing and the gear wheels. Make sure there is no dirt in here at all. Parafin is recommended to clean things up
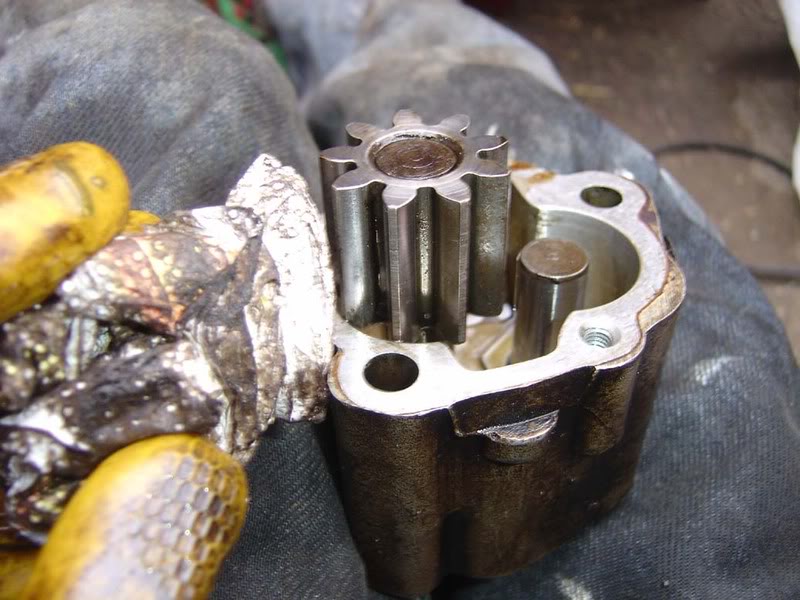
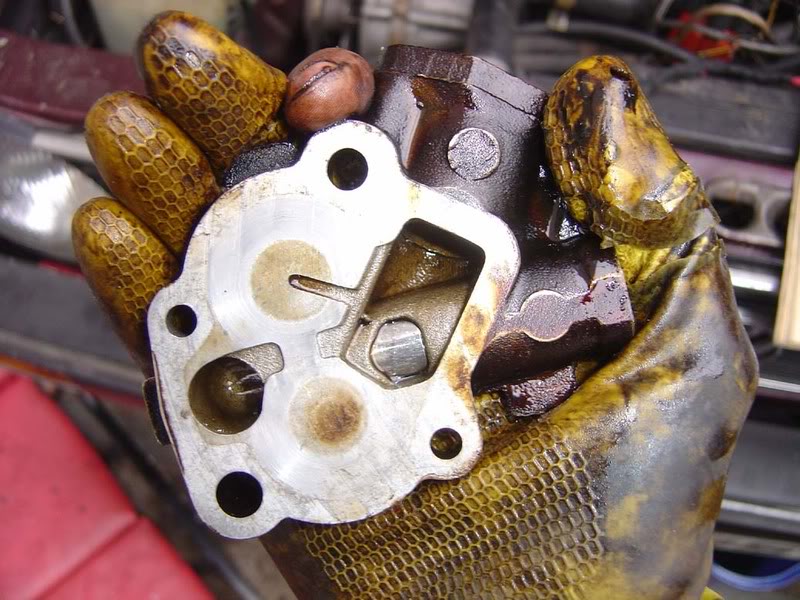
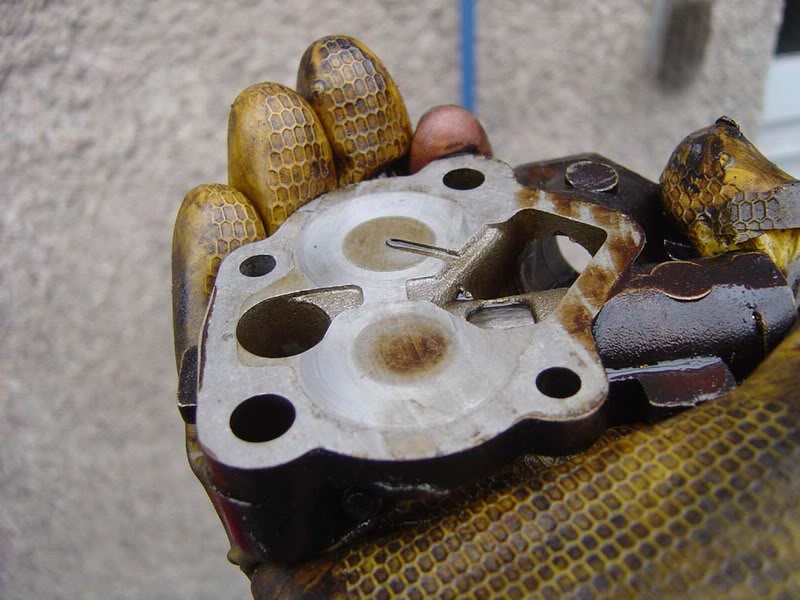
Step 29 - Take the top cover and you'll see marks where the gear wheels sit (picture 1). Clean this up with some rag/kitchen towel (picture 2) and then you can inspect for signs of wear/damage. You are looking for deep scoring or excessive wear from the cogs. If in any doubt, change the pump
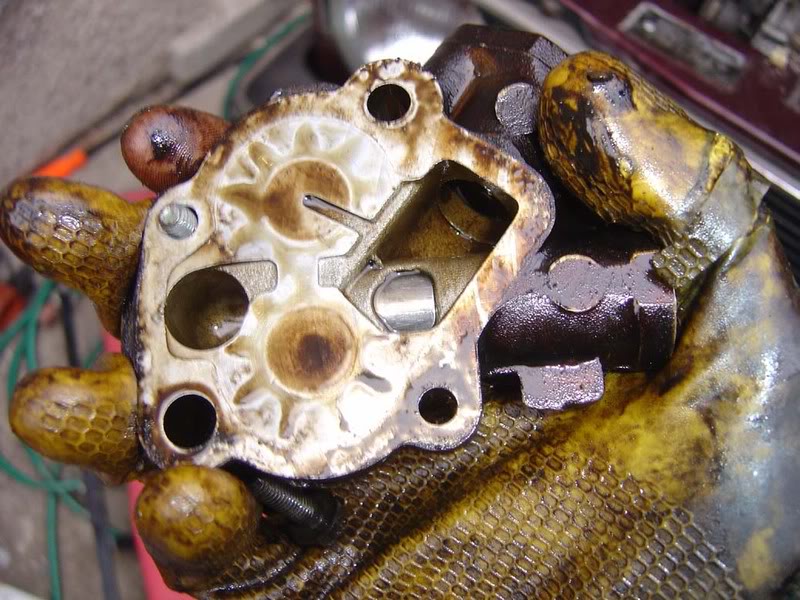
Step 30 - Pour some fresh oil into the pump to lubricate the cogs
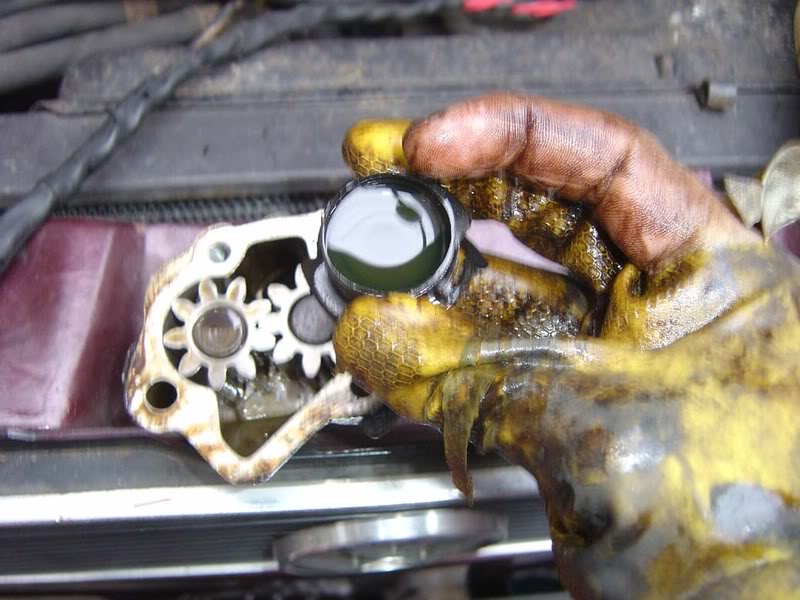
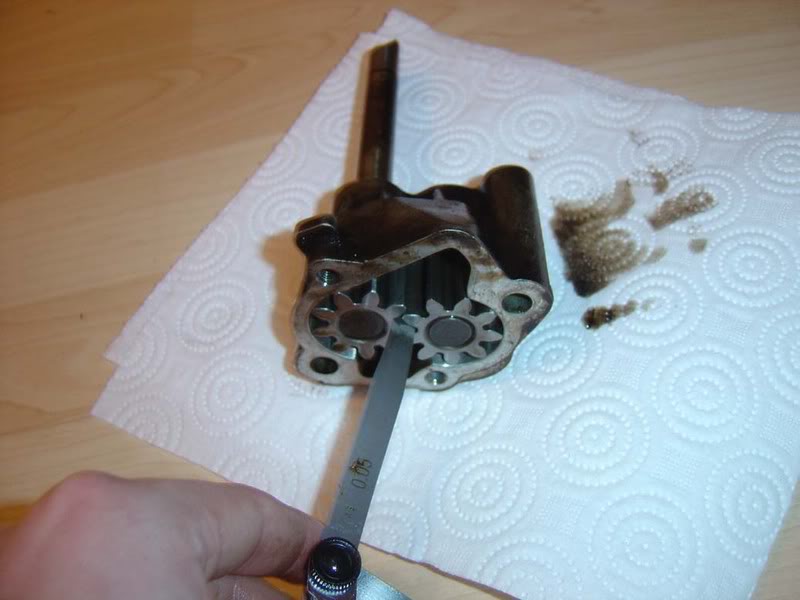
Step 31 - As you can see from the first picture, feeler gauges of 0.05mm to 0.20mm are needed to check the clearance. You are inspecting the backlash between the gears (picture 2) and you should find that the 0.05 should fit through OK but the 0.20 should get stuck. Again, if there's any doubt then change the pump
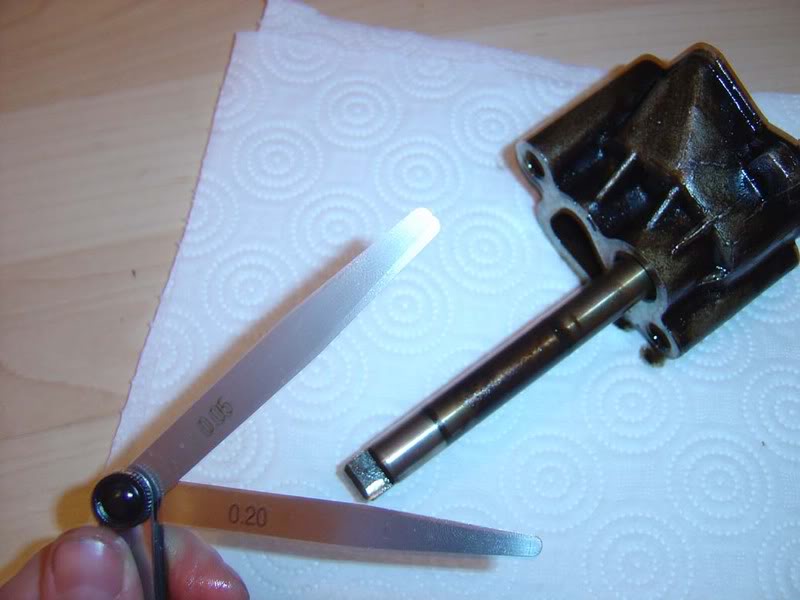
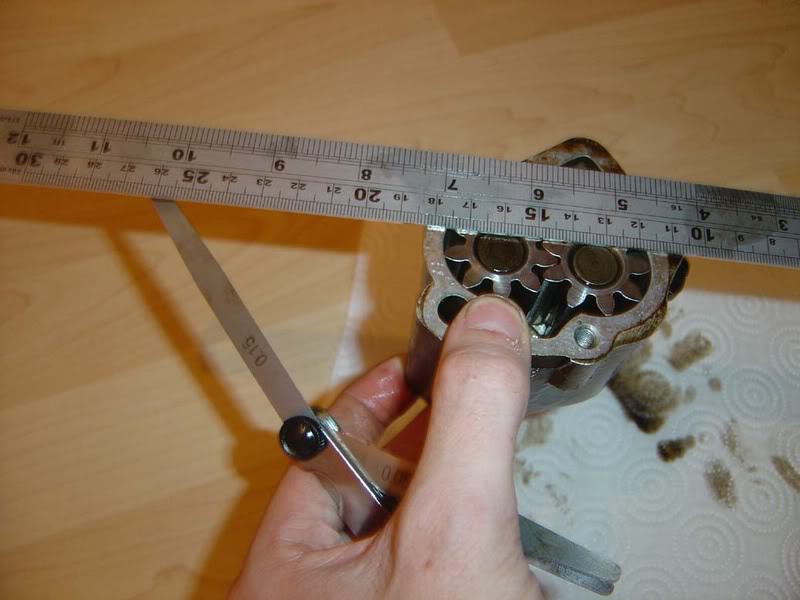
Step 32 - Put a straight edge across the housing body and check the clearance is no more than 0.15mm
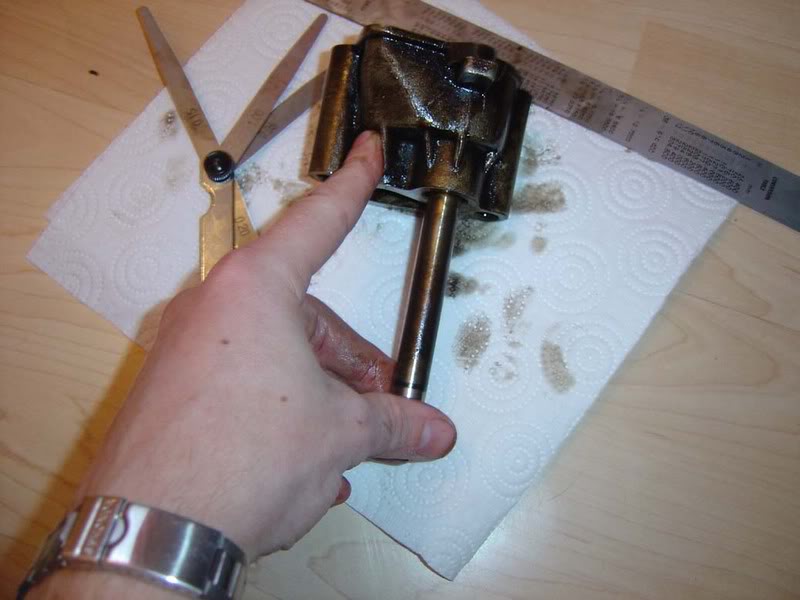
Step 33 - Check the shaft doesn't have any lateral movement in it indicating worn bearings
Step 34 - Now go round and clean up the pump housing a bit (petrol will help here)

Step 35 - Reassmeble the 2 sections of the housing with the 10mm bolts
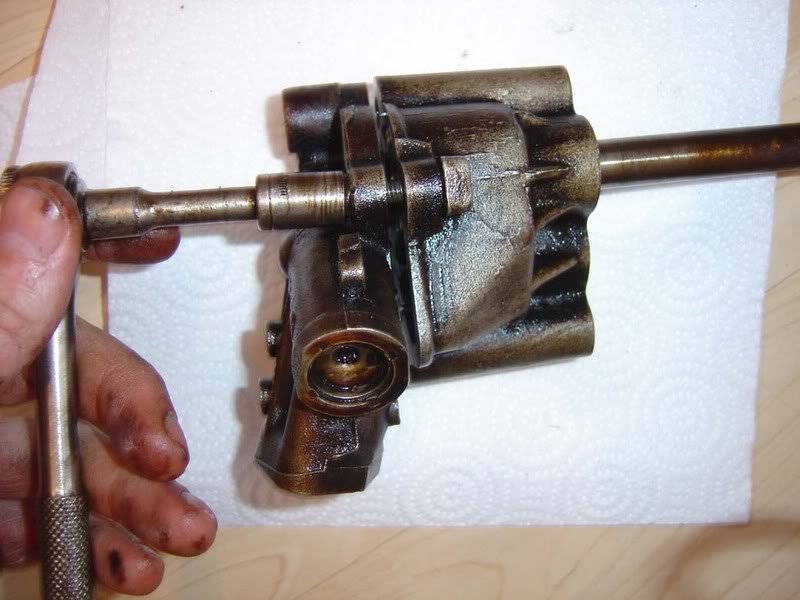
Step 36 - Now clean up the pickup tube and inspect the gauze. Use your fingernail and a needle to clear up the mesh and make sure there are no obstructions to oil flow
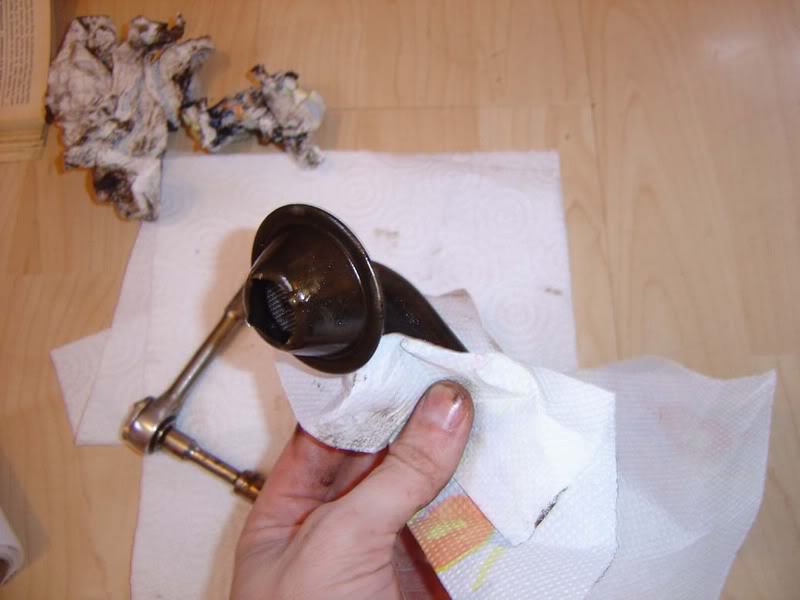
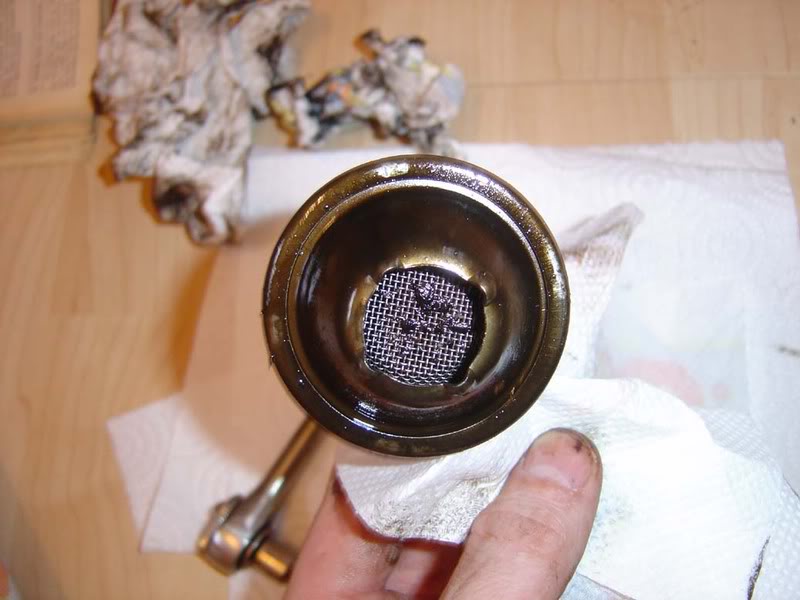
Step 37 - Re-fit the allen key bolts holding the pickup onto the housing. Make sure you get it the right way round!
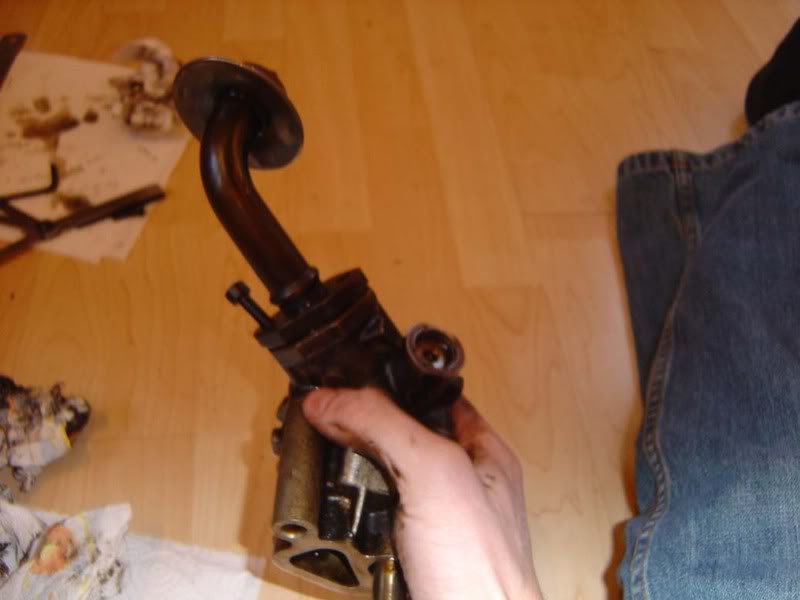
Step 38 - All done, another clean may be required
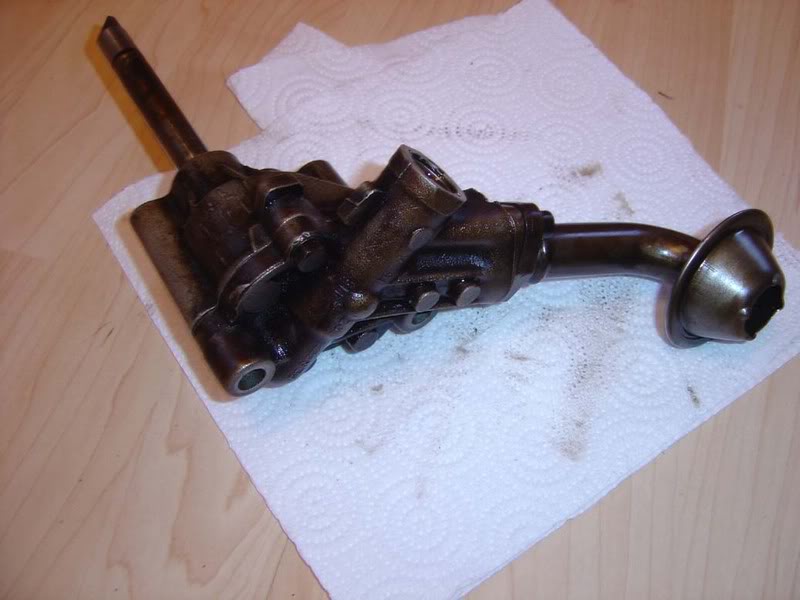
Step 39 - Prime the pump with a little fresh oil before refitting then attach the two 13mm bolts back to the engine and slide the baffle back into place
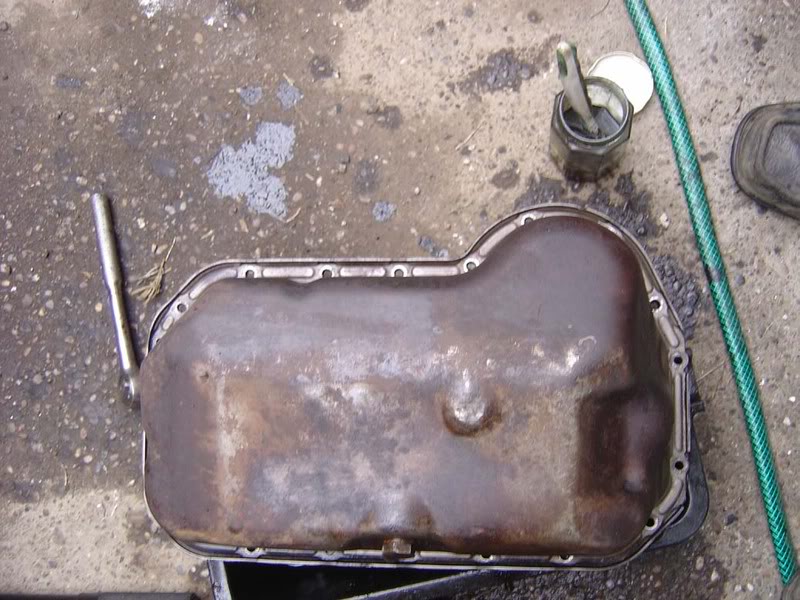
Step 40 - While the sump's off you might as well give it a clean. If it's anything like mine it will be covered in oil and dirt. Apply petrol liberally with a toothbrush to dislodge the dirt and then kitchen towel should clean it up.
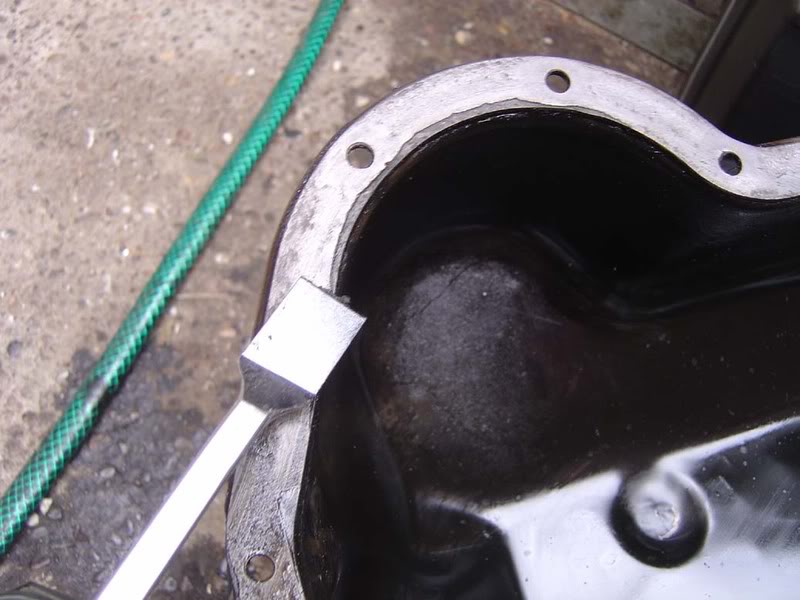
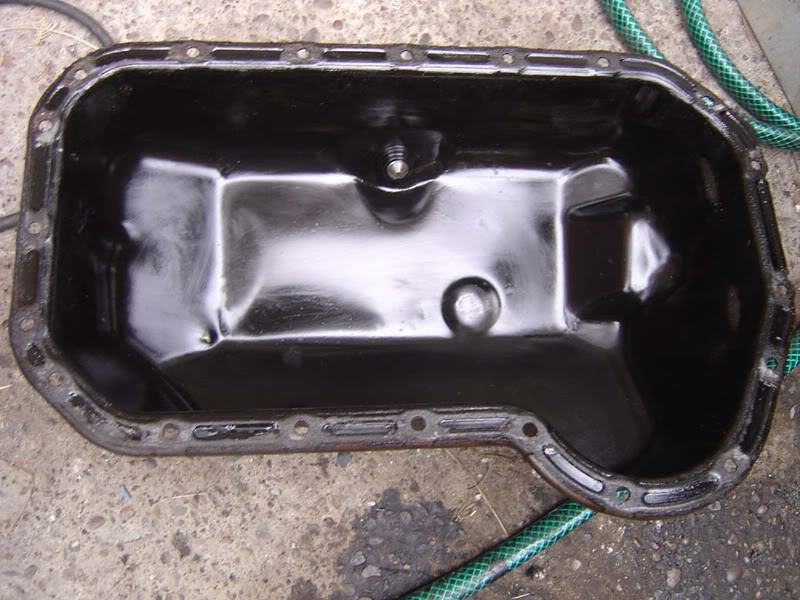
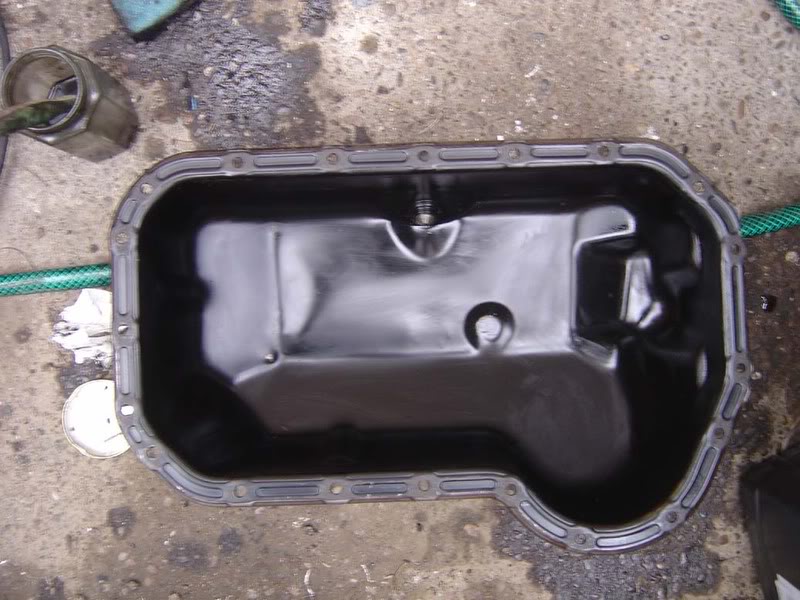
Step 41 - Work round the sump gasket with a gasket scraper removing the old gasket material. It may be quite hard and brittle so attack it from the sides and wriggle it off in sections. Again, a scrub with petrol cleans the surface up once all gasket is removed (picture 3 is before and picture 4 is after cleaning the gasket surface). Also clean out the sump pan so there is no contamination in the oil. Little bits of dirt and grit can cause big problems if it works its way into a bearing etc so keep everything very clean when working with the sump off
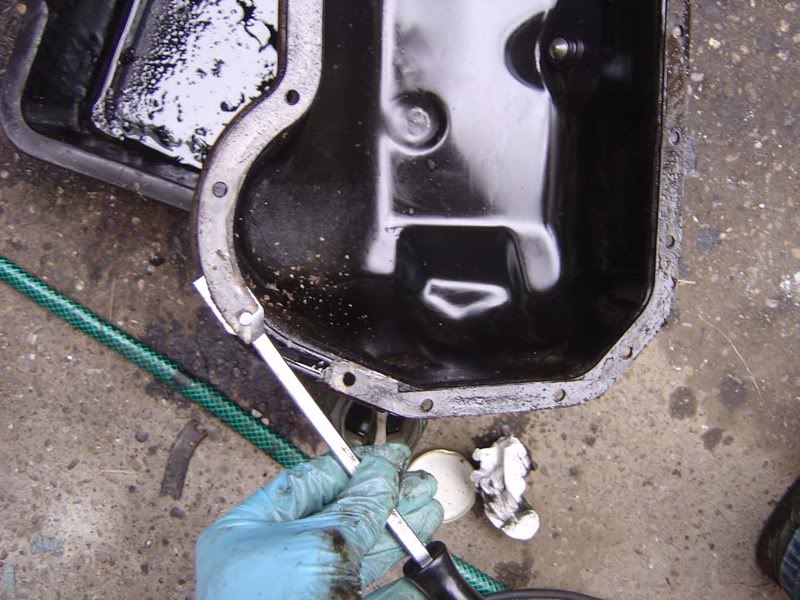
Step 42 - Now get a new gasket (which should cost about 6 or 7 pounds) and drop it into place on the sump
Step 43 - Raise the sump up (a trolley jack helps to line it up while you refit the first few bolts) then loosely fit the 10mm bolts into place. Work round the sump in a logical order (a spiral order is my preference) gradually tightening them all up. Don't forget the awkward ones - try to make sure you don'ot keep slipping off them and round the nuts
NOTE: The guide for the oil pump is for those who have a good reason not to spend the ?50 ish on a new pump. If there is any doubt at all about the condition of the pump then it is worth replacing it. Don't cut corners here or you will regret it.
Step 44 - OK, back to the normal oil change now. Run a bead of fresh oil around the rubber seal of the oil filter. Thsi will make it easier to remove for the next oil change and also helps with the sealing of the filter against the block
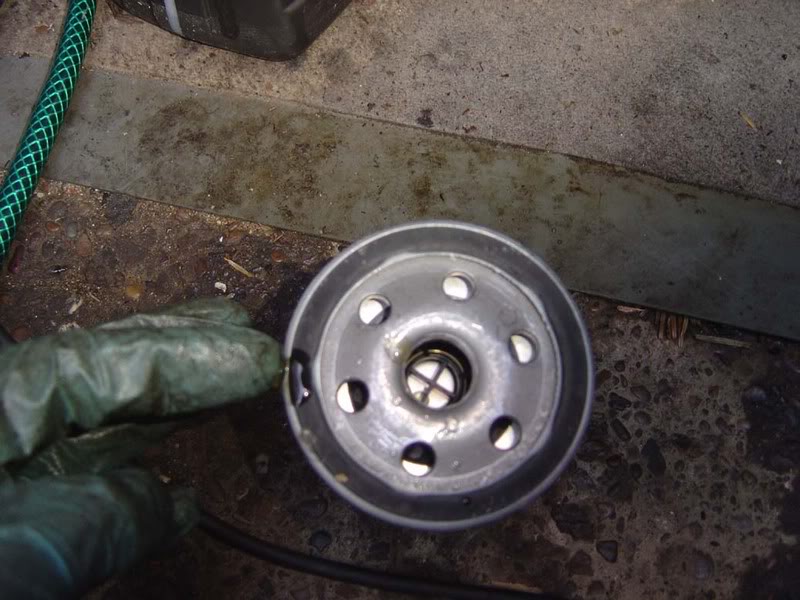
Step 45 - A member asked if I could include this step in the guide which is something I never normally do but I couldn't think of a good reason not to so here it is. Fill the new filter with fresh oil prior to fitment. The filter would otherwise go on dry and, although it would fill almost instantly, there would be a small delay where the fresh oil is pumped round the engine. Due to the fact the filter is mounted vertically you aren't going to be spilling oil everywhere either so it probably is worth doing.
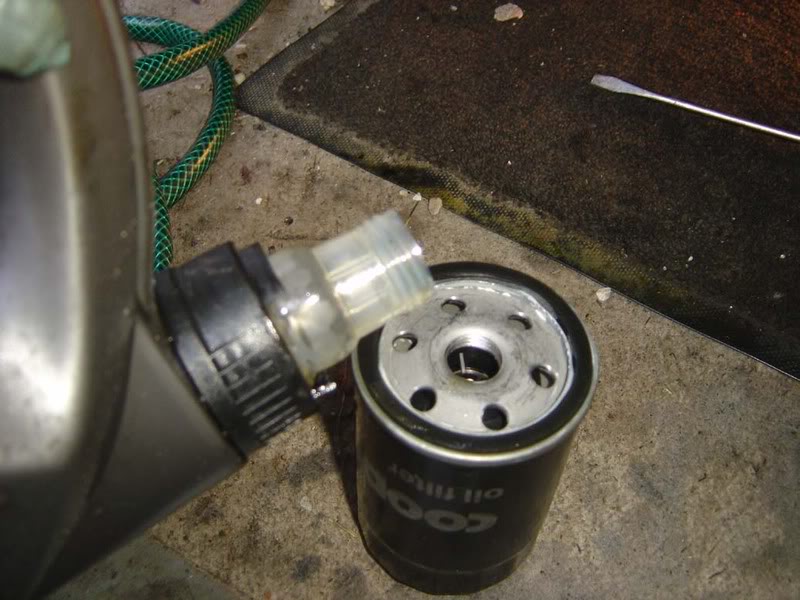
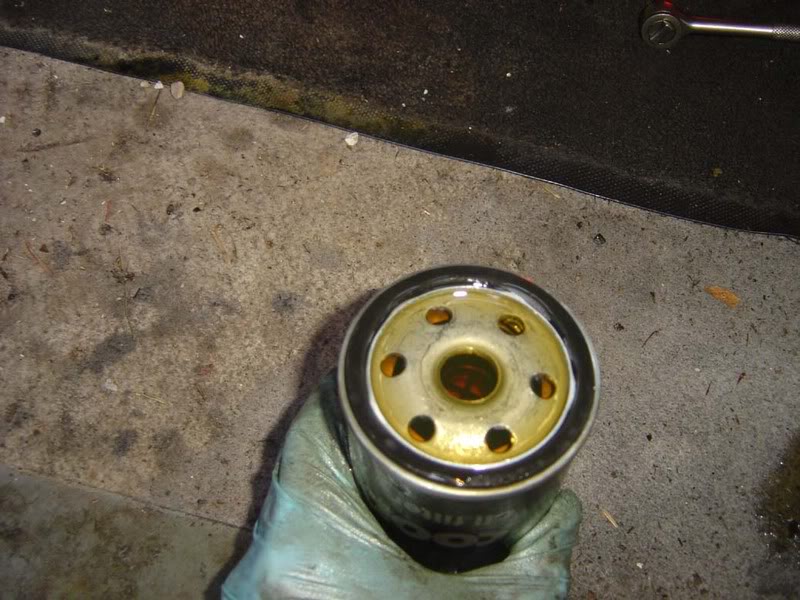
Step 46 - Now refit the filter to the block and screw it hand tight. Don't go crazy here, you'll just regret it next time. Rotate it until it 'bites' and then giev it about a turn just to seal the filter in place.
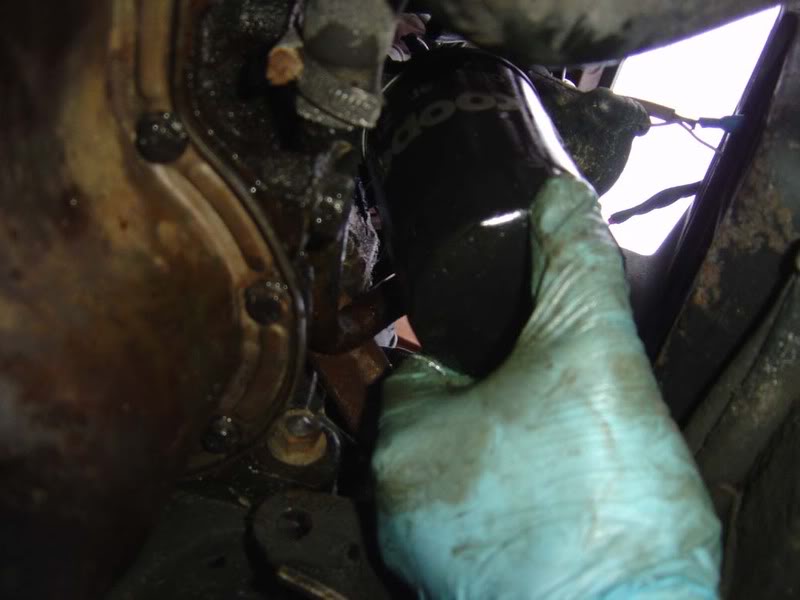
Step 47 - Replace the copper washer and then tighten the 19mm sump plug. The copper washer deforms to form a seal and should be changed on each oil change.
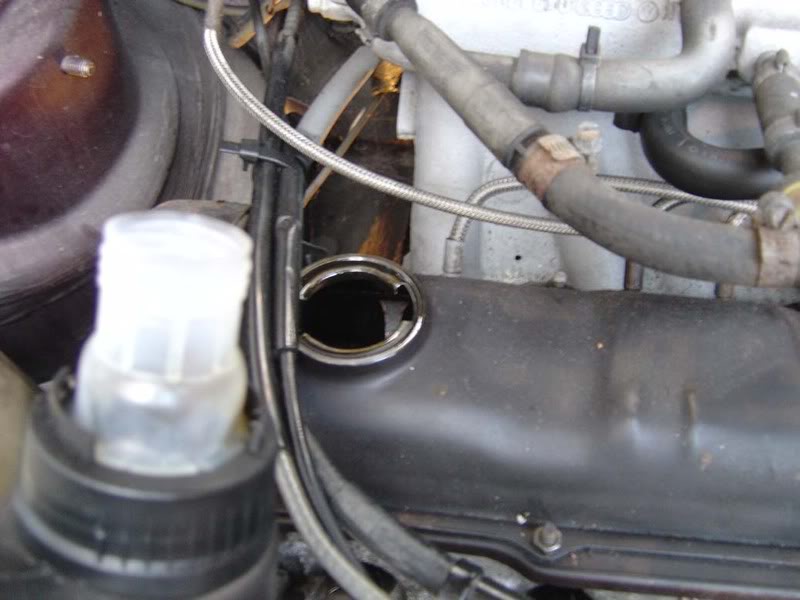
Step 48 - Drop about 4 litres of oil in then top up the rest using the dipstick as you would normally
Step 49 - Once you've finished, double-check everything is in the right place and you've not left any spanners in the engine bay etc before firing the car up. Let it run for about 30 seconds while you check for leaks (sump plug, oil filter or sump itself if you removed it - if you find any leaks, tighten the offending part), then take it out for a very brief spin. When you get back, check again for any drips and then you've finished. It's wroth keeping your eye on the oil level for a couple of days and giving it another check for any signs of leakage, better safe than sorry.
Oil is the most important fluid in an engine and performs several tasks including:
- Lubrication of moving parts
- Provides a reduced-friction surface
- Transfer of heat away from engine internals
- Protects bearings and prevents metal-to-metal contact
If you run out of coolant you overheat, run out of oil and your engine will be destroyed. Needless to say the oil system shouldn't be neglected.
You should change your oil and filter regularly (at least every 12 months) and check for leaks at least once a month. Preferably get in the habit of checking your oil weekly and chack for any signs of leaks at the same time. By the time your oil warning light comes on it may already be too late so don't neglect this.
Step 1 - First, jack the car up. It doesn't have to be too high, just give yourself enough room to crawl under and wield a spanner. Put a couple of axle stands under to be safe

Step 2 - Use a 19mm spanner to 'crack off' the sump nut but don't do more than a turn or so

Step 3 - Slide a container into place ready to catch the oil and you should be able to remove the nut by hand (the joy of lubrication). The trick is to hold onto th enut as the oil comes pouring out of the sump so you don't end up fishing it out of a pan of dirty oil

Step 4 - Let the oil flow into the container and it will quickly slow down to a constant trickle. Move the container accordingly as the flow changes direction

Step 5 - While the oil is draining from the sump you can move onto the filter. You'll find this by looking up between the front of the car and the engine from underneath. Ths filter should be hand tight so hopefully you'll be able to turn it free (if not, see steps 6 and 7)

Step 6 - If your filter is stuck you can get a filter wrench (such as that shown in the first picture), which slides over the housing (picture 2) and allows you to free it off.


Step 7 - If you don't have a filter wrench a chisel can do the same job as shown in the 2 pictures


Step 8 - Wait until the oil from the sump drops to a very light stream (see picture)

Step 9 - Now you can pop the sump nut back in and loosely fit it

Step 10 - Remove the filter completely and keep it upright, there is still quite a bit of oil in the filter body itself. Pour this into the oil pan with your oil from the sump then dispose of the old filter

Step 11 - Looking up at the flange where you removed the oil filter, give this a clean with some rag or kitchen towel

Step 12 - Empty the oil you've gathered into a suitable container and dispose of it at your local garage/refuse site. Whilst you pour the oil, inspect closely for any signs of metal or grit which could point to internal problems.

Step 13 - The golf's sump is relatively easy to remove (ordinarily you may have to remove subframes or pull the engine to do this), so it is worth inspecting the oil pump and especially the pickup pipe every now and then. This is not a job you need to do regularly but seeing as it costs about ?7 and can potentially save your engine I'd make the effort. If you don't want to do this then skip to step 44. If you do decide to take it on then go for the 10mm bolts all the way round the sump (Do this in stages at alternating ends of the engine to reduce stresses and prevent warping)

Step 14 - There are a couple of awkward bolts so I suggest you start with them. They are found where the engine meets the bell housing (gearbox) and there are 4 bolts. The two nearest the perimeter of the engine are OK to get to with a 1/4" drive ratchet and extension bars (1/2" will be tight so get a small wrench) but the inner ones are a little more awkward. The way I dealt with them was to get the 1/4" ratchet and rest the socket on top of the extension bar but not click it into place (picture 1). Slide this up over the nut and use a flatblade screwdriver to encourage it into place (picture 2). Then you can attack the nut at an angle and shoudl be able to remove it OK.
Alternatively buy a tool with a bendy extension on it and the job would be a lot easier!


Step 15 - Make sure you don't let the sump drop when you remove the bolts - pop a jack or something similar underneath whilst removing the bolts. Once you've removed all the bolts lower the sump down (it might need a little bit of a tug to break the seal)

Step 16 - With the sump lowered you should find there is still some oil remaining (bottom left of the pic). You never change all the coil (there's still some in the engine too) so regular changes are the only way to refresh it all.

Step 17 - Put your pile of sump bolts to one side somewhere safe and then have a look up into the bottom of your engine. From here you can see the main bearings, con rods (the 'big ends'), oil pump, bottom of the dipstick etc. If it's your first time, take a moment, enjoy


Step 18 - There is a plastic cover on the oil pump strainer which acts as a baffle. This is removed be pressing the plastic clips outwards (the pictures are very bad but look to step 39 c and d for better shots)


Step 19 - With the cover removed you have good access to the strainer and pickup tube. You could just clean this up (assuming there's any gunge blocking the gauze) but I suggest full pump removal and inspection

Step 20 - Slacked the two 13mm bolts holding the pump to the block, again do these in stages then remove the pump completely


Step 21 - There will still be oil in the pump so work over a bucket or some card etc to prevent runing your garage/drive. Note the allen key in place (see next step)

Step 22 - There are two (5mm I think) allen key bolts holding the pickup onto the housing, remove these and separate the tube. There is an o ring that seals the two parts, replace if necessary

Step 23 - Two 10mm bolts hold the housing together, loosen these and separate the two parts of the pump

Step 24 - Pull away the face plate from the pump housing

Step 25 - The golf's pump is a 'gear type' whereby a spindle goes to the engine and drives one of the cogs (the top one in the picture) which forces the second cog to also spin. As the gears mesh together they spin round and pick up the oil which feeds from the right hand side's inlet port. This is pushed round the housing (there is a very small clearance between the housing wall and the gear teeth) and pushed out of the outlet port where it is pumped around the engine.

Step 26 - Remove the idler gear which simply slides out the pump

Step 27 - If you slide the driven gear up you will see two oilways which I assume lubricate the gears themselves

Step 28 - Clean up the pump housing and the gear wheels. Make sure there is no dirt in here at all. Parafin is recommended to clean things up

Step 29 - Take the top cover and you'll see marks where the gear wheels sit (picture 1). Clean this up with some rag/kitchen towel (picture 2) and then you can inspect for signs of wear/damage. You are looking for deep scoring or excessive wear from the cogs. If in any doubt, change the pump


Step 30 - Pour some fresh oil into the pump to lubricate the cogs

Step 31 - As you can see from the first picture, feeler gauges of 0.05mm to 0.20mm are needed to check the clearance. You are inspecting the backlash between the gears (picture 2) and you should find that the 0.05 should fit through OK but the 0.20 should get stuck. Again, if there's any doubt then change the pump


Step 32 - Put a straight edge across the housing body and check the clearance is no more than 0.15mm

Step 33 - Check the shaft doesn't have any lateral movement in it indicating worn bearings

Step 34 - Now go round and clean up the pump housing a bit (petrol will help here)

Step 35 - Reassmeble the 2 sections of the housing with the 10mm bolts

Step 36 - Now clean up the pickup tube and inspect the gauze. Use your fingernail and a needle to clear up the mesh and make sure there are no obstructions to oil flow


Step 37 - Re-fit the allen key bolts holding the pickup onto the housing. Make sure you get it the right way round!

Step 38 - All done, another clean may be required

Step 39 - Prime the pump with a little fresh oil before refitting then attach the two 13mm bolts back to the engine and slide the baffle back into place


Step 40 - While the sump's off you might as well give it a clean. If it's anything like mine it will be covered in oil and dirt. Apply petrol liberally with a toothbrush to dislodge the dirt and then kitchen towel should clean it up.


Step 41 - Work round the sump gasket with a gasket scraper removing the old gasket material. It may be quite hard and brittle so attack it from the sides and wriggle it off in sections. Again, a scrub with petrol cleans the surface up once all gasket is removed (picture 3 is before and picture 4 is after cleaning the gasket surface). Also clean out the sump pan so there is no contamination in the oil. Little bits of dirt and grit can cause big problems if it works its way into a bearing etc so keep everything very clean when working with the sump off


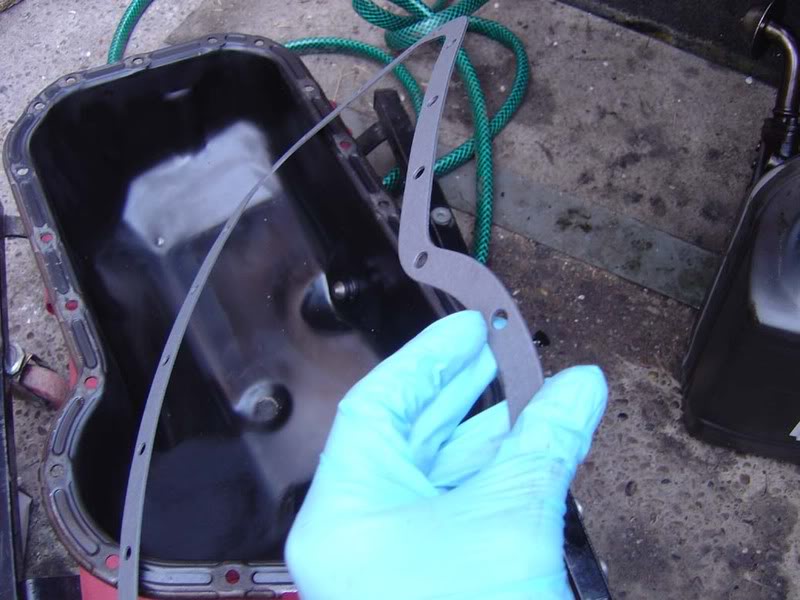
Step 42 - Now get a new gasket (which should cost about 6 or 7 pounds) and drop it into place on the sump

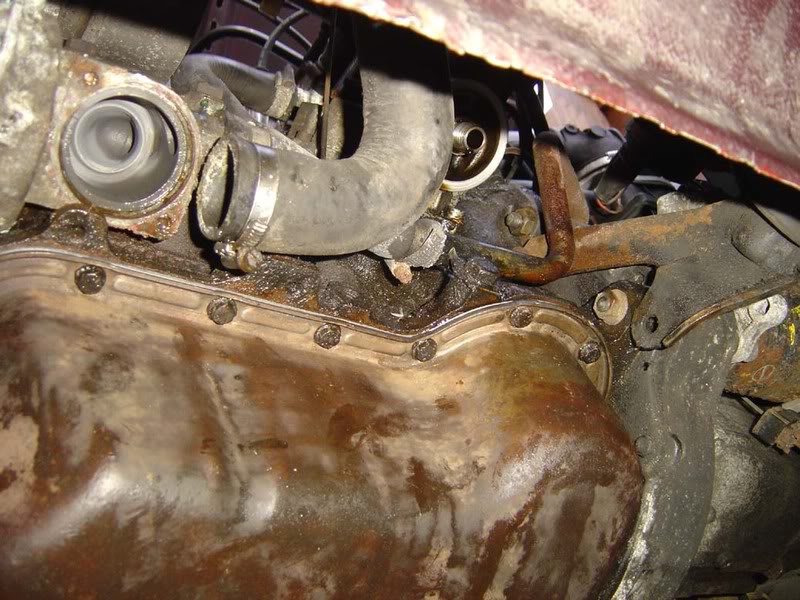
Step 43 - Raise the sump up (a trolley jack helps to line it up while you refit the first few bolts) then loosely fit the 10mm bolts into place. Work round the sump in a logical order (a spiral order is my preference) gradually tightening them all up. Don't forget the awkward ones - try to make sure you don'ot keep slipping off them and round the nuts

NOTE: The guide for the oil pump is for those who have a good reason not to spend the ?50 ish on a new pump. If there is any doubt at all about the condition of the pump then it is worth replacing it. Don't cut corners here or you will regret it.
Step 44 - OK, back to the normal oil change now. Run a bead of fresh oil around the rubber seal of the oil filter. Thsi will make it easier to remove for the next oil change and also helps with the sealing of the filter against the block

Step 45 - A member asked if I could include this step in the guide which is something I never normally do but I couldn't think of a good reason not to so here it is. Fill the new filter with fresh oil prior to fitment. The filter would otherwise go on dry and, although it would fill almost instantly, there would be a small delay where the fresh oil is pumped round the engine. Due to the fact the filter is mounted vertically you aren't going to be spilling oil everywhere either so it probably is worth doing.


Step 46 - Now refit the filter to the block and screw it hand tight. Don't go crazy here, you'll just regret it next time. Rotate it until it 'bites' and then giev it about a turn just to seal the filter in place.

Step 47 - Replace the copper washer and then tighten the 19mm sump plug. The copper washer deforms to form a seal and should be changed on each oil change.

Step 48 - Drop about 4 litres of oil in then top up the rest using the dipstick as you would normally

Step 49 - Once you've finished, double-check everything is in the right place and you've not left any spanners in the engine bay etc before firing the car up. Let it run for about 30 seconds while you check for leaks (sump plug, oil filter or sump itself if you removed it - if you find any leaks, tighten the offending part), then take it out for a very brief spin. When you get back, check again for any drips and then you've finished. It's wroth keeping your eye on the oil level for a couple of days and giving it another check for any signs of leakage, better safe than sorry.
There are no pages beneath this page
There are no posts yet


