


Fuel tank replacement

Posted
#1648736
(In Topic #232497)
Old Timer

I need to replace my fuel tank.
I could do with a list of everything I need to remove.
This is so I can make a list of all the new parts I have to purchase.
Is it whole rear beam out job?
I have a powder coated spare been but it’s bare. So I will transfer the old beam components to this one (will need lots of new bits I guess such as rubbers and hoses)
Guessing new tank straps and new tank obviously.
I recently fitted a pump but seems to be clogged again, but can reverse the pump and clear this being well.
All help gratefully received.
Thanks
Craig
Sent from my iPhone using Tapatalk
Posted

Local Hero

I would start by spraying the axle mount studs and nuts with a penetrating oil, and use only a pneumatic or electric impact wrench do not try to use a breaker bar or you stand a good chance of torque shearing the studs.
What do Divorces, Great Coffee, and Car Electrics all have in common?
They all start with GOOD Grounds.
Where are my DIY Links?
They all start with GOOD Grounds.
Where are my DIY Links?
Posted

Local Hero

From memory, remove rear exhaust so may need new clamps and hangers. As Briano says the axle needs to be lowered but you don't have to remove fully. It can be left dangling on the struts, carefully undo the 4 nuts from the mounting studs and pray they don't shear. The rubber brake flexis are just long enough to leave. If you have to undo these and they haven't been touched for 30 years expect the end to be rusty blobs and seized to the fixed lines. All may need replacing/fixing.
Assuming the tanks very low on fuel undo the rubber hose section connecting to the metal filler pipe and collect any spilt fuel. The jubilee clips may need carefully sawing off and replacing. The rubber hose section may be perised and not like being disturbed.
From inside under rear seat access hatch disconnect the wiring and any hose connections marking what goes where.
Lower tank, I've never had to replace the straps. As its lowered disconnect other breather pipes as they become accessible. Again they may be rusty/seized and not like being disturbed
Can be done on axle stands but a ramp is easlier and def an extra pair of hands is helpful.
Note I had to remove the tank for other work and mechanic friend managed to snap off the tiny breather outlet and thus had to replace the tank with a pattern part. All went well but it suffered from fuel starvation after running for 5 miles or so (standard 1.8 DX GTI) eventually source an original repalcement tank and all was well.
If your tank is full of craap from a rotten filler pipe you may be able to swill out/siphon it out and reuse if its not rust inside?
When I orignally restored the car 20 odd years ago I fitted a large in line filter in a loop of hose from the tank to the pump under the car to stop any dregs of rubbish from the tank before they got to the pump.
After a few thousand miles I removed the filter.
1983 Mars Red 1.8 Golf GTI
1987 Alpine White 1.8 Clipper Cabriolet
The trouble with doing nothing is that you never know when you are finished.
1987 Alpine White 1.8 Clipper Cabriolet
The trouble with doing nothing is that you never know when you are finished.

Local Hero
Posted
Old Timer
Fuel tank replacement
There will be a brake line somewhere but not sure if there is a joint to undo on the beam.
Then I guess there are various bushes and rubbers to replace when off. I do have a set of discs but need stub axles, callipers, back plates and pressure reducing valves do not sure it’s worth the hassle.
Sent from my iPhone using Tapatalk
Local Hero
Backinblack said
Thanks all. I am going to fit a refurbished rear axle at the same time. Guessing cables, hoses and struts are all that hold it in place?
There will be a brake line somewhere but not sure if there is a joint to undo on the beam.
Then I guess there are various bushes and rubbers to replace when off. I do have a set of discs but need stub axles, callipers, back plates and pressure reducing valves do not sure it’s worth the hassle.
Sent from my iPhone using Tapatalk
The other thing that can seize solid is the rear damper bottom bolt that often needs hacksawing off and replacing
1983 Mars Red 1.8 Golf GTI
1987 Alpine White 1.8 Clipper Cabriolet
The trouble with doing nothing is that you never know when you are finished.
1987 Alpine White 1.8 Clipper Cabriolet
The trouble with doing nothing is that you never know when you are finished.
Local Hero
OH I forgot those? They are evil sadistic things the first go round. The Bolt seizes internally to the metal through bushing and you have to cut them out, torch them, out or what ever, the first time I cut them out with a hand held Hacksaw blade.
Going back you will wrap the new bolts from head to thread with Teflon Tape and Slather it with Never-seize or copper grease. It will never do that again.. I have taken bolts out that have been "mummified" and in place for 7 years, and they came out like a Piece of cake, and still looked new after unwrapping them.
The Brake hoses attach to the rear beam and the Chassis, use only Brake line Wrenches to undo them and if they spin in the Keepers as they are want to do then use a pair of small Vice Grips to hold it, Going back wrap the thread with Teflon Tape and if they are still originals I would replace them out of hand. Clean all the flare nuts and Hard lines behind them to allow the nut to spin freely….
Mummified bolt.

Unwrapped Mummified bolts after being on a few years

I would use Copper grease on all studs and attachment items going back, as in a few years you will be glad you did.
What do Divorces, Great Coffee, and Car Electrics all have in common?
They all start with GOOD Grounds.
Where are my DIY Links?
They all start with GOOD Grounds.
Where are my DIY Links?
Posted
Old Timer
Fuel tank replacement
What about the accumulator. If the pump has sucked muck from the tank will this likely still be good. They are expensive from what I can see.
Sent from my iPhone using Tapatalk
Posted
Old Timer
Fuel tank replacement
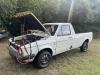
Today I got these old beasts apart that I have kicking about.
No vice, no press. Just an old wheel and a hammer. If you have had to do this with basic tools before you will know how happy I feel now it’s done. They will be going to the powder coaters with the anti-roll bar and a few other parts.

Sent from my iPhone using Tapatalk
Posted
Old Timer
Fuel tank replacement
Sent from my iPhone using Tapatalk
Posted
Local Hero
1983 Mars Red 1.8 Golf GTI
1987 Alpine White 1.8 Clipper Cabriolet
The trouble with doing nothing is that you never know when you are finished.
1987 Alpine White 1.8 Clipper Cabriolet
The trouble with doing nothing is that you never know when you are finished.
Posted
Old Timer
Fuel tank replacement
Sent from my iPhone using Tapatalk
Posted
Local Hero
Worse case is that you will have to cut the cable on the bolt end to get it free, then replace with proper cables.
That is push the cable back in place so the bolt end and cable is exposed in the interior, and clip the bolt off the cable. The issue is that to yank the bolt end you have to grab the drum end of the inner cable as the sheath easily moves between the ends.
What do Divorces, Great Coffee, and Car Electrics all have in common?
They all start with GOOD Grounds.
Where are my DIY Links?
They all start with GOOD Grounds.
Where are my DIY Links?
Posted
Old Timer
Fuel tank replacement
Will give it a go through the week and see if I can get it pushed through from the inside a little.
Sent from my iPhone using Tapatalk
Old Timer
Fuel tank replacement
Solid ends were catching the actual handbrake. Lifted it and gave the cables a wiggle from underneath and ta da. Rear beam now totally free.
Just need the lad to come home to help me lift it round the side of the house so I can strip the ARB from it and get it over to the powder coaters.
Ordered a G60 servo and master cylinder from ebay so hopefully it will be here next week. More questions to come on that -
brake pressure regulating valves - do I need them?
The bias adjuster connected to the rear beam via a spring - do I still connect this back up when discs are fitted.
I am going to run standard front discs - anything I should do because of this?
Thanks
Craig
Sent from my iPhone using Tapatalk
Posted
Old Timer
Fuel tank replacement
Lifter the back seats and see I need a new sender unit as the top is all broken.
Debating having the tank refurbished by a company that plastic coats it inside and out. New one is £90 but I read sometimes they are not so great and can cause starvation of fuel as they are not baffled properly.
Any idea if the heritage ones are any good for GTI models ? If not who would you buy from ?
This tank replacement it turning into a full on mission.
Sent from my iPhone using Tapatalk
Posted
Old Timer
The whole set of flexies need replacing. Probably the expensive accumulator and sender unit.
Getting expensive the messing about. May have to delay the disc conversion.


Posted
Old Timer
I have a lot of 'bits' in the bottom of my tank, which looks like rust particles.
I am contemplating whether to drop the tank and flush it, or replace the tank. Like you, if my tank comes out I will be wanting to refurbish the rear beam while it's out…
Posted
Old Timer
Fuel tank replacement
Get these.
Blue Spot Tools 01539 1539 Bolt Remover, Black, Set of 10 Pieces
The spend that help me get seized nuts of the rear sub frame mounts to drop the beam was amazing.
NOTE; soak, soak and soak again with penetrating oil.
I dropped the beam by disconnecting the flexi hose from the ridged hose on the beam. I shall be replacing the flexies and the ridged hoses to ensure it will be good for years to come.
ARB removal. This was an annoyance to get off. I destroyed the outside clamps and will be ordering new. Inner clamps ok but will be getting them powder coated. All new ARB bushes.
Pivot mounts are impossible to find. I shall get mine powder coated, nee bushes and washers, nuts and bolts.
Note I am fitting standard rubber bushes back again as I don’t want a rattle and hard ride. (Suspension is hard enough).
Brakes. - new disc stub axles and bolts to be ordered. Will also need to order new disc covers for behind the discs.
I have brand new mk2 discs and some old mk2 calliper carriers. I shall be ordering new mk4 callipers. I also have mk2 hand brake cables from some time ago.
This will get me a nice shiny disc converted rear beam.
Sticking with brakes for a moment I will be getting a 9 inch servo and 22mm master cylinder.
I shall leave the original brake bias valve in place that connects via a spring on the rear beam. Therefore hopefully no need for expensive inline pressure regulators.
Fuel.
Now the beam is off and out the way time to focus on fuel tank.
Drop the exhaust of the hangers. This is a must and I wish I did this first before doing the beam removal as my axle stand was in the way after.
Remove rear seat - so easy on the mk1 golf. And pull the boot lining Matt out the way also.
Three screws to remove the sender unit cover.
My sender unit is needing replacement as it’s all cracked and chipped. Money I didn’t plan for.
Empty fuel - I used an old fuel pump, some hose and connected it to a battery booster pack. Turn the pack on and pump the tank empty. 10 minutes done. Keep the doors and boot open to keep well ventilated.
Back underneath - penetrating oil again all over the nuts on the tank strap nuts. I used a ring spanner to loosen the nuts by wiring them loose and tight about 1/3 of a turn at a time. As they worked down then could use the spanner more normally. I feel these could sheer very easily. New bolts will he needed here. DONT TAKE IT RIGHT OFF YET.
Fuel pump. My golf it rotten as hell round this are and needs some welding. But remove the pipe from pump to tank. Lower the pump cage down and get this loose and out the way. (I shall rebuild in a temporary way and get this to the welders for professional repair - I don’t do welding)
Filler neck flexi to tank - disconnect
WHAT I HAVE NOT DONE BUT SHOULD - remove the inner arch pipe cover
Drop the tank was my next move by completely removing straps (I’v pulled the rubber off and will be getting straps powder coated)
There are a couple of small hoses. I got these off and will be replacing them. (Wheel are inner cover to be removed)
Tank should come away with the heat shield also. (Heat shield to be powder coated and re-used).
So more money to be spent again. Accumulator - really expensive little items - pump, hoses, cradles etc. This lot add up to a good few hundred pounds.
This is where I am up to so far. Waiting for some money to come in and then I need to make some orders. I shall be using google and various web sites to get the best costs I can. So far I reckon if I used just heritage I am up to £600-£800 in parts plus about £150 in powder coating.
I shall be looking to reduce this bill to about £700 in total. Accumulator is a good place to save money. Cradles I good condition on eBay and I will get them powder coated with the other parts, using classic vw, gsf, werks, euro car parts, etc.
Will get pictures on this as I go. Especially the re-build as it always looks nice when clean.
Sent from my iPhone using Tapatalk
Posted
Local Hero
Rear discs look and sound good in the pub but don't actually do anything unless it's a race track 250hp car.
1983 Mars Red 1.8 Golf GTI
1987 Alpine White 1.8 Clipper Cabriolet
The trouble with doing nothing is that you never know when you are finished.
1987 Alpine White 1.8 Clipper Cabriolet
The trouble with doing nothing is that you never know when you are finished.
0 guests and 0 members have just viewed this: None.