


The money pit build 2! Full ground up build.


Old Timer


Posted
Old Timer


Posted
Old Timer


Posted
Old Timer
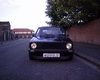
Finally got home and the sun broke out 😪
I put the rear beam, front arms and wheels on whilst on the trailer so I could unload easier.
Ok the results!!!!!
It's worse than expected which gave me a night of "WTH" am I taking on. So here's a quick run down of what I'll replace and it's not because of rot it's more getting rid of bad repairs.
Full floor from bulkhead to back seats both sides, full back boot floor in sparewheel sections, full back from bottom to above lights, both rear 1/4's inside, inner arch on passenger side rear, full inner and outer with shocker tower on drivers rear 1/4, outer cills are a maybe, convert from lhd to rhd inside car, both front chassis legs, two front wings, bonnet and front panel.
Here's a few photos of some of the repairs.


Local Hero


On the drive
T25 Diesel…sameoldblueshi£ (currently under resto)
Rocco gt2….1990 secret 2…(currently under resto)
Mk4 99 1.8t indigo blue Gti with 43k miles
Caster 93 clipper JH Green cabby
Snowy 91 GTi White cabby( sat waiting for inspiration)
Myvalver 89 GTi Grey mk2 16v
Yuppy Flu 91 GTi Flash Red Sportline
Golf mk1 owner's club on Spotify
Mk1 golf owners club playlist: Golf mk1 owner's club playlist - YouTube
Local Hero
Now you can see what's been done badly before you can move forward and get a solid car which if done right should last many more years.

1988 Mk1 Golf GTi Cabriolet 1.8cc DX, K-jet. Daily drive. 317,000 miles and counting
1978 Mk1 Scirocco GLS 1.6cc FR, Webber carb. Weekend toy.
1978 Mk1 Scirocco GLS 1.6cc FR, Webber carb. Weekend toy.
Posted
Old Timer
Kenneth Cartwright said
Well can see the crud on car now… wonder why people dont flatten weld repairs. Unless they realised would be hidden by carpets and underseal. A lot of the previous build was do in Poland. where it did have bucket seats(sparko)
Just some all our rubbish repairs done tbh mate but it is 39 years old.
I also don't understand why they don't grind them flat and all I can think is the reason you give 🤷🏼♂️
 Last edit: by mk1 daz
Posted
Old Timer
mark1gls said
There seems to be a lot of holes in the boot, perhaps they was drilled to let the water out….
Now you can see what's been done badly before you can move forward and get a solid car which if done right should last many more years.
Thanks for posting mate i was beginning to feel like it's was a pointless build thread.
The holes at the back passenger side of the boot was for all for the battery.
I wanted to really see all this but i was hoping it might have had less repairs.
I hope with the effort I'll be putting in it will last another 40 years.
Posted
Old Timer
I need to decide if having s1 bumpers on a s2 really bothers my off not 🤷🏼♂️
Looking through all the images on my phone 90% are s2 with s1 bumpers and no wheel arches so I must like the look.
Posted
Old Timer

Twitter Manager

Posted
Old Timer
blans said
Looks like you have your work cut out (Excuse the pun) Looking forward to following this … Don't give up. Keep your eyes on the prize!
Thanks for looking and commenting on the build.
Yes there not going to be much left of the original car, infect the wife said wouldn't it be easier to build ones from new panels v's what your going to do 😋
I've set the completion date for jan 2022 in my mind but summer of that year will do.
Posted
Old Timer


Posted
Old Timer


Posted
Old Timer

Posted
Old Timer
15 x 8 with 25et.
I didn't want to put plastic arch extension on as I'll be running s1 bumpers on my s2. Something I said I'd never do.
Old Timer
Posted
Old Timer
Two new front wings
Genuine bonnet
Brand new complete front end section
Two genuine chassis legs
Two rear 1/4's (the full extensions ones)
Genuine back section including tail lights.
Still to order
Two doors
Both front floor panels
Rear boot floor
Probably put sill sections on too.
Roofs good only got one small dint 😬
Posted
Old Timer
I ended up running the tt for a couple of months and it was too good to break.
So I need to put my attention on getting the shell finished hen decided on the next stages.
Still not decided on colour but thinking a pastel colour nothing too bling.
Posted

Regional Host NE

Do not know a lot but willing to help if possible
1989 Sapphire Blue Mk1 Cabriolet KR
1985 Atlas Grey Mk2 GTI 2.0 ABF
1989 Sapphire Blue Mk1 Cabriolet KR
1985 Atlas Grey Mk2 GTI 2.0 ABF
There are too many online users to list.