vw golf cabriolet 85 US Spec restore - 3279A
Posted
Old Timer

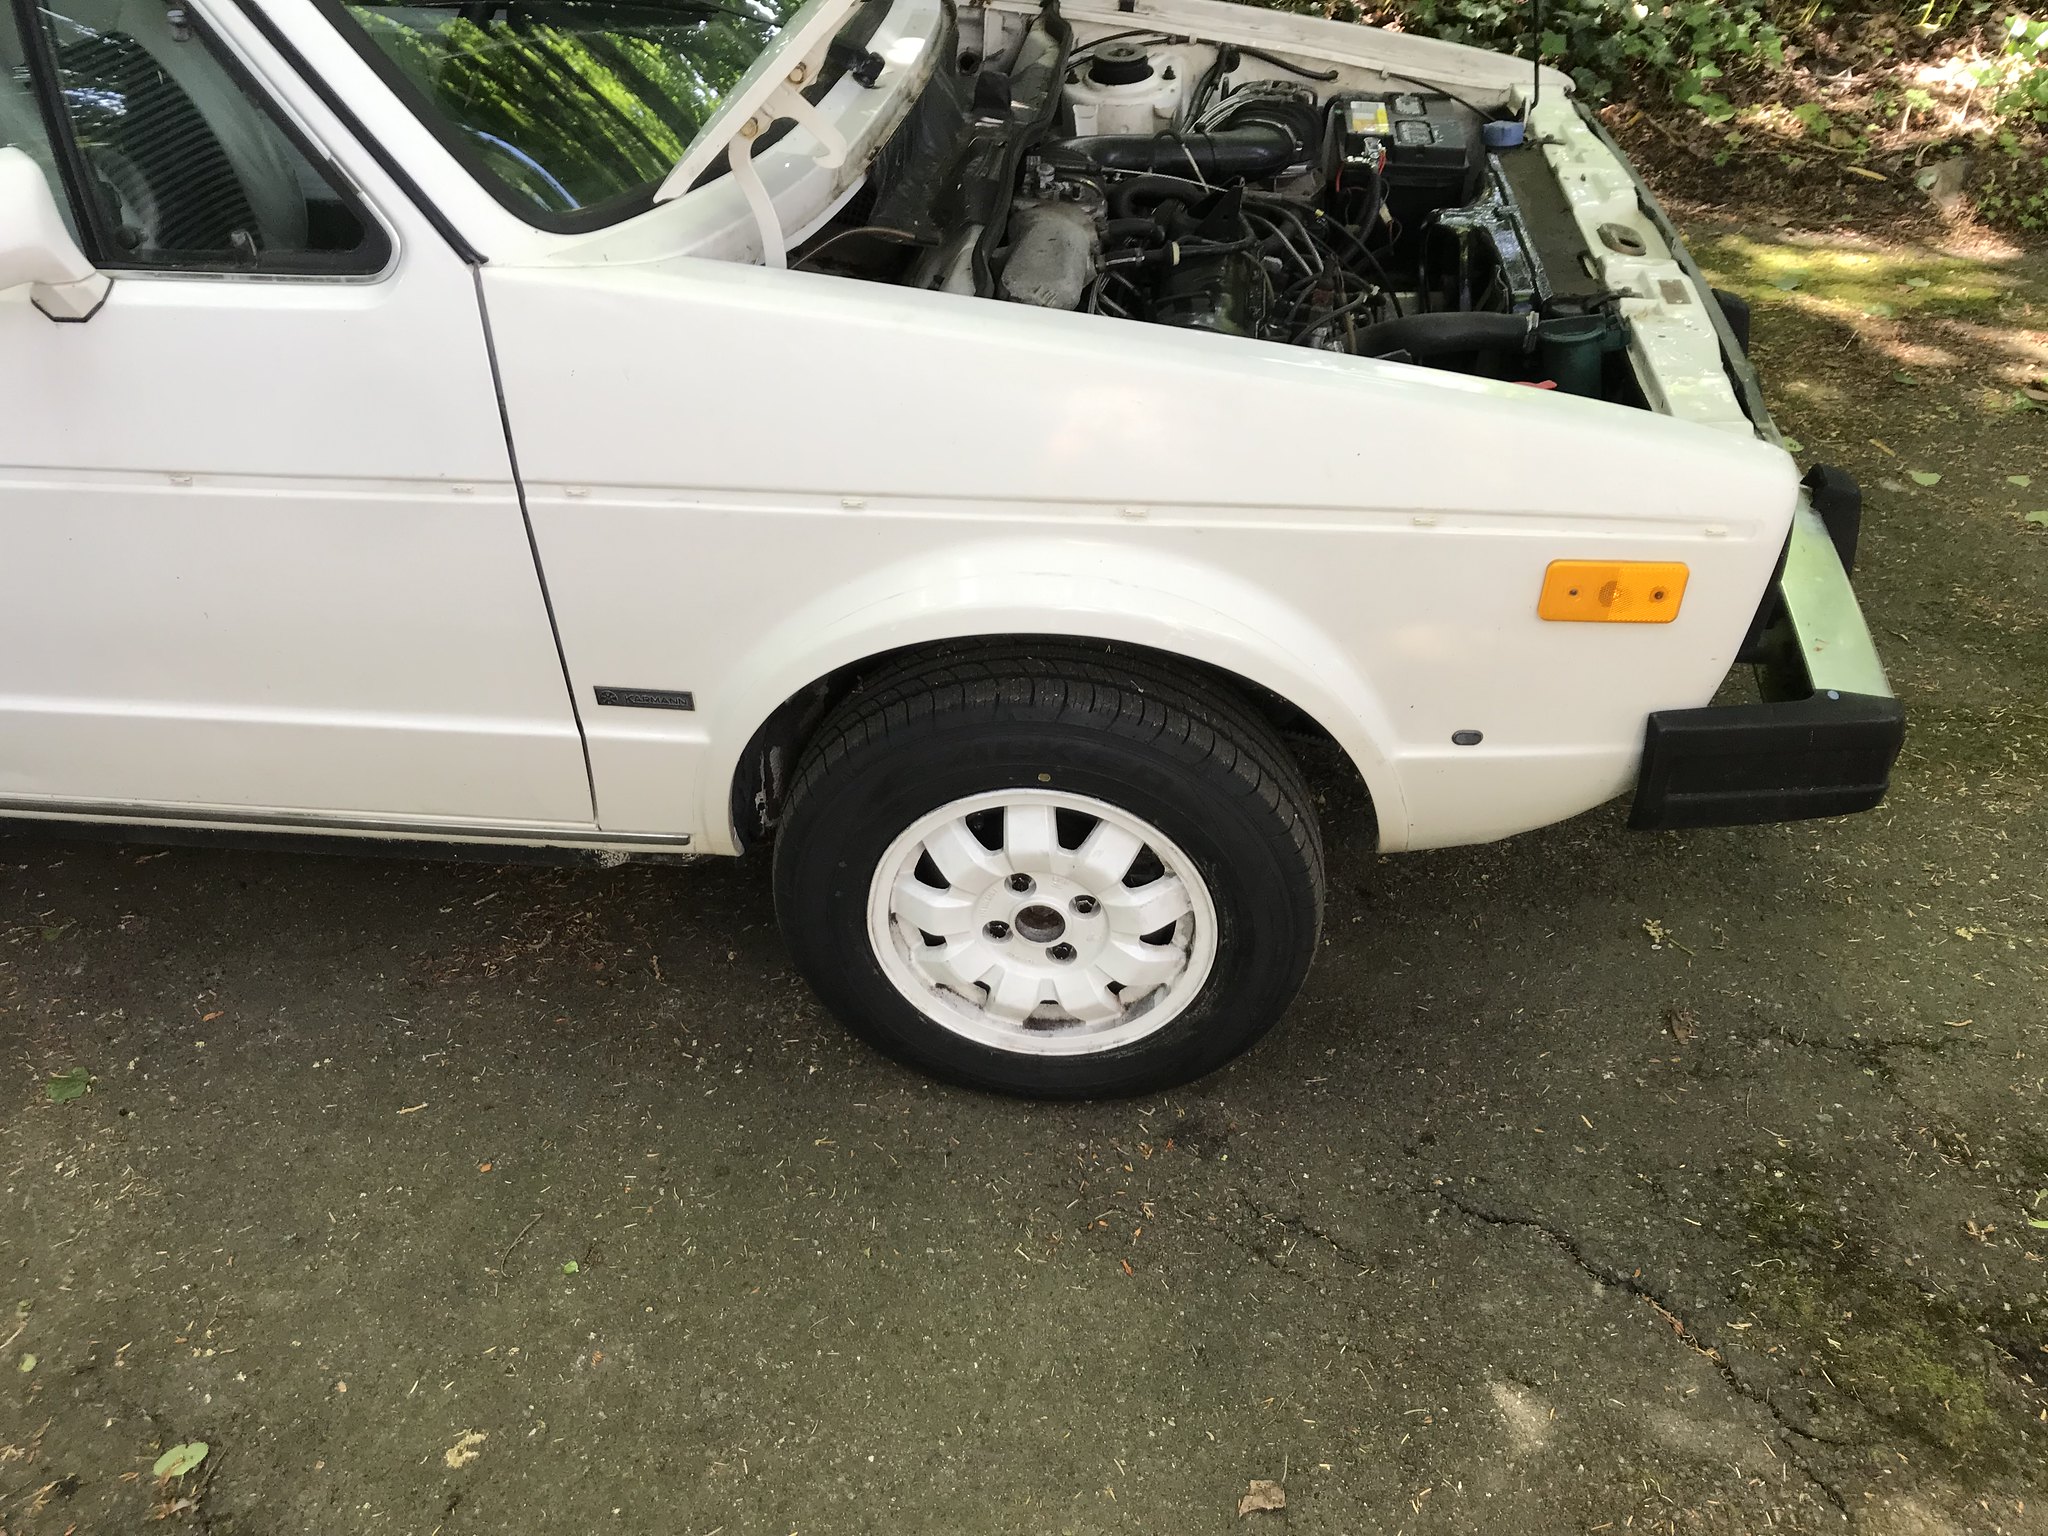
Just finished up full service and clean, fixed battery cables, painted the wheel arches and now just waiting on side trim to turn up and this cab is complete and will be sold. Really is a great car, but I just cannot keep two cabs.

I took off the wheel arches and was amazed to find not a single bit of rust underneath anywhere = result
Updates on the other cab will be coming soon - waiting on few new parts to arrive and then a lot of work will be happening.
Madone with the two Cabs 82 (UK RHD) and 85 (US LHD) (92 sold)
Posted
Old Timer

In short I want to get the car completely repainted, short out interior and then all running gear.
The most exciting part turned up - big thank you to KW suspension. Will be working with them more for my other build soon too. Quality of this suspension is very high.

Also downpipe/header/manifold turned up, I have some work to do to this so it has a flexi part. More to come on that later.

Did two pieces of work recently
1. Upgraded stereo and put in a aerial booster


2. Fixed the drivers door top trim
Lucky I save stuff over the years so pulled out of my own stock


I then used 3M heavy duty weatherstrip - boy this stuff works great and gives you about 5 minutes before starts to go off.
You apply 3M to the back of the trim, make sure you have good amount at bottom ends (not too much that it goes everywhere) and using clamps hold it in place and let try for few hours.

Working on clearing out my garage at weekend, need to do some work on my MGA and then I can get some more photos of all the parts I have (currently in loads of boxes)
Madone with the two Cabs 82 (UK RHD) and 85 (US LHD) (92 sold)
Posted
Old Timer

So in short, I have the interior fully out and working myself on new covers for the front and rear seats. I have everything now to completely take apart front and rear wheel areas and add new parts.
I also have most parts for engine refresh and service, but need to this winter really get the car stripped down more to fix some areas and get it repainted while I have interior out and all the old parts still on it.
Will get some photos up in coming weeks.
I am interested in hearing from any of our VW racing car owners on some questions I have relating to racing in europe in mk1. Feel free to PM me, I will properly start up thread on this area too.
I am also going to see my old BLACK SOY Cabriolet 92 next month as new owner is doing some work on it.
thanks
Madone with the two Cabs 82 (UK RHD) and 85 (US LHD) (92 sold)
Posted
Old Timer


Madone with the two Cabs 82 (UK RHD) and 85 (US LHD) (92 sold)
Posted
Settled In

Seat covers look good and the KW suspension V2 or V3
will work a treat!
Keep up the good work
Posted
Old Timer

ConvictGTI-No.1983EW said
Seat covers look good and the KW suspension V2 or V3
will work a treat!
Keep up the good work
thanks. Lots of more upgrades coming…
Madone with the two Cabs 82 (UK RHD) and 85 (US LHD) (92 sold)
Posted
Old Timer

Before

during

after!

Nice part is the wheels fit nice inside the arches so the drop can be really good. Some work to do on inside arches and front notch for the drive shaft clear metal
All covered up again!

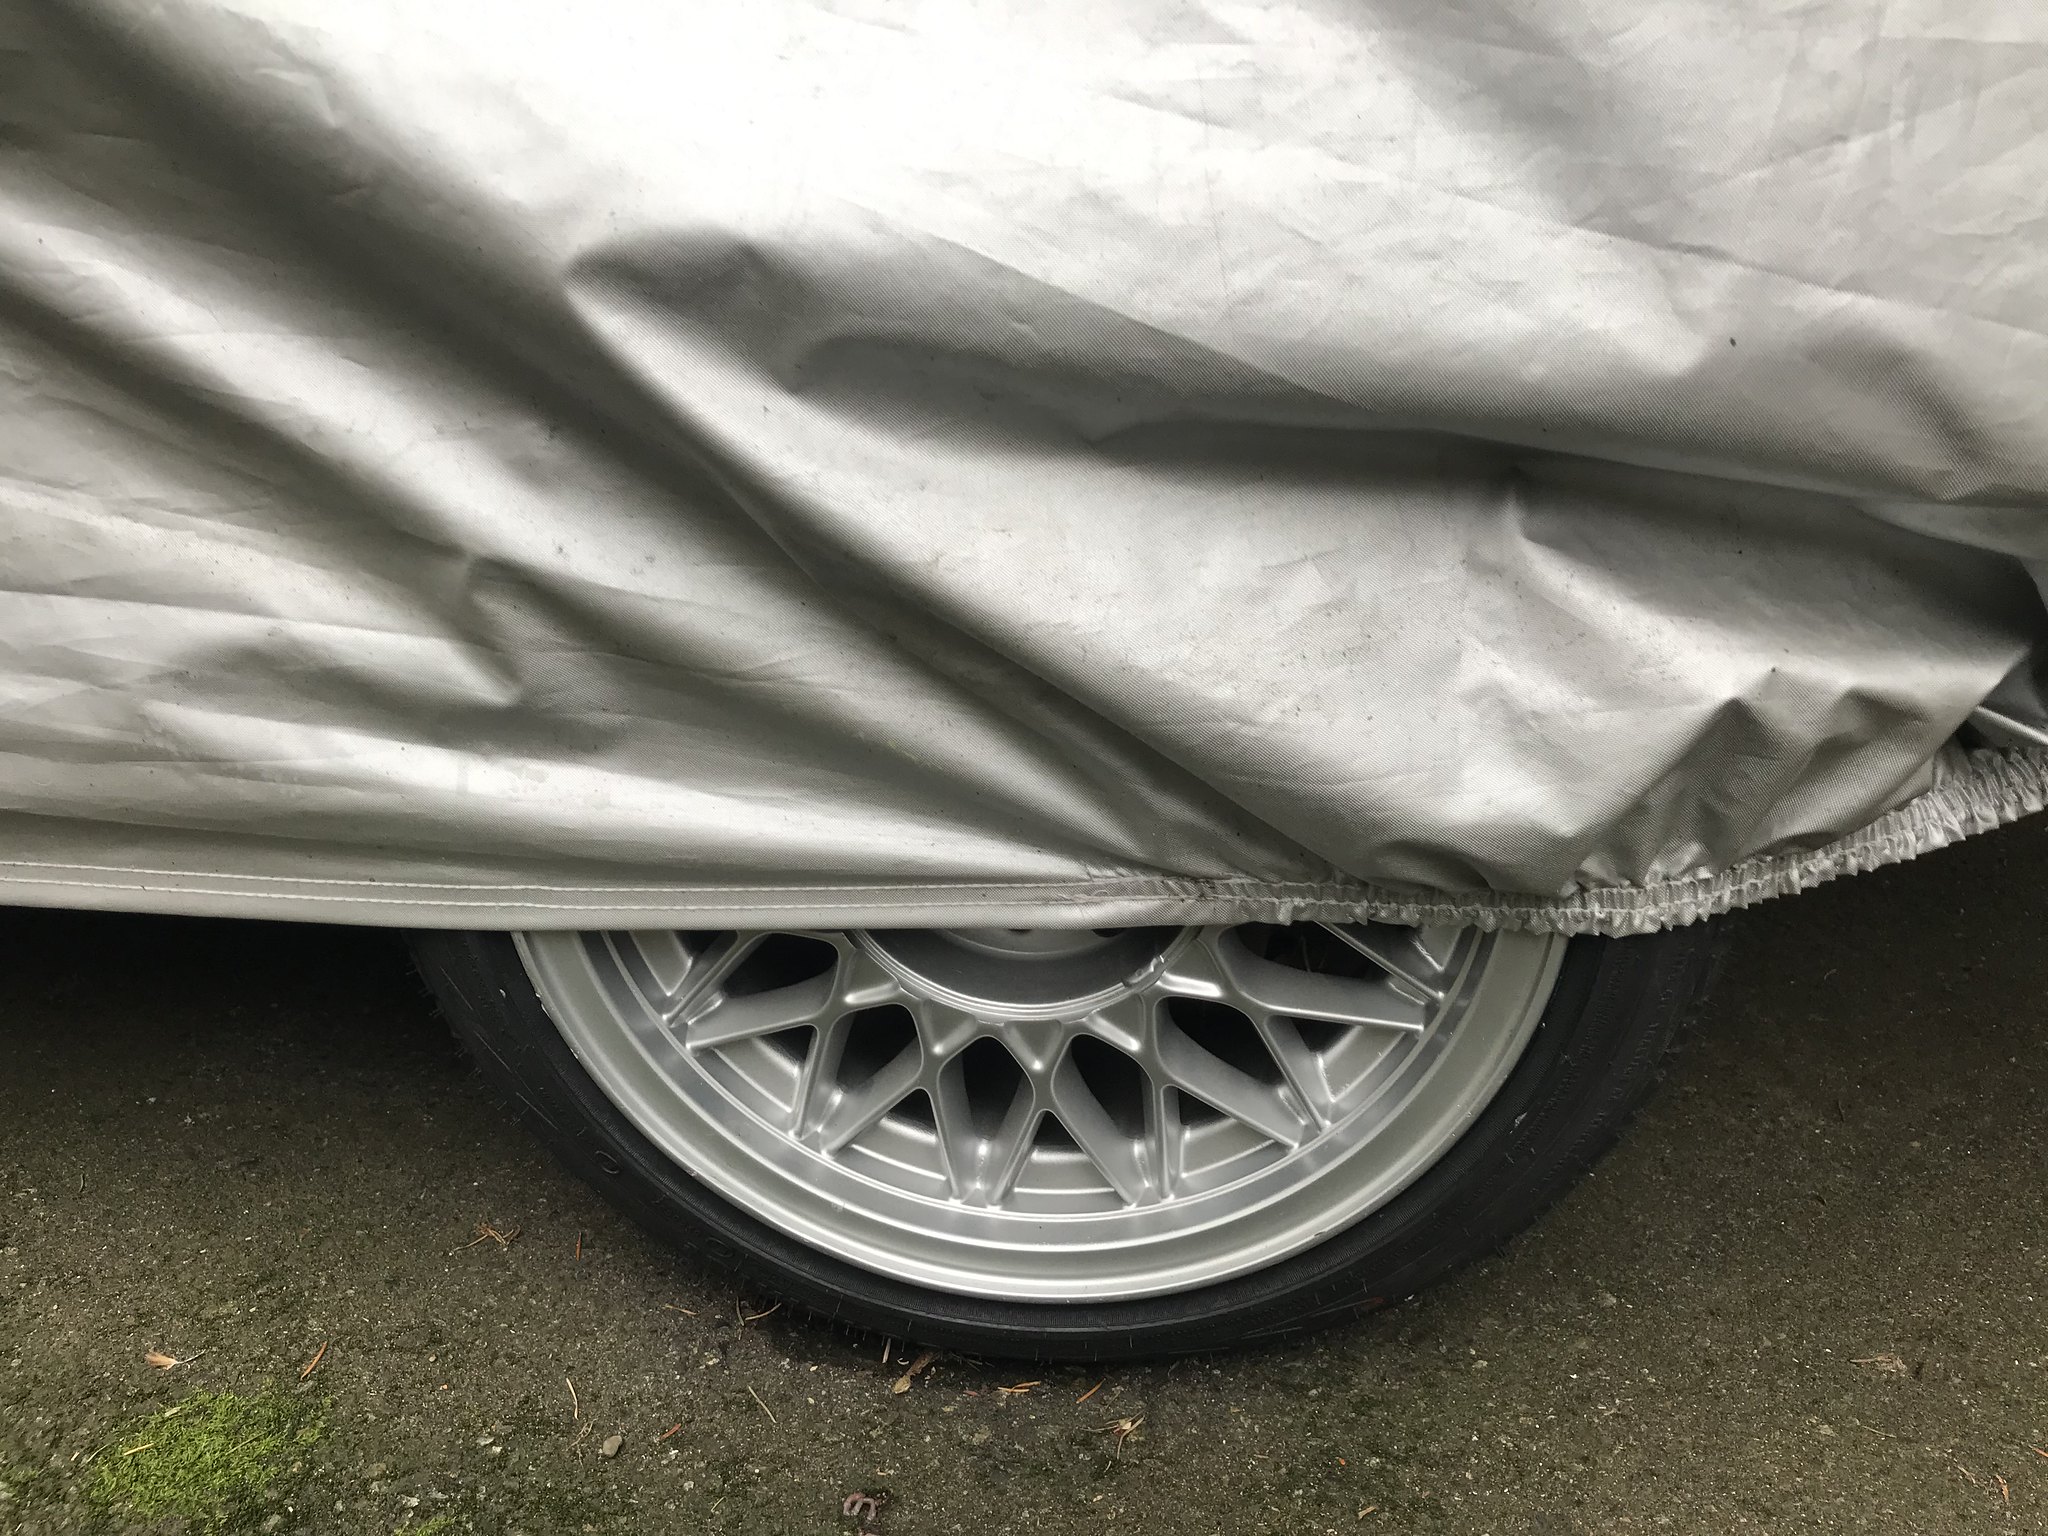
Original ones, will clean them tomorrow and then up for sale….

Madone with the two Cabs 82 (UK RHD) and 85 (US LHD) (92 sold)
Posted
Old Timer

Taking everything out was easy, don't think anything has ever been taken out before, everything is solid, just covers of seats worn out and cards need refresh.
Door damp covers still working and foam at bottom still there!

Rear speakers still work… will be upgraded later

Trying out the mk2 recaro seat base, make sure it works (had to do some slight welding on them)

with everything out, time to strip down seats - so can use material for pattern to make new interior.
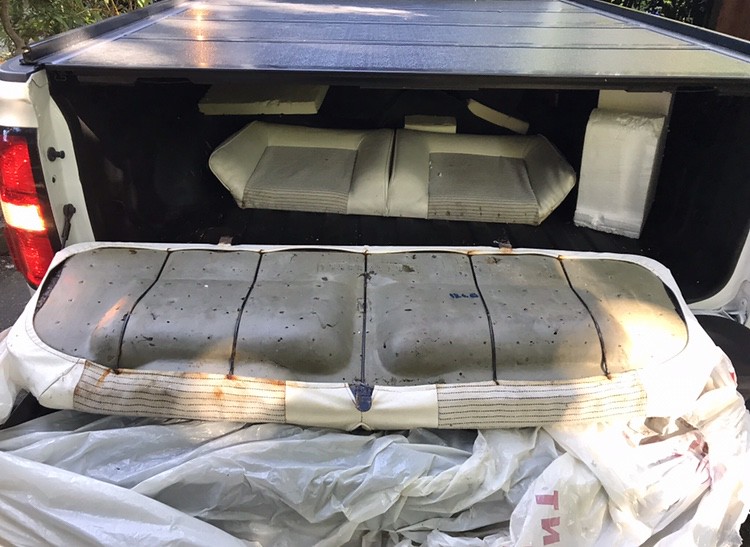
All part (forgot to take pics of front seats)

Well after copying the current cloth and many many hours of helping someone managed to have complete front and rear seats redone in leather with red

and little insight to front recaro seats
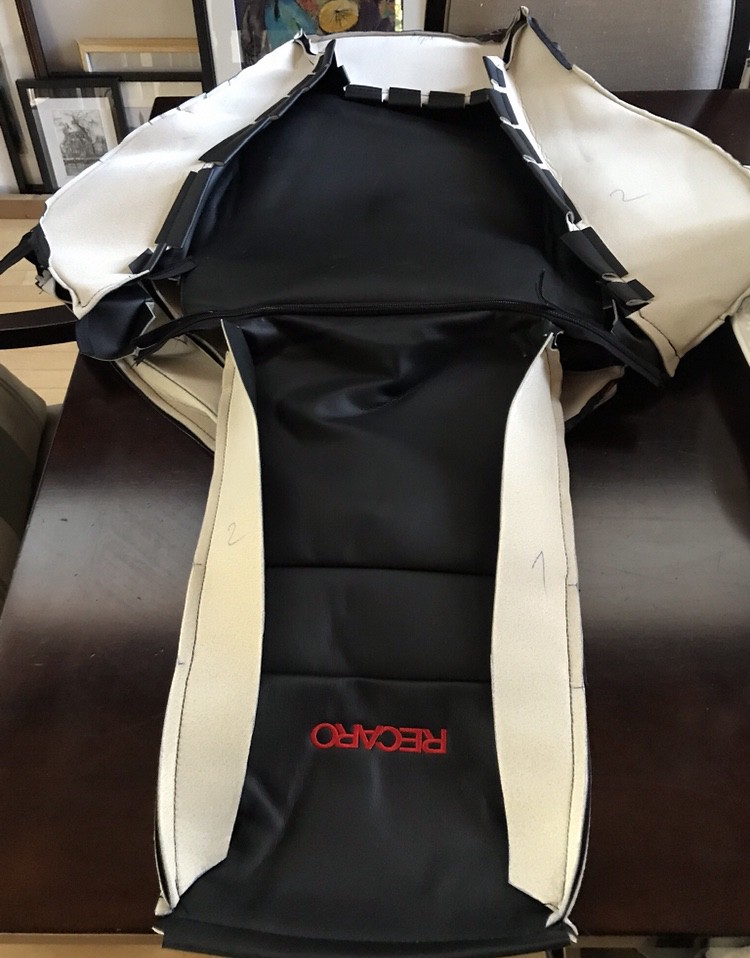
Next up is work on redoing the four cards and then I will install everything and show end results. lots to do, but having fun doing it
Madone with the two Cabs 82 (UK RHD) and 85 (US LHD) (92 sold)
Posted
Old Timer

before

after

before

after

heated seats parts

Madone with the two Cabs 82 (UK RHD) and 85 (US LHD) (92 sold)
Posted
Old Timer


4 screws soaked for few days with WD-40 and out comes the metal structure of bumpers. I don't think these screws have been undone since production line 30 years ago.

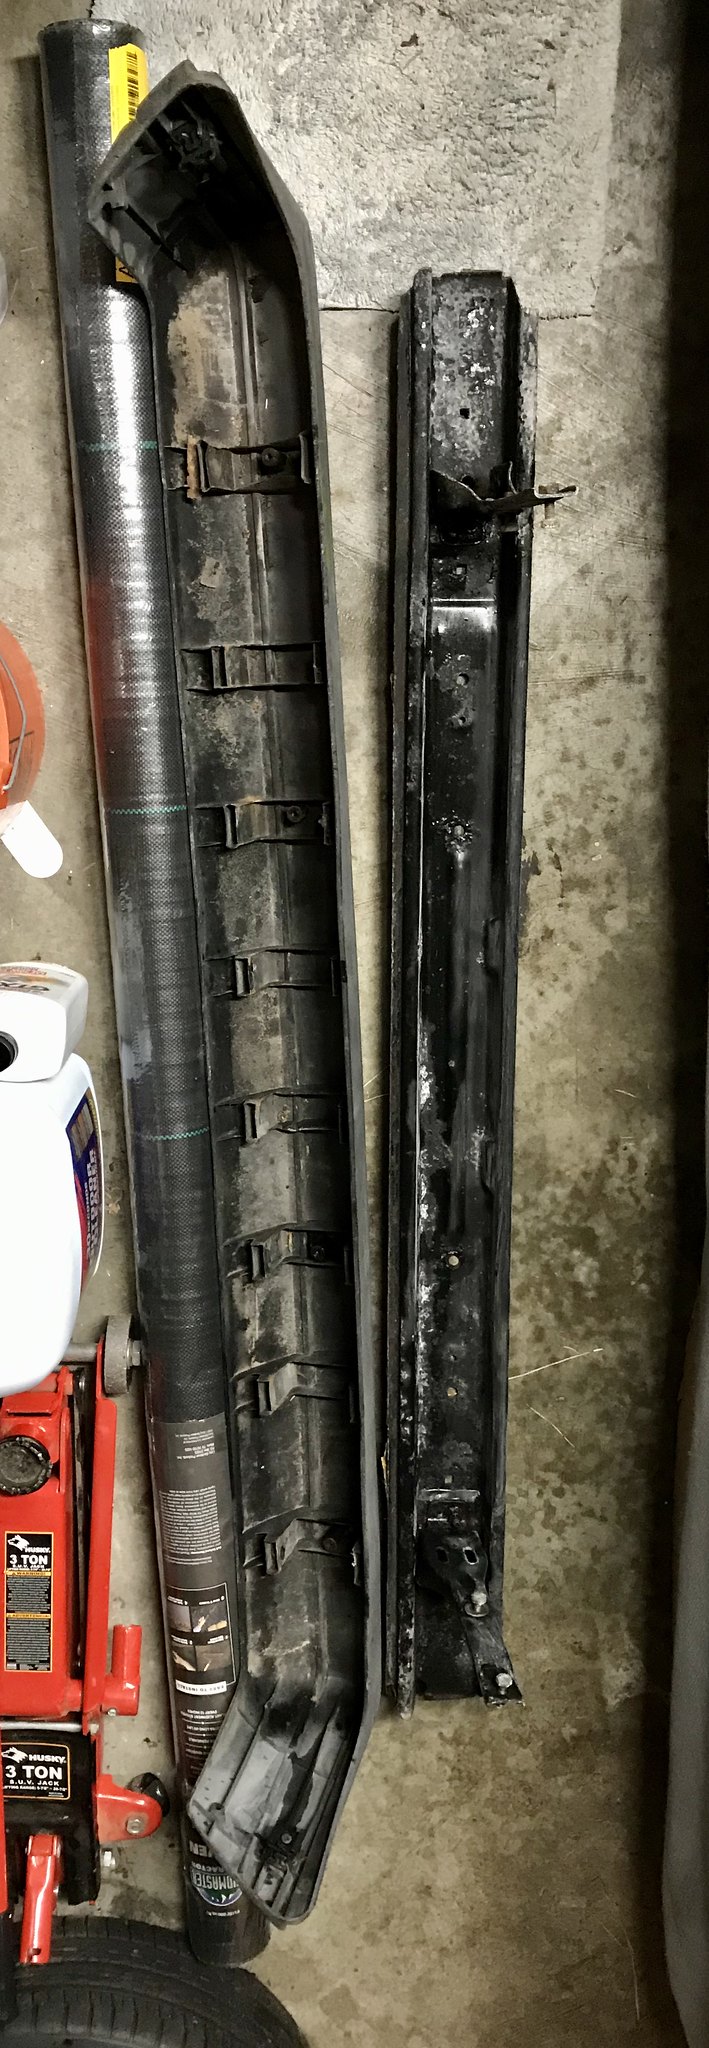
Both metal parts of bumpers is now off to be powder coated. Areas in white on metal part of bumpers is rust treatment as I wanted to see how bad surface rust was.
the plastic part of the bumpers are in outstanding condition, just need a good clean and restore to bring black plastic back to its former glory.
waiting on few parts to arrive to complete my interior.
Madone with the two Cabs 82 (UK RHD) and 85 (US LHD) (92 sold)
Posted
Old Timer

Video can be viewed here;
https://www.youtube.com/watch?v=s81N_7yX2H4
Before
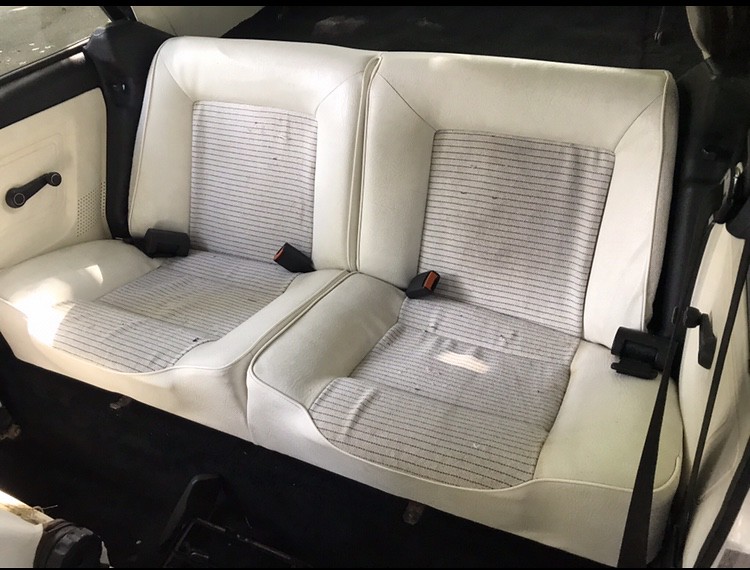
After

Madone with the two Cabs 82 (UK RHD) and 85 (US LHD) (92 sold)
Posted
Old Timer

Actually finished up my European bumpers refurb.
Taking mk1 bumpers apart is easy and painful.
1. Painful - front bumper
2. Easy - rear bumper.
Here is why;
Each bumper front and rear have a outer and inside part, primary outer is plastic part you see and inside is metal structure.
Painful: The front bumpers are plastic pressure welded from factory to hold the plastic outer to metal structure inside which is used to bolt to your VW.
There is no easy way of getting the plastic and metal apart for the front bumper other than drilling plastic out and then its a pain to try and reproduce the OEM method. So of course when I tried it I tried the lets see if I can pry out the plastic, it worked for 1 of 4 areas of plastic weld. The other 3 broke and so now I had to come up with another solution. My idea was to use plastic weld make up mold, but I don't think I could get the pressure to hold the bumper in place, so I went with the bolt, washer and nut solution and I have to say it worked very well. I used a high pressure plastic weld to hold them into the existing holds and let set for 48 hours. Bumpers have been on the car week now and I've tested them out and solution for front bumper is working. I will keep on eye on this and report on this in 6 months and year to see how it holds up over time.
Easy - The rear bumpers are great and easy as there is only 4 screws you undo and the outer and inside parts come apart lovely!
I ended up having metal parts restored properly and powder coated and then got all new bolts, washers and screws.
If you want to see more in-depth video of process view here: https://youtu.be/tcwNPTbW8HQ
Before

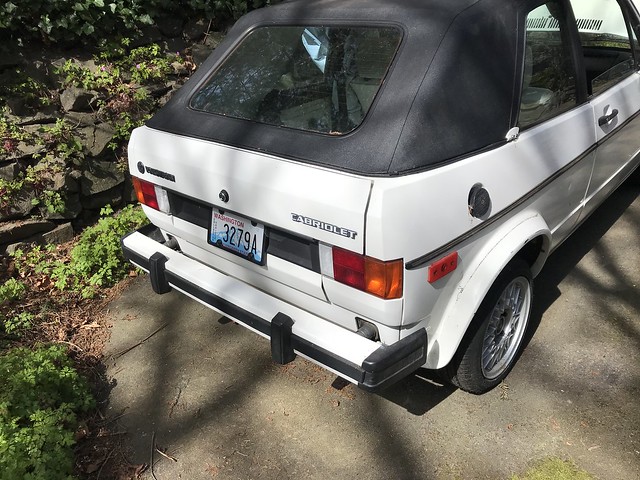
After


Next update is on Part 2 of interior and some additional exterior changes.
Fun facts of doing this job: Best tool I used during this time was my hammer
 Last edit: by madone_si
Madone with the two Cabs 82 (UK RHD) and 85 (US LHD) (92 sold)
Posted
Old Timer

Posted
Old Timer

abfmk1 said
Think those bumpers are a big improvement…
Totally agree and the weight saving is about 25 lbs per bumper, so 50 lbs total right there, at least few BHP gained haha
Madone with the two Cabs 82 (UK RHD) and 85 (US LHD) (92 sold)
Posted
Old Timer

Completed the front door cards.
Before:

Cleaned up and painted them using vinyl paint - 4 thin coats is perfect finish

Installed. Just one screw plastic cover waiting on arrive.

Really like the finish with few items with chrome.

Moved onto Recaro seat rebuilds - these are taking far too long, but I want them perfect. I am recording every step to put into a video for others usage.

only one area that requires repair

The side bolsters are being replaced with new and base and back foam will have a layer of 1/2" added to them to bring the shape back to what OEM is. Foam over time will always flatten down.
The key on doing seats is getting the right foam and this doesn't seem to be documented well online, so I will add this into my video.

and why I am using new bolsters :eek:

and back base rust repaired and painted ready for usage. I am working on base unit as that is really rusty. I basically treat rust, metal prepare, prime and P15 it, so it never rusts again!

I also stripped my original seats down for parts as Recaro seats and cabriolet seat parts are nearly the same. I was planning to use part of foam to fix my Recaro seat, but they are in near perfect condition I will be selling foam from original seats as they are perfect. Look out for those in sell sections or Flebay


Hope everyone is enjoying your VW projects?
Madone with the two Cabs 82 (UK RHD) and 85 (US LHD) (92 sold)
Posted
Old Timer

Part 1 of Recaro seat tear down and rebuild - https://youtu.be/U8pi0dPUUjw
Madone with the two Cabs 82 (UK RHD) and 85 (US LHD) (92 sold)
Posted
Old Timer

Part: Seat Slider Handle part:171 881 253 (Plastic end piece)
If this part is warn out (most are) you can still get these online at various VW specialists or on fle—bay.
The challenge is how do you get the plastic lever off the metal rod without damaging both.
The part in question!

Solution:
The original knob is held on with a little metal clip inside. The clip helps it grip to the rod. It may take some pulling, but it should just pull off.
What I did was tape up the plastic lever and put foam around it, put it in a vise and pulled back and forth on the metal rod part and bingo, with few twists it comes off.
New part: you just push on the new part and you now have handle that looks new.
Madone with the two Cabs 82 (UK RHD) and 85 (US LHD) (92 sold)
Posted
Old Timer

Goal: 1. Check and fix foam. 2. Check and fix metal structure of seat. 3. install new seat covers
Overall Foam on Recaro seat was good except for few areas.
1. One upright back bolsters shot - require fixing with new foam
2. Base seat foam had split - required gluing
3. Base seat bolsters shot - bought new ones.
4. Head rest foam was perfect.
Overall I spent 2-3 hours working on below seat, mainly so I could take loads of photos for full write up I am doing and for video. Here is summary;
Before starting on fixing…

Cut bad foam out

I ordered high density foam, cut foam and glues three layers together. I use 3M 74 Foam glue.

Start shaping the foam.. I use Carving knife - works perfect to cut foam.

Then moved onto using my air tool sander 1.5" diameter end.

Then using cheese greater for final shaping (this one is not taken from my kitchen… not sure cheese and foam go well?!)

To get to final shaping i made a template to check from one side to another.. for perfect finish - you go alone surface from back to front checking and take off foam where not needed. Also both sides are level in height too :thumbup:

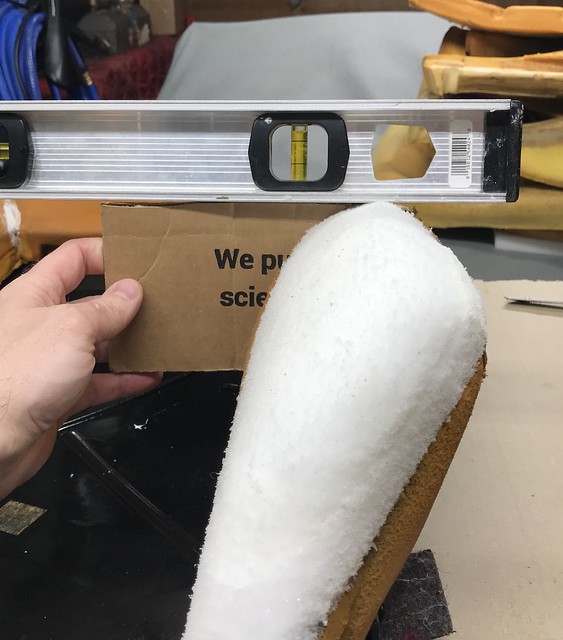
Then moved onto cleaning up the Metal frame back, didn't take photos of this, but it had very little rust but I sanded and painted it anyhow.
Then installed the foam back to metal frame and added the backing on using 3M 74 Glue

Then installed the back new seat cover.

Then worked on back and base - I got into the zone for these and only did video for them, so here is the end result. No major repairs on foam, just install covers, put metal roads in and secure to foam and staple on the back
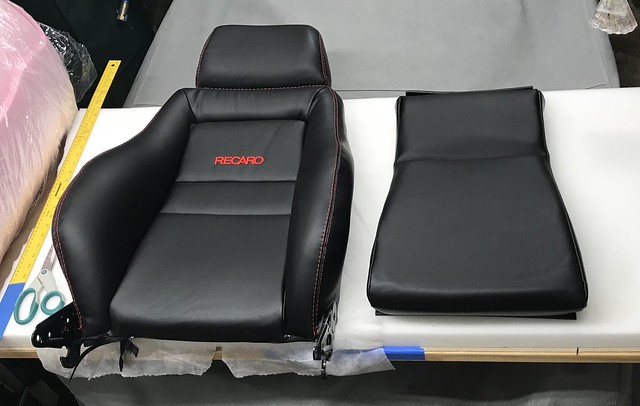
All the new covers, had a 1/2" foam on the inside, so the seats all have now a nice smooth extra feel to them.
I need to leave these out in the sun for few hours and then they are finished.
Next up new base bolsters and seat cover install and then add to main base and install in the car
Madone with the two Cabs 82 (UK RHD) and 85 (US LHD) (92 sold)
Posted
Old Timer


Posted
Old Timer

If anyone wants more insight to do this themselves, feel free to reach out to me.
Madone with the two Cabs 82 (UK RHD) and 85 (US LHD) (92 sold)
0 guests and 0 members have just viewed this: None.


