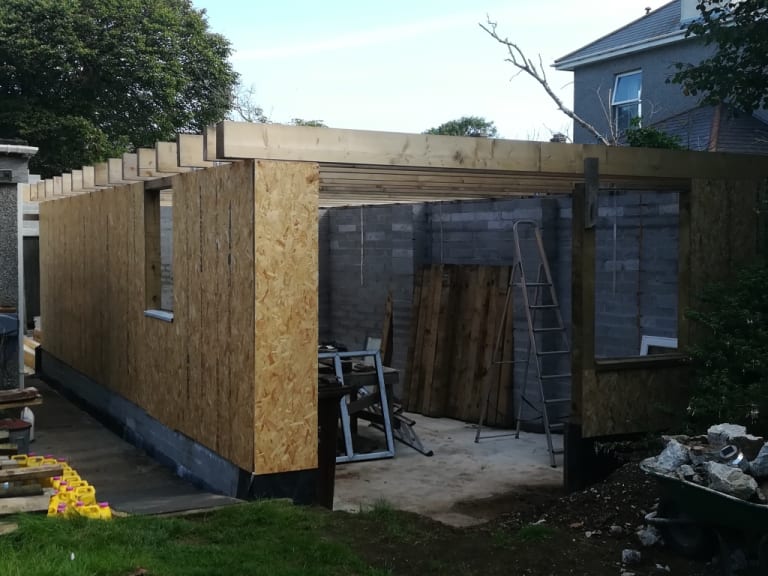
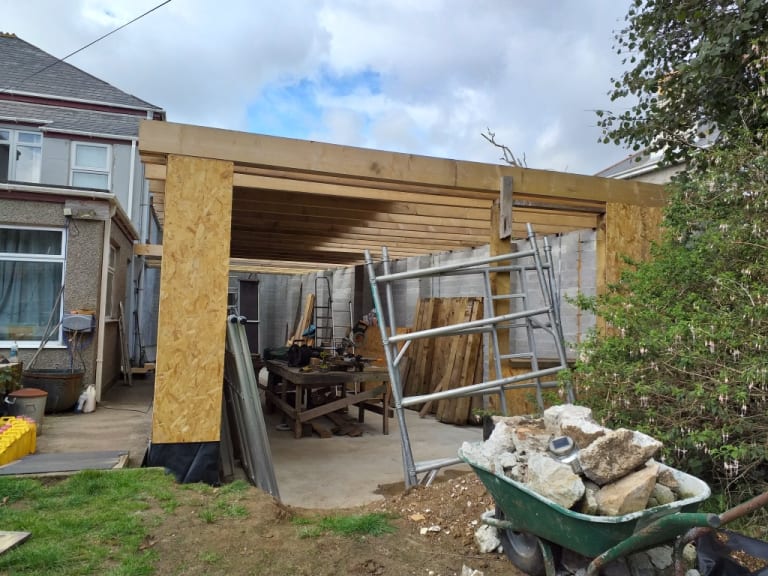
Borednows Garage Build
Posted
Moderator


Complete new build! Could get interesting!
Hopefully done before this winter.
Then fix Mynx, then Clive then possibly a certain rusty cabby might end possibly end up here for a bit (eh
Then sort the Derby then who knows?………..
I sort of have a bit of a plan for some sort of 40s or 50s car with a different engine erm, maybe
Ian
Posted
Moderator


Posted
Settling In


Posted
Moderator


Posted
Moderator


Posted
Settling In


Posted
Old Timer

Borednows Garage Build
 you must be chuffed? It won’t be long now and your finished then you’ll be living the dream. Well done fella
 Sent from my iPhone using Tapatalk
Posted
Local Hero


Posted
Moderator


'Cos it's so big everything takes ages!
However progress has been made.

First off had the roofers in to complete the slating of the roof of the pitchy bit. Don't know how to do this sort of thing and I didn't want to fall into the garage and kill myself so the experts did this bit, they also rendered the front wall and added all the weatherboards and gutting etc for the front section.
Whilst they were here they also got on the main roof of the house (a very long way up!) and replaced all the hip tiles with lead as I'd had a leak in the main roof for a couple of years. Lucily it also appears that this leak also accounted for the water running through the ceiling in the downstairs extension!!! Glad that finally got done
Annoyingly I'd had about 3 roofing companies come round to give me a quote on doing these works to the hip in the past few years but no-one ever came back with a quote. Before the garage was built access was a bit more difficult
After 13 years of being in the house I also, finally, painted the outside of the house too. Tidied everything up a bit and hopefully gives it a bit more protection for a few years.
I must be a proper grown up too now as I had to buy a very large ladder (complete with stabilser bar, don't ya know) to get up to some of the higher bits. Also sorted out the gutters and re-painted most of the weather boards along the side before the roofs went on. I've decided I don't like heights
Anyhoo.
After that came the rubber roof for the flat roof bit. Lets just say it came in a very big roll that was very, very heavy! 9x3 timbers were used to create a ramp from the grass upto the roof and the roll was pulled up these to get to the roof. It tpk 3 of pulling up a 35 degree slope!!. The of course came the unrolling (the wrong way to start with


Then it leaked at a junction of one of the rooflights, but I managed to fix that. Yay.
It seems to be quite a good system. It's more expensive than fibre glass for the materials but we managed to lay it, glue it, fix the 3 roof lights (including cutting the holes in the roof) and fit all the trims in one day. So cost of install was a lot cheaper than cost of install of fibre glass. Guaranteed for 25 yrs with an expectant life of 50.
Posted
Moderator


Of course we're now fighting lack of light and it's been raining here pretty constantly since the end of September.

Decided to add a window to the rear wall of the pitchy bit to add a bit more light. I actually had to buy this one! £20 for a 15oomm by 500mm window. Not a usual size

The it was the person door and the rest of the windows

Currently I'm trying to get the cladding done bit by bit, painting the block walls inside and lining and painting the timber structure. Of course all the bits of materials for the other jobs are all in the way of the job I'll be trying to do. I think I need a bigger garage!
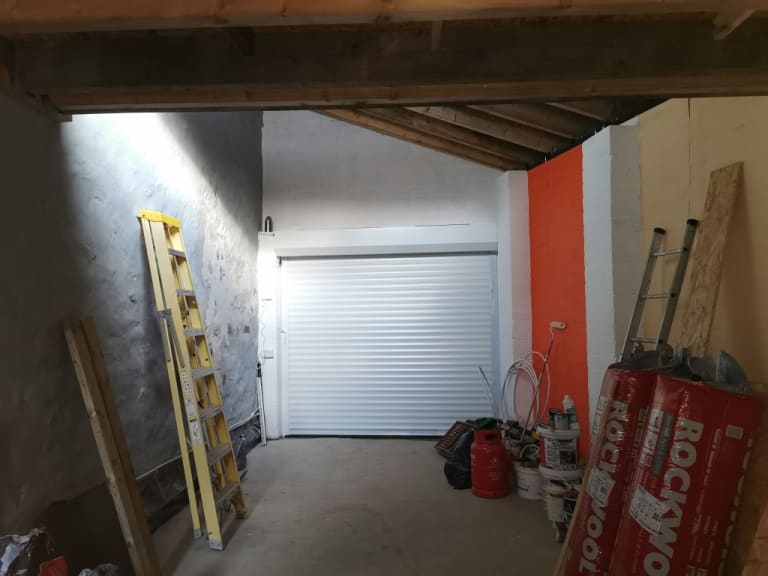
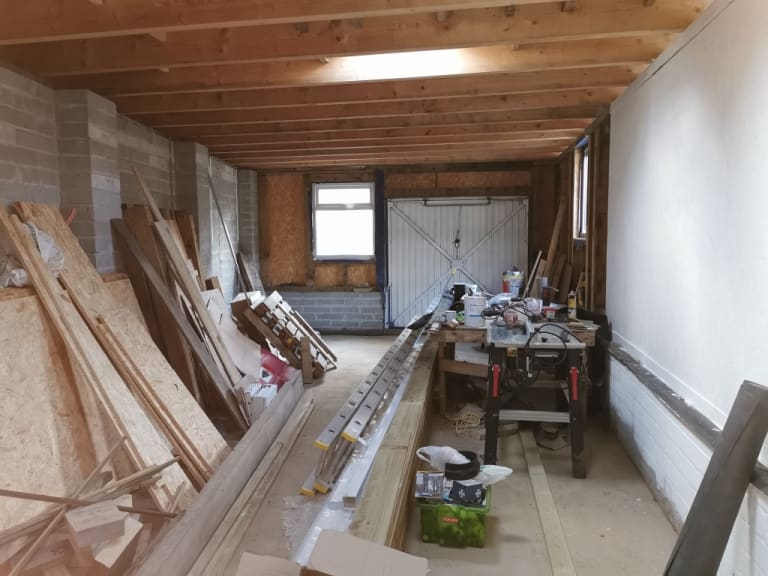

As some of the original paint was peeling it had been pulled back over the years and a 'ghost' shape was 'found'. It had to stay
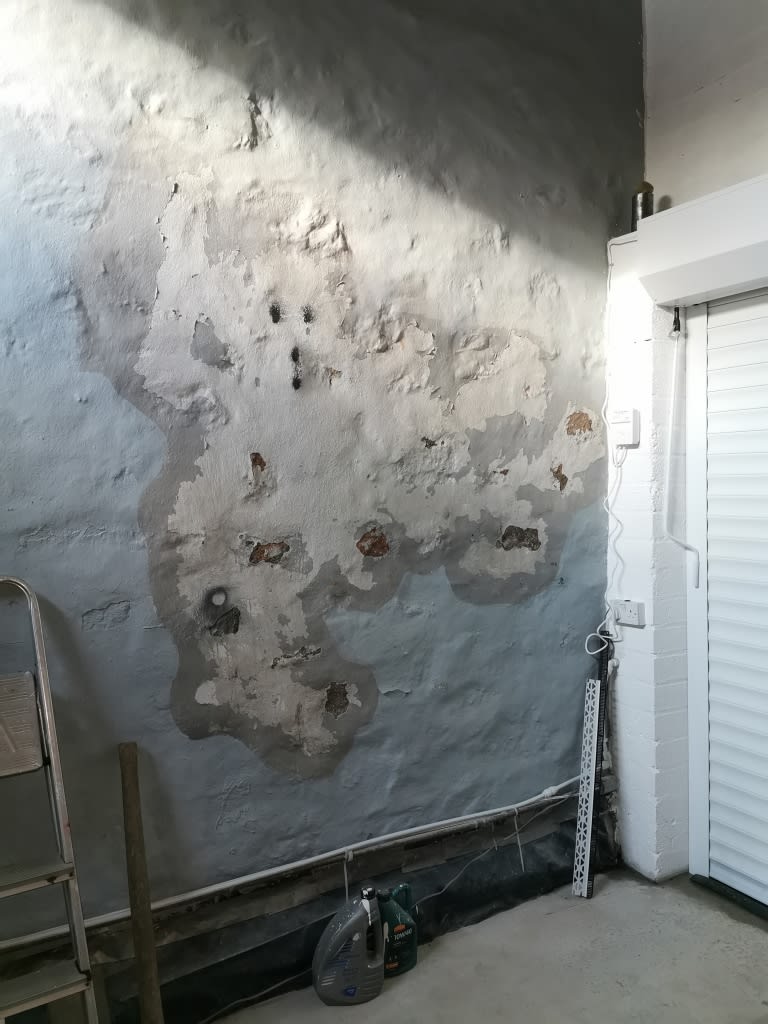
During all this we've also had life to deal with of course, Mother in Law was diagnosed with cancer, luckily it was caught in time and a bit of chopping later she's been given the all clear, Daisy Dog passed away and my Wifes also been ill. Probably stress related.
So all that's left on the garage is to finish the cladding, complete the lining and painting inside, install some flooring (any thoughts on paint, resin etc greatly appreciated!) and then do all the electrics.
Not much really
Let's hope 2020 is a better year.
Merry Christmas and a happy new year you lot
Ian
Posted
Local Hero


Love the ghost
Have a wonderful Christmas too.
Posted
Settled In

👍
83 Candy White Campaign http://vwgolfmk1.org.uk/forum/index.php?page=topicview&id=projects%2Fyour-mk1-golfs_2%2Fmk1-golf-restoration_2 89 Caddy pick up http://vwgolfmk1.org.uk/forum/index.php?page=topicview&id=projects%2Fyour-other-cars-and_2%2Fcaddy-barn-find Mk1 Scirocco project completed
Posted
Moderator


Ian
Posted
Moderator


I've had a small leak near the pedestrian door for a while and whilst trying to pin down where it was coming from I made it worse
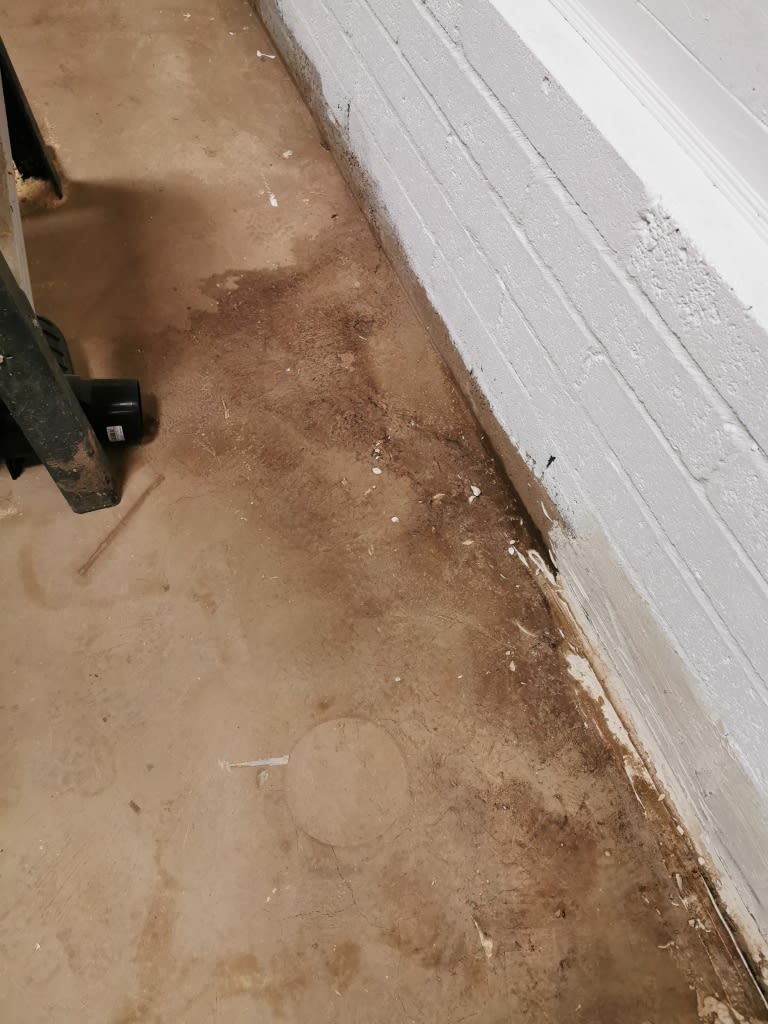

This is concrete still drying out. After a good bit of searching I found the culprit, a hole in the wall under the door, where it joins the original house.
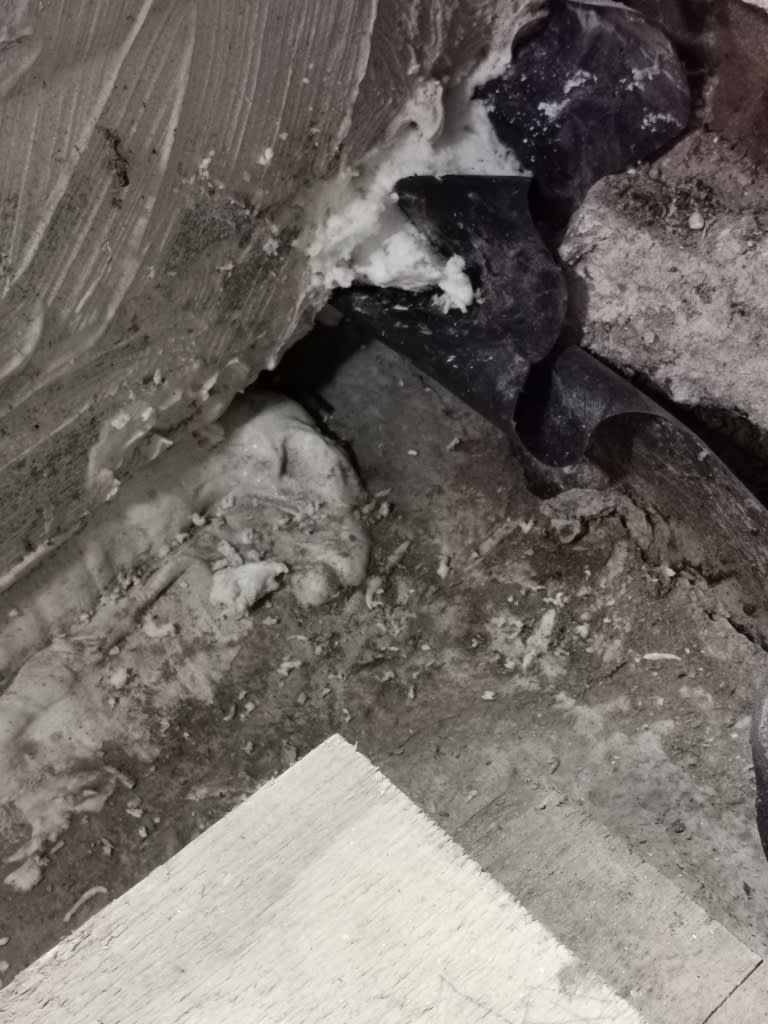
I know it sounds odd but it was really hard to pin point as this area had the membrane in the way and a bit of muck kinda plugging the hole. After a bit of picking it turns out that when I 'fixed' the leak by changing the folds in the membranes and DPC's around and glueing in new sections I'd stopped the water coming through a long length and wall and had pushed it to this corner. As such it was streaming out. It was coming from the front face of the DPC laid under the blocks on the concrete floor. Then, due to this hole, it was streaming into the garage.
So concrete installed into the channel/gap between the original footpath and the new build needed to be filled in. Pain in the neck to say the least! I also needed it to run the opposite way to the path as the path runs from the garden to the pedestrian door of the garage. Anyhoo. All done. Just gotta wait for some rain to see it I've fixed it…….


And a bit of sculpting to make a channel to run away from the door hopefully…….
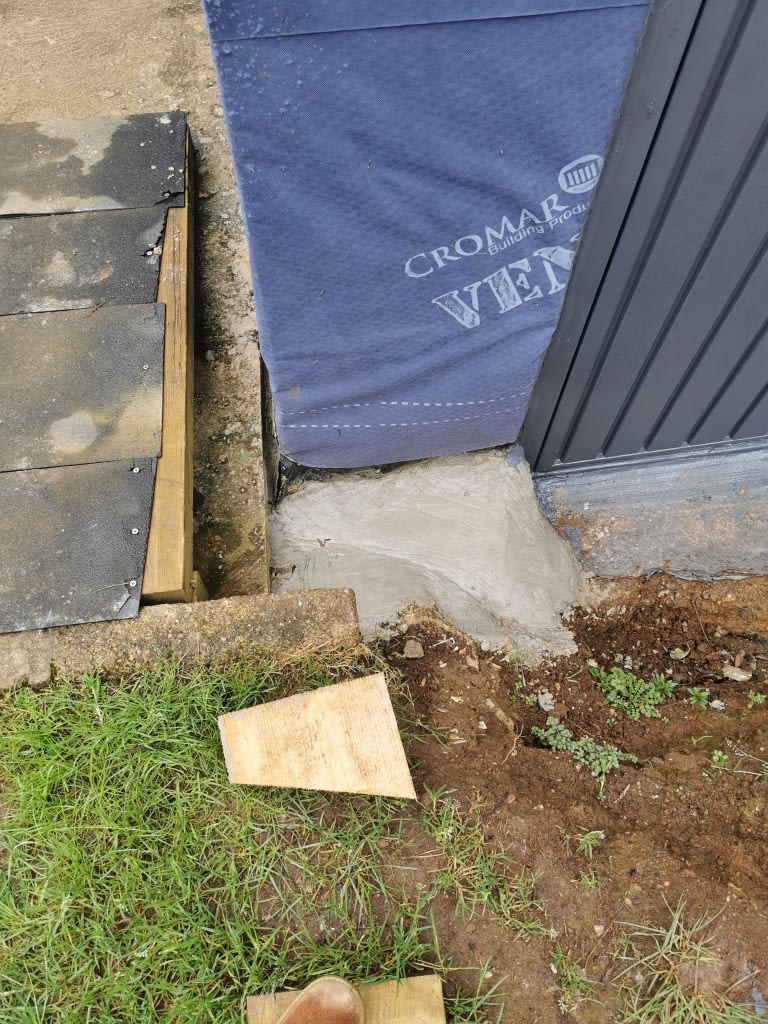
Talking of doors, painted the outside of the up and over and the concrete surround etc as we finally had some sun!


Finished lining with OSB and all primer coats now complete! Window surrounds all done and edging beads installed for a smoother transition from wall to window


Few odd bits of ling left to do, including the surrounds to the inside of the doors.
Then ceiling, flooring, lights and electrical! Not much
Wish me luck
Ian
Posted
Local Hero


Plenty of room for a bar, big tv and 3 piece sofa!
How are you going to heat such a large area when working in the winter?
Posted
Local Hero


Rich. said
It's a thing of dreams
Plenty of room for a bar, big tv and 3 piece sofa!
How are you going to heat such a large area when working in the winter?
Machine mart had/ has sale on oil burners , with 10 litre tank 20 to 40k btu that would keep space toasty.. the Chinese are doing 8kv oil burner for camper Van's for 110£ they are pretty much self contained and with a manifold you could direct heat to work area .. at that price it maybe possible to use filtered engine oil but not sure…
On the drive
T25 Diesel…sameoldblueshi£ (currently under resto)
Rocco gt2….1990 secret 2…(currently under resto)
Mk4 99 1.8t indigo blue Gti with 43k miles
Caster 93 clipper JH Green cabby
Snowy 91 GTi White cabby( sat waiting for inspiration)
Myvalver 89 GTi Grey mk2 16v
Yuppy Flu 91 GTi Flash Red Sportline
Golf mk1 owner's club on Spotify
Mk1 golf owners club playlist: Golf mk1 owner's club playlist - YouTube
Posted
Settled In

Product Range mobileborednow said
hubbadubba Got a link mate ? I've heard the stuff you're on about is the best way to go but I seem to be finding loads of stuff out there with massive variances in prices. I'd hate to buy something cheap and then find out a but more cost was needed due to it being rubbish!
Ian
Give these guys a ring, that's the stuff I used, explain what you have and they will advise the product for you and the prep required, like I said you'll need to seal the fresh surface first, this isn't cheap floor paint it's what they use for factory floors, good stuff, and if you have a nice flat screed it'll be like an F1 pit bay when it's done, this is mine
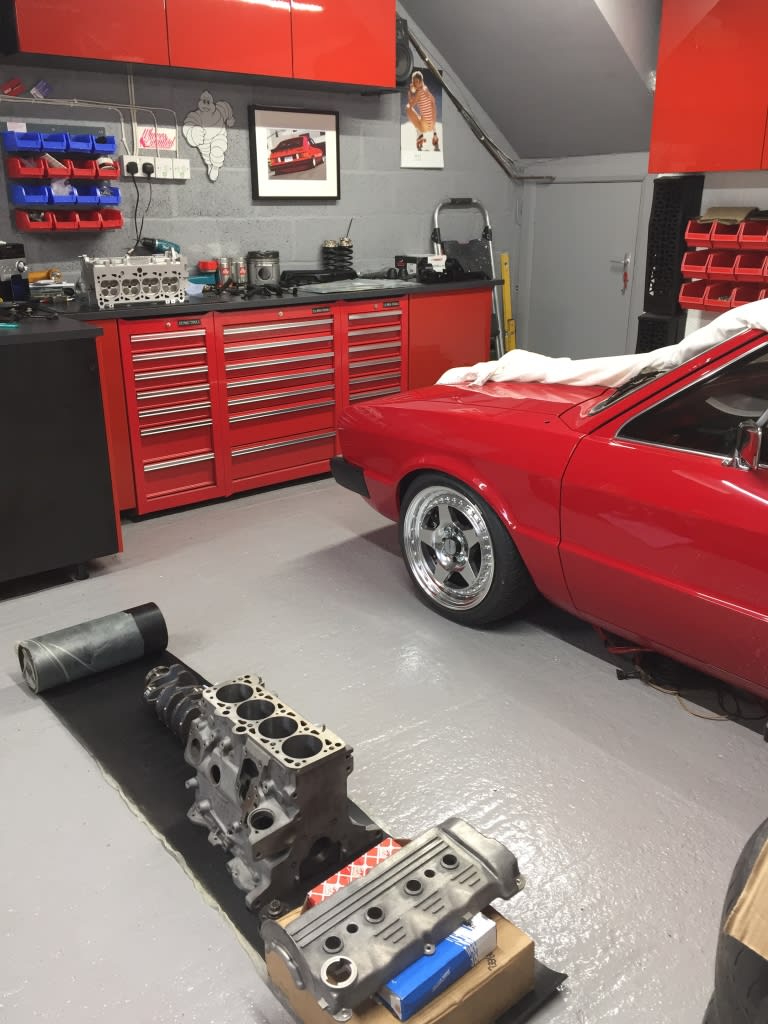
It's a tamped concrete finish so not as smooth but that's how it was when we moved here
83 Candy White Campaign http://vwgolfmk1.org.uk/forum/index.php?page=topicview&id=projects%2Fyour-mk1-golfs_2%2Fmk1-golf-restoration_2 89 Caddy pick up http://vwgolfmk1.org.uk/forum/index.php?page=topicview&id=projects%2Fyour-other-cars-and_2%2Fcaddy-barn-find Mk1 Scirocco project completed
Posted
Settled In

83 Candy White Campaign http://vwgolfmk1.org.uk/forum/index.php?page=topicview&id=projects%2Fyour-mk1-golfs_2%2Fmk1-golf-restoration_2 89 Caddy pick up http://vwgolfmk1.org.uk/forum/index.php?page=topicview&id=projects%2Fyour-other-cars-and_2%2Fcaddy-barn-find Mk1 Scirocco project completed
Posted
Moderator


If I just drove in and parked I reckon I could get 5 or 6 golfs in it. But what's unfortunate is the width. I can't pass 2 cars anywhere except at the very back. I was hoping I would be able to pass 2 cars at 2 car depths from the back wall, but I'm about 6 inches too narrow
But yes it's big
Although that being said I still haven't got the roof fully sealed yet as at the back and along the 'wooden' side the soffits still aren't in. Even with this massive gap and air being able to get in it's still not cold in there. I'm fine in a shirt and jacket. Even the floors not that cold. When moving about and doing cutting and painting I every often end up in just a shirt!
Ta for the link mate. Nice to have a happy customer reference.
I realise it's going to need sealing. I think I may do a bit of grinding to first. It's pretty good but there are a could of areas that aren't perfect.
BTW where's the build thread for the 'rocco? Love the mk1's!
Thanks for the advice, comments and the luurrrve chaps.
Ian
Posted
Old Timer

0 guests and 0 members have just viewed this: None.


