"TAG" - 1983 Campaign restoration blog
Posted
Old Timer


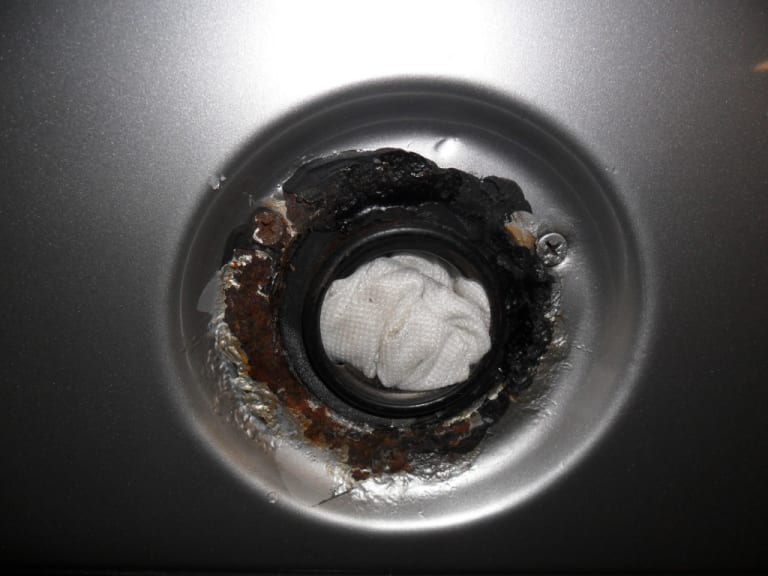
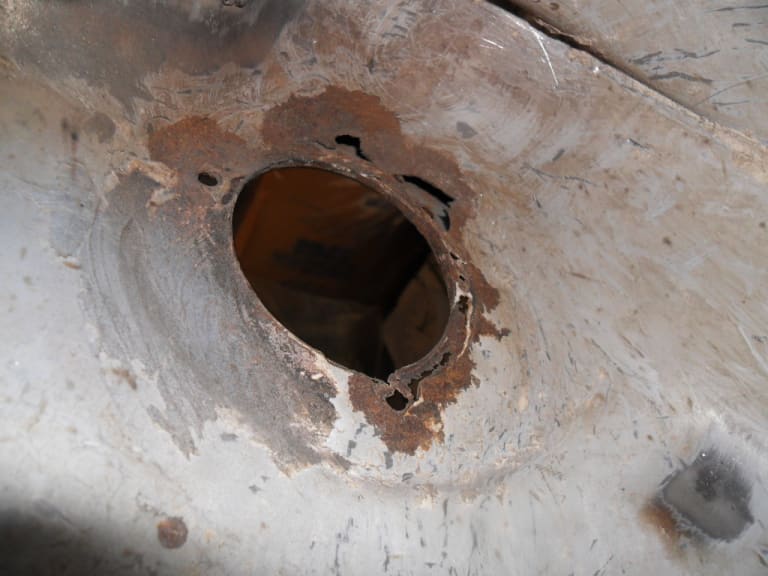
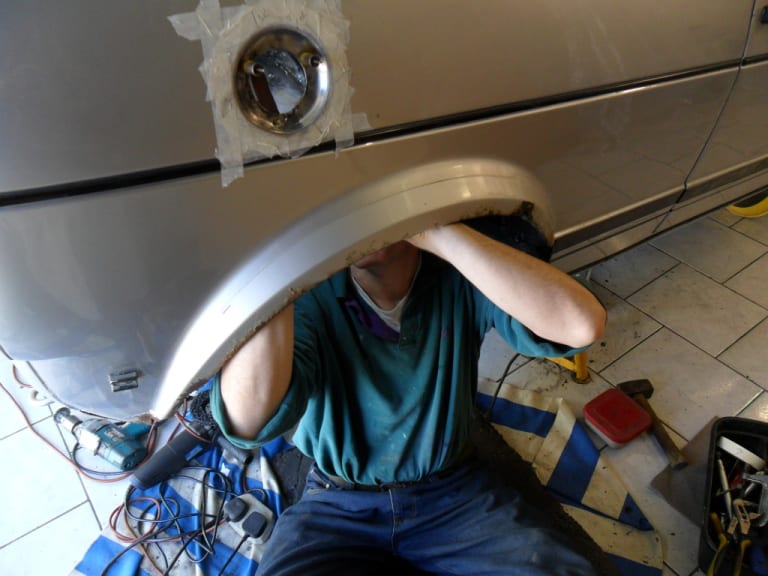
I cleaned up all the metal in and out - not easy with access again!
I do not like to remove more metal than is necessary and I believe that cutting large sections of original metal out to fix a small problem is not an approach I wanted to take.
I could have bought a repair panel and cut out the whole section - too drastic for me! I may learn to regret it bit I have tried to tackle it my own way….
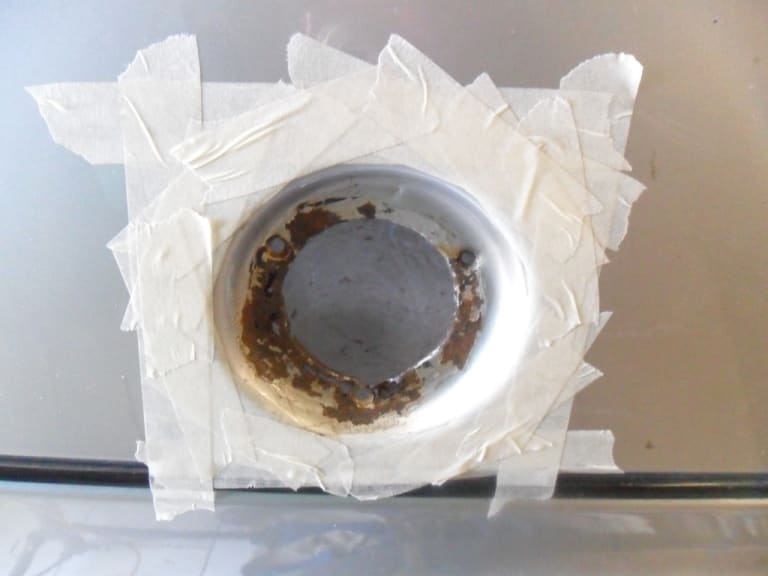
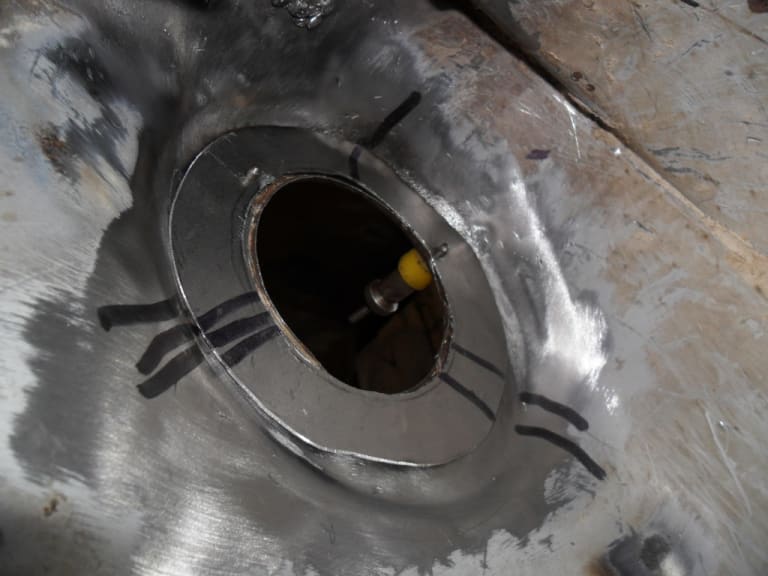
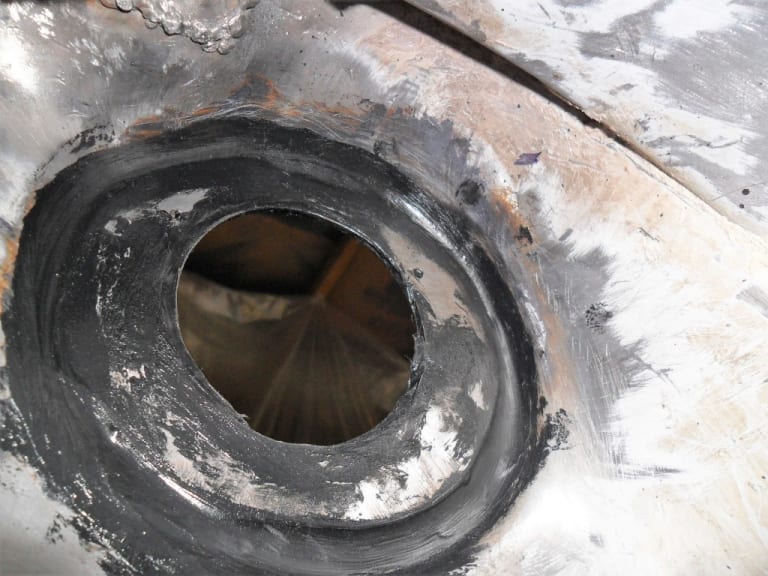
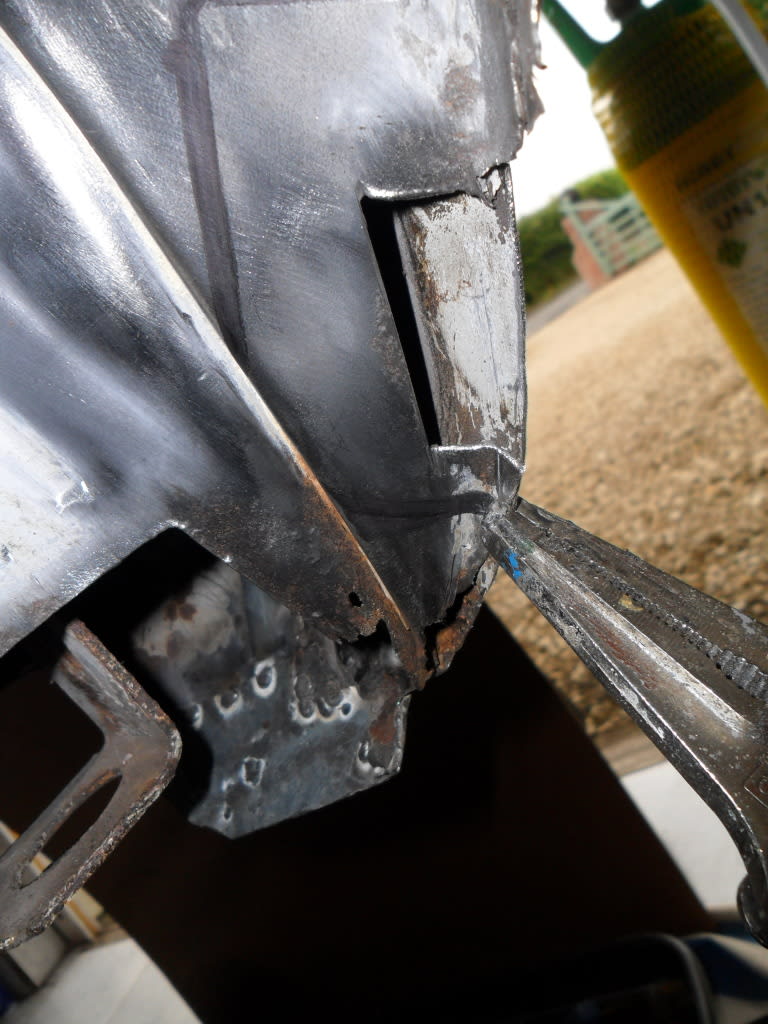
Once the rust was treated with Hydrate 80 inside and out - I made a new disc of metal to fit inside the wing on the rearside of the fuel filler hole.
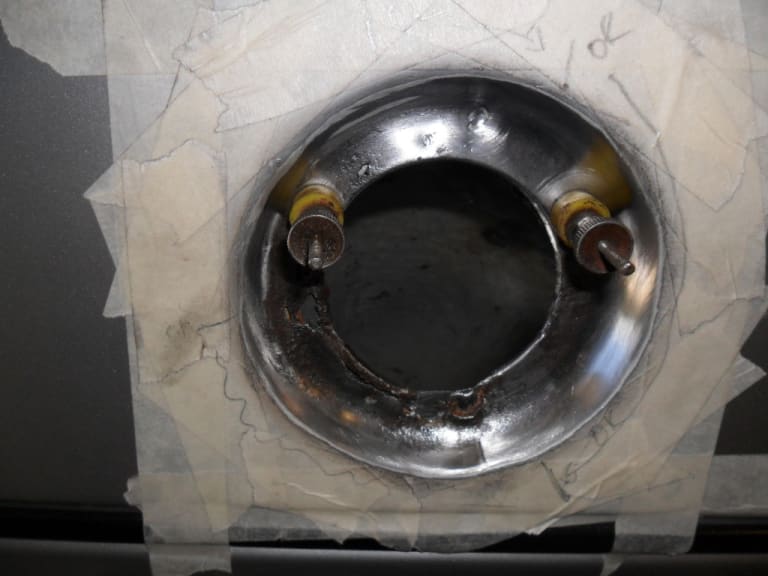
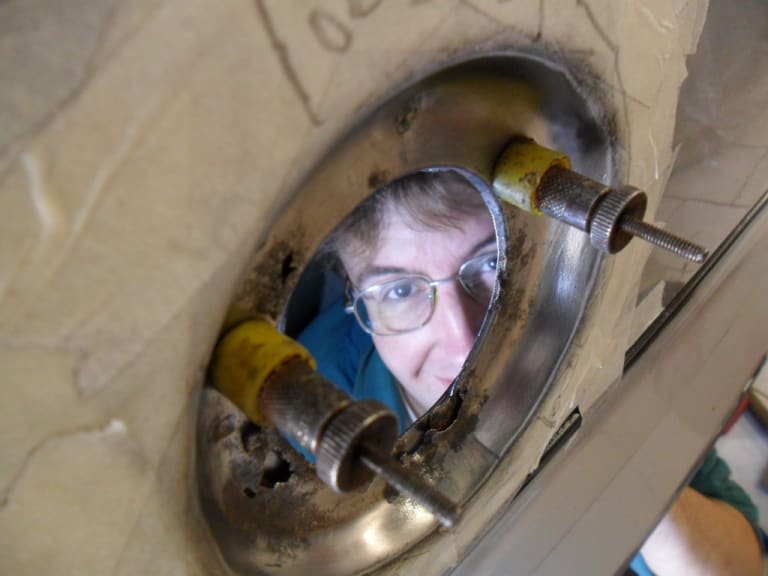
Trying to weld this panel was impossible due to lack of access so I have taken a "revolutionary" approach to the problem - I have bonded the repair panel on.
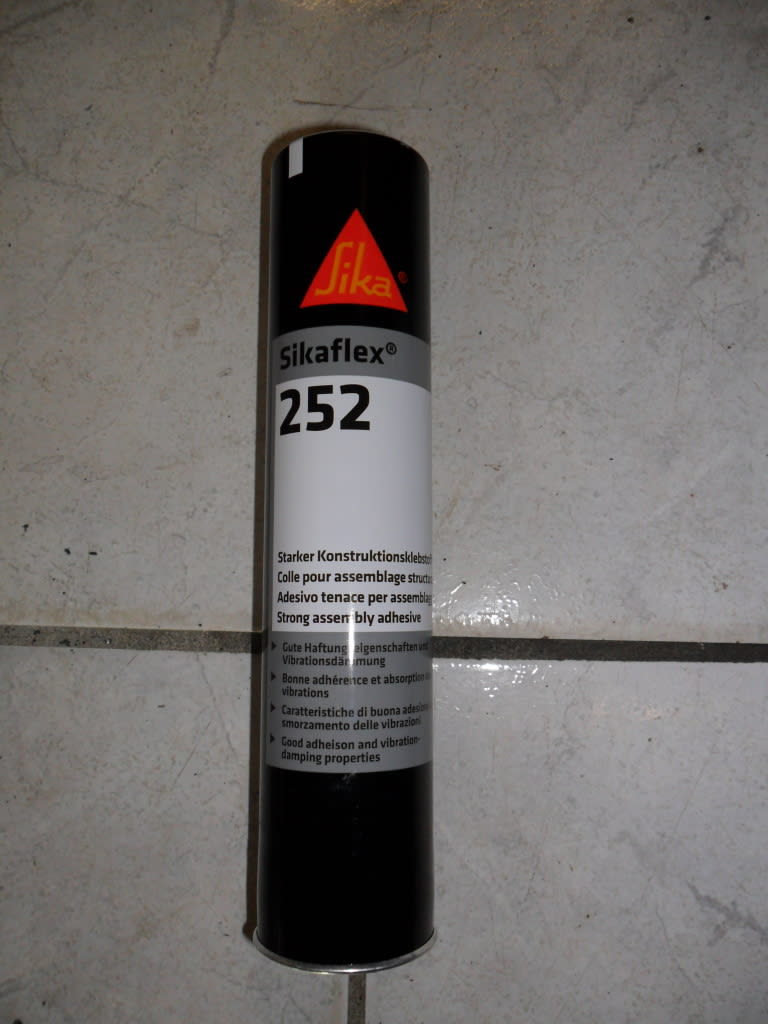
After investigation I decided to use SIKAFLEX 252 - which is a structural bonding adhesive.
I first of all used a strip-disc on a grinder to clean the Hydrate 80 treated metal back to bare steel.
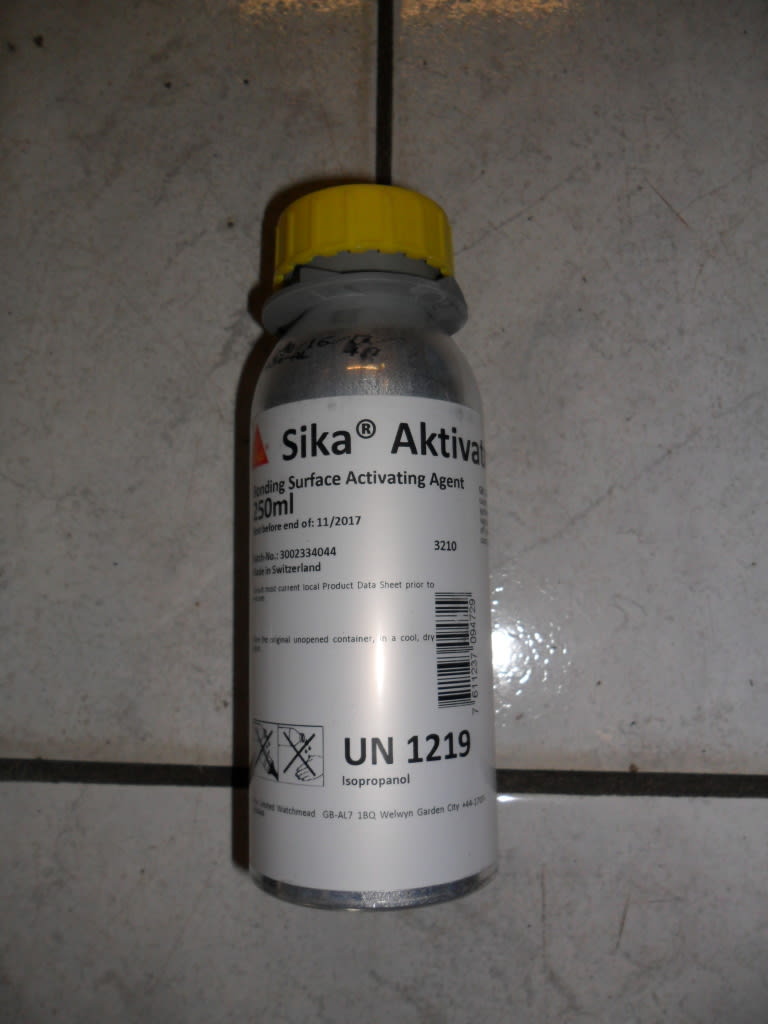
Then I cleaned both surfaces with SIKA AKTIVATOR 205 . This is a clear alcohol based solution that cleans the metal but is also a bond-activating
substance designed for the activation of surfaces prior to bonding.
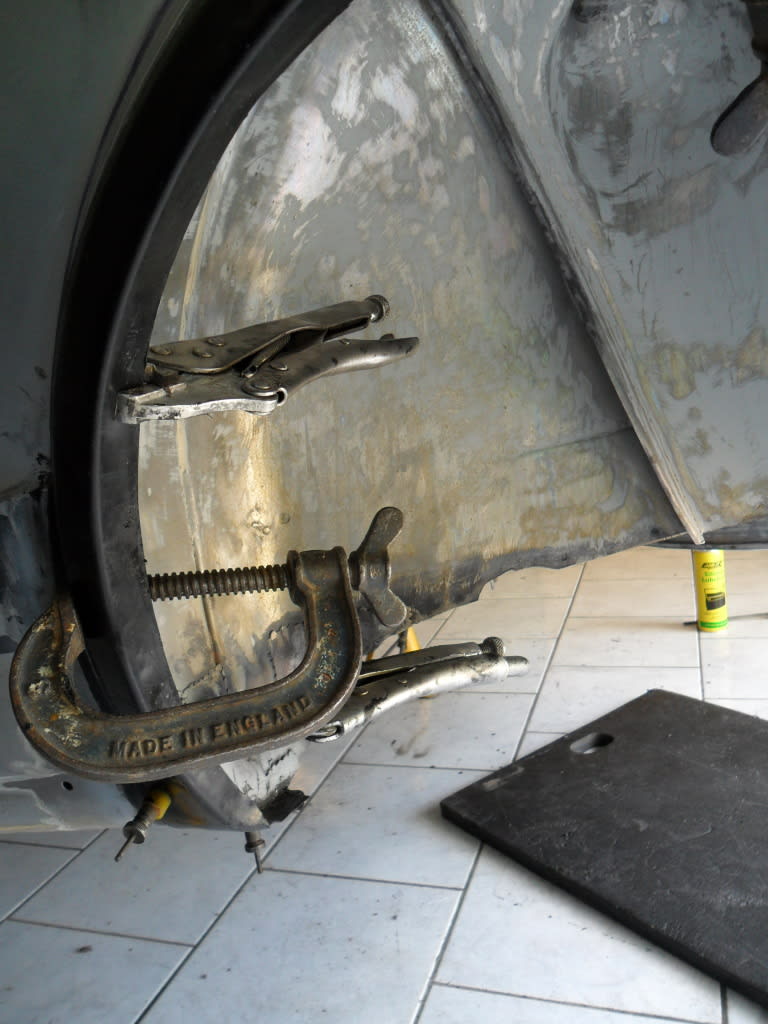
I then applied the SIKAFLEX and held the panel in place with temporary pop-rivet fasteners whilst the adhesive set.
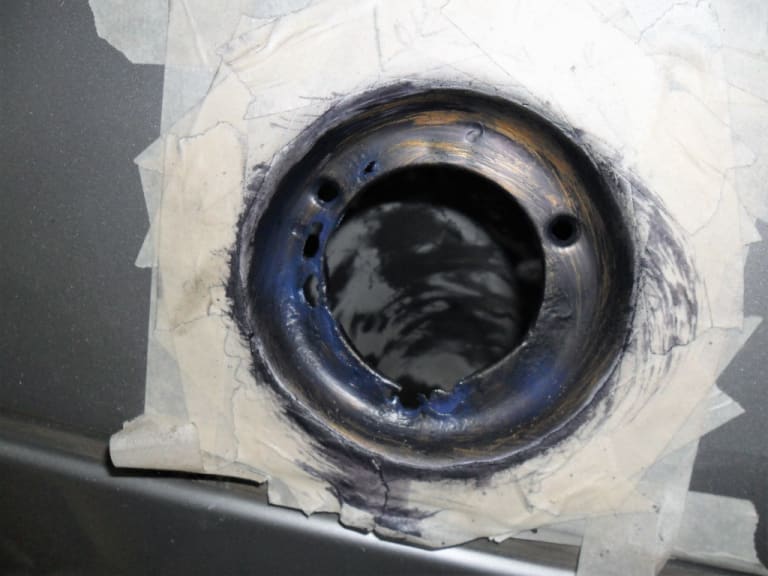
I am now left with a VERY well secured repair that I will paint with rustbuster epoxy and a small amount of filler.
I will have to wait and see if this works in the long run - but al modern cars are "bonded" together in many areas so I am confident.
1983 Golf GTi Campaign Edition, Diamond Silver
http://vwgolfmk1.org.uk/forum/index.php?page=topicview&id=projects%2Fyour-mk1-golfs_2%2F-tag-1983-campaign&redirected=1#post_1551531
http://vwgolfmk1.org.uk/forum/index.php?page=topicview&id=projects%2Fyour-mk1-golfs_2%2F-tag-1983-campaign&redirected=1#post_1551531
Posted
Old Timer


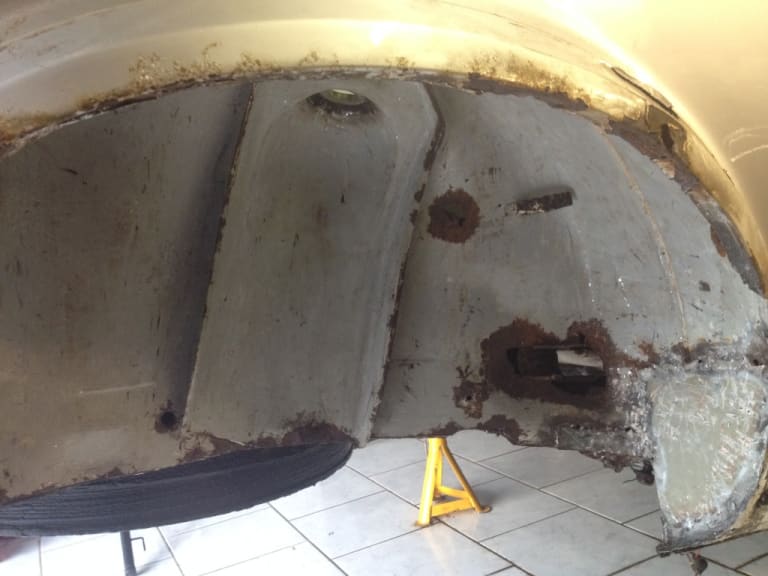
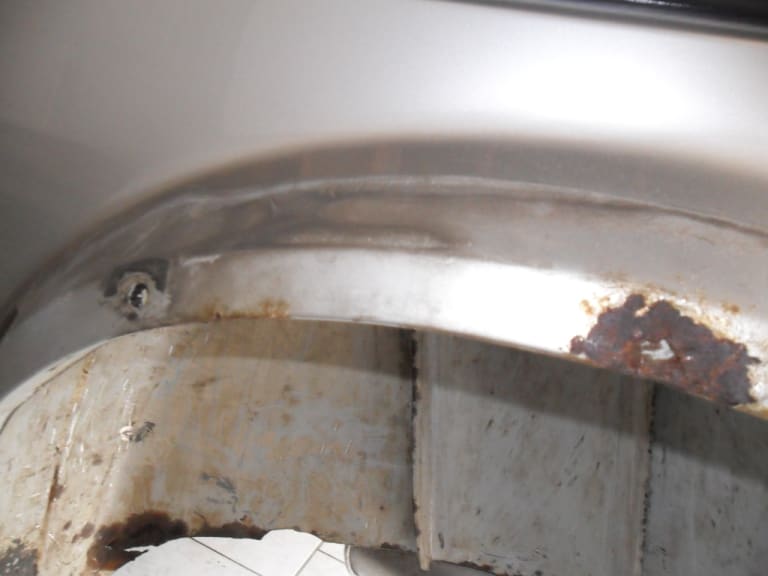
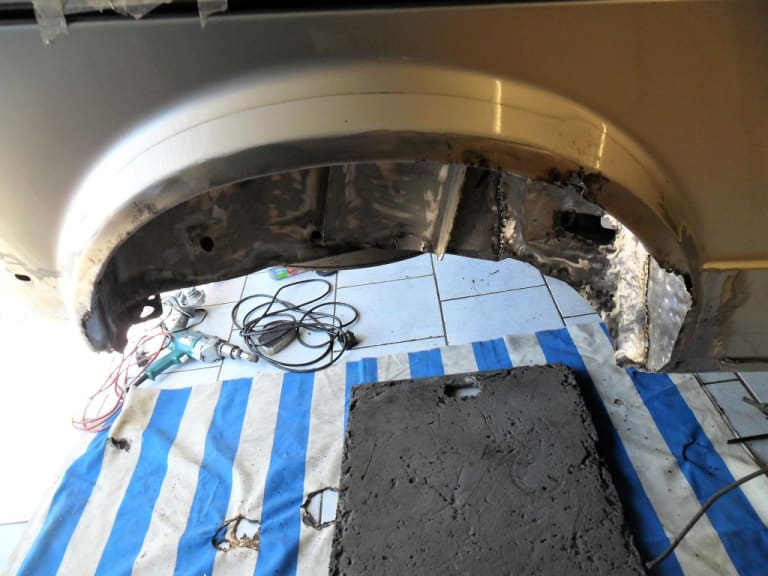
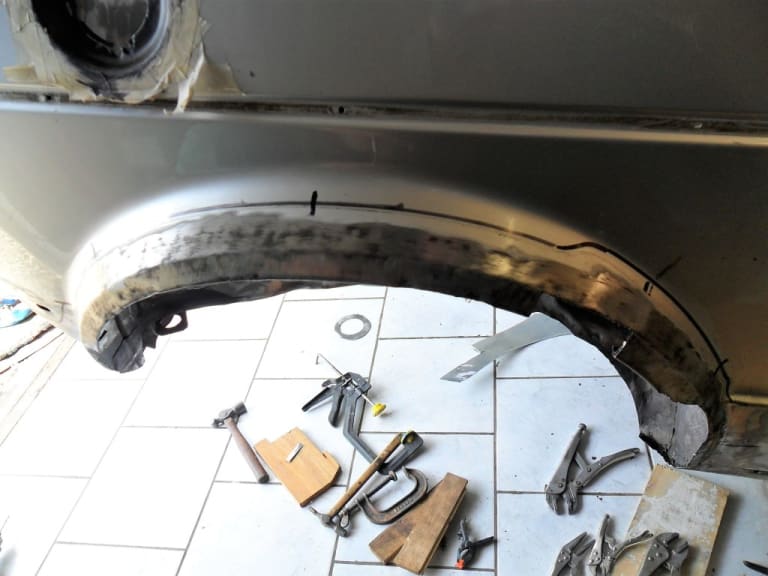
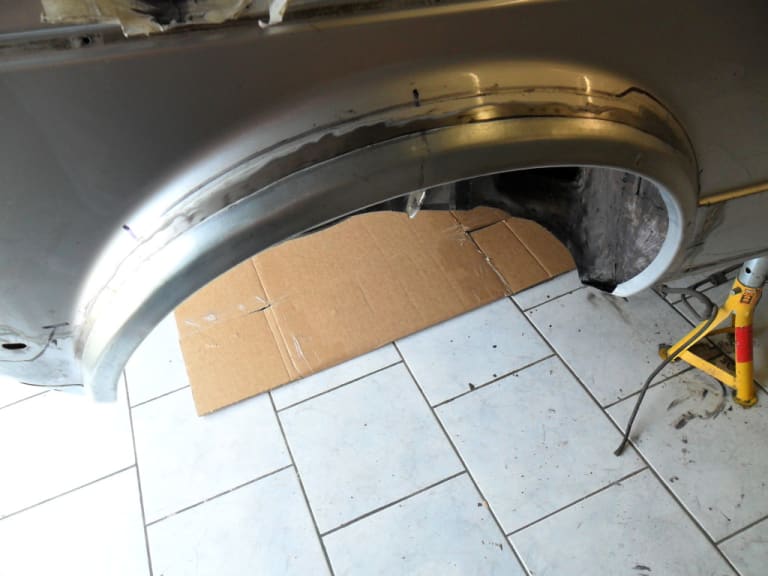
Again I took the decision not to cut out the old metal - only the rotten areas.
Again I have taken a similar approach to the repair of the fuel filler hole.
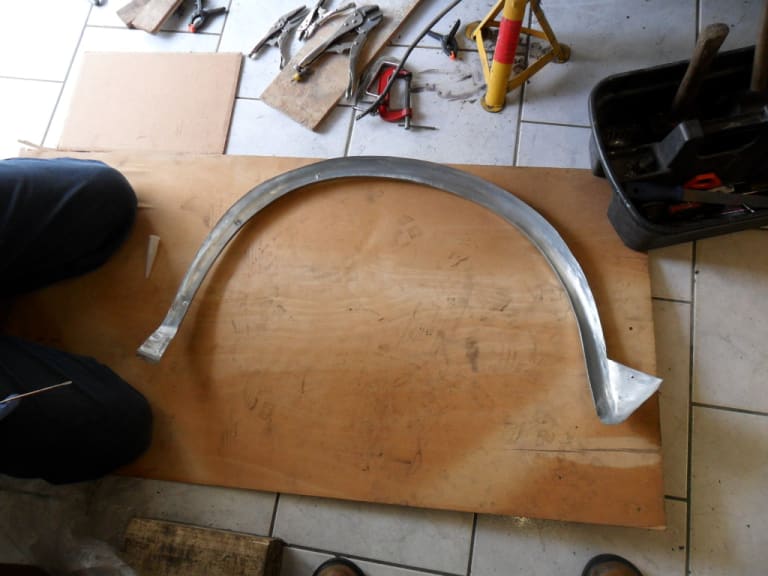
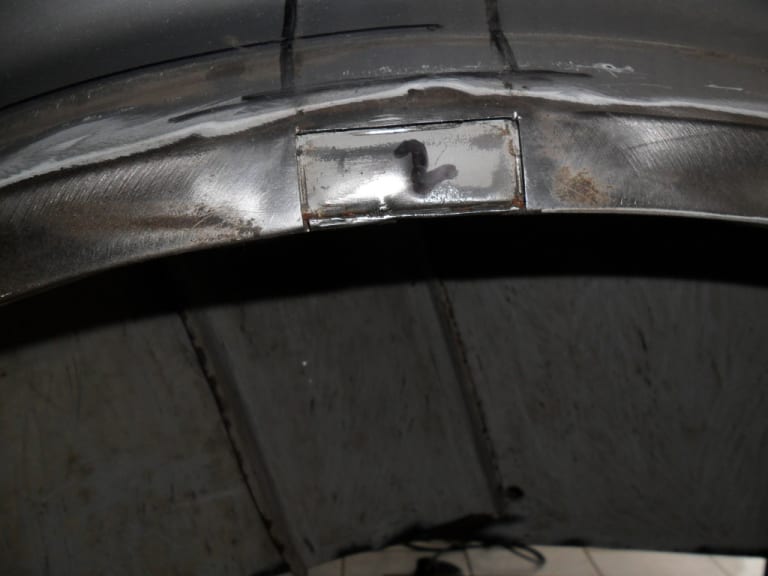
I bought a large repair panel from VWH and cut it down to just leave the minimum of new metal that I required.
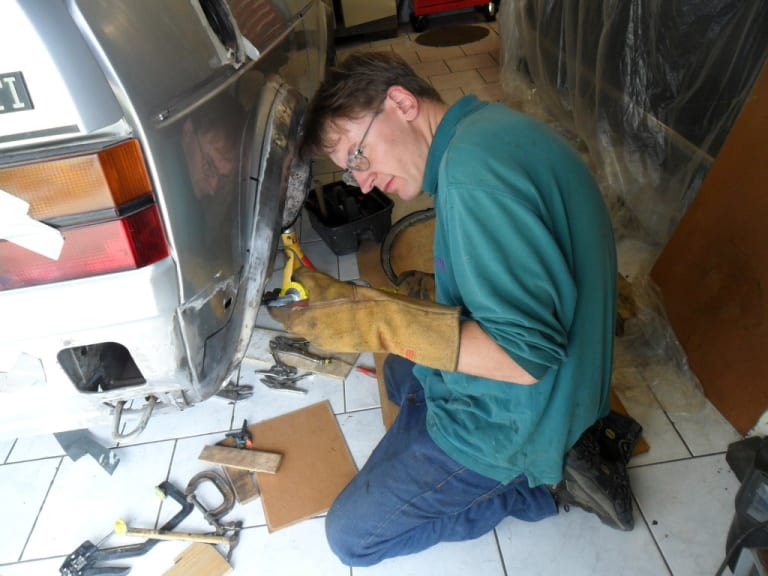
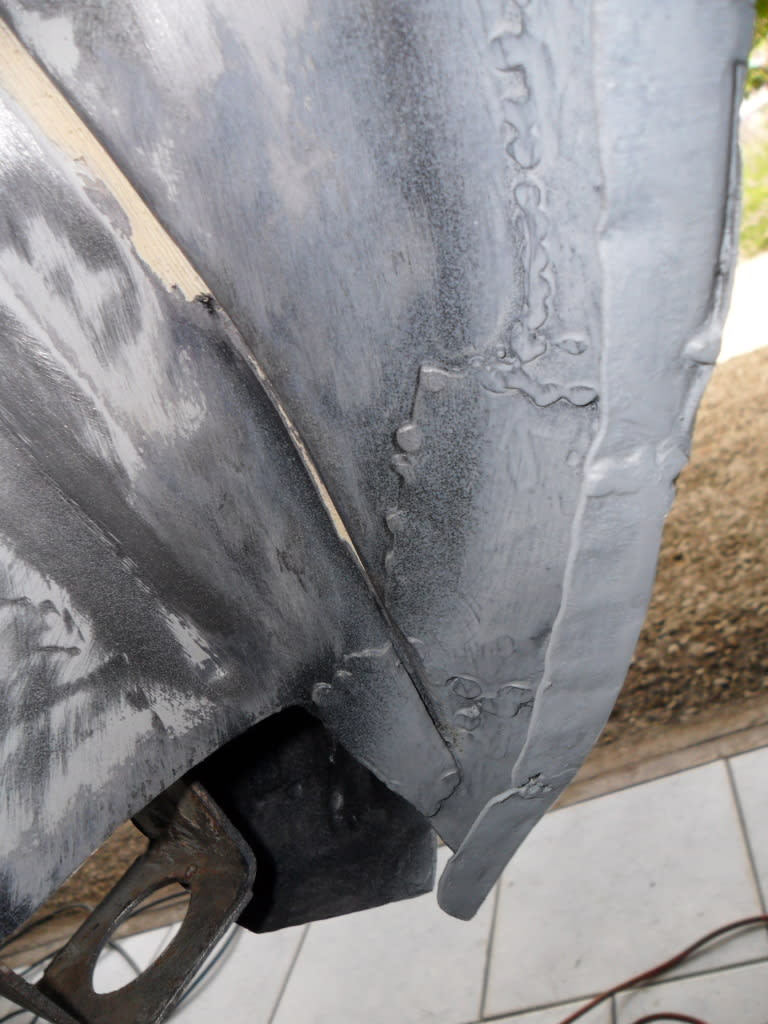
I welded the inner/outer arches together where they had corroded and then rust treated it all. I am not a confident enough welder to seam weld in the new section and I was very concerned abut distortion.
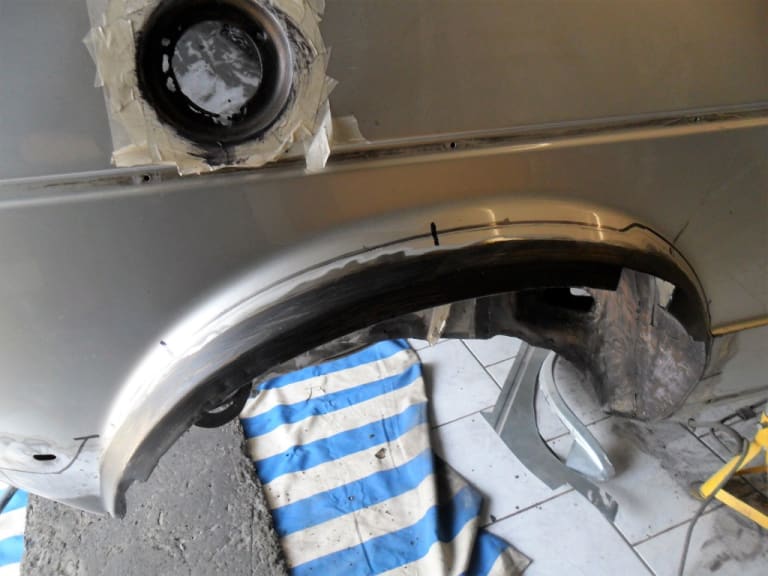
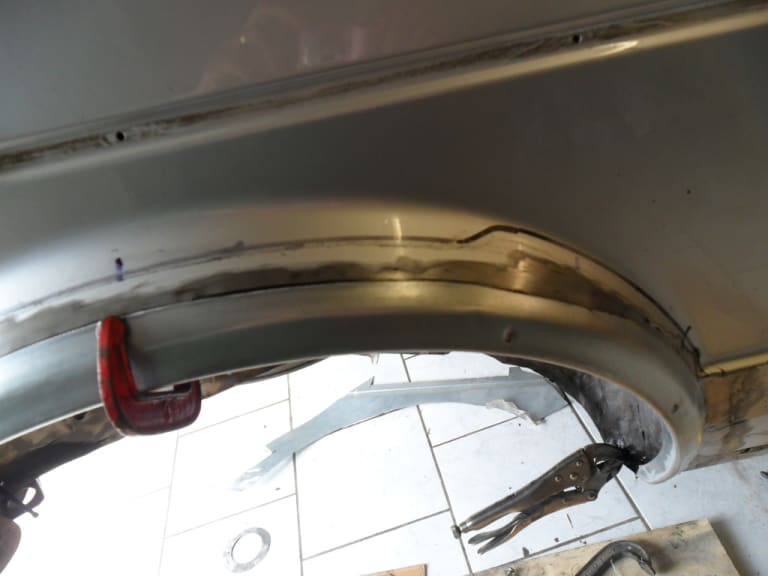
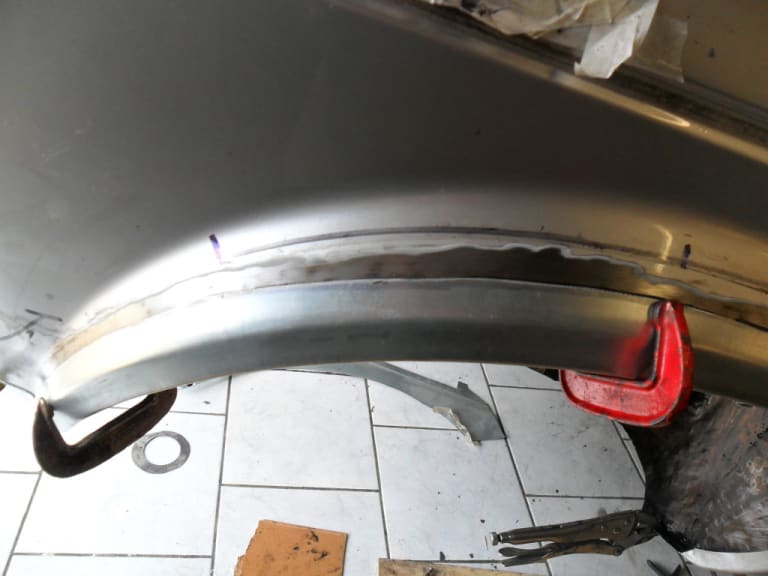
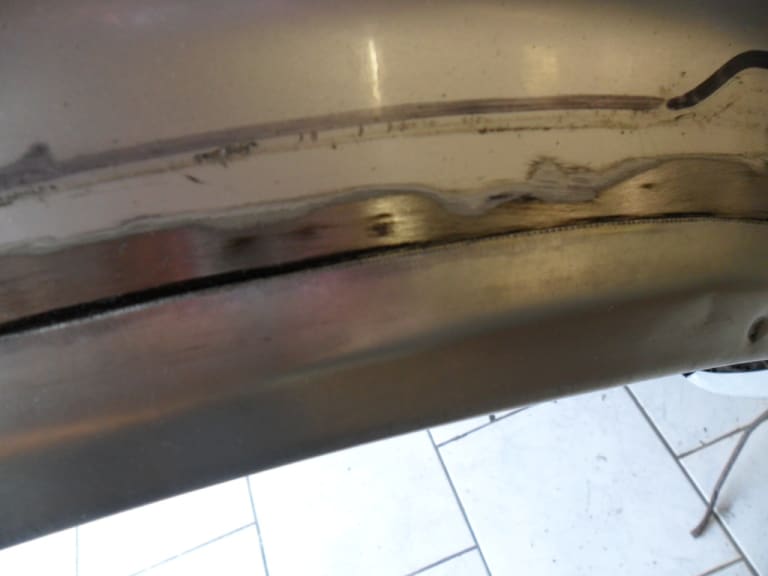
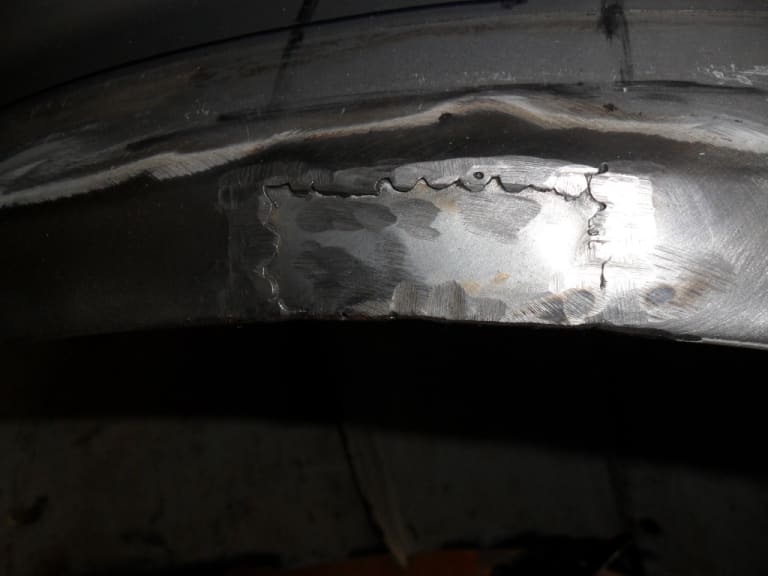
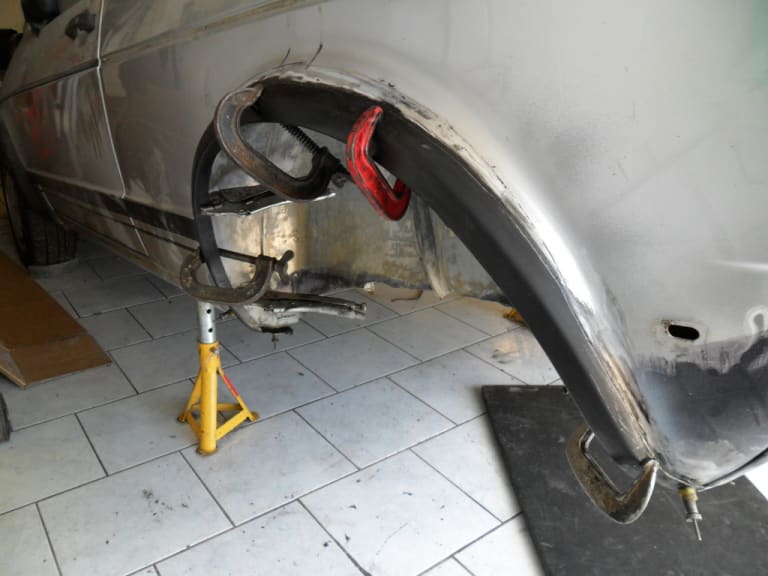
I therefore chose to bond the repair section on top of the good existing metal.
Finally I used the SIKAFLEX bonding method as above and bonded the new repair panel OVER the existing metal.
Yes it does mean that the wings are about 1.5mm more protruding than original but I believe that once the rear GTI trims are fitted no one will ever know.
Again once Rustbuster'ed and seam sealed I am hopeful for the future of the repair.
1983 Golf GTi Campaign Edition, Diamond Silver
http://vwgolfmk1.org.uk/forum/index.php?page=topicview&id=projects%2Fyour-mk1-golfs_2%2F-tag-1983-campaign&redirected=1#post_1551531
http://vwgolfmk1.org.uk/forum/index.php?page=topicview&id=projects%2Fyour-mk1-golfs_2%2F-tag-1983-campaign&redirected=1#post_1551531
Posted
Old Timer


It's funny that your first attempt at car body repairs are the same as mine, it makes me wish I could have waited until you were doing yours so that I could practise on yours and so that I could do a quality job on mine
The repairs to the wheelarch and filler hole are probably more temporary than permanent but you did more than me, I just cleaned it the best I could and sprayed some cavity wax in there so I am contemplating this winters project will be drivers sill, rear axle mount, rear wheel arch and filler hole and probably the drivers rear wheel arch tub as mine had gone above the fuel filler neck!
Keep up the good work and keep the updates coming!
Mars red 1.8 GTI tintop now MOT'd and on the road!
http://vwgolfmk1.org.uk/forum/index.php?page=topicview&id=projects%2Fyour-mk1-golfs_2%2Fwent-to-look-at-a-golf&kfs79=150
http://vwgolfmk1.org.uk/forum/index.php?page=topicview&id=projects%2Fyour-mk1-golfs_2%2Fwent-to-look-at-a-golf&kfs79=150
Posted
Old Timer


Having worked in similar places on my own car, I am sure the rot will never come back.
Posted
Old Timer

"TAG" - 1983 Campaign restoration blog
Sent from my iPhone using Tapatalk
Posted
Old Timer


Malcolm said
Loving the work, great to see progress again.
Having worked in similar places on my own car, I am sure the rot will never come back.
I certainly hope it does not come back! Thanks for the comments……
1983 Golf GTi Campaign Edition, Diamond Silver
http://vwgolfmk1.org.uk/forum/index.php?page=topicview&id=projects%2Fyour-mk1-golfs_2%2F-tag-1983-campaign&redirected=1#post_1551531
http://vwgolfmk1.org.uk/forum/index.php?page=topicview&id=projects%2Fyour-mk1-golfs_2%2F-tag-1983-campaign&redirected=1#post_1551531
Posted
Old Timer


Saulty said
The repairs are looking good so far.
It's funny that your first attempt at car body repairs are the same as mine, it makes me wish I could have waited until you were doing yours so that I could practise on yours and so that I could do a quality job on mine! I think every bit you welded on yours, I had to weld on mine with the exception of the rear bulk head where the rear passengers feet would be and that's probably because I didn't lift the carpet!
The repairs to the wheelarch and filler hole are probably more temporary than permanent but you did more than me, I just cleaned it the best I could and sprayed some cavity wax in there so I am contemplating this winters project will be drivers sill, rear axle mount, rear wheel arch and filler hole and probably the drivers rear wheel arch tub as mine had gone above the fuel filler neck!
Keep up the good work and keep the updates coming!Matt.
Thanks for the comments Saulty.
I agree it would be nice to practice on someone elses car!! I just hope that by putting some pics and info on here it may help someone in the future. It is worth checking the floor by the rear passengers heels - if there has been any water ingress on the car it is a natural "low point" where water seems to have gathered. Just make sure you rear passengers dont stamps there feet too much……….
Regards the repairs to the wheelarch and fuel neck - I certainly hope they prove to be more than temporary! As I said modern manufacturers bond a lot of panels these days and there are some arguing online that this is the way to go rather than welding. I have used Structural bonding adhesive made especially for this job. I will wait and see - I expect to get a few more "comments and sucking of teeth" on that point!!!!!!!!!!!!!
Once again thanks for your comments….. I will be back at it as soon as my hand heals up - I had a slight disagreement with an angle grinder fitted with a steel cutting disc - and my hand………….>!
1983 Golf GTi Campaign Edition, Diamond Silver
http://vwgolfmk1.org.uk/forum/index.php?page=topicview&id=projects%2Fyour-mk1-golfs_2%2F-tag-1983-campaign&redirected=1#post_1551531
http://vwgolfmk1.org.uk/forum/index.php?page=topicview&id=projects%2Fyour-mk1-golfs_2%2F-tag-1983-campaign&redirected=1#post_1551531
Posted
Old Timer

"TAG" - 1983 Campaign restoration blog
Sent from my iPhone using Tapatalk
Posted
Local Hero


Andy
LINCOLNSHIRE REGION - https://www.facebook.com/groups/467122313360002/
1983 MK1 Golf GTI Campaign Model - Under (looooong) resto!
1962 Rover P4 80
2002 BMW 745i
2008 BMW Z4 2.5Si
LINCOLNSHIRE REGION - https://www.facebook.com/groups/467122313360002/
1983 MK1 Golf GTI Campaign Model - Under (looooong) resto!
1962 Rover P4 80
2002 BMW 745i
2008 BMW Z4 2.5Si
Posted
Old Timer


Look forward to seeing you all there.
1983 Golf GTi Campaign Edition, Diamond Silver
http://vwgolfmk1.org.uk/forum/index.php?page=topicview&id=projects%2Fyour-mk1-golfs_2%2F-tag-1983-campaign&redirected=1#post_1551531
http://vwgolfmk1.org.uk/forum/index.php?page=topicview&id=projects%2Fyour-mk1-golfs_2%2F-tag-1983-campaign&redirected=1#post_1551531
Posted
Old Timer


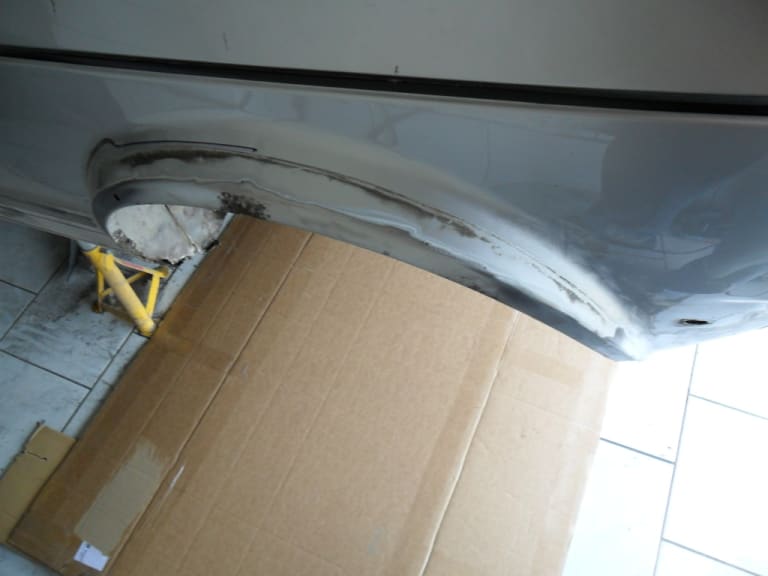
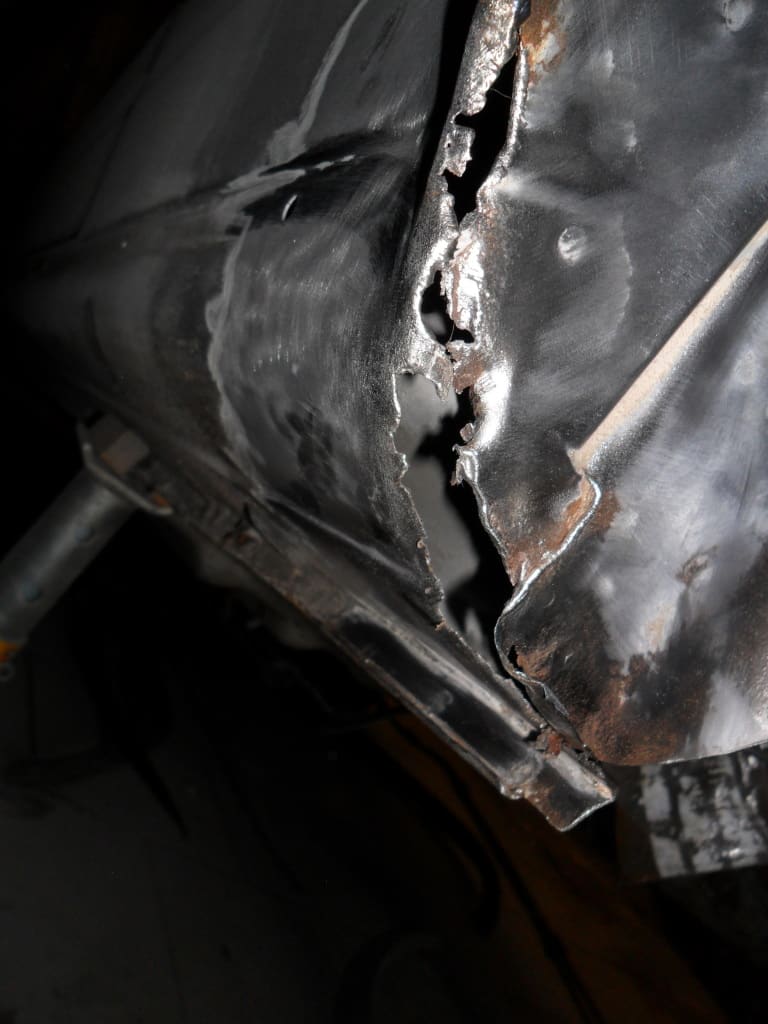
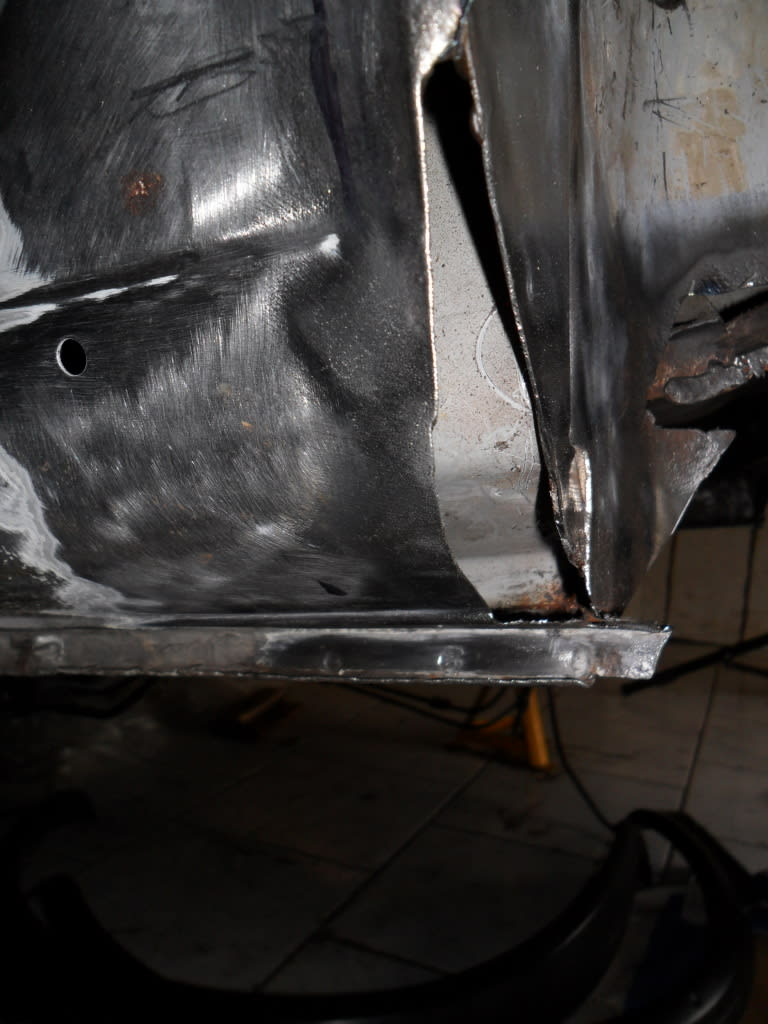
Removed the GTi trim and all looked pretty sound until I took a strip disc to it.
1983 Golf GTi Campaign Edition, Diamond Silver
http://vwgolfmk1.org.uk/forum/index.php?page=topicview&id=projects%2Fyour-mk1-golfs_2%2F-tag-1983-campaign&redirected=1#post_1551531
http://vwgolfmk1.org.uk/forum/index.php?page=topicview&id=projects%2Fyour-mk1-golfs_2%2F-tag-1983-campaign&redirected=1#post_1551531
Posted
Old Timer


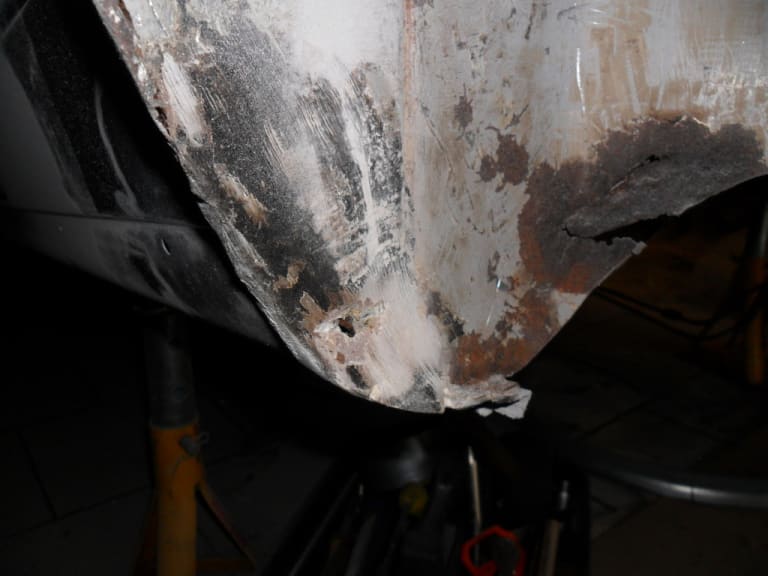
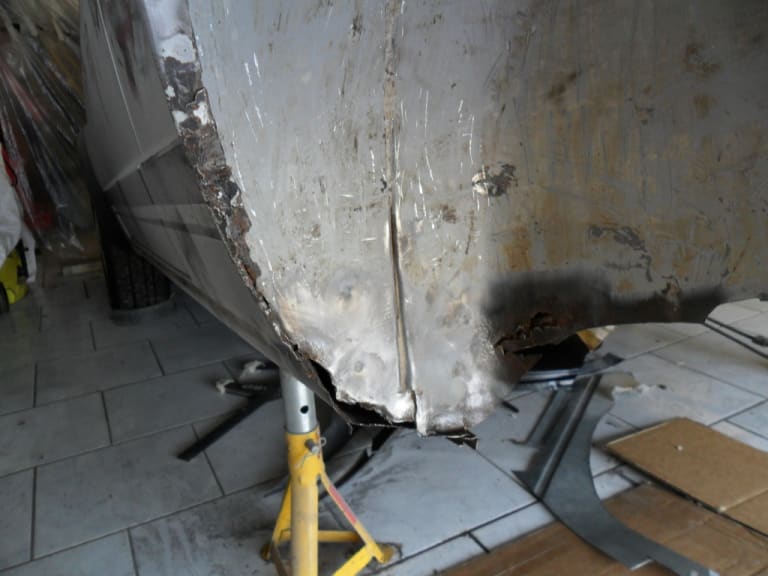
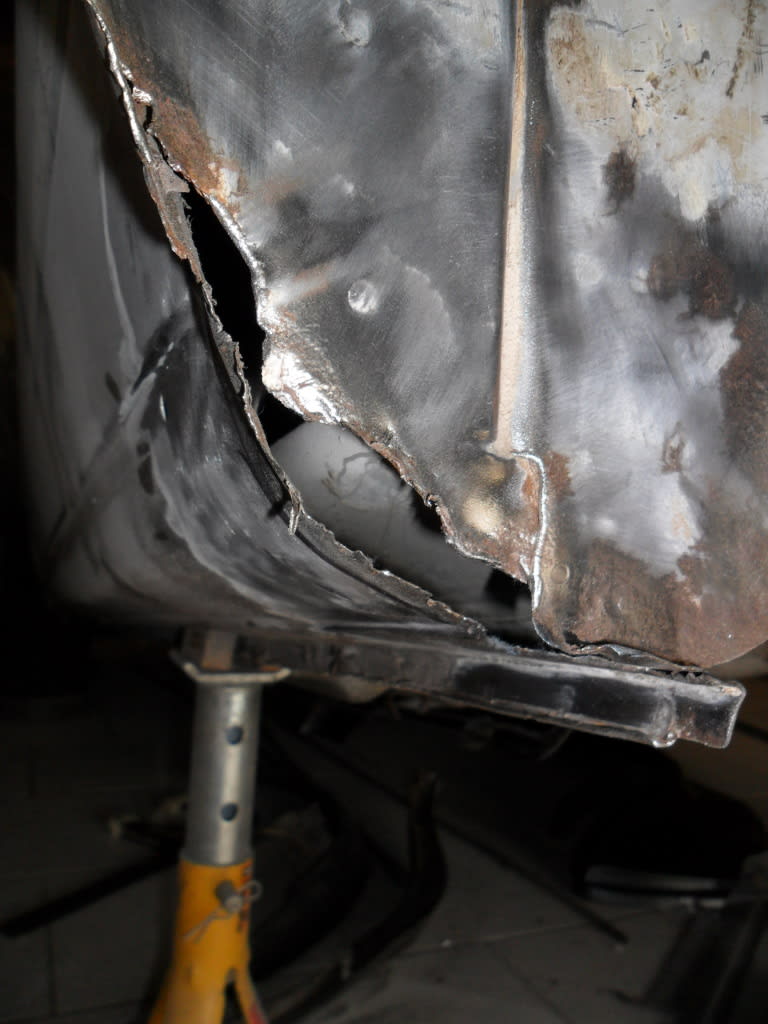
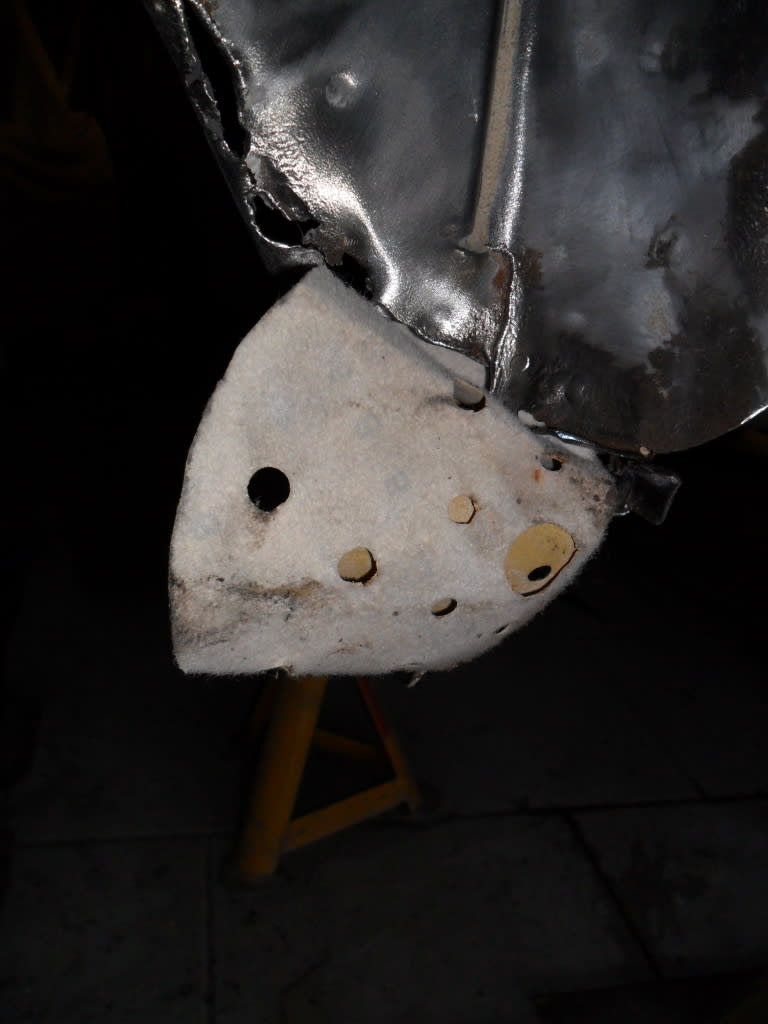
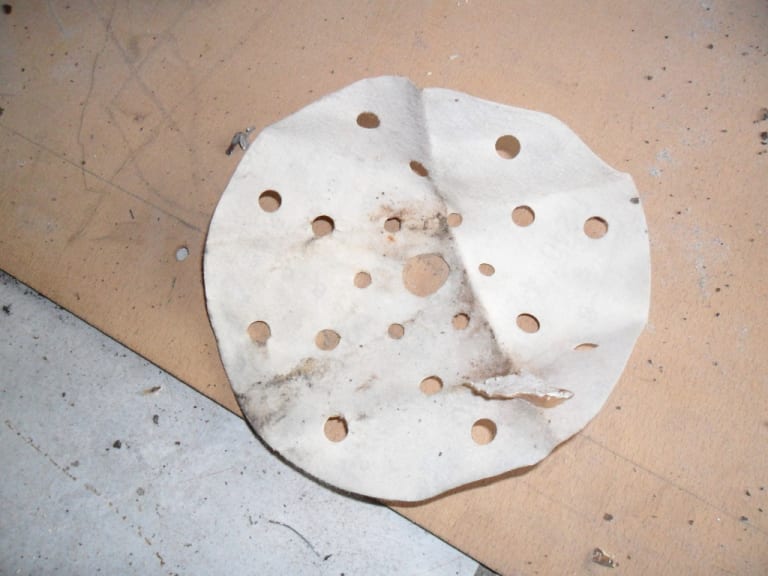
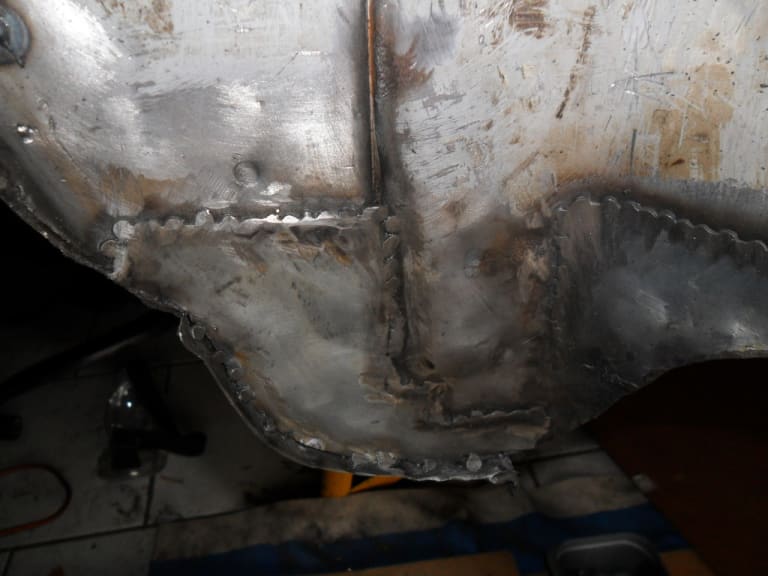
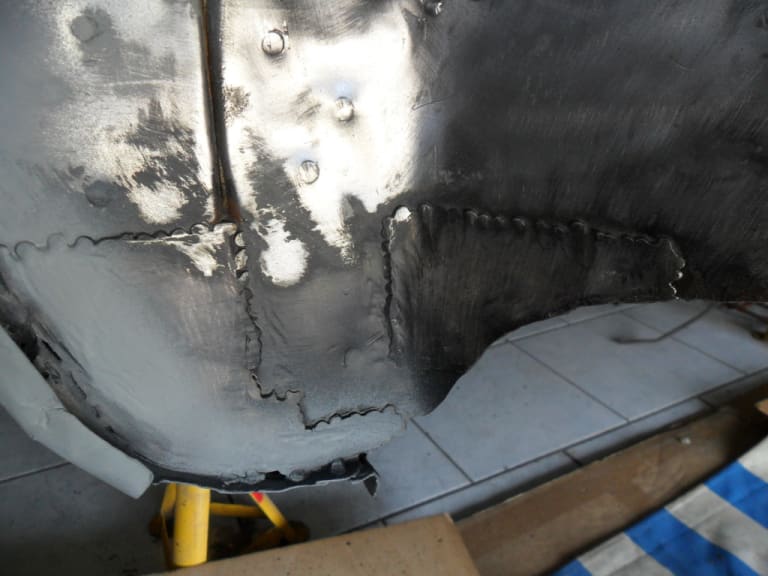
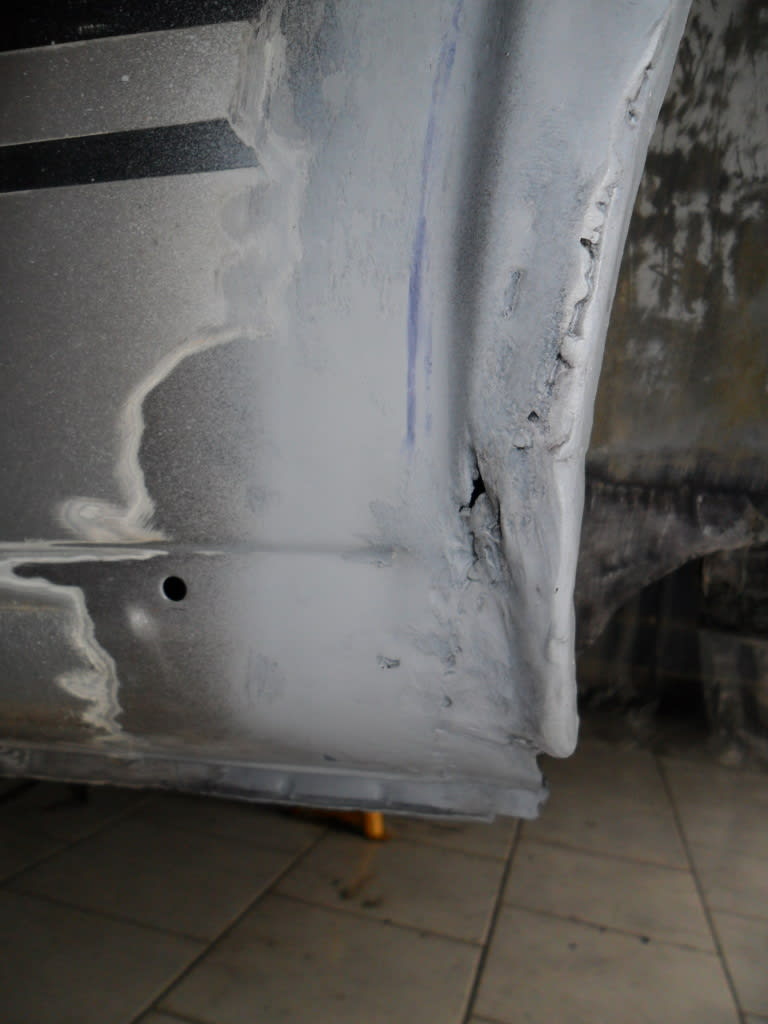
All removed, rot cut out, welded in a new end to the sill and then made new metal to finish the arch>sill section.
1983 Golf GTi Campaign Edition, Diamond Silver
http://vwgolfmk1.org.uk/forum/index.php?page=topicview&id=projects%2Fyour-mk1-golfs_2%2F-tag-1983-campaign&redirected=1#post_1551531
http://vwgolfmk1.org.uk/forum/index.php?page=topicview&id=projects%2Fyour-mk1-golfs_2%2F-tag-1983-campaign&redirected=1#post_1551531
Posted
Old Timer
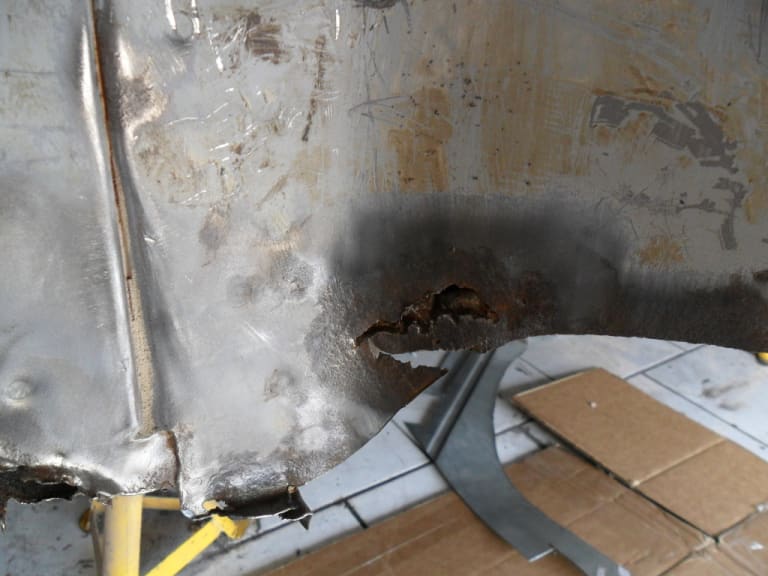
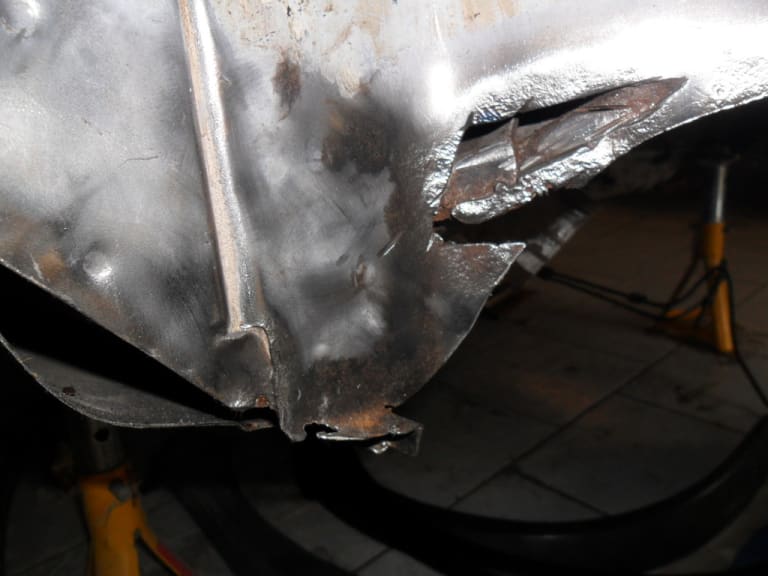
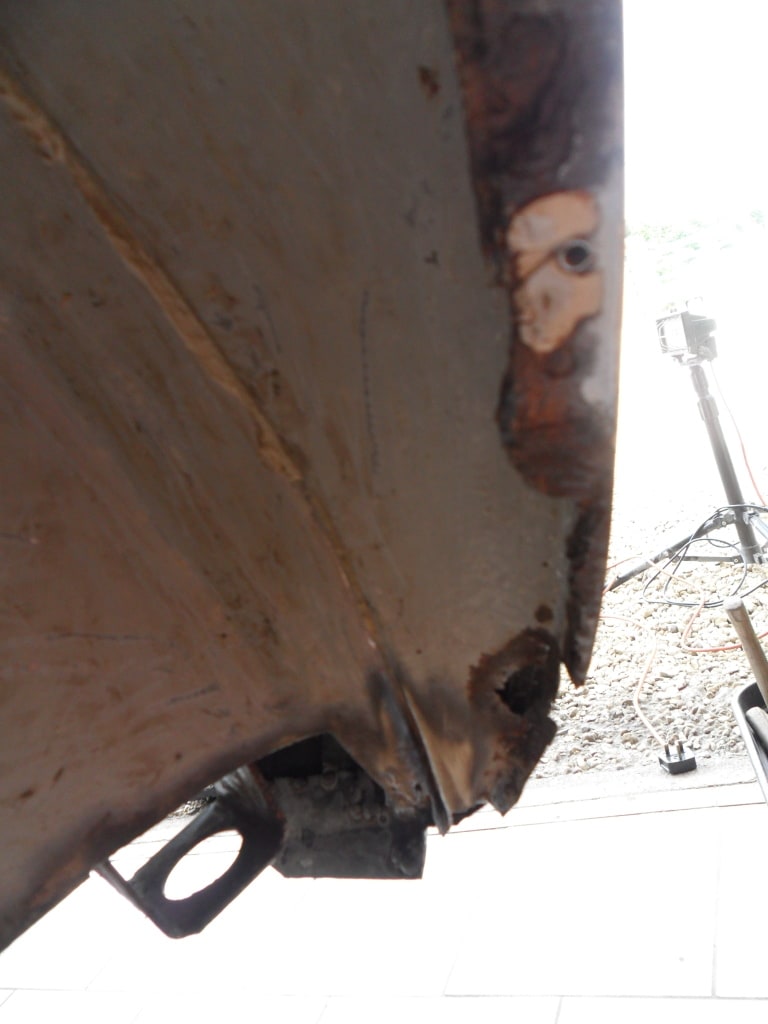
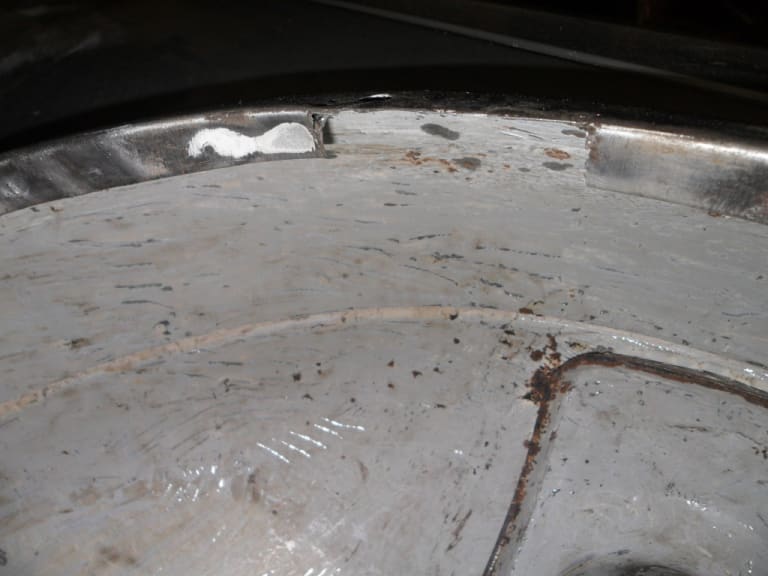
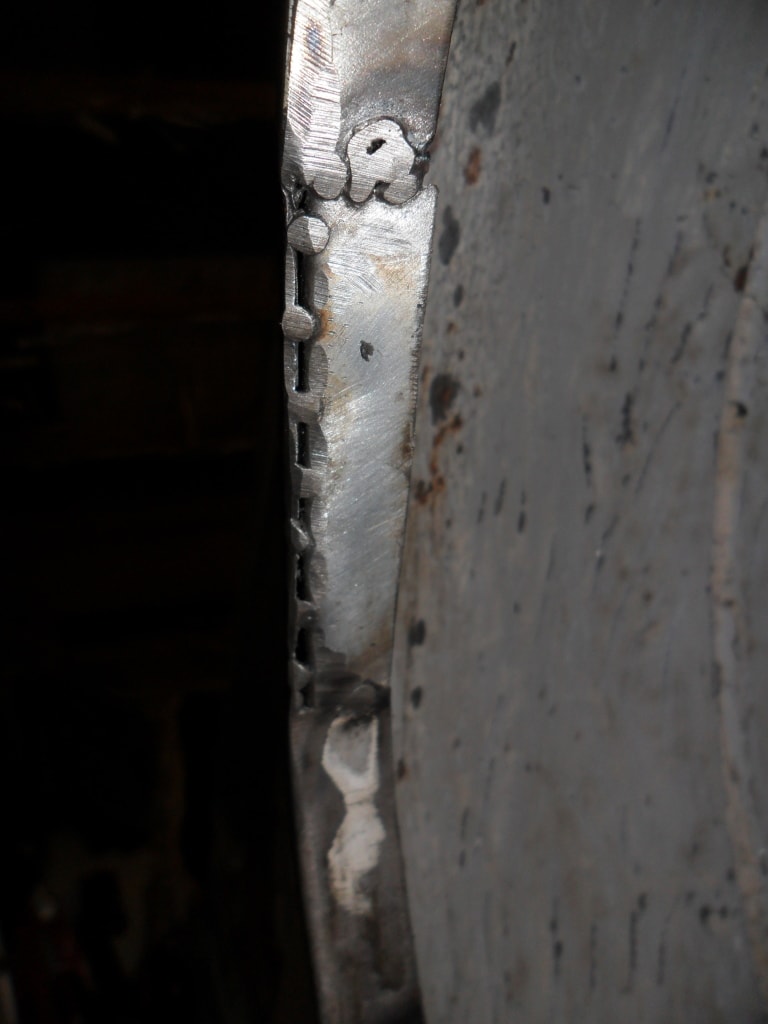
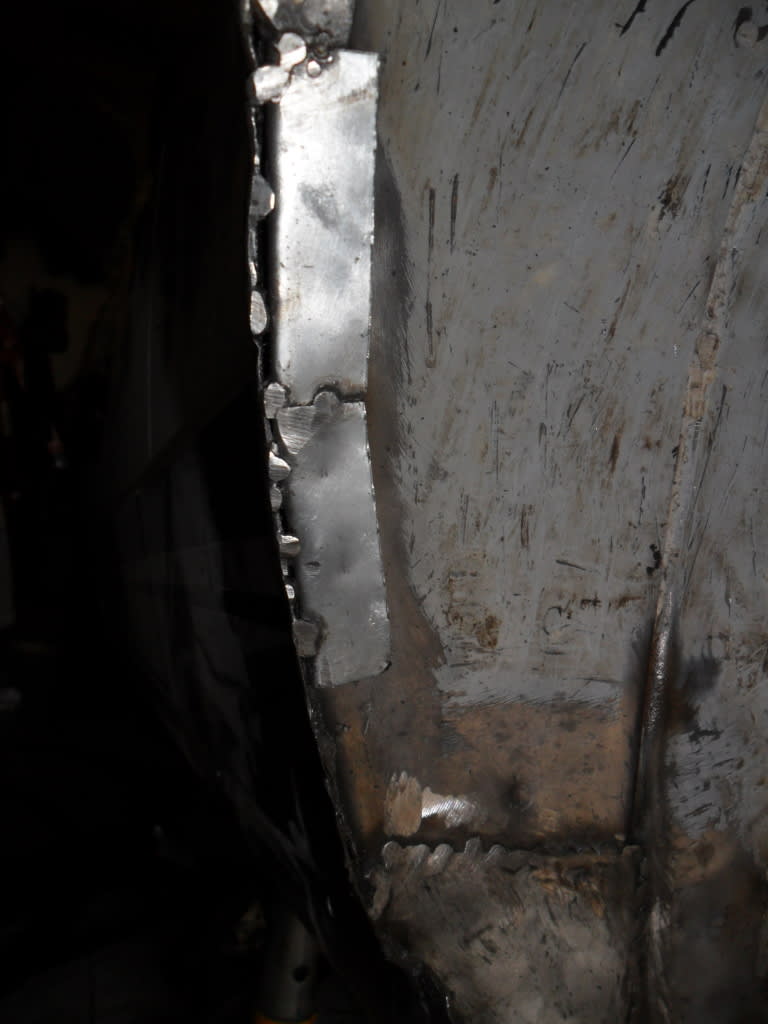
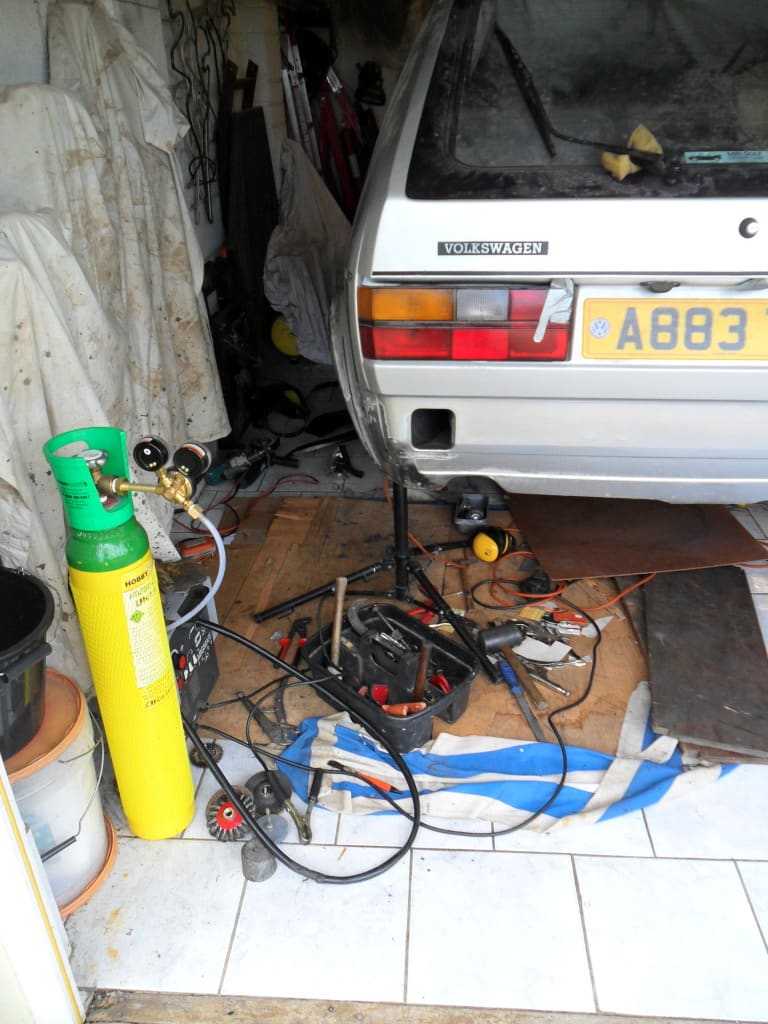


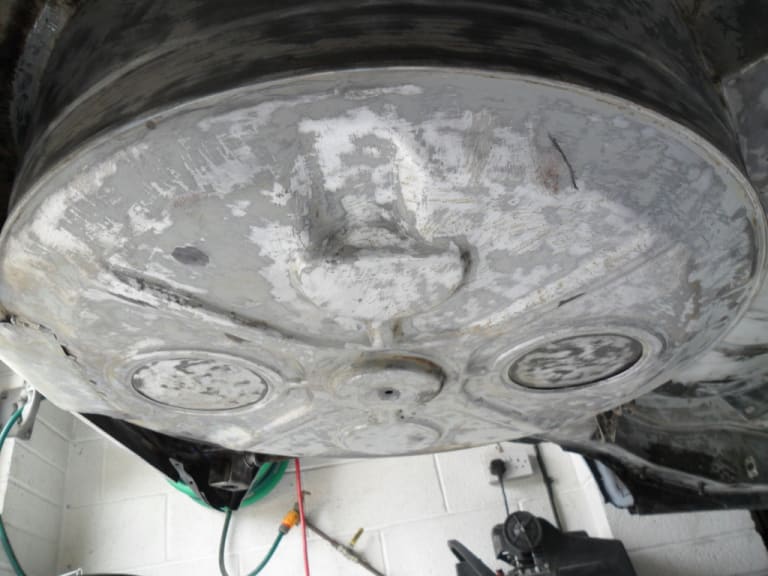
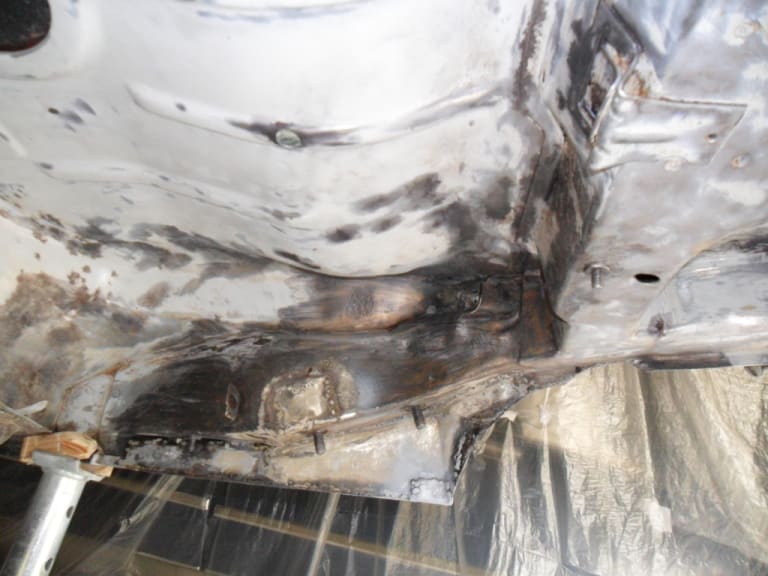
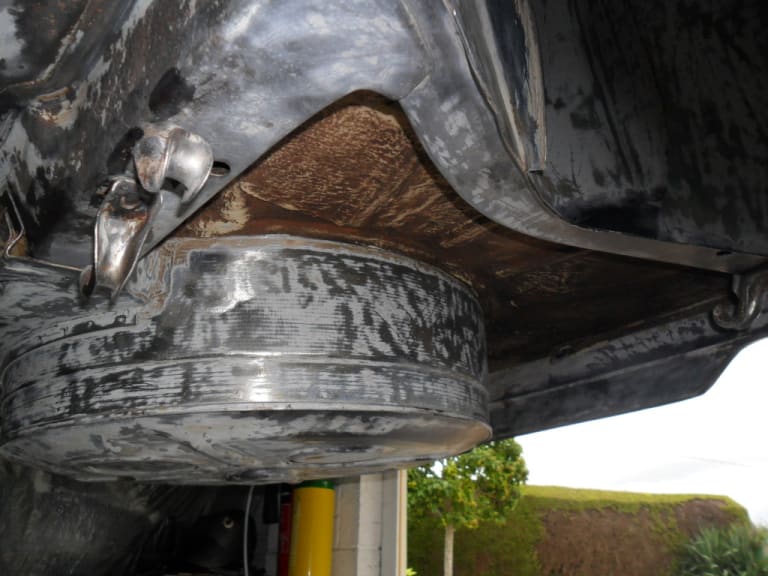
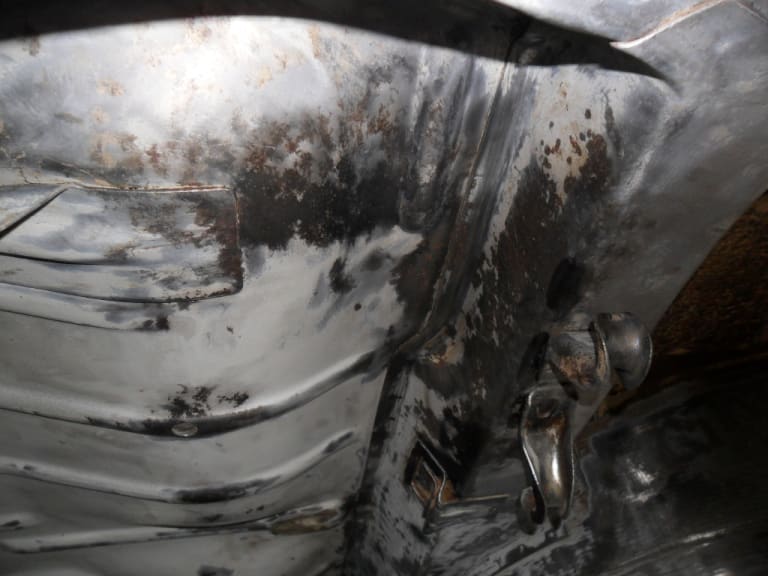
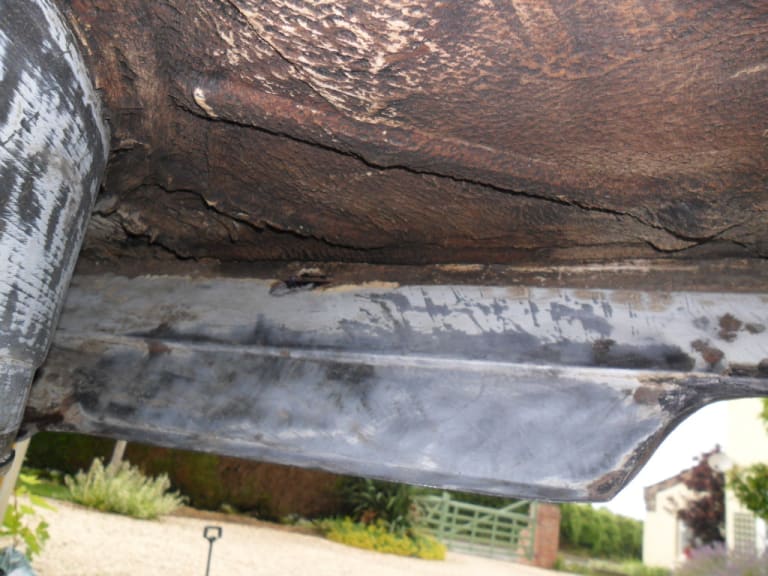
I have left the original underseal either side of the spare wheel well as it was particularly well attached and access was very difficult. Likewise I have left the underseal onteh upper section of the rear valance for the same reason.
I then degreased the underside with POR15 Degreaser, washed off with water using a garden sprayer, then treated with POR15 MetalPrep before going over any badly rusted areas with Bilt Hamber Hydrate 80.
I am now ready to paint the underside with Rustbuster 121 Epoxy paint.
1983 Golf GTi Campaign Edition, Diamond Silver
http://vwgolfmk1.org.uk/forum/index.php?page=topicview&id=projects%2Fyour-mk1-golfs_2%2F-tag-1983-campaign&redirected=1#post_1551531
http://vwgolfmk1.org.uk/forum/index.php?page=topicview&id=projects%2Fyour-mk1-golfs_2%2F-tag-1983-campaign&redirected=1#post_1551531
Posted
Old Timer


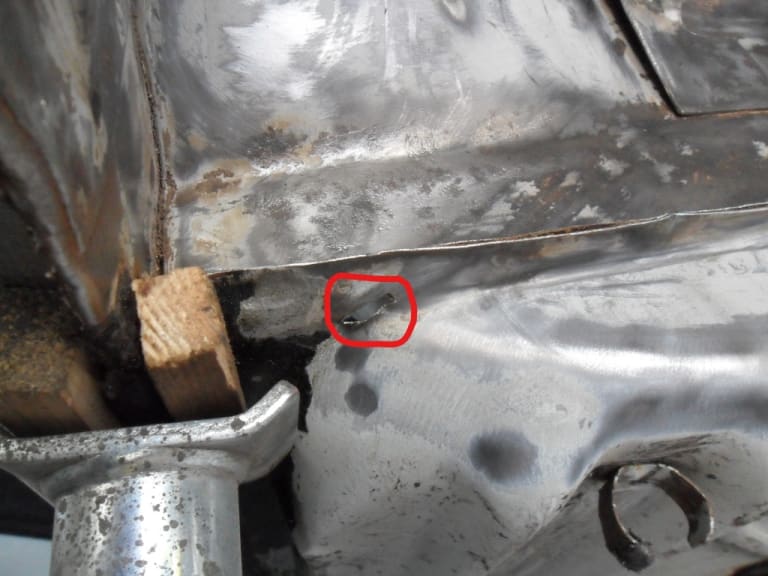
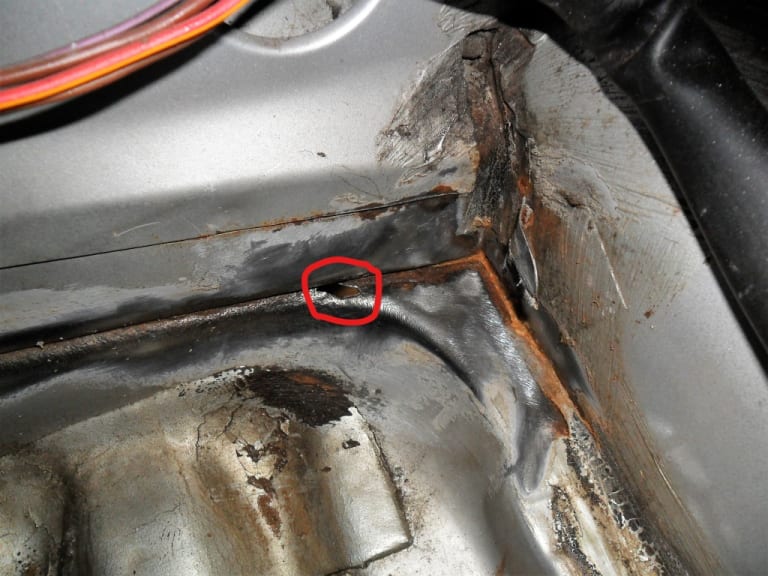
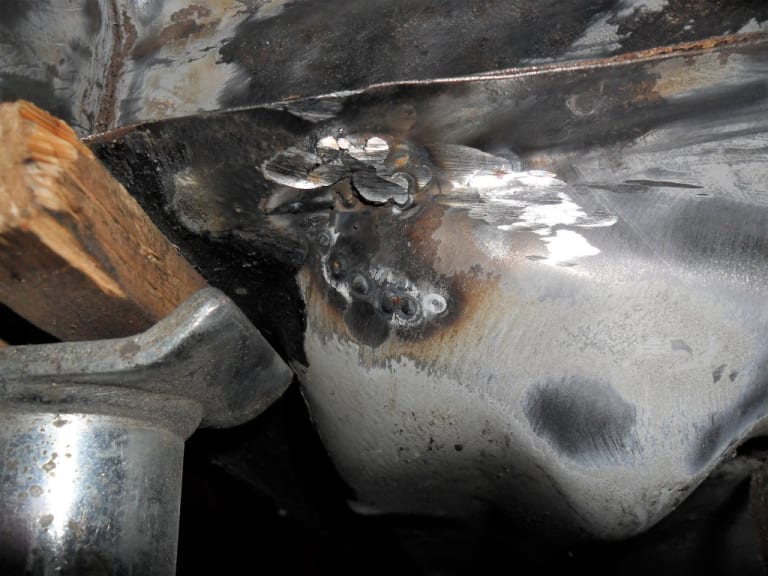
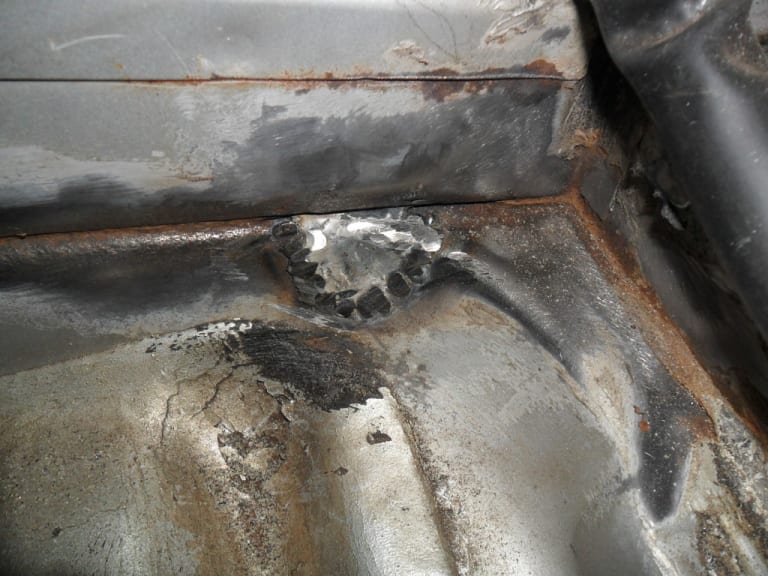
Again cut out and new metal welded in.
1983 Golf GTi Campaign Edition, Diamond Silver
http://vwgolfmk1.org.uk/forum/index.php?page=topicview&id=projects%2Fyour-mk1-golfs_2%2F-tag-1983-campaign&redirected=1#post_1551531
http://vwgolfmk1.org.uk/forum/index.php?page=topicview&id=projects%2Fyour-mk1-golfs_2%2F-tag-1983-campaign&redirected=1#post_1551531
Posted
Old Timer


1983 Golf GTi Campaign Edition, Diamond Silver
http://vwgolfmk1.org.uk/forum/index.php?page=topicview&id=projects%2Fyour-mk1-golfs_2%2F-tag-1983-campaign&redirected=1#post_1551531
http://vwgolfmk1.org.uk/forum/index.php?page=topicview&id=projects%2Fyour-mk1-golfs_2%2F-tag-1983-campaign&redirected=1#post_1551531
0 guests and 0 members have just viewed this: None.


