


"TAG" - 1983 Campaign restoration blog

Posted

Old Timer


1983 Golf GTi Campaign Edition, Diamond Silver
http://vwgolfmk1.org.uk/forum/index.php?page=topicview&id=projects%2Fyour-mk1-golfs_2%2F-tag-1983-campaign&redirected=1#post_1551531
http://vwgolfmk1.org.uk/forum/index.php?page=topicview&id=projects%2Fyour-mk1-golfs_2%2F-tag-1983-campaign&redirected=1#post_1551531
Posted
Old Timer
I was very careful not to damage anything as I know parts are impossible to find. Inside the rubber boot was orange coloured liquid!!! Once cleaned out the end of the piston looked perfect as did the other end.
I decided against removing the circlip/piston to prevent any damage to internal seals that are no longer available.


1983 Golf GTi Campaign Edition, Diamond Silver
http://vwgolfmk1.org.uk/forum/index.php?page=topicview&id=projects%2Fyour-mk1-golfs_2%2F-tag-1983-campaign&redirected=1#post_1551531
http://vwgolfmk1.org.uk/forum/index.php?page=topicview&id=projects%2Fyour-mk1-golfs_2%2F-tag-1983-campaign&redirected=1#post_1551531
Posted

Old Timer
Glad you got the bushes done OK.
Posted
Old Timer
With regards the anti gravity valve location - mine appears to be slightly different from yours. In the ETKA drawing I have part 13A (171201181A) and not the previous "three piece" 14, 22 & 23 which appears to have been replaced by 13A.
My issue is what does the M8 nut, item 16, fix to??? and what would you need a speed nut, item 24 for ??????????
1983 Golf GTi Campaign Edition, Diamond Silver
http://vwgolfmk1.org.uk/forum/index.php?page=topicview&id=projects%2Fyour-mk1-golfs_2%2F-tag-1983-campaign&redirected=1#post_1551531
http://vwgolfmk1.org.uk/forum/index.php?page=topicview&id=projects%2Fyour-mk1-golfs_2%2F-tag-1983-campaign&redirected=1#post_1551531
Posted
Old Timer
I originally had the 3 piece items and had them replaced it with item 13a, this just fitted snuggly inside the wheel arch .
The attachment bolt / L shaped stud I believe goes through a hole in the arch protector. I replaced this with a plastic bolt and nut.
I think as long as you assemble it and secure / prevent it from wobbling about, it will do. The gravity valve should be incased in 13a above your arch trim to prevent it getting mucky.
Posted

Old Timer
Mars red 1.8 GTI tintop now MOT'd and on the road!
http://vwgolfmk1.org.uk/forum/index.php?page=topicview&id=projects%2Fyour-mk1-golfs_2%2Fwent-to-look-at-a-golf&kfs79=150
http://vwgolfmk1.org.uk/forum/index.php?page=topicview&id=projects%2Fyour-mk1-golfs_2%2Fwent-to-look-at-a-golf&kfs79=150
Posted
Old Timer
Posted

Moderator


Old Timer
http://gaterosplating.co.uk
Excellent kits, cheaper than others, terrific results and lots of useful info/tips/videos on the site.
1983 Golf GTi Campaign Edition, Diamond Silver
http://vwgolfmk1.org.uk/forum/index.php?page=topicview&id=projects%2Fyour-mk1-golfs_2%2F-tag-1983-campaign&redirected=1#post_1551531
http://vwgolfmk1.org.uk/forum/index.php?page=topicview&id=projects%2Fyour-mk1-golfs_2%2F-tag-1983-campaign&redirected=1#post_1551531
Posted
Old Timer
Mars red 1.8 GTI tintop now MOT'd and on the road!
http://vwgolfmk1.org.uk/forum/index.php?page=topicview&id=projects%2Fyour-mk1-golfs_2%2Fwent-to-look-at-a-golf&kfs79=150
http://vwgolfmk1.org.uk/forum/index.php?page=topicview&id=projects%2Fyour-mk1-golfs_2%2Fwent-to-look-at-a-golf&kfs79=150
Posted
Old Timer
The 13a moulding holds the gravity valve in place and is kept up there when the wheel arch liner is fitted in place. A bolt or L shape stud fits in the moulding and is secured to the wheel arch liner.
Posted
Old Timer
Posted
Old Timer


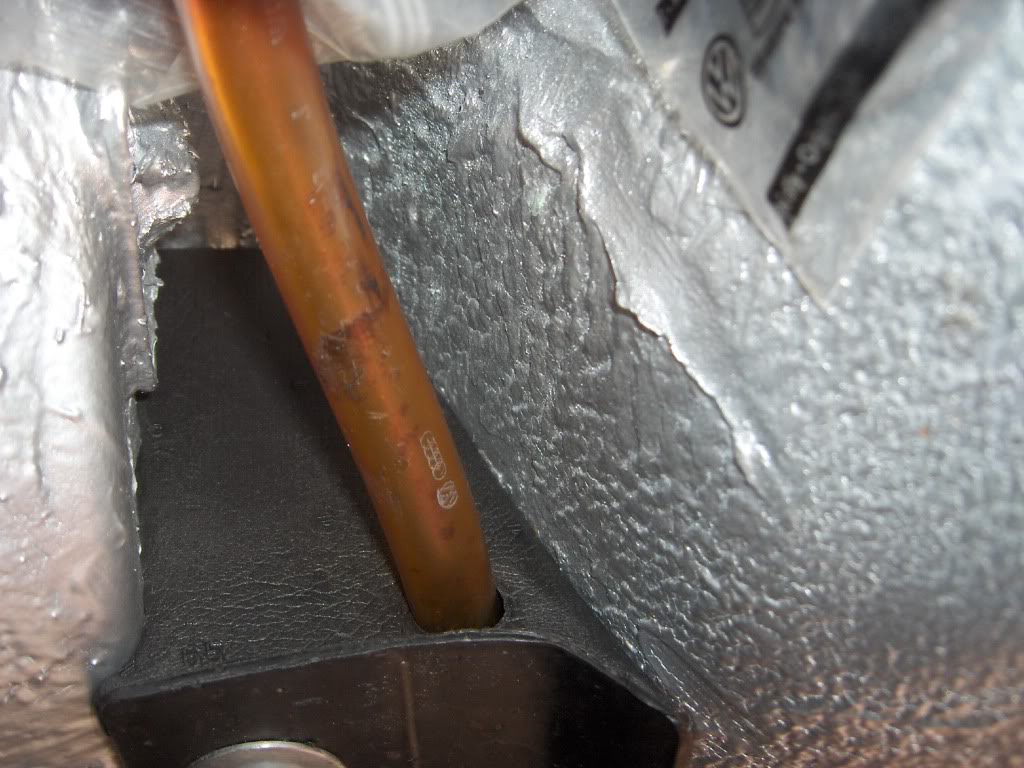
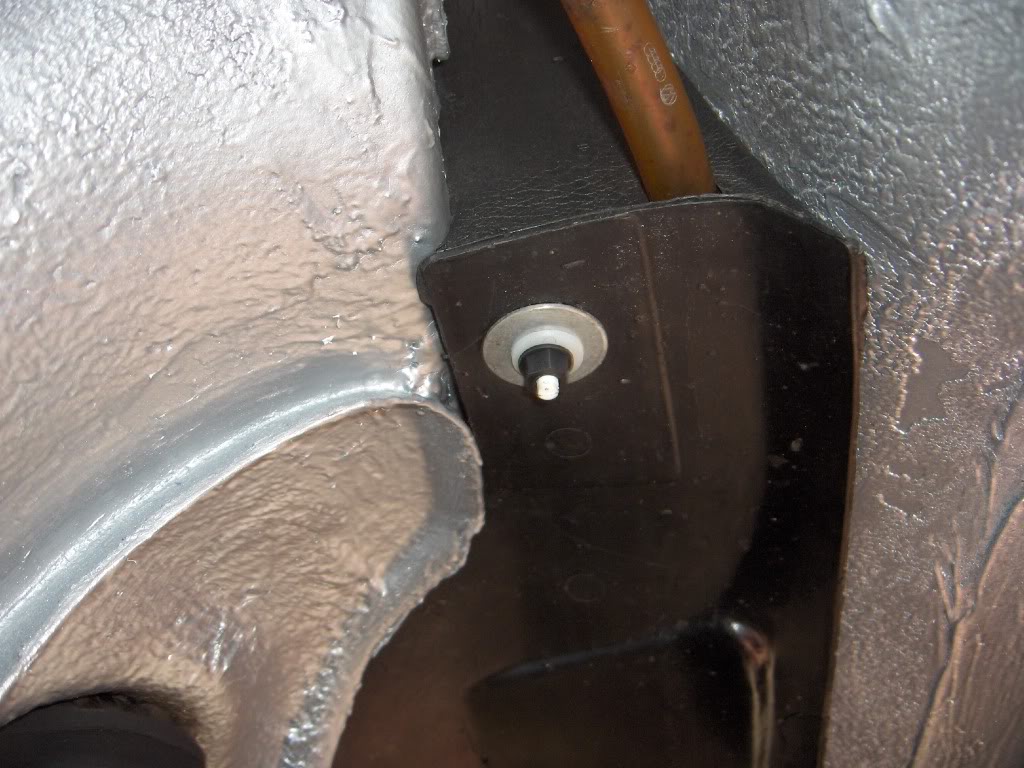
The pictures seem to have loaded back to front so the bottom picture is inside the arch before I started cutting away the rusty seatbelt mount. I cleaned up the area with a wire brush on a drill and cut out the rusty metal. You can see the angle with the m8 stud that the gravity valve and wheel arch line fixed to. The rust around the mount was pretty much restricted to the mount itself and hadn't really spread.
Mars red 1.8 GTI tintop now MOT'd and on the road!
http://vwgolfmk1.org.uk/forum/index.php?page=topicview&id=projects%2Fyour-mk1-golfs_2%2Fwent-to-look-at-a-golf&kfs79=150
http://vwgolfmk1.org.uk/forum/index.php?page=topicview&id=projects%2Fyour-mk1-golfs_2%2Fwent-to-look-at-a-golf&kfs79=150
Posted
Old Timer


I went to the scrappy and got a nut off the back of the upper front seat belt mount from a Skoda Octavia (from the adjustable part) cleared it up and welded it to a square of 4.0mm plate. I got someone to cut me it at 60mmx60mm but maybe 60mmx40mm would have been a better size due to space restrictions. It may be better to use a nut smaller than what I used because it was tight getting the gravity valve back in.
Mars red 1.8 GTI tintop now MOT'd and on the road!
http://vwgolfmk1.org.uk/forum/index.php?page=topicview&id=projects%2Fyour-mk1-golfs_2%2Fwent-to-look-at-a-golf&kfs79=150
http://vwgolfmk1.org.uk/forum/index.php?page=topicview&id=projects%2Fyour-mk1-golfs_2%2Fwent-to-look-at-a-golf&kfs79=150
Posted
Old Timer


I then became a bit slack with the photography so don't have any pictures of the repair section that I made up. With the aid of a reluctant assistant (my wife!) I marked a piece of card and cut it 10mm bigger on the left, right and bottom edges but cut it to the exact size on the top edge. I then joggled it on the sides and bottom and welded it into place. I butt welded the top edge so as to keep the existing part of the inner tub. I also welded inside the wheel arch to try and get a solid seem. I had some measurements of the existing bolt position which I marked on the repair but before I drilled it out I positioned the seatbelt with the locating peg in the hole in the inner tub and lined the seatbelt bolt hole up with my mark and made sure I could pull the seatbelt out. If the belt is not at the correct angle it will not work. I then drilled the mounting hole out to 12mm and also a few 8mm holes, clamped it in position with a bolt and spot welded through the 8mm holes. Once done I ground down the welds and filled it to get a smooth finish.
Mars red 1.8 GTI tintop now MOT'd and on the road!
http://vwgolfmk1.org.uk/forum/index.php?page=topicview&id=projects%2Fyour-mk1-golfs_2%2Fwent-to-look-at-a-golf&kfs79=150
http://vwgolfmk1.org.uk/forum/index.php?page=topicview&id=projects%2Fyour-mk1-golfs_2%2Fwent-to-look-at-a-golf&kfs79=150
Posted
Old Timer

Hopefully you will end up with something better than this, if you look closely at mine you can see where I should have gone over it with a stopper to take out a few small imperfections. I seam sealed around the repairs inside the tub and under sealed it.
In hindsight I have tried to seam seal around the bolt hole inside the car and maybe try to seal the thread of the bolt as I had a very slight bubbling around a spot weld after I drove the car in the rain. I can only assume that the water tracked through the bolt and in between the two plates and then through a pin prick hole in one of the spot welds. I have sprayed a cavity wax inside the tub to try and prevent any more water getting through which seems to have worked.
I hope this helps and that it wasn't too long winded. Good luck with the repairs.
Mars red 1.8 GTI tintop now MOT'd and on the road!
http://vwgolfmk1.org.uk/forum/index.php?page=topicview&id=projects%2Fyour-mk1-golfs_2%2Fwent-to-look-at-a-golf&kfs79=150
http://vwgolfmk1.org.uk/forum/index.php?page=topicview&id=projects%2Fyour-mk1-golfs_2%2Fwent-to-look-at-a-golf&kfs79=150
0 guests and 0 members have just viewed this: None.