Pistolpete's Mars Red Mk1 GTi restoration
Posted
Old Timer


Restoration thread for my 1983 Y-reg Mars Red GTi, non-sunroof model
Had a good night on Thursday and managed to get most of the passenger side stripped. The good news is she's pretty mint underneath so I'm well chuffed, the wee car is as good as I thought. I'm planning on using Bilt Hamber Hydrate 80 to treat the steel, then Electrox Zinc rich primer followed by Epoxy Mastic. Then I'm in 2 minds…should I just go with black or should I get the underside top-coated and lacquered in Mars Red? Any thoughts? The difficulty will be spraying underneath as I don't have a roll-over jig which in hindsight would have been much easier. Too late now though, as I think you need to have the engine removed to use them.


That's all for now. If anyone can advise me best on how to finish it in 2-pack I'd be grateful….i.e. products and equipment. For example, after its been done with epoxy mastic, should I use stonechip shield, then etch primer on top of that and then paint?
 Last edit: by Pistol
Nut & Bolt Resto Complete (Mars Red GTi original): https://vwgolfmk1.org.uk/forum/index.php?page=topicview&type=misc&id=projects%2Fyour-mk1-golfs_2%2Fpistolpete-s-mars-red&start__keyed=
Nut & Bolt Resto in Progress (Lhasa 16v): https://vwgolfmk1.org.uk/forum/index.php?page=topicview&type=misc&id=projects%2Fyour-mk1-golfs_2%2Fpistolpete-s-lhasa&redirected=1
Nut & Bolt Resto in Progress (Lhasa 16v): https://vwgolfmk1.org.uk/forum/index.php?page=topicview&type=misc&id=projects%2Fyour-mk1-golfs_2%2Fpistolpete-s-lhasa&redirected=1
Posted
Old Timer


Frost have small repair panels up to 1.2mm thick, would this be ok? Anybody tackled this job before & got pics of the job.
Cheers
Nut & Bolt Resto Complete (Mars Red GTi original): https://vwgolfmk1.org.uk/forum/index.php?page=topicview&type=misc&id=projects%2Fyour-mk1-golfs_2%2Fpistolpete-s-mars-red&start__keyed=
Nut & Bolt Resto in Progress (Lhasa 16v): https://vwgolfmk1.org.uk/forum/index.php?page=topicview&type=misc&id=projects%2Fyour-mk1-golfs_2%2Fpistolpete-s-lhasa&redirected=1
Nut & Bolt Resto in Progress (Lhasa 16v): https://vwgolfmk1.org.uk/forum/index.php?page=topicview&type=misc&id=projects%2Fyour-mk1-golfs_2%2Fpistolpete-s-lhasa&redirected=1
Posted

Old Timer

Pistol said
I'll be looking to repair the small hole in the rear drivers side axle mount soon. Should be reasonably straightforward weld repair but what thickness of steel should I be buying for this?
Frost have small repair panels up to 1.2mm thick, would this be ok? Anybody tackled this job before & got pics of the job.
Cheers
1mm thick plate here would be fine, as its only a "skin" of metal covering up the actual rear beam mount bracket, some of the more rusty builds on here have good photos of this area.
Good work on the underside, but a angle grinder with a wire wire will make it even easier. I use a mix of the grinder and the drill, just wear a face mask or you will be pulling bits of wire wheel out of your face and neck
Posted
Old Timer


I'm now thinking I would like a stainless 4-branch manifold….but would rather fit heat shields than have to wrap the manifold. Have read that the heat shields are very important to prevent the steering boot from melting….and some cars have literally gone up in smoke as a result !! Have also read that wrapping stainless steel manifolds can cause them to crack….decisions decisions !!!
I started to prep the rear driver's side chassis leg that needs a patch welded in. By the time I'd cut out the rust back to solid metal, the size of the repair is bigger than first thought. It is an obvious weak point, as behind this area leads to the hole in the front of the rear wheel arch where the fuel breather pipes run through.

That's all for now….still collecting parts for the rebuild….managed to get the correct Bosch fuel pump from ECP. Also new rear wheel cylinders and brake shoes. But all that is a long way off yet.
Nut & Bolt Resto Complete (Mars Red GTi original): https://vwgolfmk1.org.uk/forum/index.php?page=topicview&type=misc&id=projects%2Fyour-mk1-golfs_2%2Fpistolpete-s-mars-red&start__keyed=
Nut & Bolt Resto in Progress (Lhasa 16v): https://vwgolfmk1.org.uk/forum/index.php?page=topicview&type=misc&id=projects%2Fyour-mk1-golfs_2%2Fpistolpete-s-lhasa&redirected=1
Nut & Bolt Resto in Progress (Lhasa 16v): https://vwgolfmk1.org.uk/forum/index.php?page=topicview&type=misc&id=projects%2Fyour-mk1-golfs_2%2Fpistolpete-s-lhasa&redirected=1
Posted
Local Hero


Andy
LINCOLNSHIRE REGION - https://www.facebook.com/groups/467122313360002/
1983 MK1 Golf GTI Campaign Model - Under (looooong) resto!
1962 Rover P4 80
2002 BMW 745i
2008 BMW Z4 2.5Si
LINCOLNSHIRE REGION - https://www.facebook.com/groups/467122313360002/
1983 MK1 Golf GTI Campaign Model - Under (looooong) resto!
1962 Rover P4 80
2002 BMW 745i
2008 BMW Z4 2.5Si
Posted
Old Timer


Had a good night at the car tonight, managed a solid 4hrs underneath. Firstly, after prepping the rear chassis leg repair, I applied Bilt Hamber Hydrate 80 to treat the rust/scale around the area. I have to leave this 24hrs now before I can apply the Electrox zinc primer (Bilt Hamber again). This was really just to treat the metal behind where the patch repair will go, but a little goes a long way so I carried on just to see how it would turn out. It definitely looks like good stuff. Eventually, the whole underside will be done this way, followed by Electrox and then Epoxy Mastic before applying Mars Red top coat.

While that was drying, I continued with the underseal removal, I've certainly broke the back of it now, mainly the transmission/exhaust tunnel to do and then a few bits to go back over.

Hopefully get back at it again tomorrow night…if my aching body can take 2 nights in a row!! :wacko:
Nut & Bolt Resto Complete (Mars Red GTi original): https://vwgolfmk1.org.uk/forum/index.php?page=topicview&type=misc&id=projects%2Fyour-mk1-golfs_2%2Fpistolpete-s-mars-red&start__keyed=
Nut & Bolt Resto in Progress (Lhasa 16v): https://vwgolfmk1.org.uk/forum/index.php?page=topicview&type=misc&id=projects%2Fyour-mk1-golfs_2%2Fpistolpete-s-lhasa&redirected=1
Nut & Bolt Resto in Progress (Lhasa 16v): https://vwgolfmk1.org.uk/forum/index.php?page=topicview&type=misc&id=projects%2Fyour-mk1-golfs_2%2Fpistolpete-s-lhasa&redirected=1
Posted
Local Hero


Andy
LINCOLNSHIRE REGION - https://www.facebook.com/groups/467122313360002/
1983 MK1 Golf GTI Campaign Model - Under (looooong) resto!
1962 Rover P4 80
2002 BMW 745i
2008 BMW Z4 2.5Si
LINCOLNSHIRE REGION - https://www.facebook.com/groups/467122313360002/
1983 MK1 Golf GTI Campaign Model - Under (looooong) resto!
1962 Rover P4 80
2002 BMW 745i
2008 BMW Z4 2.5Si
Posted
Old Timer


Good news is that's the underside underseal stripping job just about complete. I have a few wee fiddly bits to get into with some smaller wire brush attachments, but the bulk of it is done. Thank God, I would never recommend anybody to do it this way….get a roll-over jig instead. The other good news is the car is pretty much immaculate underneath, obviously the 1983 Mk1's were quite well rust-proofed from the factory.

The bad news is after relocating my rear axle stands to get underneath that area, I have another hole in the drivers rear axle mount area.

Thankfully this one is quite small although it runs right to the edge so will be an awkward one to patch.
Nut & Bolt Resto Complete (Mars Red GTi original): https://vwgolfmk1.org.uk/forum/index.php?page=topicview&type=misc&id=projects%2Fyour-mk1-golfs_2%2Fpistolpete-s-mars-red&start__keyed=
Nut & Bolt Resto in Progress (Lhasa 16v): https://vwgolfmk1.org.uk/forum/index.php?page=topicview&type=misc&id=projects%2Fyour-mk1-golfs_2%2Fpistolpete-s-lhasa&redirected=1
Nut & Bolt Resto in Progress (Lhasa 16v): https://vwgolfmk1.org.uk/forum/index.php?page=topicview&type=misc&id=projects%2Fyour-mk1-golfs_2%2Fpistolpete-s-lhasa&redirected=1
Posted
Settled In

MK1CRAZY YAHOOOOO!!!!!
Posted
Local Hero


Andy
LINCOLNSHIRE REGION - https://www.facebook.com/groups/467122313360002/
1983 MK1 Golf GTI Campaign Model - Under (looooong) resto!
1962 Rover P4 80
2002 BMW 745i
2008 BMW Z4 2.5Si
LINCOLNSHIRE REGION - https://www.facebook.com/groups/467122313360002/
1983 MK1 Golf GTI Campaign Model - Under (looooong) resto!
1962 Rover P4 80
2002 BMW 745i
2008 BMW Z4 2.5Si
Posted
Old Timer


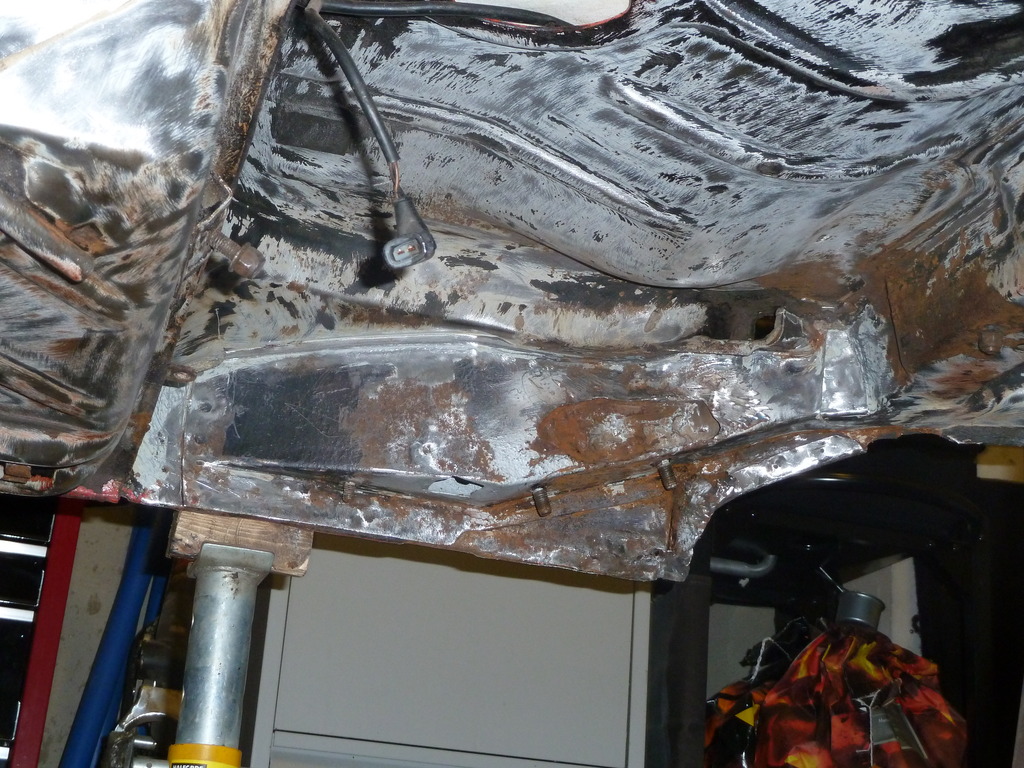
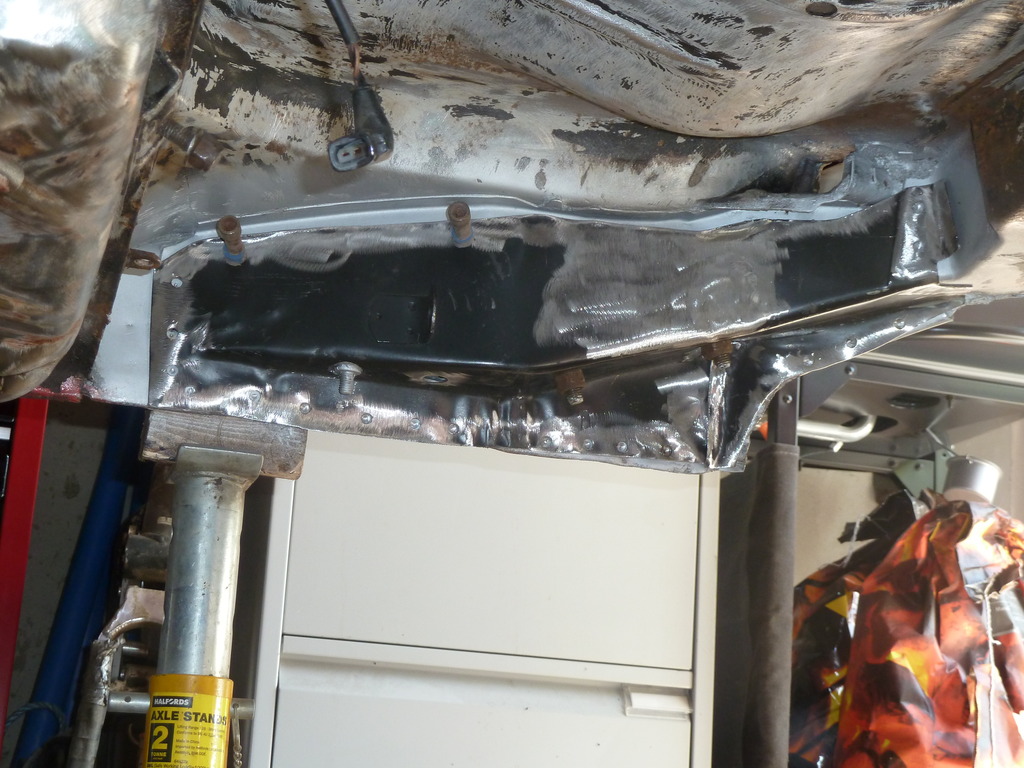
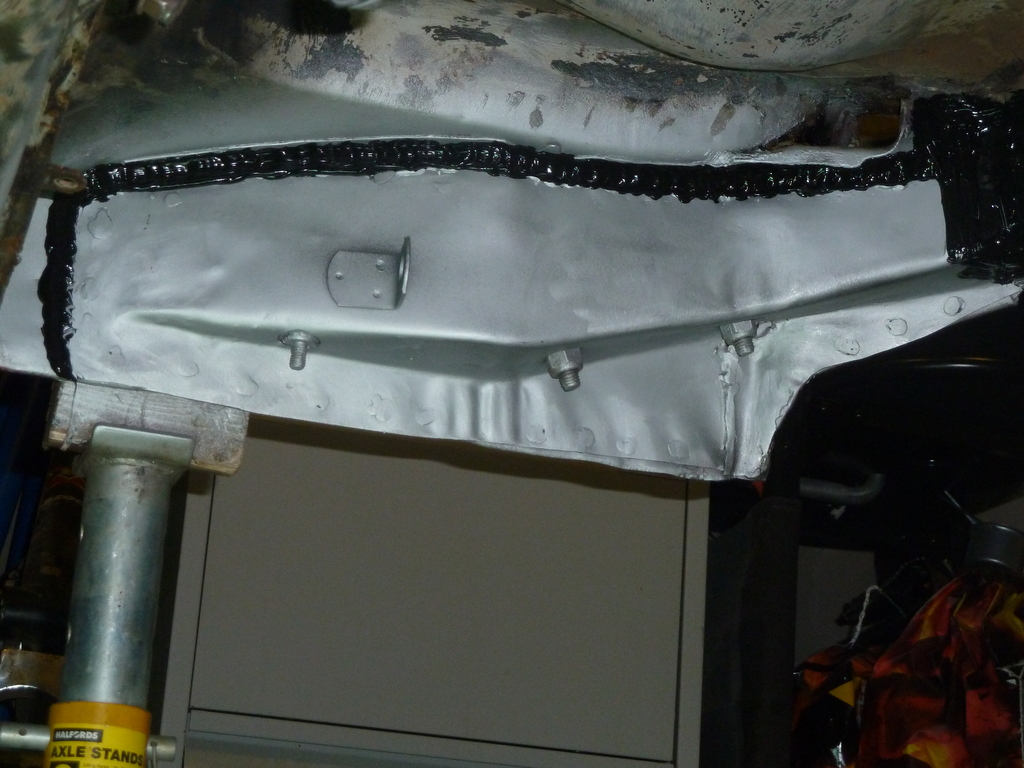
Basically, things came to a grinding halt while I waited for my bodyshop man to come to the house and weld in the new rear axle mount repair section on the drivers side. This was not a job I would tackle myself, so I just had to wait until he was free to do it as it had to be right.
Before:
During:
After:
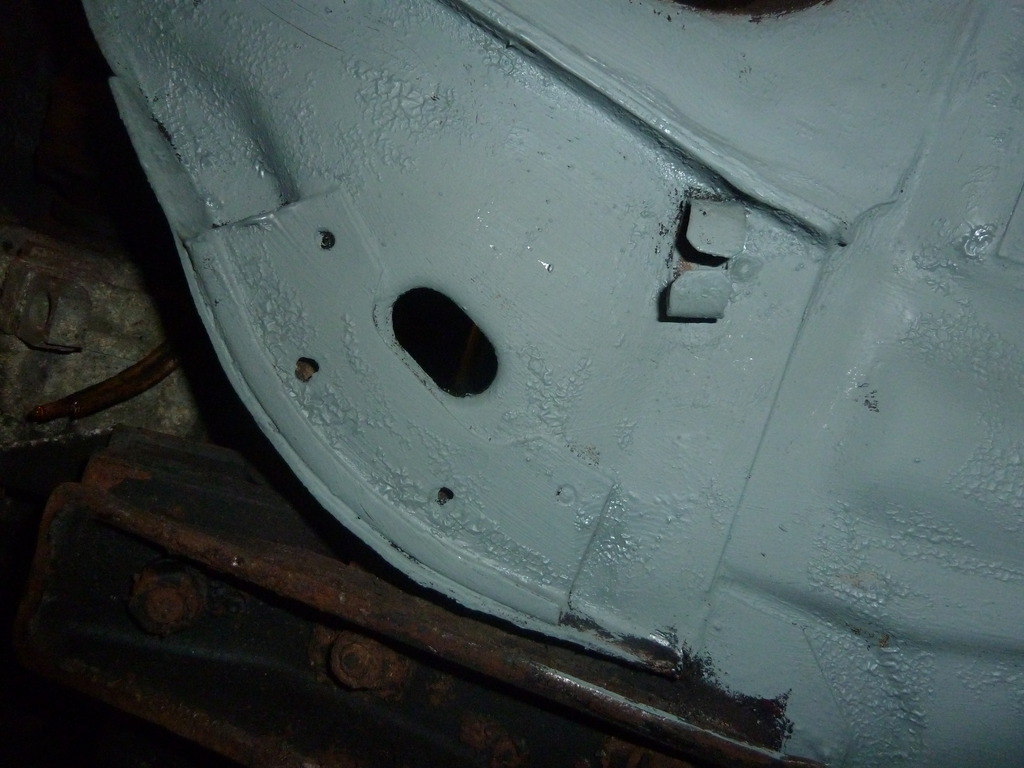
Now I can start getting the last preps done before coating the underside. Hopefully the updates will be a bit more frequent than they have been as I really want to get the car back on the road.
Nut & Bolt Resto Complete (Mars Red GTi original): https://vwgolfmk1.org.uk/forum/index.php?page=topicview&type=misc&id=projects%2Fyour-mk1-golfs_2%2Fpistolpete-s-mars-red&start__keyed=
Nut & Bolt Resto in Progress (Lhasa 16v): https://vwgolfmk1.org.uk/forum/index.php?page=topicview&type=misc&id=projects%2Fyour-mk1-golfs_2%2Fpistolpete-s-lhasa&redirected=1
Nut & Bolt Resto in Progress (Lhasa 16v): https://vwgolfmk1.org.uk/forum/index.php?page=topicview&type=misc&id=projects%2Fyour-mk1-golfs_2%2Fpistolpete-s-lhasa&redirected=1
Posted
Old Timer


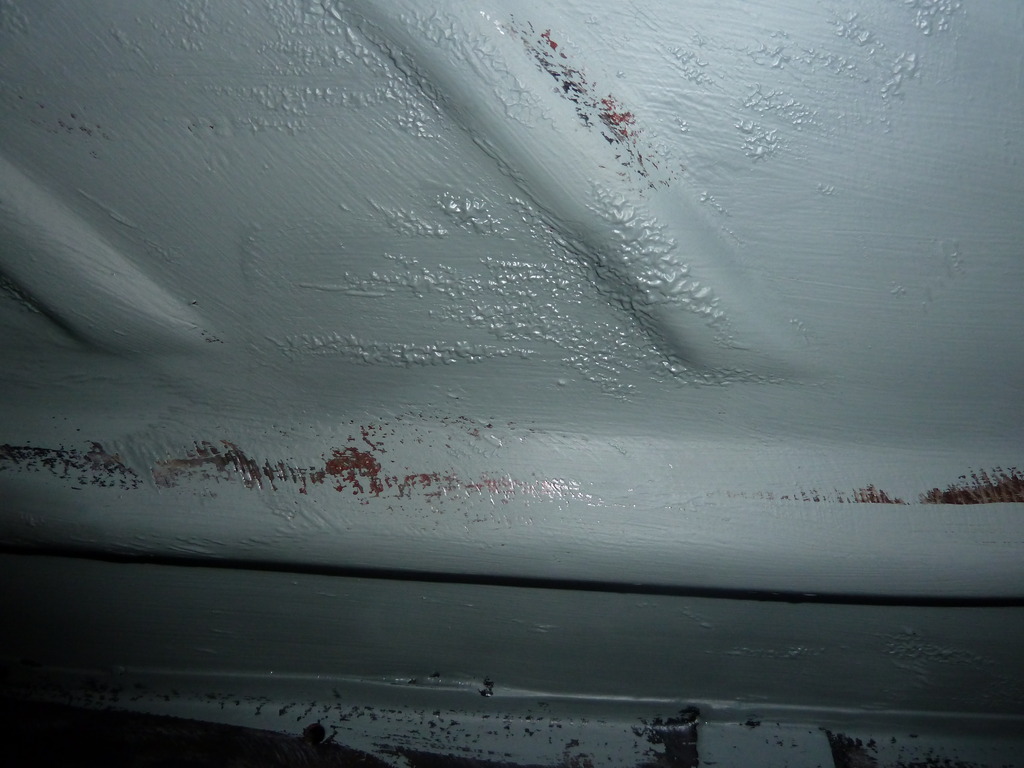
Nut & Bolt Resto Complete (Mars Red GTi original): https://vwgolfmk1.org.uk/forum/index.php?page=topicview&type=misc&id=projects%2Fyour-mk1-golfs_2%2Fpistolpete-s-mars-red&start__keyed=
Nut & Bolt Resto in Progress (Lhasa 16v): https://vwgolfmk1.org.uk/forum/index.php?page=topicview&type=misc&id=projects%2Fyour-mk1-golfs_2%2Fpistolpete-s-lhasa&redirected=1
Nut & Bolt Resto in Progress (Lhasa 16v): https://vwgolfmk1.org.uk/forum/index.php?page=topicview&type=misc&id=projects%2Fyour-mk1-golfs_2%2Fpistolpete-s-lhasa&redirected=1
Posted
Moderator


Might be worth trying that?
Posted
Old Timer


Nut & Bolt Resto Complete (Mars Red GTi original): https://vwgolfmk1.org.uk/forum/index.php?page=topicview&type=misc&id=projects%2Fyour-mk1-golfs_2%2Fpistolpete-s-mars-red&start__keyed=
Nut & Bolt Resto in Progress (Lhasa 16v): https://vwgolfmk1.org.uk/forum/index.php?page=topicview&type=misc&id=projects%2Fyour-mk1-golfs_2%2Fpistolpete-s-lhasa&redirected=1
Nut & Bolt Resto in Progress (Lhasa 16v): https://vwgolfmk1.org.uk/forum/index.php?page=topicview&type=misc&id=projects%2Fyour-mk1-golfs_2%2Fpistolpete-s-lhasa&redirected=1
Posted
Settled In

Keep up the good work!
Posted
Settled In

Posted
Old Timer

Posted
Old Timer


So for some pics, from this:-
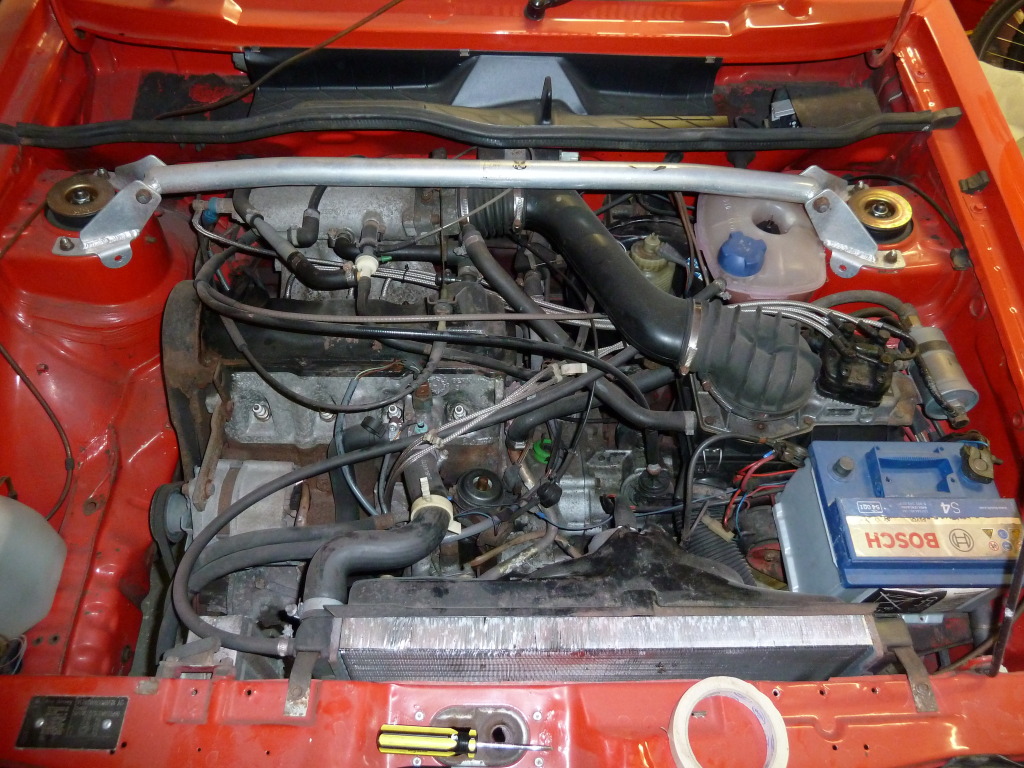
Work in progress:-
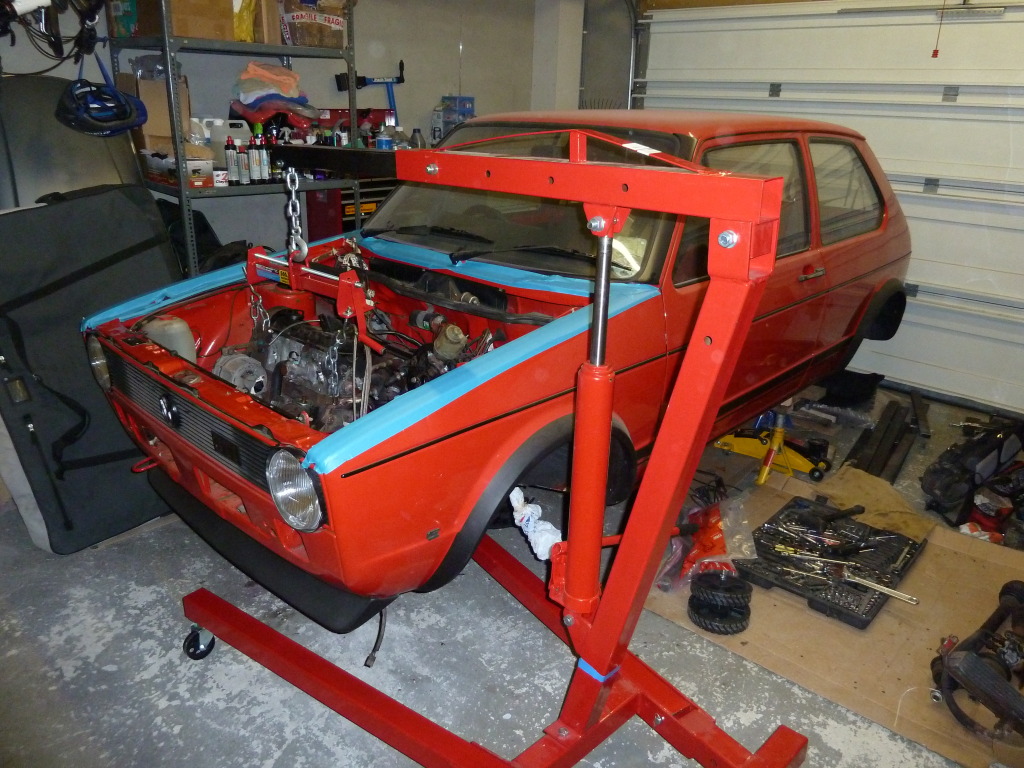
Engine out, quite straightforward really and the load leveller and crane certainly were very useful given I did it on my own:-
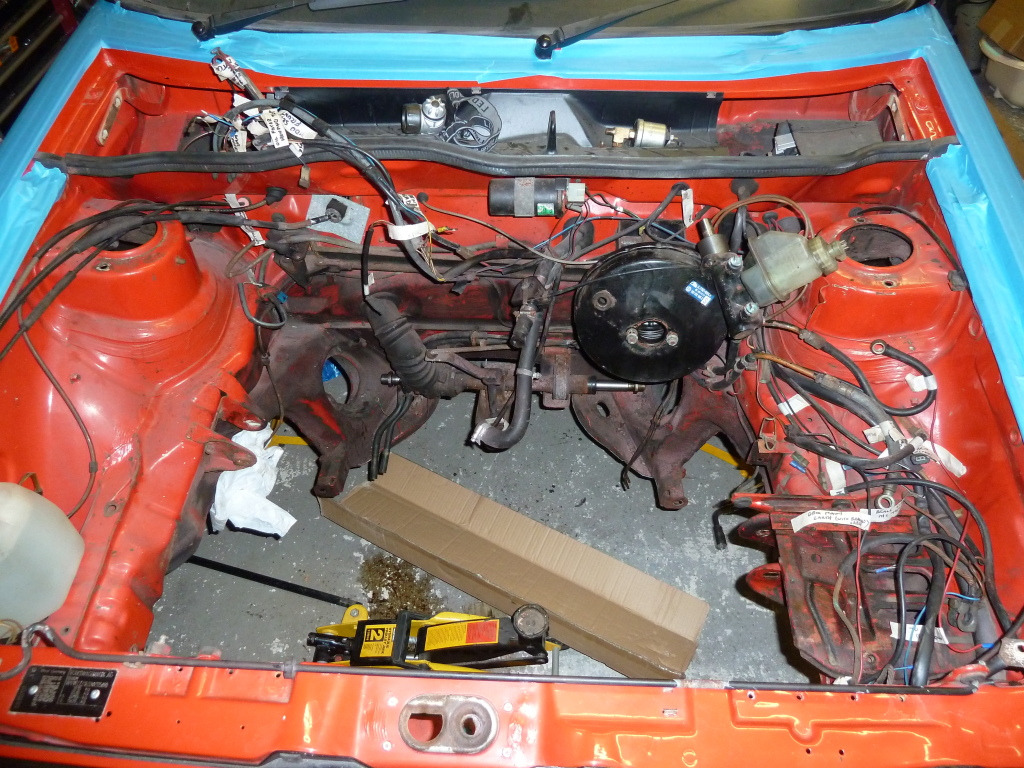
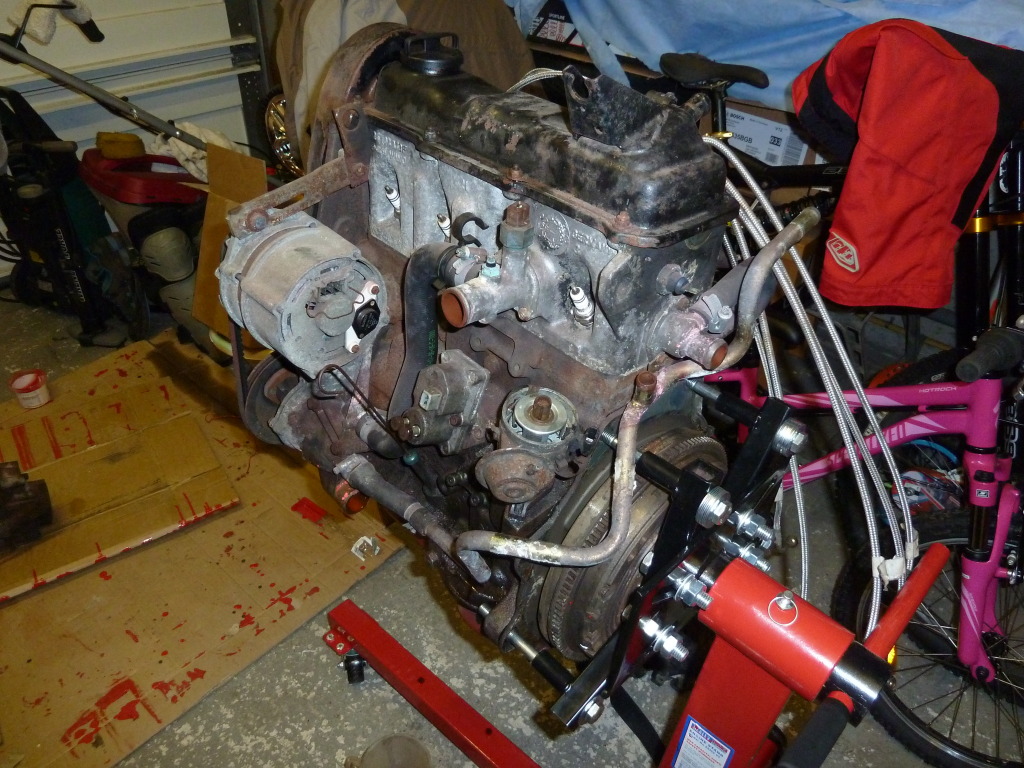
Engine on the stand. It'll stay here for a while as I want to concentrate on getting the underside and engine bay ready for paint as a priority. The detailing of the engine and bits can be done while the shell is away.
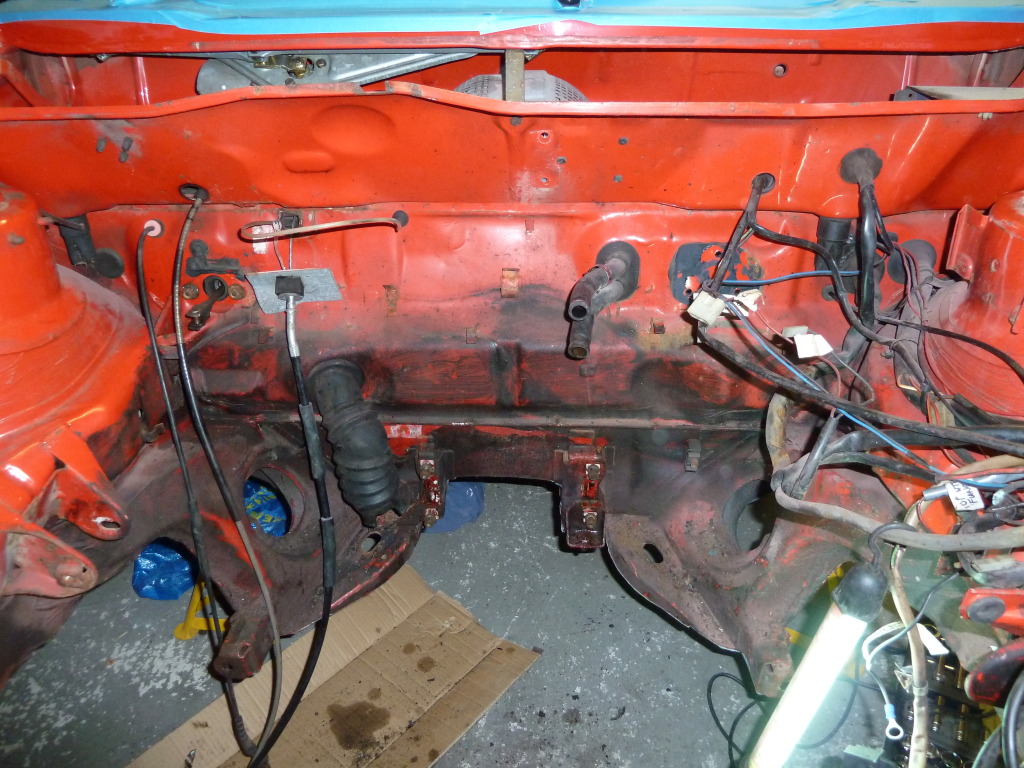
And that's the bay pretty much clear. Not sure what to do with the wiring, as I don't want to remove it but it will be getting tidied up. But what should I do with it for painting? Just wrap it all up and bag it?

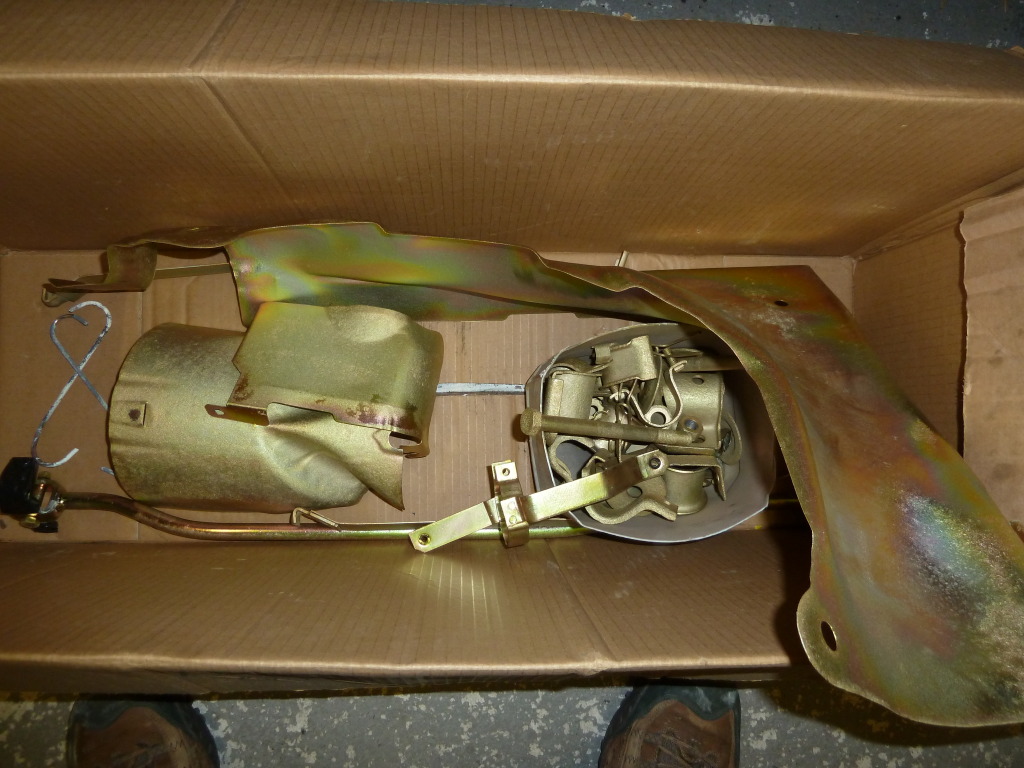
And just some bits I've been getting ready for the rebuild when it finally comes:-
And since June, that's it pretty much up-to-date. I'm hoping to get cracking now I have the rollover jig, so I'll post up some further pics when I get it mounted. I plan to transport the shell on the jig to the paintshop, so I need to get some castor wheels and some additional steelwork to join the 2 jigs….and then find a suitable means of transporting it.
Nut & Bolt Resto Complete (Mars Red GTi original): https://vwgolfmk1.org.uk/forum/index.php?page=topicview&type=misc&id=projects%2Fyour-mk1-golfs_2%2Fpistolpete-s-mars-red&start__keyed=
Nut & Bolt Resto in Progress (Lhasa 16v): https://vwgolfmk1.org.uk/forum/index.php?page=topicview&type=misc&id=projects%2Fyour-mk1-golfs_2%2Fpistolpete-s-lhasa&redirected=1
Nut & Bolt Resto in Progress (Lhasa 16v): https://vwgolfmk1.org.uk/forum/index.php?page=topicview&type=misc&id=projects%2Fyour-mk1-golfs_2%2Fpistolpete-s-lhasa&redirected=1
Posted
Moderator


When my engine bay was painted before the new engine went in all the loom wires were taped together in one big bundle and just left to hang. Also my paint shop offered to collect the car too. It was on four wheels. Might help you out…
The zinc yellow chromate plating is addictive so best be careful.
There are too many online users to list.


