


83 Gti set to get full resto

Posted
Settling In

My 83 Gti set to get full restoration
Can I ask what are you doing with your old spare wheel well? I'm after a quarter section to do a repair on mine??
Posted

Moderator


With regards to the wheel well, it's provisionally all gone I'm afraid
 I'll let you know if anything changes, though.
Andy.

Posted
Settling In
Melteddrummer said
Thanks Rubix. You'll get there mate, just need to be patient.
With regards to the wheel well, it's provisionally all gone I'm afraid
Andy.
No worries, let me know if there's any left and good luck with your build.
Posted
Moderator
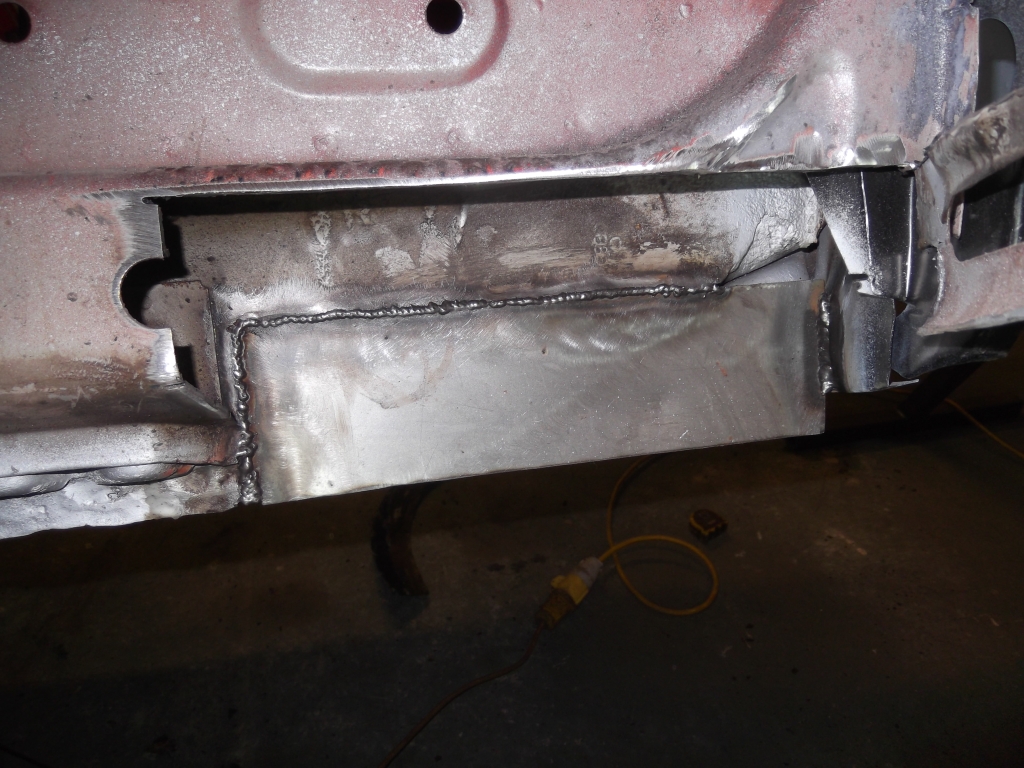
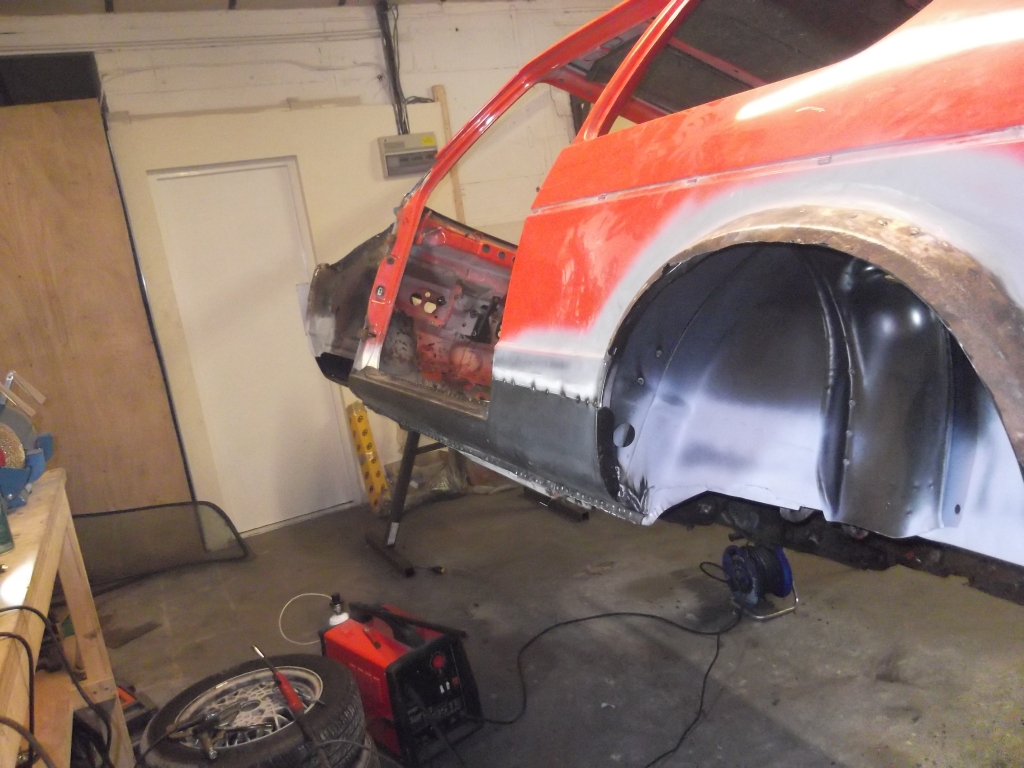
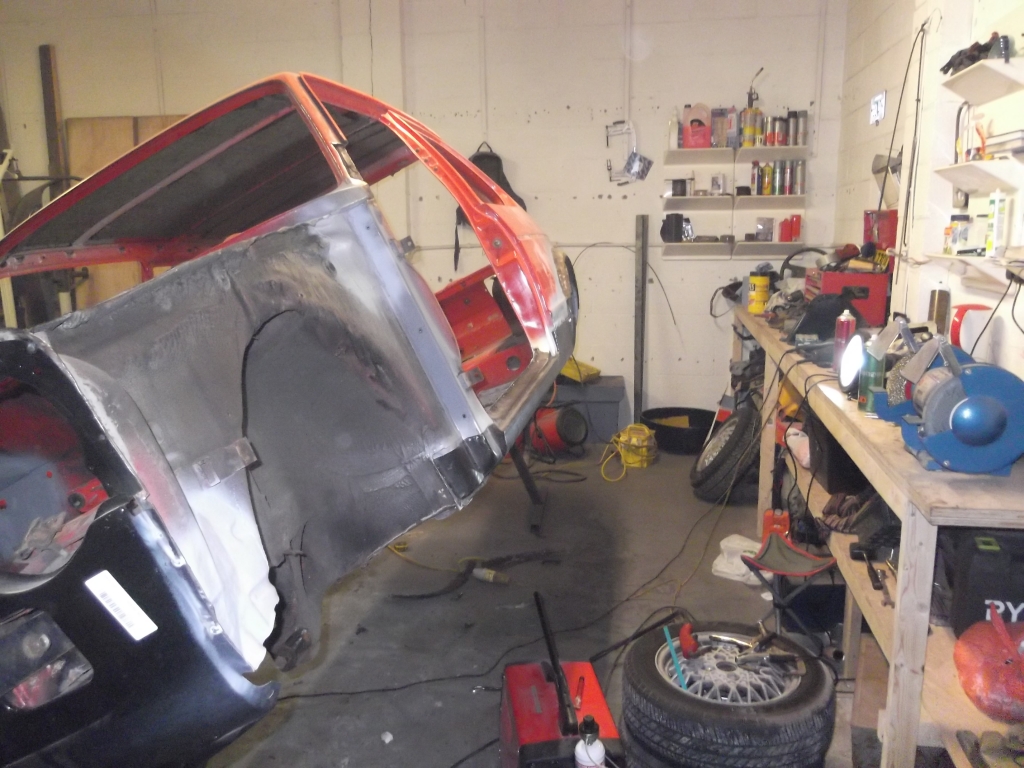
Spent the last couple of evenings prepping the wheel tub area ready for the new one to go back in. I first of all cleaned off any surface rust and treated with 'Locktite' rust treatment stuff and had a good general tidy up.
So tonight I went back cleaned all the 'Locktite' off and sprayed every surface with weldable primer, as I have with every part so far.
Here's some piccies….
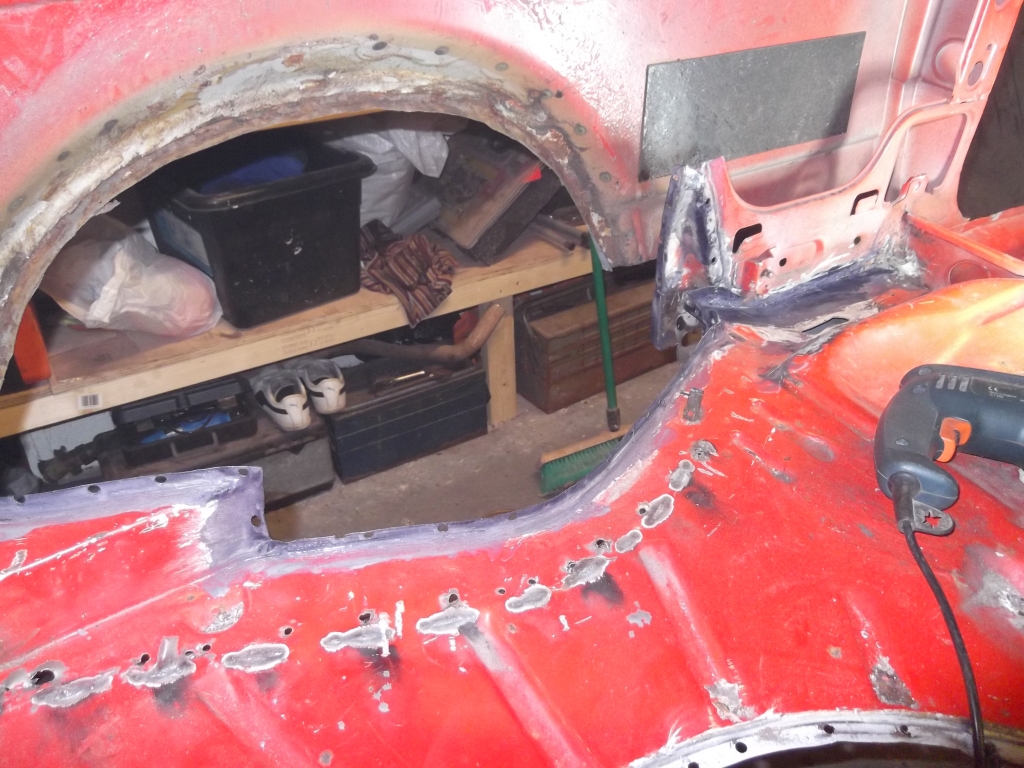
Tub in…
The tub lines up perfectly with the chassis repair I did earlier so I'm well pleased with the result!!

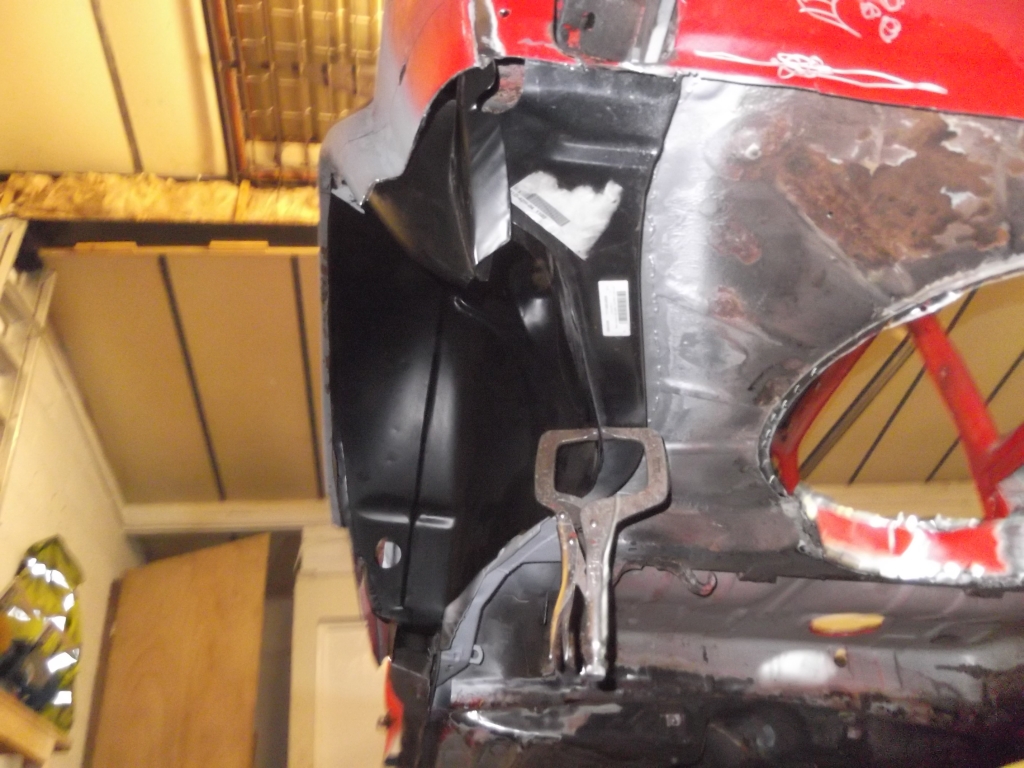
As it stands now, the tub is not welded in as I found a poor outer arch repair that needs sorting, someone has just welded a new arch over the top of the old rusty one

I'm just not sure whether to weld the tub in before I do the outer arch repair as I would prefer to be able to treat/paint both sides of the outer arch repair to help prevent any rot starting again. Thoughts anyone?
Anyway, that's as far as I got tonight, thanks for reading.
Andy.


Local Hero
Regards making it rust proof you can buy cavity wax in an aerosol form which comes with a long bendy tube and a metal nozzle. You can get this wax right into the joints as it starts off with a very thin viscosity before slowly becoming harder but never solid.
I used this as it has high temperature resistance: http://www.innotecworld.com/products/primers-coatings-paints.php?productid=237
Posted
Moderator
 ) I see exactly what you mean, this is exactly the type of info I need, being a novice.
 Just had a read up on that wax, looks like good stuff, cheers for the heads up.
Andy.
Posted

Local Hero

Andy
LINCOLNSHIRE REGION - https://www.facebook.com/groups/467122313360002/
1983 MK1 Golf GTI Campaign Model - Under (looooong) resto!
1962 Rover P4 80
2002 BMW 745i
2008 BMW Z4 2.5Si
LINCOLNSHIRE REGION - https://www.facebook.com/groups/467122313360002/
1983 MK1 Golf GTI Campaign Model - Under (looooong) resto!
1962 Rover P4 80
2002 BMW 745i
2008 BMW Z4 2.5Si
Posted
Local Hero
Hairyarse said
Nice work. I need to fit my o/s/r arch tub soon. I wasn't sure if I needed to make a jig up or not to ensure new one is in spot on position so as not to affect the top rear suspension mount point?
Not a bad shout neither. "Measure twice - cut once" the old man taught me!
Posted
Moderator
Hairyarse said
Nice work. I need to fit my o/s/r arch tub soon. I wasn't sure if I needed to make a jig up or not to ensure new one is in spot on position so as not to affect the top rear suspension mount point?
Thanks mate. That was my first thought too, I was going to make a jig but tbh, you cant go too far wrong(or at least I hope
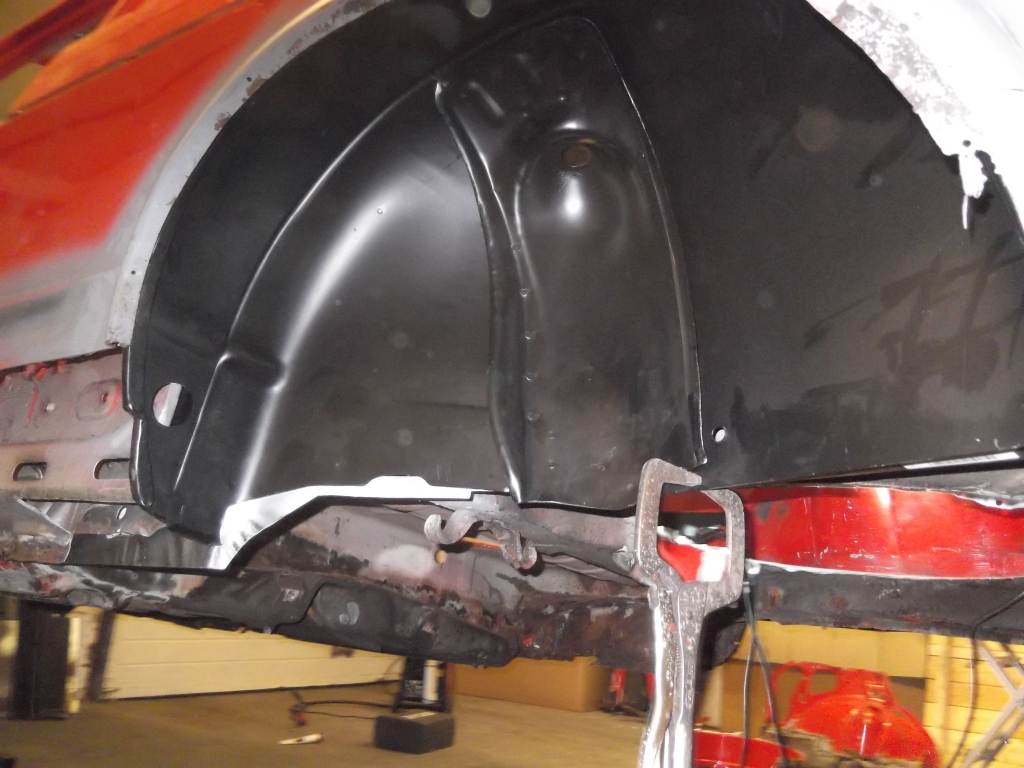
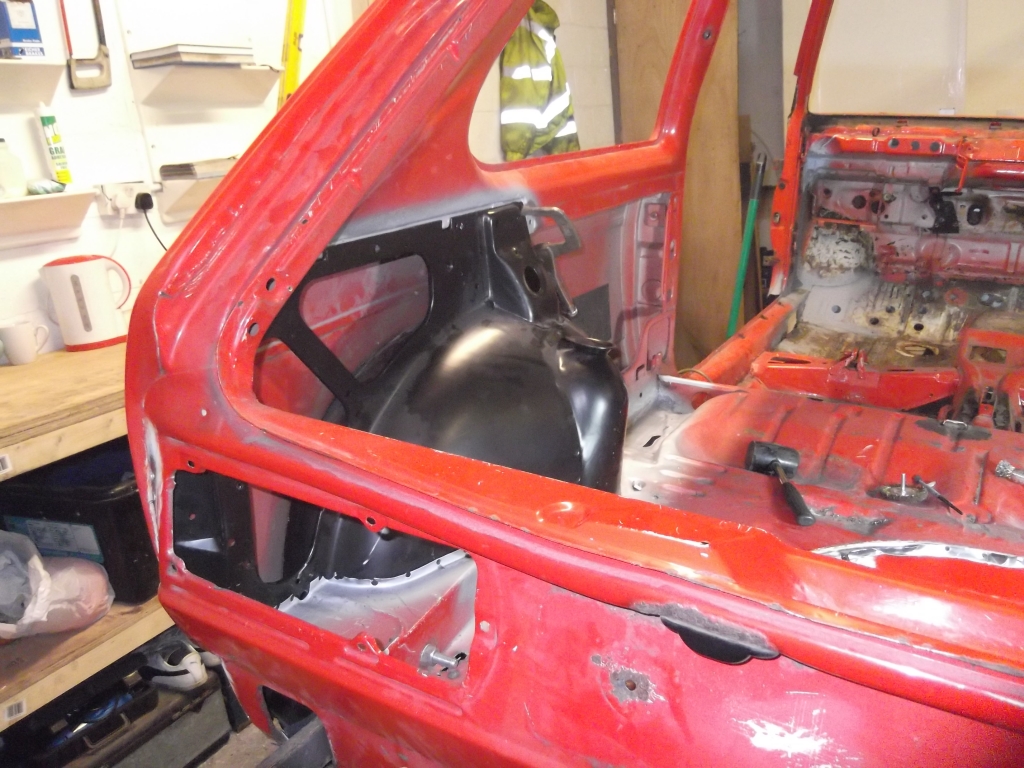
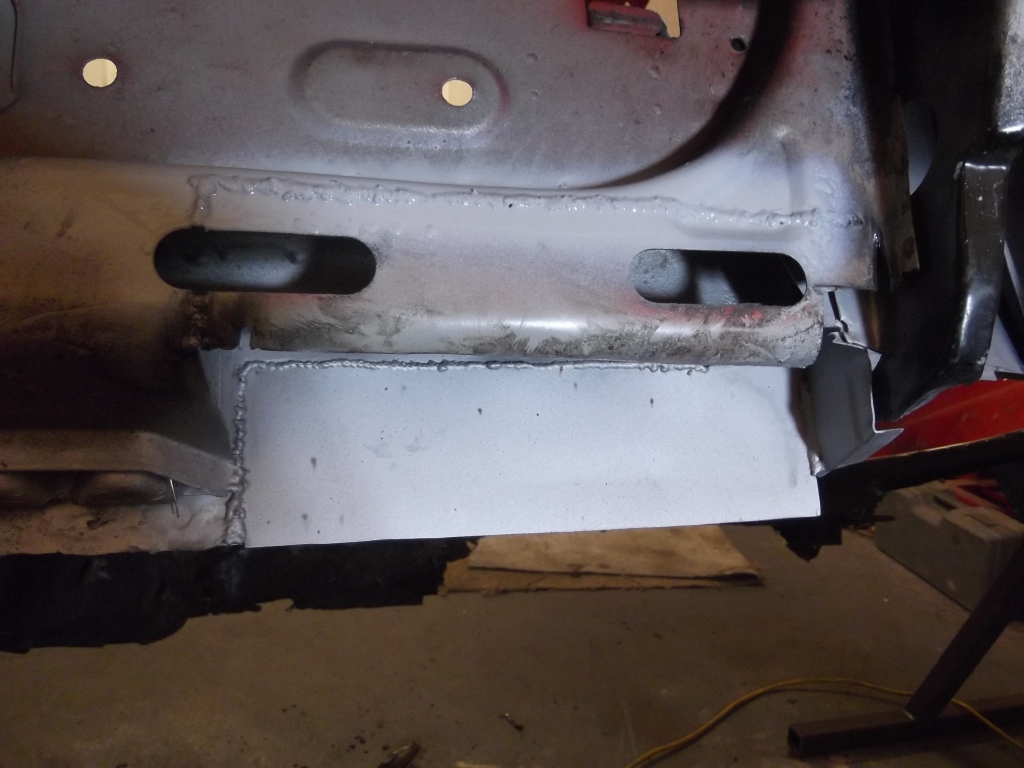
) . If you look at the pic above, looking through the boot, you can see the recess at the top of the tub and under the rear window, I just got a nice line along there and also lined the lips together on the chassis leg. Both the new tub and the old tub measure the same from the boot floor now.The tubs from Heritage are VAG parts, so the fit is really good too.
Hope this helps,
Andy.
Posted
Local Hero
Mine's from Heritage too so should be good fit.
Andy
LINCOLNSHIRE REGION - https://www.facebook.com/groups/467122313360002/
1983 MK1 Golf GTI Campaign Model - Under (looooong) resto!
1962 Rover P4 80
2002 BMW 745i
2008 BMW Z4 2.5Si
LINCOLNSHIRE REGION - https://www.facebook.com/groups/467122313360002/
1983 MK1 Golf GTI Campaign Model - Under (looooong) resto!
1962 Rover P4 80
2002 BMW 745i
2008 BMW Z4 2.5Si
Posted

Moderator


Posted
Moderator
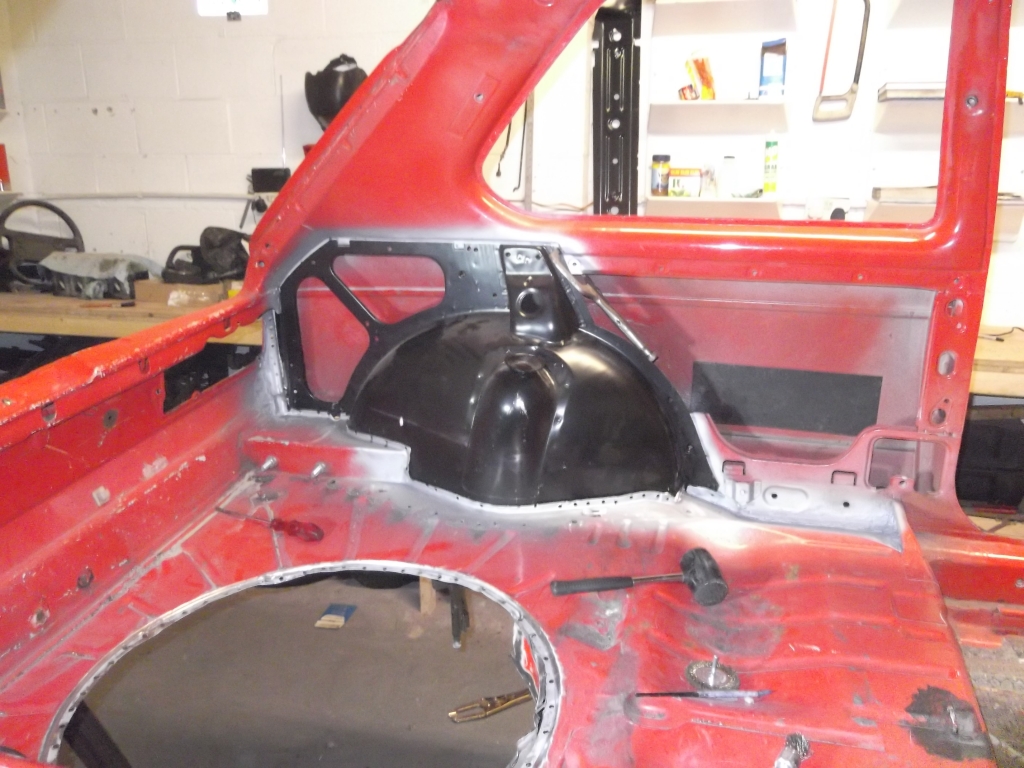
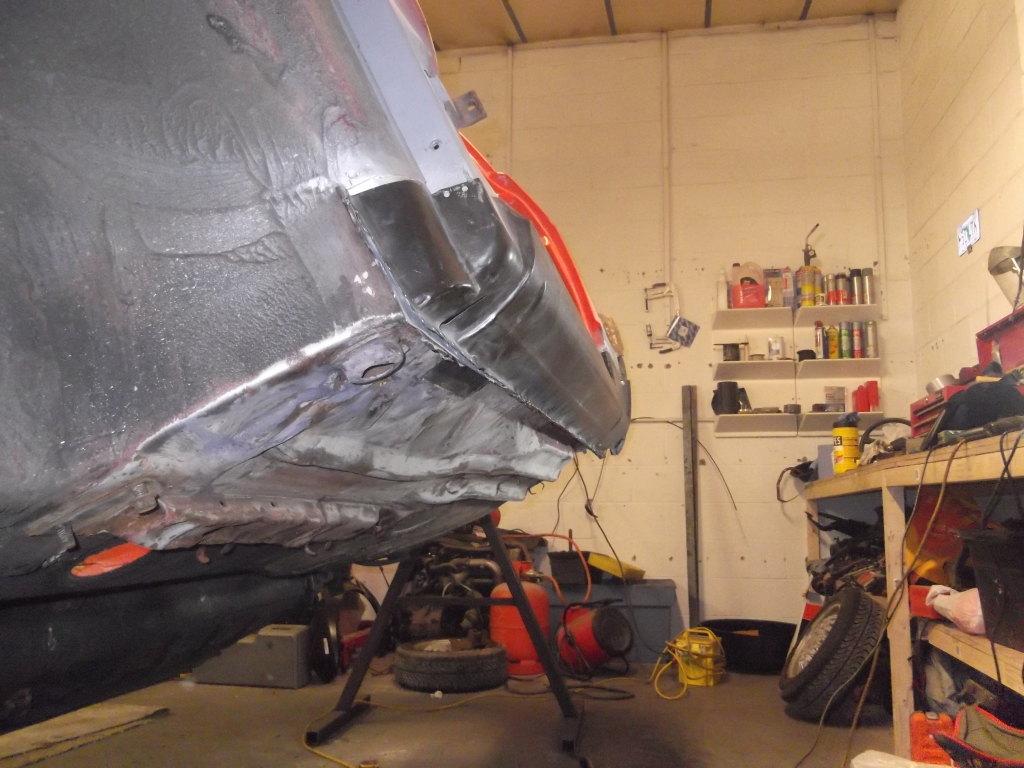
managed to get a bit more done on the car over the weekend/tonight. Wheel tub is just about welded in, just a little bit to finish off inside the car. So, I decided to get on with the n/s inner/outer sills.
I got some sills off my dad who has had some welding done on his car recently and had some panels left over.
First was a repair to the front inner sill.
Donor sill cut to size, reworked then fitted/welded.


Next was a repair at the rear of the sill. I had to cut away the inner sill to get to the axle mount from the outside to remove some rot, piccies…
cutting away inner sill

Rot removed
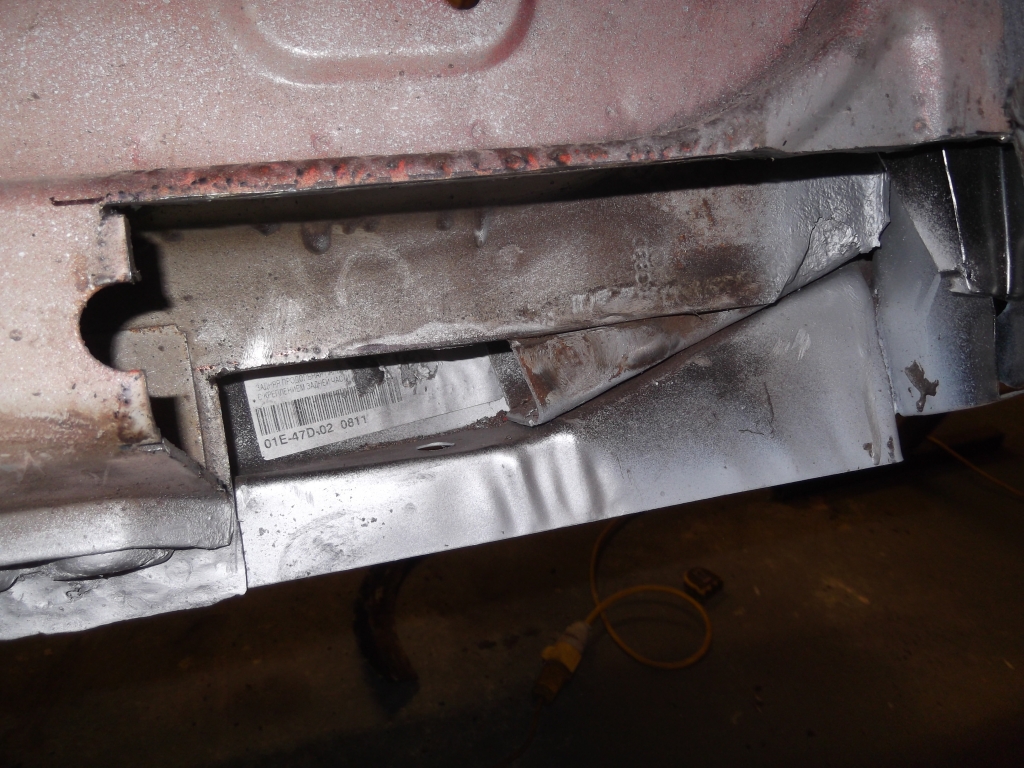
New piece in
top half of inner sill welded back in, the lower half was rotten too so had to make a new piece from the donor sills
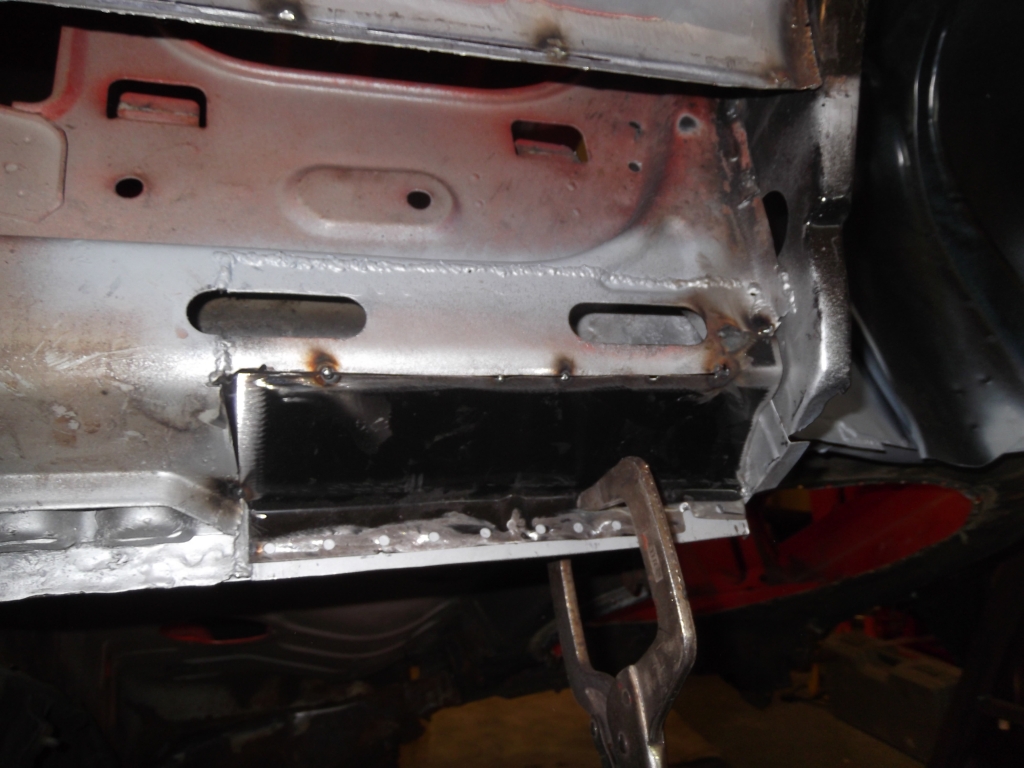
Inner sill finished off

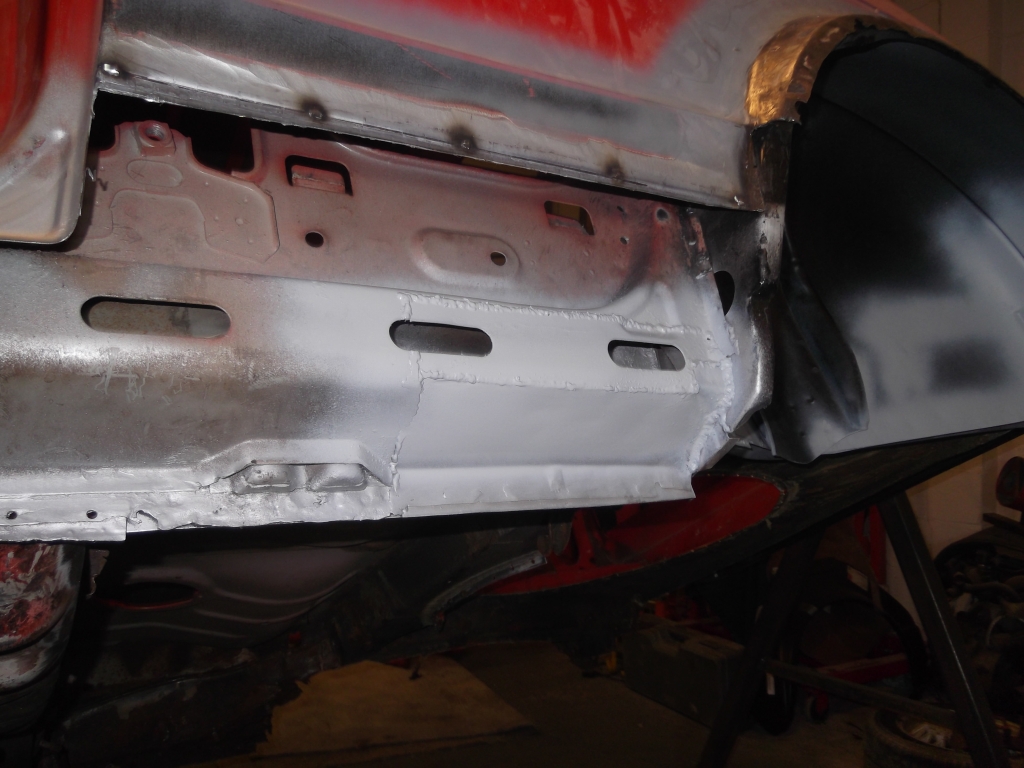
Next was to start the outer n/s sill, I'll go back tomorrow night and finish it off, I was starting to get hungry by this time lol.
Last few piccies…..
That's it for now, I'll add another update tomorrow night. I'm really starting to get in to this now, work is just getting in the way now lol.
Cheers, Andy.
Posted

Moderator
Posted
Moderator
borednow said
"Work getting in the way" I know that one mate
Well jealous of your skills
E
Just making it up as I go along mate
It's the first time I've worked on a car, so we'll wait and see how it turns out Andy.
Posted

Newbie

Local Hero
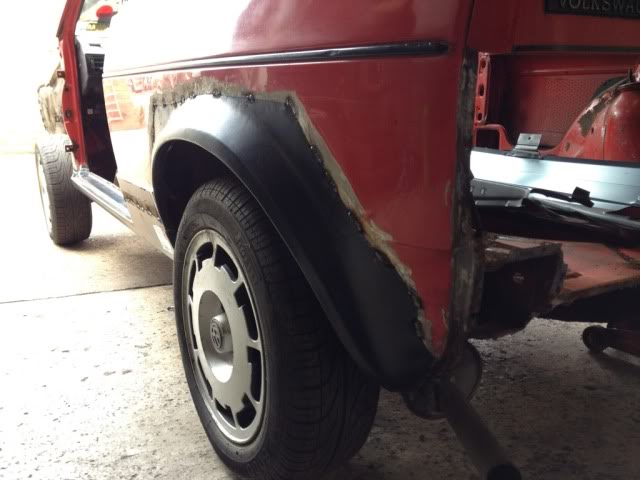
Cut your new outer arch panel to suit the car not the other way round. try and cut it 10 mm out from the quarter panel vertical along the arch flare. Just off the small radius. keeping the curve is important as it keeps the strength in the rear quarter while welding.
When you have your outer arch gripped in place and as you weld the arch to the existing rear quarter use 2 pairs of extended arm mole grips very close together (just enough to get your weld nozzle in between) to grip the two surfaces you are welding. Weld the spot just enough until you hear the penetration occur (just a tack weld really) and then walk away from it for 5 minutes leaving the grips in place. This will allow the heat to disperse from the weld before welding the next.
Your first weld can be at the top centre of the arch. Your next weld will be at the bottom of the arch and your next weld will be at the opposite end of the lower arch.
Once you have those 3 welds in place then weld half way in between the gaps. Again alternating between front and rear of the arch and leaving 5 minutes between each weld.
Once you are at the stage where you are having to grip on already welded tacks then grind those welds back but being careful not to introduce heat into the panel. Maybe grind one but weld the opposite side of the arch.
It takes nearly a day to weld an arch in this way but done properly it will need next to no filler which is what you want. The last one I did I lead loaded after and it didn't need any filler. - Just a bit of stopper.
Patience is key! - A day spent welding it properly will save a day trying to get the correct shape with filler!
 Last edit: by Yomp
Posted
Local Hero
Moderator
Good advice Yomp.
Posted
Moderator
smudger1980 said
Some nice work there Drummer, seems to be coming along nicely.
Good advice Yomp.
Cheers Smudger, yeah it's coming along well mate, apart from my welders regulator decided to break tonight
really enjoying it otherwise though!! Yomp said
Looking at your pictures I'd say your weld line wants to be where the last arch was welded on if my previous description was hard to follow!!
Cheers for the advice Yomp, much appreciated! I understand your description clearly mate, I take it we're talking butt welds here though, not lap joints?
Quick question Yomp, with regards to heat dispersement, does the same apply to the sill at the rear beneath the horizontal black stripe?
Wouldn't mind picking your brain about 'leading' too, it's something I've been thinking about.
Cheers, Andy.
Posted
Local Hero
Where the proposed cut line is of the rear quarter is it should still be a tight gap to your tub line if your new tub is in correctly. Leave the new arch about 10mm longer so you have an overlap of 10mm between the quarter cut and the arch panel so you have an overlap of the 2 panels effectively. You sandwich the new arch panel between the quarter and the tub.Melteddrummer said
Cheers for the advice Yomp, much appreciated! I understand your description clearly mate, I take it we're talking butt welds here though, not lap joints?
As I say it should be almost a tight fit to get the new arch to fit between the tub and the quarter. Your extended mole grips actually grip the tub, arch and quarter together.
(If you have a large gap and its more than the thickness of the new arch thickness then you may have to take it easy with the mole grips as these could cause distortion themselves.)
You do end up with a small step the thickness of the quarter panel metal and with grinding all the tacks back this step should be minimal and can be filled back towards the outer edge of the arch over a decent feathered distance.
When you say butt weld, you mean butting the 2 panels together? If it is then you'll just be chasing blow holes and heat it up.
Yes, distortion is even more of an issue in this area as the panel is flat. Again tack once and walk away! I would joggle that joint with an overlap to begin with though.Melteddrummer said
Quick question Yomp, with regards to heat dispersement, does the same apply to the sill at the rear beneath the horizontal black stripe?
Here's a picture of how not to do it!
Its on the arch but you can make out the panel is rippled to F**k under the trim line!
Leading is a forgotton art with modern plastics.Melteddrummer said
Wouldn't mind picking your brain about 'leading' too, it's something I've been thinking about.
You can buy a basic lead loading kit from Frosts which gives you tallow, flux a couple of sticks. You need the proper course files to file it and a blow lamp.
The hard bit is trying to lead load vertical panels as if you get it too warm it just runs off onto the floor! Although with your jig you can turn a vertical panel to a horizontal panel.
The beauty of lead is its like solder and gets between the join and seals it. It also has more flex than plastic filler and won't crack or sink so no flatting marks 6 months after painting.
It does have its limitations in that you have to be really careful using where distortion could occur from the heat. ie large flat panels.
You need a good selection of rough files as well.
Last edit: by Yomp
There are too many online users to list.