


Helios Blue Campaign

Posted

Moderator


Helios Blue Campaign
Cheers Hugh.
www.vwgolf1.com - vw golf parts and genuine accessories!

www.vwgolf1.com - vw golf parts and genuine accessories!
Posted
Old Timer

Engine is looking a lot more OEM then when I had it ! Engine is a minter though, am sure it'll put a smile on your face, esp. with that monster head. Just remember to check throttle body and inlet manifold gaskets against the metal before fitting and trim with scalpel where necessary. I do remember having to grind out a fair amount from the inlet manifold ports so that it matched the head ports correctly. Last thing you want is a gasket overhanging and blocking flow. As said, that head is a monster - TSRs very best from when TSR were 'proper' TSR !
All the best,
Mark
Posted
Settled In

Shughy said
Loving this project thread. Great detail and gonna be some motor when finished. If you want sell it… look me up! Top work…
Thanks!

Posted
Settled In
Thanks for the advice on the gasket. I did try to get hold of one not so long ago but was told that they had gone obsolete. Shall I just use gasket paper and trim to correct size/shape?
Cant wait to get her up and running!

Posted
Old Timer
All the best with it
Mark
Posted
Old Timer
Posted
Settled In
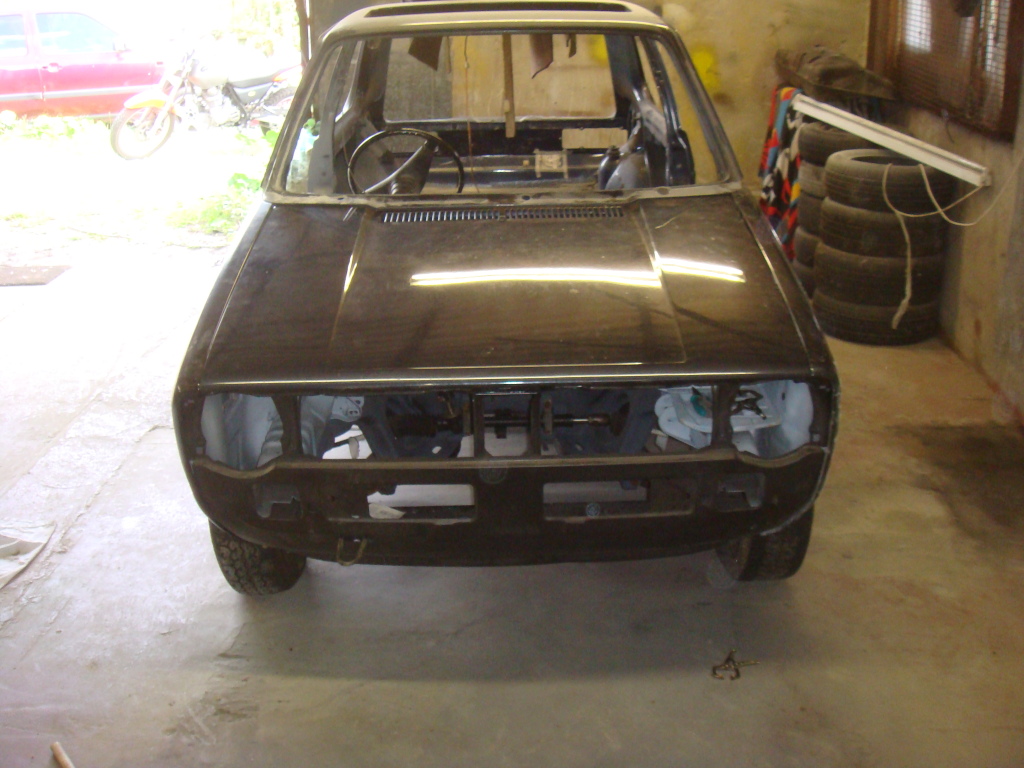
Managed to get a bit done over the last week, thought Id try and get the rest of the bodywork done.
First started to tackle this horrible hole…

First I cut the rust away and gave it a quick coat of weld through primer…

This is the section im going to use to help repair it…
The section that I need all cut out…
Now to weld it in!


After I ground all the welds back, I applied the first skim of filler…

And did a bit of sanding…

Still need to finish this off, it need a bit more of filler but I got bored of sanding so I moved onto something else. Ill come back to it later!
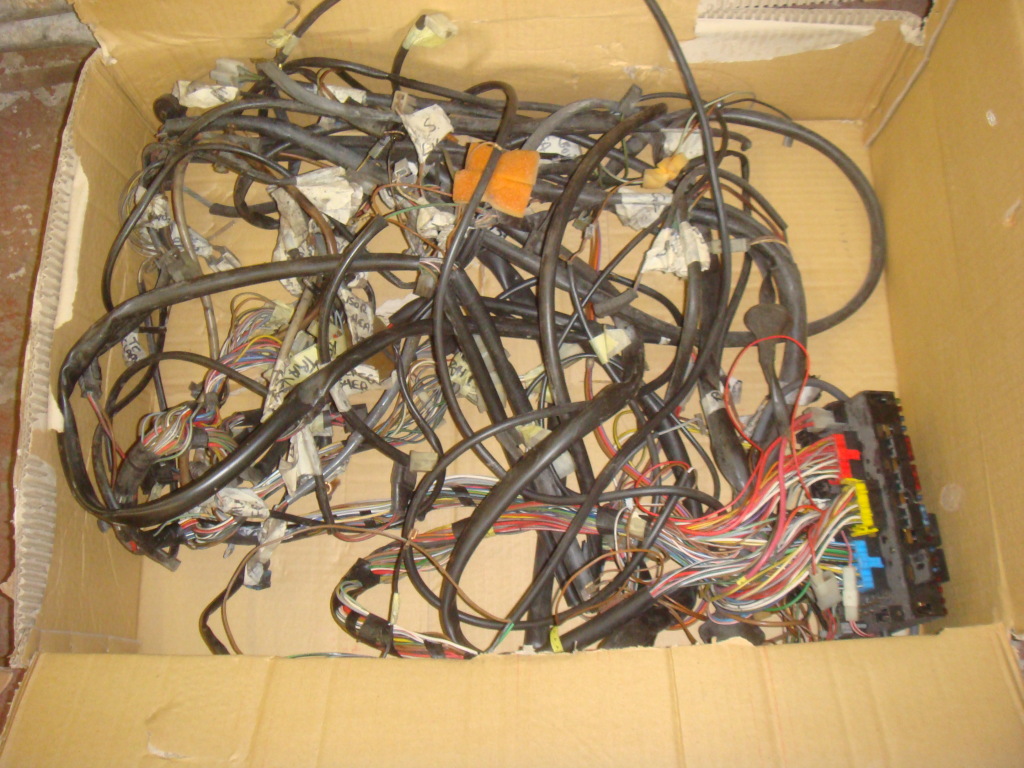
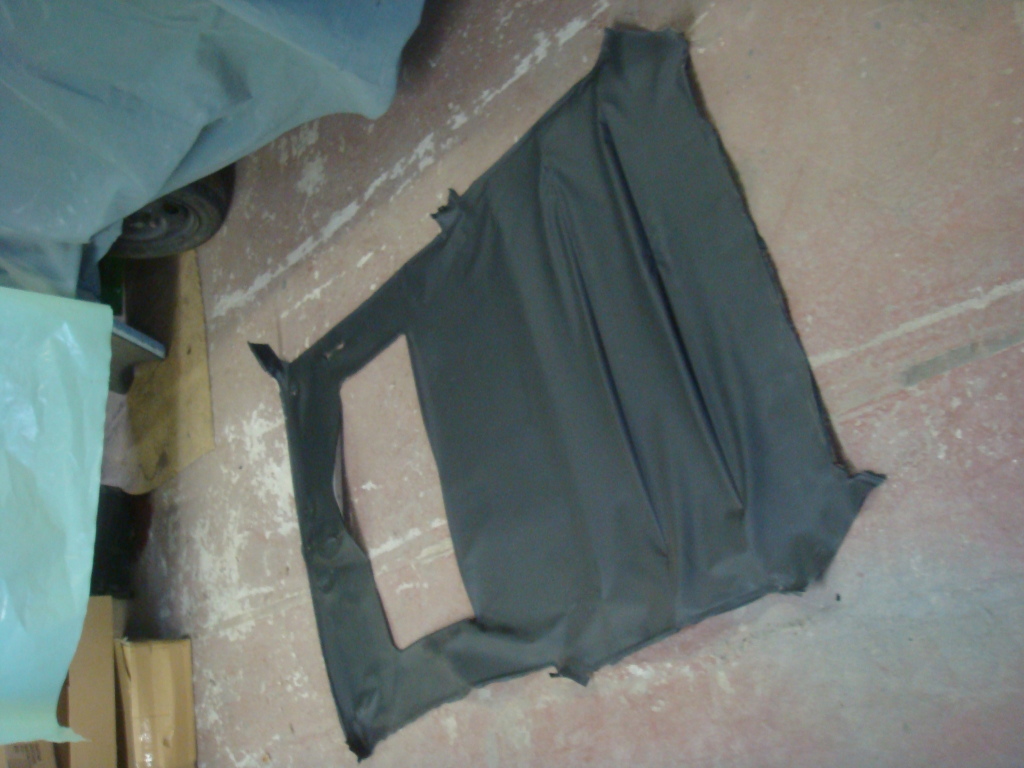
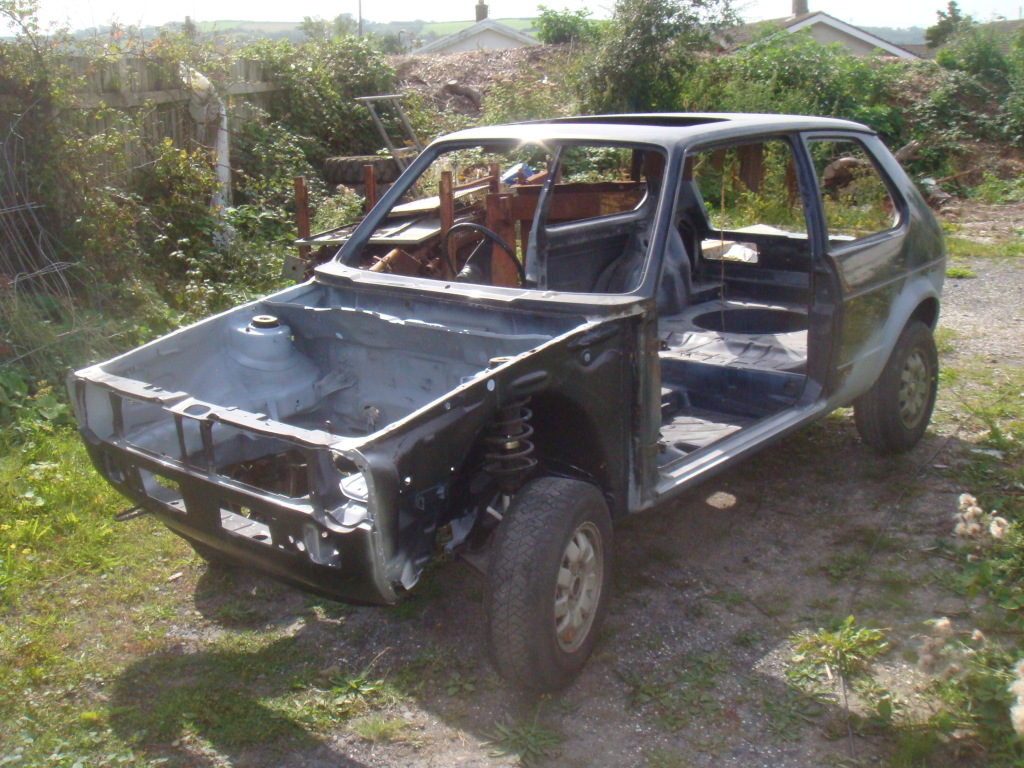
I decided to strip out the rest of the inside, the loom, rest of the sound deadening and the headliner.
Big mess of wires!
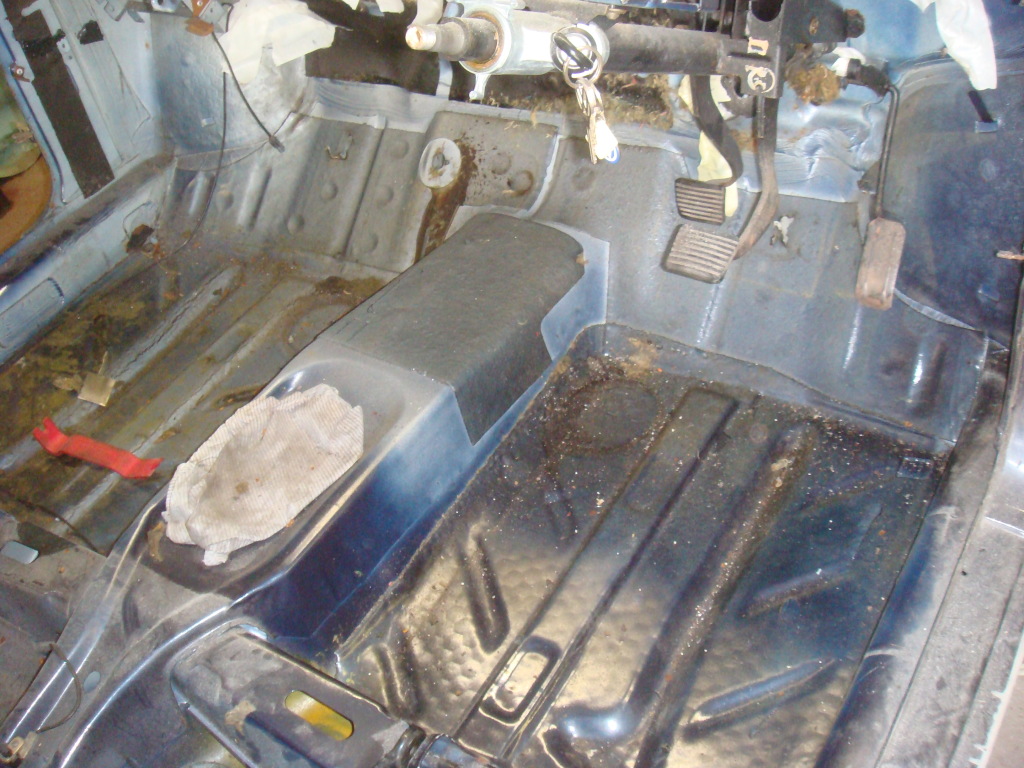
Floor looks pretty good, didnt find any more holes

Headliner out. This took a while as I want to use it again as its in mint condition. Well thats the plan anyway, see how well it goes when I try putting it back in!! 8O

Unfortunately I found this when I took the headliner out
 Luckily its only a bit of surface rust and looks alot worse than it is!
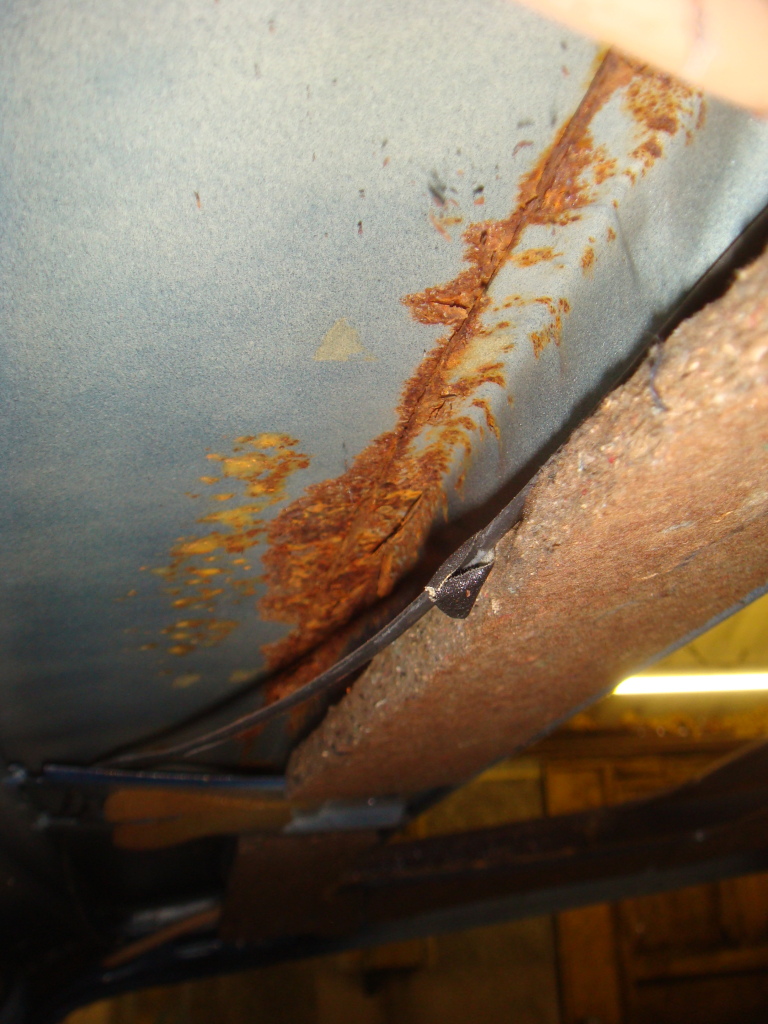
Ill come back to this again later!
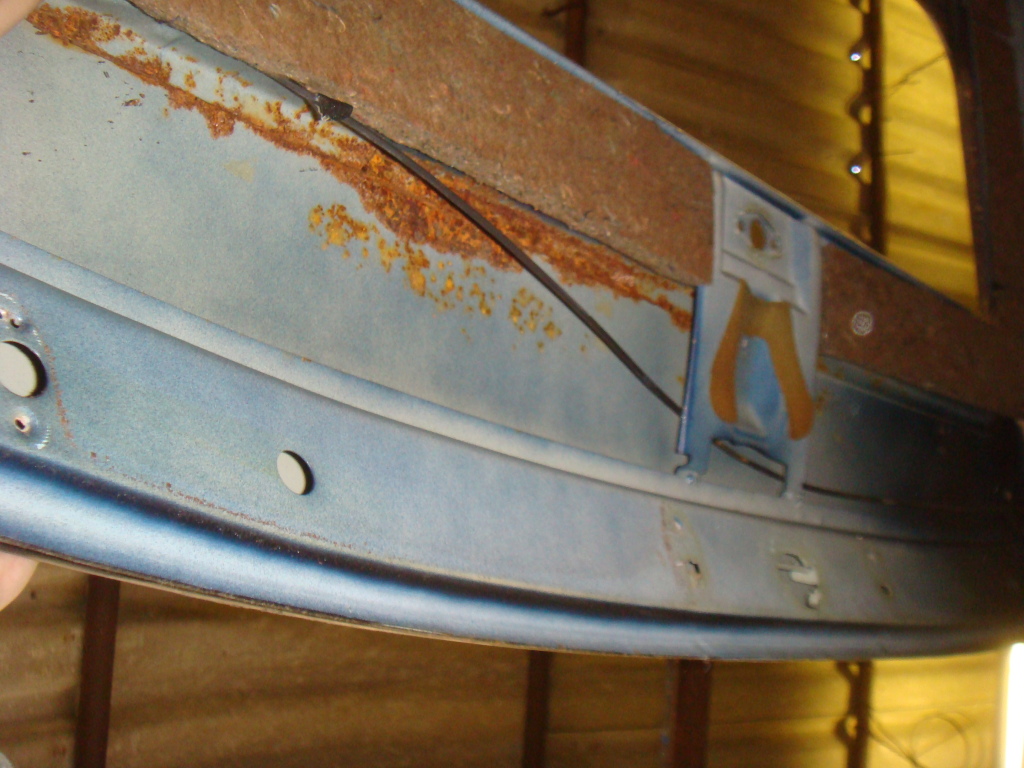
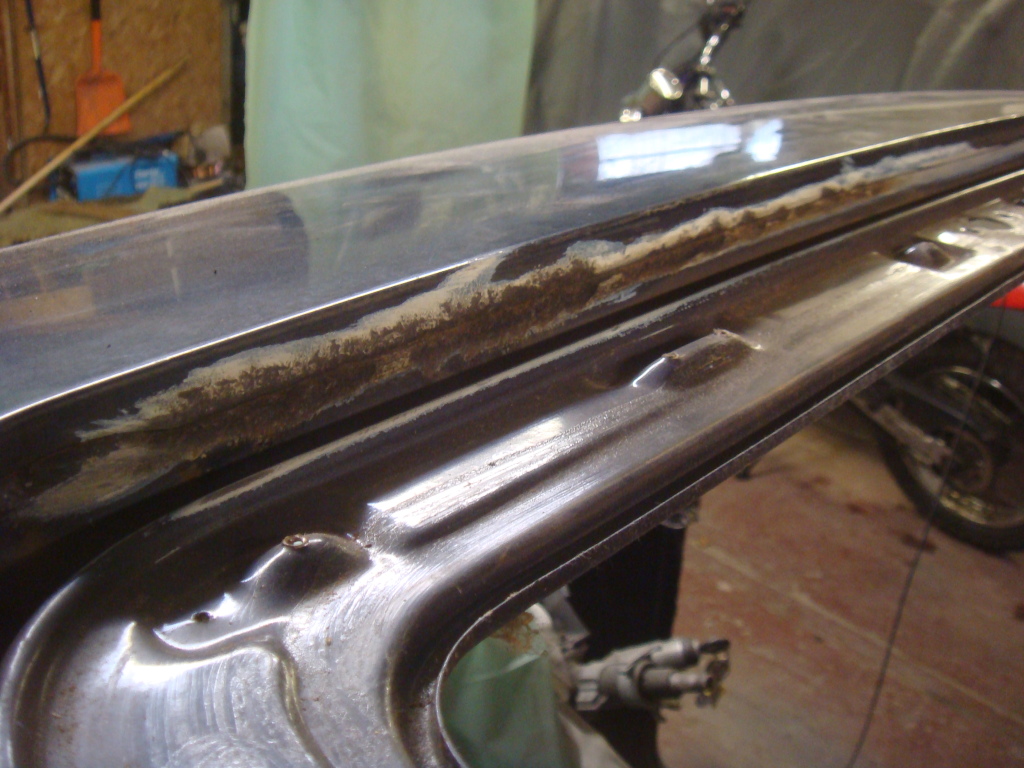
MOved onto sorting some bubbling on the roof…


Ground all back, treated with rust cure and then a bit of filler…
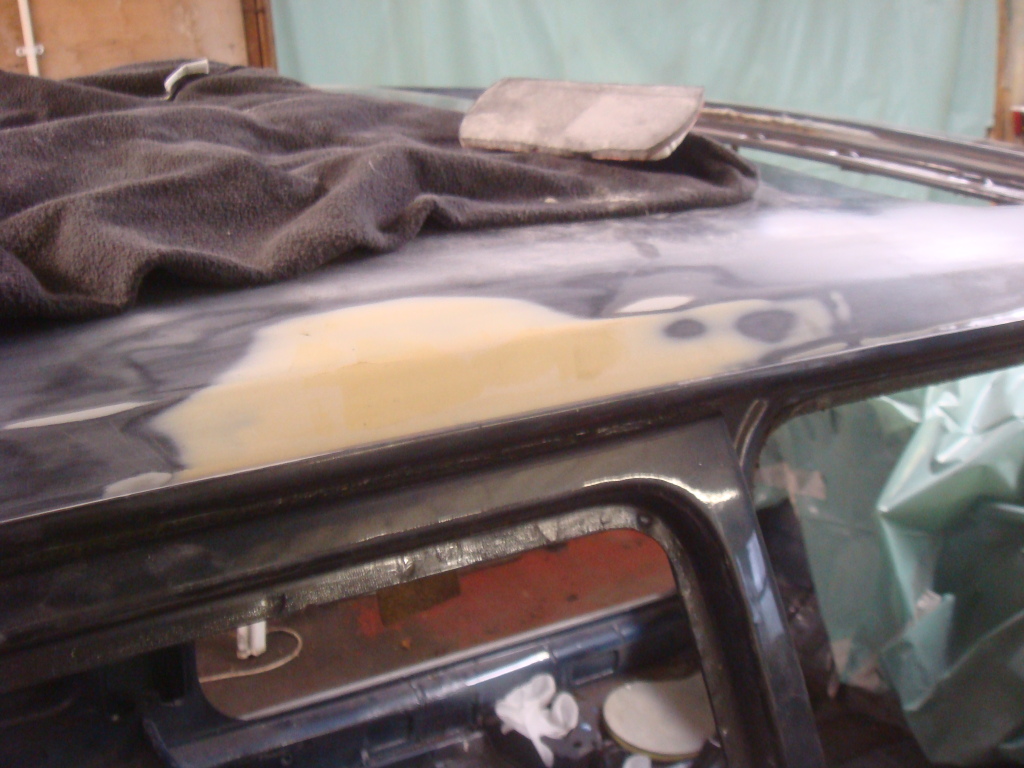
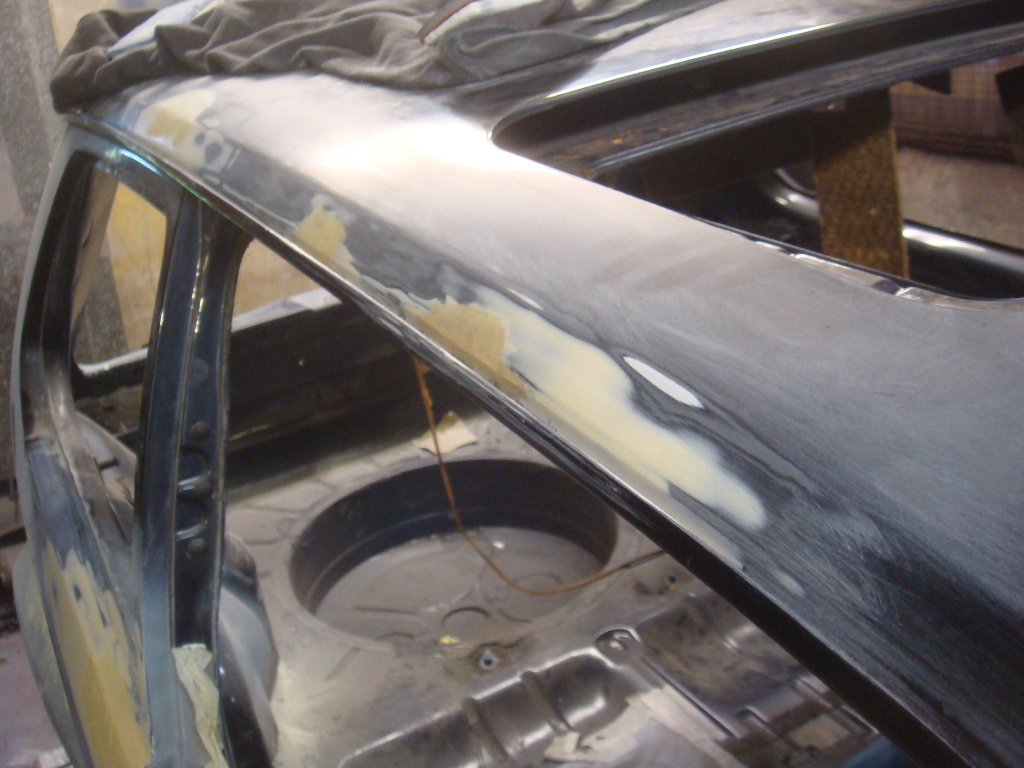
Will need to finish this off too, got bored of sanding and filling again!
I then finally started to grind back a bit of bubbling around the sunroof…


Again, luckily the rust wasnt too bad. No need to cut any metal away here!
Thats as far as I got this week, i got bored of grinding, sanding and filling and the rain here in sunny South Wales was getting to heavy it started raining inside my unit! 8O
Hopefully should have another update next week!
Posted

Old Timer
Posted
Settled In
Butleraw '83 Schwarz Black GTI

Posted
Settled In
Wish I'd kept mine more original. Specially in the engine department.
Definitely got the best paint colour there :wink:
'83 MK1 Golf GTI
'08 Audi S3 2.0 16v TFSI
'08 Audi S3 2.0 16v TFSI
Posted

Settled In
Good luck and keep up the good work. :punk:
MK1CRAZY YAHOOOOO!!!!!
Posted
Settled In
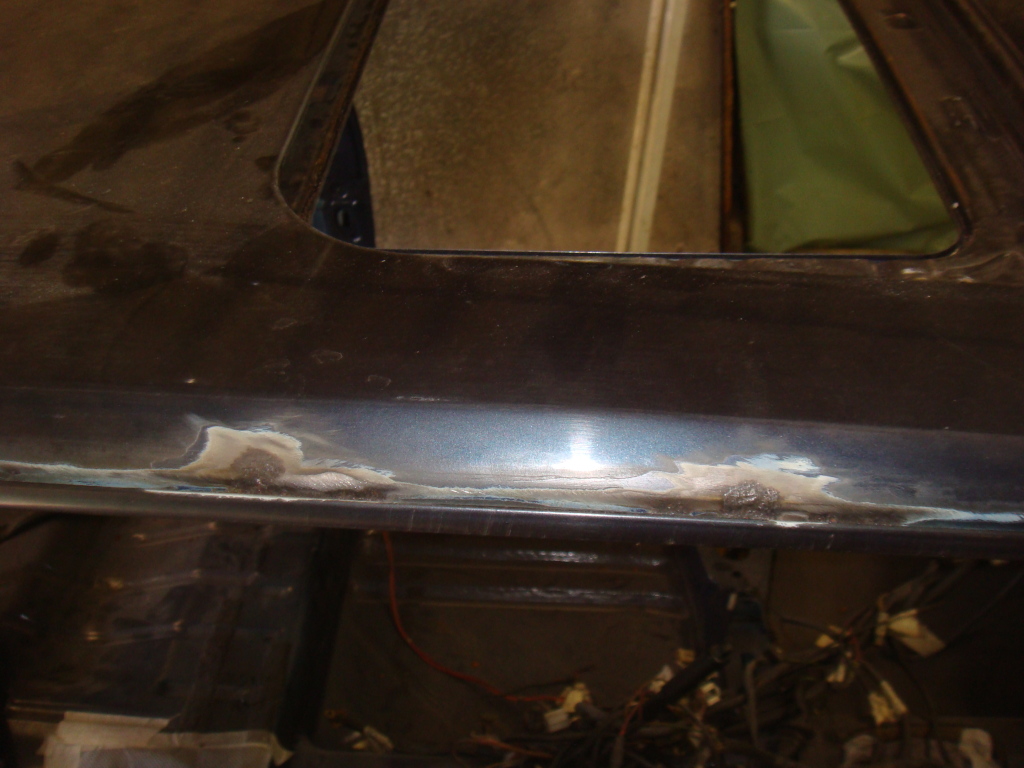
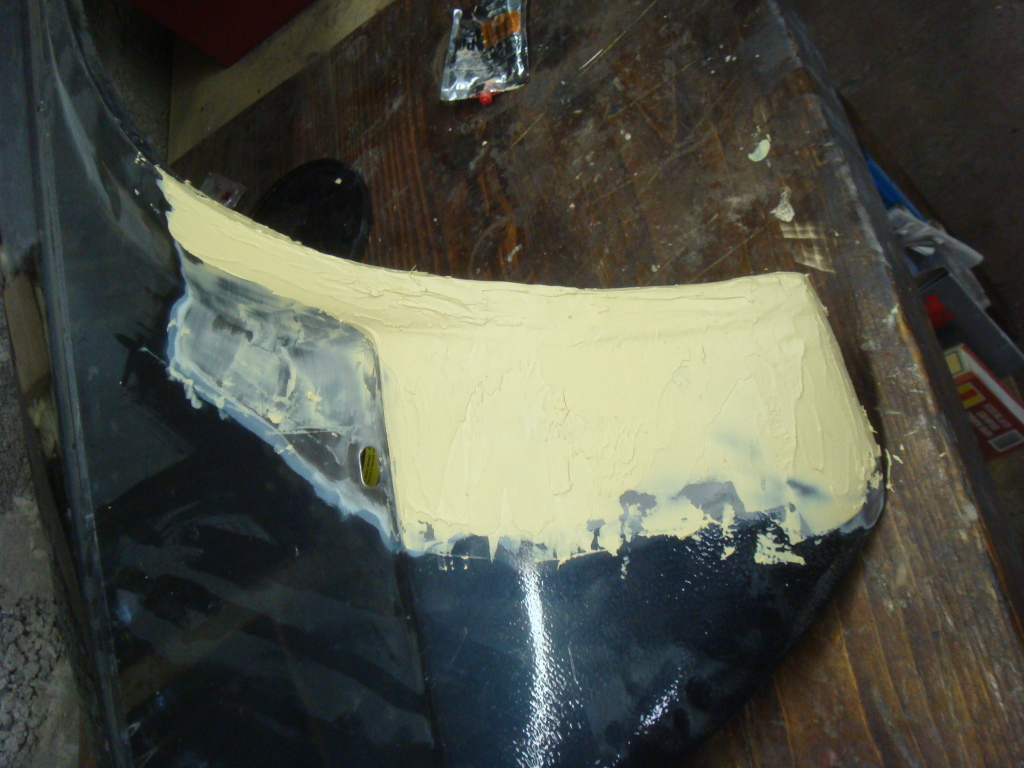
Heres the finished result on the rear window bit…


Thank god thats over! Soul destroying work filling is.
Heres some of the roof finished..


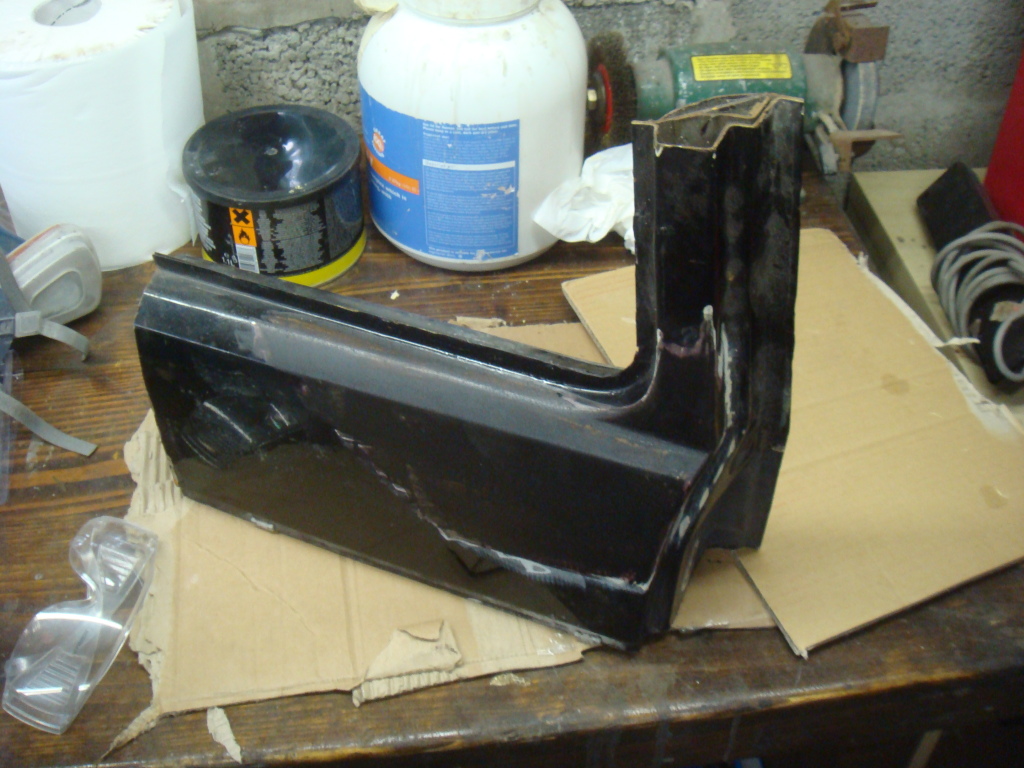
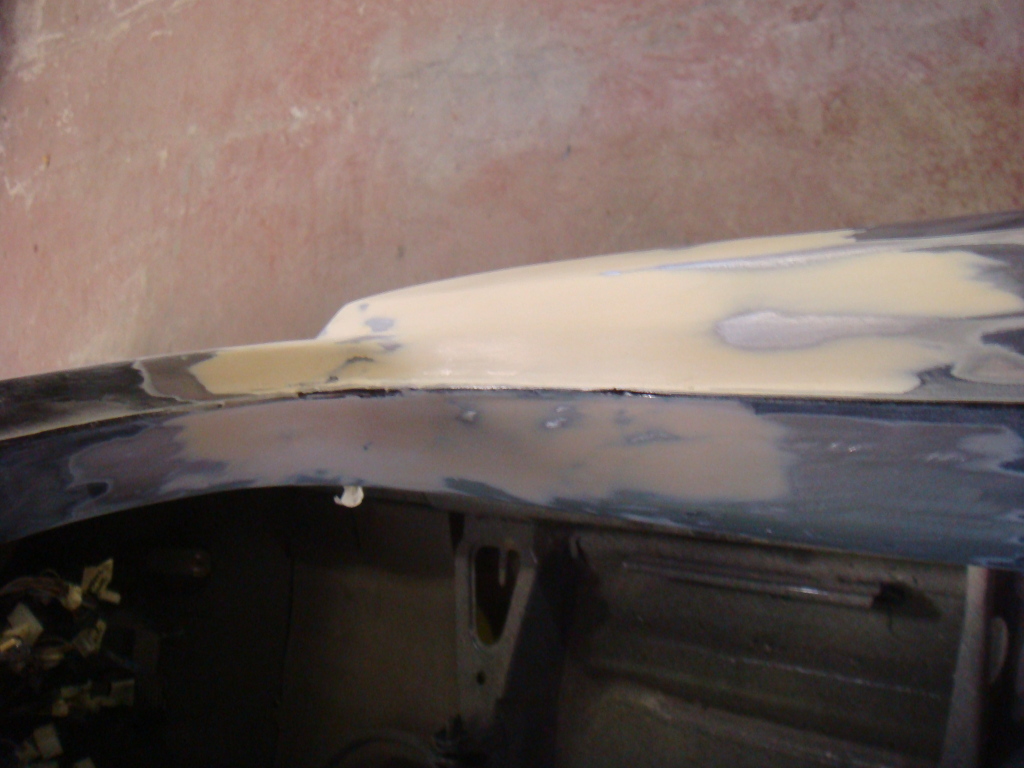
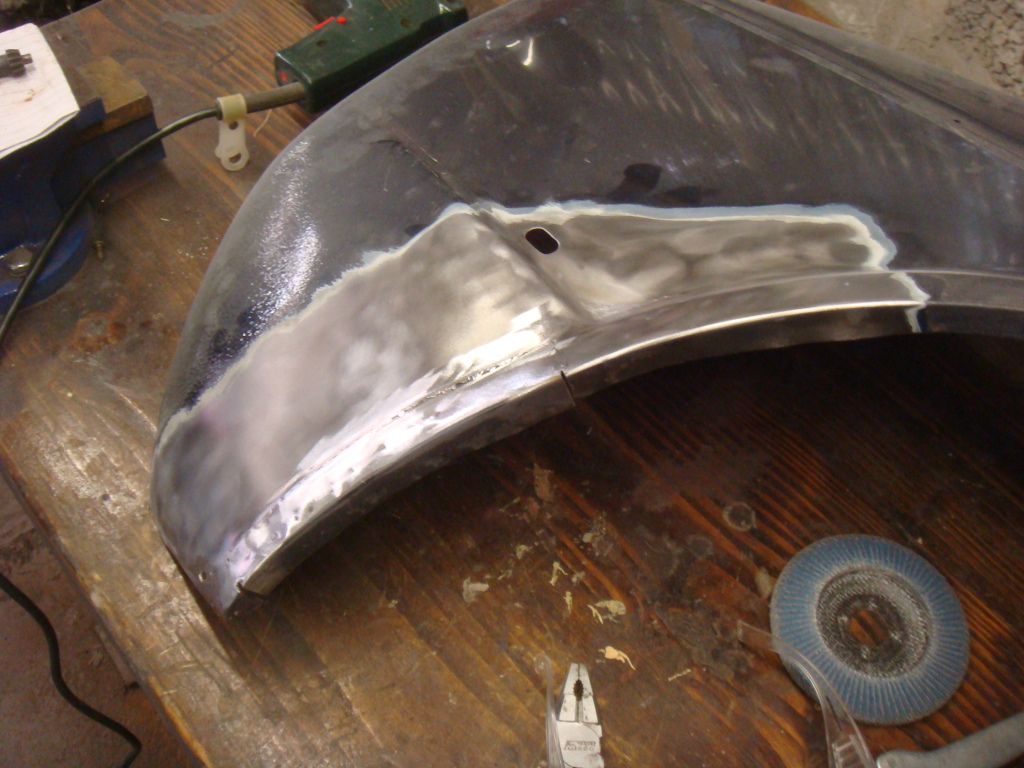
After that, I then moved onto repairing one of the wings. I wanted to use genuine replacements and managed to find one on ebay a while back for the drivers side for £77. Not bad for a brand new genuine VW wing! I missed out on the passenger side one though, I think it went for £150 in the end!! Everybody seemed to be after a passenger side wing I guess!
Anyway, as there was only minor rust to the wing, and it fit like a glove I figured Id be better off repairing this one than taking the risk of a pattern wing.
Heres how it went…
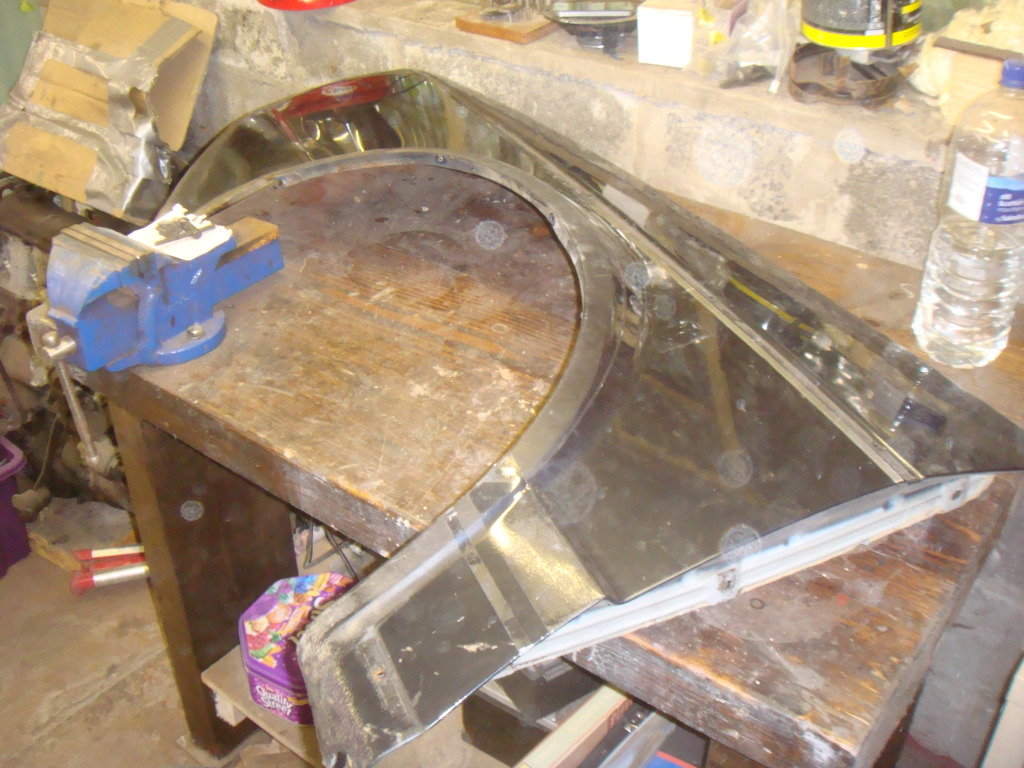
The damage..


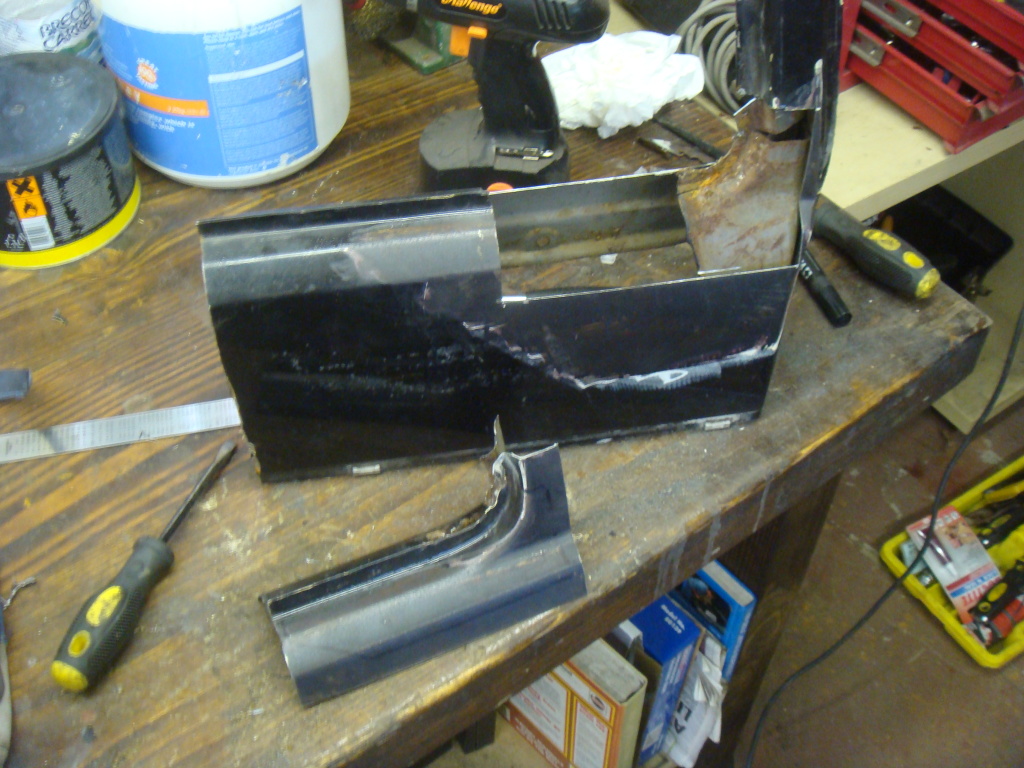
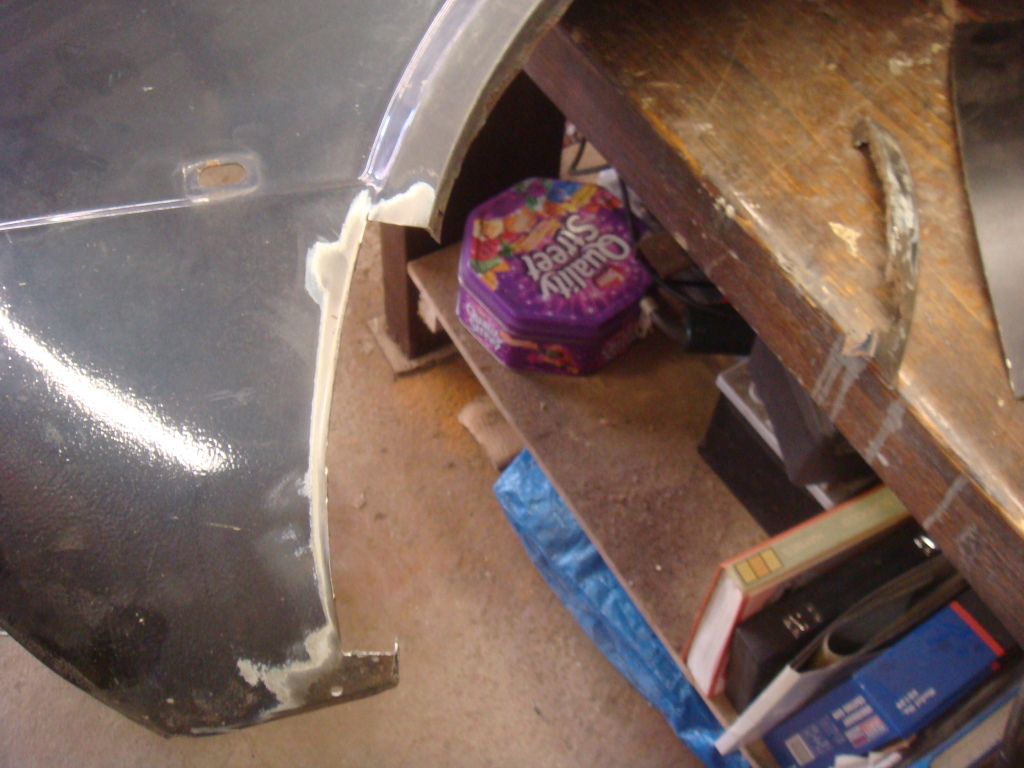
Ground back to reveal how much to cut away…

Rusty section removed…
I then used a section of a rear arch panel that I had left over from when I repaired the lower sections of rear arches…

Section fashioned into correct shape (more or less :roll: )

Held in place…
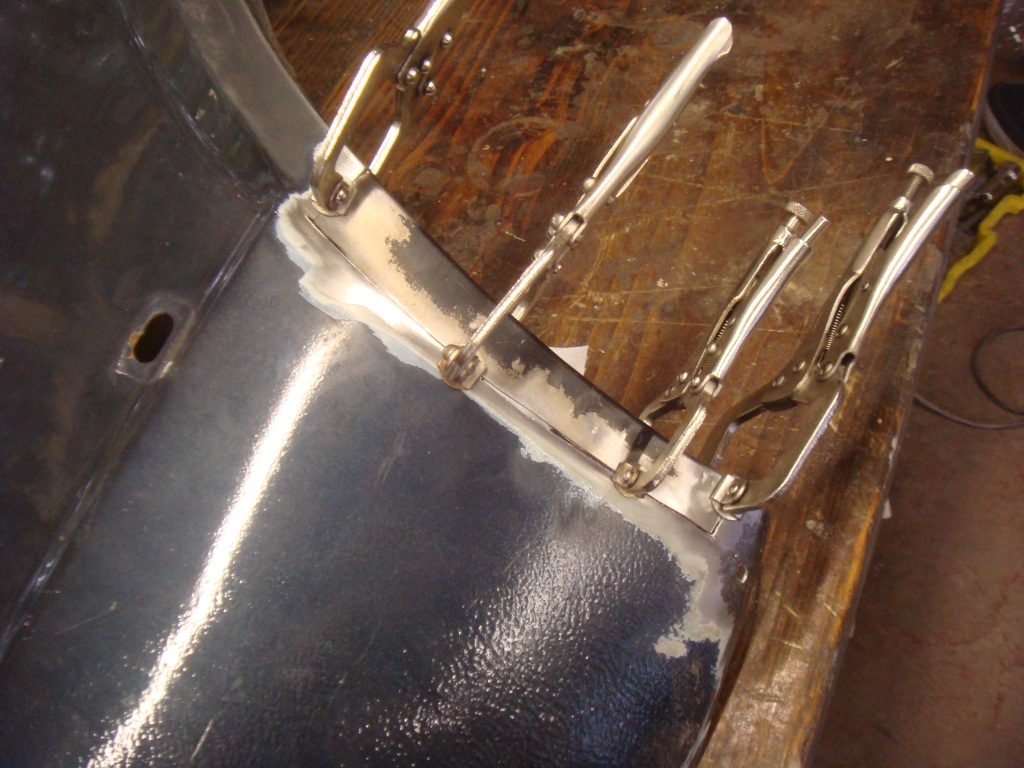
And then tacked in…

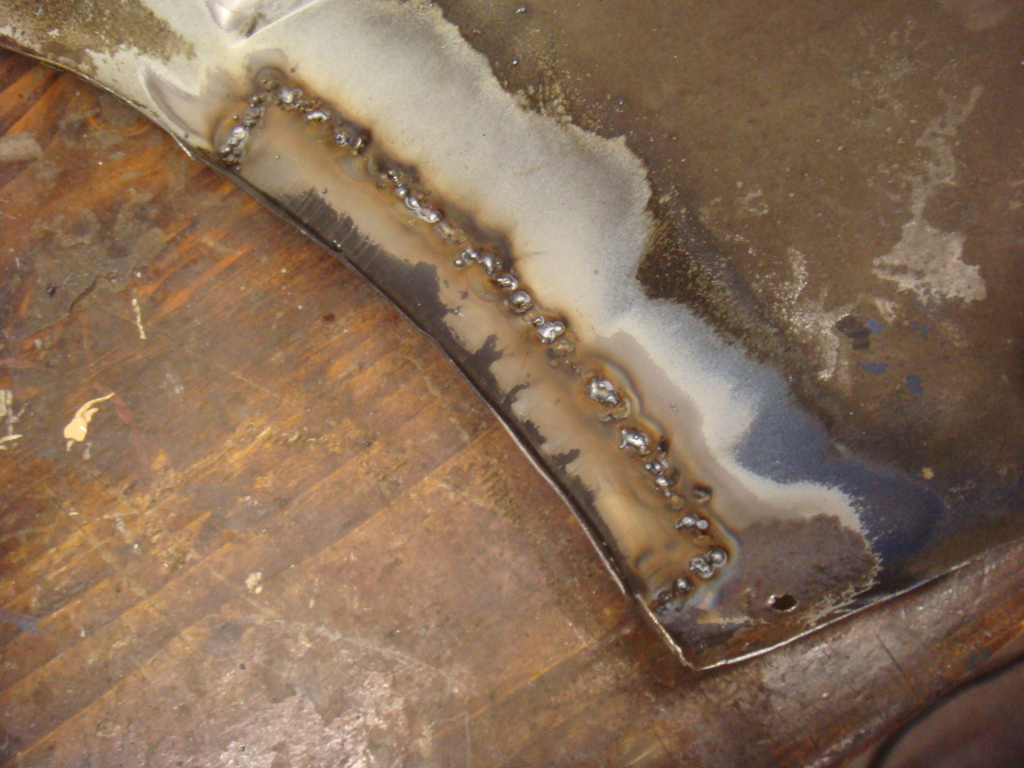
Just for extra strength, and as you cant see it I welded up the back too. I always find it difficult not to grind my welds too thin when grinding them back, at least with this technique I have a little more margin for error!
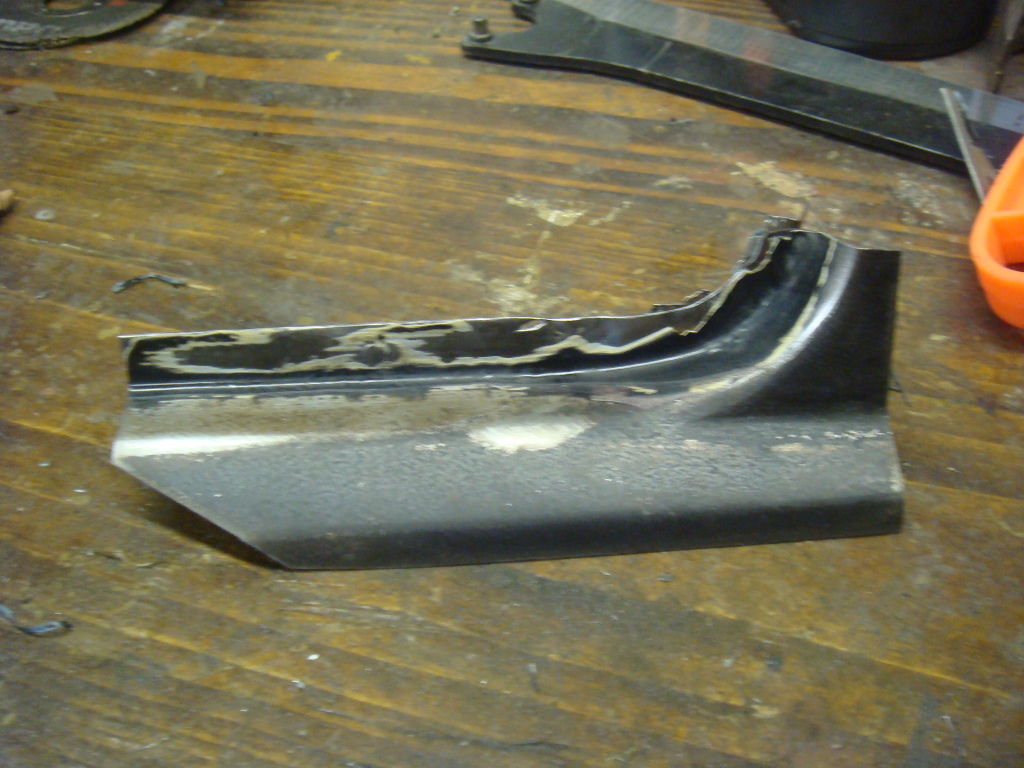
Ground back…

Skim of filler…


Then some primer to finish!
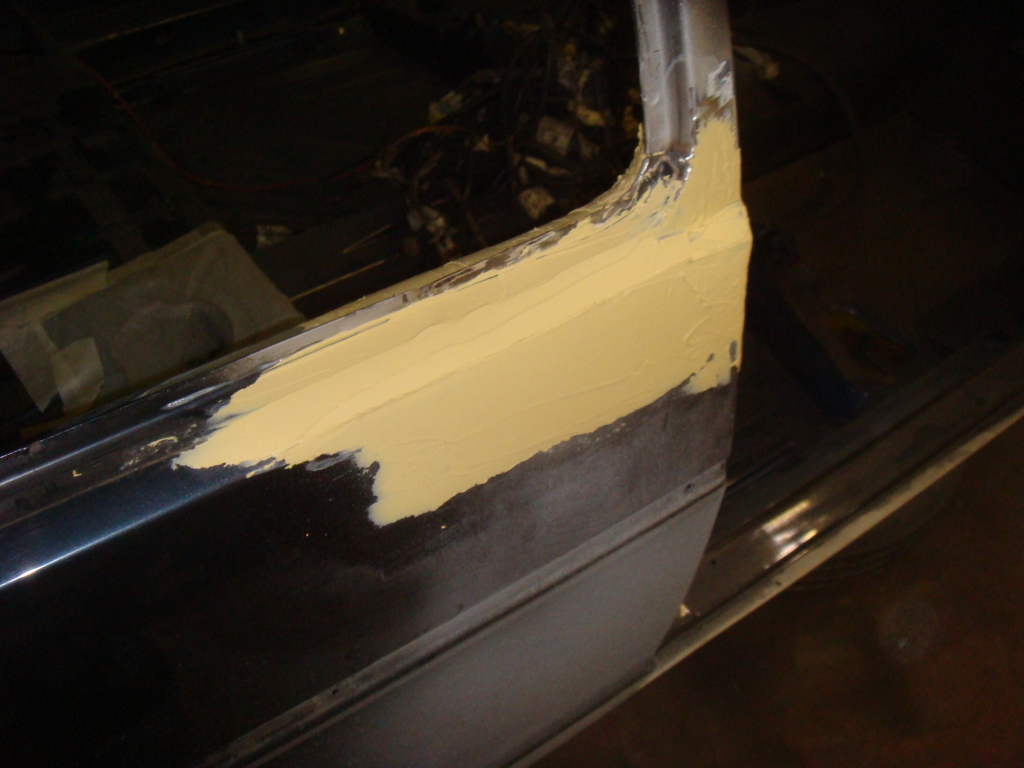
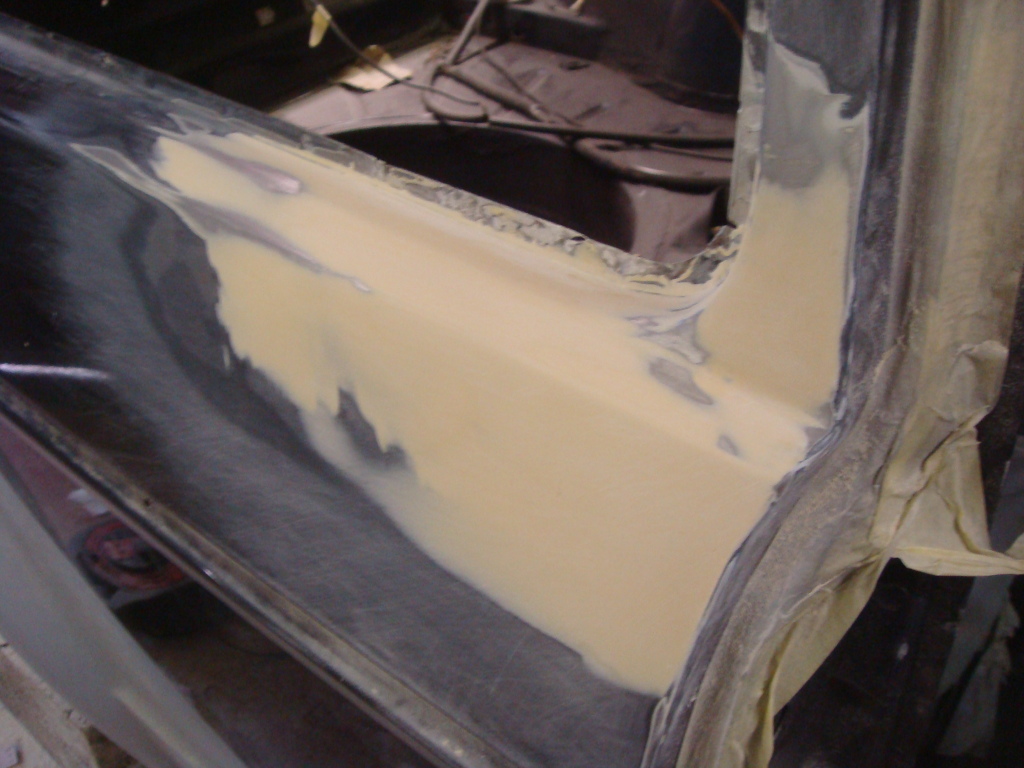
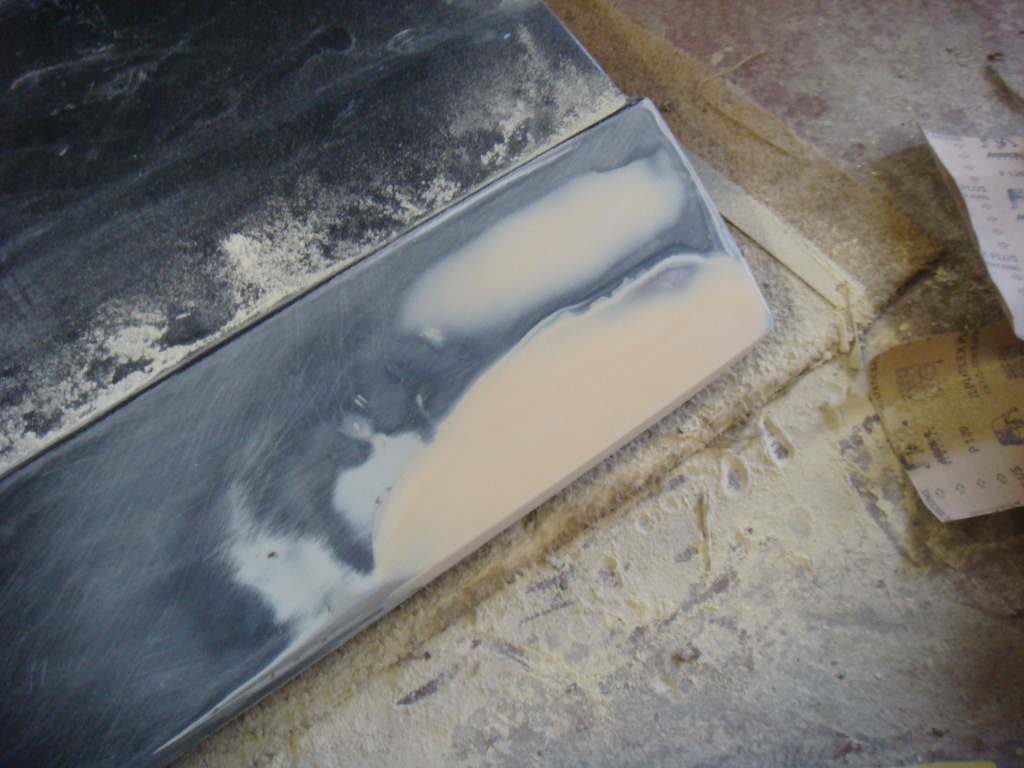
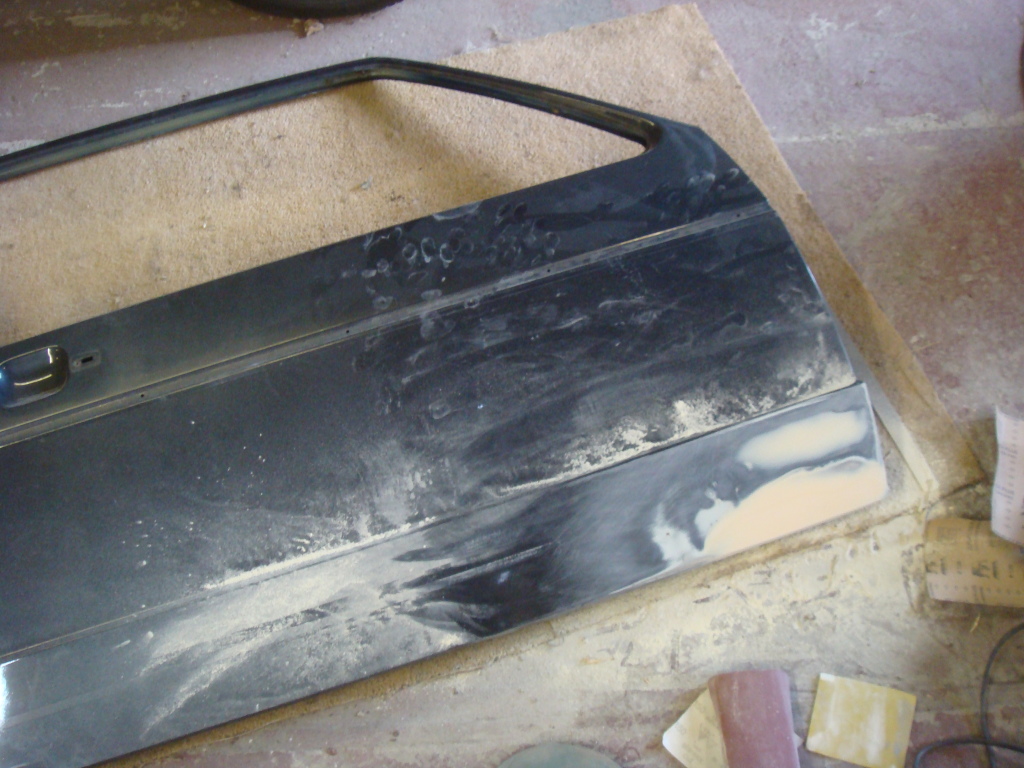
I then moved onto repairing some rust on the bottom of one of the doors, I ground it all back then just gave a skim of filler, sanded it flat followed by some primer…
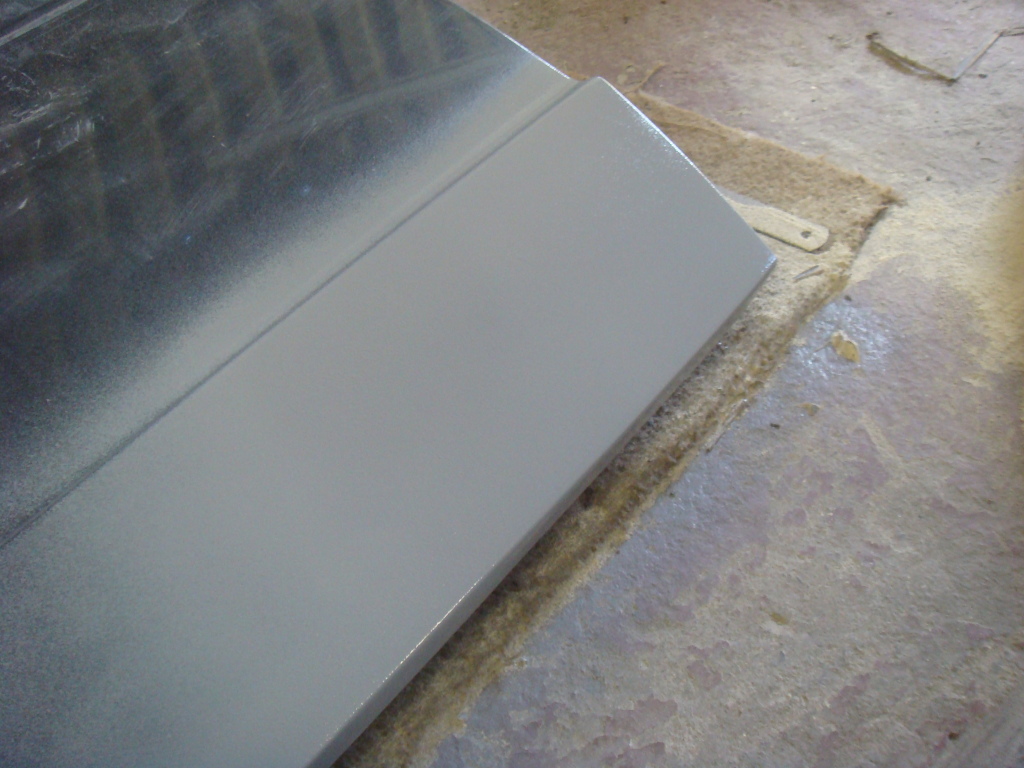
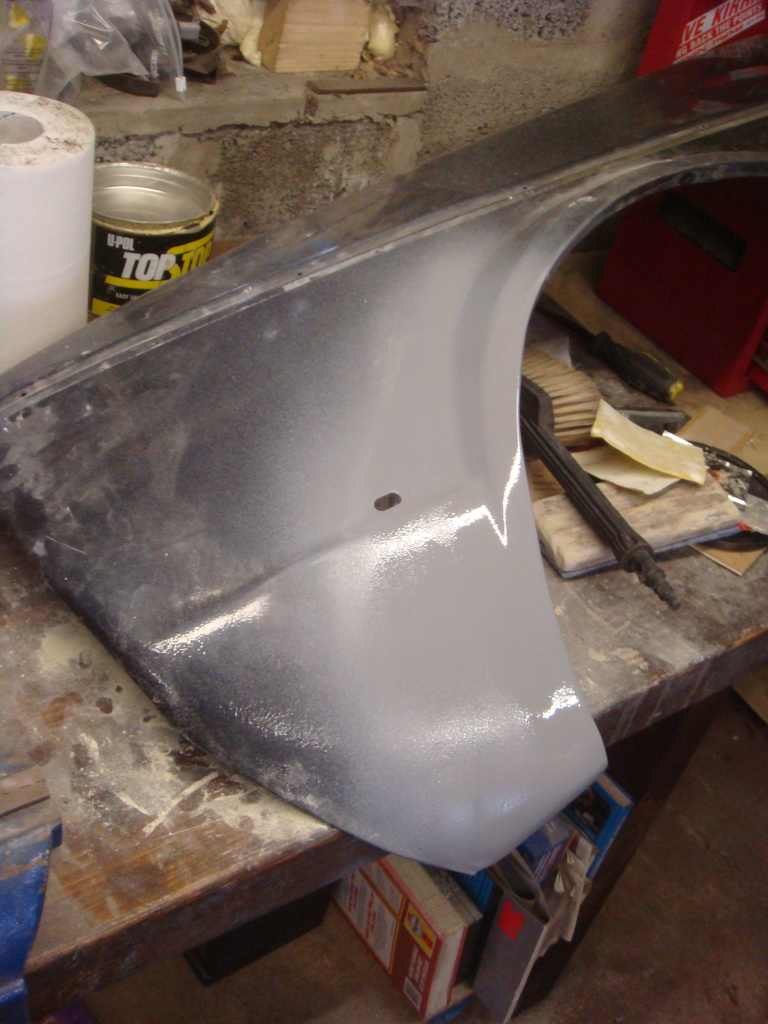
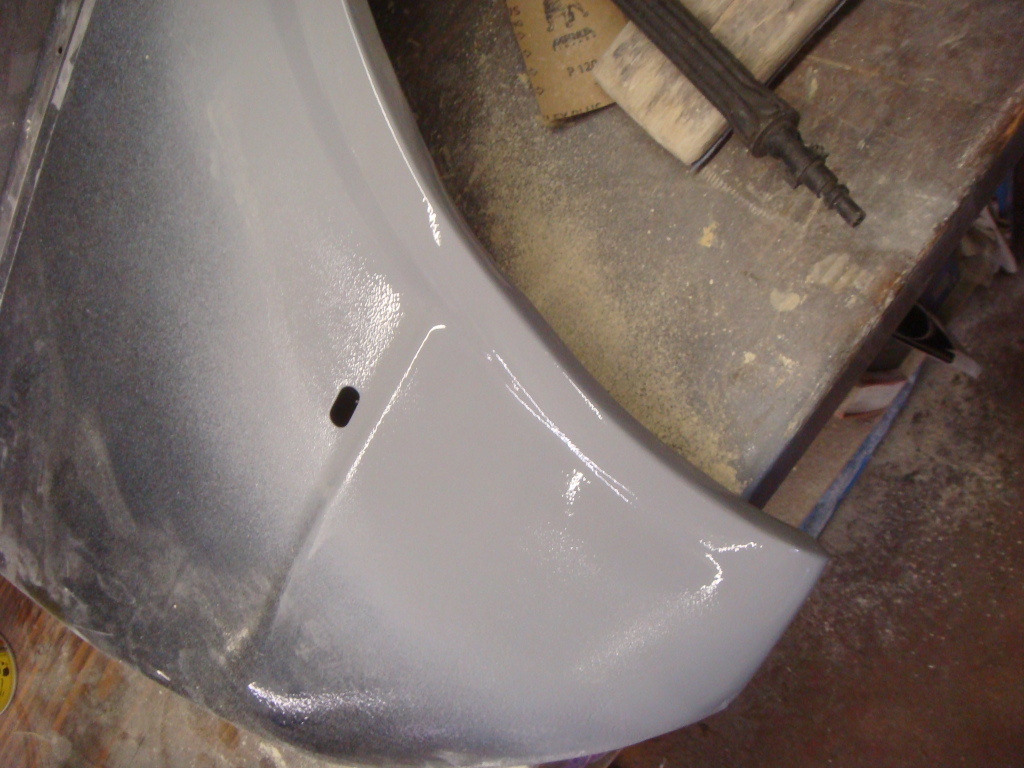
Next up was the front panel, this is a genuine panel and I was amazed at how well it fit! I was still expecting it to be a pain even though it being genuine. It all seemed to line up well. We will see how well it fits when its all painted 8O :redfaced: But as for now, it looks good.
offered it up…

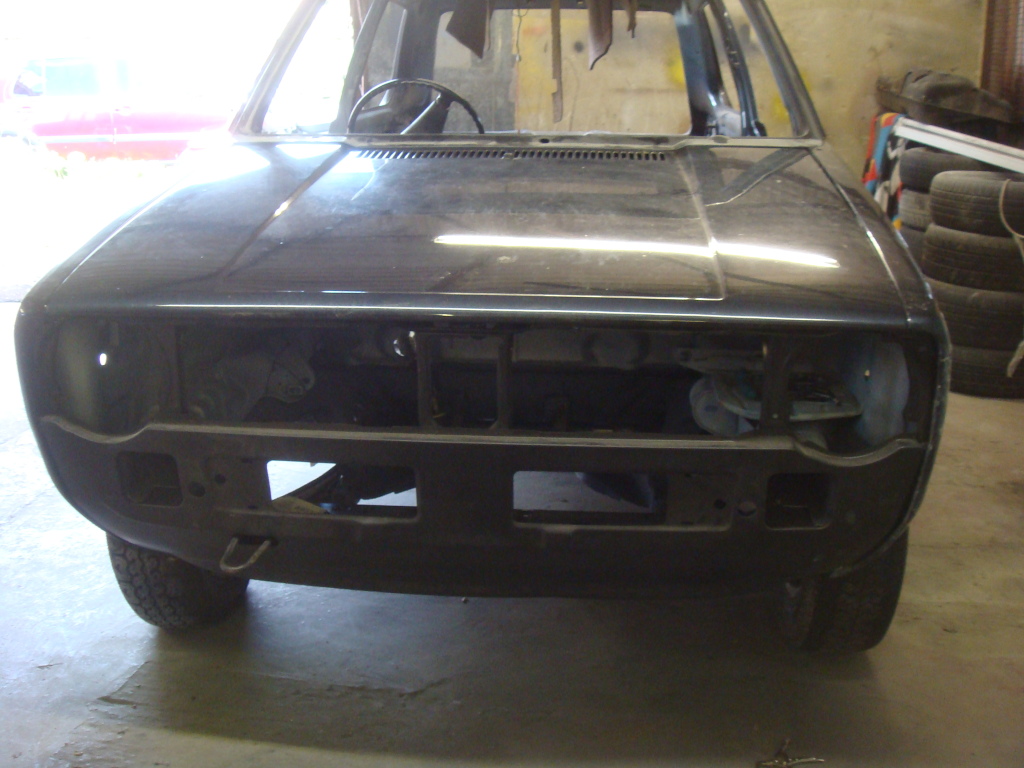
Then put all the wings and bonnet on to make sure everything was lined up nice…
Then I cleaned up all the areas to be welded and started to spot weld it in place, but as it was past 5.30pm and Machine Fart was shut my welding gas ran out

Only needed a few more welds too and all the welding would of been finished!! Gutted, going to have to buy another bottle of gas just to finish this off. If id known how much gas I was going to use at the start of this project I would of bought from another source, those clarke bottles dont last for shit!!
So thats as far as ive got this week, getting there!! Still a bit to do before paint but not too far away now.

Posted
Settled In
Beeno said
Looking good and I'm no expert on welding myself but i think you've done good. It looks really good. Can't wait to see the finished project.
Good luck and keep up the good work. :punk:
Thanks, always nice to have some encouragement. The welding is working, I think there is still some room for improvement though
Posted
Settled In
adi3390 said
Love it, some great progress there!
Wish I'd kept mine more original. Specially in the engine department.
Definitely got the best paint colour there :wink:
Ill probably regret keeping it original with all the problems that k-jet brings haha. As for the colour, I think your right
. Its a close call between Helios blue or Atlas grey id say!
Posted

Old Timer
Bob
Posted
Settled In
As for the filling and sanding, I myself had no real experience in doing it! Just had a go, had a couple of tips of mates who arent experts but knew a little bit and watched a lot of you tube vids! haha.
The main trick ive learnt is to skim a larger area than you expect and blend it in rather than skimming the bit you need filled, then you dont end up taking all the filler of and having high/low spots all over the place leading to the repair standing out like dogs balls when its painted!
It took me over a week to do get that rear window section to a standard thats acceptable!! And the rear arches and rear panel took around the same time. Im sure someone who does this for a living or has had more experience would of had all the fillering spot on in a day or two, maybe less! Its all a learning curve though, all be it a repetitive and sould destroying one!! haha.
As for the paint, thats something I have done a bit of before, on smaller stuff anyway. Never attempted a car before, but how hard can it be ay? 8O
I have all the equipment though, professional guns, compressors, access to wholesale paint supplies and access to a professional booth, the same one where 'purton' sprayed his bali green mk1. I also have him to help me, for a few beers
and his didnt turn out too bad at all, check out his thread on here.I am going to get a price for a 'professional' spray job as I know a few guys who are really good but also quite pricey so, to be honest, looking at my bank balance I think im leaning towards doing it myself!
Thanks for all the replys! And good luck with yours Bob.
Posted
Old Timer
pet73r said
Hi Bob, thanks for your kind words! How are your projects going? Are you on track to finish the purple beast on time?
As for the filling and sanding, I myself had no real experience in doing it! Just had a go, had a couple of tips of mates who arent experts but knew a little bit and watched a lot of you tube vids! haha.
The main trick ive learnt is to skim a larger area than you expect and blend it in rather than skimming the bit you need filled, then you dont end up taking all the filler of and having high/low spots all over the place leading to the repair standing out like dogs balls when its painted!
It took me over a week to do get that rear window section to a standard thats acceptable!! And the rear arches and rear panel took around the same time. Im sure someone who does this for a living or has had more experience would of had all the fillering spot on in a day or two, maybe less! Its all a learning curve though, all be it a repetitive and sould destroying one!! haha.
As for the paint, thats something I have done a bit of before, on smaller stuff anyway. Never attempted a car before, but how hard can it be ay? 8O
I have all the equipment though, professional guns, compressors, access to wholesale paint supplies and access to a professional booth, the same one where 'purton' sprayed his bali green mk1. I also have him to help me, for a few beers
I am going to get a price for a 'professional' spray job as I know a few guys who are really good but also quite pricey so, to be honest, looking at my bank balance I think im leaning towards doing it myself!
Thanks for all the replys! And good luck with yours Bob.
The purple beast is now muti coloured lol…primer here and there lol. All welding is complete, front panel is on and lines up well. Everything I need to do is done basically, it's ready for the body shop next week. I do want to learn the sanding and paint side of body work, but I prefer oily hands then cracked and dry ones, plus that filler dust is nasty&gets everywhere.
If you take it to a body shop at least you got someone to blame and point the finger at when it doesn't,t look right.
My swallowtails all in primer now, ready for paint, but has been put on hold as need to the purple one out first. All the best and I'll be watch your thread.
Posted
Settled In
Posted
Settled In
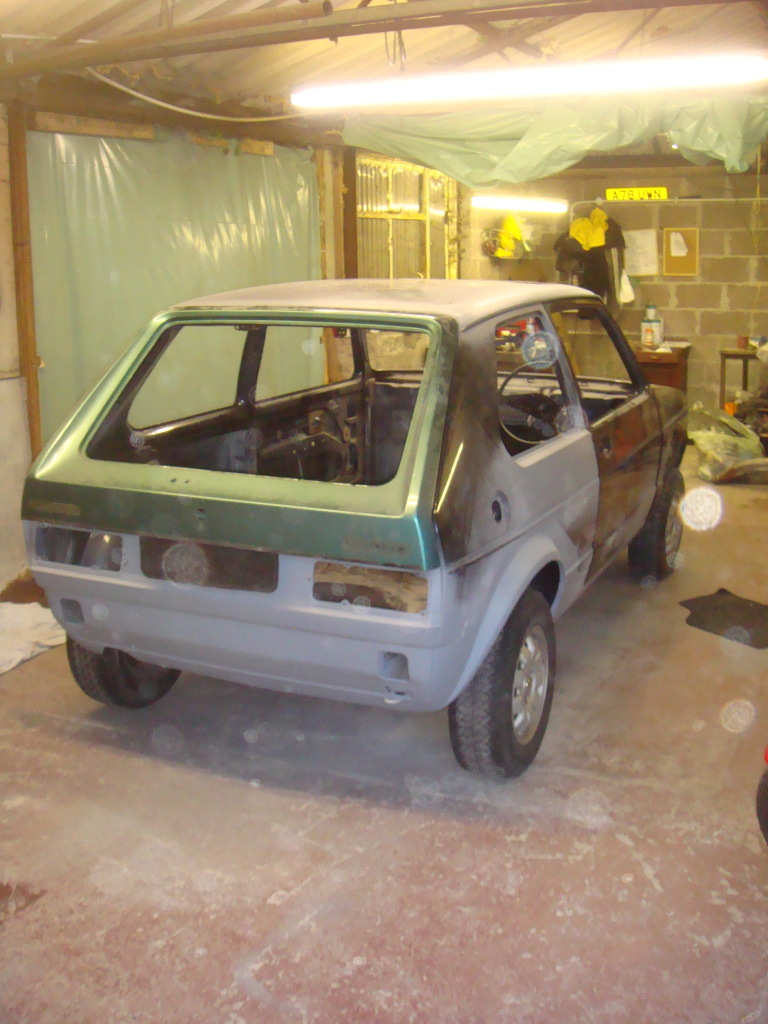
It was sunny not so long ago, for one day at least :roll: so I moved her out into the sunlight to get a look at the repairs I had done. Wanted to see the filling in natural light!
All looked pretty good apart from the roof. Nice to see it outside rather than in that dark unit!
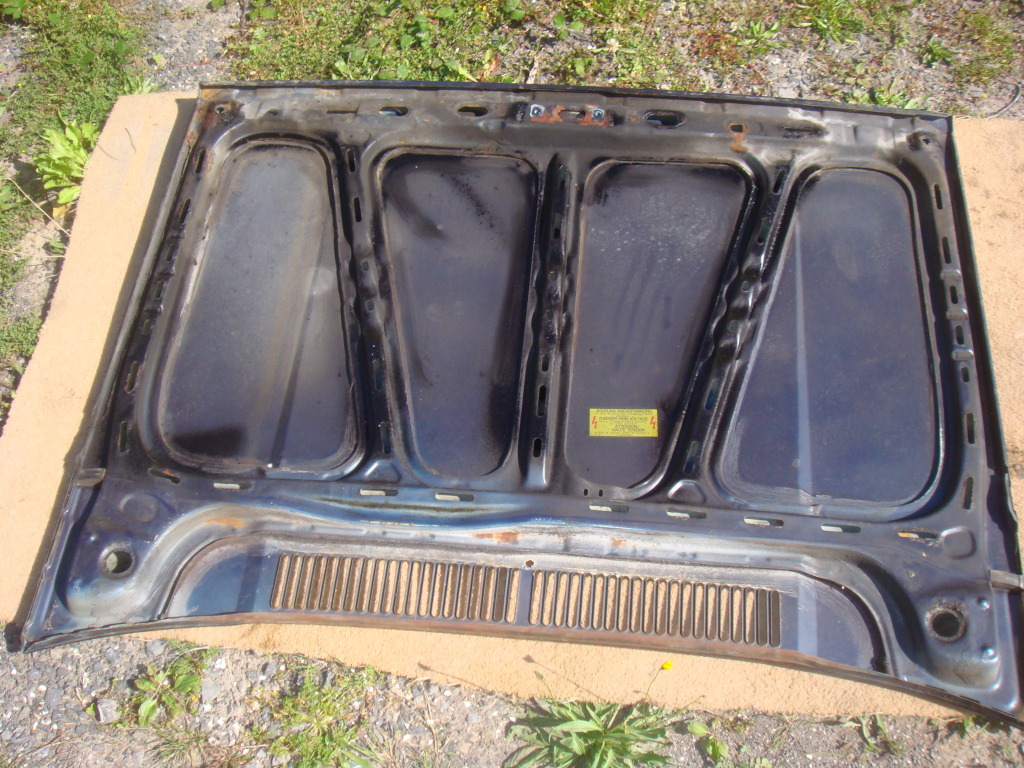
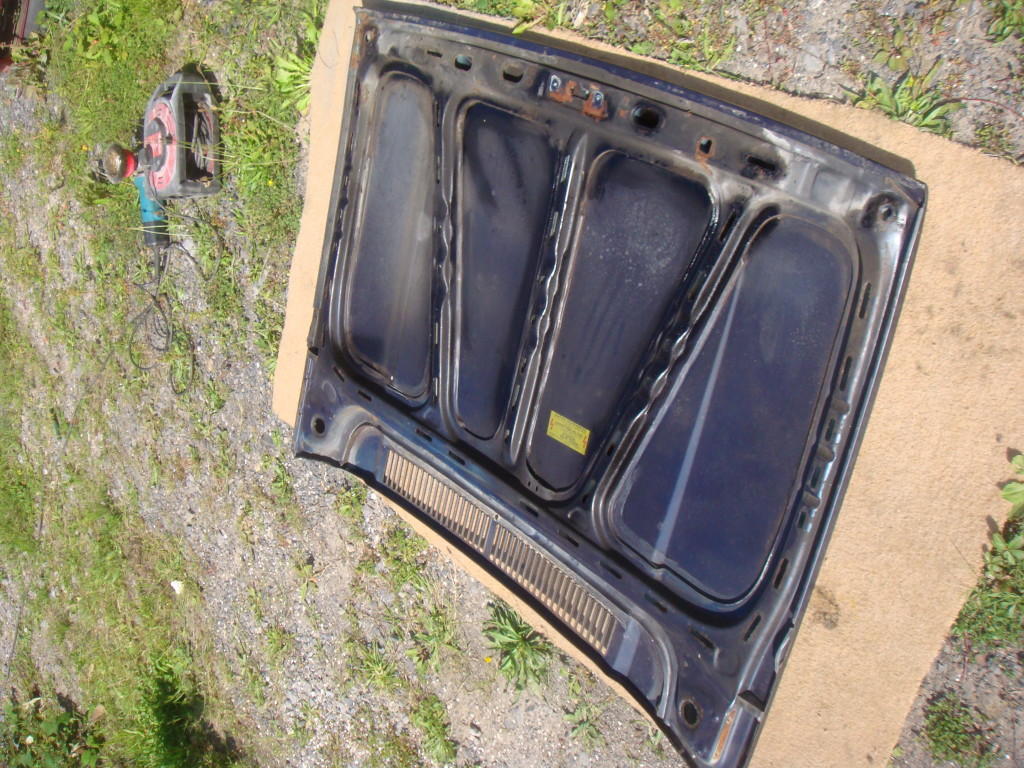
Cleaned the bonnet up a bit too, just took the surface rust off with the wire wheel.
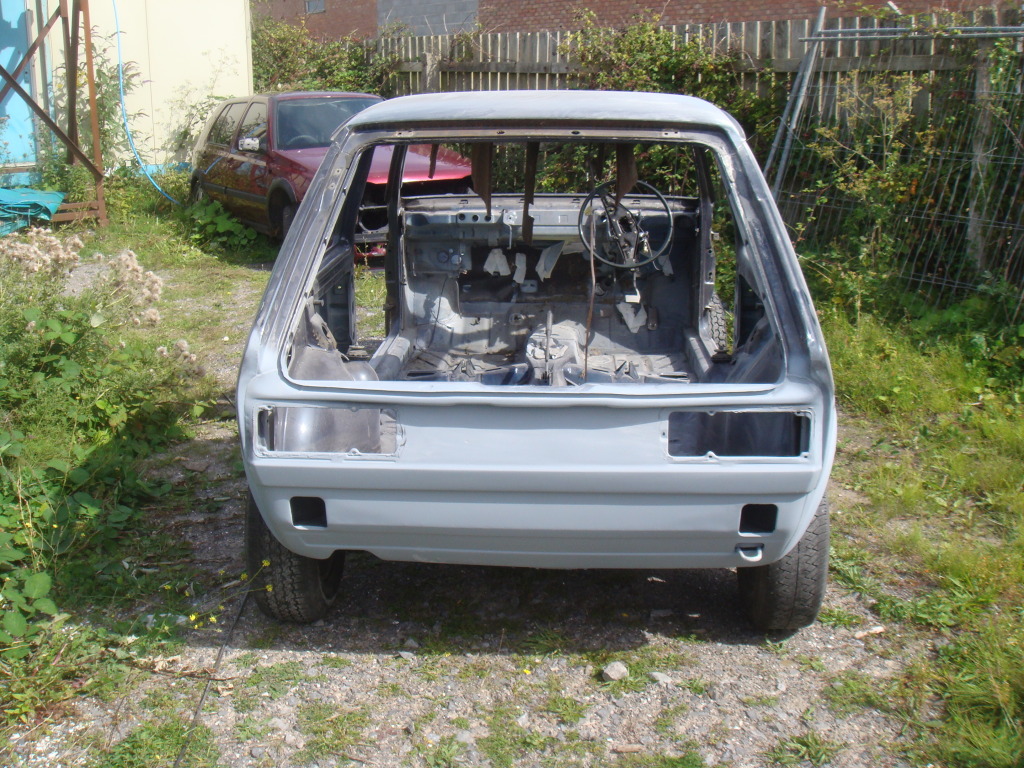
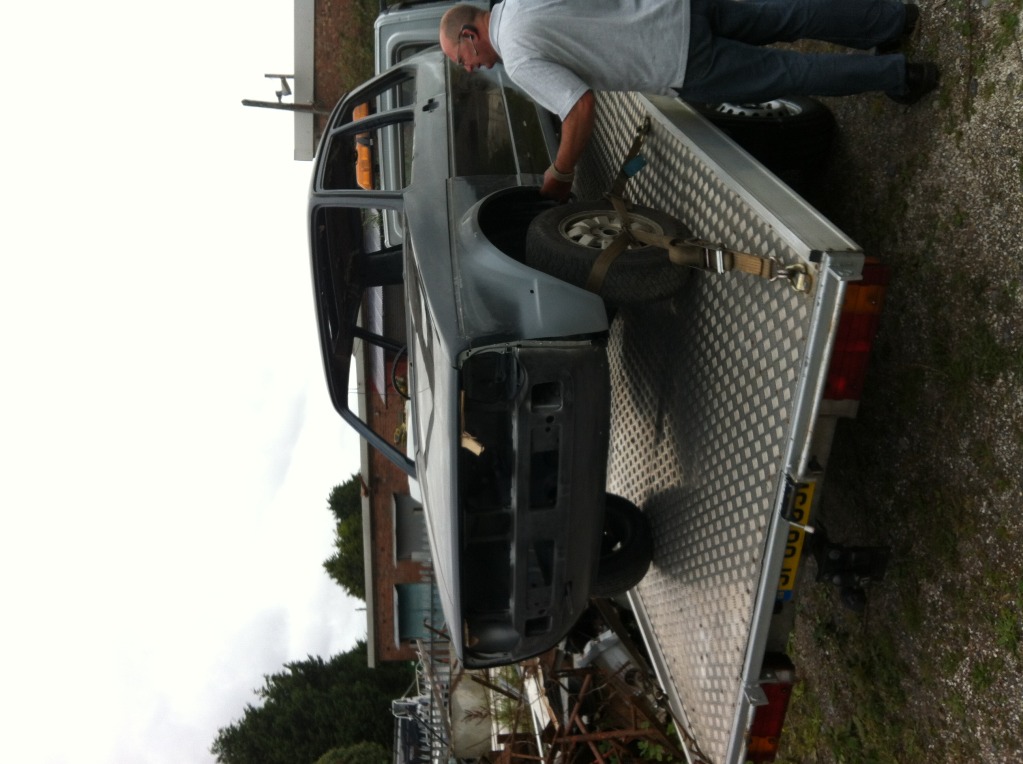
After much consideration, with winter looming, and my patience wearing thin with filling and sanding, the size of the task dawned on me. I decided it was time to hand it over to someone to finish the rest of the paintwork. I simply had lost interest in filling and sanding, and I still had all the flatting, blocking and more sanding to do!
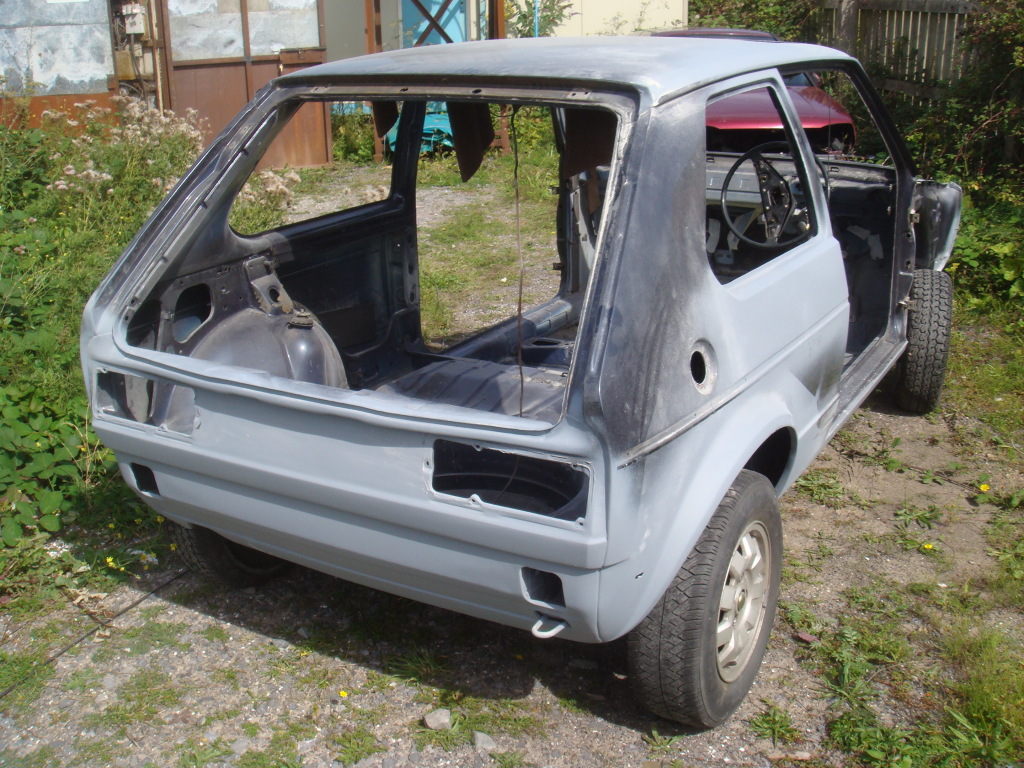
So I put her all back together loosely…

And called in Anthony the flatbed driver to come pick her up and ferry her down to the body shop…
Posted
Settled In

0 guests and 0 members have just viewed this: None.