


G60 into mk1 guide

Posted
Local Hero

G60 into mk1 guide
stusublime said
I've had problems getting it too, any chance you could e-mail it to me as well Paul ? I'd really appreciate it
stucomrie@hotmail.co.uk
Thanks - Stuart
If its okay with the original poster, I'll make it freely available in the technical section?
Posted
Old Timer

 i will be redoing the guide soon once i have had my engine bay painted with proper illustrated piccys.
MY GUIDE TO FITTING A G60 ENGINE INTO A MK1 GOLF
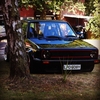
I started off with a stock 8v golf gti,but you can use any variant of the mk1 for this conversion.
1st job is to take out the engine on your mk1 on the gti it is pretty easy and should only take about 2 hours max.
Things to do 1st
• Disconnect the battery and remove from the car
• Remove radiator and all pipework
• Disconnect the pipes that connect to heater matrix/near the bulkhead
• Disconnect all the wiring and earth straps from the engine.there is a large earth on gearbox mount.
• Disconnect the speedo cable and throttle cable.
• Disconnect the gear linkage.
• Disconnect the clutch cable.
• Unbolt all the 12mm fuel pipes off the metering head and disconnect the fuel feed and return be sure to mark which is which.
• Unbolt the oil cooler from the front panel but leave the pipes connected.
• Unplug the pipe from the servo.
• Remove the metering head and airbox.

• Disconnect the starter motor and remove the front engine mount.
• Get the car as high up as possible and support it on axle stands.
• Go underneath the car and remove the exhaust from downpipe.Remove the antiroll bar and then unbolt the downpipe from the manifold.you don’t have to do this but I found it easier.
• Unbolt the driveshafts and drop them down.
• Remove the rear gearbox mount.
You should be ready to remove the engine
Support the engine on a hoist and then remove the drivers side mount bolt and the gearbox mount bolt the engine is now ready to be lowered.
I found it easier to lower the engine onto the floor,but some people prefer to lift it out from the top.
That’s it engine out.there are a few things you need to do before refitting the G60 engine.
• 1st job is to move the fuel lines across(not neccesary if your using a carb engine car.you can slowly bend the pipes up and cut off the excess or do what I did and cut the pipes underneath the car and join on some new rubber hoses(remember to mark which pipes are feed and return)
Now onto driveshafts and gearbox.I used the original GTI shafts and gearbox but if your going to use a 16v box or the G60 box you will need the 100mm shafts to match the box.Also if your using the 02a G60 box you will need to purchase some new mounts you can buy these from
http://vwcaddyforum.com/showthread.php?t=13657
you will also need to convert the car to cable change and convert it to either a hydraulic clutch or convert the gearbox to a cable clutch I think you can buy the arms from early ibiza’s
This is why I stuck with the rod change box as it’s the easier option.
Swap your clutch/flywheel and box onto the G60 engine
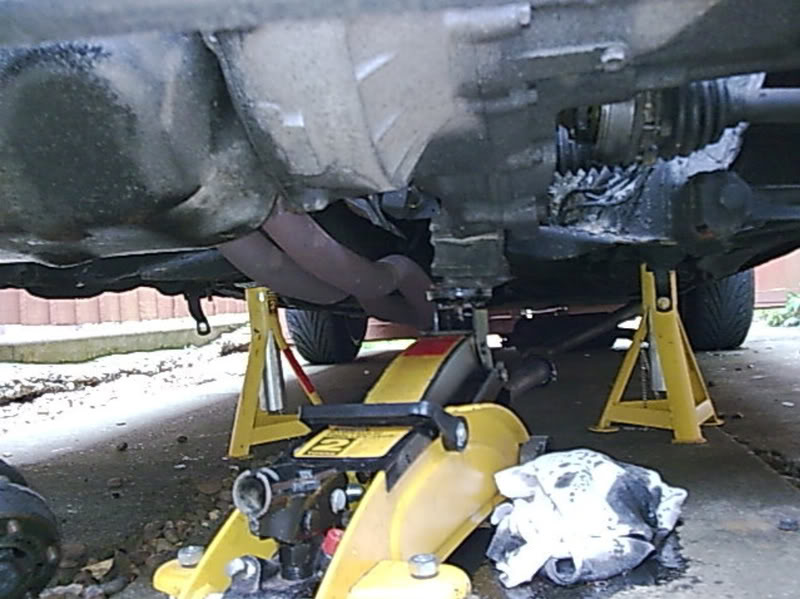
Now you will need to fabricate the drivers side mount.This was done by cutting the mk1 mount in half and welding it to the water plate on the G60 block
• Remove the cambelt cover and cambelt,remove rear plate and then remove the water plate on the side of the block
• Take the mk1 mount and place it on top of the waterplate.
• Mark the mk1 mount just after the round part and cut it off.Then place on top of the waterplate and weld in place.
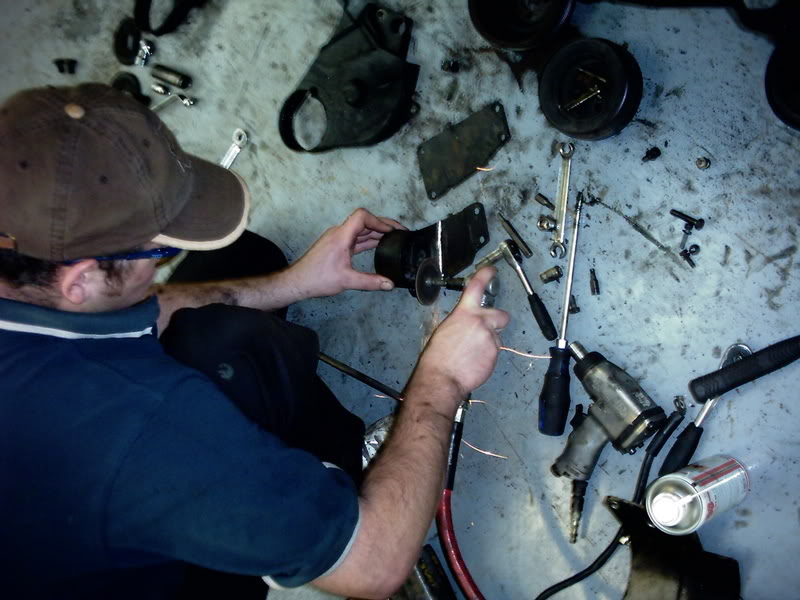
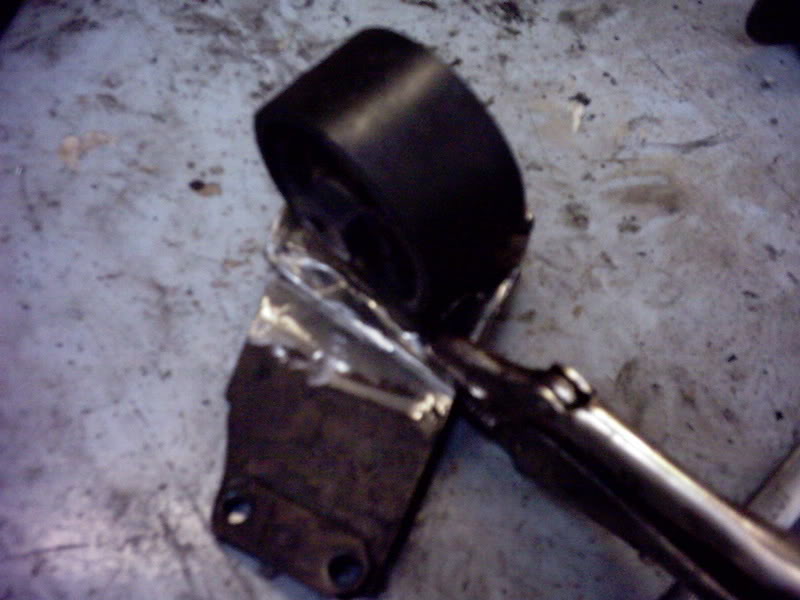
• Bolt back in place using a new gasket and some sealer.
• Bolt it all back together and now is a good time to replace the cambelt and tensioner.
You will now need to remove the charger and charger bracket off the G60 engine.IT wont go in with these still on.
Remove the G60 exhaust manifold as you cannot use this on the mk1.Either use your original one or buy a good 4 branch like I did.
Before you put it back together you will need to sort out the lambda.i had a lambda plug welded into my manifold at the cost of ?10
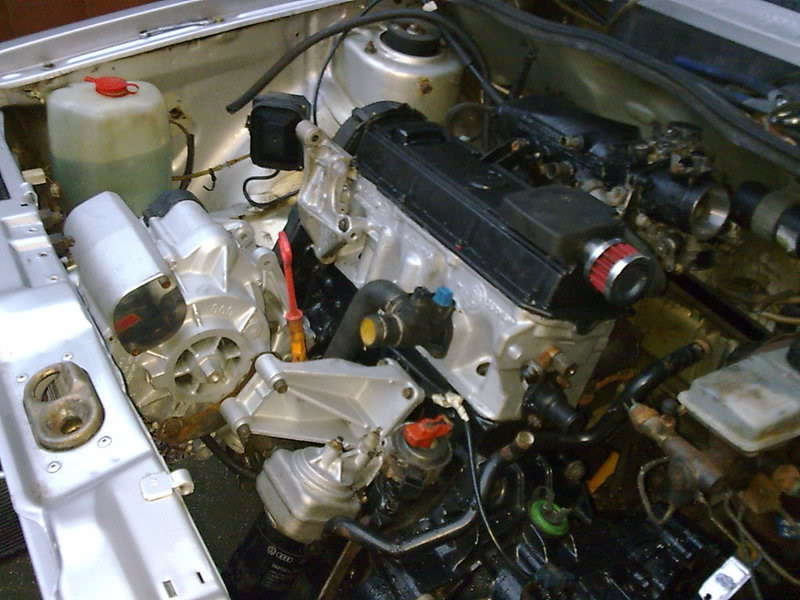
Your now ready to refit the engine.
As before I fitted my engine from under the car.Lift into place and bolt back in using the engine mount bolt and the gearbox mount bolt.
• Reconnect the rear mount
• Reconnect the starter and front mount
• Reconnect the driveshafts/if your going to use a 4 branch don’t connect the driverside up till you have bolted the 4 branch on.
• Reconnect the gear linkage
• Reconnect the speedo cable.
• For the throttle cable use the original cable but you have to cut it and fit a solderless nipple.
• Connect the servo pipe up,use the G60 one you may need to extend it a little using some rubber pipe.
• Connect up the waterpipes from the heater matrix.
• Bolt on the charger brackets and refit the charger
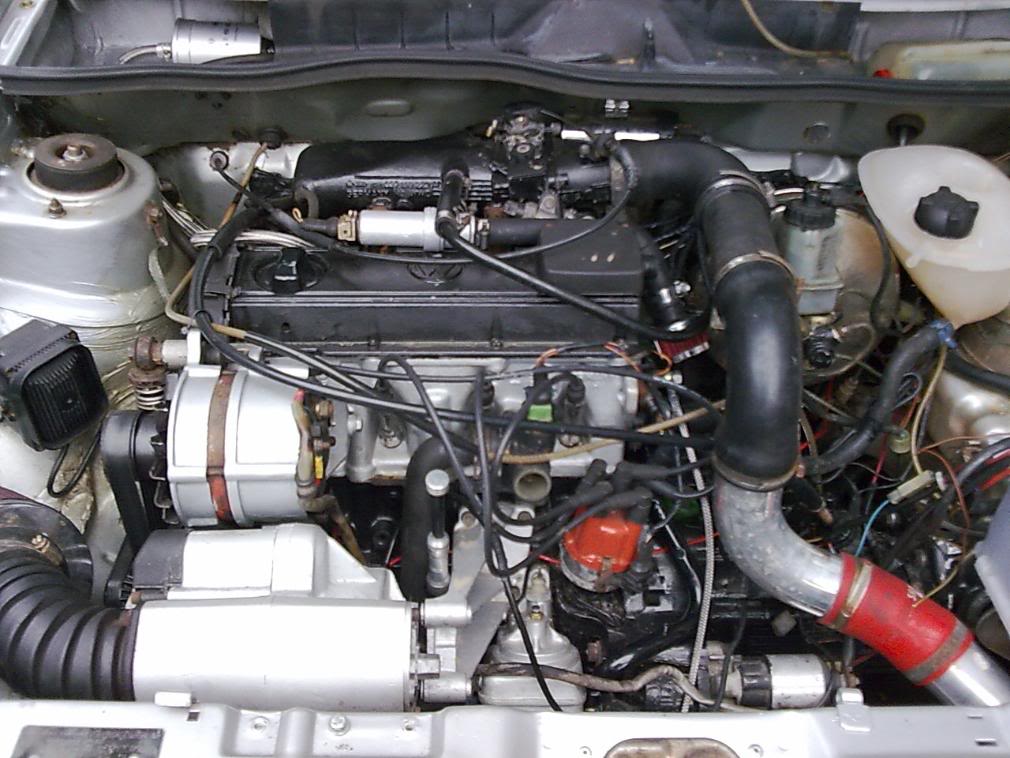
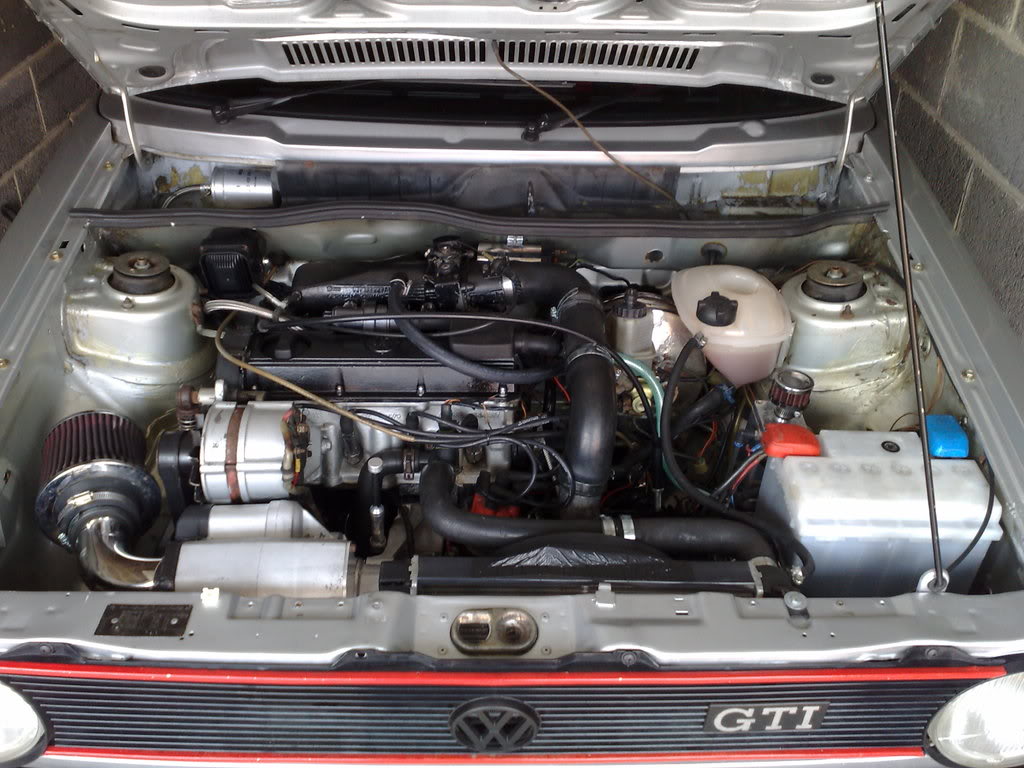
Your car should now look something like this
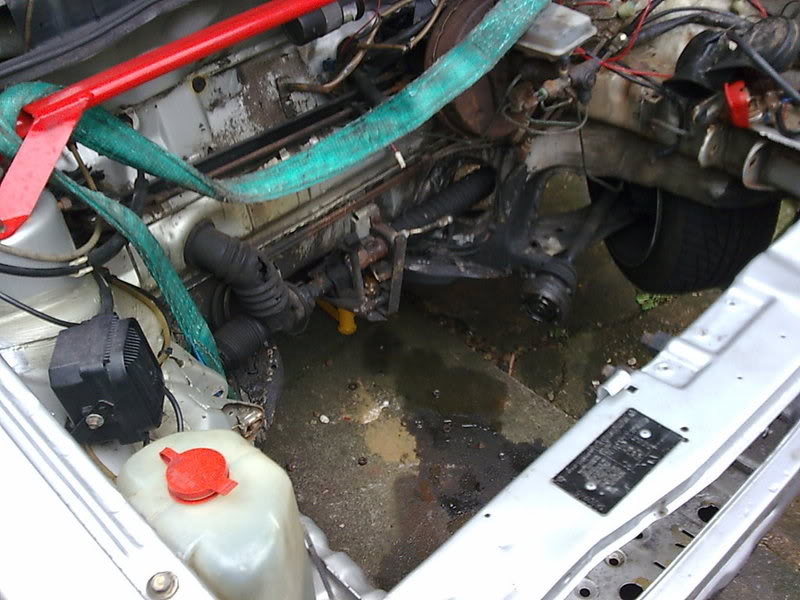
Next job is to fit a fuel filter,use one from a G60 corrado you can mount this on the inner wing or I fitted mine up in the rain tray near the wiper motor.
That’s it for now.
Wiring
1st job is to take off the lower dash tray inside the car.
Unscrew the fusebox and pull forward.from inside the engine bay locate the engine loom that goes through the bulkhead it’s the loom on the left.
Pull the rubber gromit with loom in forwards.
Go back inside the car and locate where the loom plugs into the fusebox.Unplug the loom from the fusebox there is also a couple of other wires that need disconnecting one is the large black and red cranking wire the other is a large 4 pin plug which controls the wipers.
Go back into the engine bay and slowly pull the loom through the hole till it comes out.
Unplug the wiper wiring you can cut the wires that goto the mk1 ignition module as you don’t need these.make sure you cut the Black with red stripe wire near the coil and just unplug the black wire off the coil you need these 2 wires.
That’s it for now keep this loom as you need it to mate to the G60 engine loom.
Now you will need to get the G60 engine loom and strip it bare as most of it you do not need.
I used this guide as it was brilliant be sure to mark all the wires that you need.
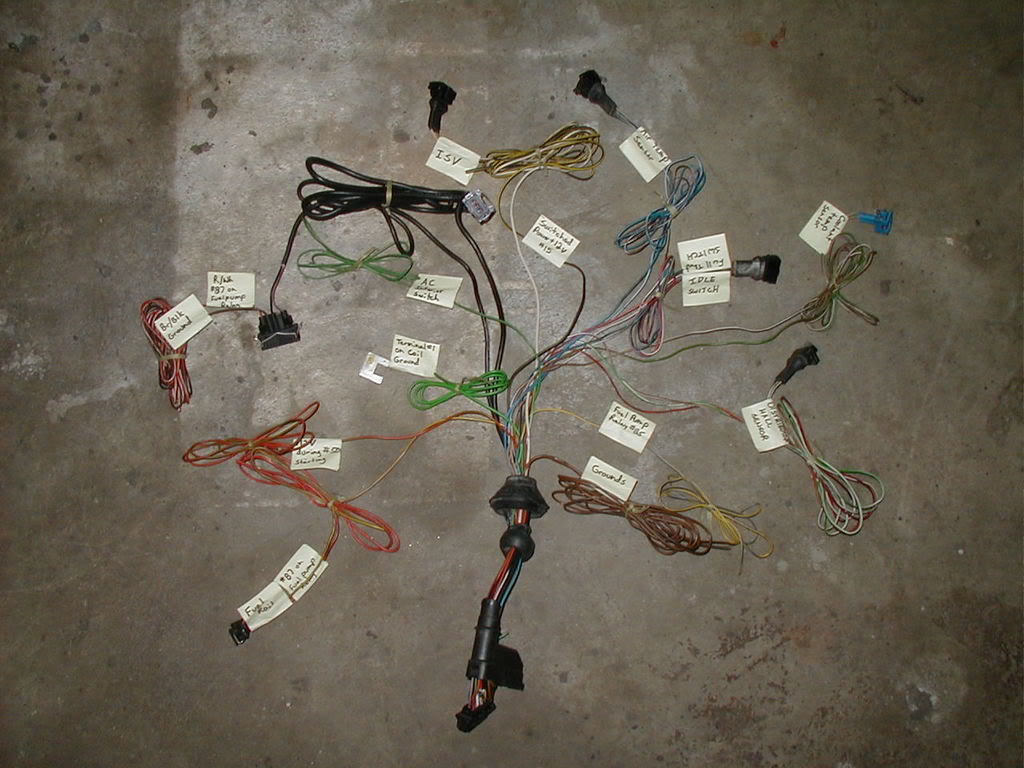
Larger version can be found at
http://www.plasmabunny.com/albums/nigel/digifant_wiring_harness.jpg
Wiring key moving in a clock wise manner from the bottom left
Fuel Rail-Brown/Yellow stripe, solid Red goes to #87 on the fuel pump relay
Red/Green strip- goes to #50 recieves +12v during starting
Terminal 1 on coil (negative -)- solid Green wire larger diameter, has a specific plug for the coil
*Heated O2 sensor- solid purple (signal), soild black (ground), brown with black stripe (ground), Red with white stripe recieves power from #87 on the fuel pump relay
AC- solid Green but small diameter wire with yellow plug (not to be confused with the coil negative) you don’t need this but some companys use this wire to map the cars ecu if you get it chipped
Knock Sensor-i did not label it because if you cannot recognize which connector it is you should not be attempting this project in the first place
ISV or Idle Stabilizer Valve- Solid White/ Black with Yellow stripe recives power from #15 which is switched 12V +.
The ISV can be succesfully eliminated for those looking to reduce the complexity of the harness, it will idle a little rough on cold days however the blk/ylw wire will still need to be powered
Air Temperature/CO potentiometer- Blue solid, Blue with White stripe, Brown with White stripe
Throttle Switches- Brown with White stripe, Red with Black stripe (idle switch), Blue with Black stripe (Full throttle switch or Wide Open Throttle or WOT switch)
Coolant Temperature Sensor- pretty blue plug, Brown with White stripe, Brown with Green stripe
Distributor Hall Sensor- Brown with White stripe, Green with White stripe, Red with black stripe
Yellow with Blue stripe, goes to #85 on fuel pump relay
Brown and Brown with black stripe are grounds.
when you have your loom as pictured below you will need to mate this to the mk1 loom.
1st off strip the mk1 loom down to the bare again.
You need to Keep the blue and black wire that goes to the oil pressure switch on the side of the head and keep the yellow with red stripe wire that goes to the temp guage switch.
You also keep the black/red which normally goes into the big white plug on the coil and the black wire that goes to the coil and all the wires that go to the wiper motor.These have there own plug which you unplugged inside the car.the rest you can chop out.
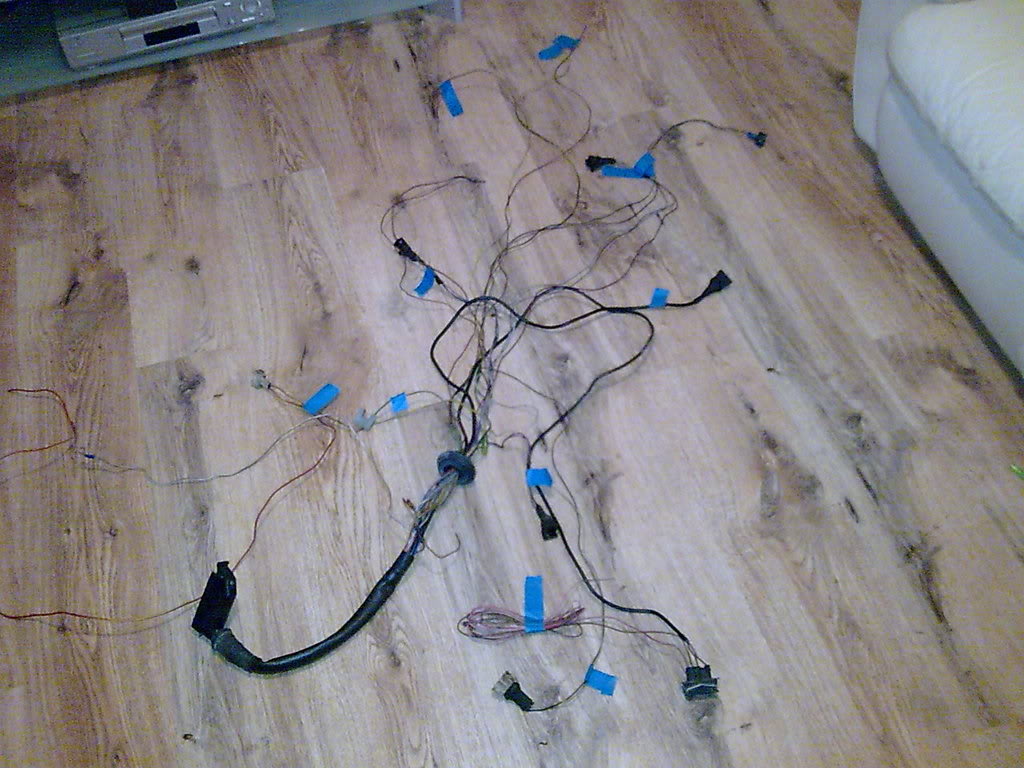
Now take the corrado loom and start to mate it to the golf loom there should only be about 12 wires left on the mk1 loom so you need to feed these through the large rubber grommit on the G60 loom.
The plug for the fusebox needs to be on the same side as the ecu plug.
Once you have done this you need to go inside the car and feed the loom back up into the engine bay you have to do it this way as the large ecu plug wont fit into the cabin from the engine side.
Be sure to keep all the wires that connect from the G60 ecu plug to the fusebox inside the cabin and connect all the plugs onto the engine.you can now plug the golf loom back onto the fusebox and reconnect the plug for the wipers back up.
Now to connect the G60 ecu up
Inside the cabin connect the Brown/yellow stripe wire and the Red with white stripe wire together and connect up with a female spade connecter.look up above the fusebox and you will see a T piece connecter with 2 wires going onto it.The red and yellow wire is the fuel pump wire.On the bottom there is 1 other wire and a spare connect the spade connecter you have just made onto the spare.
The yellow with blue stripe you don’t need to connect unless your going to use a separate fuel pump relay.
Again look up and you will see a large Red and black wire this is the cranking wire for the starter motor.You will see a spare female plug connect the Red with Green stripe wire to this using a male spade connecter.
Now for the Ecu power wire this the large Black with yellow stripe and needs to be connected to a switched +12v I used a multimeter and used one of the spare terminals on the fusebox make sure it still receives +12v while cranking or it wont start.
That’s it G60 ecu is now connected to the mk1.
Go under the bonnet and connect the coil wires up this is the large green wire with a large white plug this goes to the negative side of the coil.now this is the important bit connect the Black and red wire from the original mk1 loom to the spare space on the large white plug this is for the rev counter and fuel pump primer.connect the black wire to the + side of the coil.You can disconnect all the old coil wiring and coil amplifier and chuck it away.
Connect the engine earth up this is the large Brown with white stripe wire and it connects to the side of the head.
Connect the earths up there are 3 in total 2 brown wires from the ECU and the black and brown from the lambda plug these all goto the negative side on the battery
There is also the blue and black wire from the golf loom to connect up this goes to the pressure warning switch on the side of the head.The brown and yellow goes to black temp switch near the blue temp switch you will have to use a small red female connecter and then make up an earth on the other side.
Thats it now you can tape the loom up.
If you get a bit stuck just use this diagram.
http://www.snstuning.com/DIY/Digi%20Diagrams/g60ECU2.jpg
Don’t forget to attatch the vaccum pipe up to the ecu this should be exactly 1m long and connects to the back of the throttle body top plug.bottom one gets blocked off.
Now onto the rest of the plumbing.
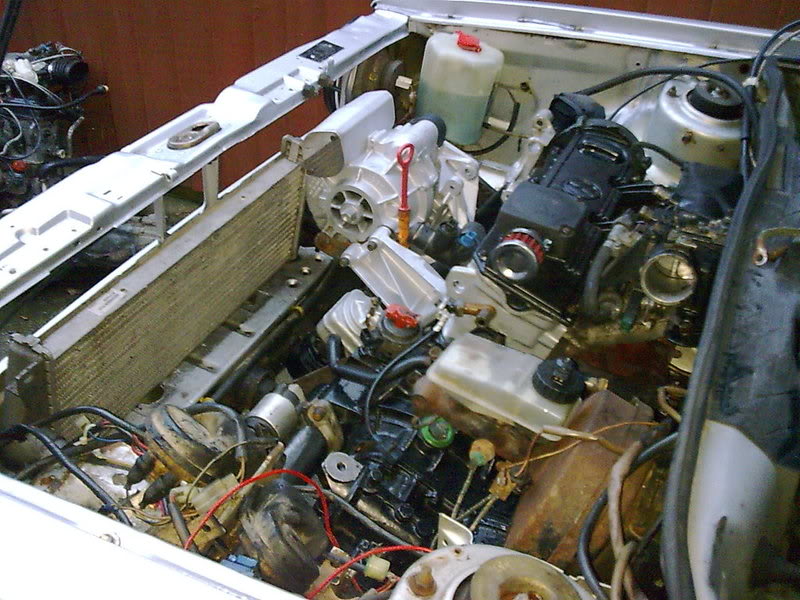
Intercooler and pipework
There are lots of different methods for doing this.
I used a front mount intercooler off a landrover td5 and used a rallye outlet on the charger this was the easy way as the rallye outlet comes off at a 180dg angle so makes connecting up to the front mount pretty easy.
You can buy the rallye outlet from
www.g-werkes.com
For the other side I used part of the original G60 piping and cut it off about 3” after the Co sensor you will then have to measure and order the correct pipes to connect to the other side of the intercooler.
On mine I also blanked off boost return pipe and eliminated the isv.
Radiator and piping
The easy way is to use the G60 radiator this connects straight up.But you will have to drill some new holes in the crossmember.I used the sensor from the mk1 radiator and also used the fan housing off the mk1 and cut the couling down a bit this meant I didn’t have to mess about with the wiring.
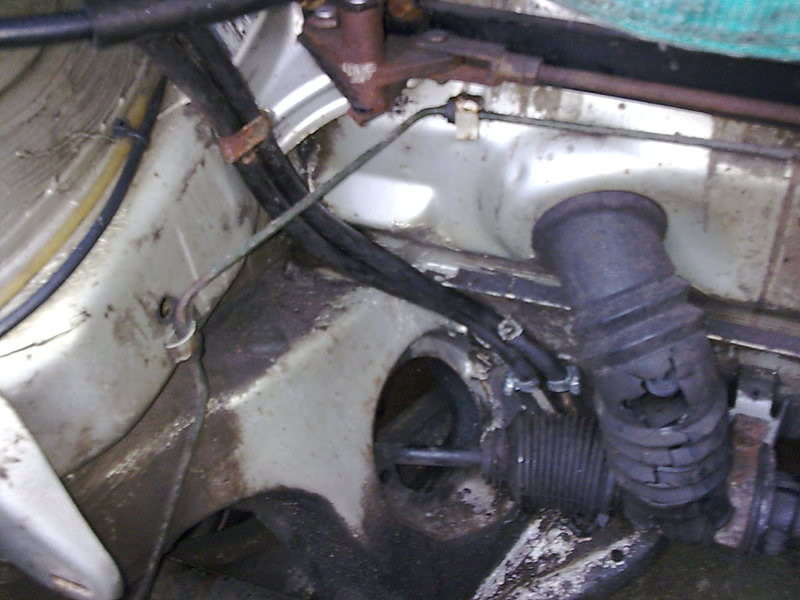
Air filter.
I used the stock piping from the G60 airbox and connected a cone filter onto the end of it.You then have to make a bracket that connects it to the inner wing.If you want to you can buy alloy bends that bolt straight to the charger jabba sport or G-werks and a few other places sell these.
Washer bottle
This will have to be moved as it gets in the way of the air filter just move it across to the passenger side and mount it using a rear washer bottle bracket.the wiring runs along the passenger side near the battery so just trace it back cut the green with red stripe wire and re-attach it.the brown is a earth so either just ground it on the body or connect it to the – negative side of the battery.
Job done it should now run enjoy ;-)
83 MK1 GTI G60 85 MK2 GTI 20VT 2004 SEAT ALTEA 2.0 TDI SPORT
Posted
Settled In

what are the main benefits and drawbacks of doing this conversion.
Dan
Posted

Settling In

miniturbonutter@aol.com
Thanks in advance

Posted
Old Timer
miniturbonutter said
Hi, I'm also struggling to get to the link, any chance of emailing it to me too??
miniturbonutter@aol.com
Thanks in advance
You no longer need the link just look above i have added it in a post
83 MK1 GTI G60 85 MK2 GTI 20VT 2004 SEAT ALTEA 2.0 TDI SPORT
Posted
Settling In
paul_h said
miniturbonutter said
Hi, I'm also struggling to get to the link, any chance of emailing it to me too??
miniturbonutter@aol.com
Thanks in advance
You no longer need the link just look above i have added it in a post
Thank you!!!
Posted
Settled In
Wire from Loom goes to Fuse box Pin,device and wire
ECU Live (Black/Yellow)–>–Pin B8 for Ignition Live(Red/Black)*
Fuel Rail (Yellow/Red)—>–Pin E14 for Fuel Pump Live (Red/Yellow)
Lambda (Pink/White)—–>–Pin E14 for Fuel Pump Live (Red/Yellow)
Fuel Relay(Green/Red)—>–Pin D24 for Starter Motor(Red/Black)
Brown wires are earths
Big green wire goes to coil earth
Use the black wire for the coil live off the MK1 loom same with the black/red wire
Thats all you need to make the engine run.
*or any other switched live from ignition
Posted
Settled In
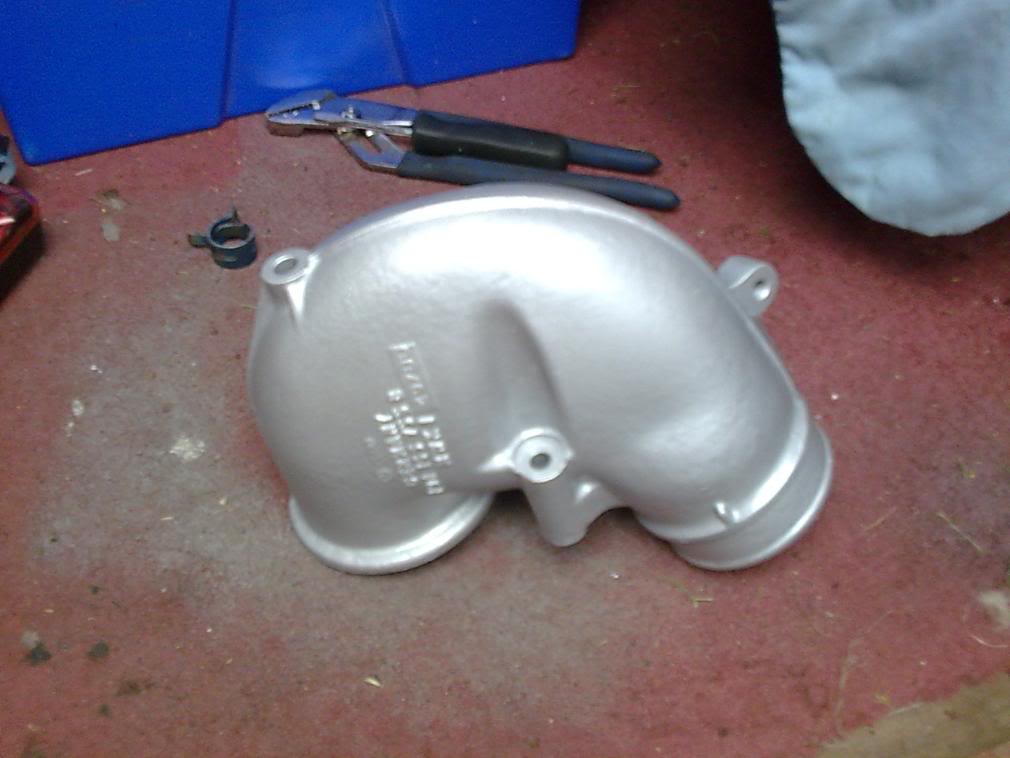
Mounting bracket
May the seed of your loin be fruitful in the belly of your woman.
Posted
Old Timer
83 MK1 GTI G60 85 MK2 GTI 20VT 2004 SEAT ALTEA 2.0 TDI SPORT
Posted
Settled In
May the seed of your loin be fruitful in the belly of your woman.
Posted
Settled In
May the seed of your loin be fruitful in the belly of your woman.
Posted
Settled In
i live to dub....
Posted
Old Timer
83 MK1 GTI G60 85 MK2 GTI 20VT 2004 SEAT ALTEA 2.0 TDI SPORT
Posted
Settled In
link no longer working? boohooooo!!
Posted
Guest user
or isit a custom jobby?
Posted
Local Hero

Posted
Settled In
smiffy
Posted
Settled In
KUL74R said
what exhaust manifold fits? will the standard one from a corrado fit?
or isit a custom jobby?
Anyone?
What doesn't kill me can only make me stronger.
Mk1 will be back.
Mk1 will be back.
Posted
Old Timer
83 MK1 GTI G60 85 MK2 GTI 20VT 2004 SEAT ALTEA 2.0 TDI SPORT
Posted
Newbie

koenbreel@msn.com
Thank you very much!
0 guests and 0 members have just viewed this: None.