


Sill and floor pan repair

Posted
#1474907
(In Topic #195260)
Settled In

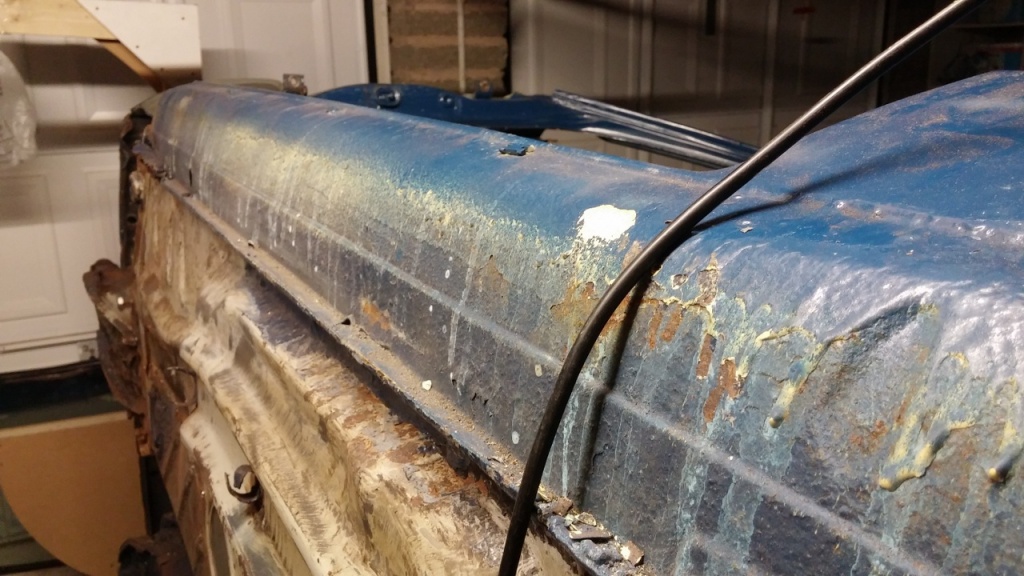
How are the different layers arranged in the below photo. I can see the floor pan and sill are spot welded together but which part has the lip? Both have lips that run 90degrees to the actual panel, but the original on the car has a lip that runs parallel to the floor?
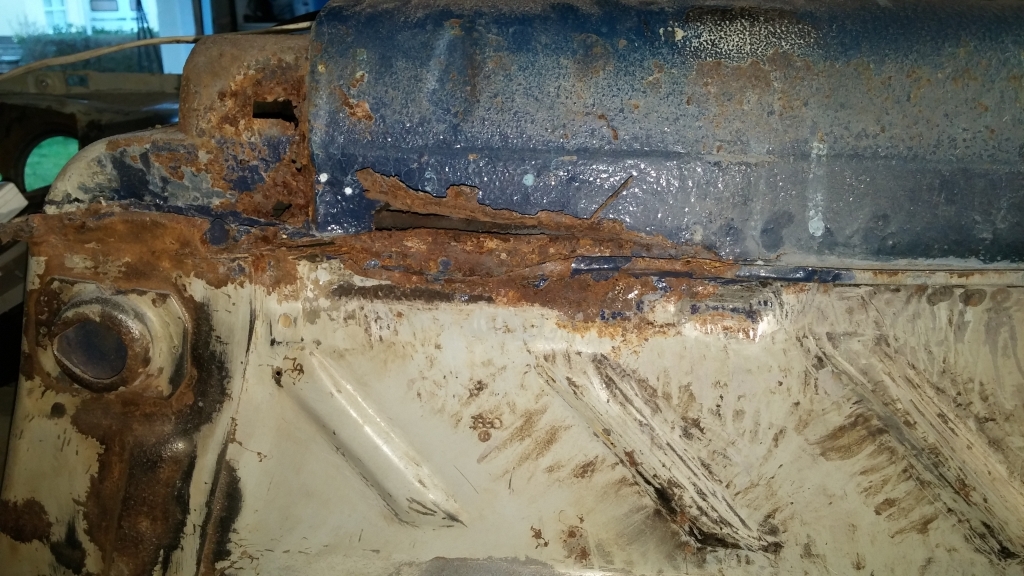
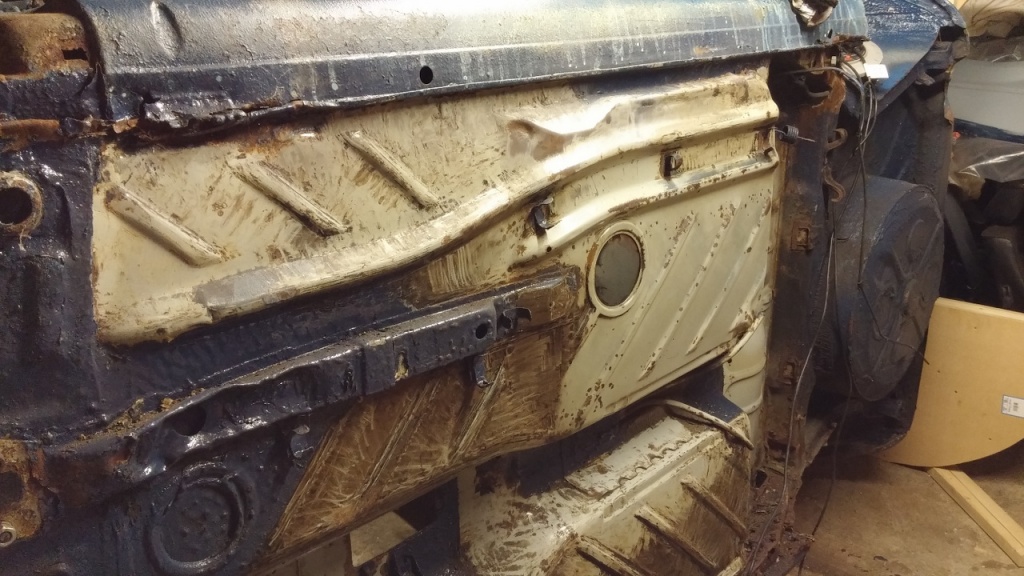
In the photo below i have marked where i think i need to cut the rot out and then i can see what lies beneath and hopefully see how the different panels join together! I just don't want to cut out too much and then have to weld more back in, easier to cut more out!!
Posted
Old Timer

looking at the pic your going to be doing inner sill work though im afraid
as for welding its quite simple, low amps, clean metal, gap desired and tack,tack,tack. I leave a 2mm gap all around myself but you could go to 1mm. cleaner it is, easier it will be lad
Posted
Settled In
What's the best order to fit new panels as i need to do the sills, rear arches, rear beam mounts and the rear panel (on both sides!) I was thinking do the front floor panels and sills and then the rear beam mounts as i'll know a little more then. Next roll the car back to normal and fit the rear arches and finally once it's all done the rear panel, sound about right? I can learn on the sills etc before tackling the important rear beam mounts and then the rear panel will hopefully be not too bad as it's visible!
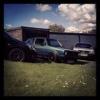
The previous paint job wasn't the best of quality!!!
Some pictures of the car at present, think i'll be having fun with the welder!
Posted
Old Timer
Posted
Settled In

Posted
Settling In

Posted
Settled In
VR6 campaign
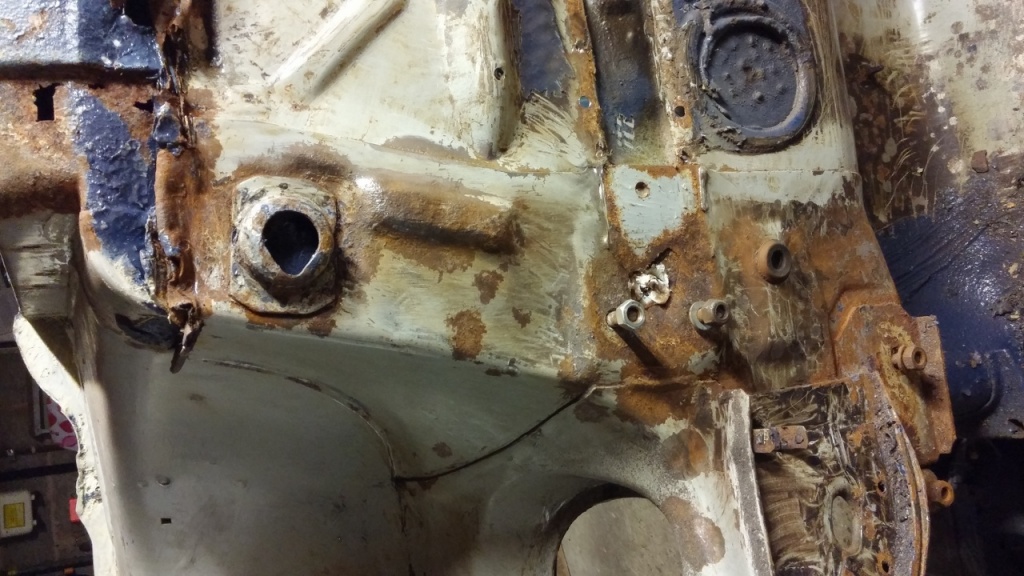
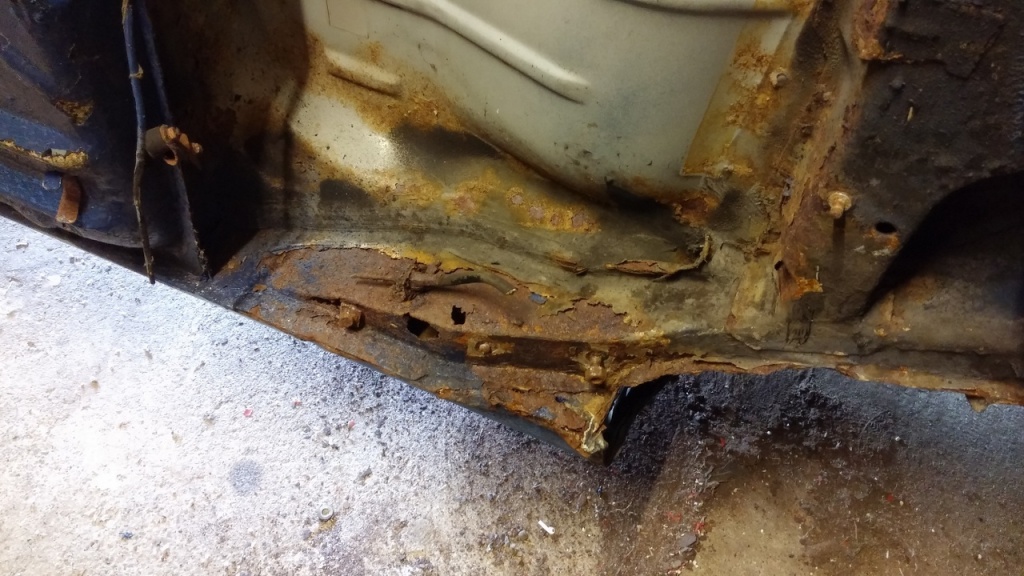
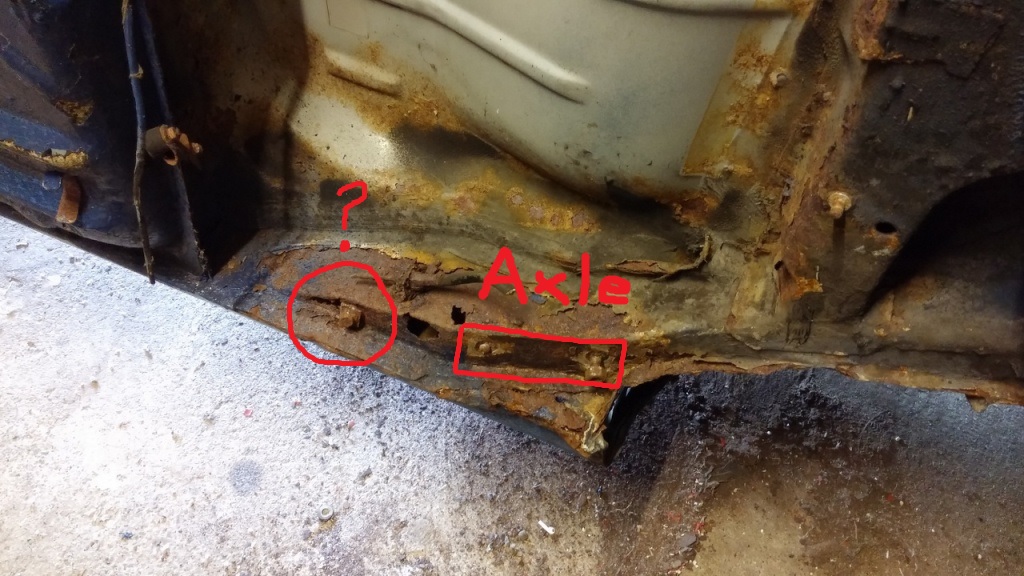
Out of interest, what is the bolt here for?
Posted
Settling In
Posted
Settled In
Brad. said
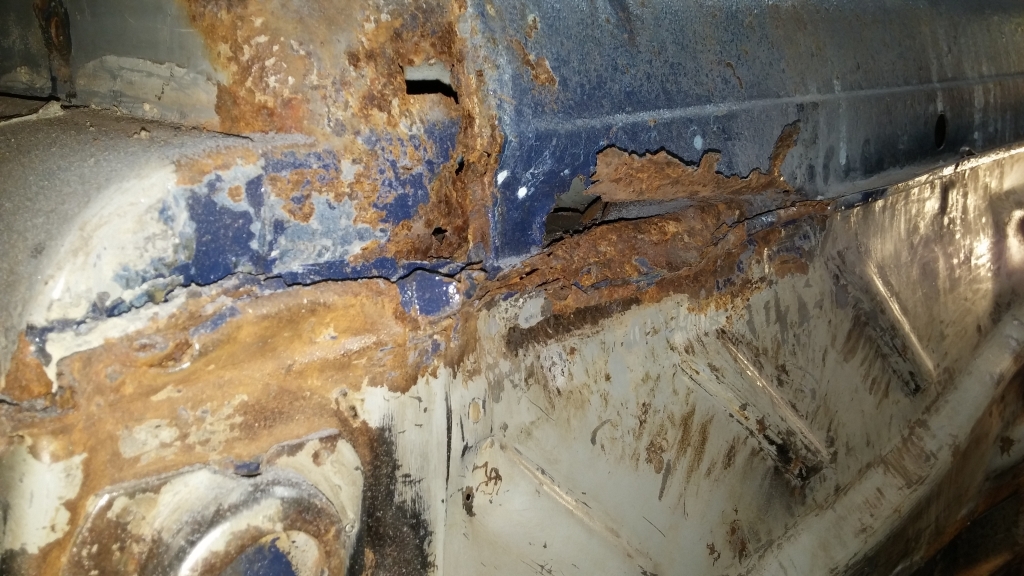
The floor pan has a 90* drop with a lip that covers the rest as you can see in the last pic, the iiner sill goes dow the that level straight, and the outer goes down to it and drops 90*
looking at the pic your going to be doing inner sill work though im afraid
Having had a play with the tin snips i can now see what you meant, i think my mock CAD drawing below shows how they all overlap, is it correct?

The repair floor panel i have doesn't have the lip shown in the next picture, what do other people do when repairing this area, or have i got a really cheap nasty panel??

Posted
Local Hero

Not really had a good look as its dark outside and the car is my daily so it's on the drive.
1988 Mk1 Golf GTi Cabriolet 1.8cc DX, K-jet. Daily drive. 317,000 miles and counting
1978 Mk1 Scirocco GLS 1.6cc FR, Webber carb. Weekend toy.
1978 Mk1 Scirocco GLS 1.6cc FR, Webber carb. Weekend toy.
Posted
Old Timer
Posted
Settled In
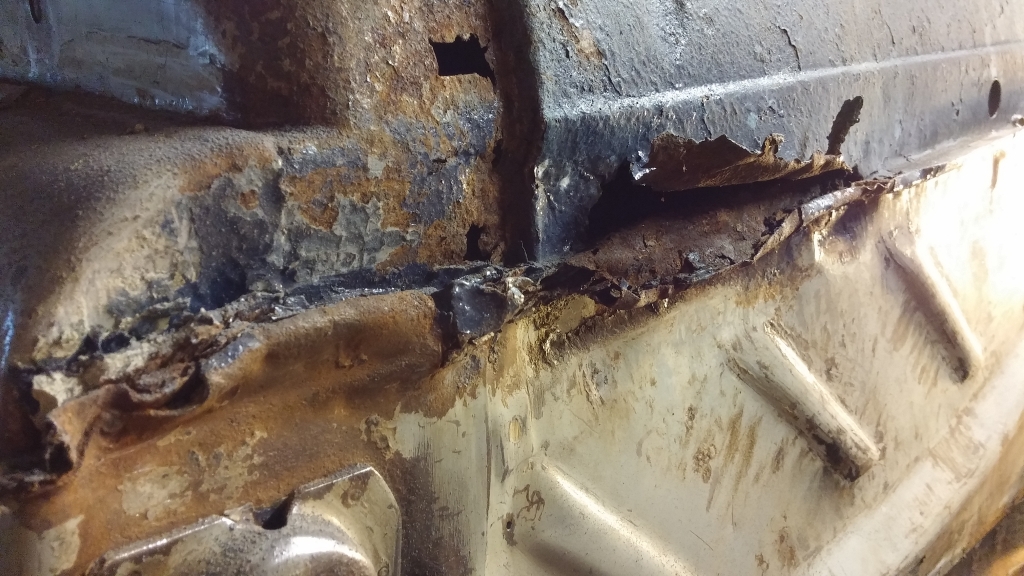
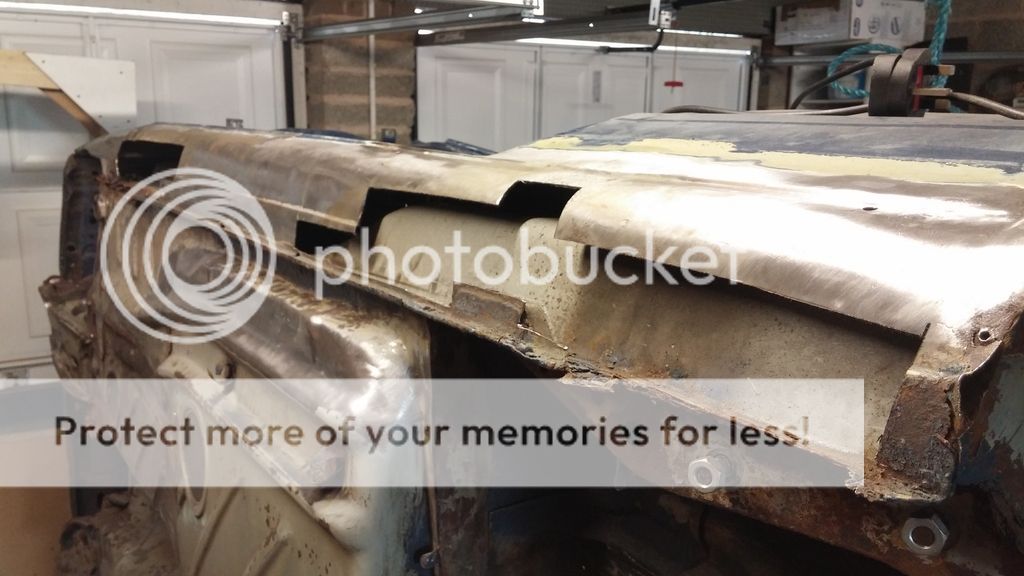
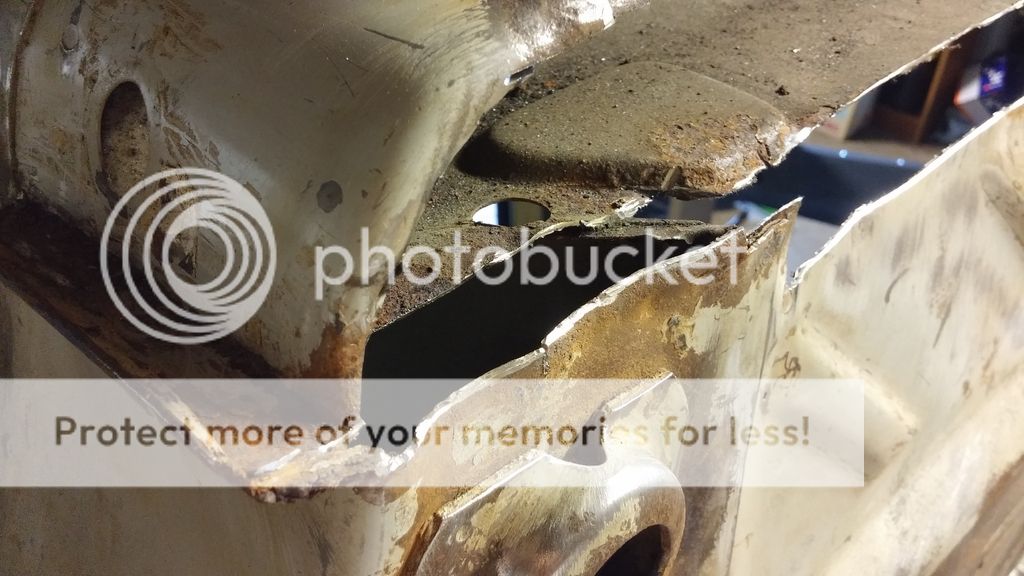
Results were definitely better than i expected, but now i need some advice as to where to cut? Is it better to cut along a flat surface or along a panel corner? I'm assuming it's better to cut along the flat surface so that when you dress the welds it's far easier. I know i should keep as much original metal as possible so
On the picture where should i cut the rust out to, or should i cut the whole sill out up to the door shut on top of the sill when the car is sat properly? I'm thinking just above the line B as it will be eaiser to cut the repair panel not on the curved part of the sill. Probably totally wrong!!


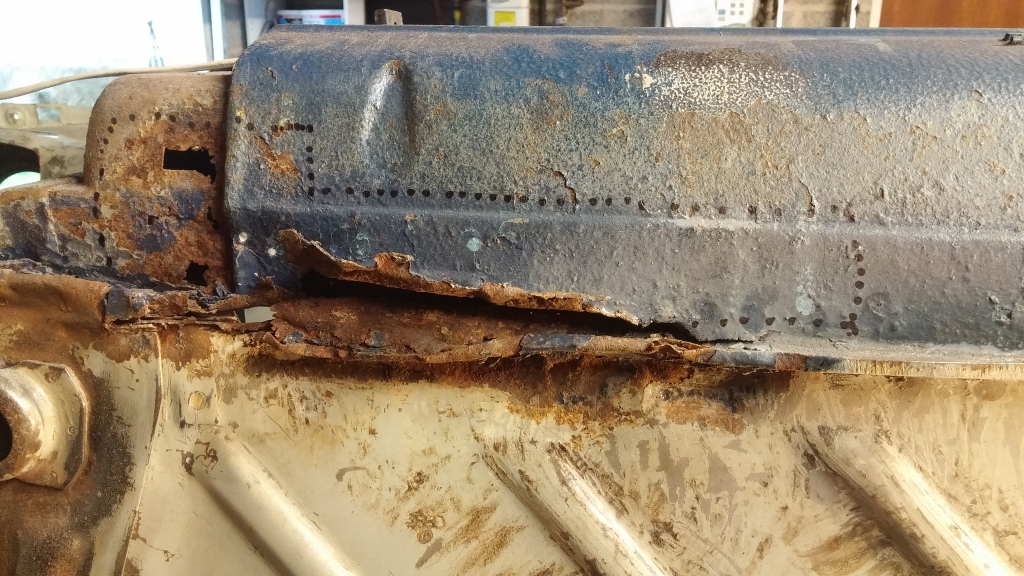
Further along the sill looks really good, as i did think i would just replace the whole sill as the back arch looks as bad as the front part of the sill.

Posted
Local Hero

Regards Volkswarren
X2 1983 A REG EW CAMPAIGN In WHITE(Awaiting full rebuild solid body) & T Reg S1 GTi Project, Still Looking for Series 1 GTi's or a 16S Oettinger to restore (Complete Cars only) or an A reg Lhasa Green or White Gti to restore, also consider Black, Red or Blue, Also Golf Driver Project Wanted anything considered WHY
X2 1983 A REG EW CAMPAIGN In WHITE(Awaiting full rebuild solid body)
& T Reg S1 GTi Project, Still Looking for Series 1 GTi's or a 16S Oettinger to restore (Complete Cars only) or an A reg Lhasa Green or White Gti to restore, also consider Black, Red or Blue, Also Golf Driver Project Wanted anything considered WHY
Posted
Old Timer
Posted
Settled In

Posted
Settling In
Posted
Settled In
Posted
Settling In
Posted
Settled In
I just used a cutting disc on a angle grinder to cut the bits out nothing else. Will post some progress once there's something to show.
Posted

Settled In
I have some damage on the lower sill where some amateurs placed the hydraulic jack to lift the car. Thus crushing the sill/lip
Not as major as yours but want to fix it before it gets any worse.
Keep up the good work

There are too many online users to list.