


Borednow's Cabby - New Season new pics!

Posted
#1269334
(In Topic #152430)

Moderator


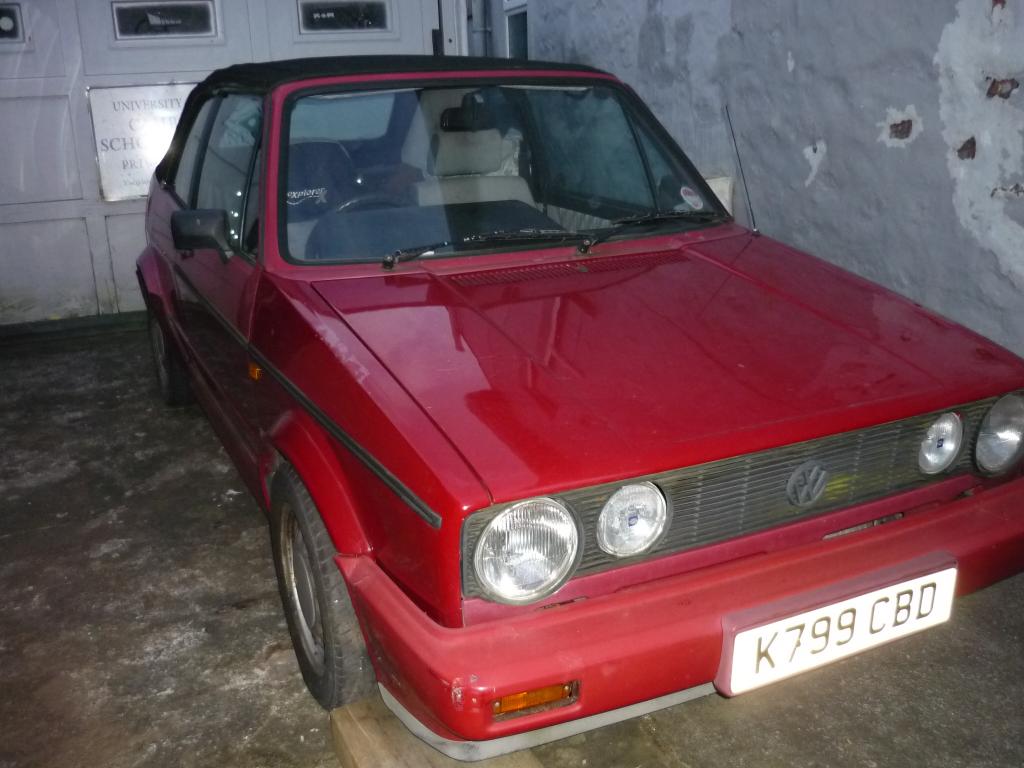
93 Clipper Cabrio
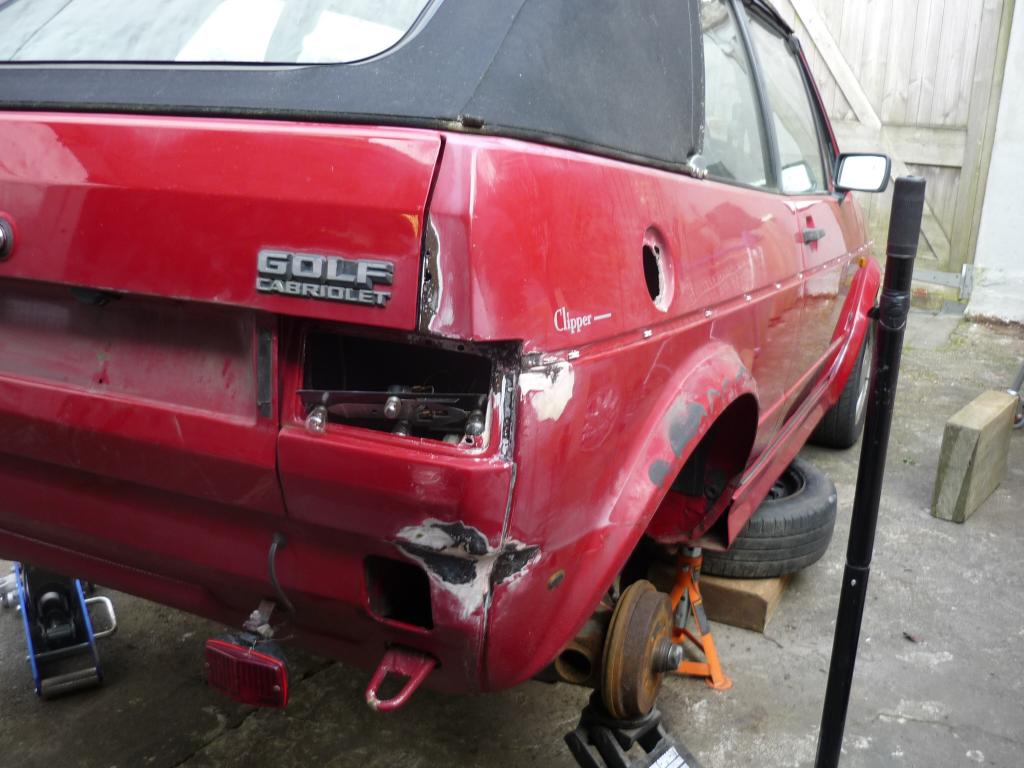
It's a 1993 (K-reg) Golf Clipper Cabby. 90,000 miles, 1.8 carb model.
Several careful owners. There's also been several not careful owners too by the looks of it. Has some old paperwork to back up the mileage over the last few years including a new mohair hood about 5 years ago.
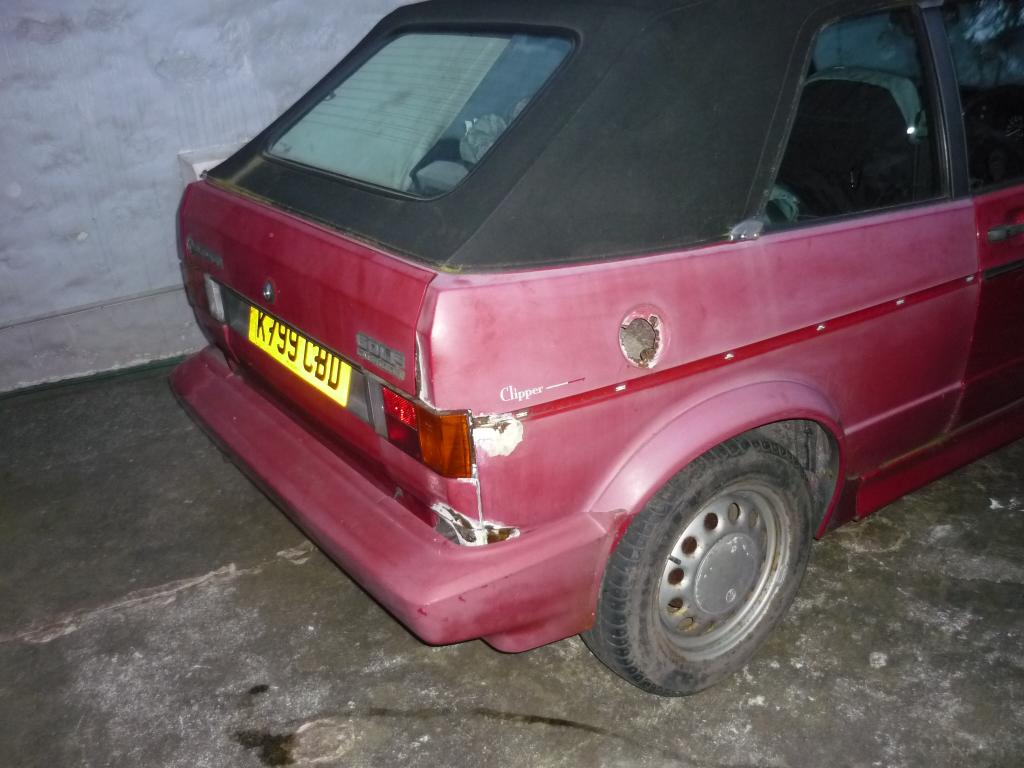
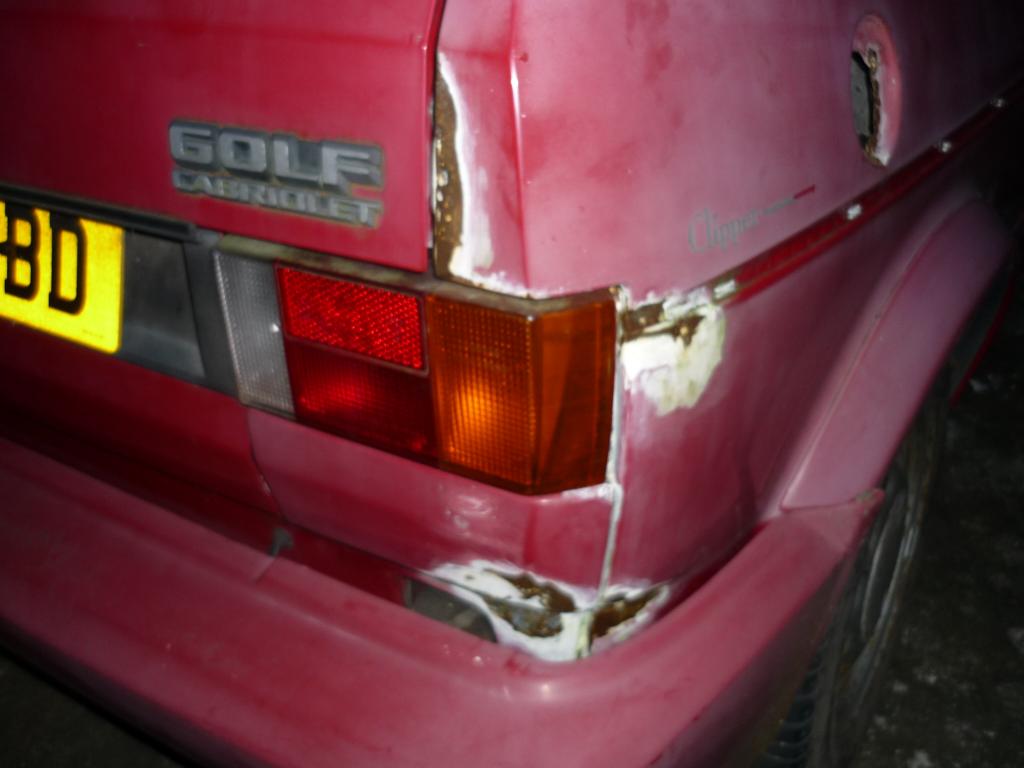
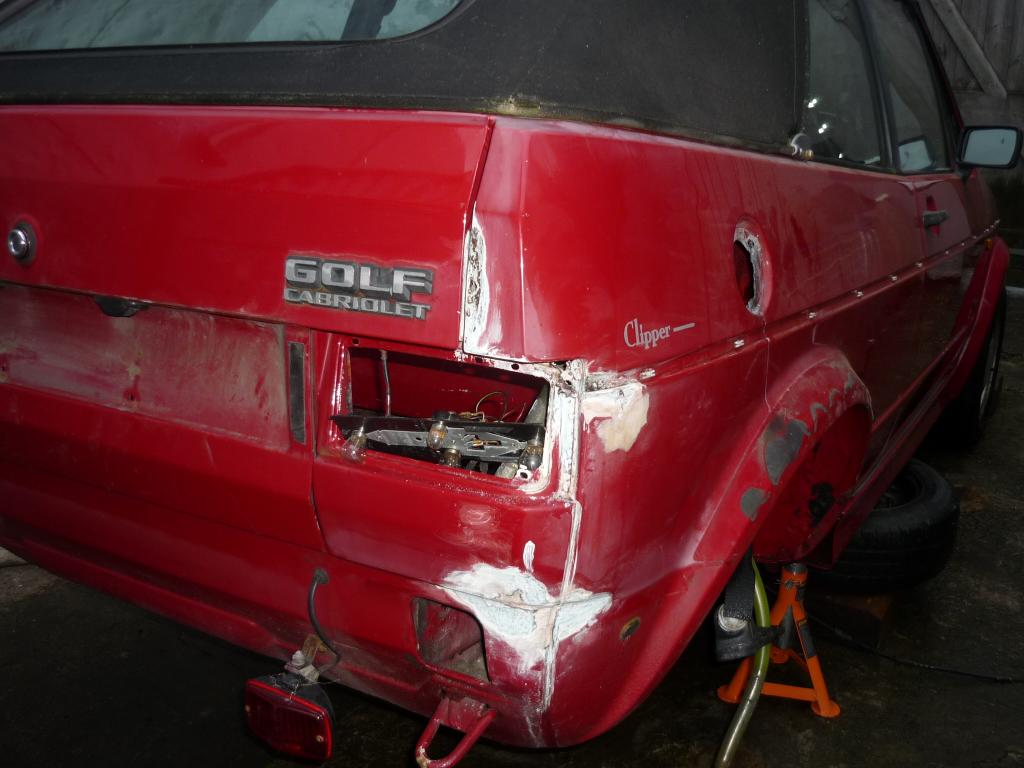
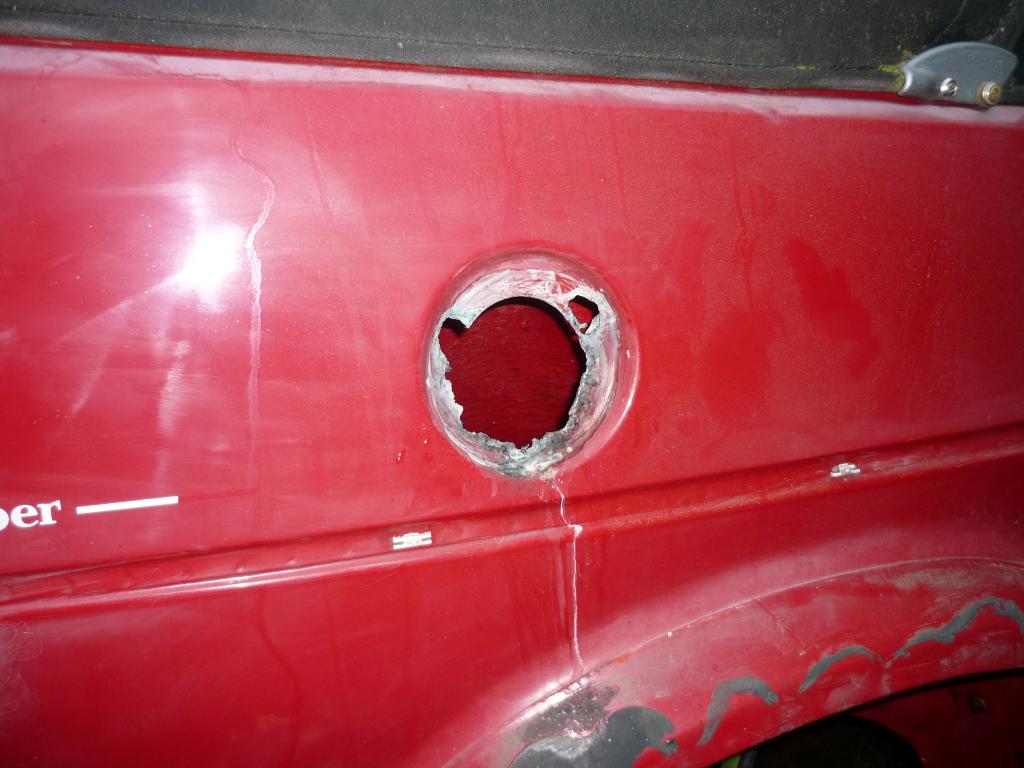
I saw it advertised on ebay fairly close to me down in Cornwall so went to have a look just to see really. Didn't really have the intention of buying it but as it was up for £400 starting bid thought it was worth a look. It appeared to be sound in all the right places so bunged in a bid and I got it. It had been stood for about 18 months after the owner decided to some work to the fuel filler neck and rear drivers corner and never got around to finishing it.
First challenge then was to actually get it home! So last Thursday I rented a trailer, threw a spare battery in the boot of the car and popped down to pick it up. Course the battery was flat and the brakes were locked on so couldn't drive or push it onto the trailer. Luckily the trailer had a winch so managed to get it on. Took it down to a local garage for a 'pre MOT' check to see if it was ok or whether I'd be cutting it up for spares. Turns out it needed only a few things for the MOT
1, New front shocks
2, rear drum on passenger side
3, Steering rack gator
That's it!
 To say I was surprised is an understatement
Took it home and chucked in front of the garage while I decide what to do with it.

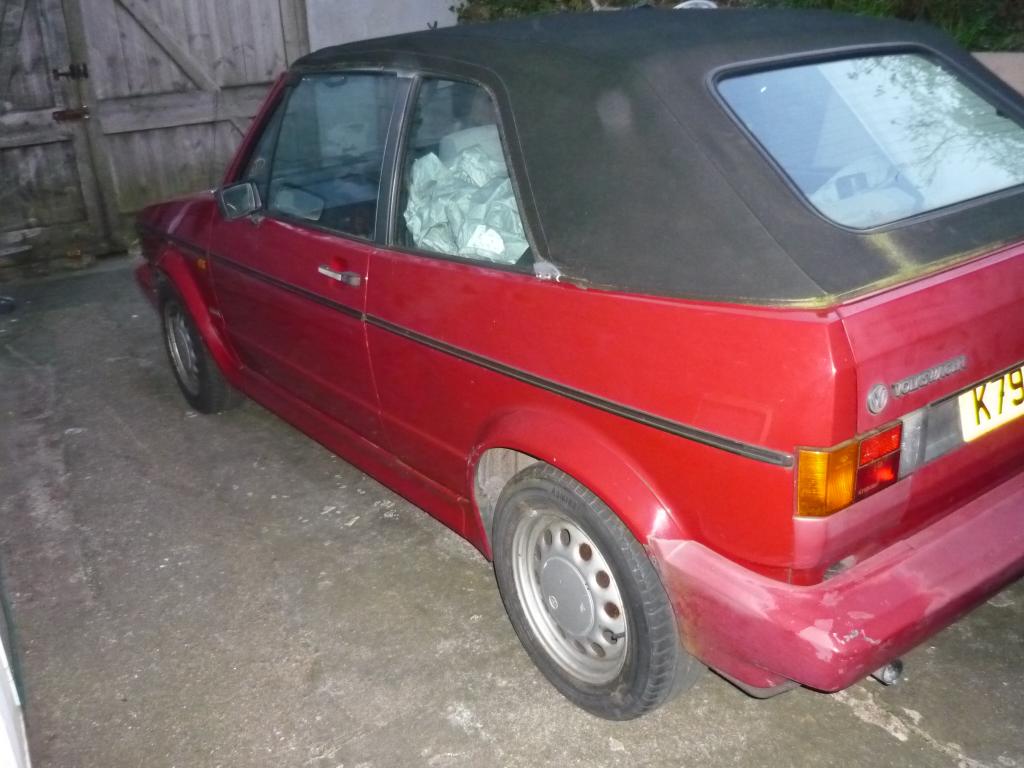
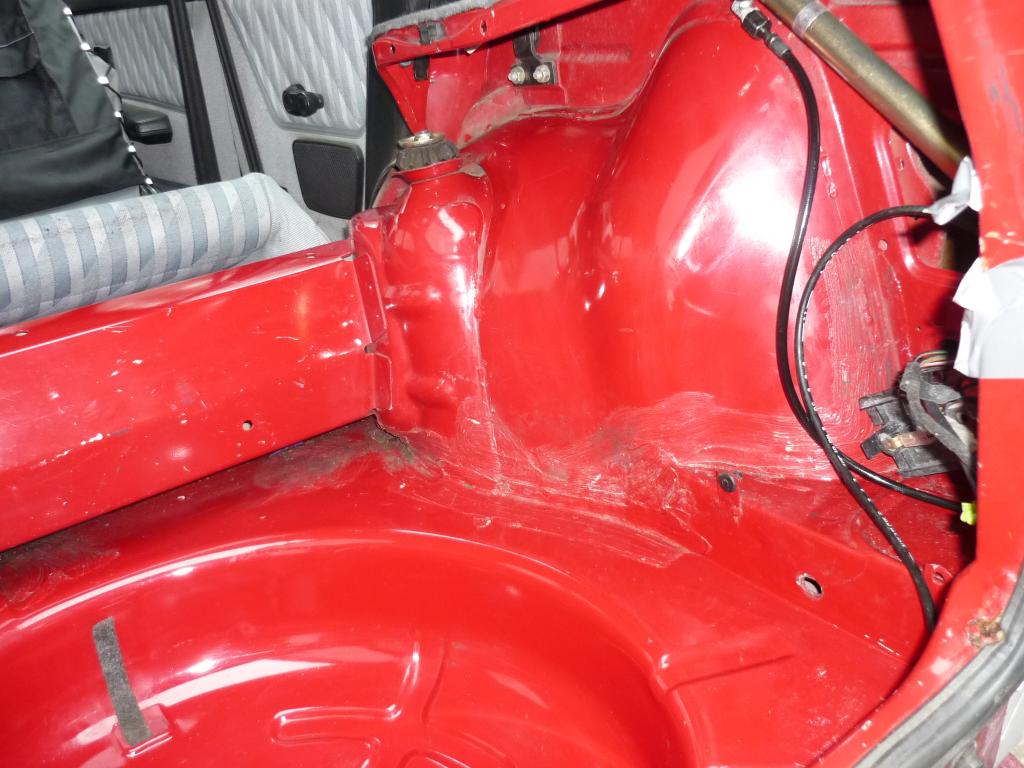
And the poor Drivers rear panel.
On Friday i decided that spending some money to fix up would be the best idea. So made a list, new disc and pads for the front, new drums, shoes and bearings, springs etc for the rear end, new polybush rear sub frame mounts, new suspension mounts for the rear, new front top mounts, new stater motor (the original was a bit tired), a new fuel filler neck and as it seemed rude not a set of JOM coilies as well. I've never bought new stuff before for a car I've always bought and re-furbed second hand stuff bit I thought what the hell this time! After all what else are credit cards for
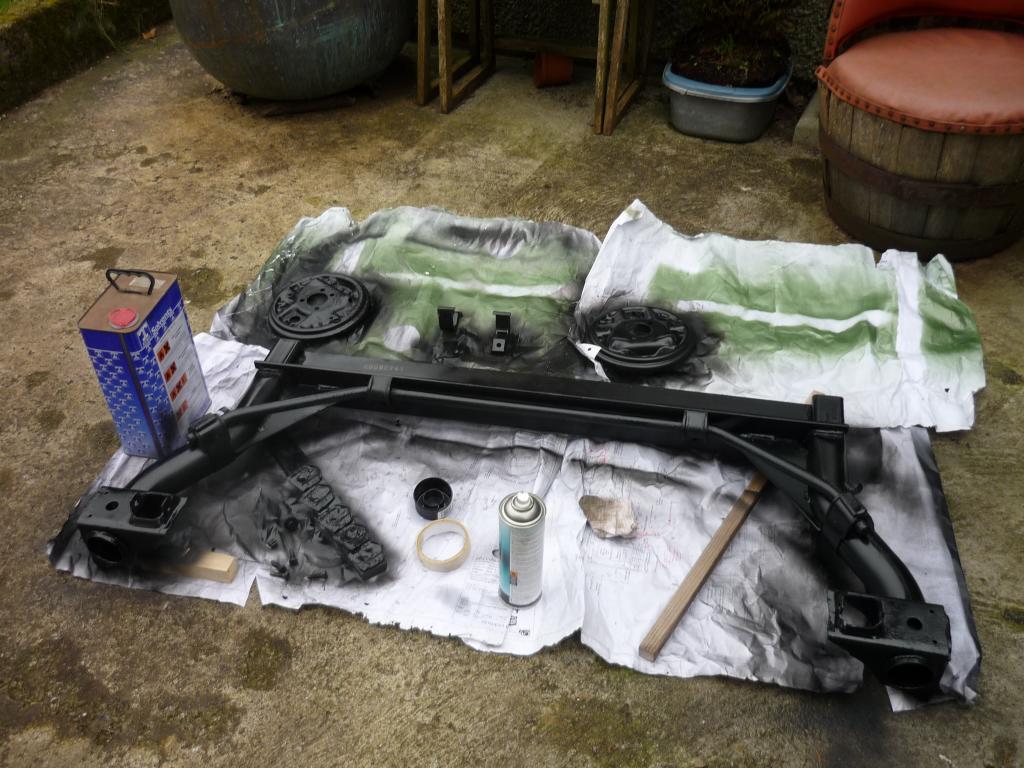
Saturday was spent compounding the body to see just how bad the paint was and generally emptying all the rubbish and spare bits out of it.After much contemplation I thought I'd start with the rear end as this needed the most work so Sunday was spent taking off the rear beam, brakes etc
Managed to get it all off and apart even without a Haynes manual. I bet putting it all back together again won't be quite so easy!
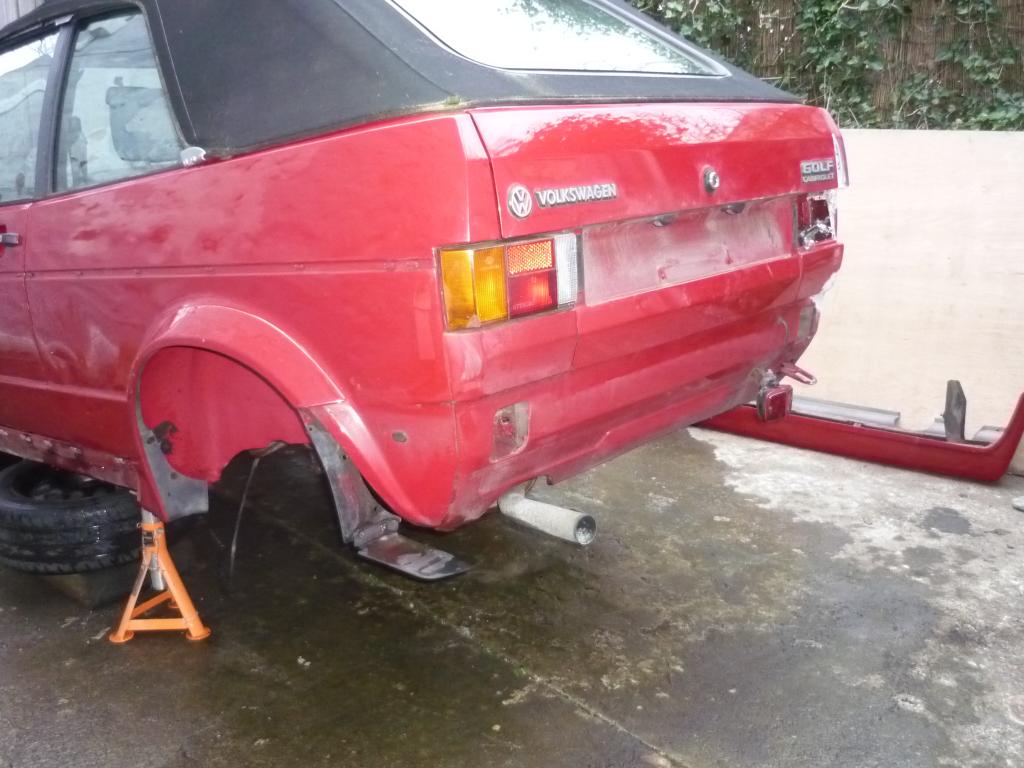
The inside of the rear wheel arches seem to be in fairly reasonable condition once I managed to clean all the years of grime of 'em.
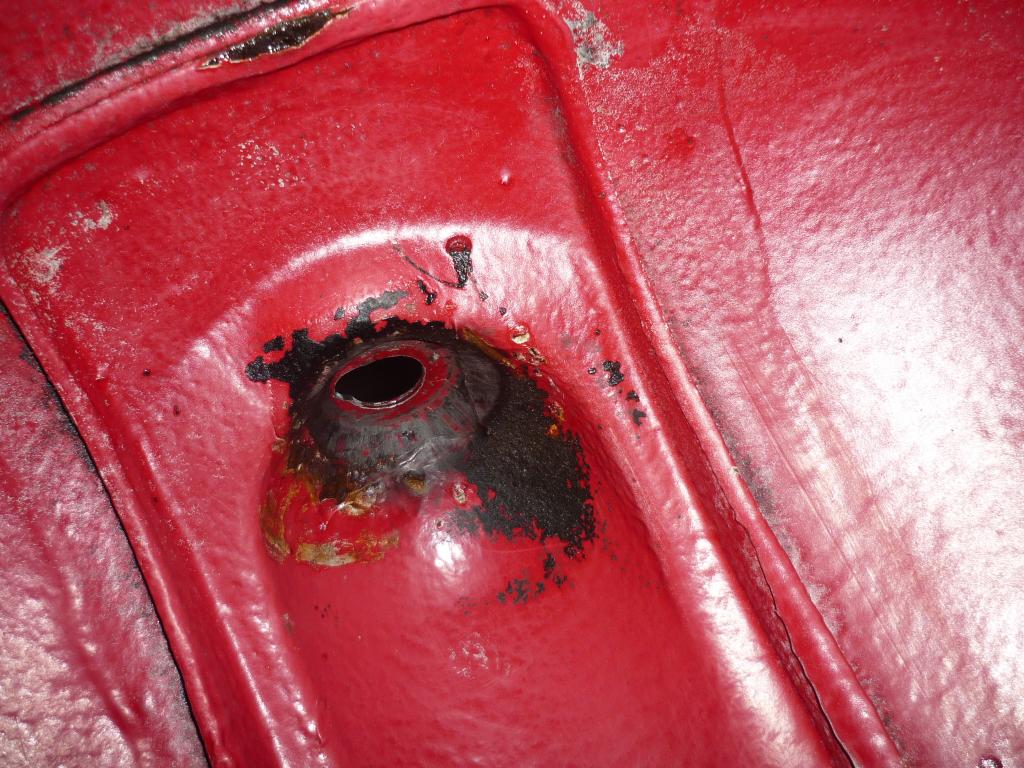
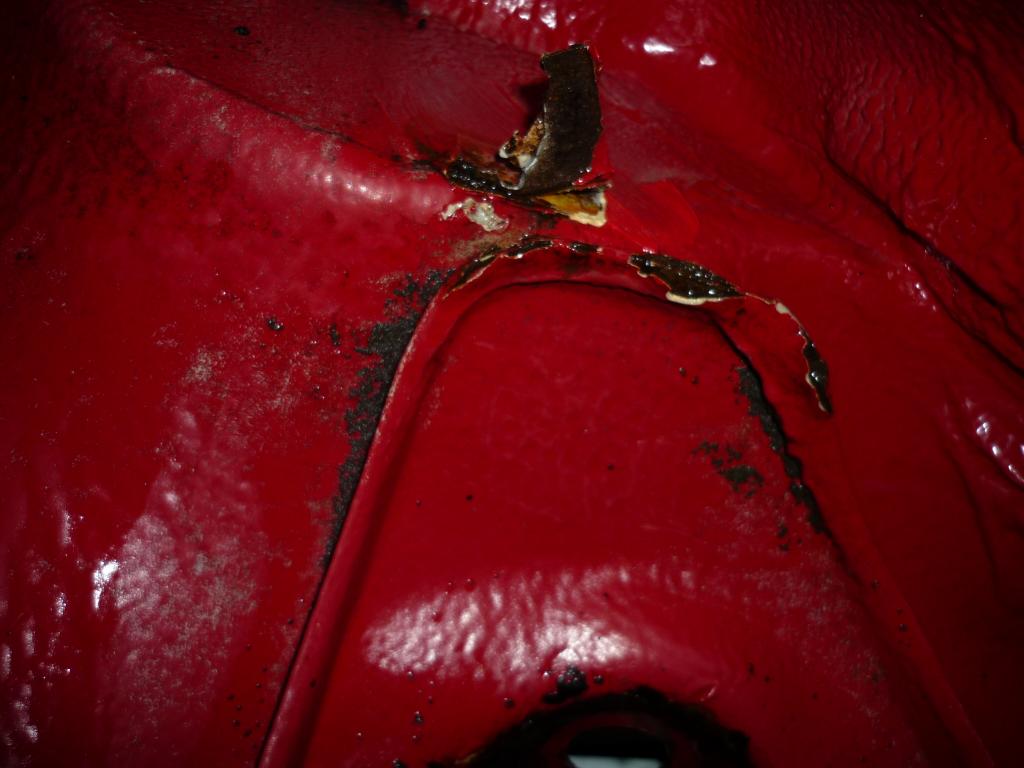
Also treated the rust around the filler neck and the rear end
That's it to date. Not too bad a start for only 4 days ownership.
 This weekend will be spent cleaning up all the bits that I've taken off. Wish me luck.
 Last edit: by borednow
Posted

COTM Team

Chris

Posted

Moderator
Good luck with the project.


Posted
Moderator
I just wish that the people who had worked on it before had used the proper tools. I hate having to try and file down nuts and bolts and using a an adjustable to get things apart just because all the flats are rounded off!

Still they'll all be replaced with new shiney ones so at least it's only during the strip down.
Posted
Moderator
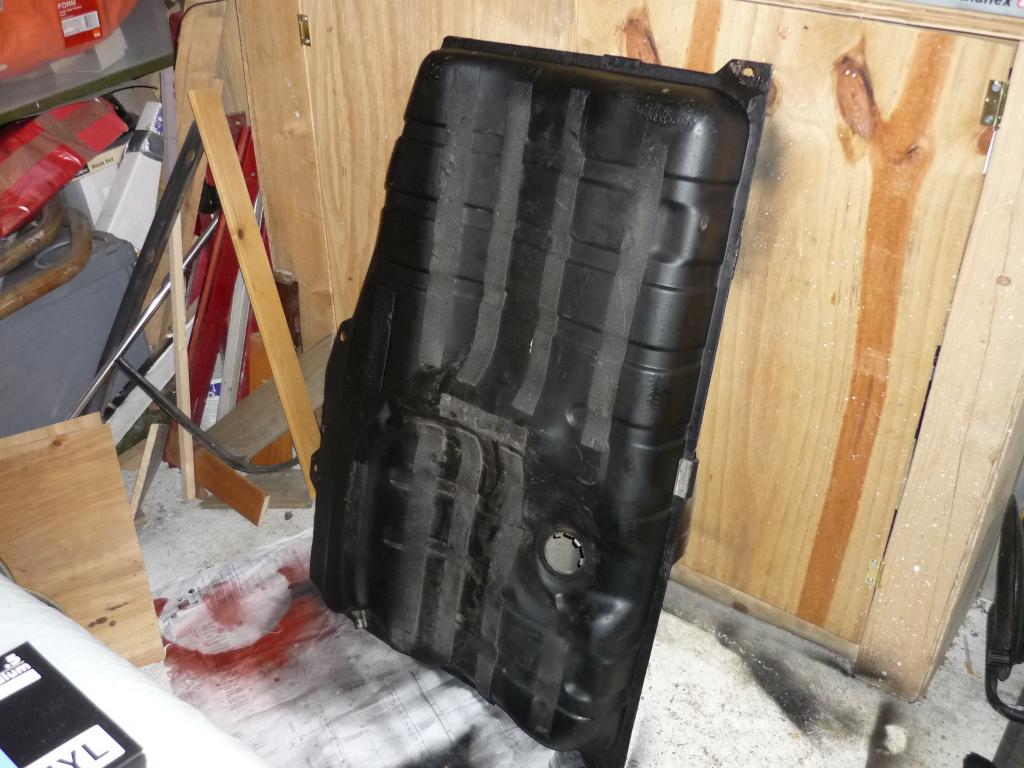
I received a re-conditioned fuel tank from Collo16v last week (cheers Mart
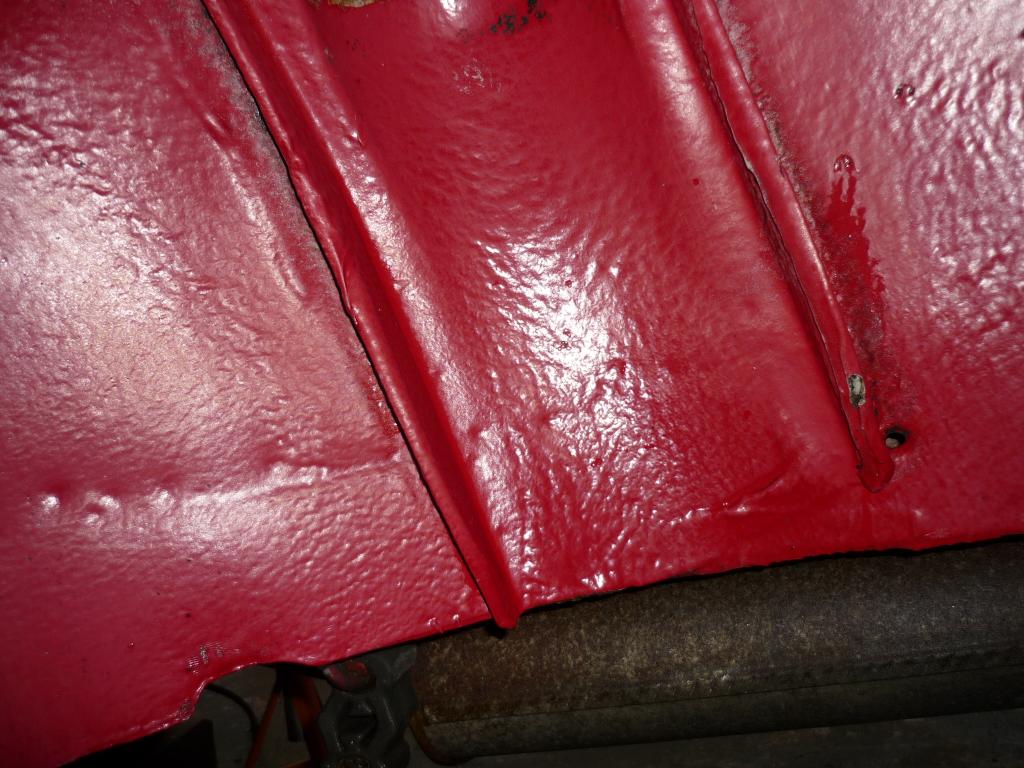
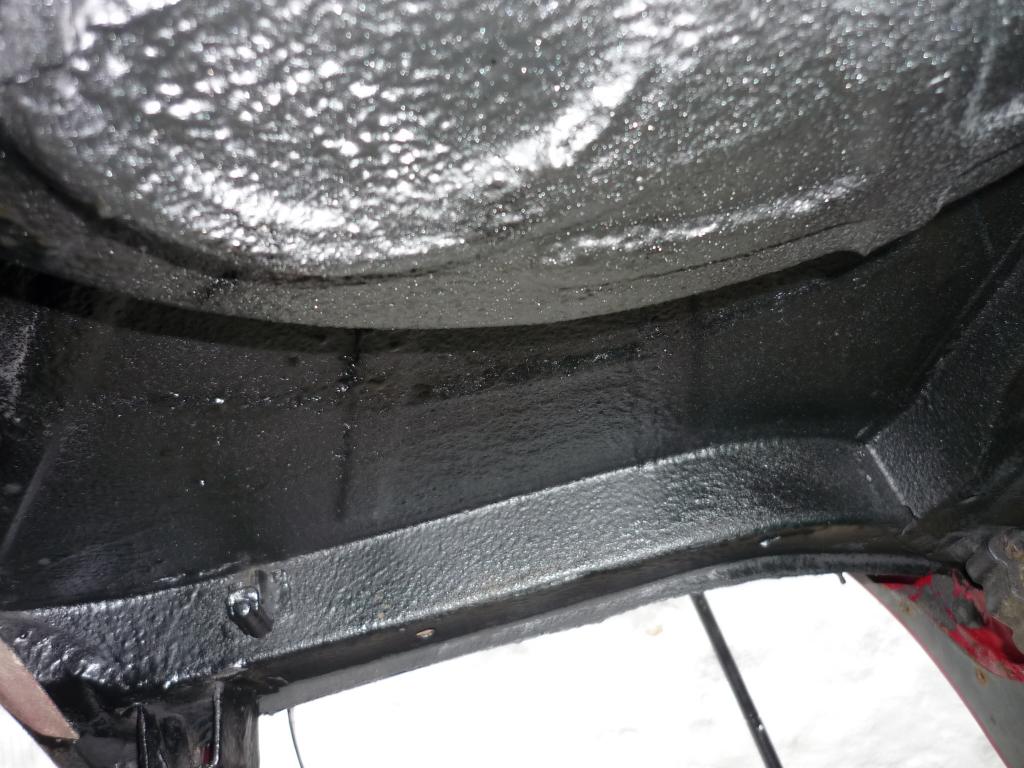
) to replace the one on the car that I expected to be full of rust given that the fuel filler neck was completely rusted out and removed by the previous owner. So I set about removing the old one.While it was off it gave me the chance to check the floor and all the bits of chassis for rot and give it a shiny new coat of paint as well.
Rear beam off and ready for paint
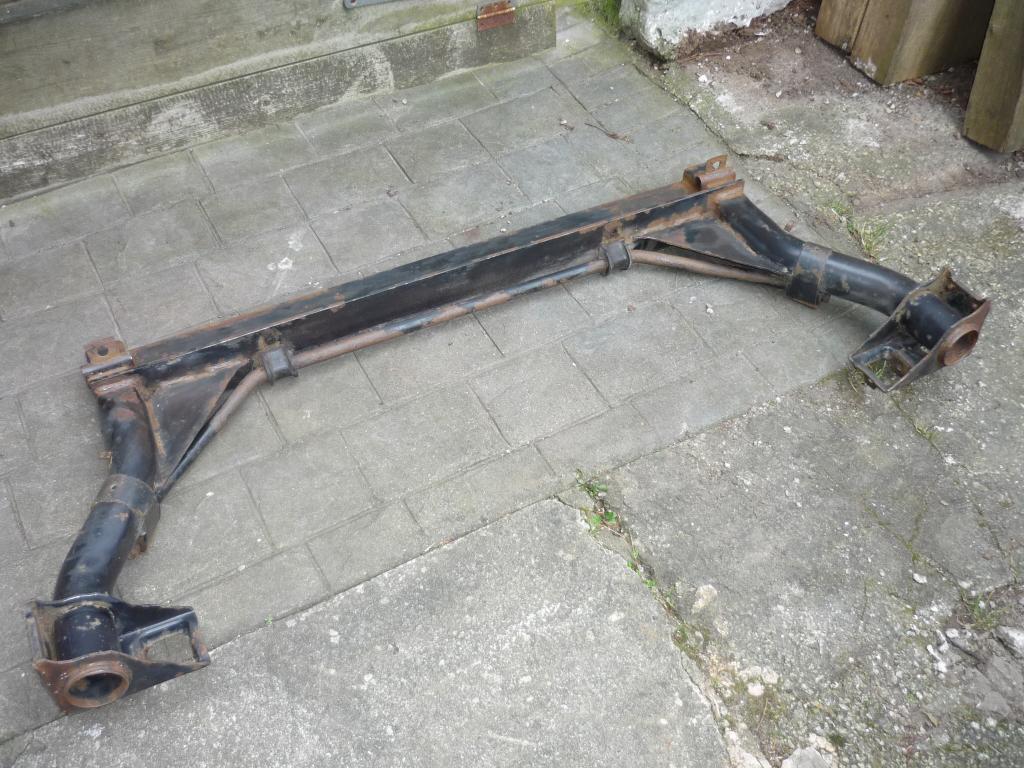
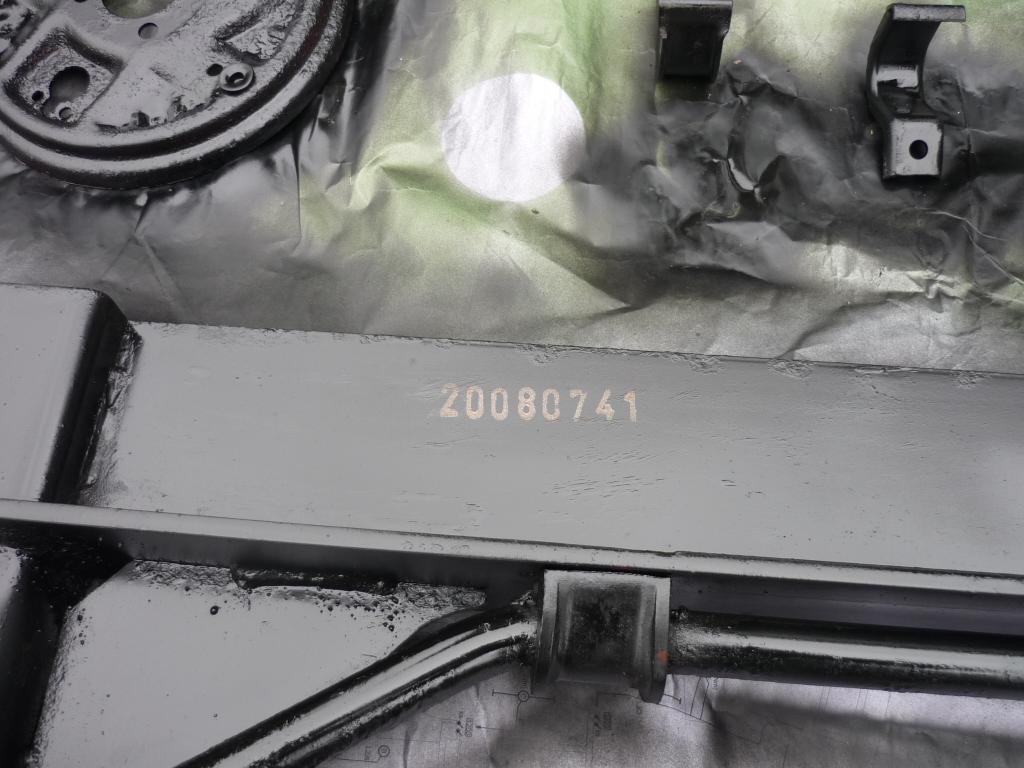
The beam was treated to several coats of rust convertor and then painted in satin black 'tough black' paint along with all the other bits that would be going back on
Gotta love it when the original numbers are still visible even after 20 years
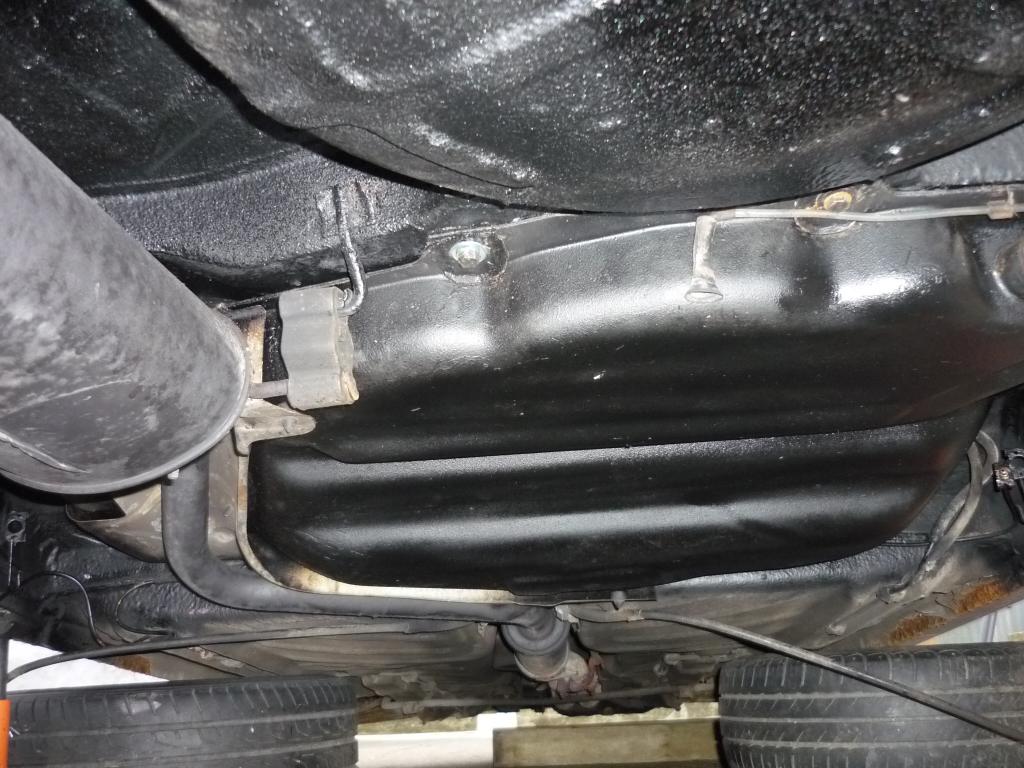
Re-con tank ready to go in
Underside all painted and ready for the tank
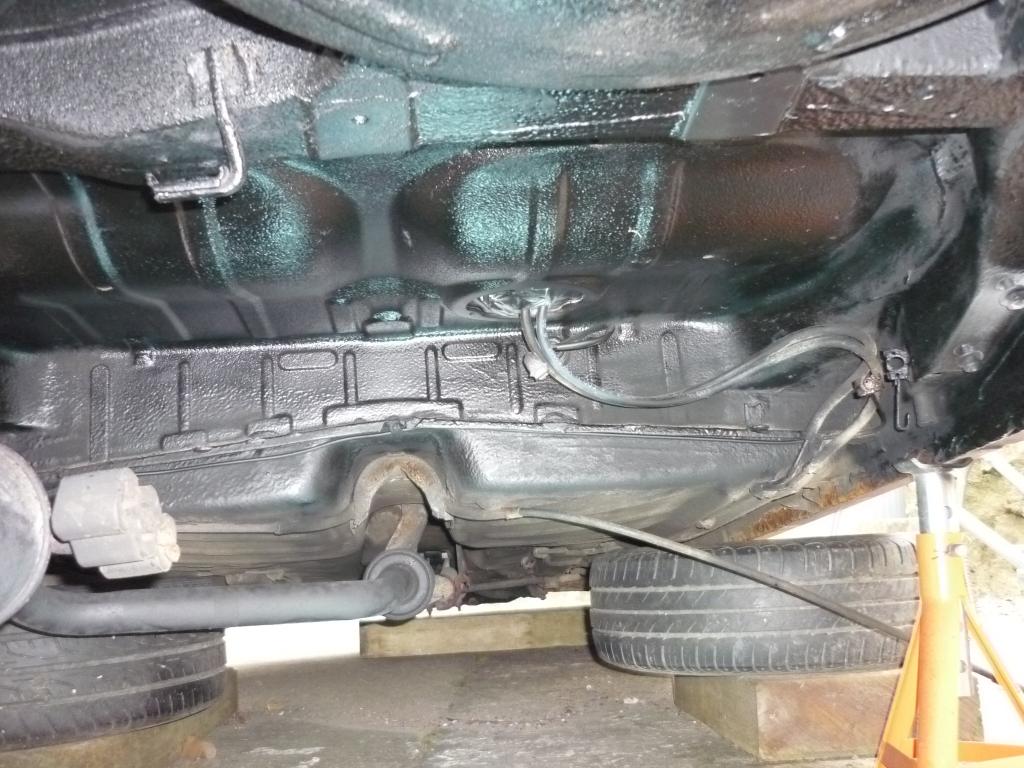
The floor looked OK generally so it was just a matter of treating the little bits breaking through and then coating everything in new stone chip protection paint so I think I was quite lucky really.
Then get the new tank in without scratching the hell out of it, exhaust re-hung and everything back together. The second time we actually remembered to move the fuel lines out of the way so it would actually fit properly. Amazing what you realise AFTER all the bolts are tight innit
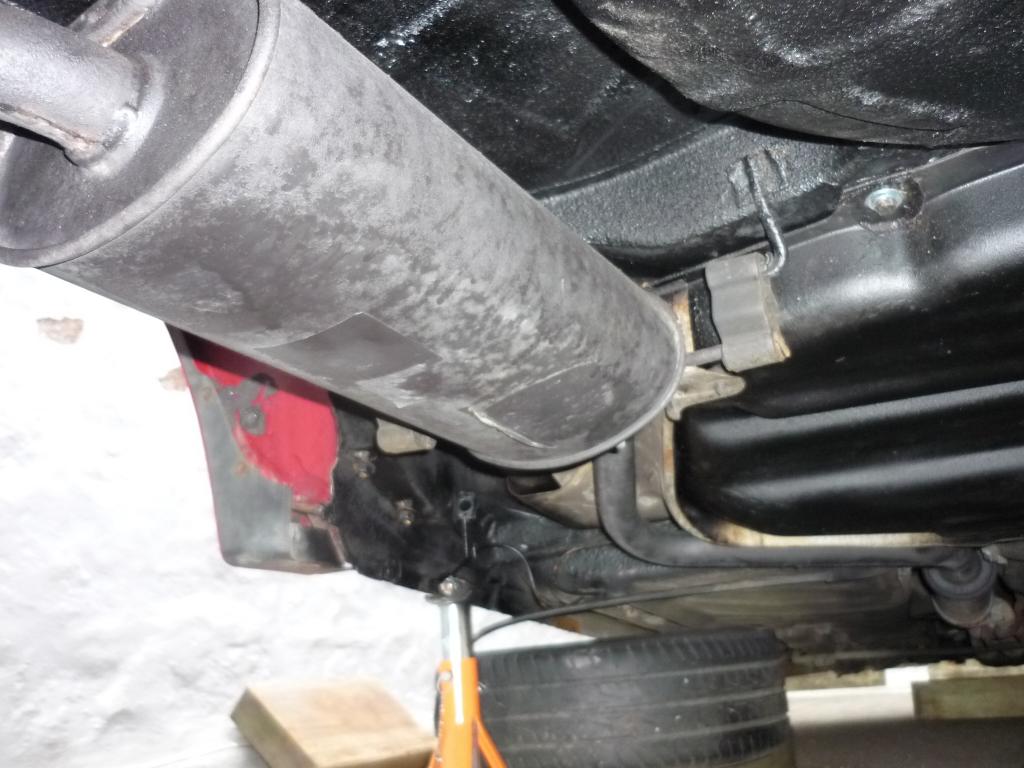
Also painted the exhaust black with stove paint. It'll probably just burn off but hopefully it will stop any more surface rust forming.
So next weekend will hopefully involve putting the beam back on and then building it all up again. I had major problems trying to get the old rubbers out of the mounts. Turns out the inner cylinder of the mounts has rusted and welded itself to the bolt. Tried belting it with a small hammer, heat, penetrating fluid, cold spray, soaking it on oil overnight, soaking it in vinegar overnight and hitting it with a bigger hammer. All to no avail. So I'm currently trying to track down the bolt and the cup washer, just when I thought bits for golfs were easier than bits for mk1 polos
 cf_emoticons__BangHead: Dagnamit!
Posted
Moderator
Posted
Moderator
We ended up dropping the tank again to get the pipes on after struggling for 20 mins and failing

I must really make better notes of how i take things apart

Posted

Moderator

Posted
Moderator
borednow said
Having just read your thread I'd say getting stuff back on tricky situations is what you do
We ended up dropping the tank again to get the pipes on after struggling for 20 mins and failing
I must really make better notes of how i take things apart
we have encountered a few issues along the way with more to come no doubt.JonP worked out that if the breathers were undone from behind the wheel arch that gave more flex to get them back in place. Also mine were really solid so needed boiling water to soften them up so they would play ball.
Posted
Settled In

Posted
Settled In
Rich
Posted
Moderator
utterly-dubberly said
Looks like you baqgged yourself a bargain there mate! You certainly wasted no time getting stuck in lol,good man!
Yeah I was getting 'bored' again so needed something to do. The Derby is nearly 'finished' and I actuially find myself taking stuff off just o out it back on
Thought I'd start with the chasis stuff and leave the body and interior for later. Dunno though. The car doesn't seem to look any better but I've spent about 80 hours on it so far
RICH234GHA said
Nice project at a baragin price, Look forward to more updates
Rich
Cheers mate. Hopefully it'll move along a reasonable pace. Finding small bits seems to take time though ans it's messing with the planned programme a bit. Still that's half the fun I suppose
Still trying to decide whether to go with a change of colour with it.
Any thoughts or suggestions would be appreciated!
E
Posted
Settled In
If I changed the colour of mine it would be going a matt blue I think.
Rich
Posted
Moderator
RICH234GHA said
Thats funny, Im in the same dilema if I should change the colour of mine, Main thing putting me off is that the engine bay / inside of car will be the original colour,
If I changed the colour of mine it would be going a matt blue I think.
Rich
I know what you mean mate. That's what worries me too!
Posted
Moderator
Bit bloody chilly and waiting for stuff to arrive from Heritage as well before the beam can go back on.
So I thought I'd tidy up the inside a bit instead. it's a job that needed doing but I had intended to do it a bit later on.
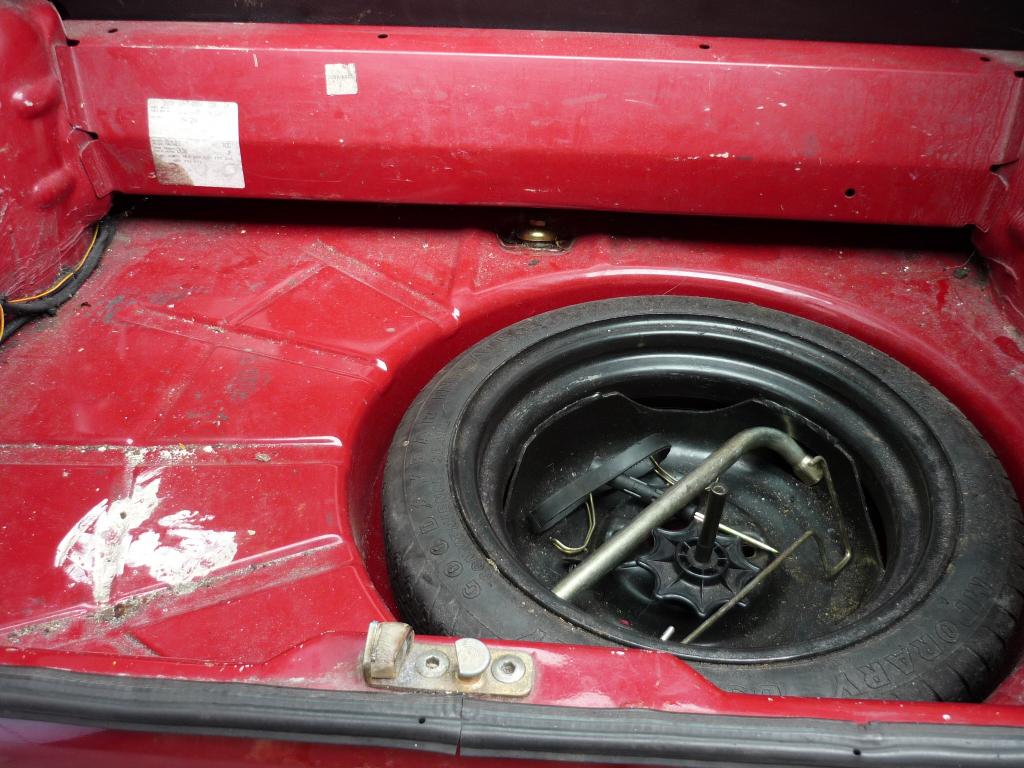
Boot before
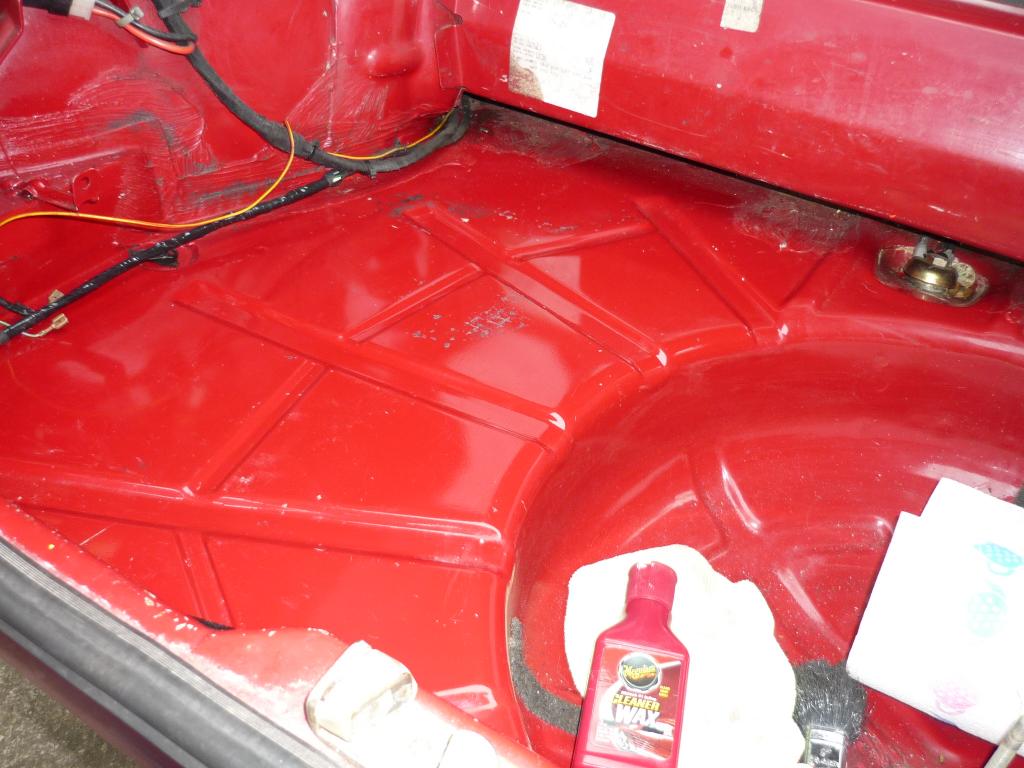
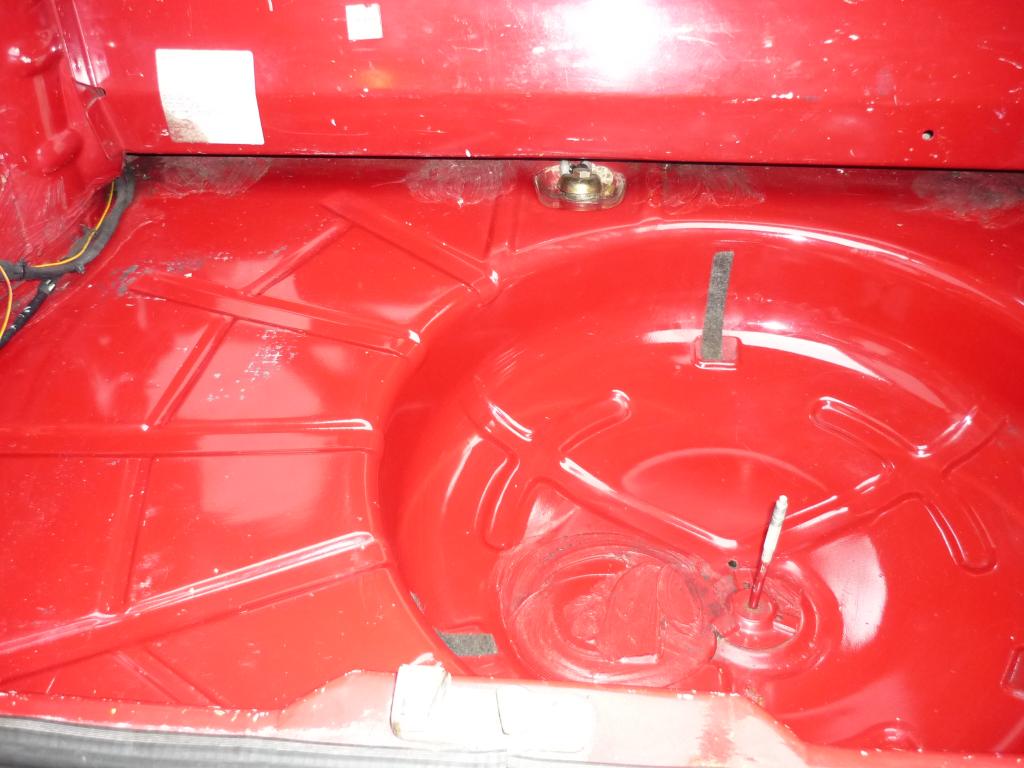
and after a bit of elbow grease and McGuires cleaner wax
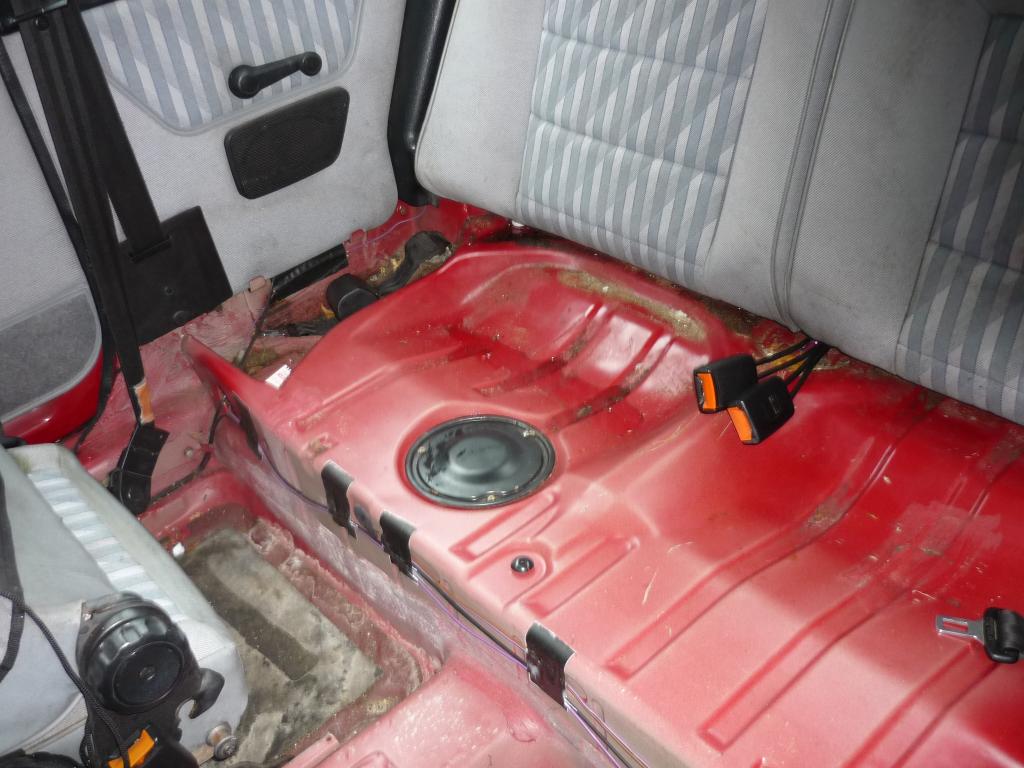
Rear Seat base out. No rust phew!
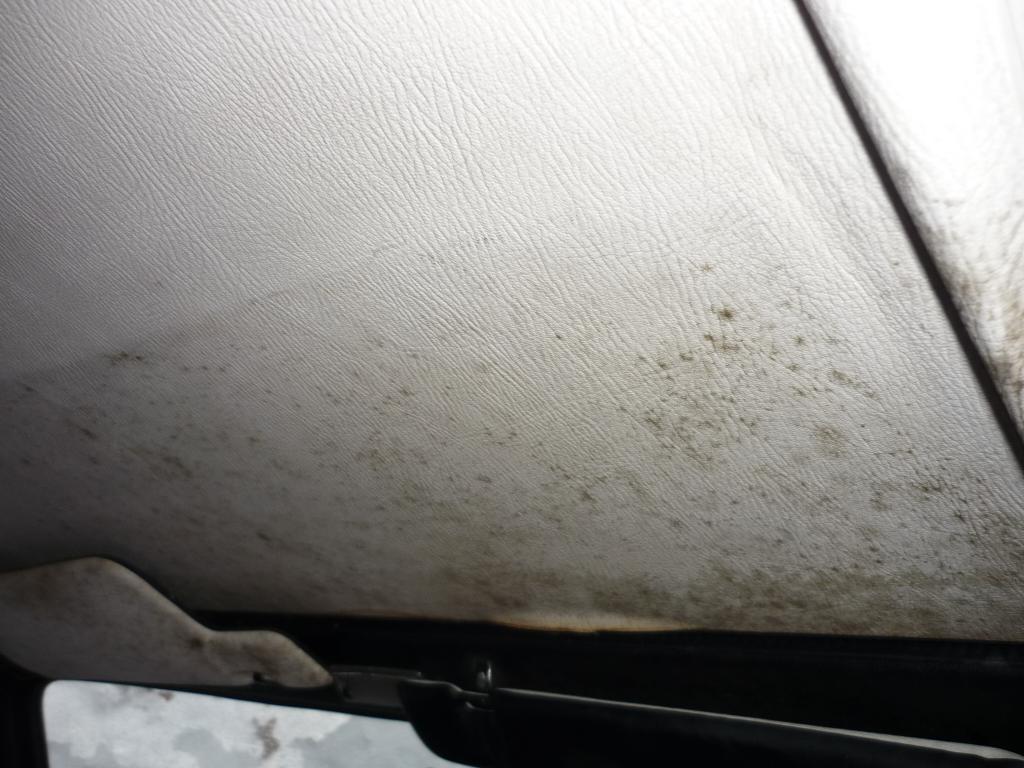
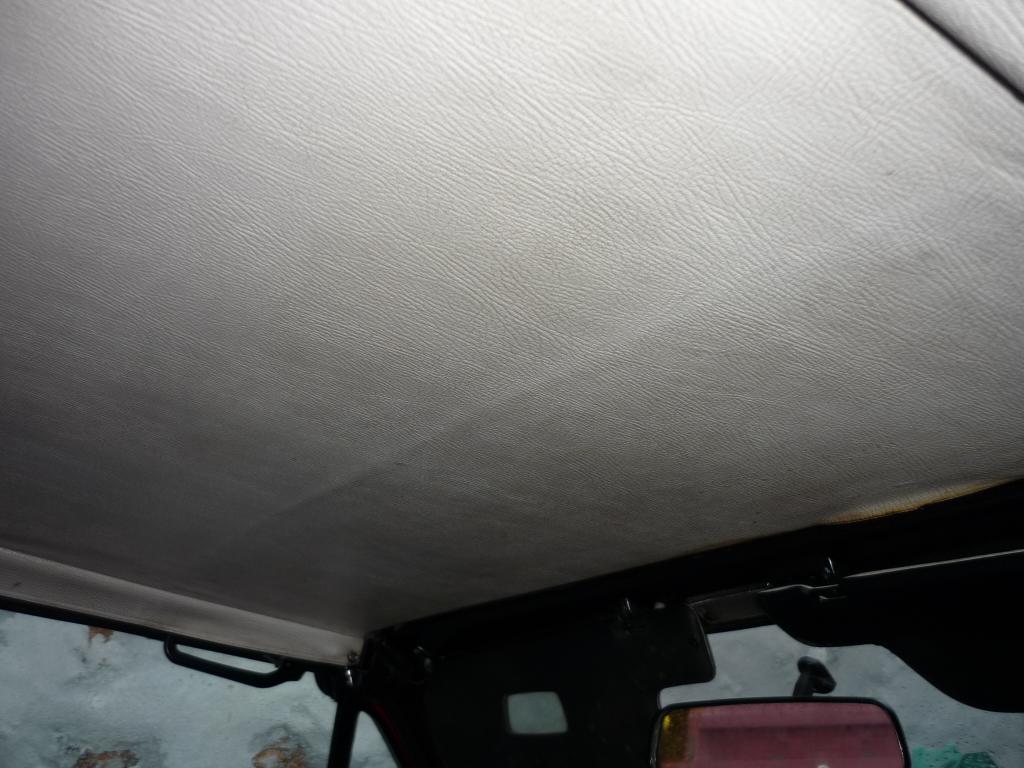
Inside of the roof and the sun shades had obtained a bit of mold
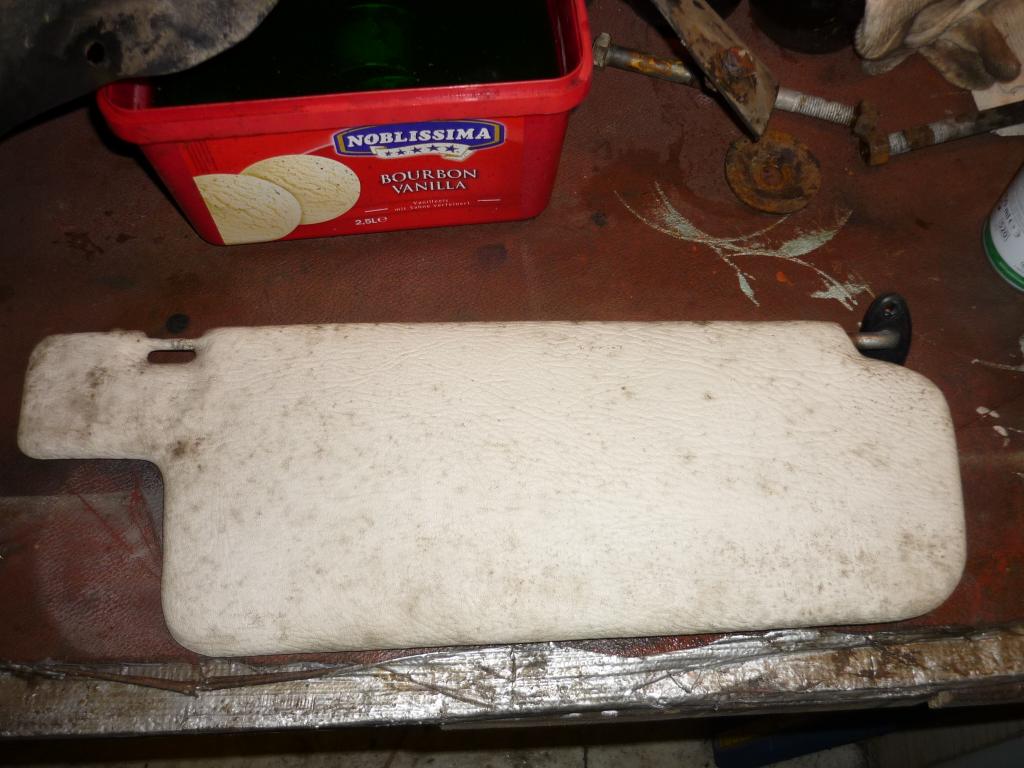
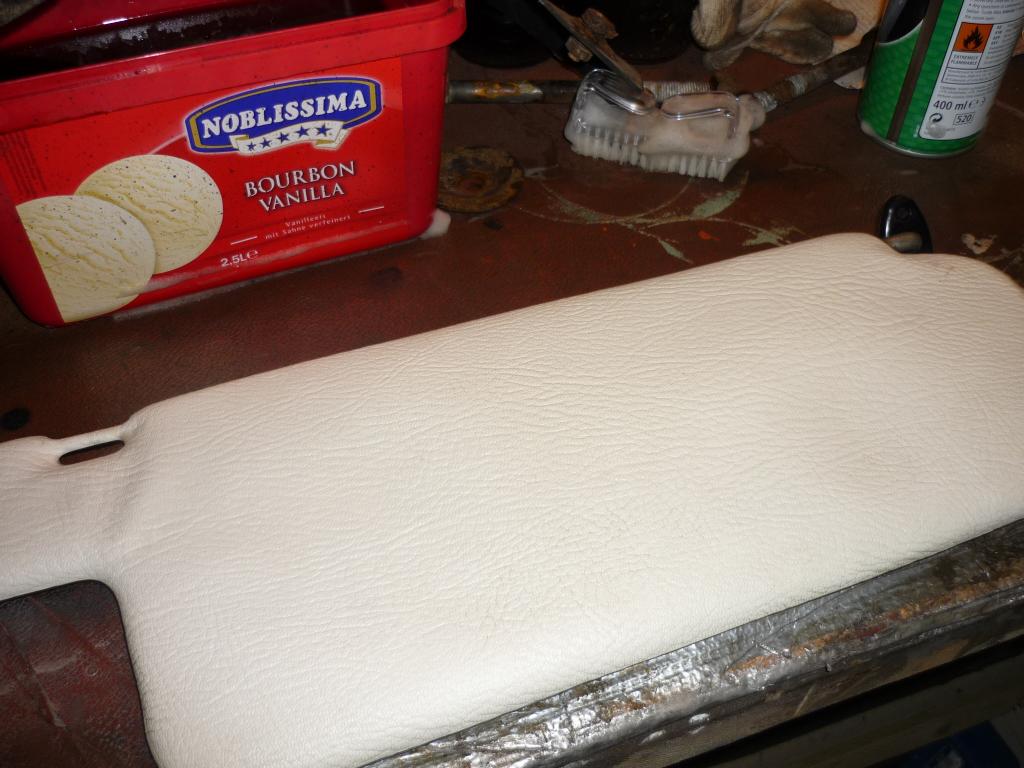
But a bit more elbow grease had em sorted
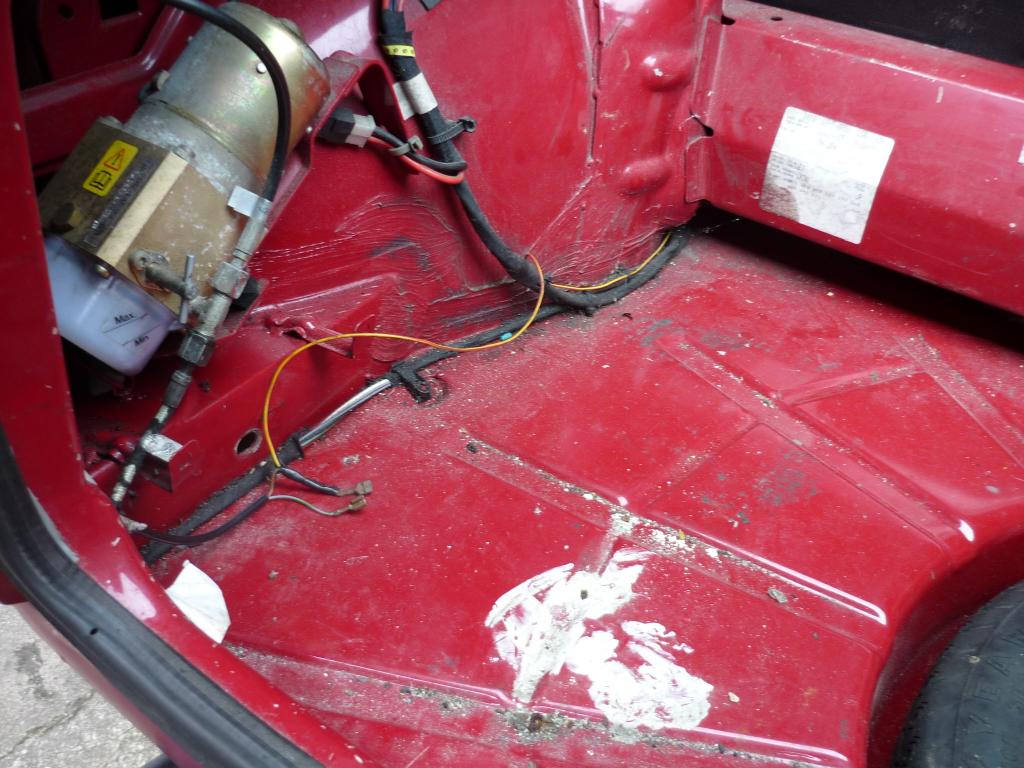
Also got the front seats and all the rest of the fittings from the floor and removed all the water and years of rubbish from the inside, crisp bags, old lighters and several years of car park tickets
Hopefully crack on with getting the back end back on next weekend if it's a bit warmer and all the bits turn up.
Posted
Old Timer

may i ask what you used or what you did to clean the mold off the visors? its appeared on mine a bit after they got a bit damp, dont know what the best way to go about cleaning it off is?
cheers
'83 formel e
Posted
Old Timer
Posted
Moderator
ned_h said
looking good mate
may i ask what you used or what you did to clean the mold off the visors? its appeared on mine a bit after they got a bit damp, dont know what the best way to go about cleaning it off is?
cheers
It was just some cheap stuff from Halfords in this case. Comes in a green and yellow can with a yellow brush on the top cap I think it's a turtle wax product. DO NOT use the brush it comes with though. Get yourself some cheap nailbrushes. Stick loads on and let it 'fester' give it a gentle rub with the nail brush and wipe off the remains of product. Should be shiney and clean and smells nice too!
If it's not all gone give it another go. Brad. said
This is gunna be a clean cabby. Great progress fella!
Thanks mate. Dunno about that! The body work is fairly b****ed in places TBH.
I think it needs several new panels which I can't afford at the mo.
I've had the strange thought of stripping all the paint on the outside and just clearing the lot. Then painting the inside and just sticking in some mats and the front seats and leaving it like that for a bit.
I may be losing it though!
E
Posted
Old Timer
thanks for the advice, i'll give it a go soon before it gets any worse!
'83 formel e
Posted
Moderator
0 guests and 0 members have just viewed this: None.