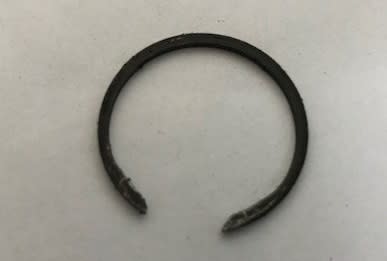
ATE Brake Master Cylinder - Circlip Removal
Posted
#1649564
(In Topic #232658)
Newbie


Method to remove difficult circlip
Once the master cylinder is removed from the car, on order to dismantle and replace the seals the circlip must be removed. However, it looks as if VW/ATE did not want to make this a serviceable part as the circlip has no holes and chamfered ends which make it almost impossible to remove (see photo).

I tried without success to use a pick to get behind it. Instead I used the following method.
Drill a small hole (~3mm) in the end of the master cylinder casing in the gap between the circlip ends to just the depth of the circlip grove, use a pillar drill if you have one or centre punch it and use a steady hand! Don’t drill too far or you will damage the washer below – in my case I was able to push the washer down the master cylinder a few mm to prevent damage and it was sufficiently gummed-up to stay there. Then slide round the circlip until the end covers the new hole and it’s now easy to get behind it and remove the circlip.

To remove the pistons/seals which tend to stick, after removing the retention bolt, I used a long socket placed over the rod. Then bang the socket with a hammer inwards to dislodge the seal/washer and the internal springs will push out the pistons.
PS As always with brakes examine the parts carefully. Don't reuse the master cylinder if its bore is scored. Ensure that the new seals are installed correctly - probably best to take a photo of the pistons to aid reassembly
0 guests and 0 members have just viewed this: None.


