


X's Restoration: Update 16th July!

Posted

Local Hero

X's Restoration: Update 16th July!
I picked up a set of new bolts from Vw, complete with bottom nut and bolt as well, was about ?13 a side..
if you havent already sorted your set, let me know your address and I'll post you my old ones FOC
steve
Posted
Settled In

you have PM
Posted
Local Hero
NigelO said
Steve - you're a star! :mrgreen:
you have PM
In the post, amanged to catch first class tonight
Posted
Settling In

Posted

Local Hero
stevep said
try putting brake fluid on the other nuts and bolts and leave over night before you undo them, it works really well just don't get it on your shiney paintwork.
well what im gonna do every couple of hours until we get round to it is coat the bolts in wd40 (nut and bolt sides) so the might just seep in enough to loosen them off
1983 Golf 1.3 Driver:

Posted
Settling In

Posted
Local Hero
wussy said
hi x im just 17 and just got my mk1 golf formel e and iv been told that old cars are for old men but i know that the mk1 golf is the best looking car and now see another young person sees that lol urs looks nice tidy motor im liking the red mines white but realy dull at the mo and have to take ur advice under the bonnet cuz mine is as bad as urs was when u got it nice seeing pic on how ur getting on and good to see another young gun with a mk1
cheers, im glad that the young people amoung this forum know what a good car is.. so many people have got stupid chavvy cars for there first car (my brother had a 1.2 clio :roll

but yeah, white isnt the best of colours… rare though!
be warned, under bonnet work is very hard, very tedious, and very time consuming… it took me about 15 hours in all to get that bonnet shiny 8O but it is very satisfying to know that its finished.
1983 Golf 1.3 Driver:
Posted
Settling In

Posted
Local Hero
Yes well, My dad and i had another go at getting the suspension on today and we started by trying to get the old bolt out which after a while, we managed:
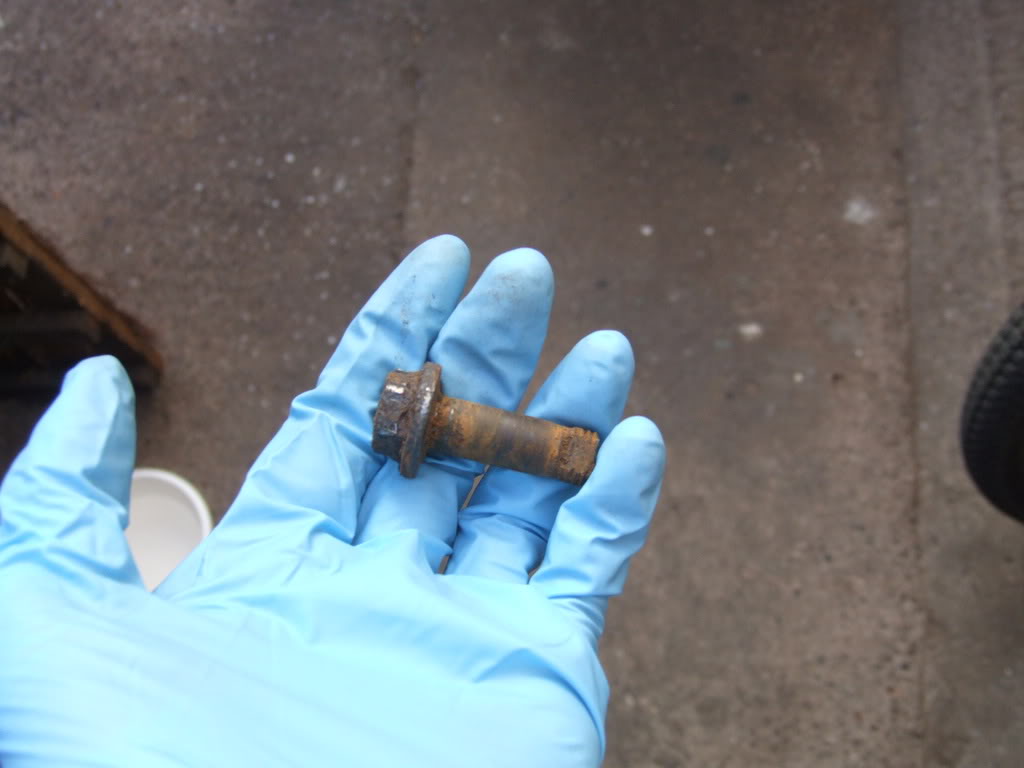
:roll: a bit on the tatty side if you ask me..
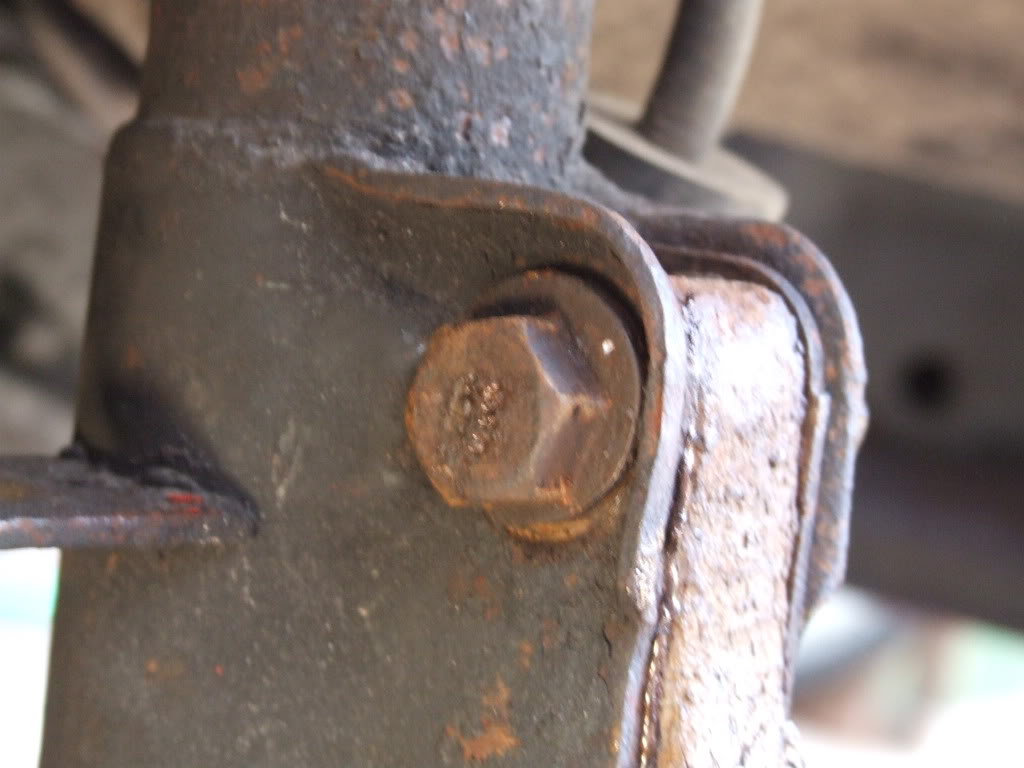
then we rolled on to the lower bolt, which presented another problem, it didnt shear, it just rounded straight away, and not even mole grips could stop it from turning

we tried using a hammer, we tried both using different tools on the seperate ends of the bolt (head and nut ends).. but after a while, my dad realised with some reasoning and persuasion it should come out:
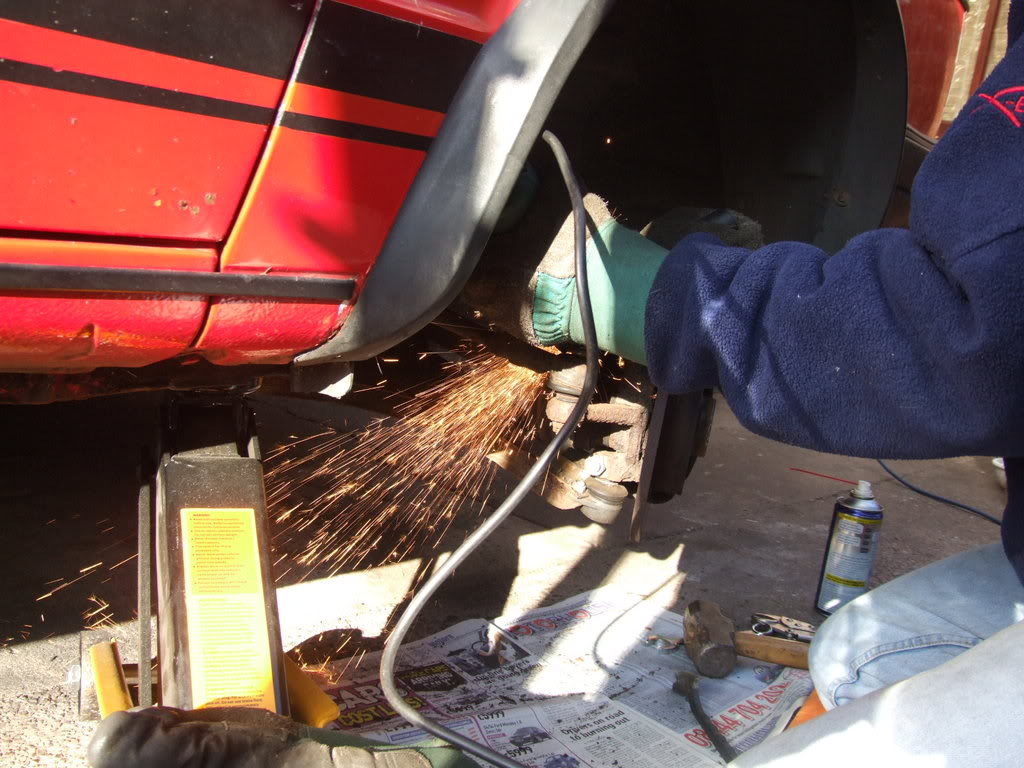
:twisted:
although leaving the bolts a bit worse for wear:
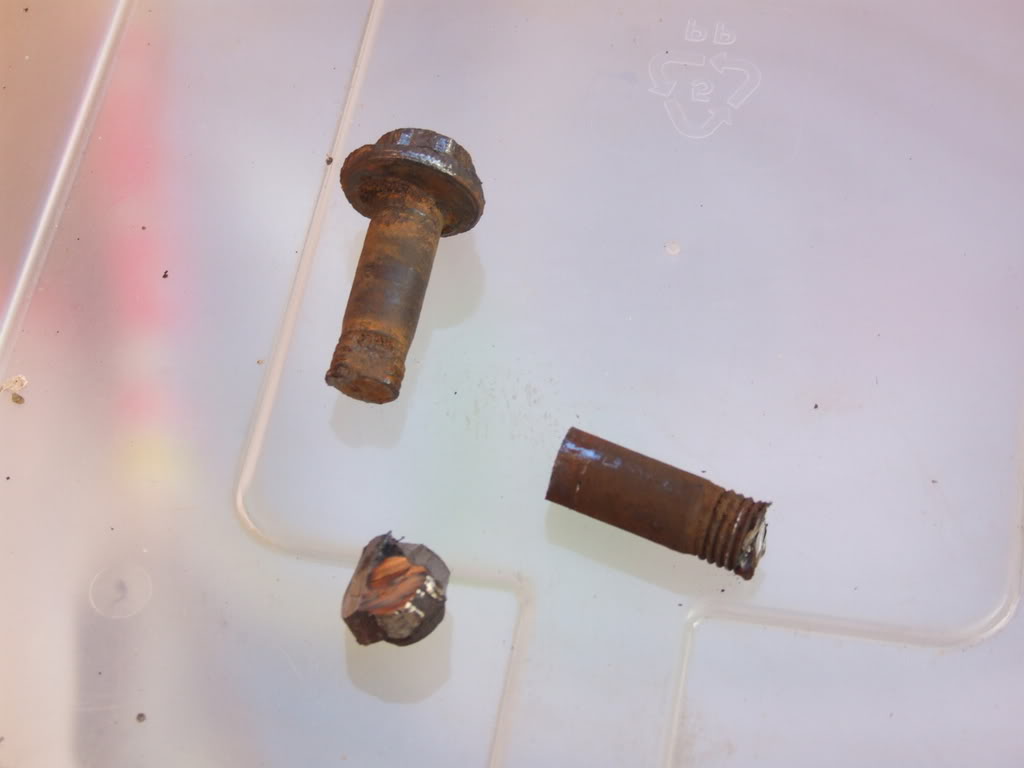
anyway, that EVENTUALLY got the bloody thing out so we were ready to put the new shock in, but judging by the state of the old ones, they are more than likely the originals:
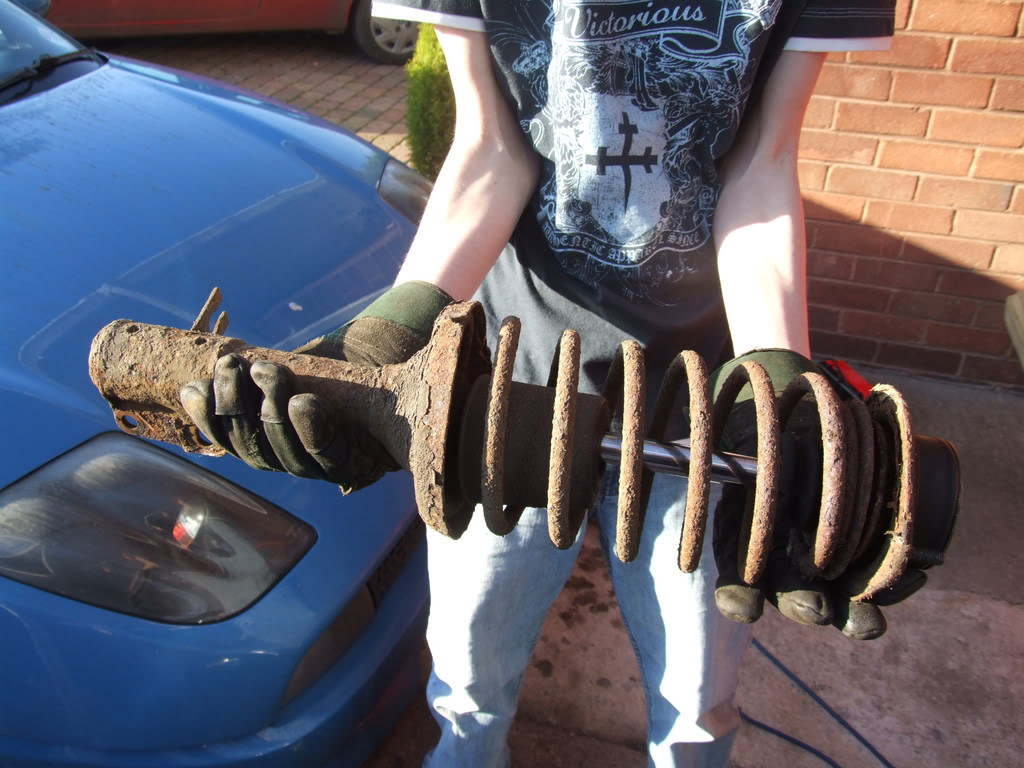
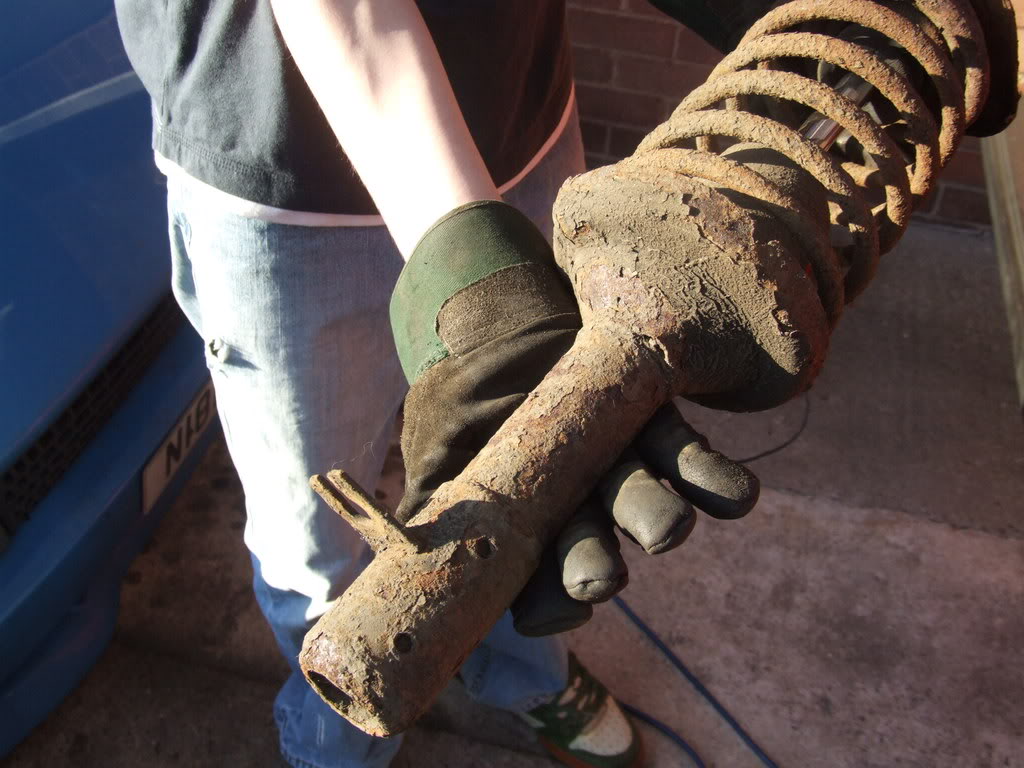
(by the way, yes those are my stupidly skinny arms in the pictures
 )
)(and yes, i AM wearing a t-shirt when the ground outside is still frozen, notice my identity is still hidden *evil laugh*)
a further 20 minutes passed but finally:
:dance: :dance: :dance: :dance: :dance: :dance: :dance: :dance:
its on!
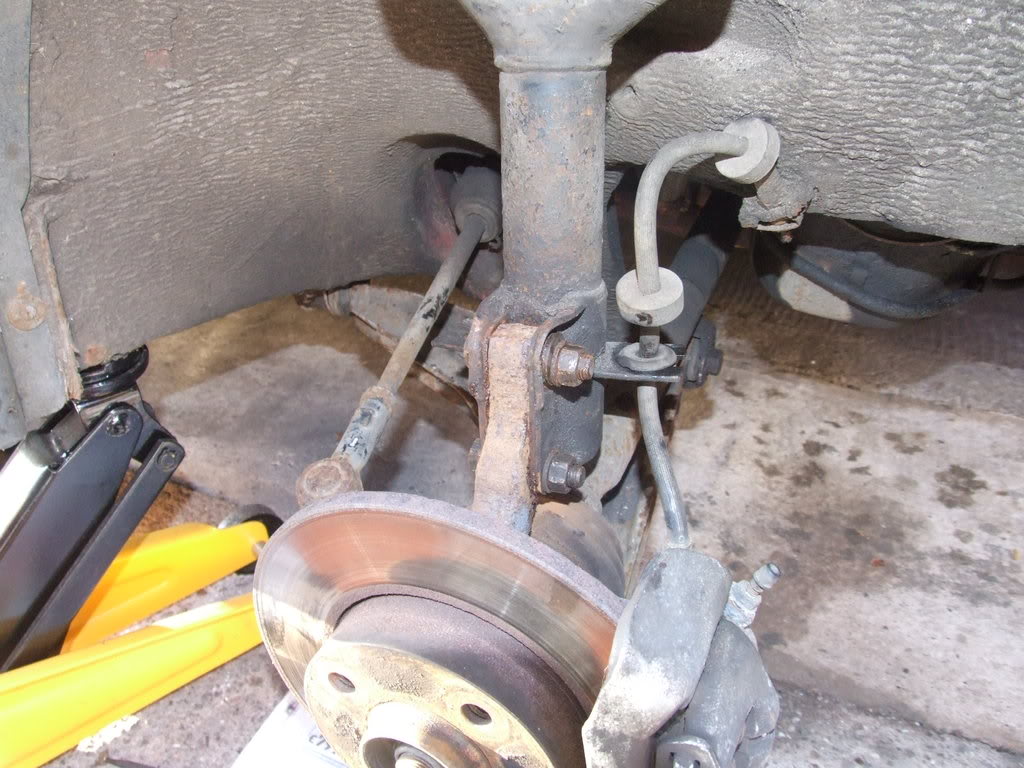
my dad also came up with a little trick to help with camber adjustment:
you can see a little whiteish dot on the eccentric washer thing, thats a punchmark that my dad put in to tell where the widest point is 8)
by the way, if anyone can tell us/me how to adjust it and what by that would be great.. the haynes was a bit vague "adjust the steering camber correctly" :roll:
so that's what my day has been spent on, im probably gonna have a go at the rear tomorrow at some point, it looks simple enough so it shouldnt be that hard… i AM however taking the precaution to put the car on axle stands because the rears have to be accessed from the underneath… being crushed would probably kill me to death
 :roll:
1983 Golf 1.3 Driver:
Posted
Local Hero
Posted

Old Timer


Posted
Settled In
There are certain elements of Haynes manuals that are wonderfully detailed, but there are other sections that are just plain infuriating.
"Set the camber correctly" is as much use as a bacon butty at a Barmitzvah - although the manual states the camber (20', +/- 30'), it doesn't say what the range is between fully negative and fully positive using the adjuster bolts.
I'm not paying ?30 just to check the camber, so I've thought of another way. Somewhere in my toolbox I have a builders square ( basically a big 'L' shape ). I can put it against the wheel and measure the difference between the square and the rim. Using Pythagoras' theorem, I should be able to work out the angle of the wheel. Then again, seeing as X is fresh out of school, perhaps he could do it for me

However, it may be even easier than that - the tolerance from the ideal setting (+20') is +/- 30', so if I can get the wheels with zero camber, they will be within tolerance.
Has anyone dialed in more negative camber? It would be interesting to know how the car handles with a degree or so. Perhaps I'd better wait until it has decent tyres on first, the current plastic items will understeer no matter what the camber is set to.
Ah well - its good to have a little success every now and then - it was only a stuck bolt, but its still satisfying to sort it out.
Posted
Local Hero
NigelO said
as much use as a bacon butty at a Barmitzvah
seeing as X is fresh out of school, maybe he can do it for me
Got work though :wink: and you seem much more well-informed as to what you're doing than me, so for the safety of the car its best that i sit and watch tv whilst you work
i mean watch your masterful skills in motion 8)
1983 Golf 1.3 Driver:
Posted
Local Hero
NigelO said
There are certain elements of Haynes manuals that are wonderfully detailed, but there are other sections that are just plain infuriating.
I know what you mean. I haven't opened my Haynes manual for about 6 months now! The Mercedes ones are worse!
Posted
Settling In
Camber adjustment
Posted
Local Hero
looks ok to me, off to get tracking done tho as that seems more important..
so X/Nigel, is it all on yet? Hows it looking??
Posted
Local Hero
Lawsy said
so X/Nigel, is it all on yet? Hows it looking??
well, we only managed to get one done today, i should have the back drivers done by tomorrow, so at the moment the car looks VERY crooked, because the back is higher than the front because the wrong shocks were put on, and the driver's front is lower than everything else because thats got -40mm now.. so it just looks like its got a flat tyre from the front :roll:
i hope you know the chaos that ensued from these shocks
only joking, the car'll look good afterwards
1983 Golf 1.3 Driver:
Posted
Settled In
so X/Nigel, is it all on yet? Hows it looking?
Nope - just the front driver's side shock on at the moment.
Waiting on that last lower bolt before I fit the other side (both bolts had to be hacked / bashed out on the driver's side, so I have no reason to believe that the nearside will be any easier.
At least the rears should be a bit easier (tempting fate)
Posted
Local Hero
NigelO said
so X/Nigel, is it all on yet? Hows it looking?
Nope - just the front driver's side shock on at the moment.
Waiting on that last lower bolt before I fit the other side (both bolts had to be hacked / bashed out on the driver's side, so I have no reason to believe that the nearside will be any easier.
At least the rears should be a bit easier (tempting fate)
funny, ive just posted something similar above :roll:
1983 Golf 1.3 Driver:
Posted
Local Hero
NigelO said
Waiting on that last lower bolt before I fit the other side
if that a hint, then I'm a nun!!!!
0 guests and 0 members have just viewed this: None.