


VW GOLF MK1 BLACK SOY CAB (92) GTI

Posted
#676549
(In Topic #81606)
Old Timer

VW GOLF MK1 BLACK SOY CAB (92) GTI
The grill has been in garage for about a while - not in good condition…!
 ]
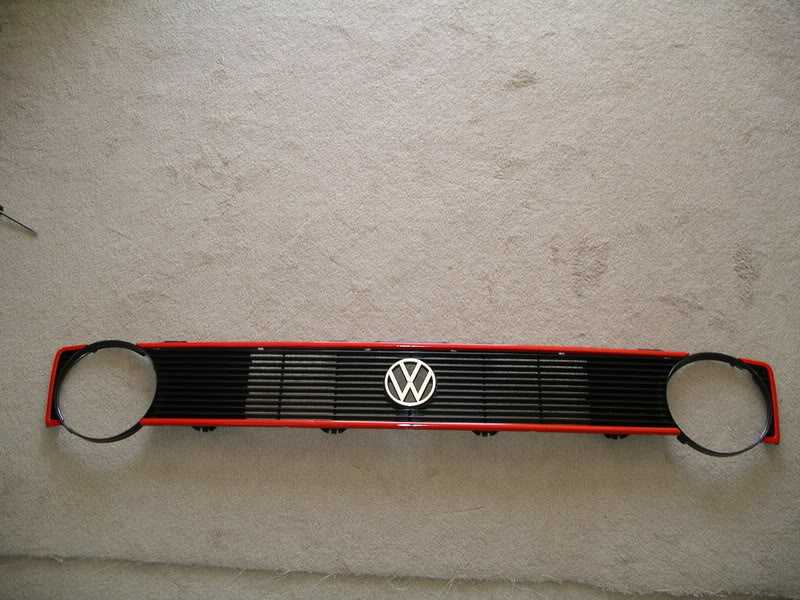
]Took the red grill trim off for restore. Close up pictures…
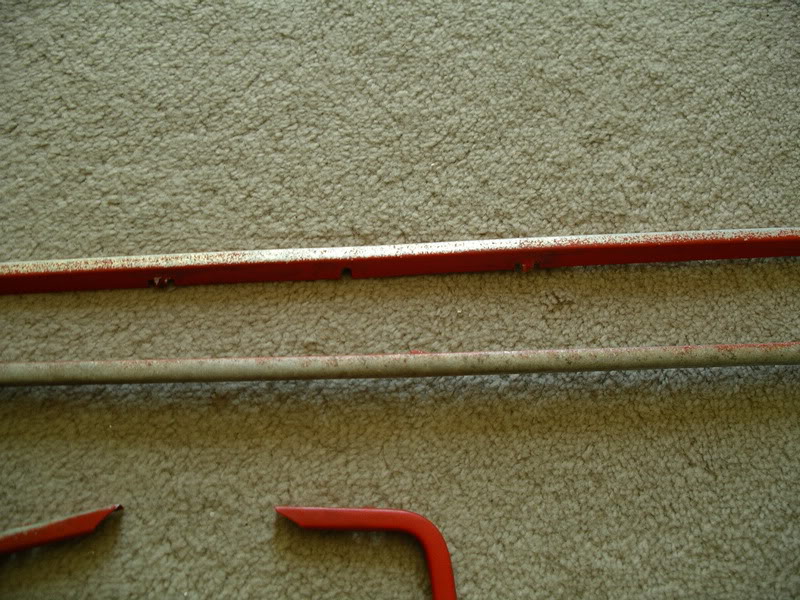
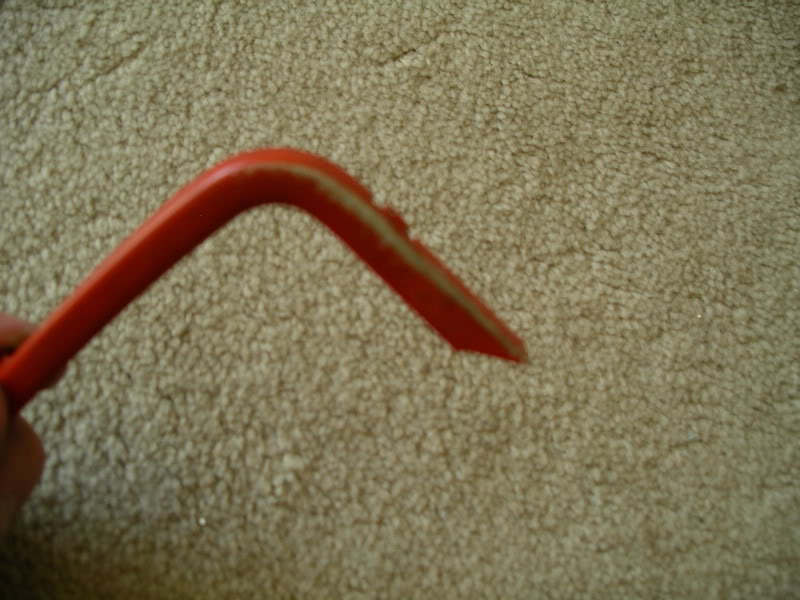
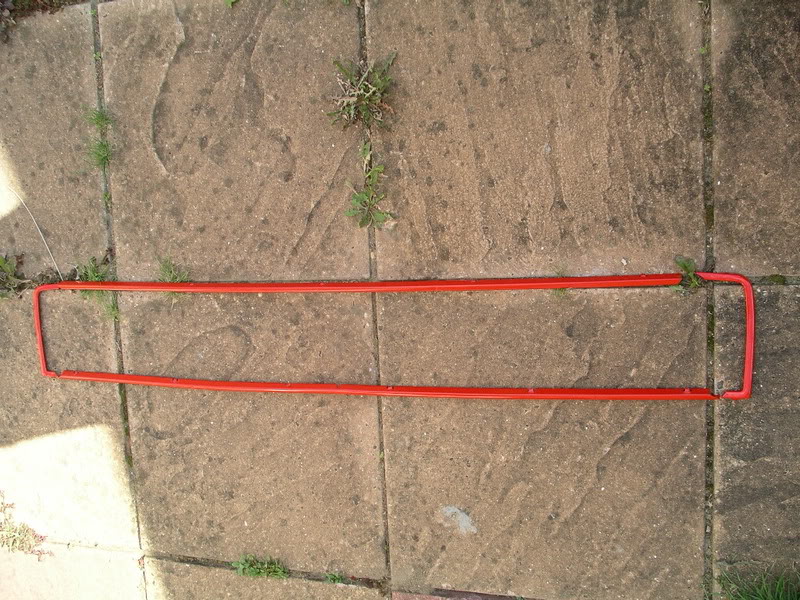
I stripped all the paint off the trim and then painted them, ending up as below

I took a new single mk1 grill and added a new chromed VW sign
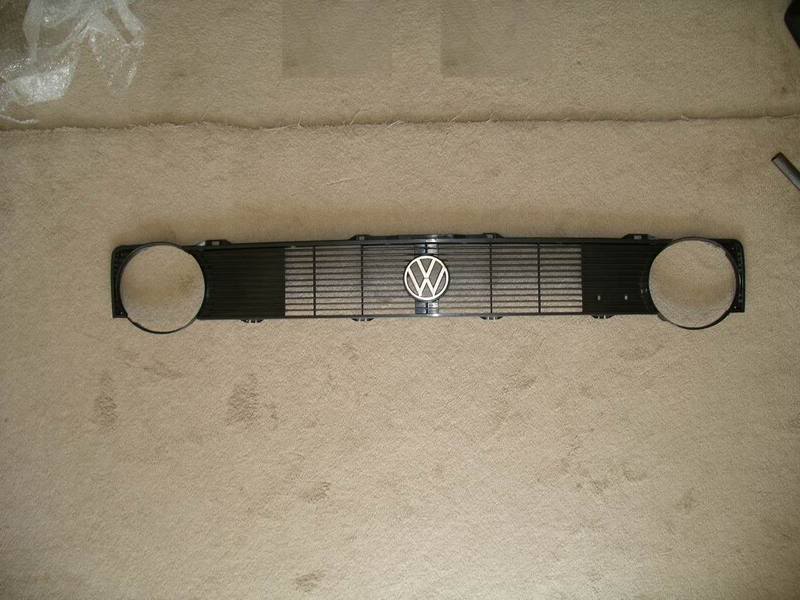
I then added the new freshly painted red trim :smiley:
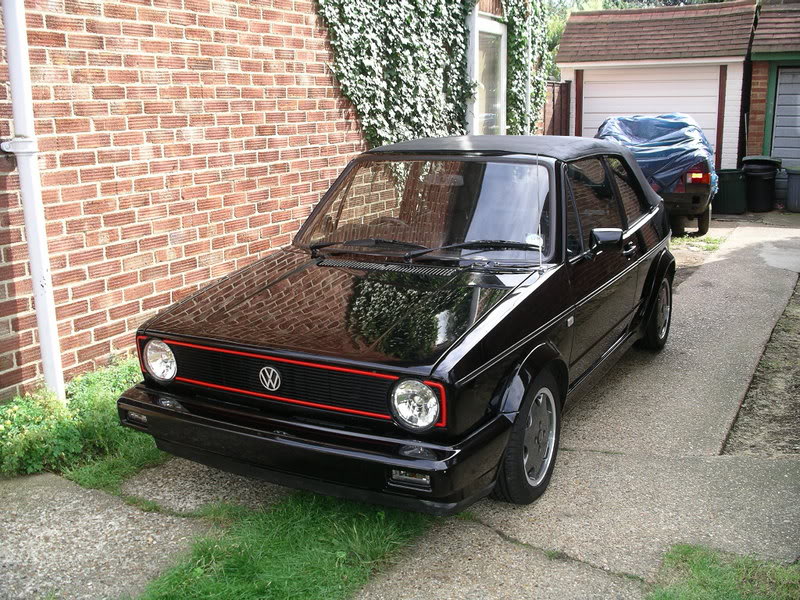
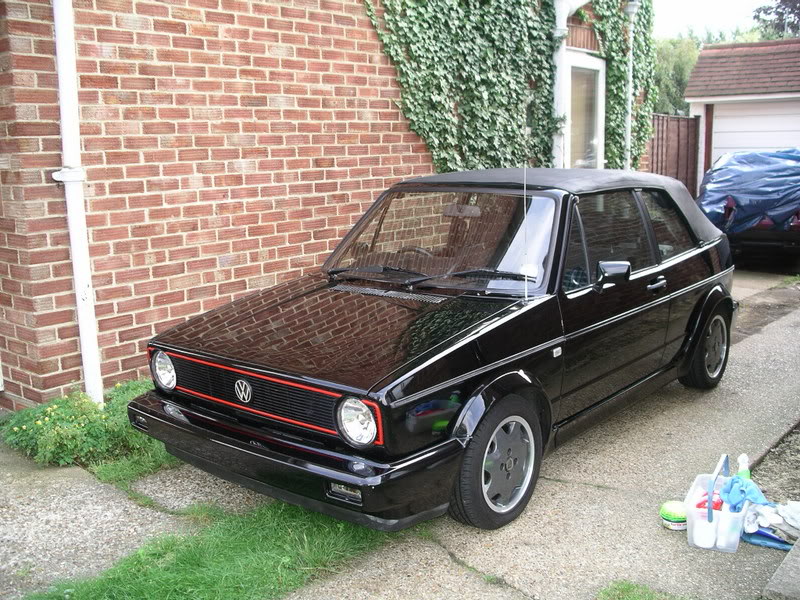
Here is how the car looked this morning
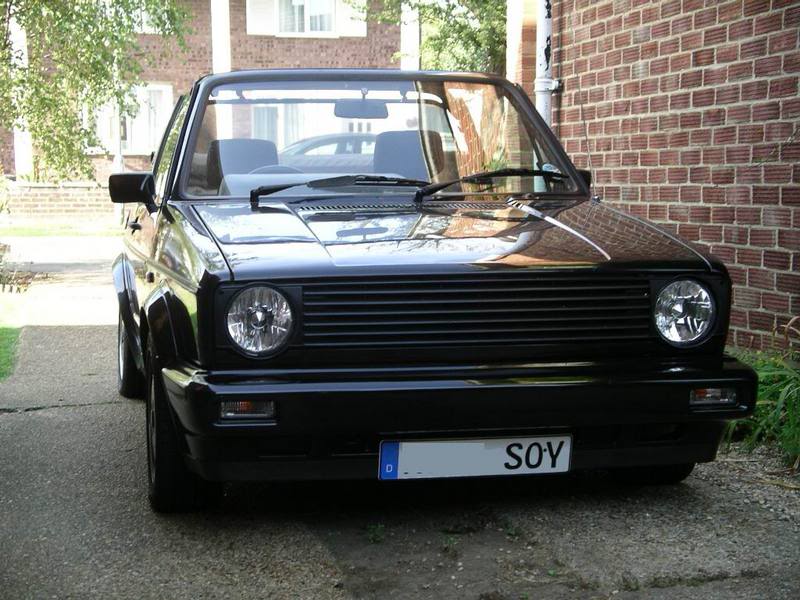
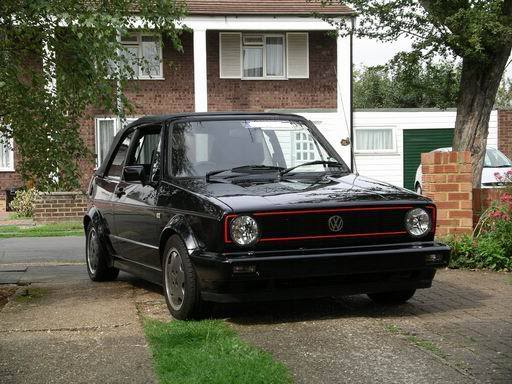
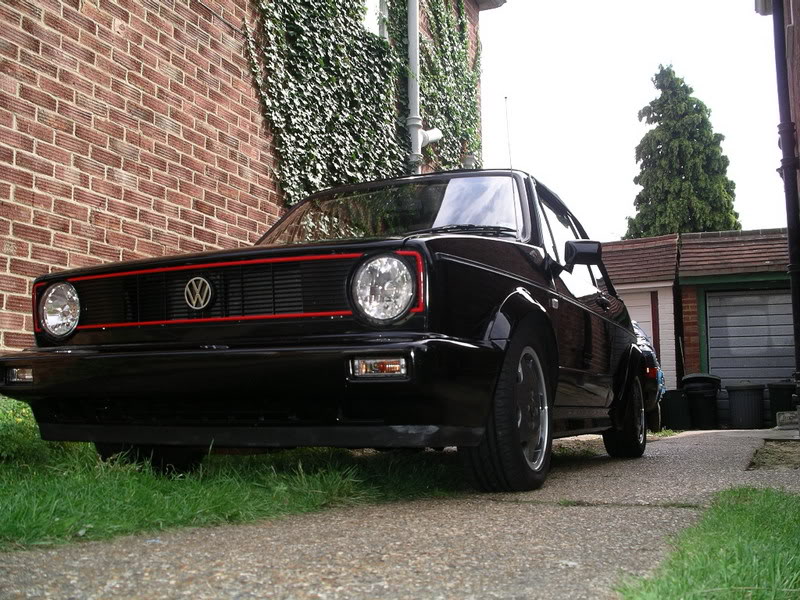
and now with the new red single lamp grill…. have to say I'm really pleased with the outcome… What does everyone else think?
With number plate on

With no number plate

Rear end picture

Get that wax on the car!!!
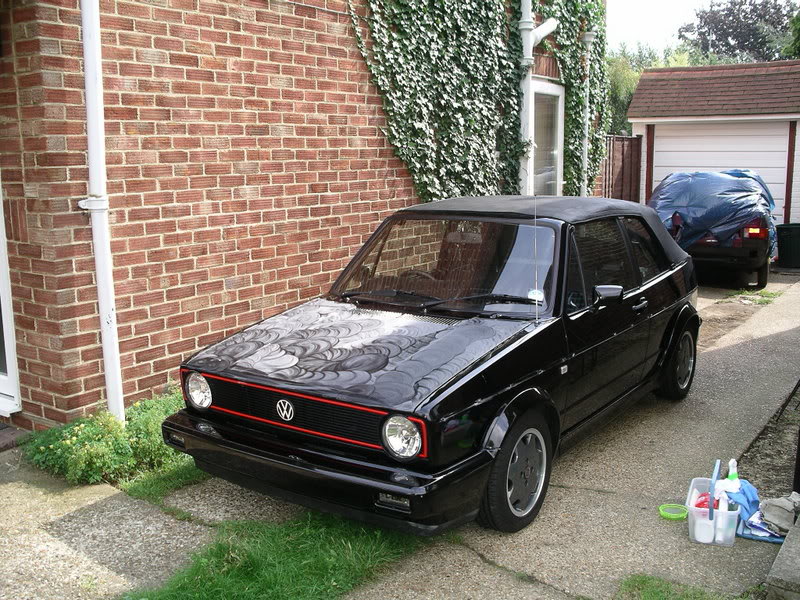
Now cleaned off

The car is going in for a complete spray next month - October06, really can't wait.. :smiley:
Madone with the two Cabs 82 (UK RHD) and 85 (US LHD) (92 sold)
Posted
Settled In

i live to dub....
Posted
Old Timer
Brakes upgrade happening this weekend…
Madone with the two Cabs 82 (UK RHD) and 85 (US LHD) (92 sold)
Posted

Web Team

Red trimmed grille def, gives a character to the front end.
Car looks ace!

Posted

Local Hero
1981 1600 GTI (coming to a road near you soon…)
1983 1100 C
1983 1100 C
Posted
Old Timer
markwon said
Looks good, has a bit of the original GTI look, those badgeless grills are everywhere and a bit boring.
yep I prefer the old skool grills.. 8)
Well the gearbox has to come out in the next week, its gone in second gear and is making a bad noise all the time :cry:
I've spoken to my spray man yesterday and we are all go for a complete respray for late October time, so the fun of taking the interior out, hood off starts in the coming weeks…
No real mod's other than arch work to fit on 6 x 16 on front and 8 x 16 weeks on the rear… the wheels of choice are;

now you properly thinking that is going to be hard work on the arms, well it won't as I'm going to have a custom power steering set-up put on the car - to 90% standard spec to the LHD power steering the european and US golf owners have
 I will update you all more on the power steering later, as I am looking to put this into production and sell it to anyone that requires it.
Madone with the two Cabs 82 (UK RHD) and 85 (US LHD) (92 sold)
Posted
Old Timer
Posted

Settled In
1272 driver with a magic tree!!
Posted
Old Timer
A few little things working on at the moment as well..
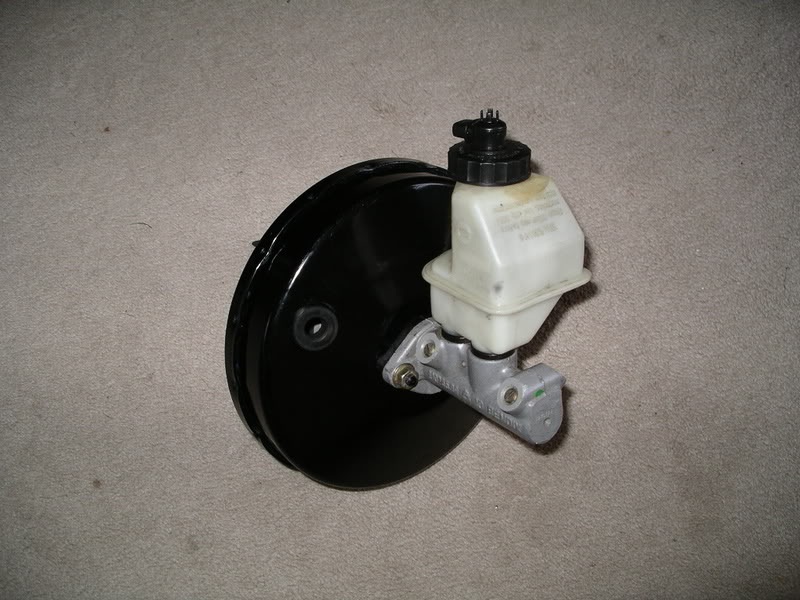
Upgrading the brakes to Mk2 16v Master cylinder and servo, thanks to 'Carbs' for the T-pieces so I can now install the new brake lines to the brake servo.
Lucky for me in later cab's the brake switch is already places inside the cab behind the brake peddle - bonus
I also rolled out the old skool from the garage today and made a list of work to do on that in the coming weeks hehehe - will update you all on that shortly.
Madone with the two Cabs 82 (UK RHD) and 85 (US LHD) (92 sold)
Posted
Old Timer
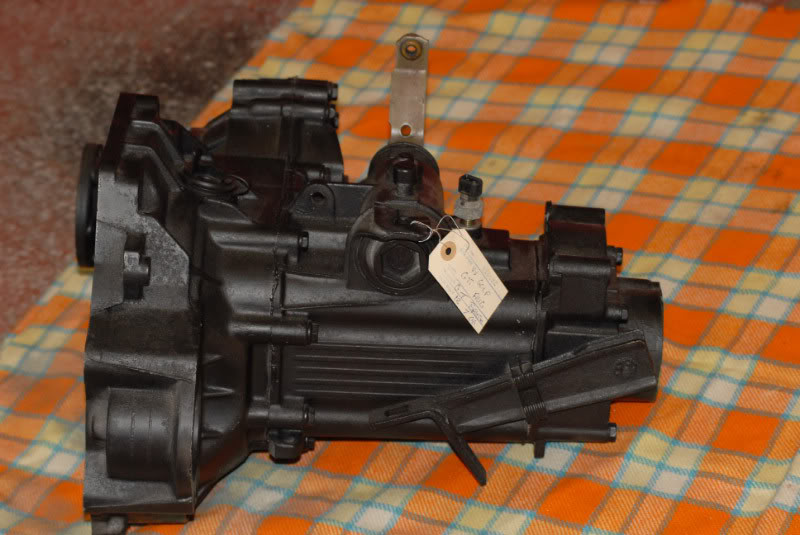
New recondition gearbox - 425.00 from http://golfmk1.co.uk (Richard Masters) - great services and great price for reconditioned gearbox. If you ping Richard on details, which I would as I've reviewed all the gearbox suppliers and Richard's services come out best for price and quality of work… say Simon - Black Cab advised you to speak to him. I provided my gearbox on a sunday and I got my gearbox back the following weekend.
The gearbox is being installed this weekend, would of been this week if not for traveling for work…
I've had alot of issues with noisey tappets in the last few weeks, so I've order all new tappets to replace and possible replace of CAM as well
I've not been happy with the brakes in the last month as I've not used the car at all (with traveling around and sorting out moving to US) I am in mid conversion of upgrading the car, with new brake lines at the front at the moment only, with a view of upgrade the rear brake lines too.
Due to the famous man Jo - 'TVRGolf' (google search or look on youtube for video on TVRGolf to see what the TVRGolf is) having a few personal issues the last several weeks no work on the respray has happenned but he has promised to me this will happen soon, before I ship the car out to the USA.
It will be worth the wait in my mind.I bought a 2.0 16v engine which turned out to be a total pill of cr*p and so I'm now on the hunt for a lovely 2.0 16v engine with bike carbs to go in the car, but the right spec and price has not come along yet, but I am sure this set-up will be brought and in the car VERY sooner
I will be uploading details of the new gearbox, brakes upgrade and few other little bits I've been doing of late in the coming week.
thanks
PS I've managed to buy myself today through my other half friend a nice custom mk1 tin top - powering steering A/C LHD golf from 'LA' area for a lovely sum of $400.00 which is driveable and with no rust - will be shipped to Seattle area in Jan07 for me to start as a new project in USA, pictures will be available in Jan07…
Madone with the two Cabs 82 (UK RHD) and 85 (US LHD) (92 sold)
Posted
Old Timer
Pictures of car in bits coming in the next week, poor car is all over the place at the moment in the garage

Madone with the two Cabs 82 (UK RHD) and 85 (US LHD) (92 sold)
Posted
Settled In

-
love your cab :clap:
notice you have some german plates mounted under the front bumper. looks real nice!
just got some myself and was wondering how you fixed them in place?
cheers
andy
Posted
Old Timer
Re: -
andyb77 said
hi mate
love your cab :clap:
notice you have some german plates mounted under the front bumper. looks real nice!
just got some myself and was wondering how you fixed them in place?
cheers
andy
Hi Andy
Sure no problem at all, you drill two small holes in the lower part of the bumper that align up with holes you have in number plate and then screw onto bumper.
Si.
Madone with the two Cabs 82 (UK RHD) and 85 (US LHD) (92 sold)
Posted
Old Timer
What you all think? Will the red look great in the engine area?
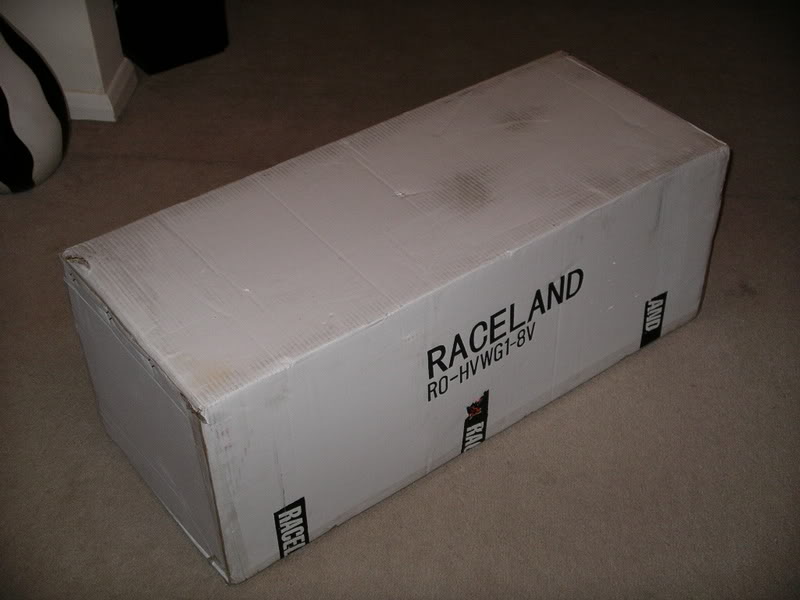
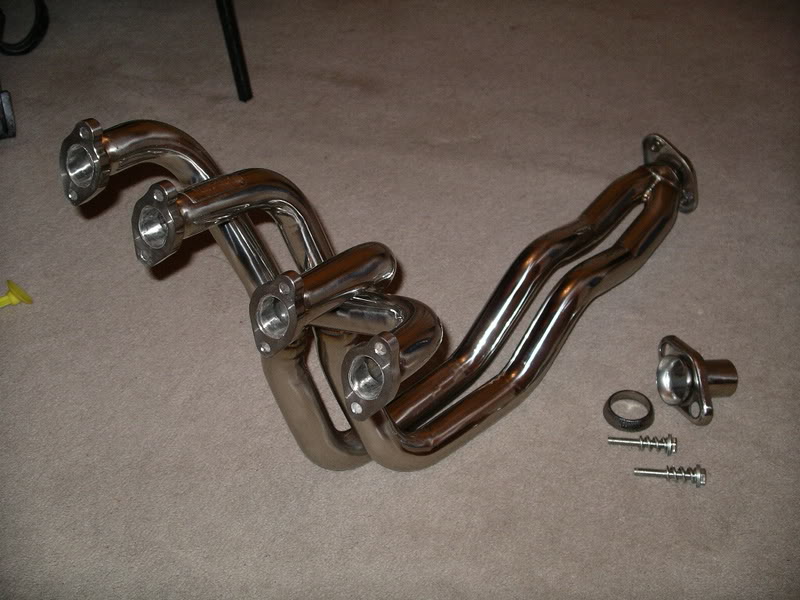
Bought some more goodies as well - all new gaskets for engine, new clutch, new rad, new water pipes and Stainless steel manifold from TUNINGLEADER Raceland & my fav - custom made true 4 point lower strut brace - fully adjustable from USA. 8)
I'm thinking of upgrading the Cam, but not sure what to go for.
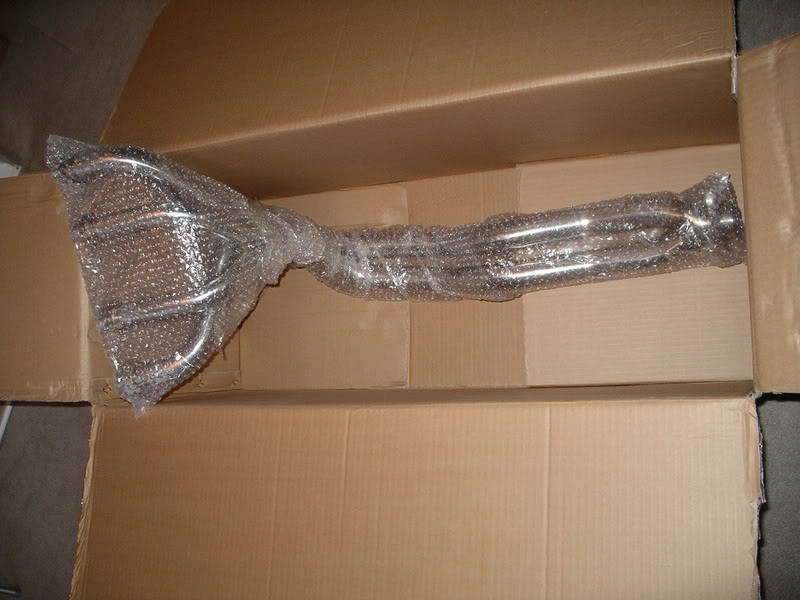
Some pictures for you.. more to come later in week
The true 4 point strut frame

What is this?????!!!
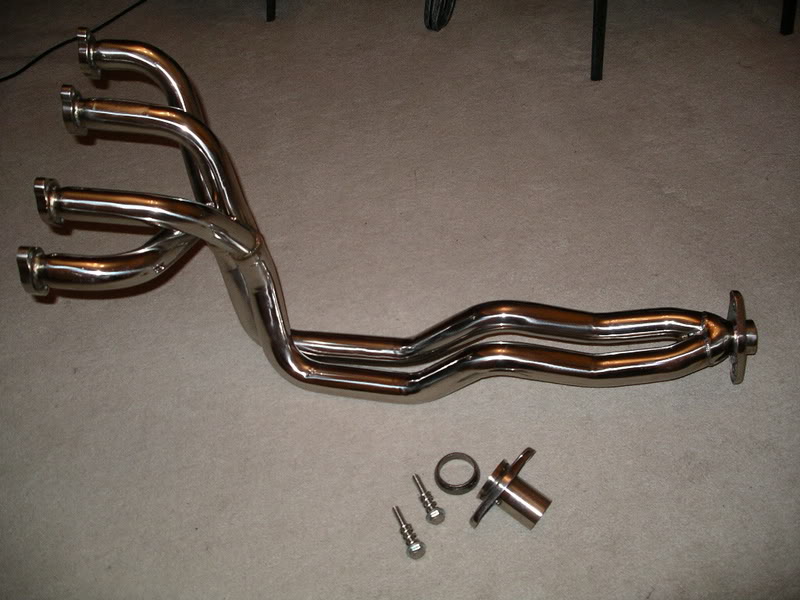
The Exhaust manifold….
Bling Bling!!!

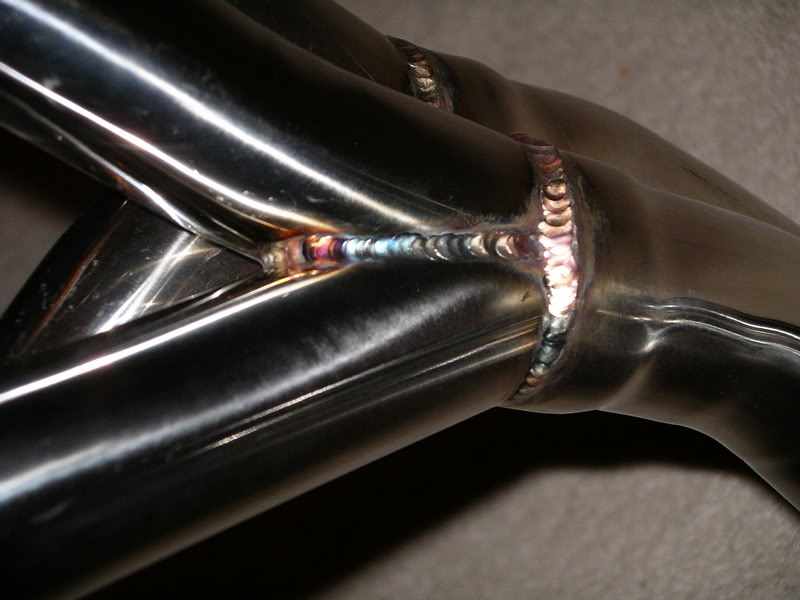
Look at that welding….
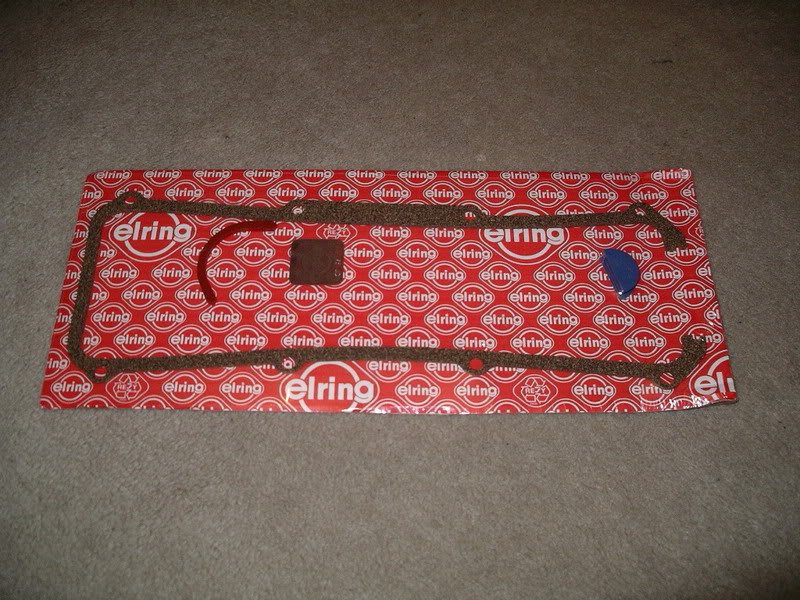
Rocker cover gasket kit
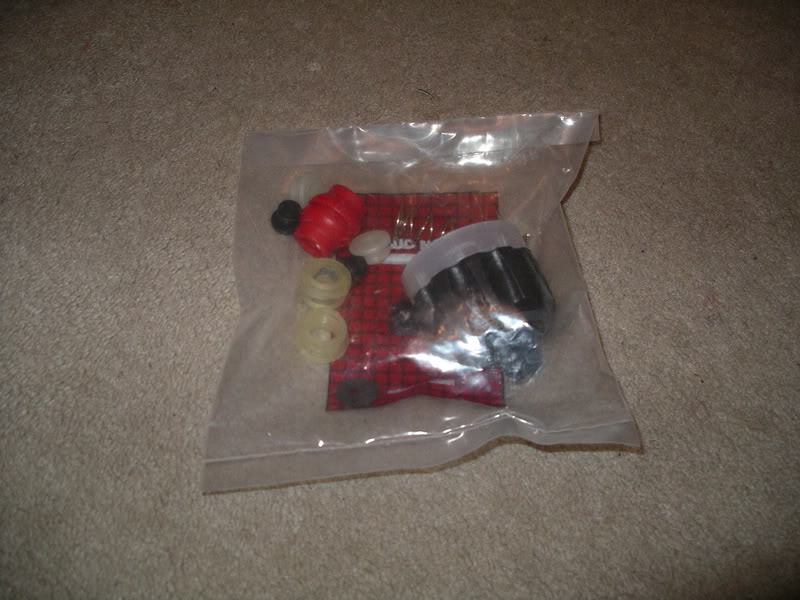
Gear level linkage bush kit
Madone with the two Cabs 82 (UK RHD) and 85 (US LHD) (92 sold)
Posted
Old Timer
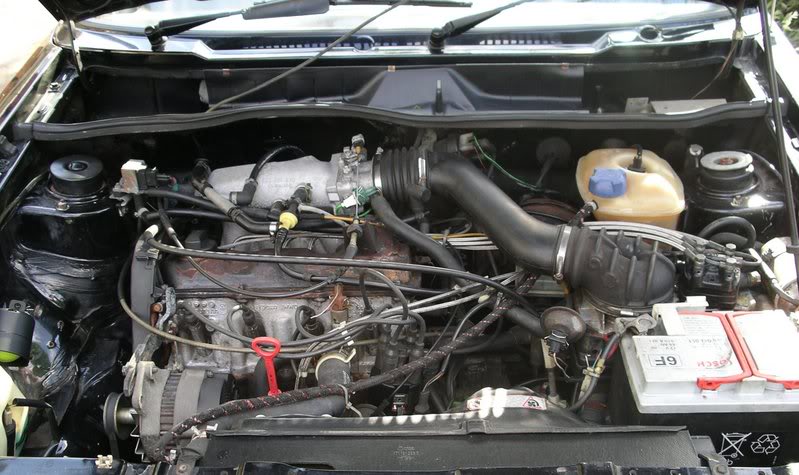
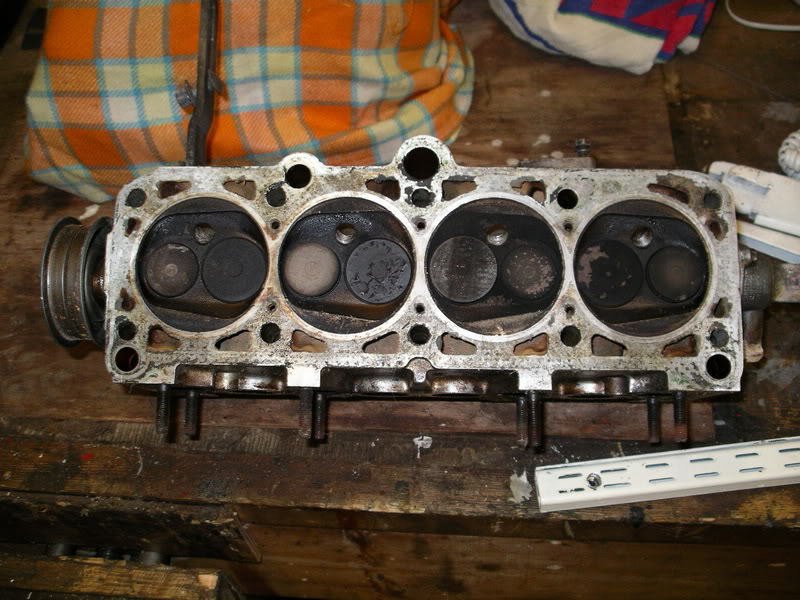
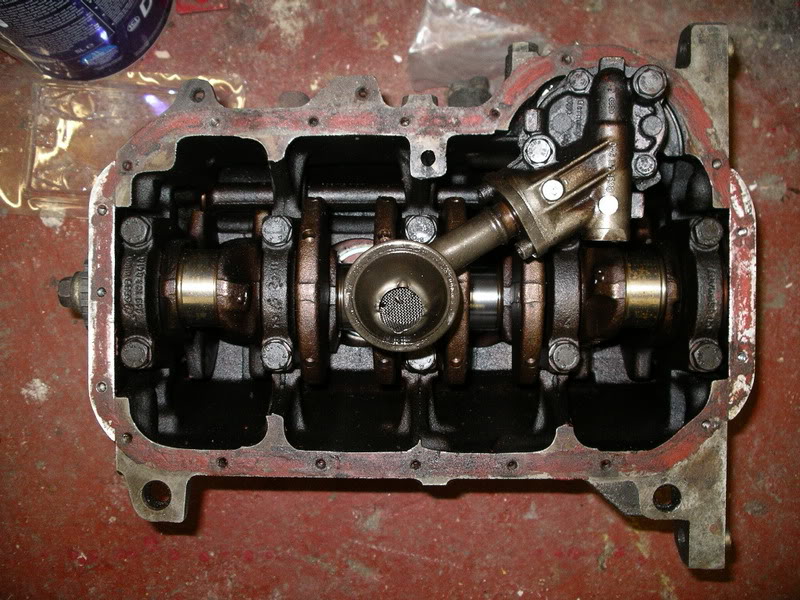
Engine as it was - only picture I could find about 6 months old…
Engine Head…
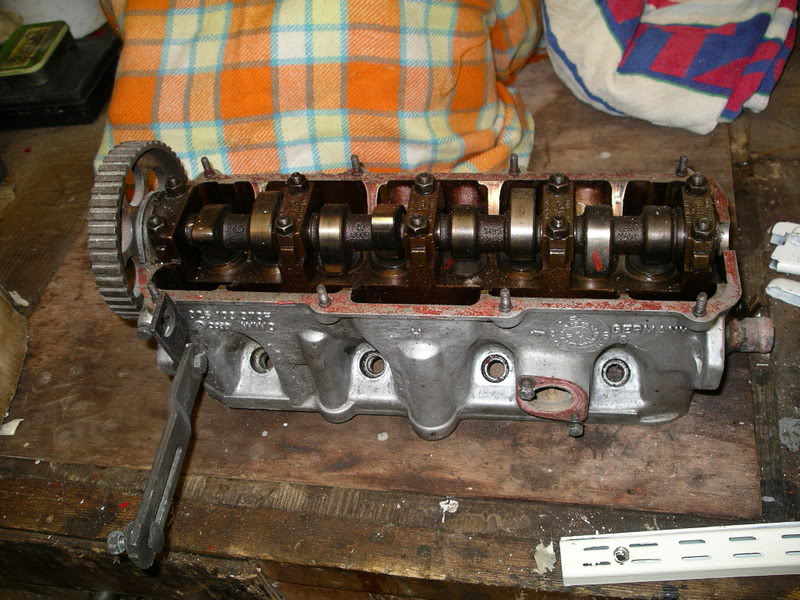
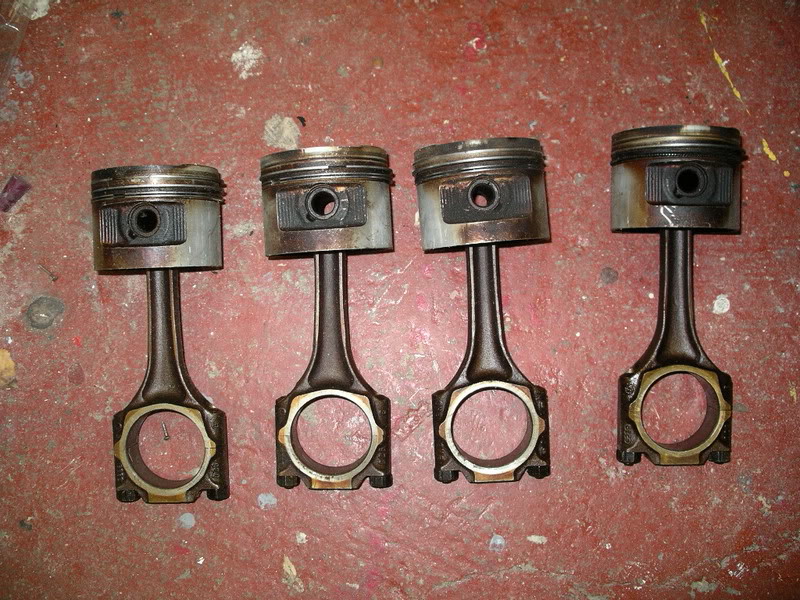
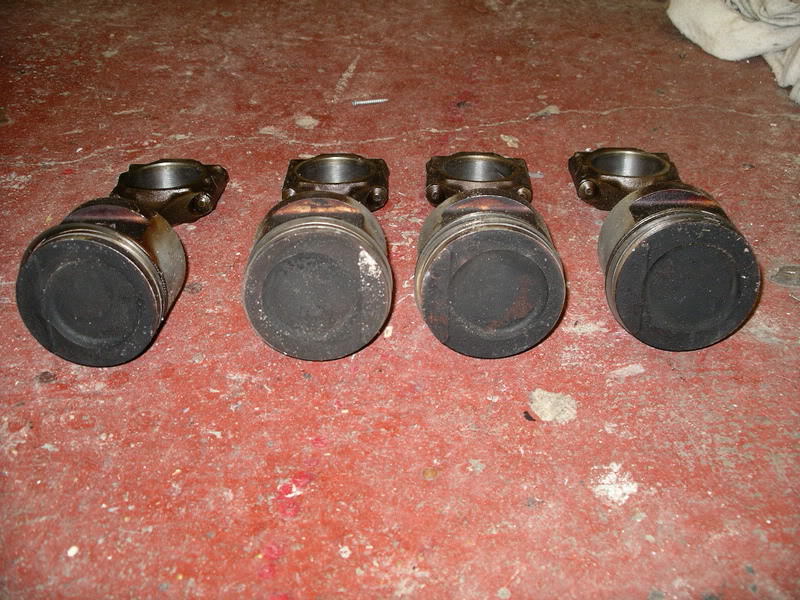
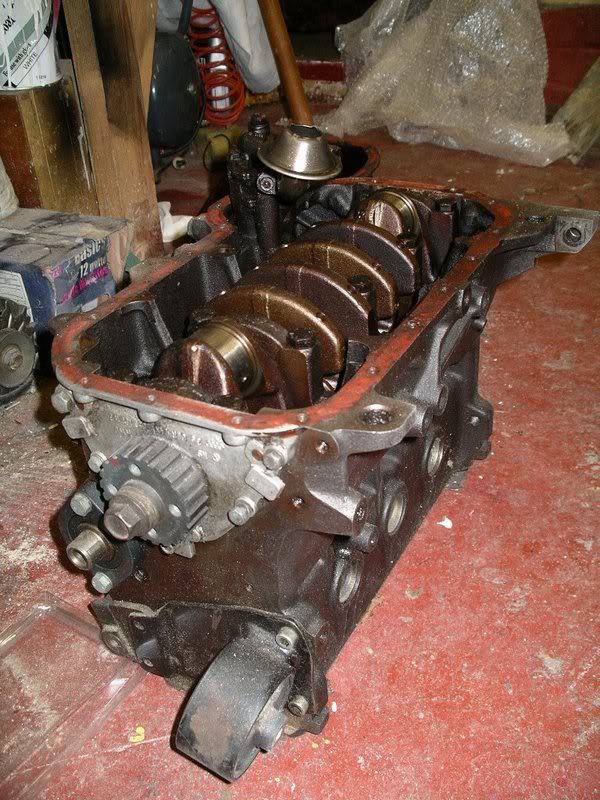
Bottom end in parts…

Here is the mk2 16v Brake Servo I took out of the car
and the Exhaust wrap

Madone with the two Cabs 82 (UK RHD) and 85 (US LHD) (92 sold)
Posted
Old Timer
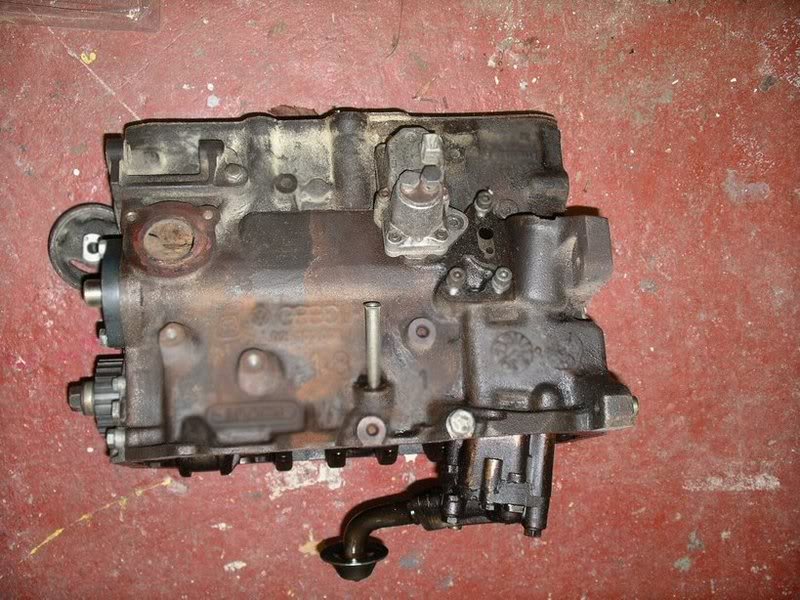
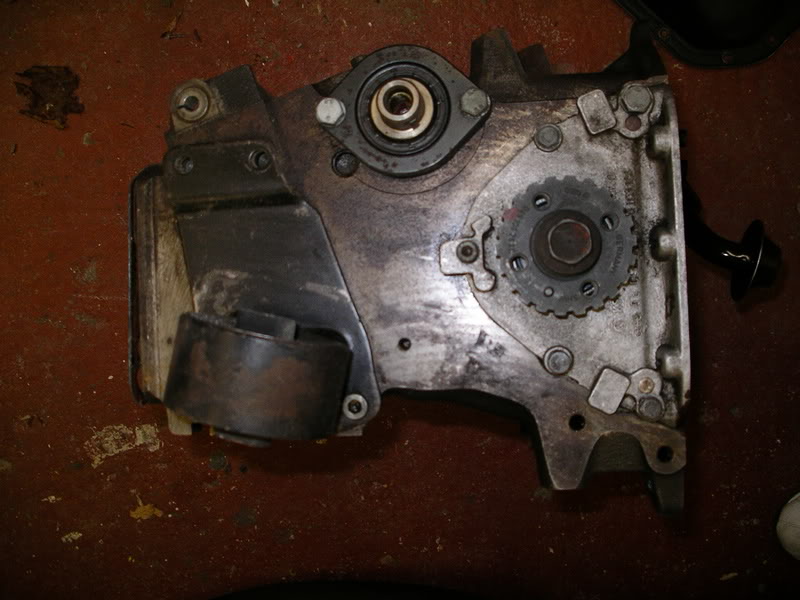
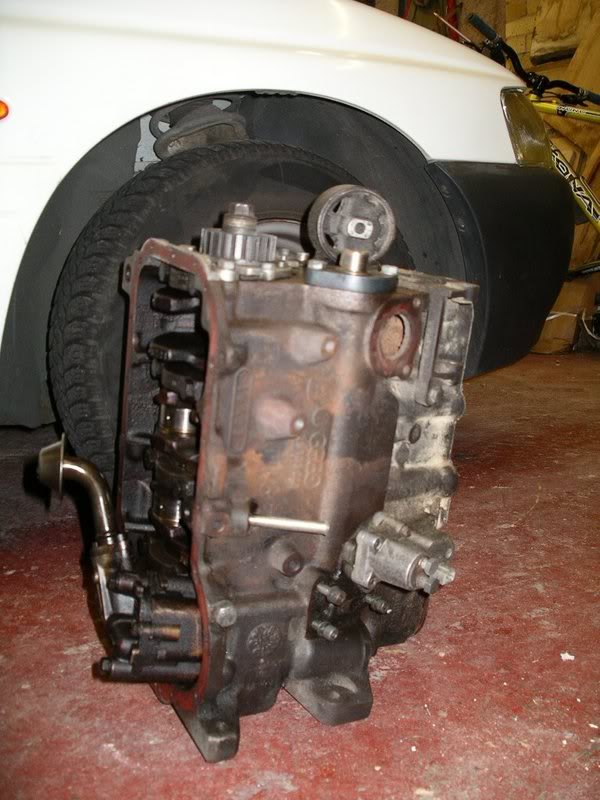
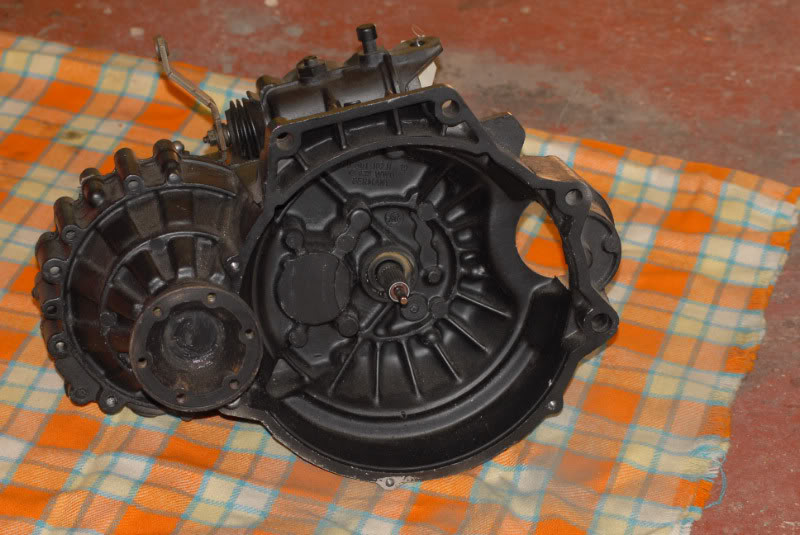
Took some pictures of the gearbox before I starting to rub it down ready for painting black later this week… Hopefully this one will last longer than my other two I've put in the car in the last year!!!!!

Main update on sunday…
Madone with the two Cabs 82 (UK RHD) and 85 (US LHD) (92 sold)
Posted
Old Timer
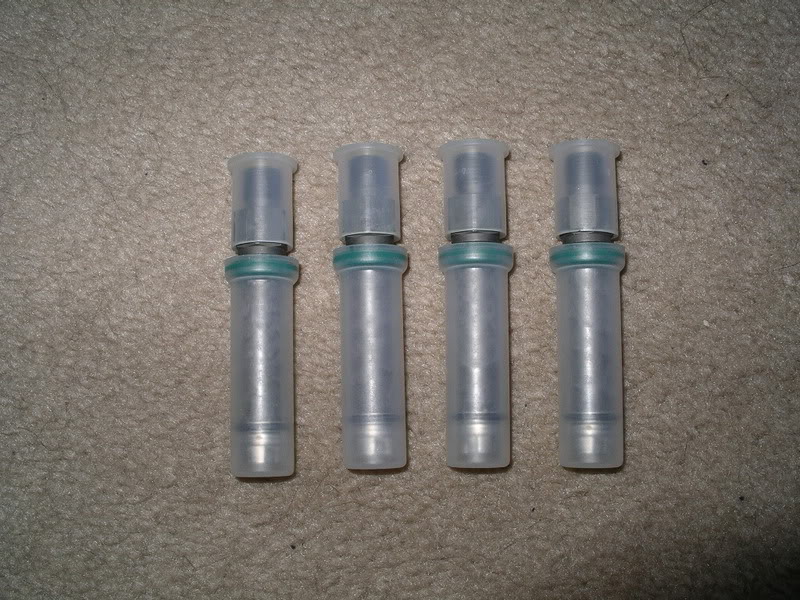
So I though I would test my fuel injectors as I know one of them was not working right in the last few months… Here is a very useful test to try this out on - see link below (you need your car work of course) so I tried this out on my old cab in the garage at home, found that out my second injector was not working right - not spraying or release right amount of fuel :angry: - so I'll be ordering new fuel injectors tomorrow - more money!!!! VW want 43.00 each and Rich can get you 23.00 each new!!!!
Some useful links for people on this site…
How to Test your Fuel Injectors on golf - mk1
http://www.vwgolfmk1.co.uk/Main/Testinjectors.pdf
Bosch Fuel Injection (up to and including Lambda) - useful info…
http://www.vwgolfmk1.info/Fuel/bosch.pdf
There is only a few place I've found that sell new Fuel Injectors for mk1 in the UK - one being VW dealers and the other - http://www.golfmk1.co.uk - same person as I got my new gearbox from…
So with Injectors out of the way I thought I would focus some time on the head, I've taken all the tappets, cam, values etc off the head and the head will be going off for a clean and a head skim, so with most people just replacing the tappets, I thought I would check my first, as most cabs later model golf cab have hydraulic tappets instead of early models that have solid lifter tappets. So the fun begins!!!
I will update tomorrow on the fun with the tappets!!
Madone with the two Cabs 82 (UK RHD) and 85 (US LHD) (92 sold)
Posted
Old Timer
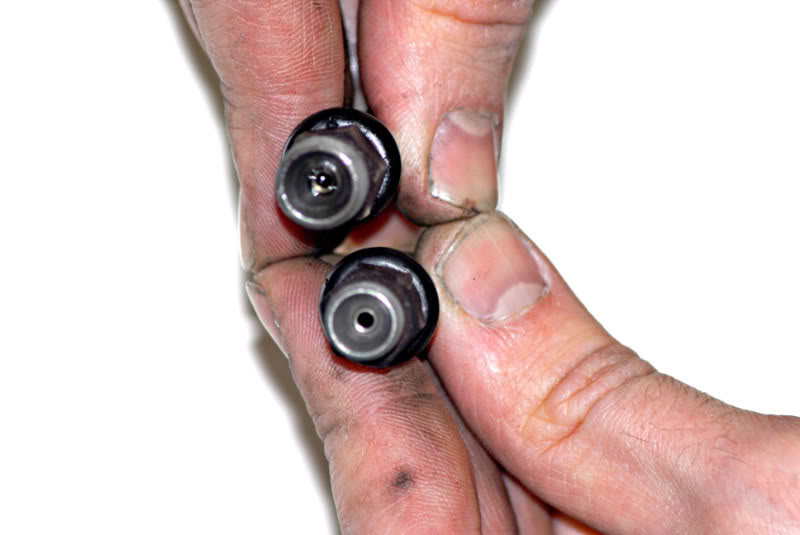
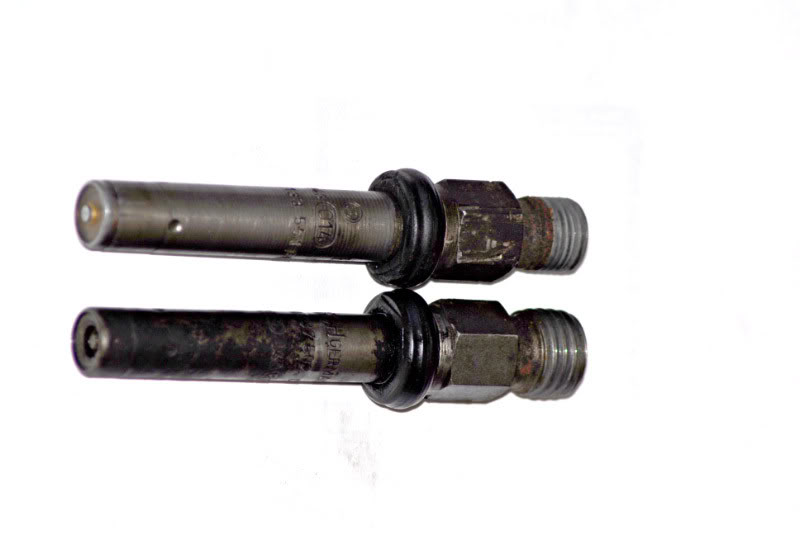
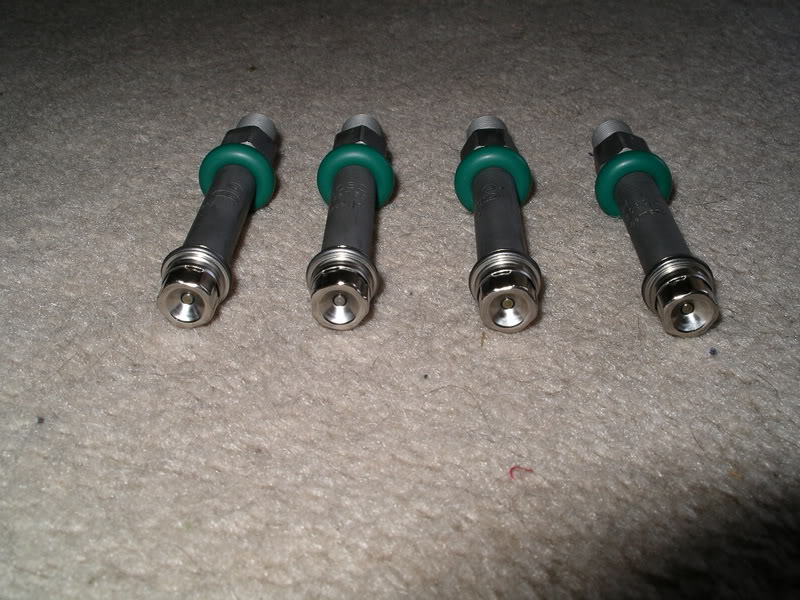
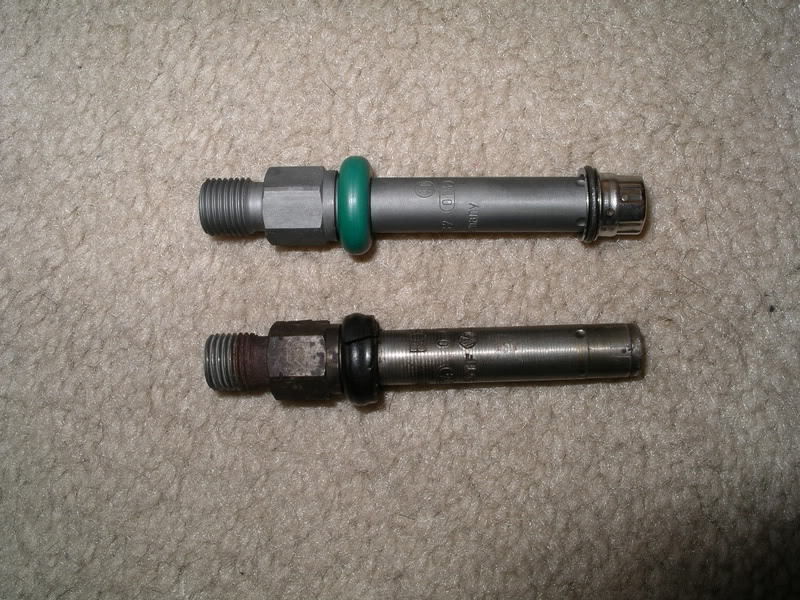
My 1983 Gli version - DX 1.8GTI - has code 049-133-551 - larger injector tops - see picture
My 1992 GTI - DX GTI - has code - 035 133 551 - small injector tops - see picture
I am not sure what the benefit is of the difference but I would love to know if anyone else has same spec injectors as my 92?
Madone with the two Cabs 82 (UK RHD) and 85 (US LHD) (92 sold)
Posted
Old Timer

Old and New…
and I bought off ebay a tool to adjust the idle mixture - 3mm Hex wench for 20pence - bargain…
So with Injectors out of the way I thought I would focus some time
on the head, I've taken all the tappets, cam, values etc off the
head and the head will be going off for a clean and a head skim, so
with most people just replacing the tappets, I thought I was check
my first, as most cabs later model golf cab have hydraulic tappets
instead of early models that have solid lifter tappets. So the fun
begins!!!
Very useful link on this site covers both tappets services -
http://www.forum.golfgti.co.uk/index.php?topic=33994.0 - I followed
steps from US forum which was very close to what you need to do -
below is steps I used from guide with a few added points that I
did.
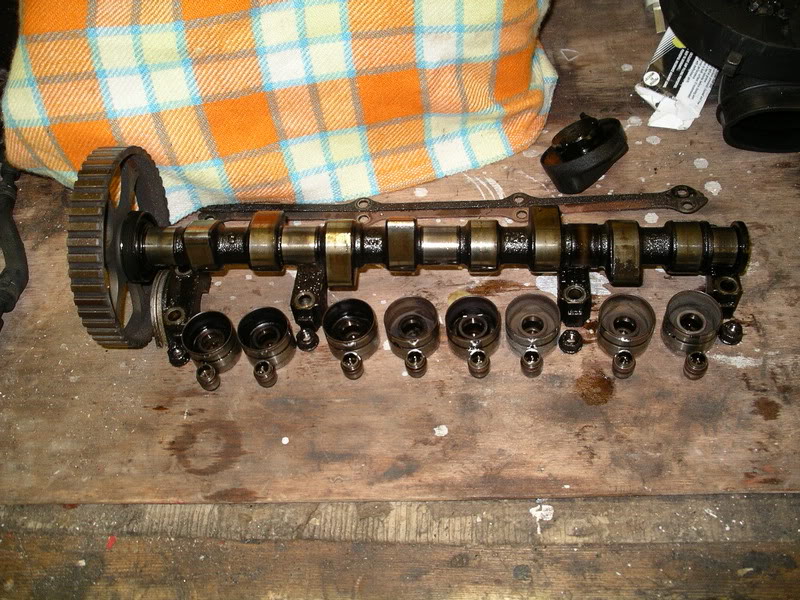
1. So I first of all took the cam off the head - quite easy really
- 8 bolts holding it in place. Once these are taken off and you
remove the cam holders you can easily lift the cam off the head,
showing the lovely tappets.
2. Now its best to place the cam and the bolts and cam holder on
bench in order as you took off the car - everything must go back as
it was before

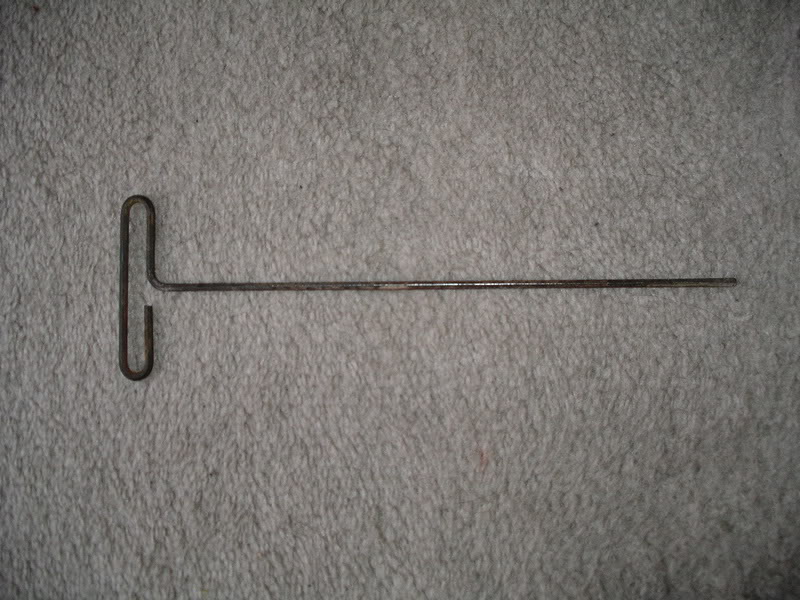
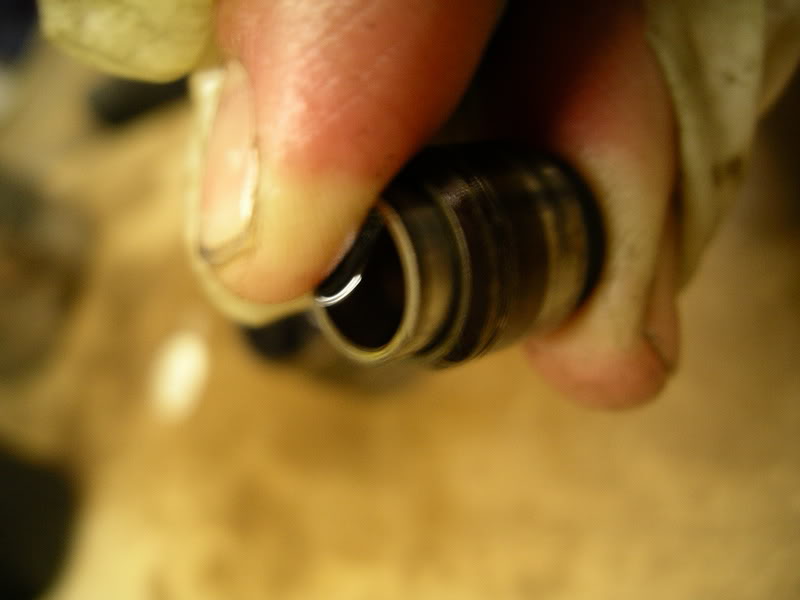
3. Now with a magnetic I pulled each lifter (tappet) out of the
head - again make sure you line the tappets up on the bench against
the cam so you know which one come from which value or number them.
Its best to give them a wipe, so to clean off any excess oil.
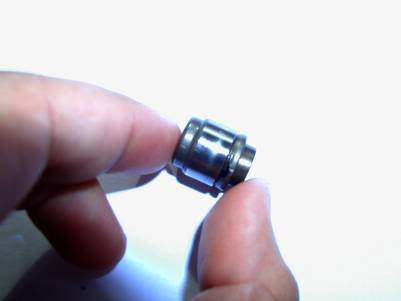
Once this is done, find a wooden surface, in the garage, as it will
get quite messy, (old MDF board or similar). Hold the lifter with
the open end facing downwards and tap quite hard several times, and
see if the piston has moved downwards? If it has it will come off
fairly easy with either further tapping or with assistance of a
pair of mole grips.
4. This next step can and will would be time consuming, if your lifters are badly gummed up. In which case the best
thing to do is soak them up in a bath of Gunk engine cleaner or
WD40 or fuel overnight. But as you soak them in, with a pair of
pliers try to free up the piston in all lifters so it goes up and
down in a smooth manner as this would free it, if it had become
gummed up. What you will find in the morning is most of the oil
would have flowed out of the lifter, simply take them out and flush
them with fresh cleaner and a cloth.
5. Now, what you will need to do if get a old pot or something and
as you pull the piston up and down a lot of oil and gunk will shoot
out of the hole in the lifter keep doing so until no more fluid
comes out. After this try to tap the pistons out, by knocking them
on a hard wooden surface.
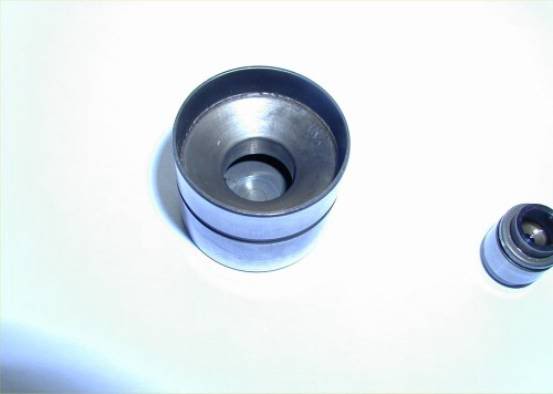
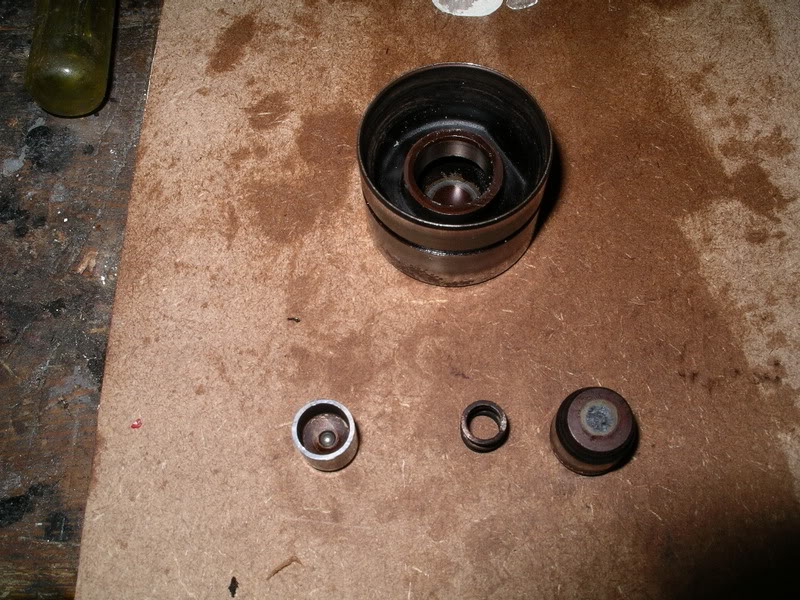
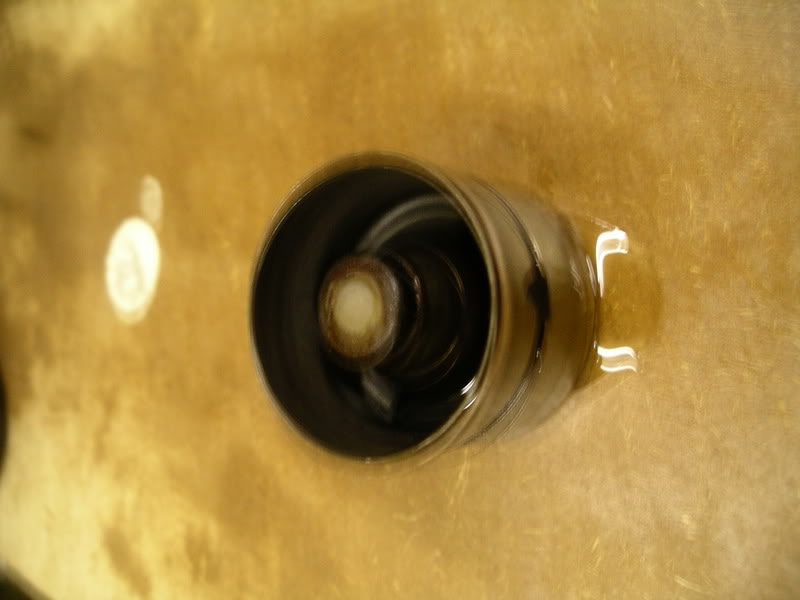
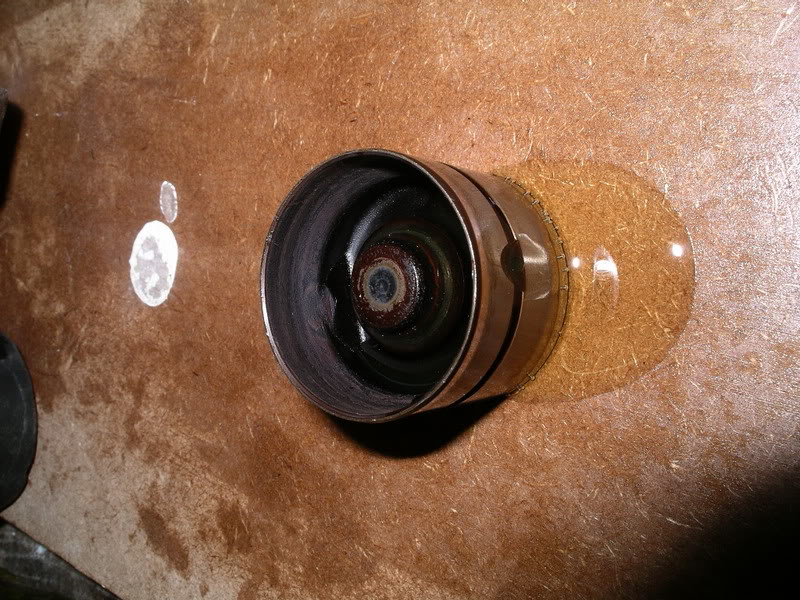
This picture shows the piston that is fitted inside the lifter,
look to the centre, and you will see a ball bearing, this acts as a
release valve to let oil in and out of the piston.

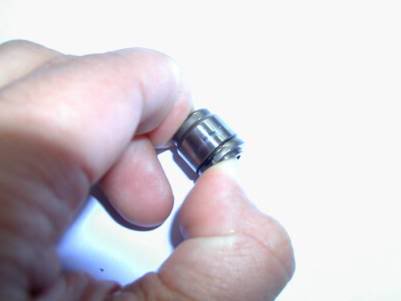
7. Now that we have established this, you can get a pointed object,
like a small punch or similar and depress the ball, what you will
get is the oil will begin to come out, keep doing this until all
the oil has come out.
8. Having done this what you need to do now is to test to see if
the spring inside is ok, or whether its collapsed or broken, this
is done by compressing the piston. If all is ok, just clean up the
piston, making sure the sides are totally clean with no varnish or
gum.
9. We will now go onto see how we can sort out the tappet itself,
i.e. the bucket shaped part where the camshaft lobe pushes against.
Normally after several thousand miles, you will no doubt have some
wear. You will now need to linish the tops of each tappet, this can
be done by using P240 wet/dry paper using WD40 as a lubricant, put
the paper on a flat surface (a machined pieces of steel or a small
sheet of glass) and then rub the base of the follower is a circular
motion over the paper, make sure you turn the follower regularly as
you linish, keep going until there are no scuff makers present.
It should look something like this!

If you have some wear on the sides of the tappet, then very
carefully and lightly smoothen up with some 1200 or 2000 grade wet
and dry paper, but don't over do it as this need s to be a tight
fit inside the cylinder head valve bores.
10. Finally once all the lifter have been cleaned assemble the
lifters - see my steps below with pictures, and put them in a bath
of *hot* oil, the hot oil will cause any air inside to expand and
be forced out, mind you don't burn your self.. put the lifters open
side down. Then allow the oil to completely cool, the remaining air
will contract and be replaced by oil.. that will get them nearly
full, test each of the little ball valves before you put them back
together.
11. Pop each lifter (tappet) back into the head values - make sure
each one goes back to its original location.
How to put lifters back together again after taking apart to clean
out. (These pictures are of a lifter Tappet before it was cleaned properly - I know, will get the cleaned up ones upload in next update)
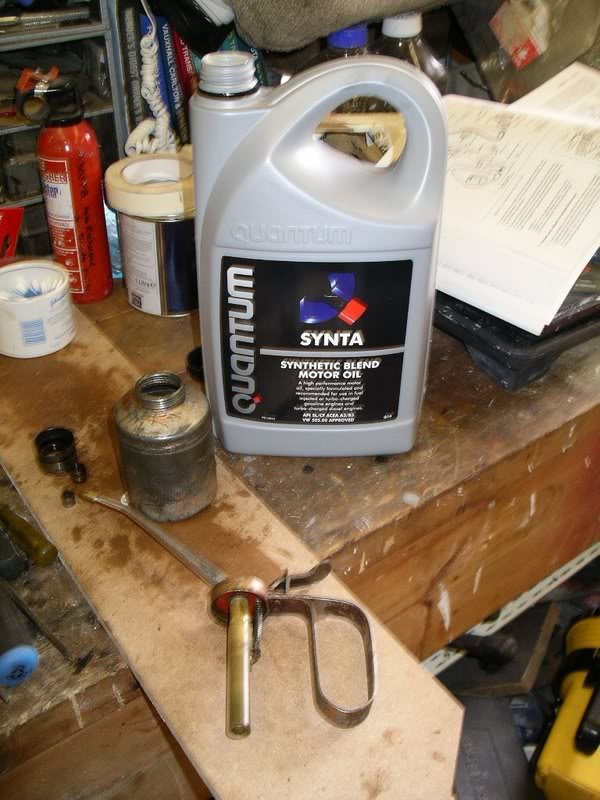
1. All items in bits

2. Fill the lifter (tappet) up with oil - see my choice of oil in picture..
3. Then put together the piston - three parts - you put the spring
inside the piston, I then added a little oil, and then put the centre part inside the piston to complete. I then pushed the piston together so to make sure its working properly.
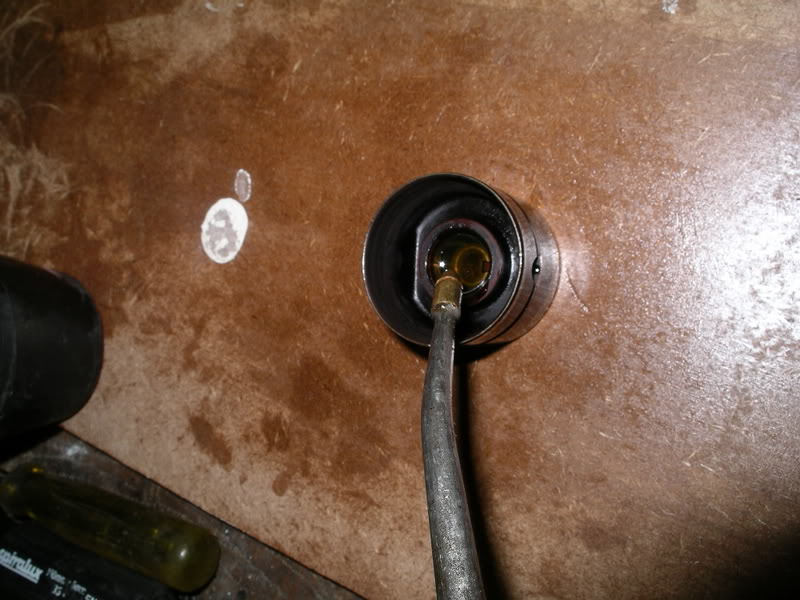
4. Then time to put the piston into the lifter (tappet)
Then push the piston down - you will see oil pour out of the tappet - so be clearful its messy!!, then with a wooden hammer, I used the end of the hammer to push down on the piston in the lifter to make sure it moves up and down - be careful when doing this, you will notice oil pouring of out the lifter which means its working
Well for me the lifters (tappets) are all ready to go back into the
head once its been cleaned up and skimmed, so another job done…
and saved about 80.00 pounds instead of buying new ones
Madone with the two Cabs 82 (UK RHD) and 85 (US LHD) (92 sold)
Posted
Old Timer
0 guests and 0 members have just viewed this: None.