


Stoocake's restoration

Posted
#1130753
(In Topic #135181)
Settling In

Stoocake's restoration
…I guess we'll see how I get on with that as the project unfolds.
Anyway…on to the good stuff.
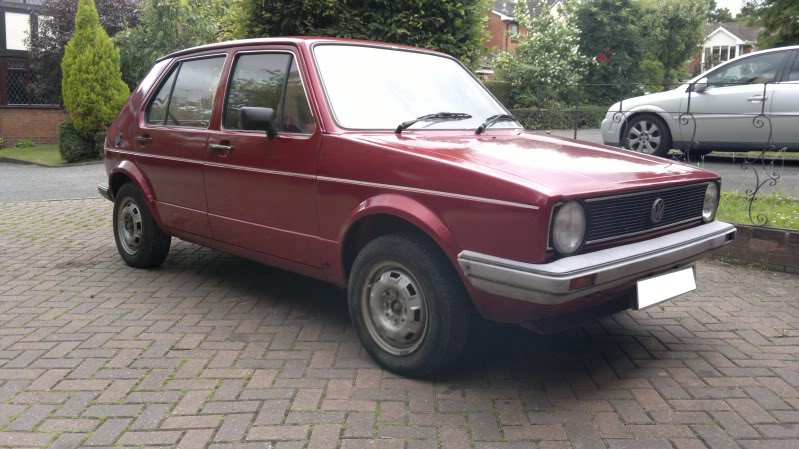
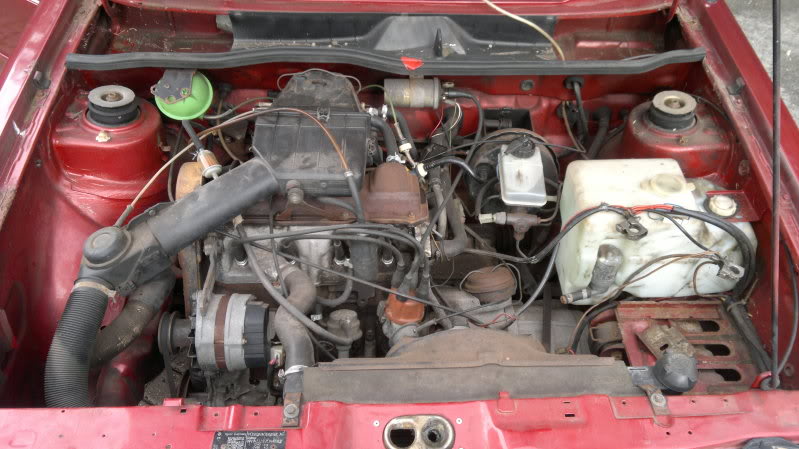
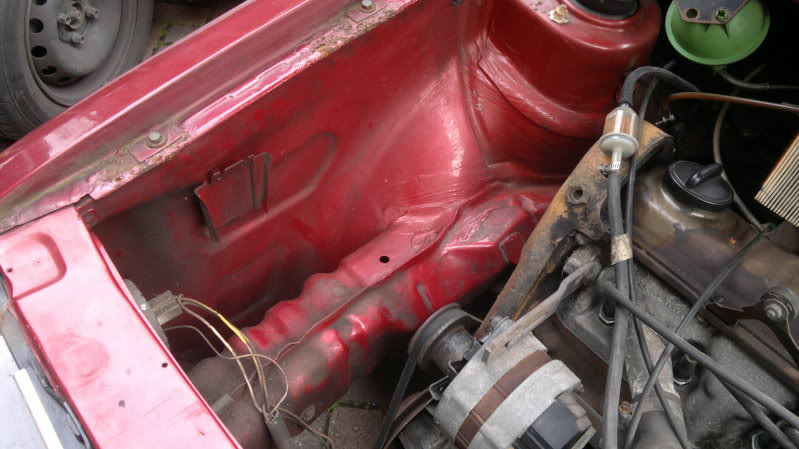
The interior the day I got it

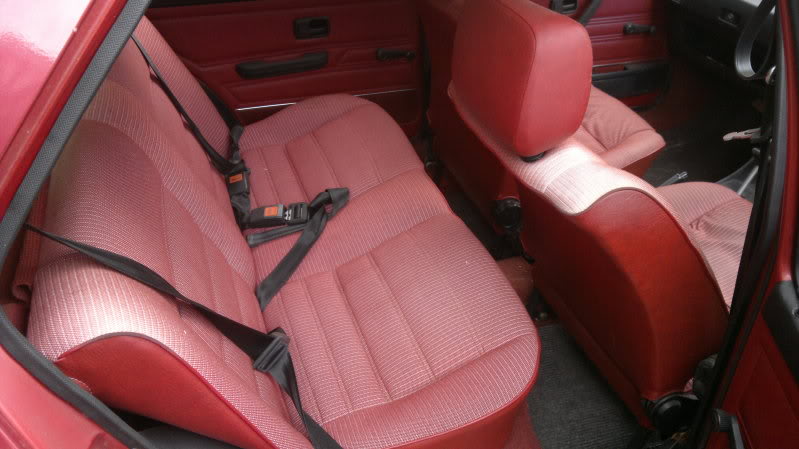

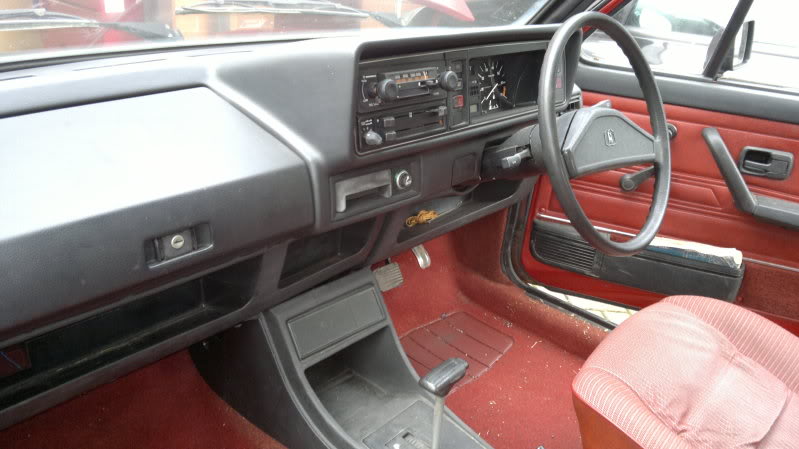
And cleaned up…

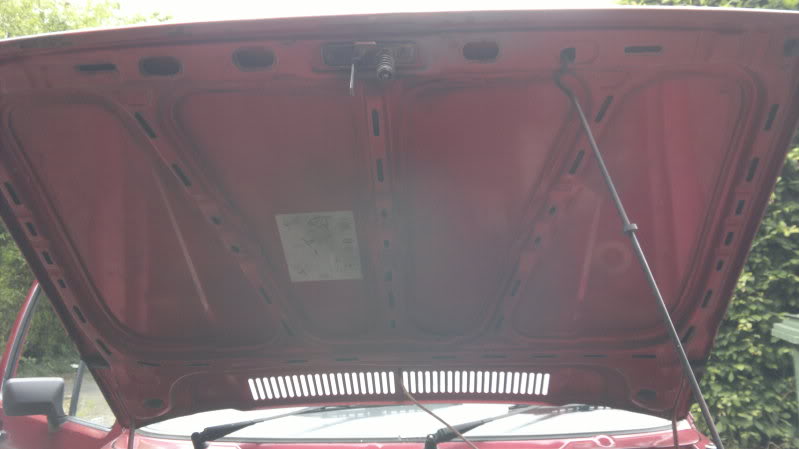
Inner wings look tidy
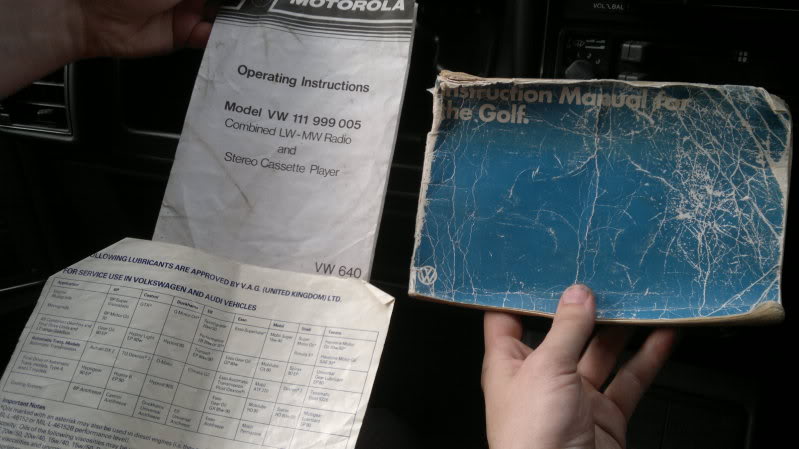
Even got the original handbooks!!
1982 Restoration: The Mk1 Golf Owners Club is currently closed
Posted

COTM Team

chris

Chris

Posted
Settling In
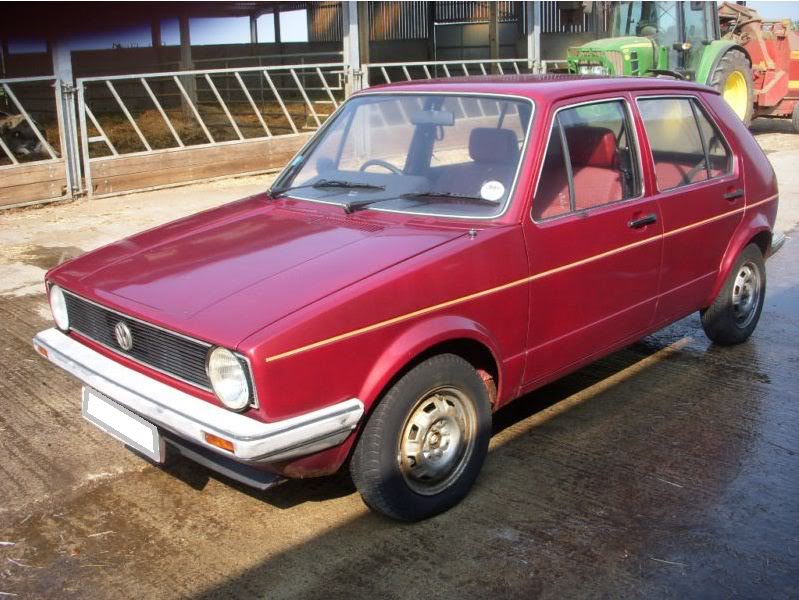
aircooled1968 said
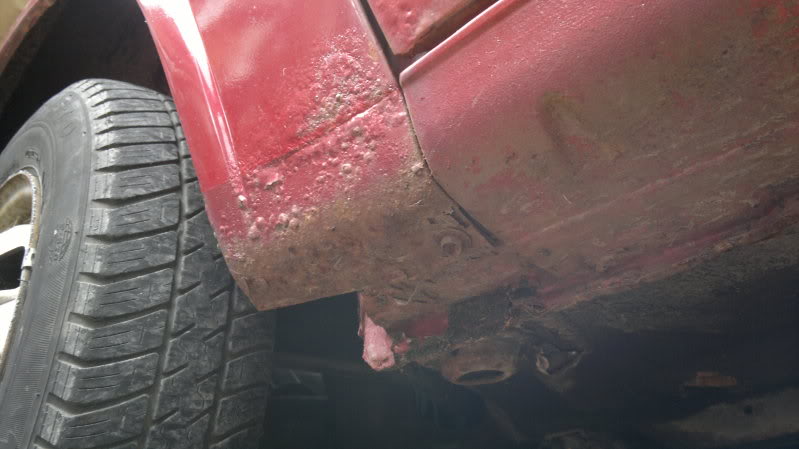
ooh another 5 door project, good luck with her bud, she doesnt look bad tbf, colour nice too, are the wings rotten at the bottom or is it just stone chip paint?
chris
Both wings look pretty shot so they'll be replaced. There is various bits of rust all over the car - mostly very minor but both sills at the back where the sills meet the arches are pretty nasty. I'll update with more pictures soon. I'll be going for a full respray once all the rust is removed - I'll be keeping the colour the same though.
1982 Restoration: The Mk1 Golf Owners Club is currently closed
Posted
Old Timer

Engine replacement is in order, just recondition the original block and box when it's out and put it back in if/when you get bored of going fast.
'83 Black GTI Cab on BBS RAs - DreamBoat 3000'
Resto = http://www.vwgolfmk1.org.uk/modules.php?name=Forums&file=viewtopic&t=67552

Resto = http://www.vwgolfmk1.org.uk/modules.php?name=Forums&file=viewtopic&t=67552
Posted
Settling In
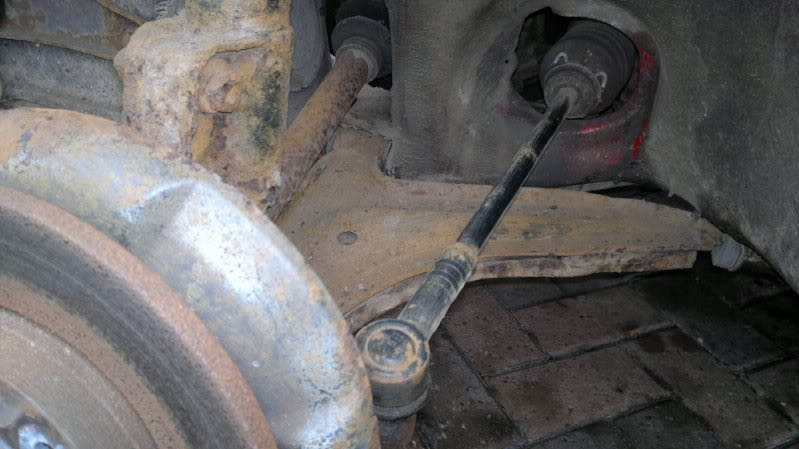
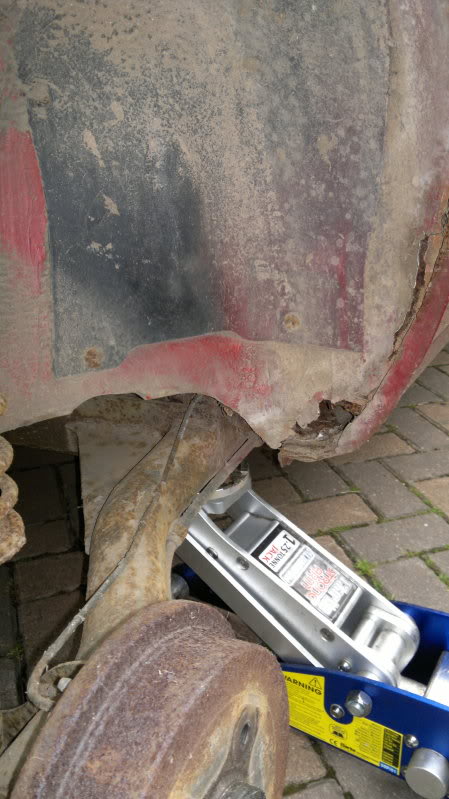
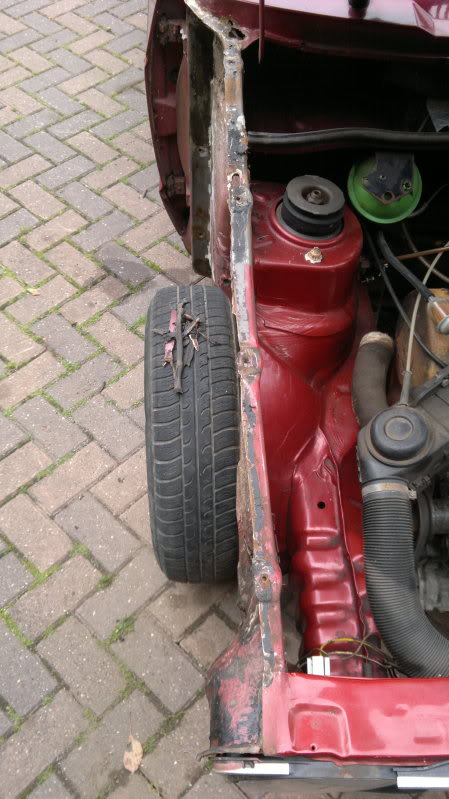
Wheel off to see how everything looks underneath:
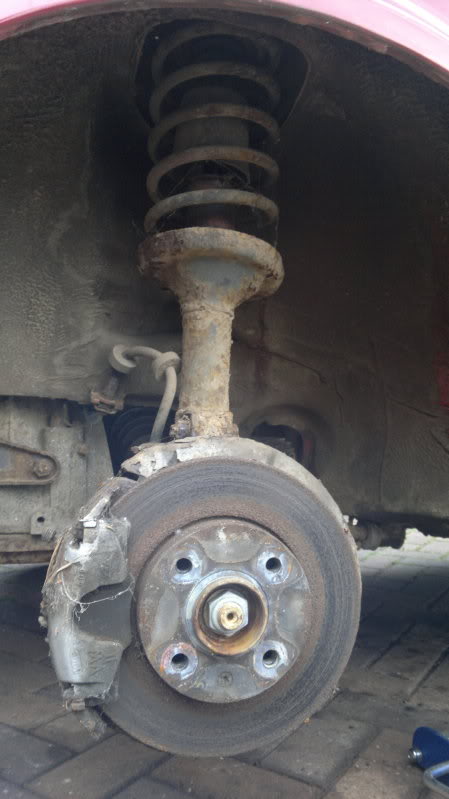
All looks pretty decent - just surface rust but I'll be getting everything sand blasted and painted/powdercoated

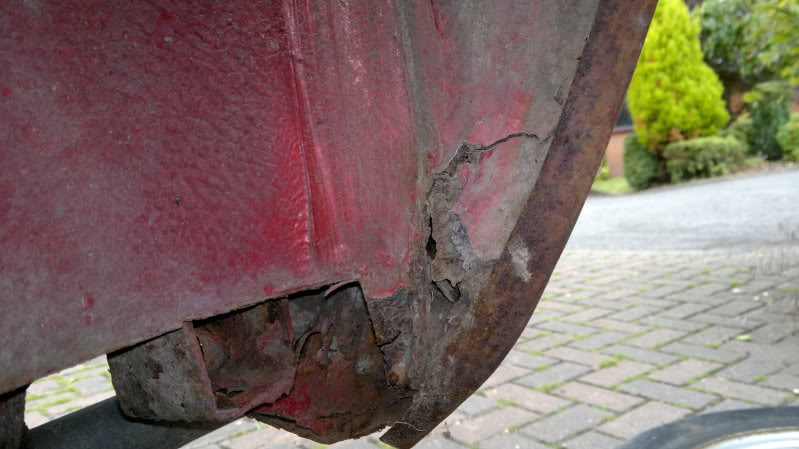
Here are the worst bits of rust - same on both sides
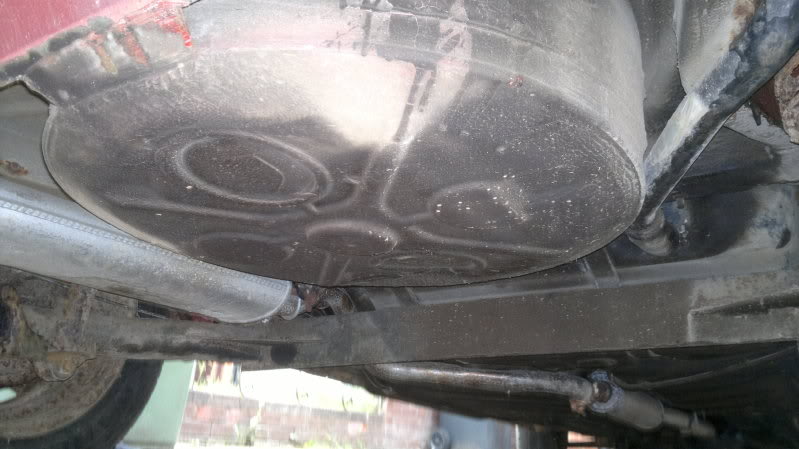
Tyre well is sound apart from a dent - might press back out
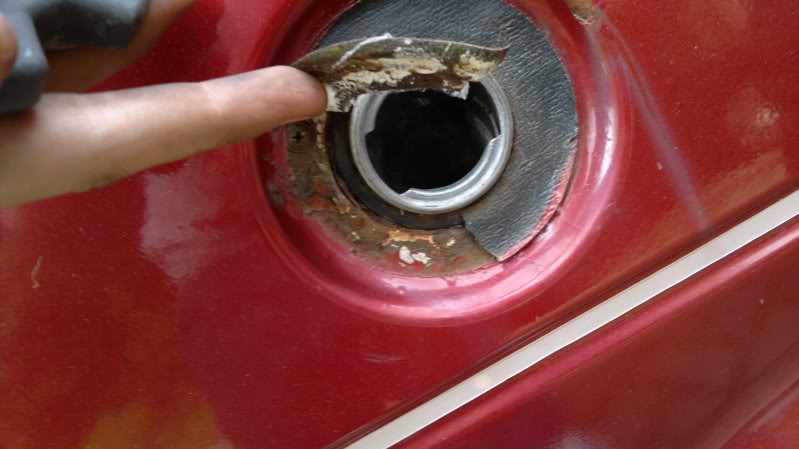
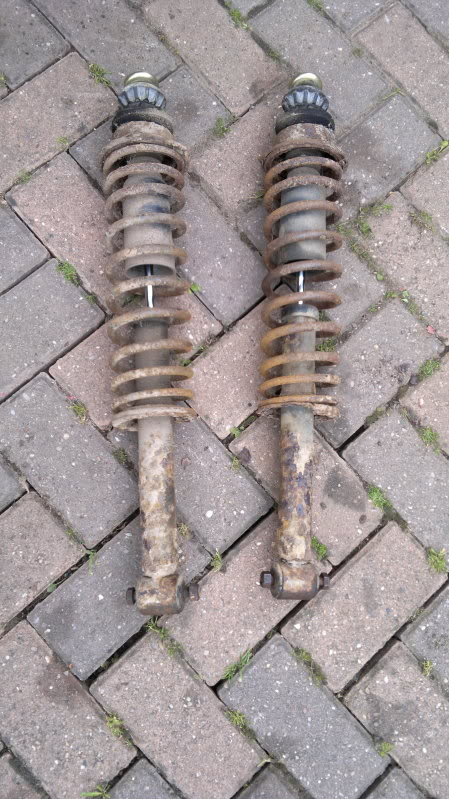
Fuel filler isn't too bad at this point - will keep an eye on it
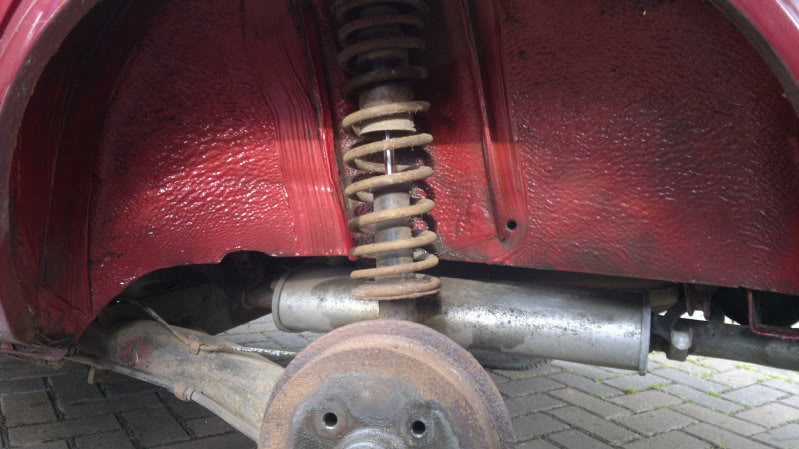
Dampers off
Rear beam cleaned up - decided to get it shot blasted and powdercoated anyway but looks pretty good for the age

Cheers guys.
1982 Restoration: The Mk1 Golf Owners Club is currently closed
Posted
Settling In
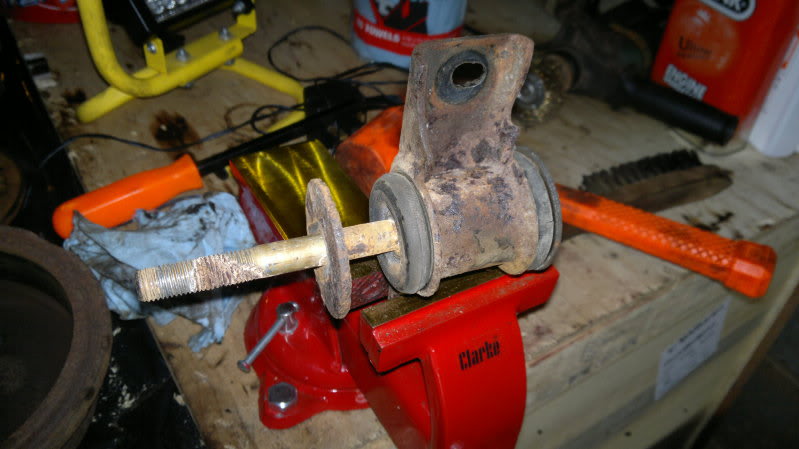
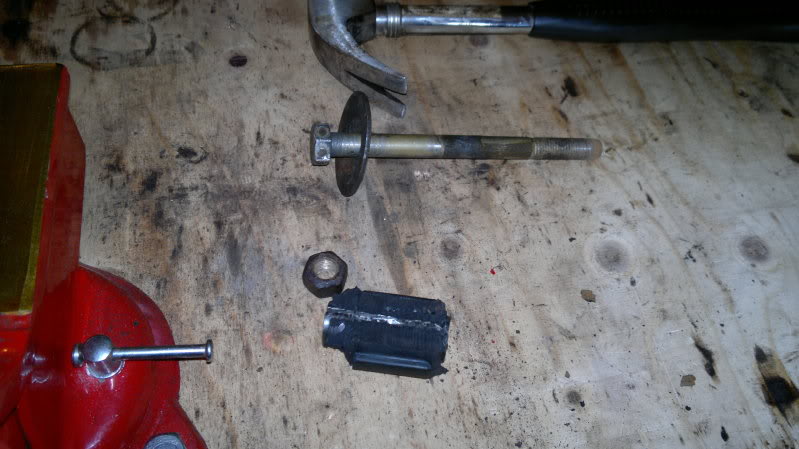
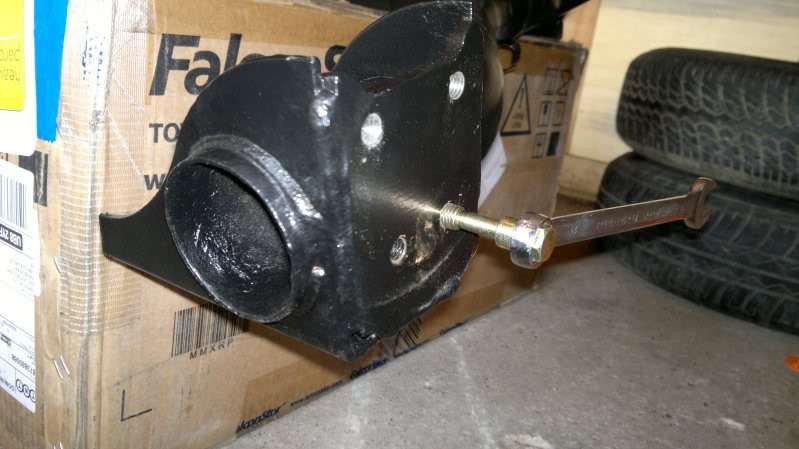
Anyway, had a problem getting the rear beam mounting bolts out the old bushes. Ages of soaking, twisting and levering did the job…would have been easier to replace but I'm being tight and Scottish. Getting them back in might be fun too…
Had all the rear suspension components shipped off to get powdercoated and they came back looking pretty damn good.
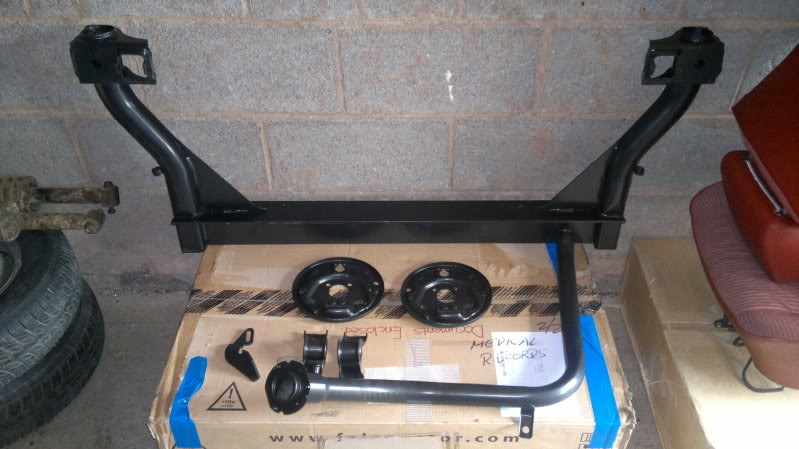
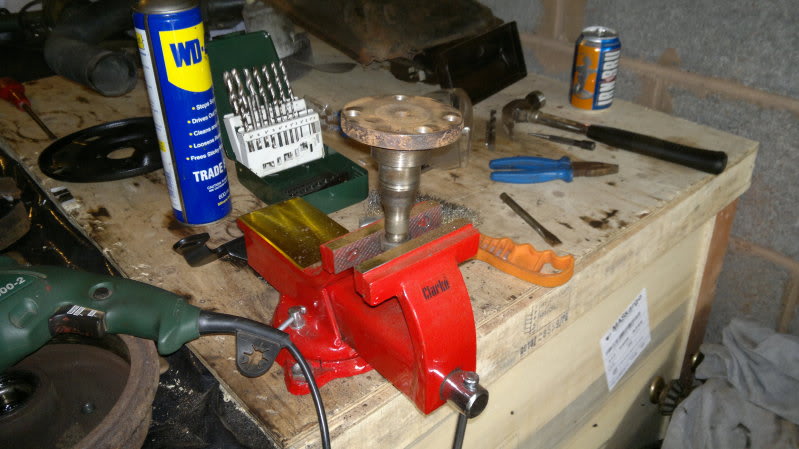
Retapping the threads to clear the powder from them
Cleaning up the stub axle
And fitting to beam
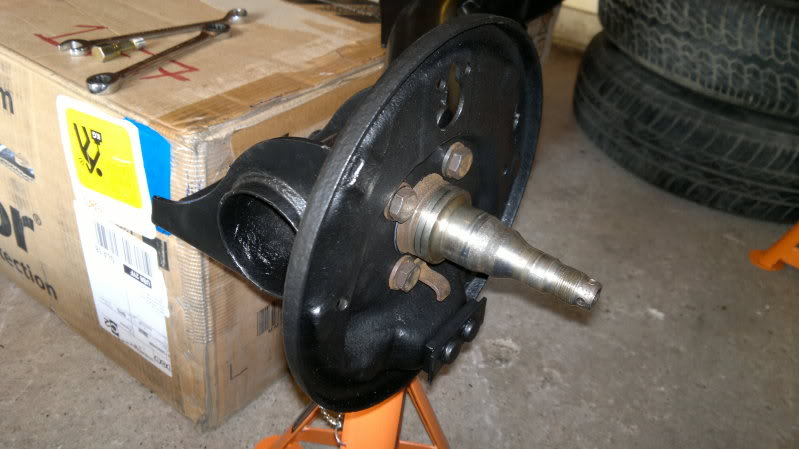
Half way through reassembly
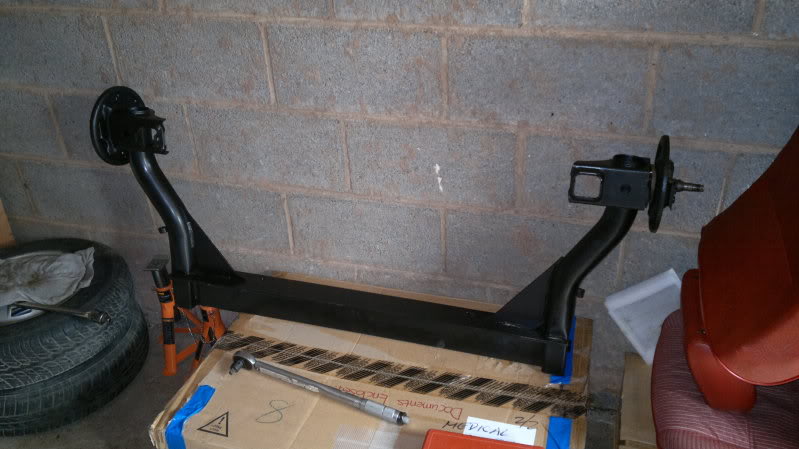
Made some new brake lines as the originals were pretty corroded. Not happy with my flaring tool so might have to replace that if I can…maybe I just like buying tools.
1982 Restoration: The Mk1 Golf Owners Club is currently closed
Posted
Settling In
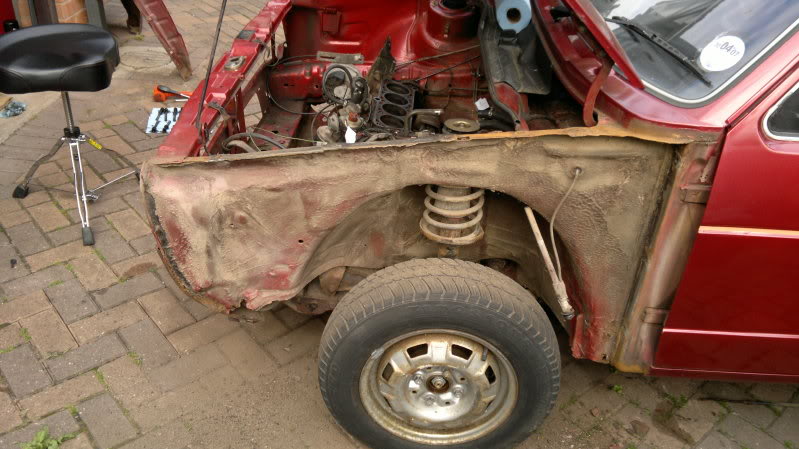
On to the pictures - started tearing down the front end to get a look under the wings
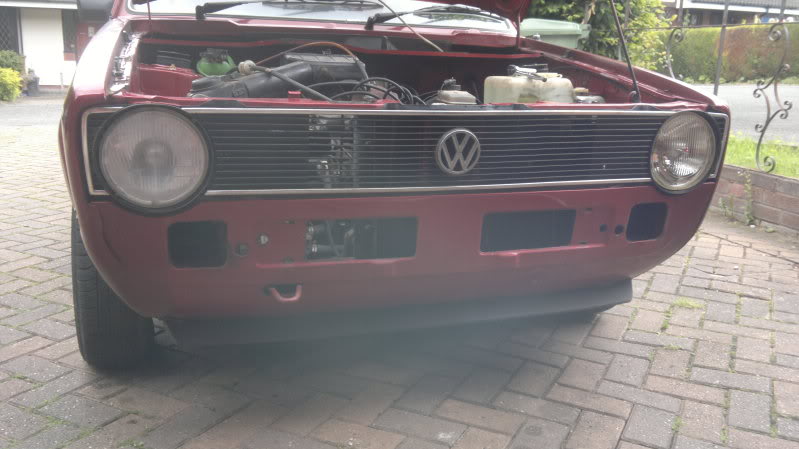
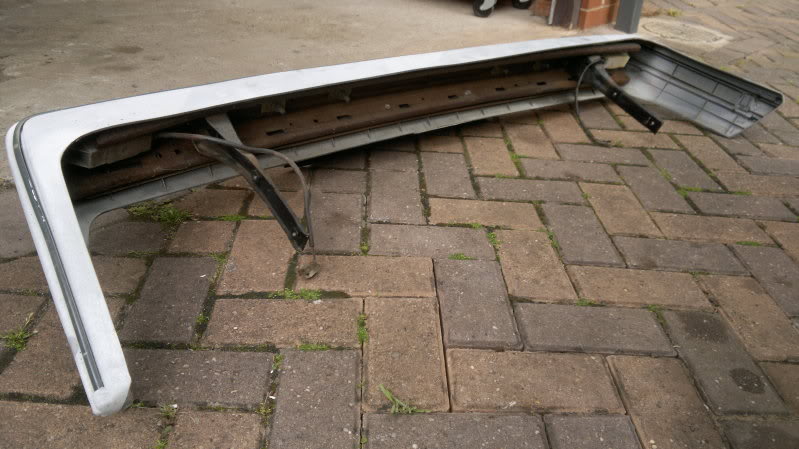
Bumper looks absolutely shot - got to be easier to replace than repair this
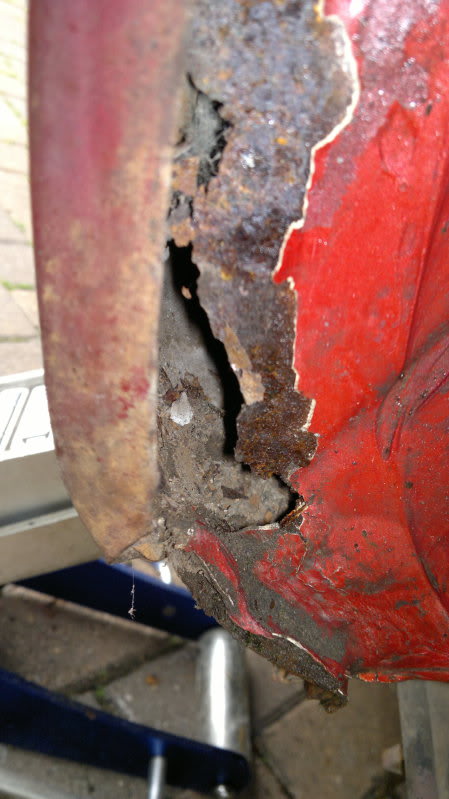
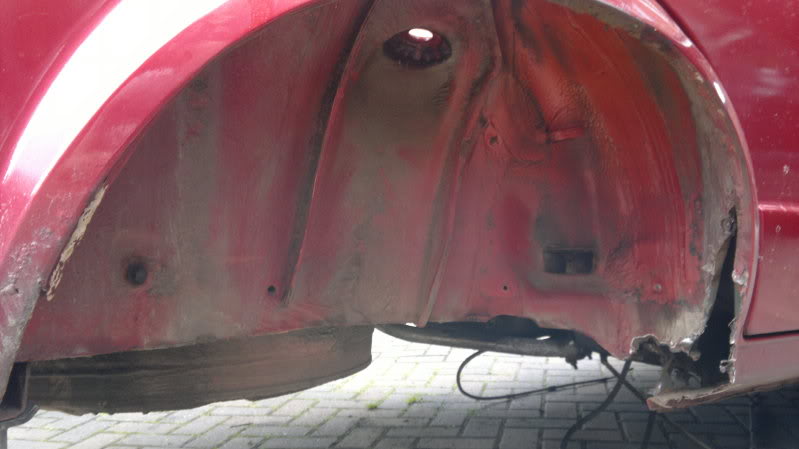
Wing off, nothing too major by the looks of it - few minor rust holes
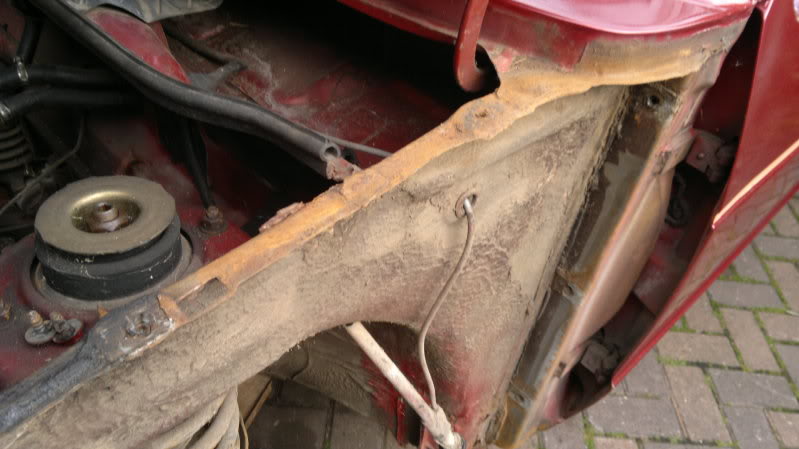
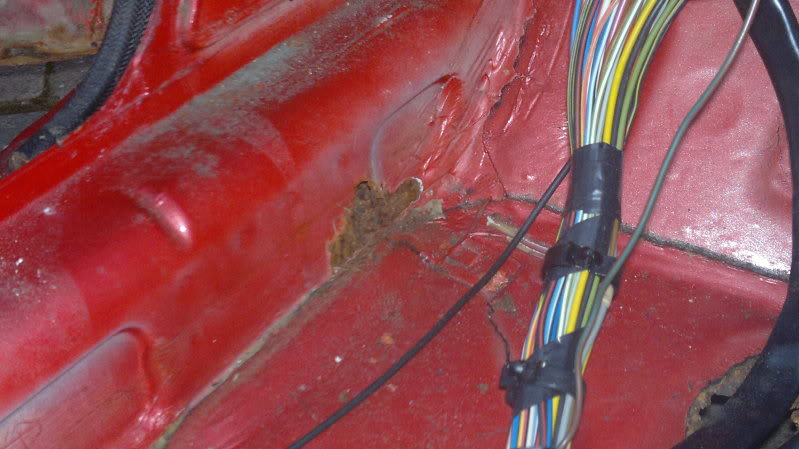
A pillar starting to go but doesn't look too widespread…do you reckon this will be easy to cut out and patch up?
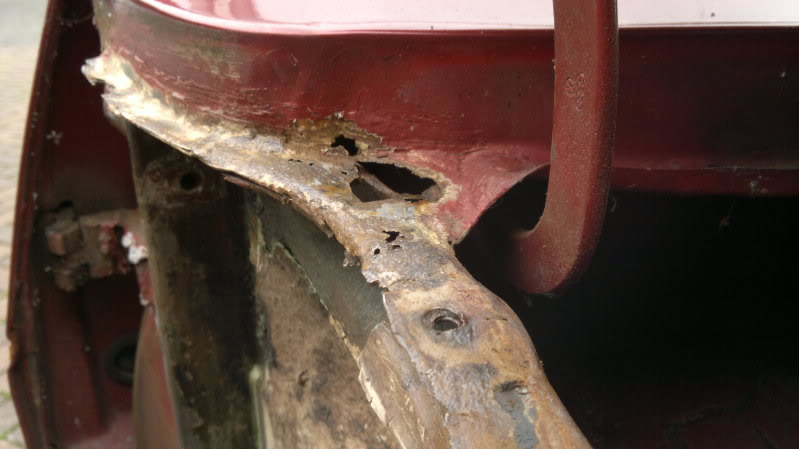
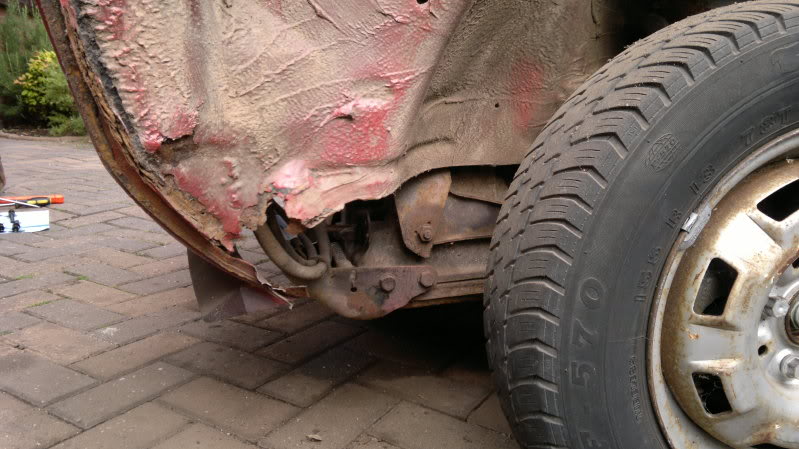
Similar story at the front of the sill
Got the fan cowling off ready for my next trip to the shot blasters
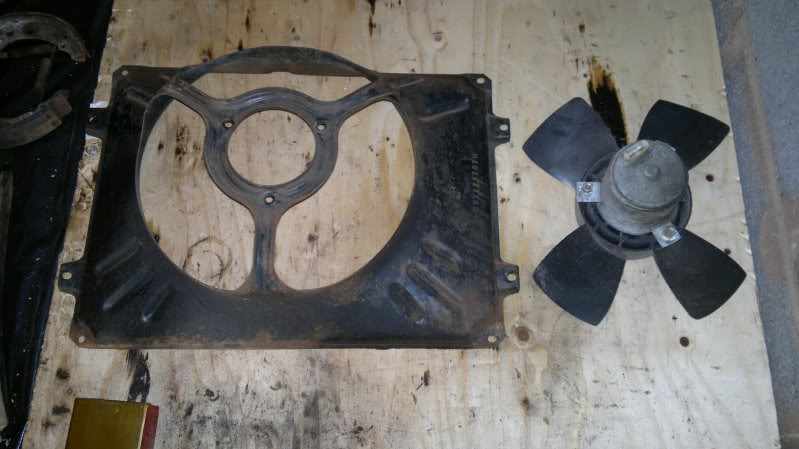
And may well do the engine and timing cover at the same time
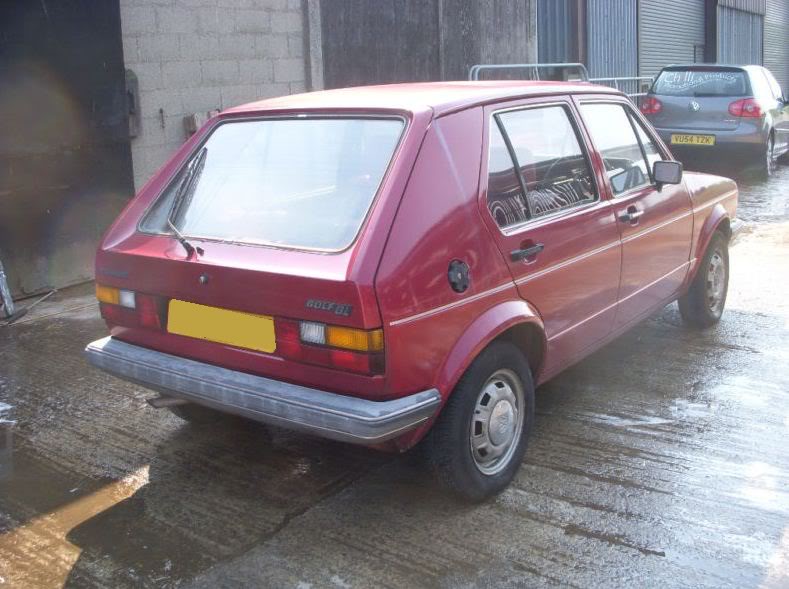
How it stands now - not an eyesore on the drive at all


1982 Restoration: The Mk1 Golf Owners Club is currently closed
Posted
Old Timer

Posted
Newbie

Posted
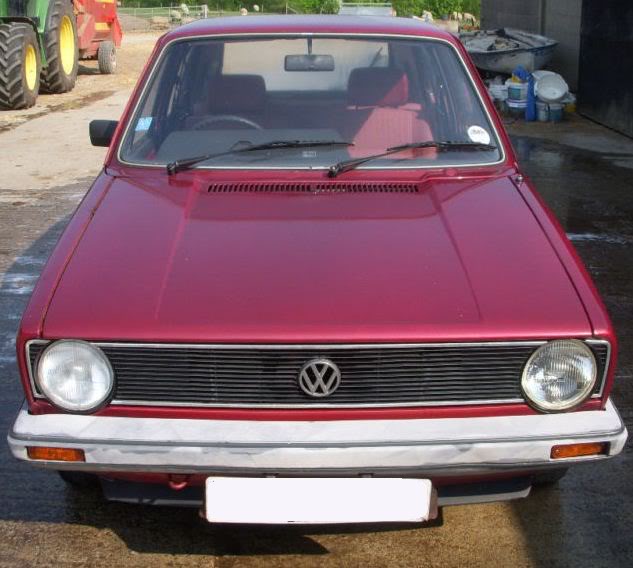
Settling In
RatRide said
nice weisel there! What's the colour called do you know?
I'm not sure but I will find out for you tomorrow - stay tuned.
I'll be getting it resprayed and debating whether or not to keep the colour……..what do you reckon?
1982 Restoration: The Mk1 Golf Owners Club is currently closed
Posted
Settling In
1982 Restoration: The Mk1 Golf Owners Club is currently closed
Posted
Settling In

Posted
Local Hero
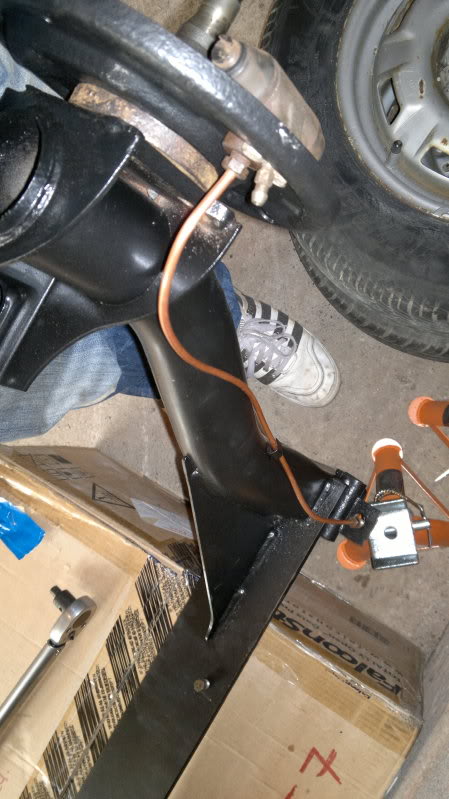
Can i suggest that you remove the piece of metal i circled off in the pic as it is this that collects and old water thus causes the rust on the a pillar, if left, it will continue underneath also.
Mine have been removed on both sides to prevent this in future, but depending on how you feel, is the car in original condition if removed, but there again it is not original as parts are being replaced lol.
Pete

Posted
Settling In
I've had a change of heart about the car…hopefully for the best but decided to just go ahead and modify it. As nice as it would be to keep standard, I've always wanted to take an older car and modernise the mechanics of it to my own tastes so just going to say sod it, and go my own way :-)
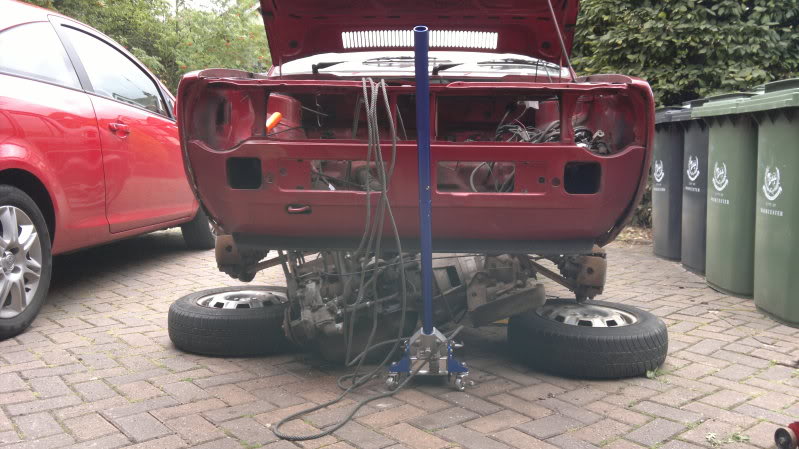
So with that in mind…out with the engine…
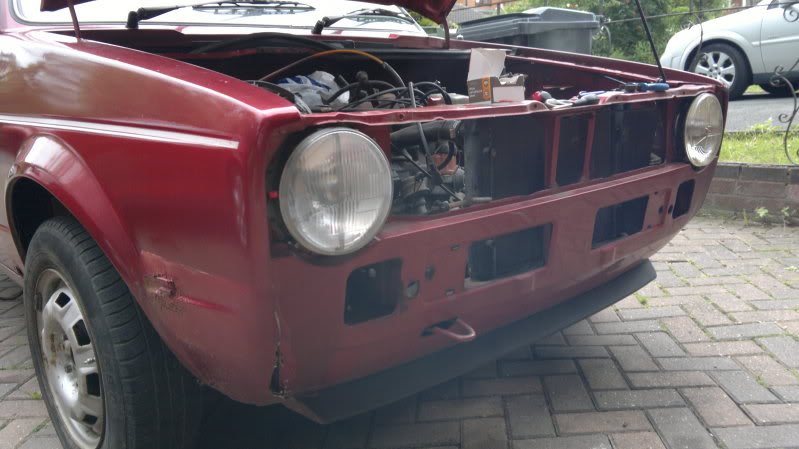
Front end off
(I took more photos at this point but the battery in my phone died so lost a few of them for some reason)
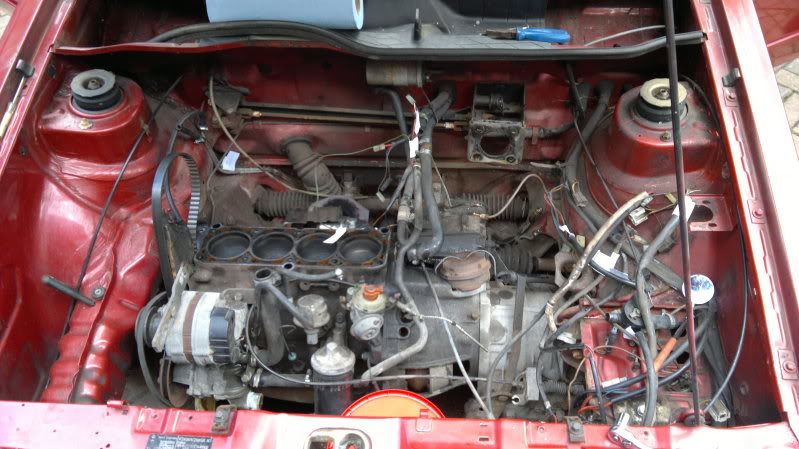
Stripped everything down so I could get the cylinder head off (just figured it'd be easier to manouver engine out of the car without it, and MUCH easier to get to wiring for starter motor so I could disconnect it).
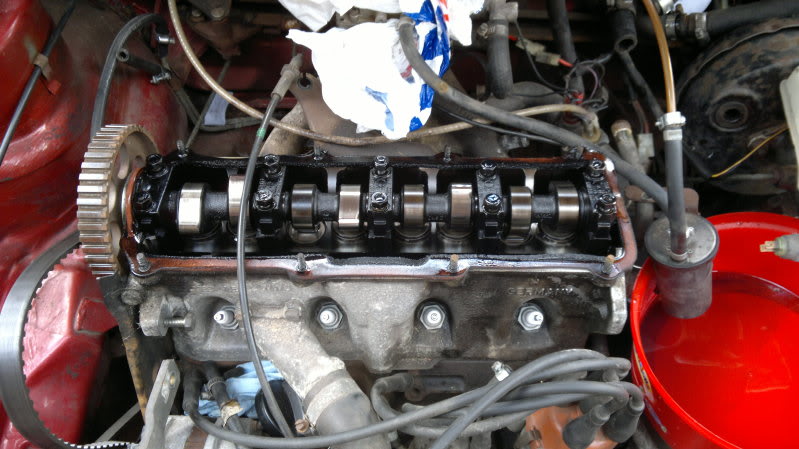
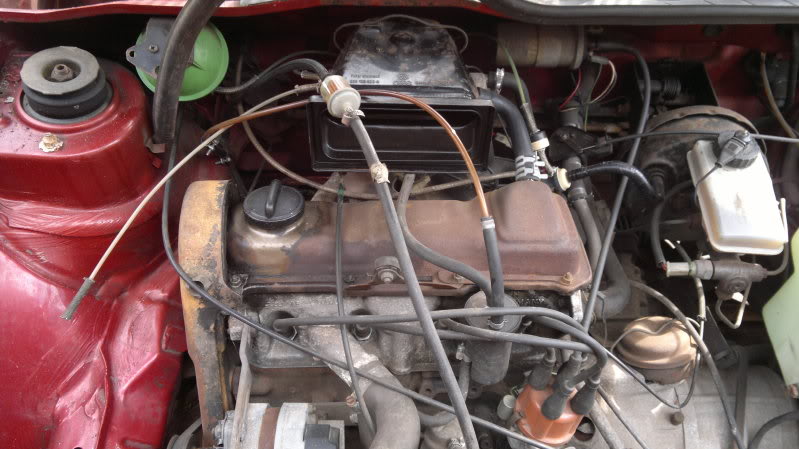
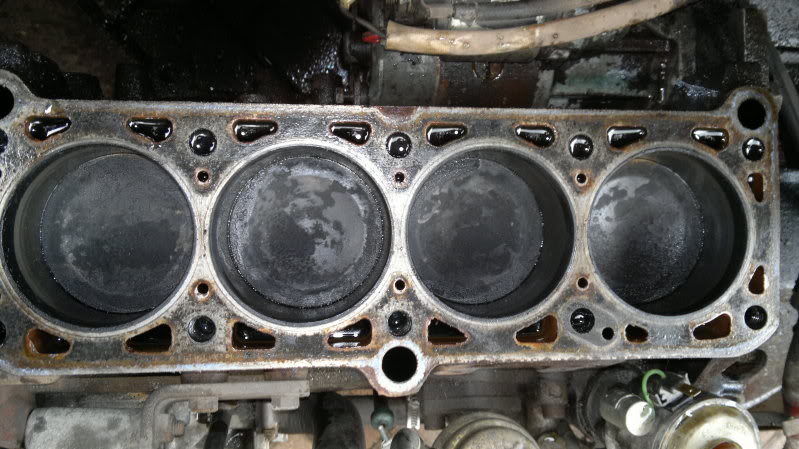
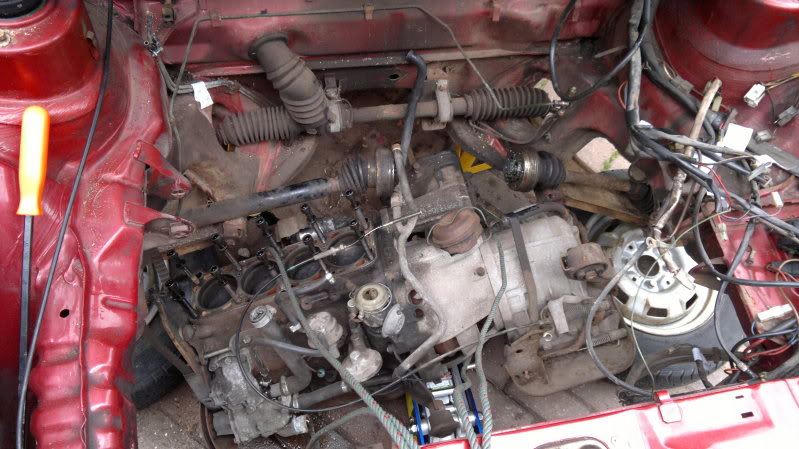
Bores look ok - wee bit of carbon but the engine ran well so all seems in good condition
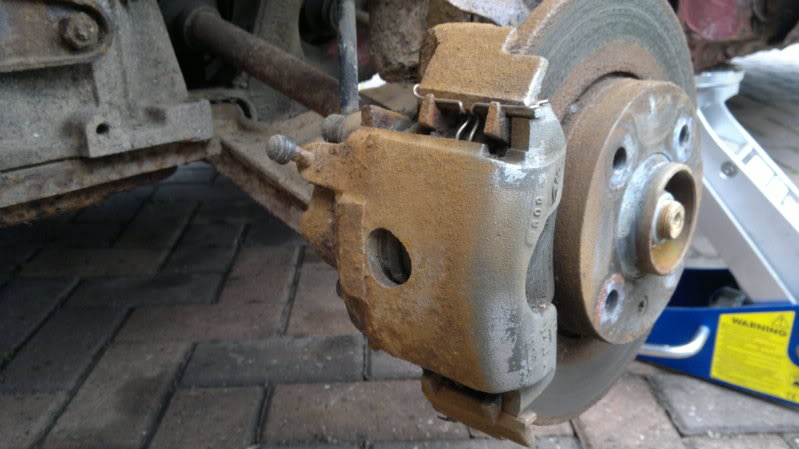
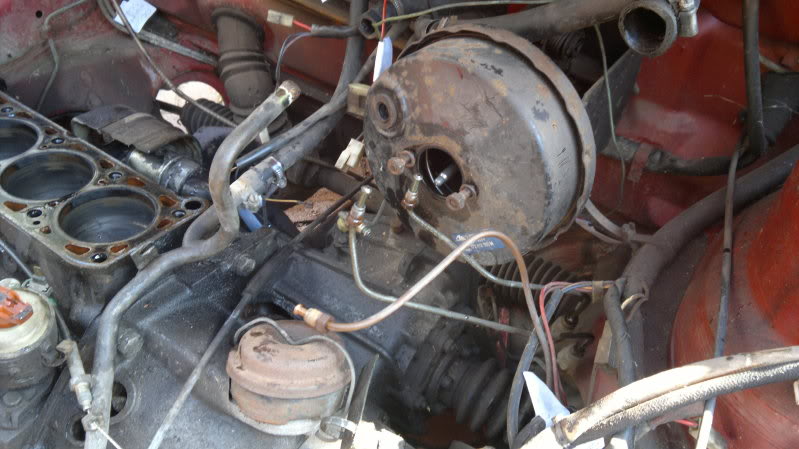
Stripping brakes
I'll be stripping the bay entirely for the respray (not settled on colour yet…). When I replace the engine I'll be going for something a little unconventional I think…I'll see how settled I am on the idea as time goes on.
Waiting for the end of the month now before I've got more money to spend on it…damn not winning the Euromillions…
Cheers
1982 Restoration: The Mk1 Golf Owners Club is currently closed
Posted
Settling In
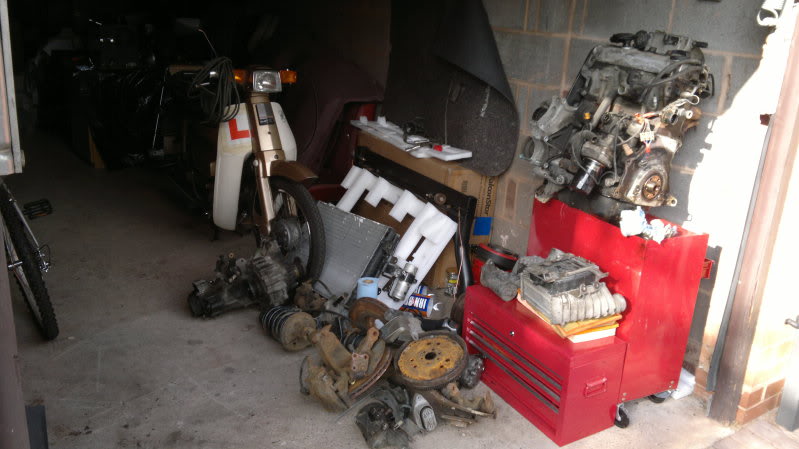
Boxes of bits fast filling up - I live in a shared house and I'm hogging the garage all to myself…trying to make an effort to keep space down but quite hard.
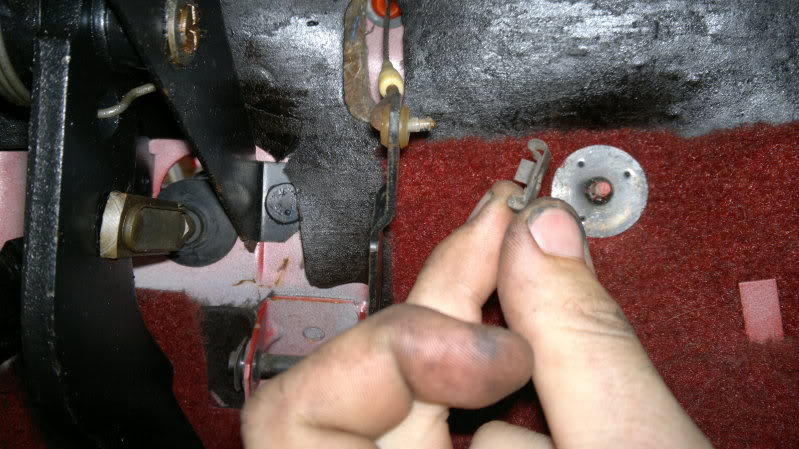
Just a reference pic for the throttle cable - anyone know the best way to get the grommet out the bulkhead? It's pretty damn tight
I've stripped all the brake components off the bulkhead as I'll most likely be needing to move the cylinder thanks to the new engine. Forget to take a pic after so this is all you're getting ;-)
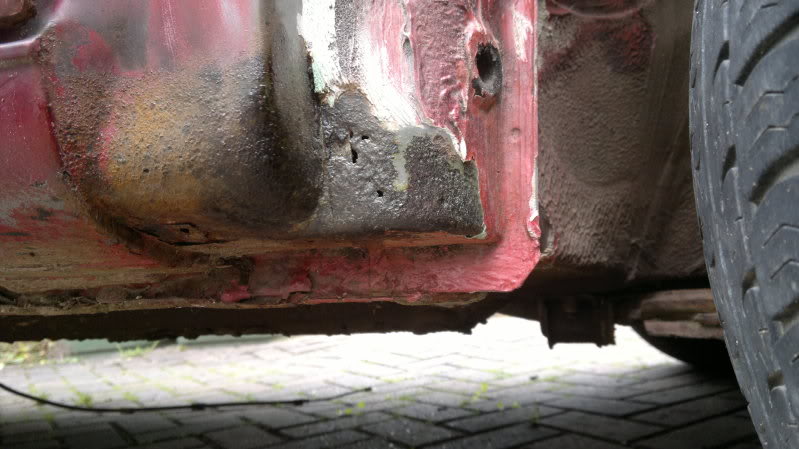
Finally took the NS wing off - rust a little worse on this side sadly - front of sill has a few holes in it and generally worse condition. Ah well, shouldn't add too much time to the project…
1982 Restoration: The Mk1 Golf Owners Club is currently closed
Posted
Local Hero
Looking forward to this update, nice to see this kind of work.
Myself sitting here jealous seeing you can weld something i can't but would love to do, as not just money you save but your own work to get her back to mint condition.
Best of luck to you bud, hope all goes well :wink:
Posted
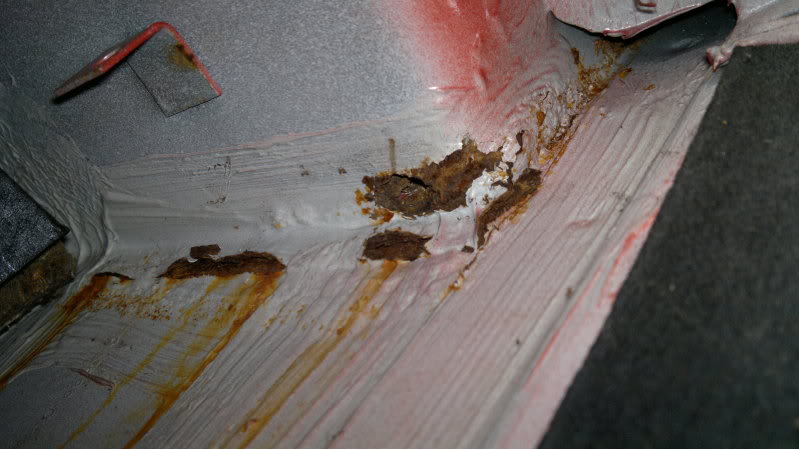
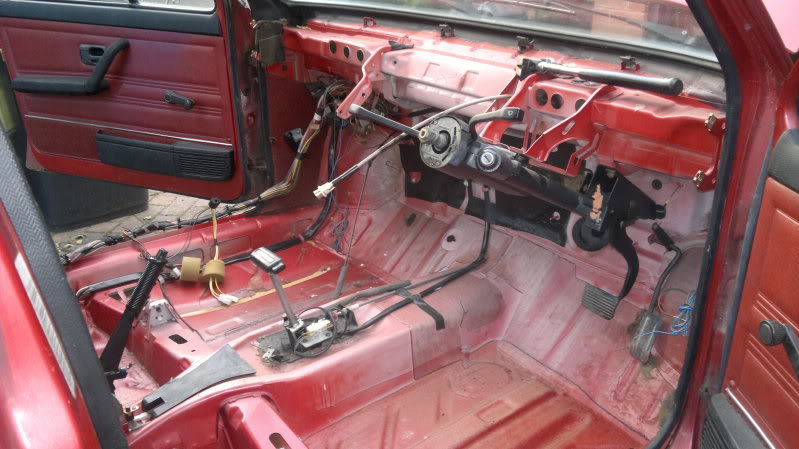
Settling In
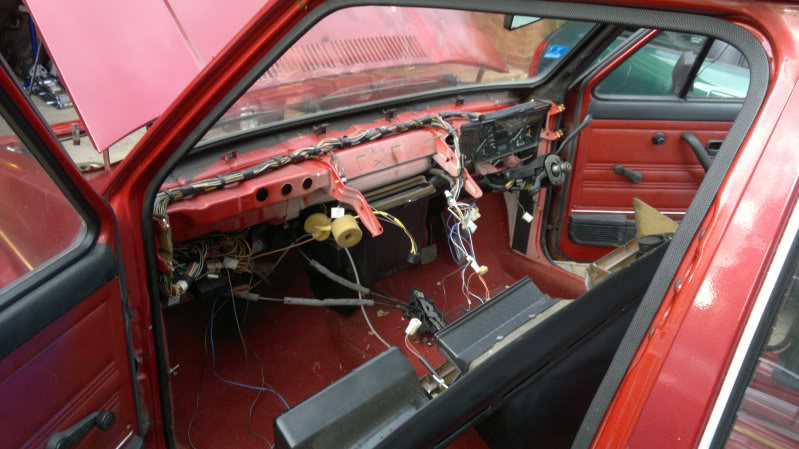
Started getting the rest of the interior out - dash was nice and easy to remove
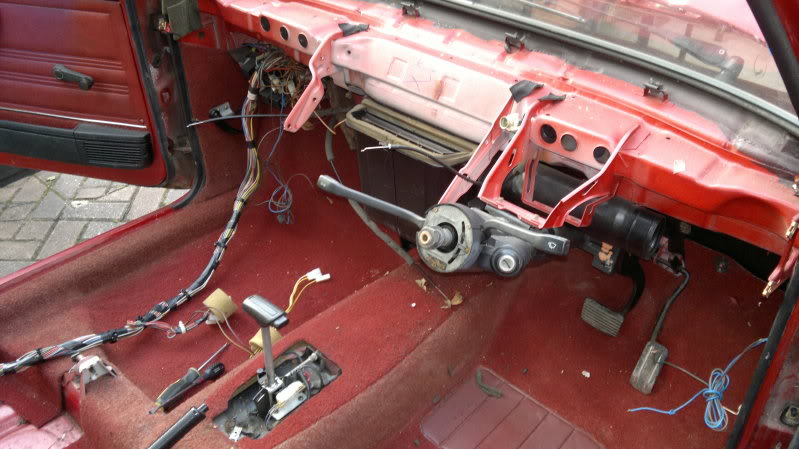
Some water has got in and rusted holes in this panel but should be easy to weld in a patch
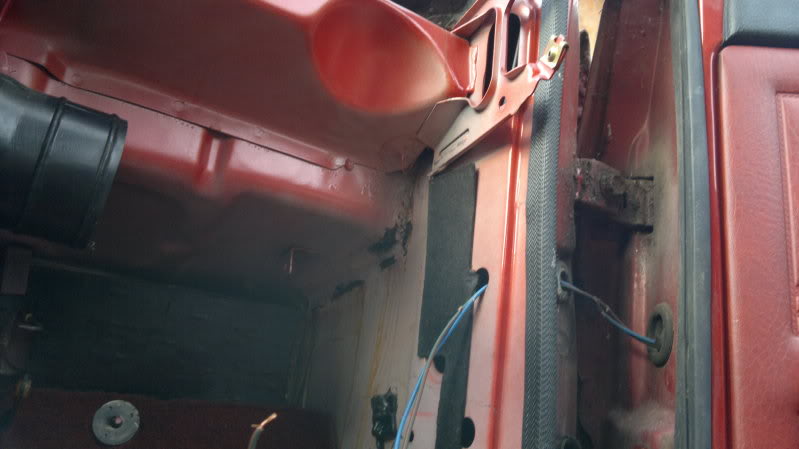
Carpets out - little bit damp under drivers side - presumably from hole shown above
Inner sill on passenger side is rotten where it meets the floorpan, most of the way along
Not much left

Onto the rear suspension - wanted to get the rear wheels back on and move on to the front (the rear subframe will be off again to do paint and reinstall fuel tank etc)
Didn't get any pics of the beam installed…but I don't want to show it until I've got new shocks as the old ones really let it down :-P
Engine had to come out - managed to drag it out single handedly using nothing but a bit of rope and a trolley jack (I'm too tight to hire a crane)
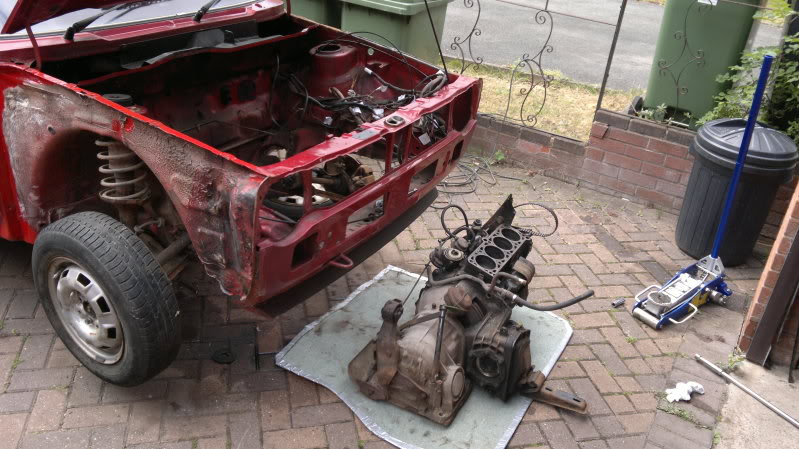
Anyone want a 1.5 with 3 speed auto? …thought not :-P
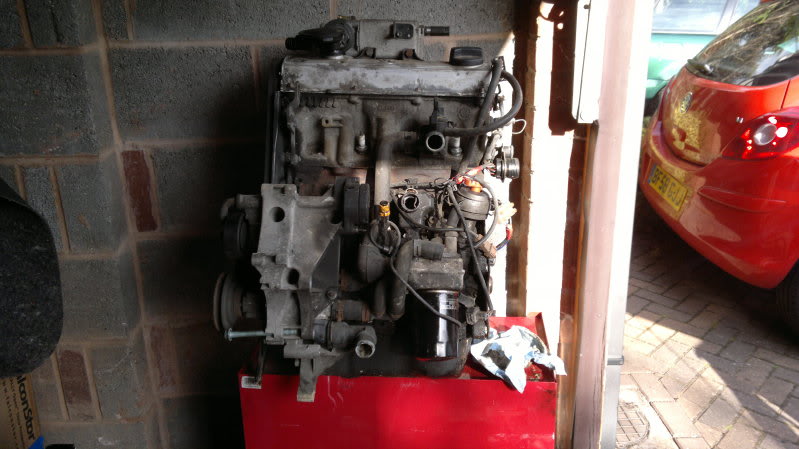
So having decided to modify the car after all, I wasn't sure what engine I wanted but I came across a 2.0l 8v with everything I needed and loads more for £70!
The block:
Lots left to do - will update again in a week or so. Cheers
1982 Restoration: The Mk1 Golf Owners Club is currently closed
Posted
Settling In
I haven't forgotten about the project, I've still been working on it but had a few other things on, including passing my bike test, getting my new (to me) CBR600 ready to ride, training for a half-marathon, being ill, planning a stag do, and tied up on a massive project on work. Also I've been learning to weld - surely a useful skill in Golf ownership!
So I'm back! And the project should pick up some speed!
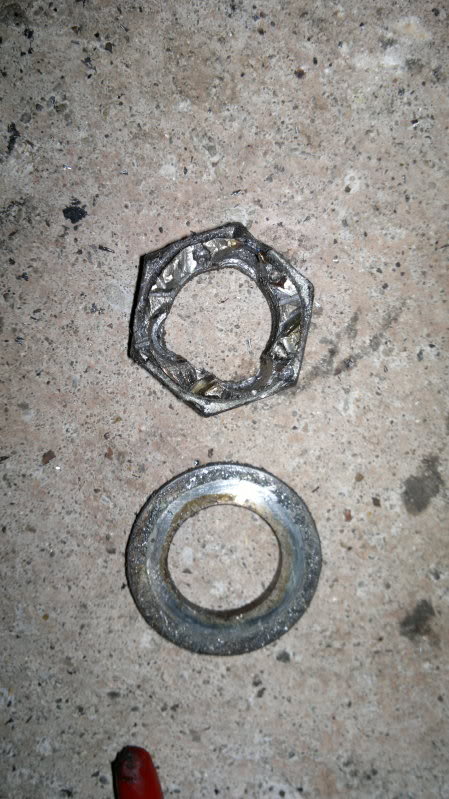
Amongst some of the work I've been doing on the Golf include trying to remove include disasembling the front hub assemblies - had an absolute nightmare getting the driveshaft out - ended up drilling the end of the hub/nut, but took several days to do this. Still, no damage to hub and the driveshaft is scrap anyway
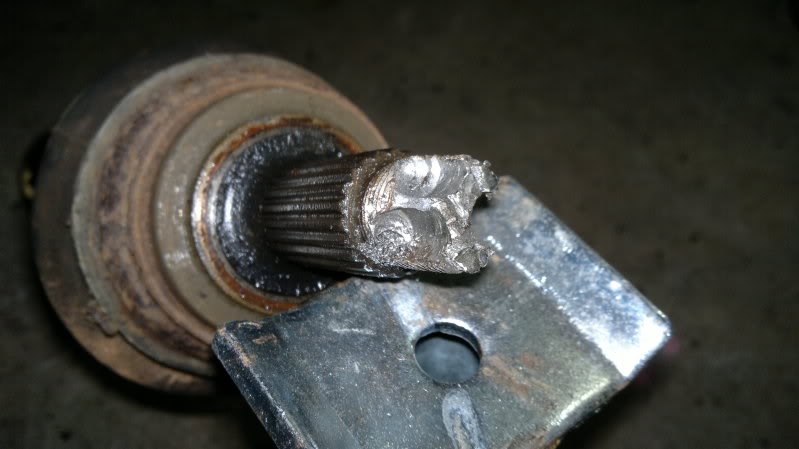
Such a rewarding sound when the nut popped free
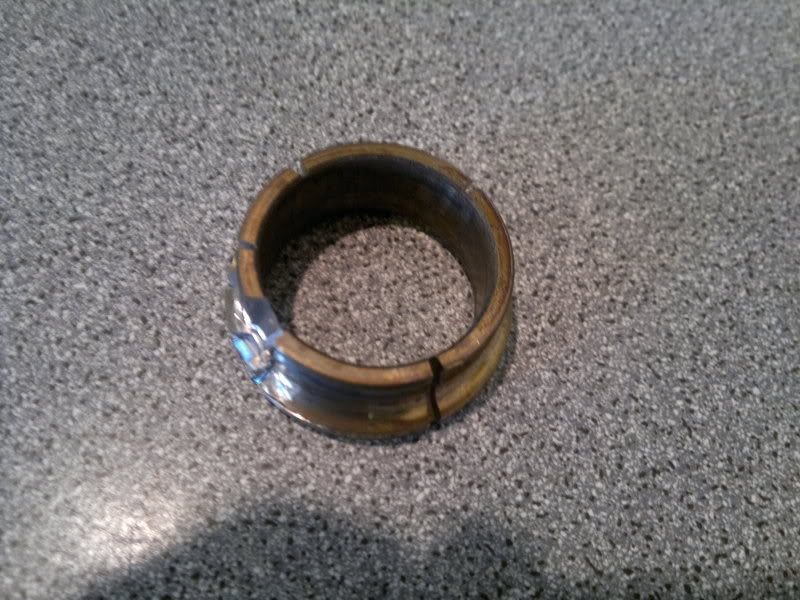
After that, disasembling the hubs and getting the bearings out was the next challenge. NS came away relatively easily, bit of heat and using some C-spanners I kept from my old HSD adjustable shocks and off it came, but the OS one was an absolute git. Took a couple of days to remove - had to grind slots into it with a reinforced dremel cutting disk and tap with a hammer after freezing the hub and blow-torching the bearing casing
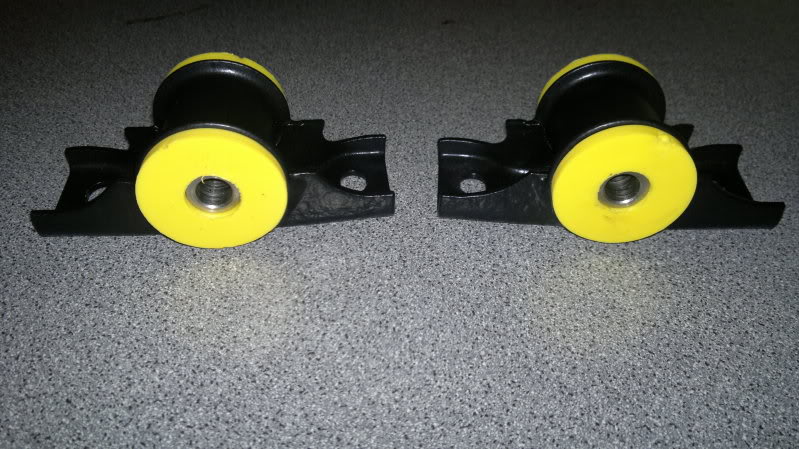
I have a manual steering rack now that I have fitted new tie-rods and ends to, painted the body and brackets and here is the result - looks better in the flesh

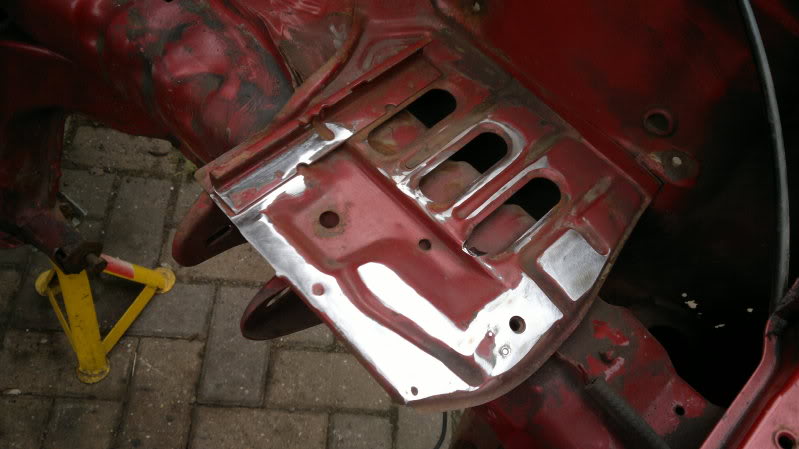
The battery tray was pretty rusty so I took the paint off that and painted in grey primer until I settle on a colour for the car - I seem to be changing my mind every 5 minutes about what colour I want it, but plenty bodywork to do so I guess there's no rush
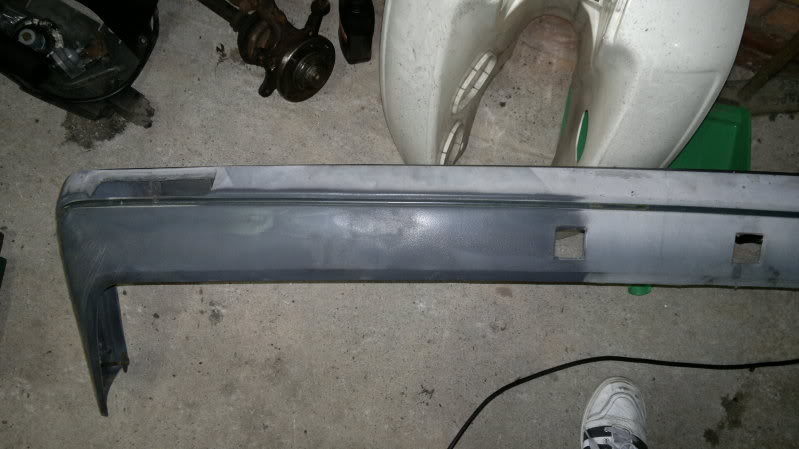
Someone here said that heat can restore plastic bumpers to their original colour - they were right! Thanks for the tip
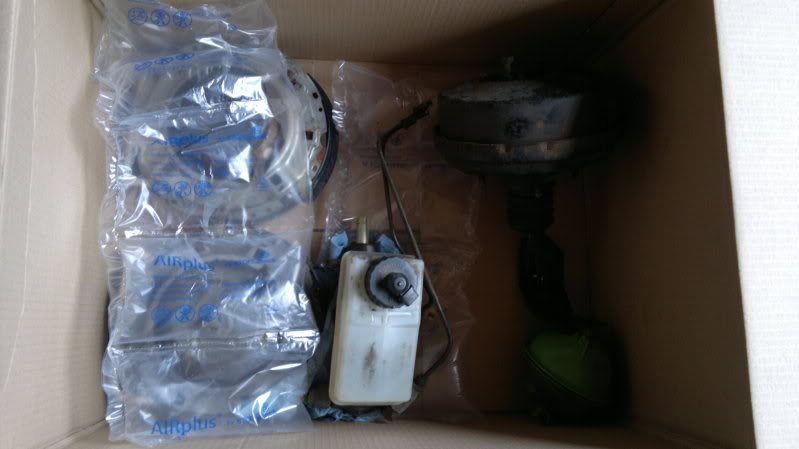
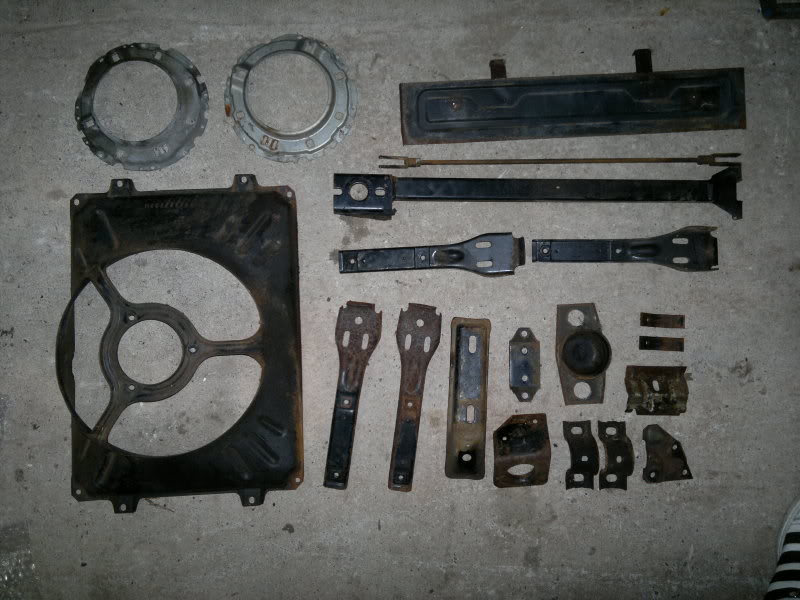
I've stripped a load more parts to get powdercoated, so will get them done soon and pictures will follow.
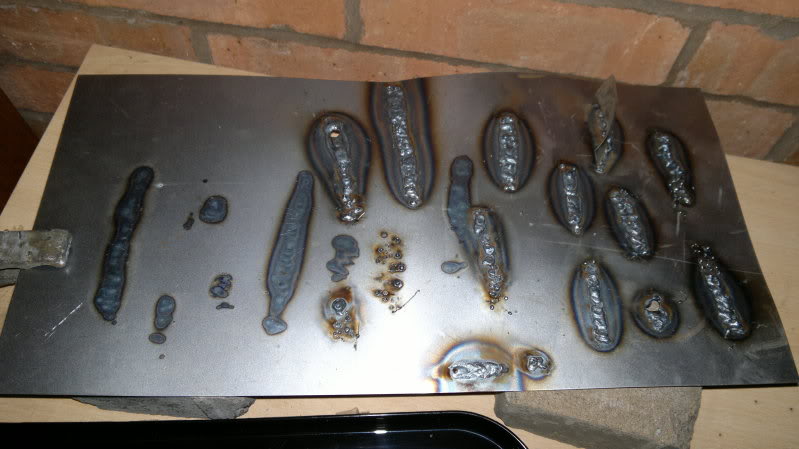
I've been teaching myself to MIG weld and getting the hang of it now. A wee bit more practice and I'll be confident to go at it on the car - this was my first go…
Can anyone help confirm what I need to do about the fuel tank if converting to injection? From what I gather I should either change to a petrol injection tank and fit larger fuel lines under the car, and modify the wiring using a lighting connector from a mk2? Diesel tanks will work but have a larger mesh in the bottom - both tanks have swirl pots? If possible I'd rather use the existing tank as it's in sound condition, and either fit an internal pump if possible (is it?) or use an inline one (and perhaps an aftermarket swirl pot in the engine bay if I'm worried about fuel surge?)
All comments welcome.
1982 Restoration: The Mk1 Golf Owners Club is currently closed
Posted
Settled In

ERROR: A link was posted here (img) but it appears to be a broken link.

Posted
Settling In
I've taken a load of stuff to the powder coaters - whether I'll use all of these again or not I'm not sure, but it was cheap, and I had a few other bits done as well - some fittings from my motorbike and a couple of car ramps that someone gave me, they should come up nice.
Should have the 'after' pic in the next couple of days.
1982 Restoration: The Mk1 Golf Owners Club is currently closed
0 guests and 0 members have just viewed this: None.