


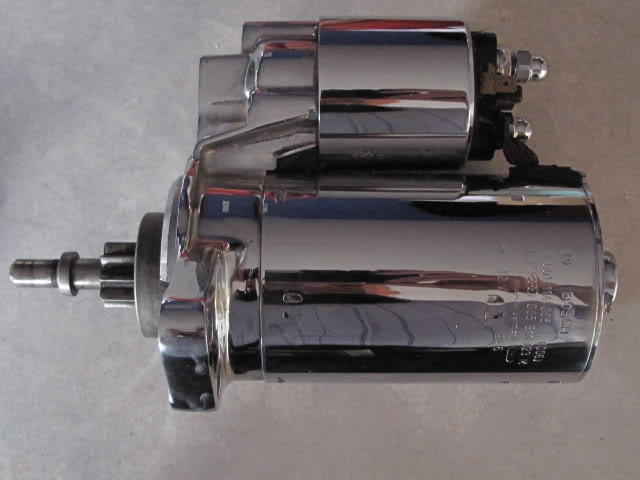
Slippys chrome bits looks like a build thread starting!!!!!

Posted
Old Timer

Slippys chrome bits looks like a build thread starting!!!!!
Posted
Old Timer
Posted
Old Timer
Posted
Old Timer
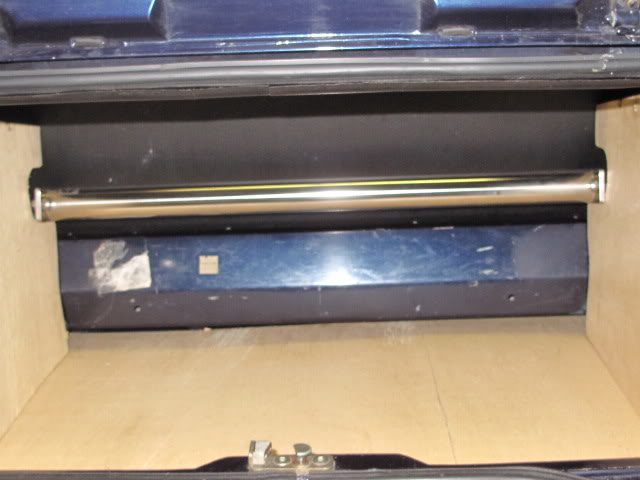
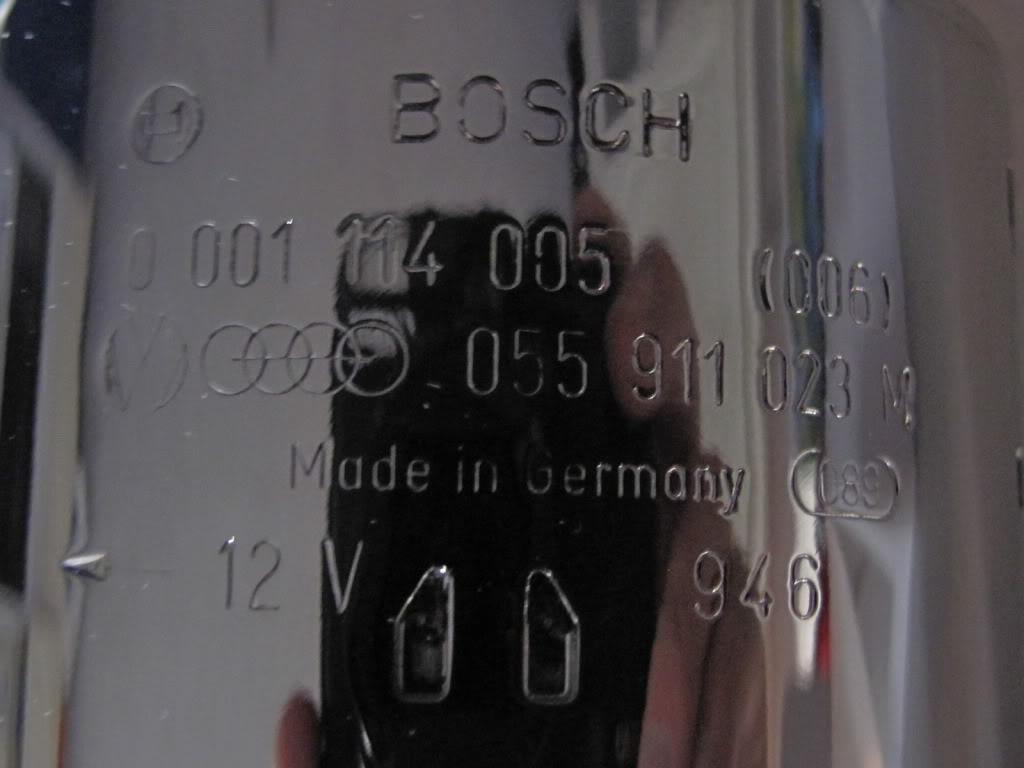
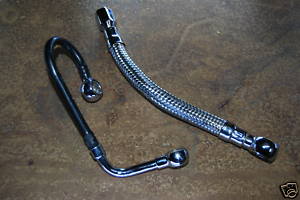
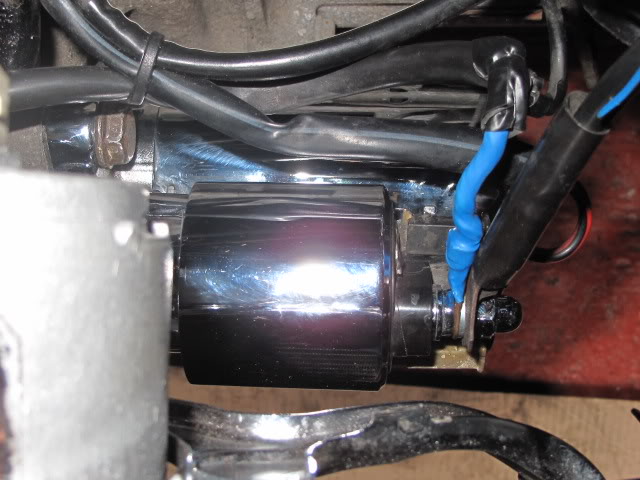
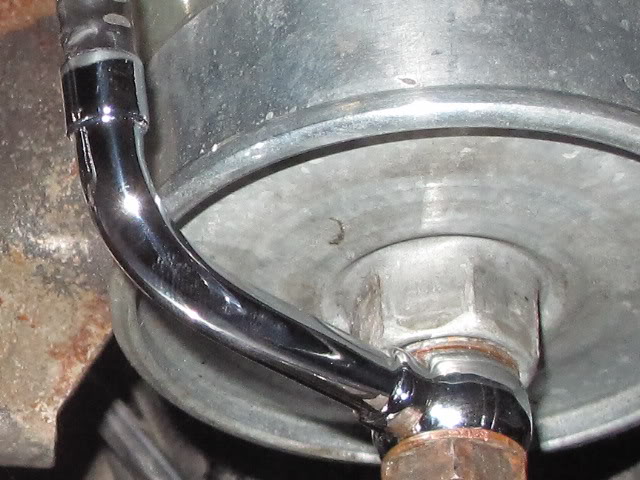
Also got the chrome fuel hoses from Germany today.
Replaced the brushed stainless top rad car with a mirror finished stainless one, have few more for sale they are an exact fit, check out the for sale section.


Posted
Old Timer

Posted
Old Timer
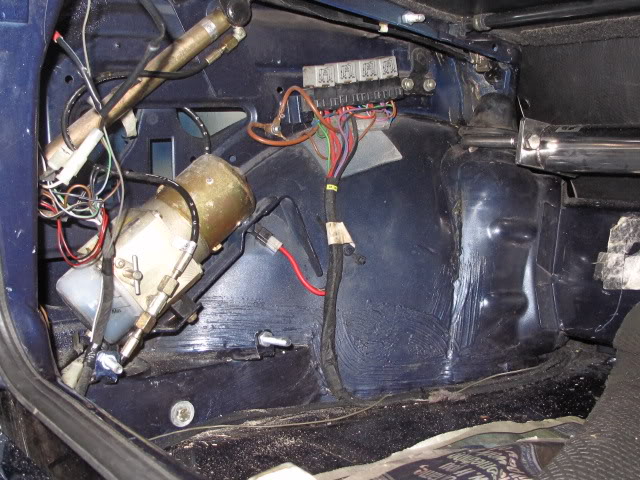
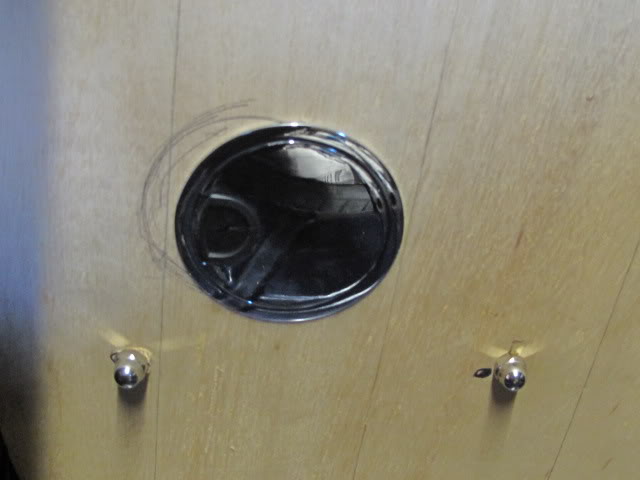
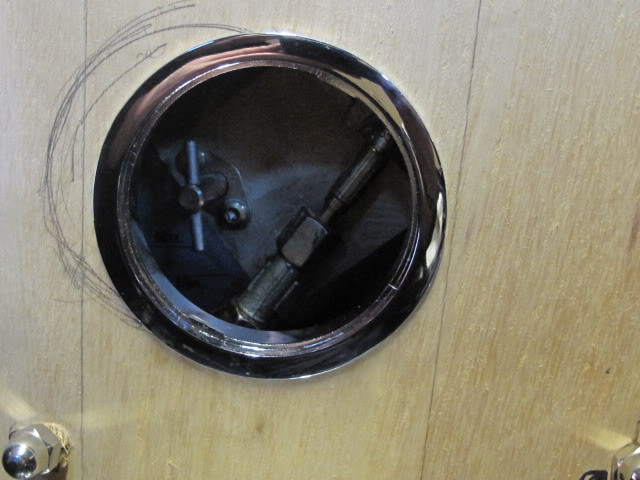
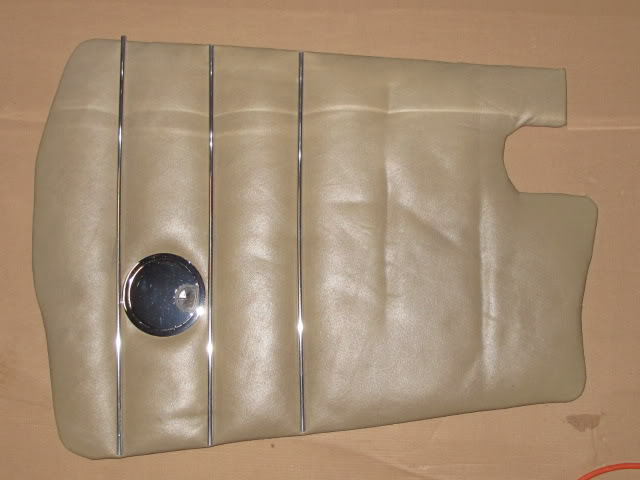
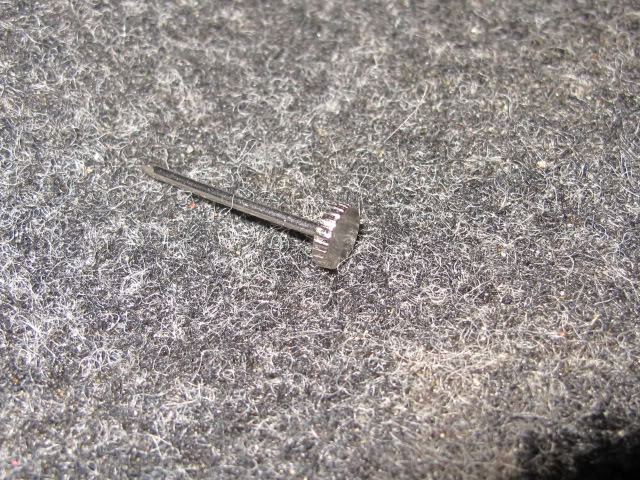
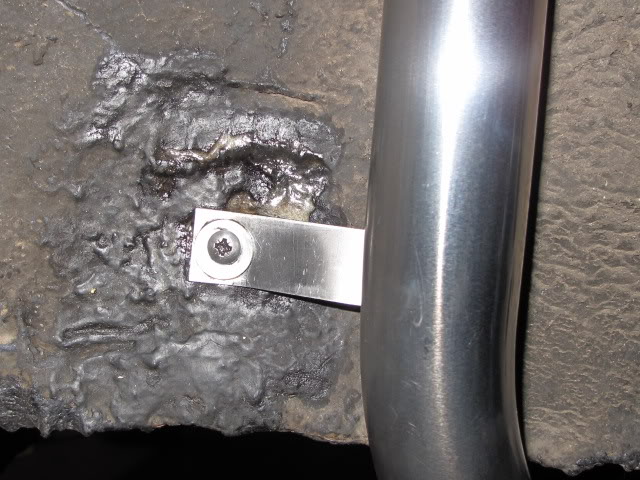
Looking at the cut ends I was not very happy with the finish, I know these will not be seen once the parcel shelf is in place however I still wanted them to look finished.
Thought of a few ways of getting a nice clean finish and then came up with the idea of putting something down the inside of the alloy pipes to finish them off, but what?
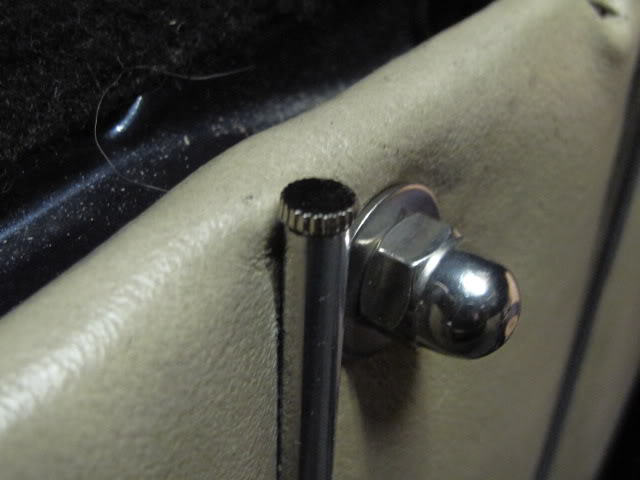
Had a look around the screw and nail boxes and found some alloy pins with a nice rounded head and a serrated edge, tried one out and perfect fit and finished them of just right, so got ten and glued them in, sad I know. Just need a couple of stainless cap nuts and washers and the cards are finished.

Posted
Settled In

Posted
Old Timer
Posted
Life Member


its the kind of thing that when you have it all finished and sparkling you dread having an oil leak or do like i did with my cabby top the oil up and forgot to put the cap on right
 all my nice clean and shiny TSR was full of oil, sick as a parrot :roll:
 the only problem i can see you having is knowing when to stop adding and changing stuff this kind of thing is a slippery slope

Dont ask what your club can do for you, but what can you do for your club? 
Posted
Old Timer
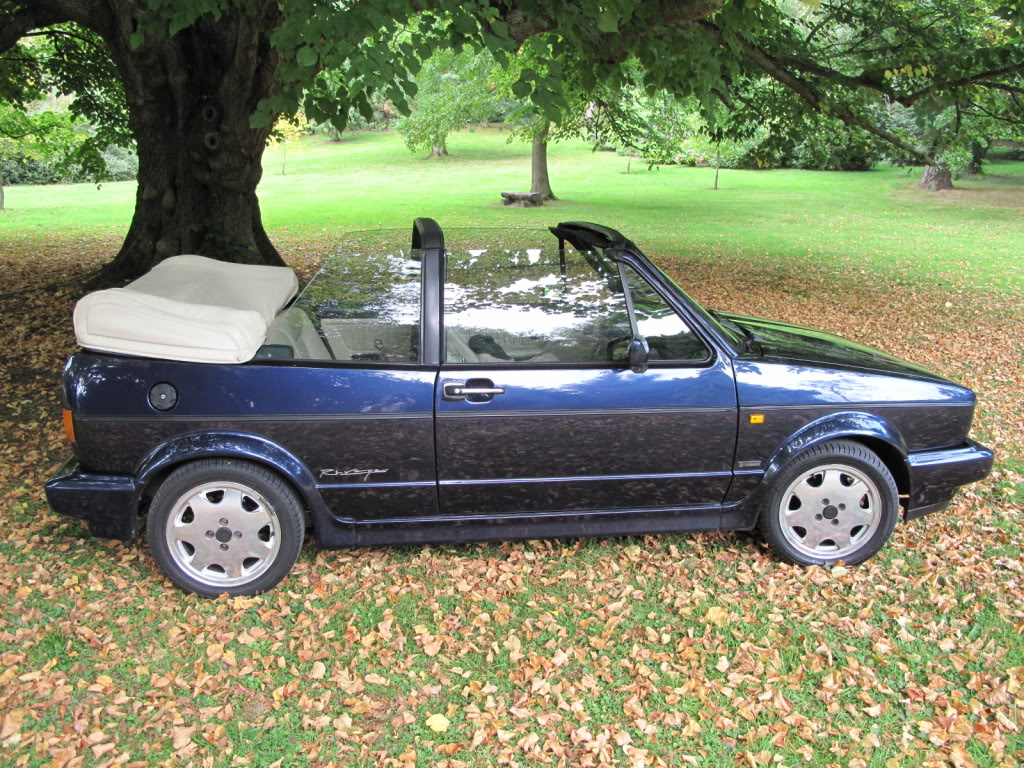
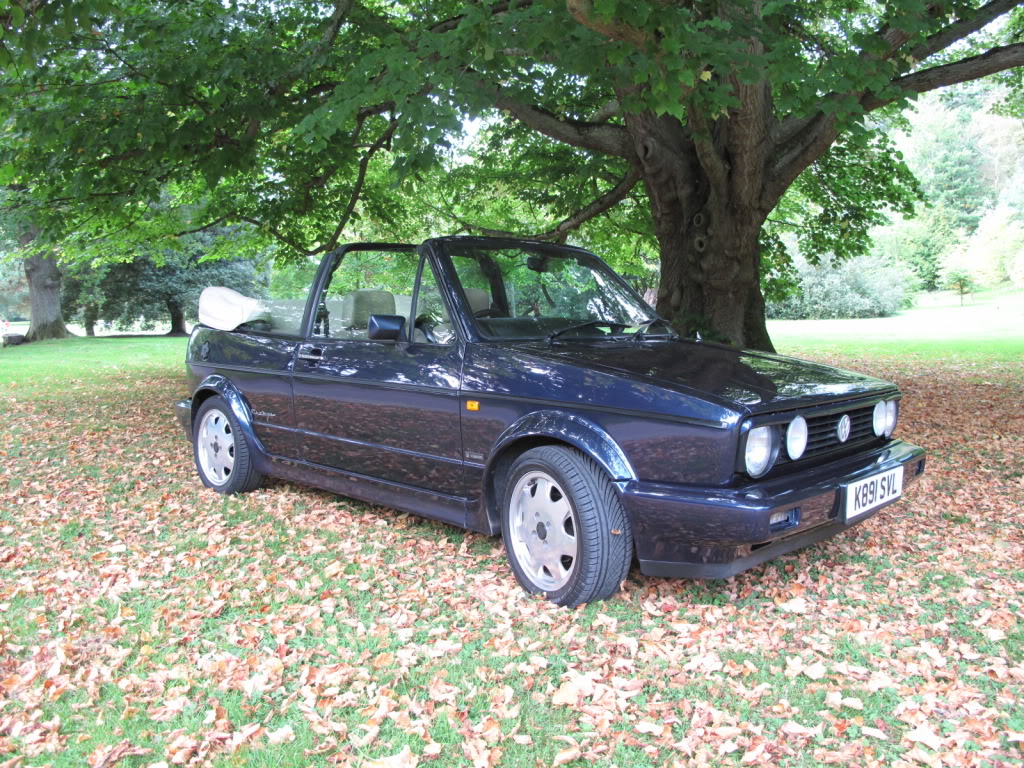
She will never be a show car, but every thing can be seen. Its now got to the stage of going as far as I want. Sure painted head and block would be nice, but the cars there to be driven. Still have a full stainless exhaust to fit, stainless filler neck, polished inlet manifold, 16v wur and 16v throttle body and custom air filter intake, but in no real rush will get fitted when I get the time, she needs a new mohair hood but there's no one local so its either DIY job or the ferry to the mainland to get it sorted. That's what I say now but you never know what I might see next that's shiny LOL
Thanks for the comments
Slippy8v
Posted
Old Timer
I'm in the middle of making my own too…where did you put the foam? between wood and leather?
Have you weatherproofed them in anyway, with a plastic sheet or something?
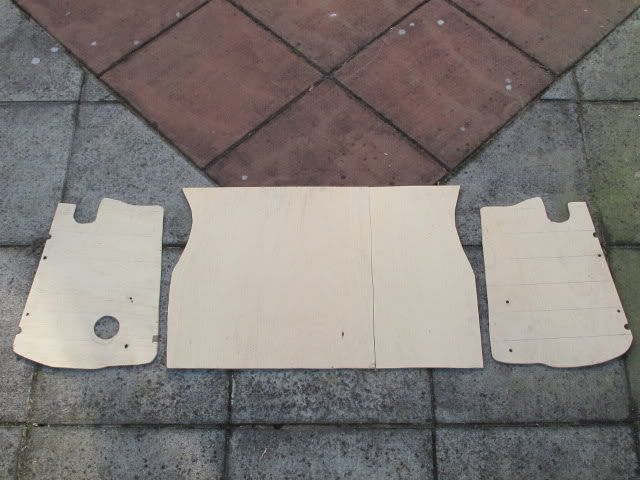
Your new bootfloor, can you fit that in as one piece? or did you have to make it in two parts to get it in?
Cheers, and keep it up.
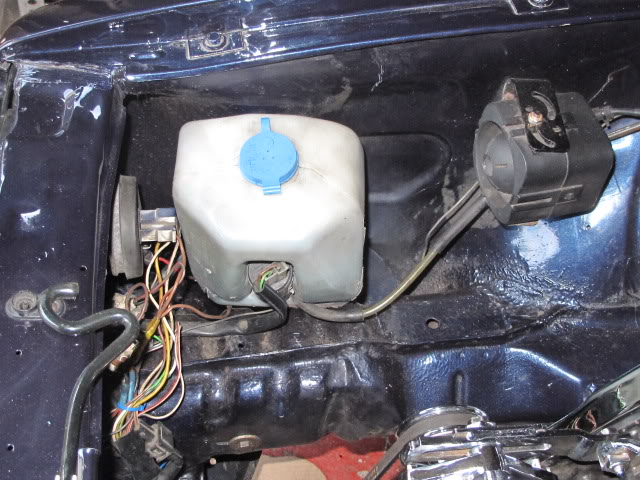
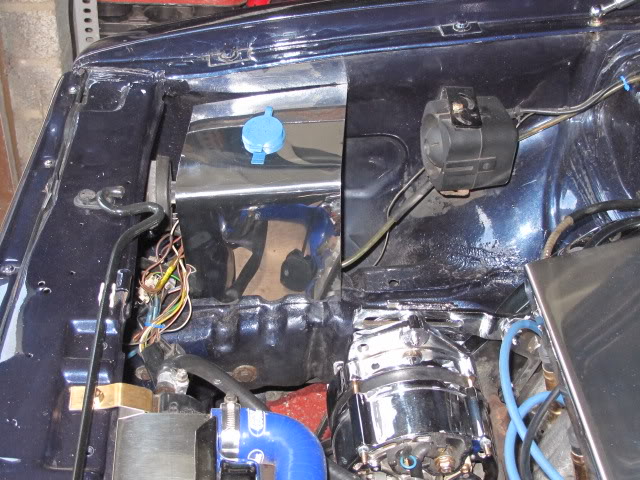
Give us a pic of the engine bay as is, with all the new shiny shinyness.
'83 Black GTI Cab on BBS RAs - DreamBoat 3000'
Resto = http://www.vwgolfmk1.org.uk/modules.php?name=Forums&file=viewtopic&t=67552

Resto = http://www.vwgolfmk1.org.uk/modules.php?name=Forums&file=viewtopic&t=67552
Posted
Old Timer
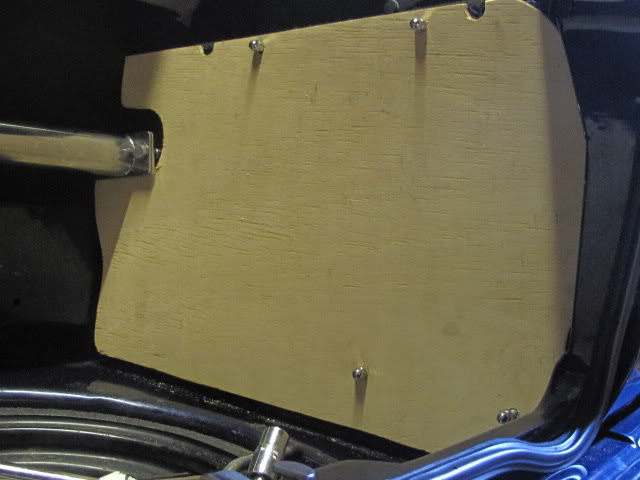
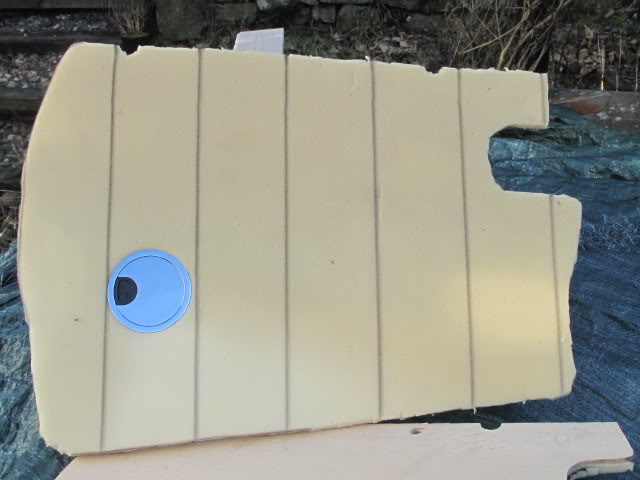
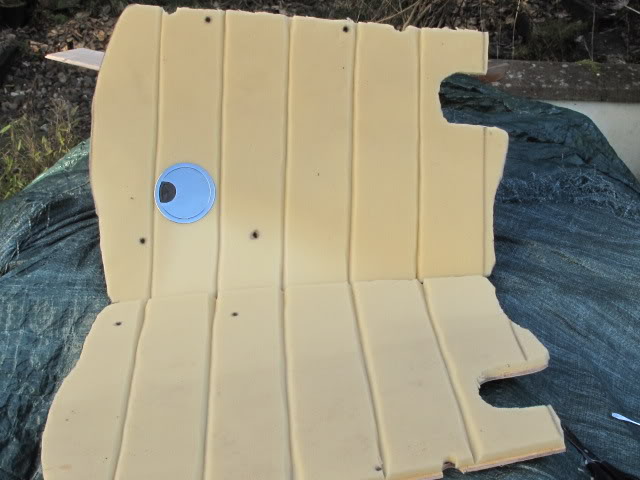
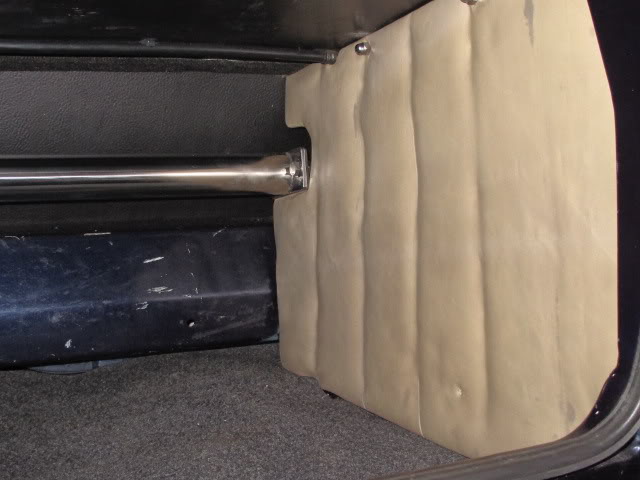
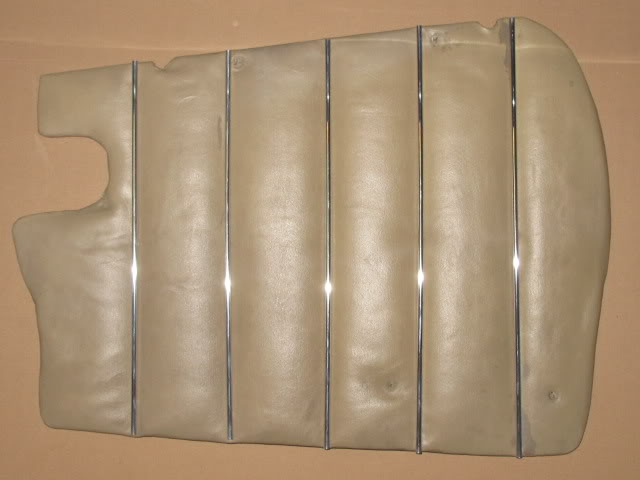
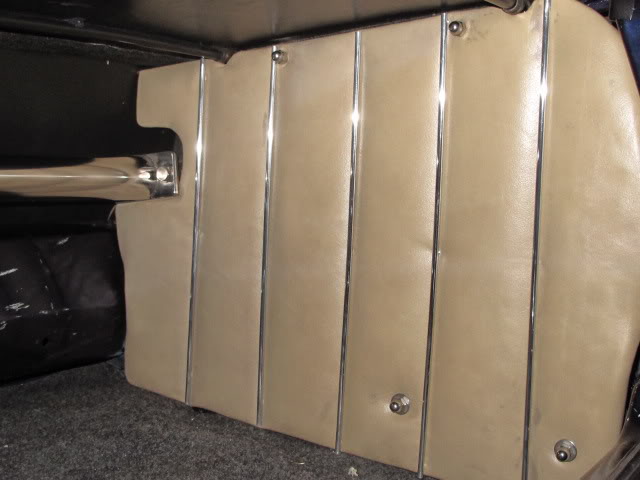
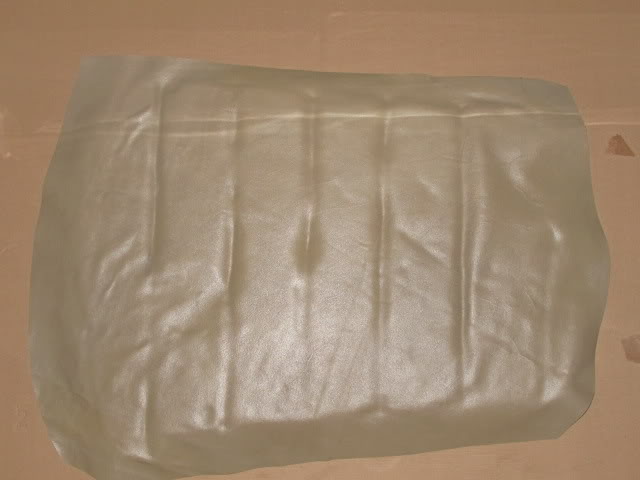
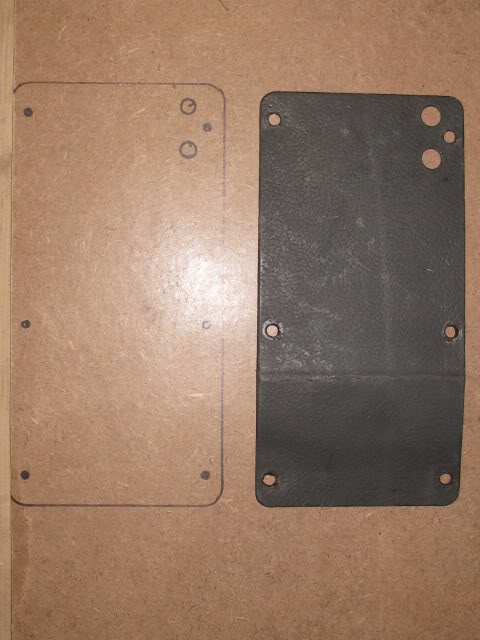
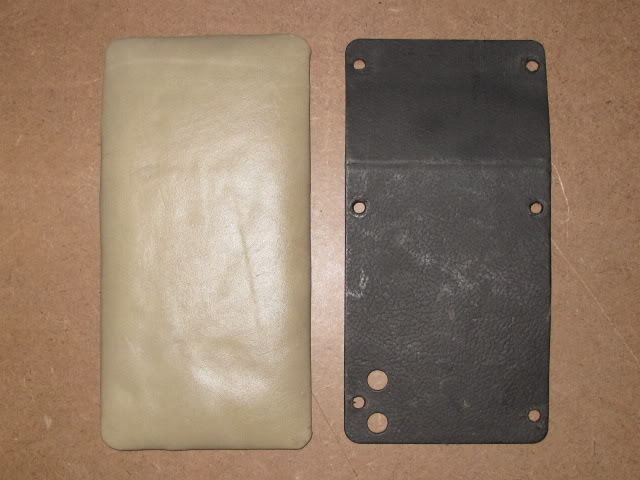
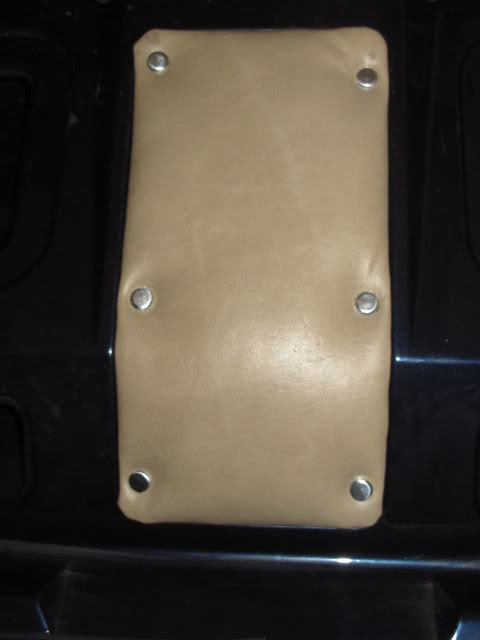
Glued the foam onto the plywood then glued the leather onto the foam,then stapled the leather onto the back of the plywood.
did not put any weather proofing on as the boot has always been dry so did not feel the need.If there are any problems i can always remove the cards and retro fit with plastic sheet
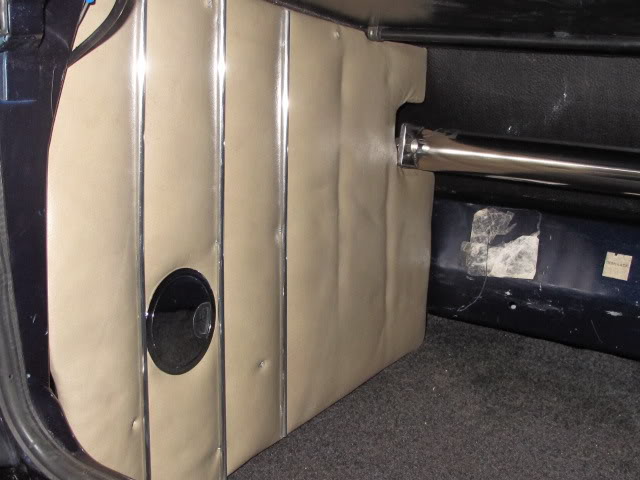
The ply floor had to go in as 2 pieces but i cut it of center so the largest part covered the wheel well,and therfore will not sag.
Slippy8v
Posted
Old Timer
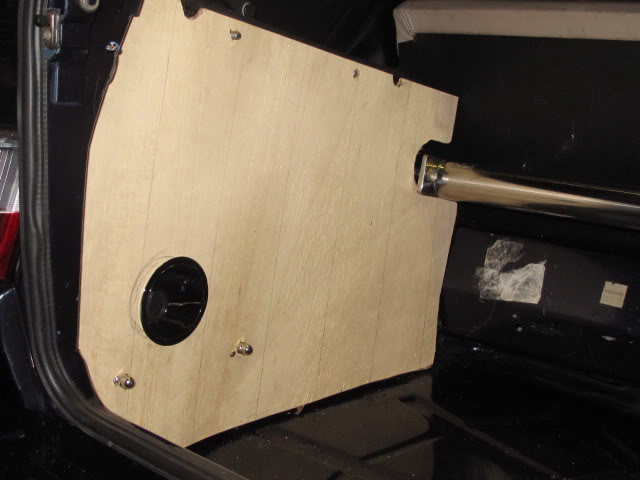
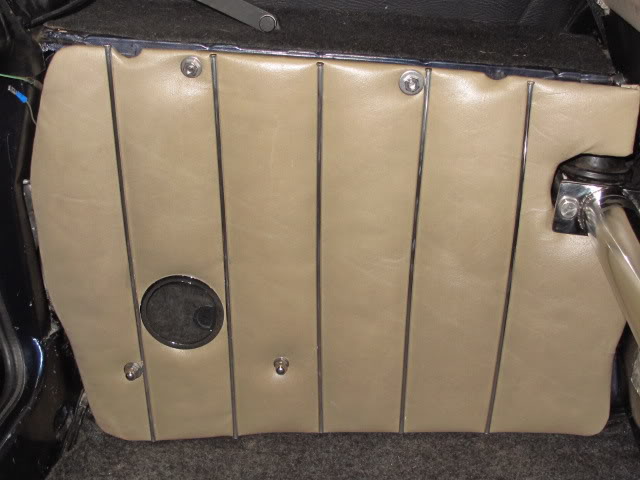
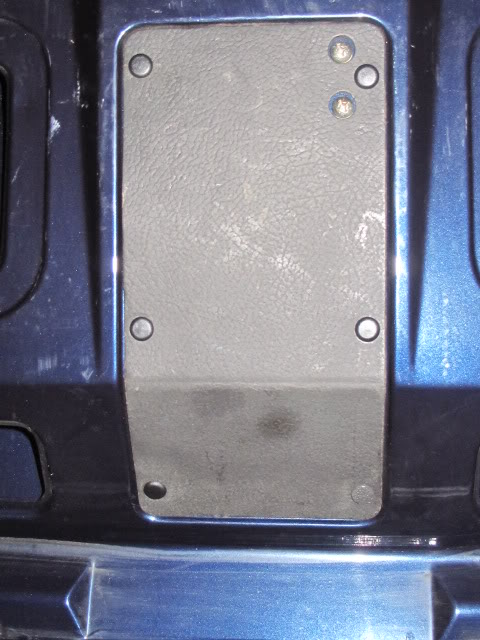
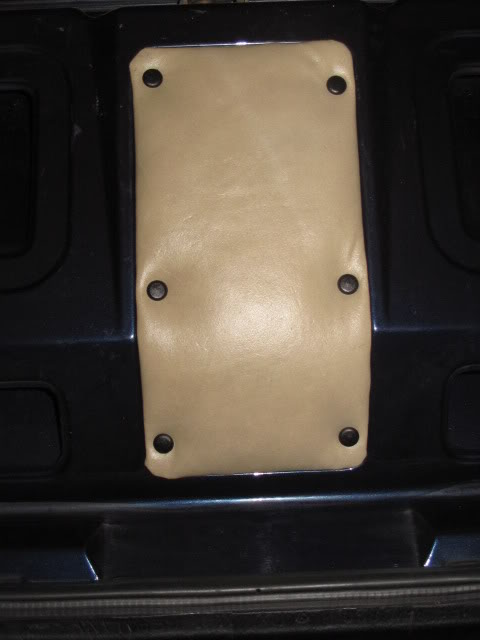
Cut out the panel clip holes and clipped it on. I will look out for some cream panel clips or chrome ones if I can get them and replace the black ones but in the mean time happy with the look.
Posted
Old Timer
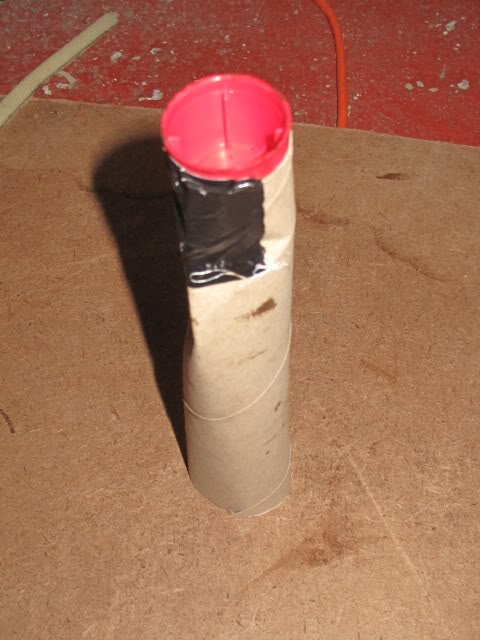
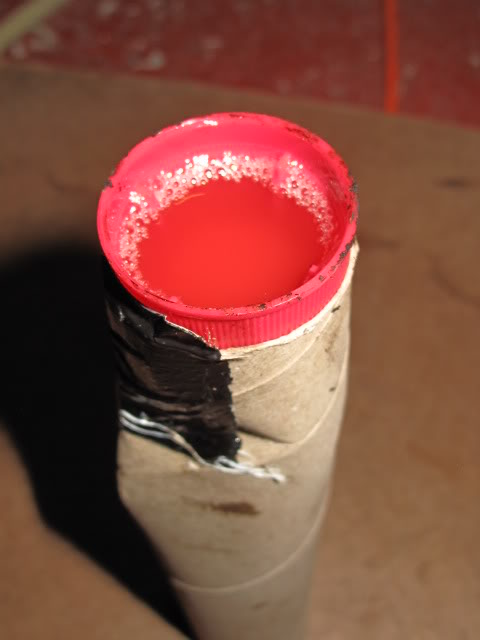
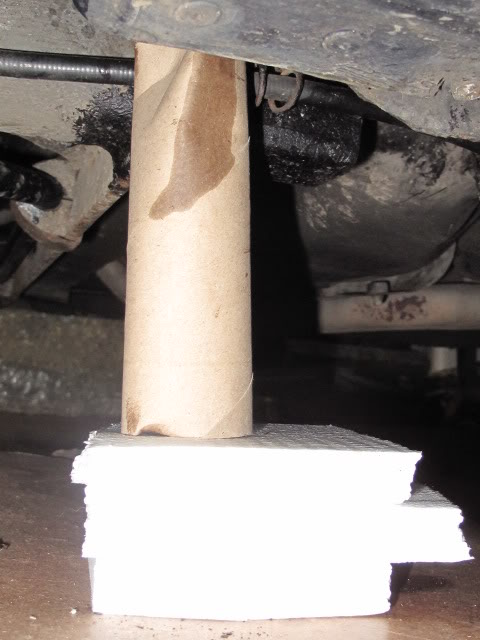
So here's what I came up with, I got a kitchen roll tube and the plastic cap from the wd-40 can a perfect fit to go over the nut and threaded end of the rear beam bracket nuts.
Taped the wd-40 cap onto the end of the kitchen roll tube, got some polystyrene sheet then set the tube and cap (empty) up so they would cover the nut and threaded end.
Filled the cap up with wd-40 then carefully put the cap over the nut and threaded end.
Placed the polystyrene under the tube, so now the nut and threads are sitting covered in wd-40. I will let them sit for a few days then do the other nuts. Now I will be sure there well soaked before I try to remove them.i will replace the nuts with nice stainless steel ones,funny did not think i would get anything shiney to put on here LOL
Posted
Old Timer
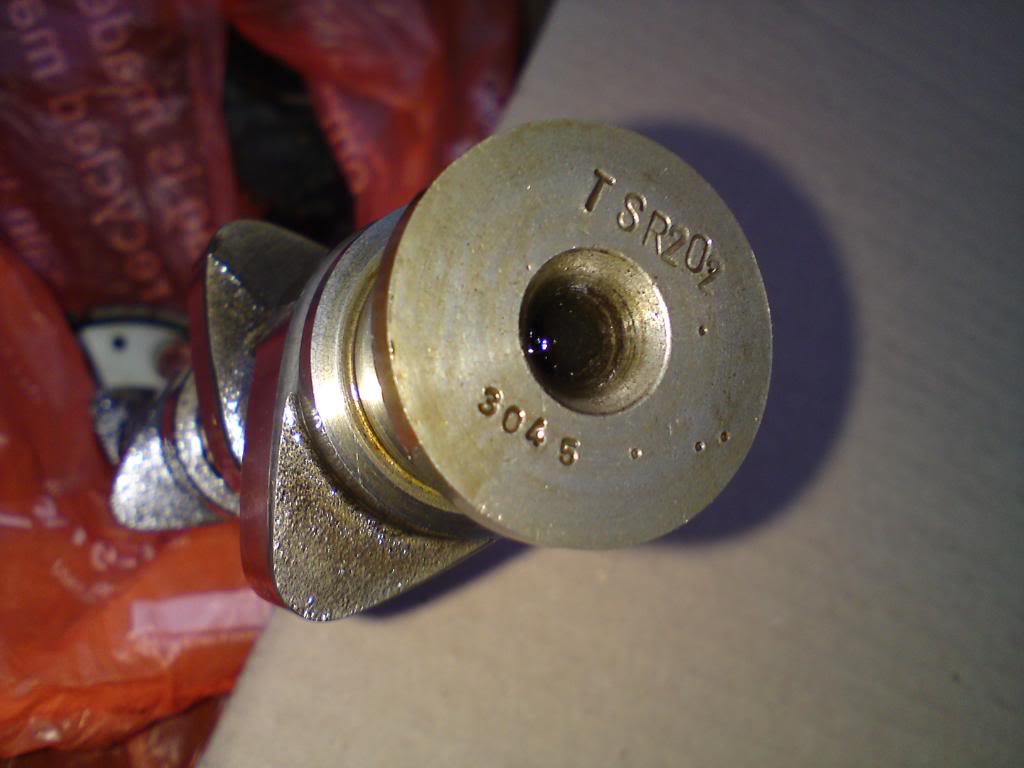
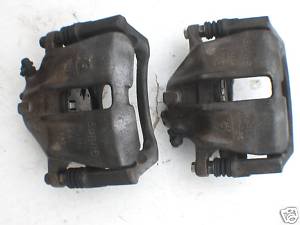
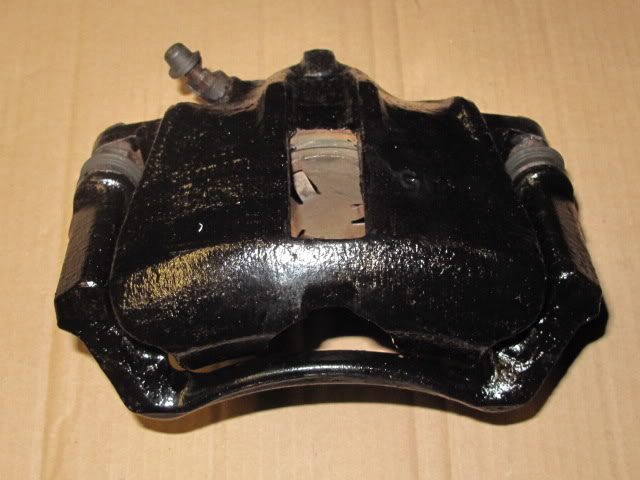
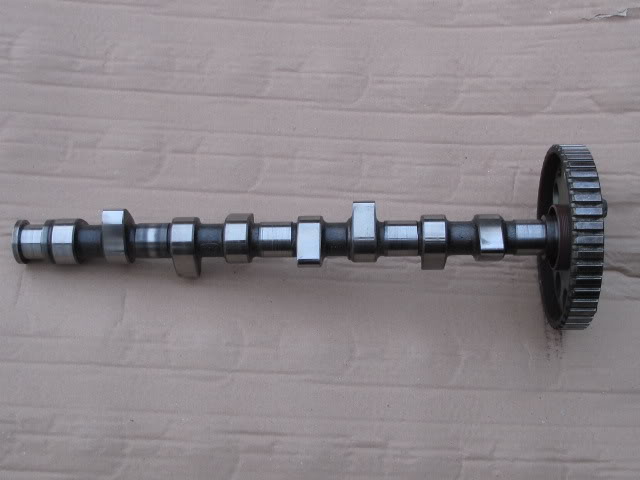
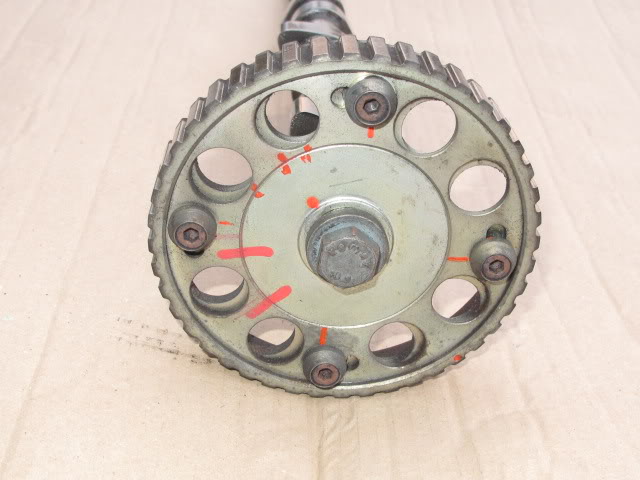
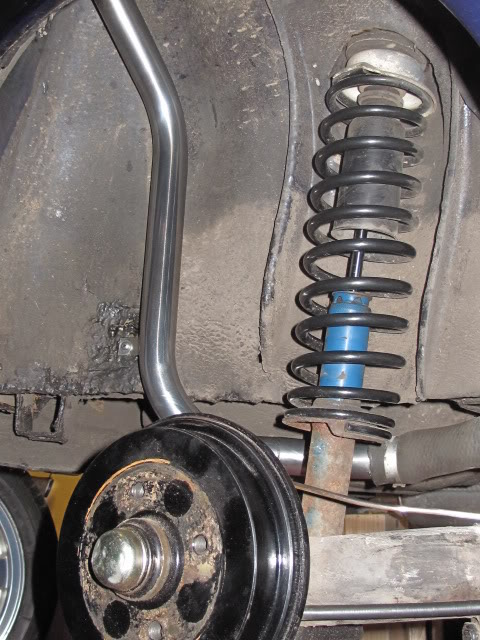
Also just picked up a Tim Stiles Racing 202 profile mild/fast road cam by Kent Cams, duration 268/272 and a Kent vernier pulley, this should give her a wee bit more BHP and to help her stop also picked up a set of front 256 calipers and carriers. Not in any rush to fit these yet but to good to miss.
Posted
Old Timer
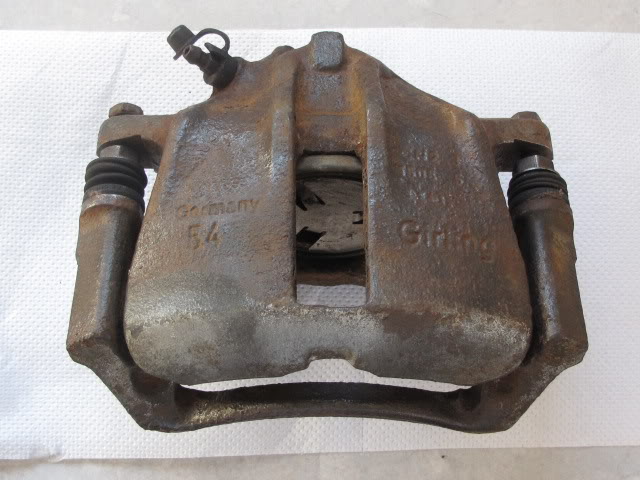
The 256 callipers arrived to cleaned them down and painted them, every things nice and free on them, just need the discs and pads.
The TSR cam also arrived looks ok as does the Kent vernier cam.
Posted
Old Timer
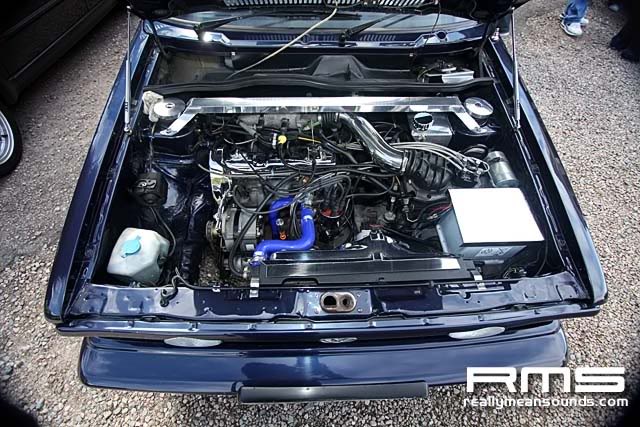
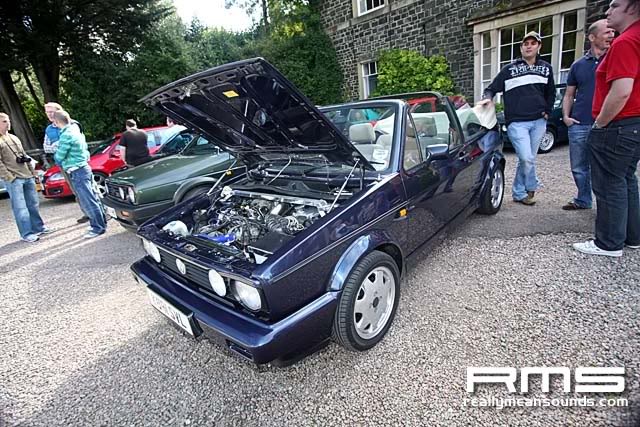
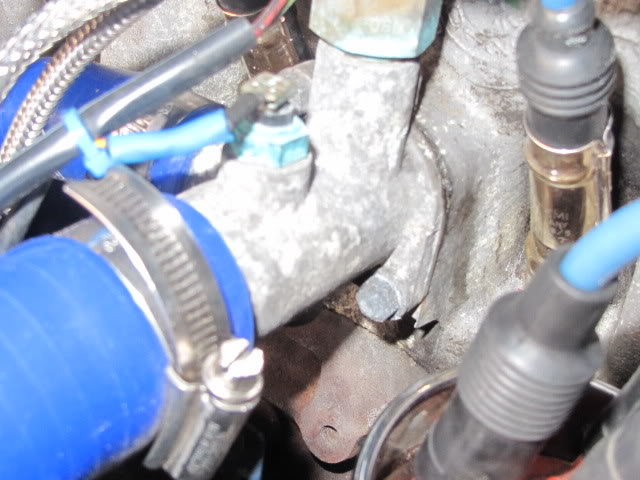
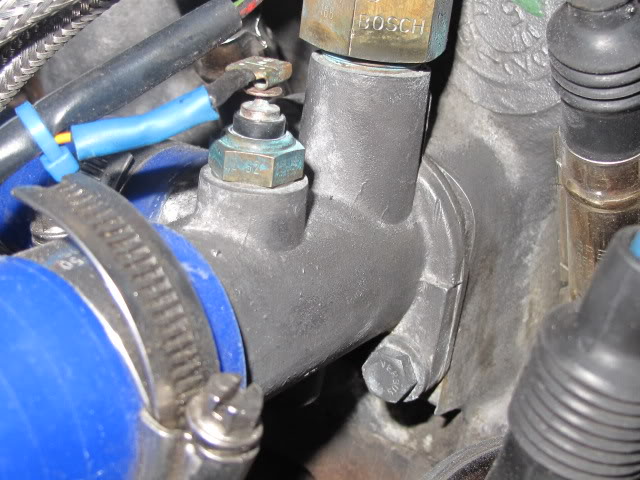
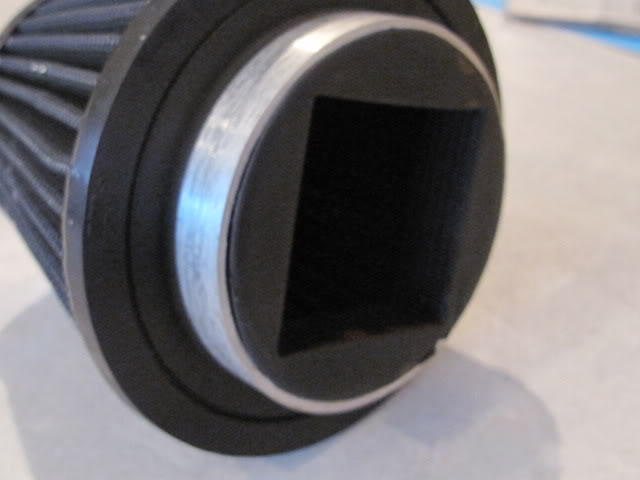
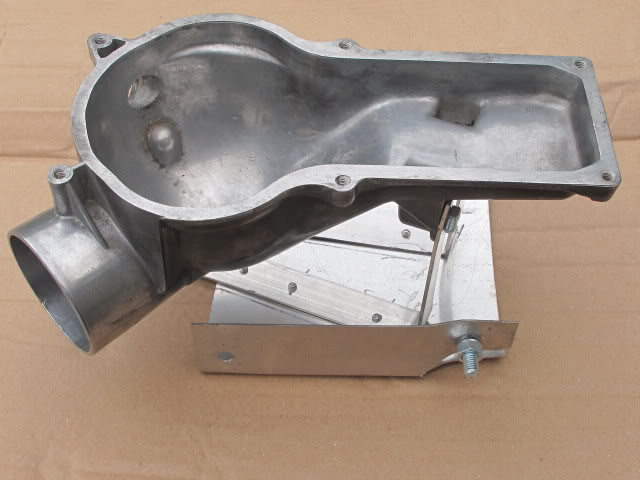
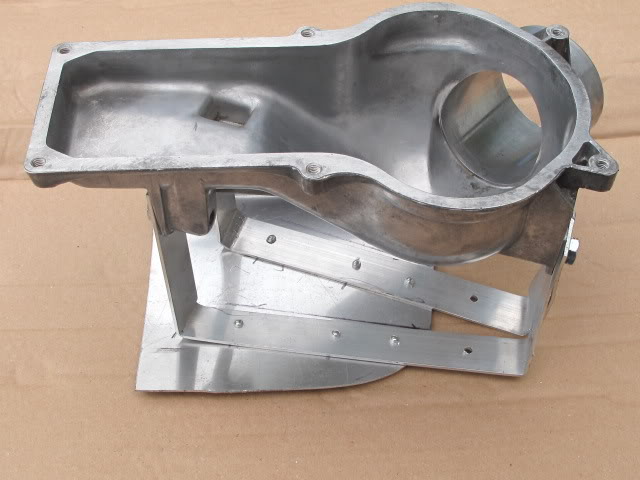
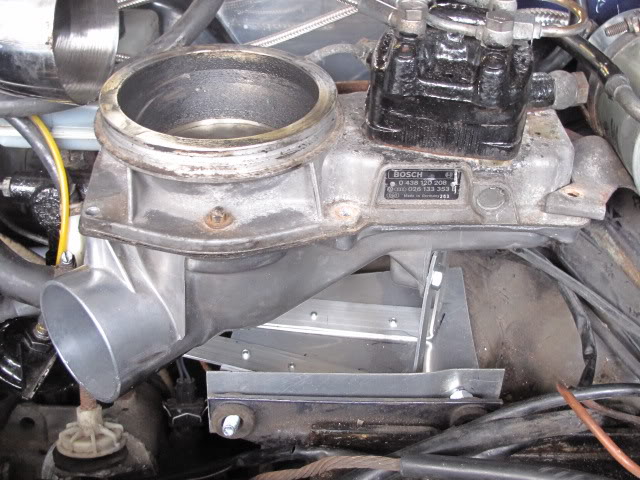
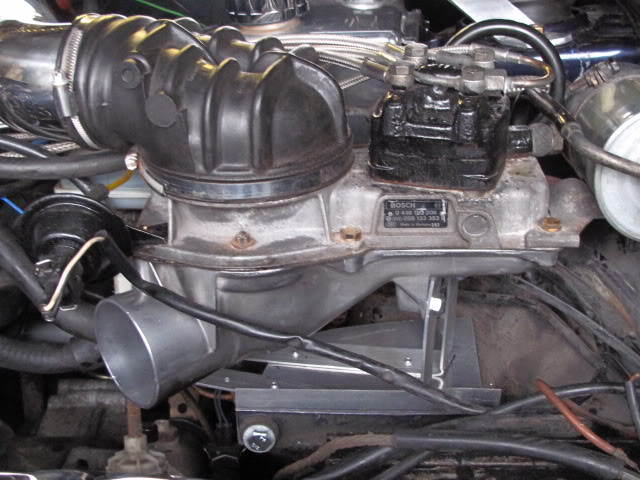
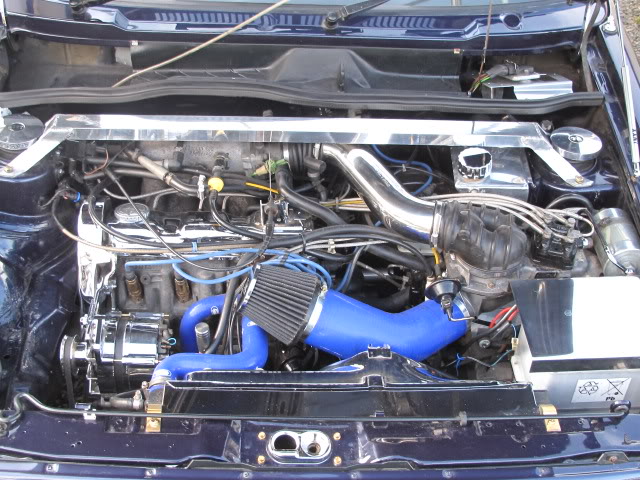
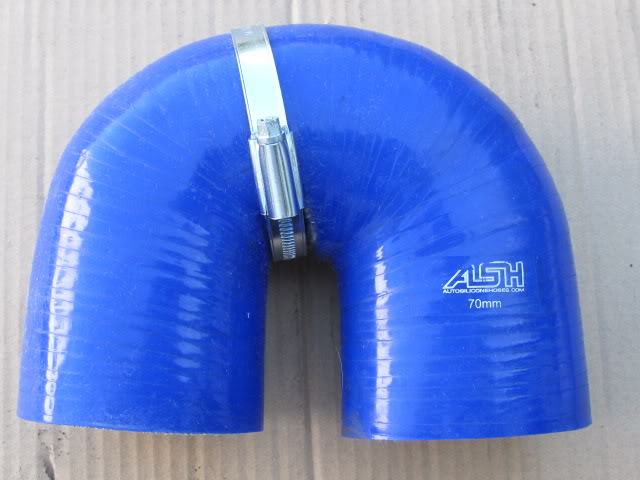
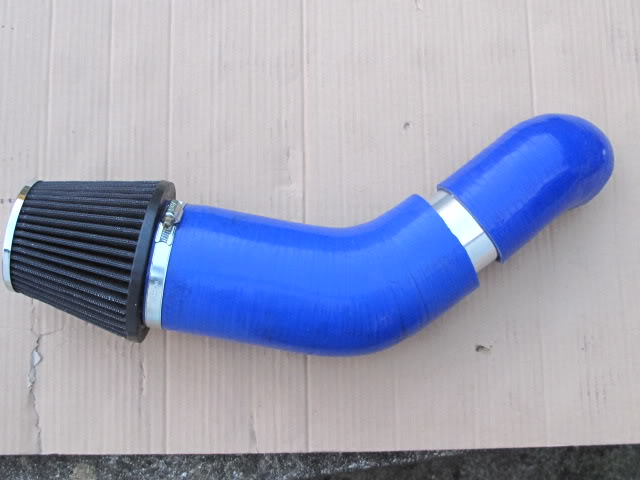
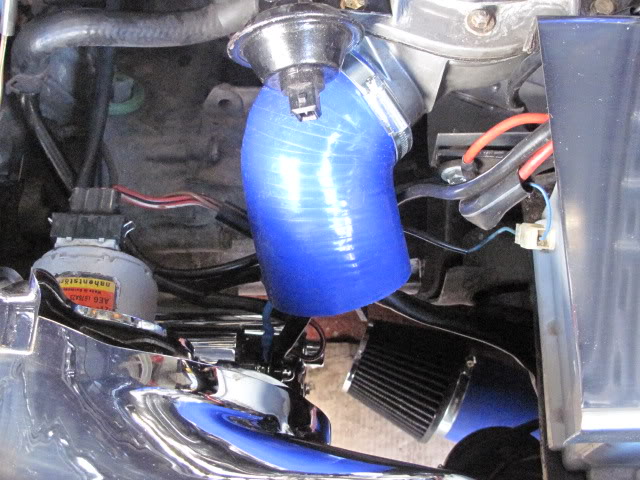
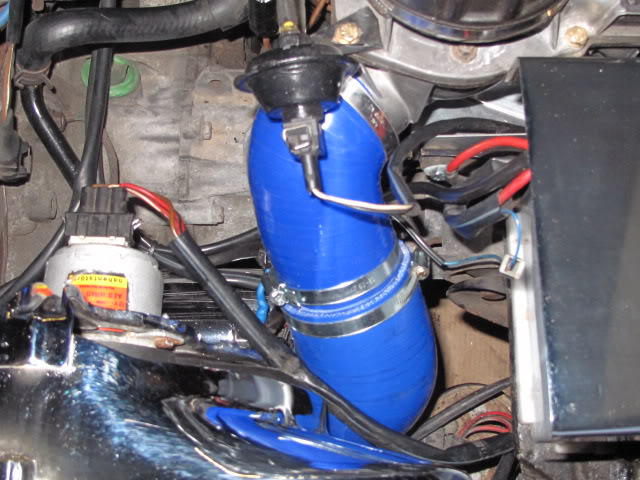
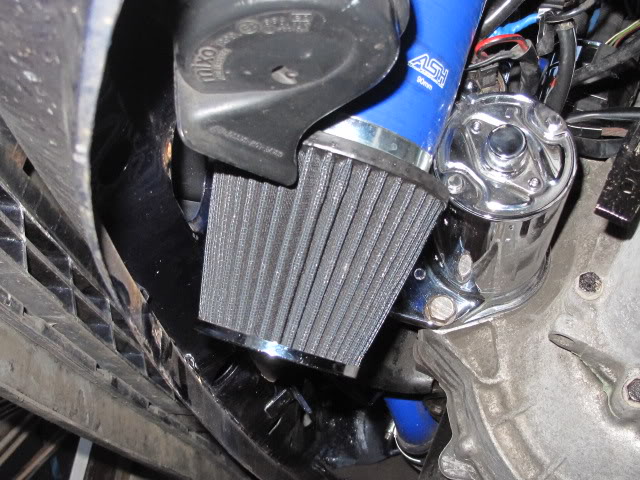
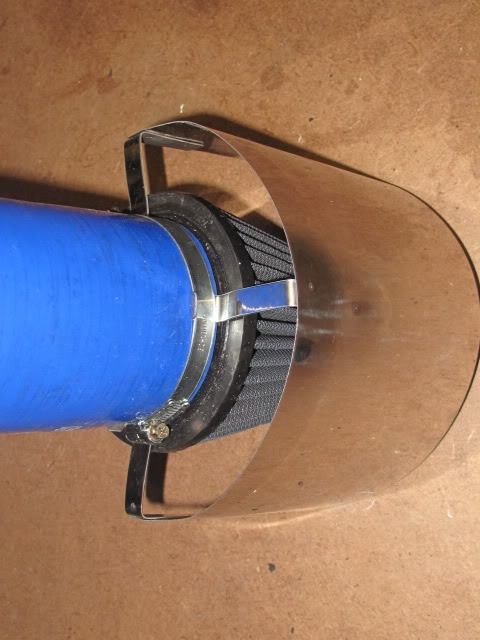
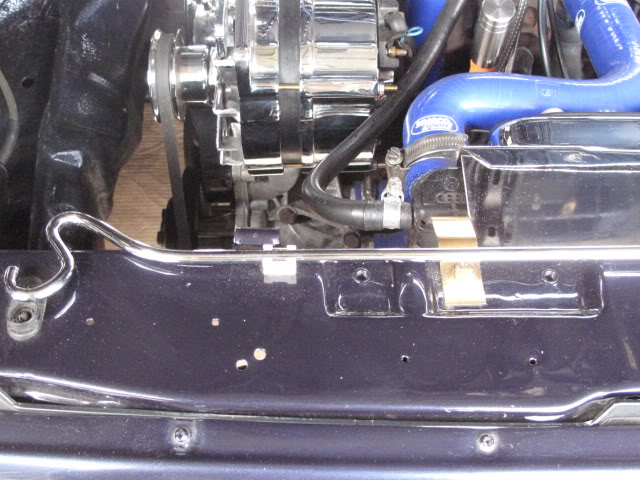
Had to get an alloy ring reducer made to fit the K&N filter onto the big silicon hose, did a trial fit and found the bend was not sharp enough, so fitted it as it was so I could still drive the car, looked pretty mean.
Ordered up a 70mm u bend and then cut this in half this would give me a good sharp bend to drop the filter down to the front of the grill nearly where the original air intake was, cut the silicon hose to size then joined them with a piece of 70mm alloy tube then used big hose clips to join everything together. Fitted onto the alloy filter intake and made sure every thing was nice and tight.
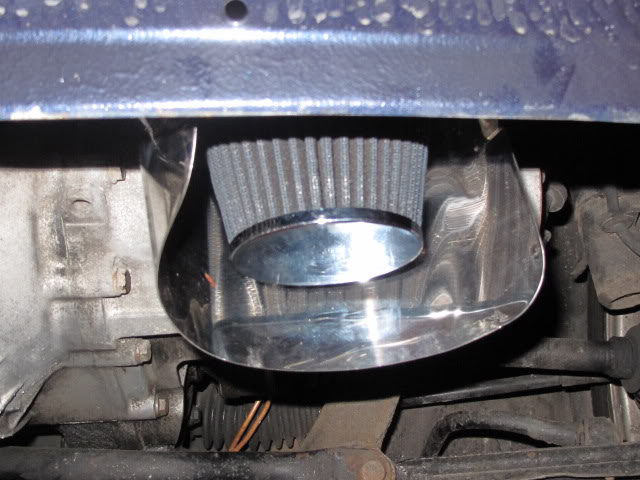
Ar*e forgot about the alloy heat shield so unscrewed every thing again and fitted the heat shield. This should also act as an air scoop, the filter sits just above the front panel and part of the heat shield just below it. looks nice and tidy now, just need to give her a spin to see what its like, and check out if there are any rattles from it.
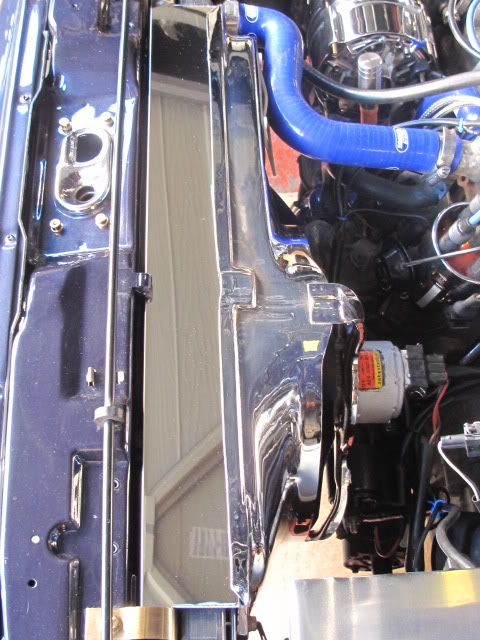
I have already had the car out with the filter running over the top of the radiator cowl and did feel an improvement in how the car ran.(check out pic)
I know this will not get me any more BHP but it sure looks good and sounds good as well.
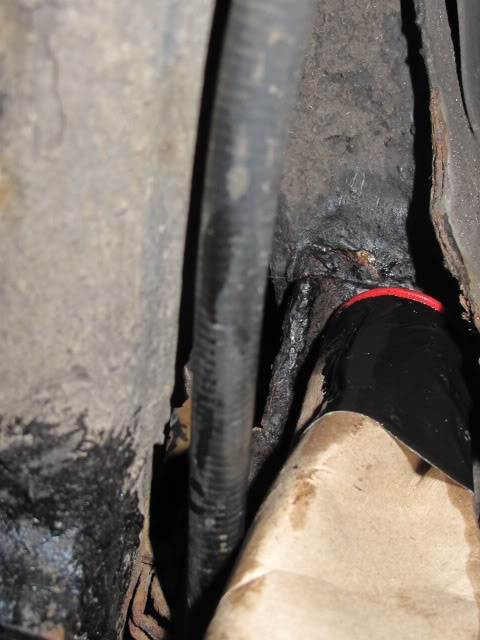
Must remember to keep out of puddles LOL. Also fitted one of the chrome fuel pipes from the filter.
Posted
Old Timer
Posted
Old Timer
Sprayed plenty of wd-40 on the hose clips and screws over the last few days.
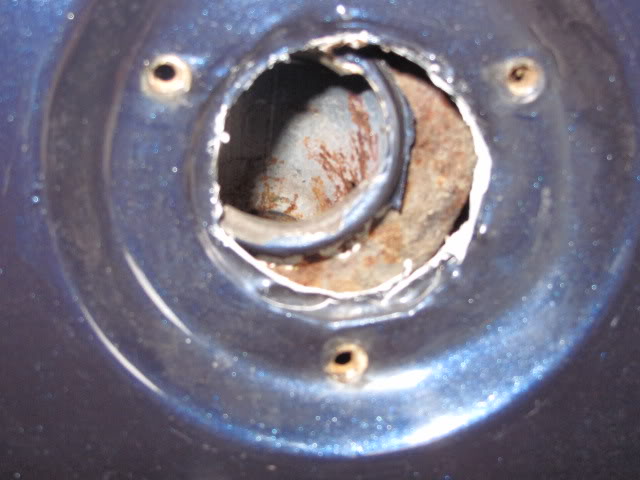
First I tried the filler cap to see if it fitted on to the new filler neck.
No is the answer, a word of warning to anyone fitting this filler neck check the cap fits first as I had to get the multi drill out to remove some of the metal in the two slots where the petrol cap fits on to, I also had to grind down some of the metal inside the fitting to get the cap fitting properly. Not the sort of thing you want to do once you have it fitted on the car.
Jacked the car up on one side so any petrol would run to the other side of the tank, I had run the car to under quarter full so knew this would help stop any petrol running out once the hose was taken off.
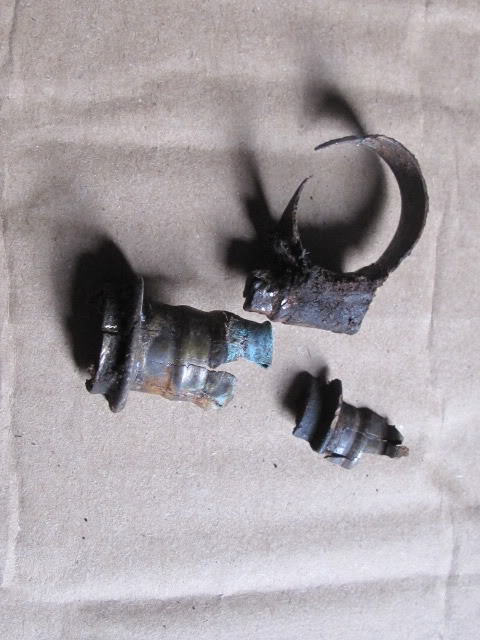
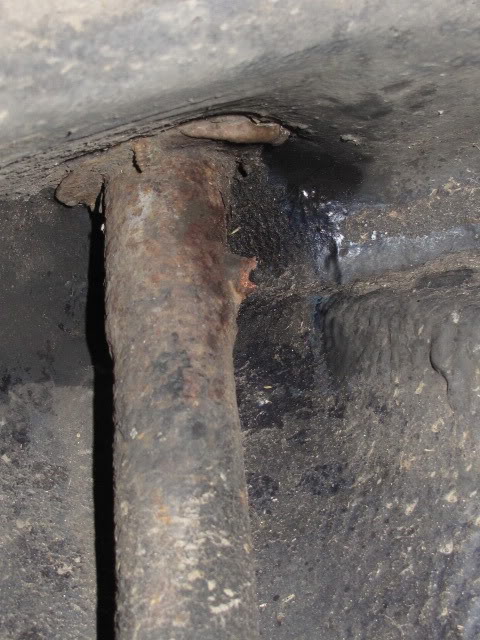
First part was to remove the hose clip on the breather pipe, nice and easy it just broke off rusted through!!!!
Next was to remove the 3 screws on the filler cap mounting point, this was easy as I had already loosened them in preparation for the refit.
Then the hose clip on the rubber hose pipe going to the fuel tank, again no problems, just needed to wriggle the hose off the end of the old filler neck. Bucket in place to catch any petrol which might come out, very little about an egg cups worth!
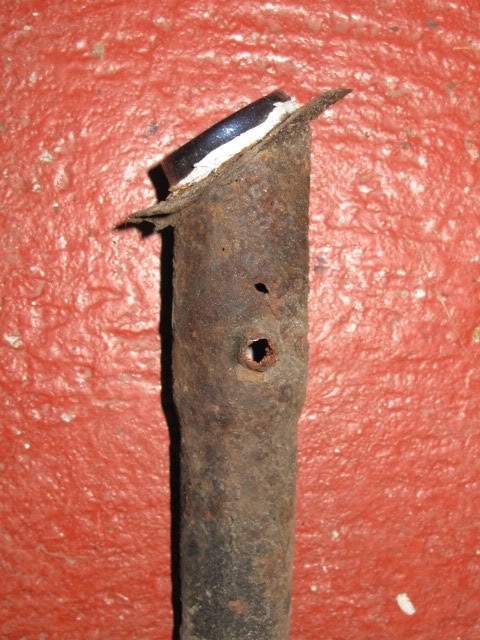
Then took the old filler out, not a pretty sight in day light.
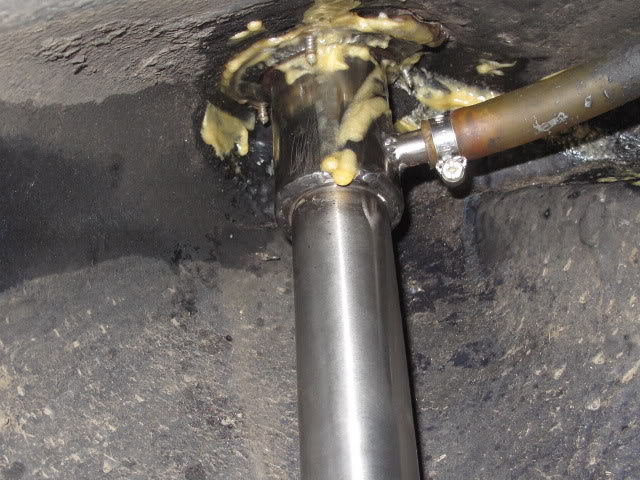
Got the new filler neck and tried the fit, not far off but really would need a few minor tweaks for the perfect fit. Put the hose on at the tank but left it as a loose fit to allow final fitting. Screwed the petrol cap mounting end on using new stainless steel screws, fitted the breather hose back on a fitted a new stainless hose clip, then fitted a new stainless hose clip on the petrol thank hose. Tightened every thing up and could see the mounting bracket at the bend off the filler neck did not match up with the old screw hole, so bent the bracket as near as I could but ended up drilling a new hole and screwing it in place with a stainless self taper. Happy with the final fit gave it a good spray of wax oil, and a quick polish. No more worries about rusty filler necks.
This should be a straight forward job but allow time for tweaking the fit and also getting the filler cap to fit correctly, spent about 3 hour from start to finish allow your self a good half day. The Crazy Quiffs stainless neck is very well made however each car may need tweaks in the fitting. Use of a pipe bender would be useful for the minor tweaks for the perfect fit. Happy its on and another job of the list.
Nearly forgot also fitted a chrome bonnet stay bought from totenkopf from the MK1 owners club.
Posted
Old Timer


0 guests and 0 members have just viewed this: None.