


mk1 project - shell up custom rebuild- sheet metal work time

Posted
#831254
(In Topic #99295)
Settled In

mk1 project - shell up custom rebuild- sheet metal work time
recently joined this site after buying said car.
thought i'd start a project thread to update and document my progress.
feel free to chip in any comments good or bad as i go.
after saving then lovingly tinkered with this
building this - first ever engine build - just to see if i could
from this
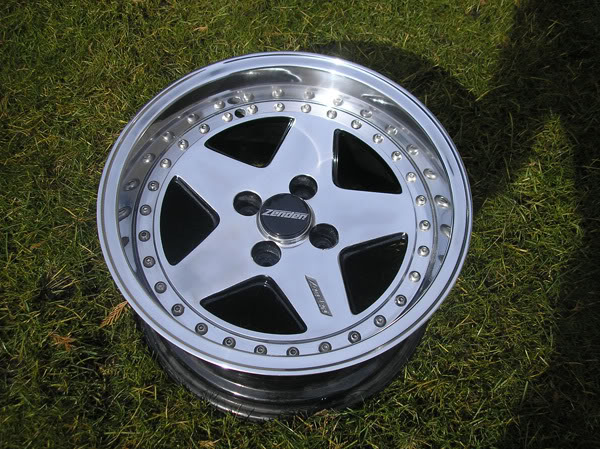
and squeezing these on
i got alittle bit bored :unsure:
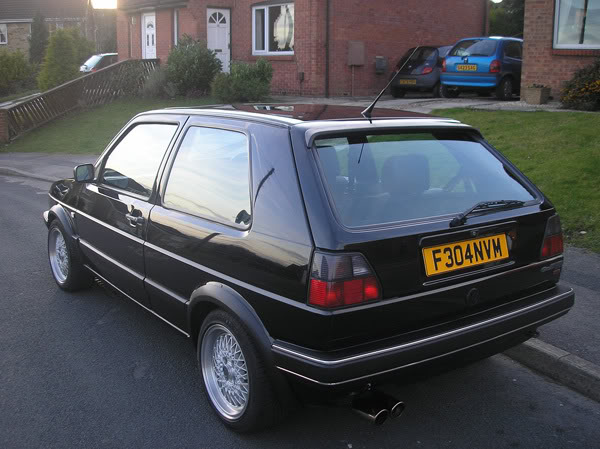
Always hankered after a mk1 and wanted to build a car from scratch so i truely knew every nut and bolt and that all the work was my own doing.
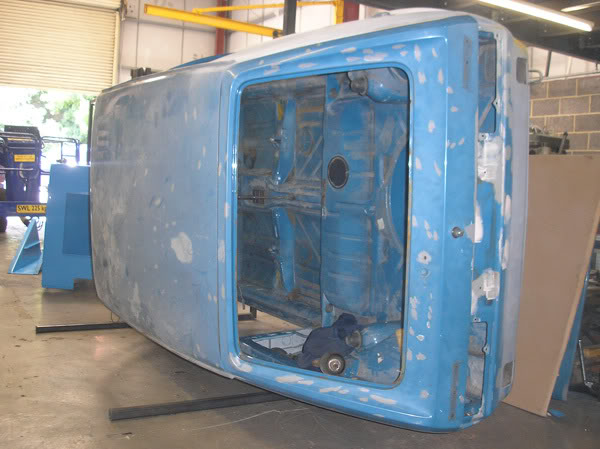
1 impulse buy later i was travelling back from nottingham way with a "project" shell for peanuts.
shell was in pretty good nick apart from misc bit of chassis leg removed / bodged front panel / hole in wheel well / rotten section of rain gutter / roof / 2 tonnes of filler in rear arch etc etc - MAYBE NOT AS GOOD AS IT SEEMED - but i like a challenge :wacko:
stripped the car of all bolt on bits / glass inner wings and usual rot prone area's were solid - phew
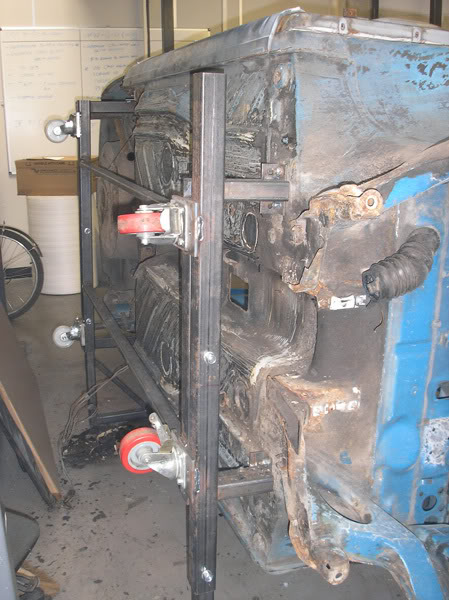
Then fabricated a turn over / rolling chassis dolly so i can shift it around at work ( enginnering / design company) and when i've finshed the poop jobs like stripping the underseal i'll be able to wheel about my garage at home.
here are some photo's

next step is underseal / seam sealer removal - whole car inside and out
take most back to bare metal
etch prime
start welding
plan is for a seam welded, caged up track weapon - that will hold its own in the looks dept too. Show and serious go
Will be carrying out all the work myself and the stuff i can't do- i'll learn / practise - then do.
engine wise planning for a 250 BHP 1.8t running megasquirt or standalone. should be scary enough
will keep you updated
Posted
Settled In
sounds like u got good plans for the mk1 then, will keep an eye to see how this one turns out. got a colour scheme in mind if its gonna be a track slag?
Posted
Settled In
love the mk2 but need a daily driver - was prety funny turning up to a business meeting with my car scrapping over the speedbumps in the car park

colour wise - candy white i think or very close + carbon detailing
no interior
weld in custom cage
flocked dash
custom instrument clusters
want it to be a track based car but have the fit and finsh of a show type car - contradictory i know
Posted

Local Hero

nice work on the 16v build :y:
keep the updates coming
Posted
Settled In
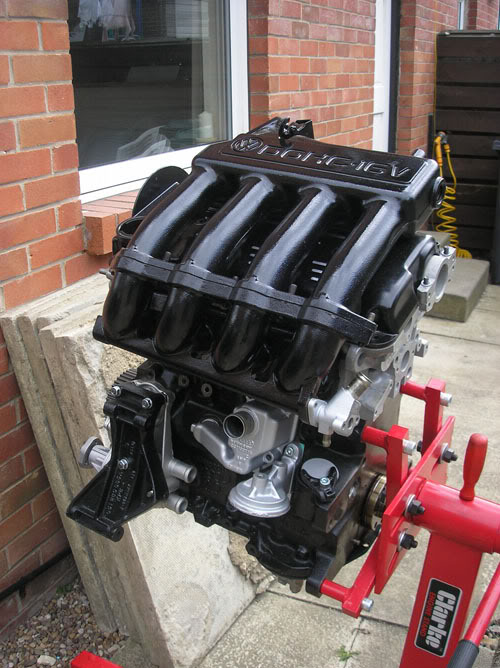
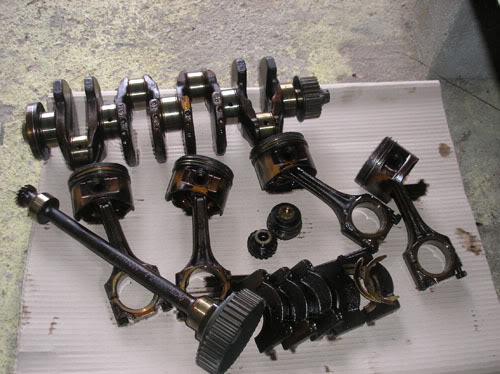
valver engine spec
fully rebuilt 9a - every bearing nut bolt seal
balanced bottom end
weight matched pistion assemblies
lightend flywheel / intermediate shaft
P& P KR head + cams
mocal oil cooler
wur mod
made 170bhp with a fuelling problem and leaky injectors so looking aroun 175+ now
only got 3000 miles on it!
The chassis dolly picks up on front wishbone mounts / rear beam mounts.
so the car can stay on the frame until final assembly. plan is to mock the whole car up and get it running. Then strip it all down and paint / reassembly - long winded but results will be better.
Posted
Local Hero
Looking forward to reading this as it progresses…
Rich
Posted
Settled In
first going to steam clean the underside to remove all the 26years of crap currenlty cligining on for dear life to the underside of the car
then
angle grinder party this afternoon. bye bye wheel well - complete with tarmac viewing window.
bye bye seat rails / cross member.
then underdseal / seam sealer removal afterparty - gonna try rope some mates in with bribes of beer and food.
photo update early next week
Posted
Old Timer

Good luck with the seam sealer removal!!! It was fun when i did it! Wear a mask too as you'll be snotting out powdered seam sealer for days if you don't lol!!!
Great start to the build - looking forward to the updates! 8)
Posted
Settled In
so thanks for the comments and the inspiration.
Posted
Settled In
finally some updates
starting to get together images and pictures that will hopefully influence the direction of the car - pretty much set on the colour and general look along with some of the more detailed bits - even down to the routing of the wiring
lot more dtails to work through - i want to get a clear picture of where i'm going before i start.
Also been starting to stockpile parts
anyway having finished cleaning the underside of the car back to bare metal - have to pick out sealer from the seams before i can seam weld it
Made a start on the front inner arches - Rog came over to lend a hand and left with blisters after 4 hours scraping - cheers B)
he's also pretty handy with a camera
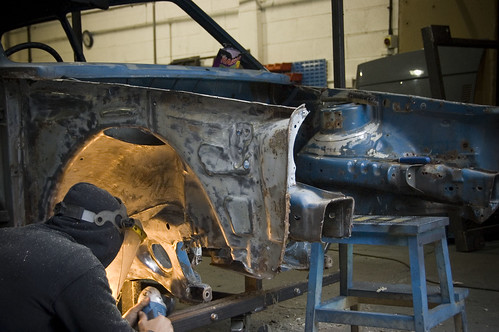
me giving the arches some grinding - note full face visor having had to pick wire strands out from my neck before

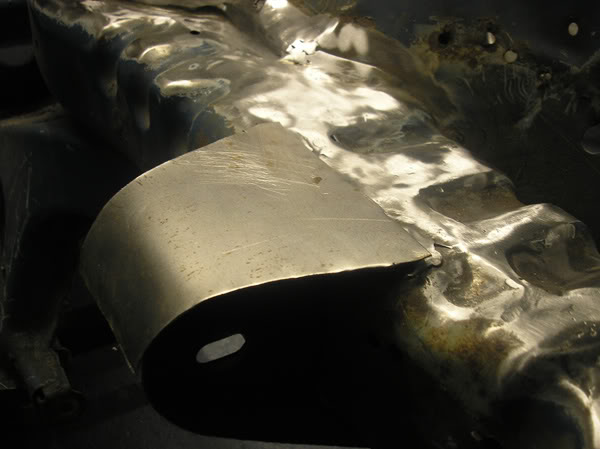
front panel cut out - for better access and so it can be worked on off the car / replaced
finished arch - ready for seam welding and smoothing

after 4 hours on the arches i treated myself to some bay work - mainly to save my sanity :wacko:
cut out all the un wanted brackets - so thats all of them then and made a start on one of the turrets
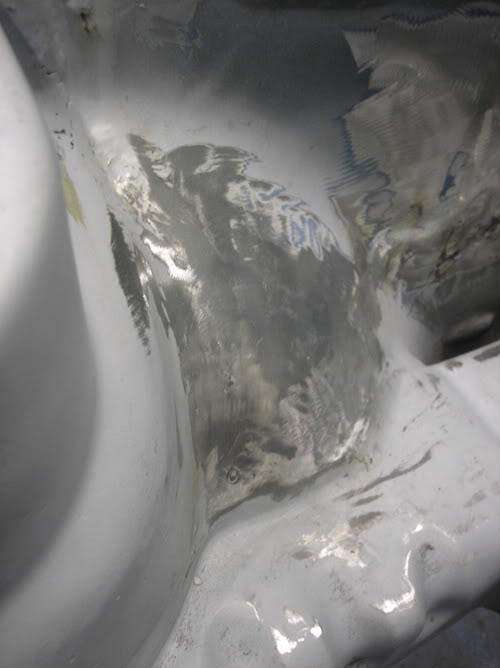
first seam welded - had good penetration through into the inner arch
follwed that up by 3 further passes of the torch to build up material below the seam to help smooth the joint. ground one small section back and i was really pleased with the result
General idea is to concentrate on getting the metal work right rather than use huge amounts of filler as some people do
ALL killer no filler
engine discussions are still on going need one soon so i can mock the whole car up
updates to follow soon - off to sort the garage out - car is coming home soon ! to really start bay work + body work
some more updates
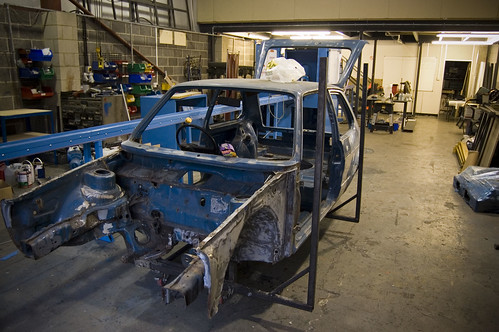
major thing is car is back home now in my garage - so i can do abit more more often
started work on one of the turrets - got it ready for a final few spots of weld then some hand sanding reasonably happy how its looking but probably needs another few hours to finish it up so that only the lightest of skims is needed

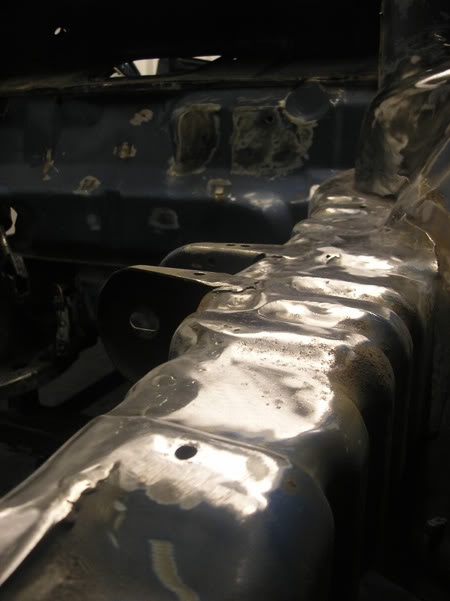
de seamed the pass side chassis leg - don't want to go down the route of boxing them in - personally think it detracts away from the shape / style of the bay + looks too bulky
no where near complete but you get the overall impression

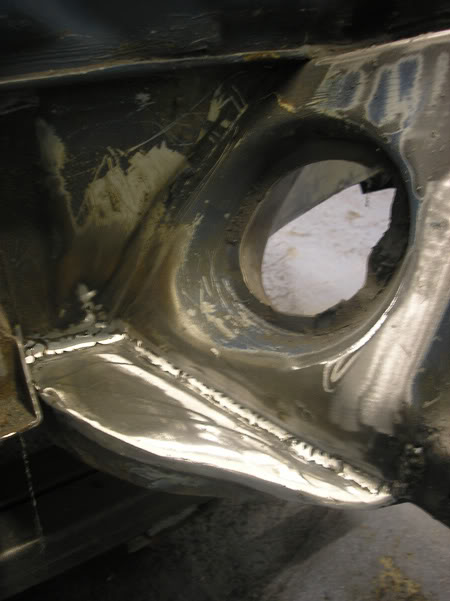
made a start on boxing the gearbox mount in - this is a first check of the shape few more test fits and some prep to do before it gets welded

sides will be done too and the captive nut relocated to the one closest to the front - so you don't see the bolt
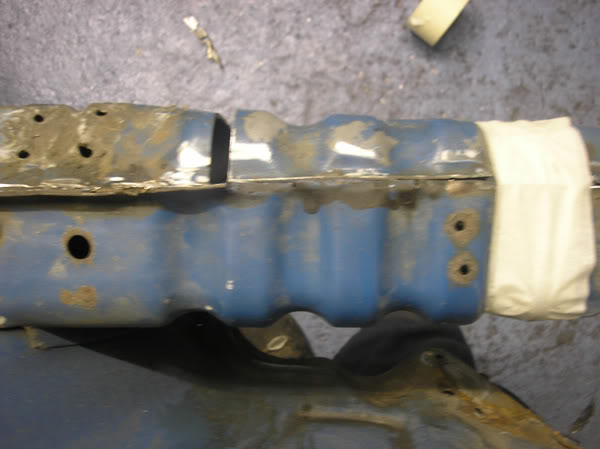
made a start on the driver side chassis leg - the ribs dont line up and this will be more noticable when the seam is removed aint isn't gonna look good

chop chop - grind grind = realigned

need to remove the same amount from the front of the chassis leg section and rebuild the flange to meet the front panel + some prep work to fill the gaps
welding gas to be collected tmw so should see some progress soon
will keep the updates coming
mike
Posted
Settled In
finally some updates
starting to get together images and pictures that will hopefully influence the direction of the car - pretty much set on the colour and general look along with some of the more detailed bits - even down to the routing of the wiring
lot more dtails to work through - i want to get a clear picture of where i'm going before i start.
Also been starting to stockpile parts
anyway having finished cleaning the underside of the car back to bare metal - have to pick out sealer from the seams before i can seam weld it
Made a start on the front inner arches - Rog came over to lend a hand and left with blisters after 4 hours scraping - cheers B)
he's also pretty handy with a camera
me giving the arches some grinding - note full face visor having had to pick wire strands out from my neck before
front panel cut out - for better access and so it can be worked on off the car / replaced
finished arch - ready for seam welding and smoothing
after 4 hours on the arches i treated myself to some bay work - mainly to save my sanity :wacko:
cut out all the un wanted brackets - so thats all of them then and made a start on one of the turrets
first seam welded - had good penetration through into the inner arch
follwed that up by 3 further passes of the torch to build up material below the seam to help smooth the joint. ground one small section back and i was really pleased with the result
General idea is to concentrate on getting the metal work right rather than use huge amounts of filler as some people do
ALL killer no filler
engine discussions are still on going need one soon so i can mock the whole car up
updates to follow soon - off to sort the garage out - car is coming home soon ! to really start bay work + body work
some more updates
major thing is car is back home now in my garage - so i can do abit more more often
started work on one of the turrets - got it ready for a final few spots of weld then some hand sanding reasonably happy how its looking but probably needs another few hours to finish it up so that only the lightest of skims is needed

de seamed the pass side chassis leg - don't want to go down the route of boxing them in - personally think it detracts away from the shape / style of the bay + looks too bulky
no where near complete but you get the overall impression
made a start on boxing the gearbox mount in - this is a first check of the shape few more test fits and some prep to do before it gets welded
sides will be done too and the captive nut relocated to the one closest to the front - so you don't see the bolt
made a start on the driver side chassis leg - the ribs dont line up and this will be more noticable when the seam is removed aint isn't gonna look good

chop chop - grind grind = realigned

need to remove the same amount from the front of the chassis leg section and rebuild the flange to meet the front panel + some prep work to fill the gaps
welding gas to be collected tmw so should see some progress soon
will keep the updates coming
mike
Posted
Settling In

Posted
Settled In
roughly speaking
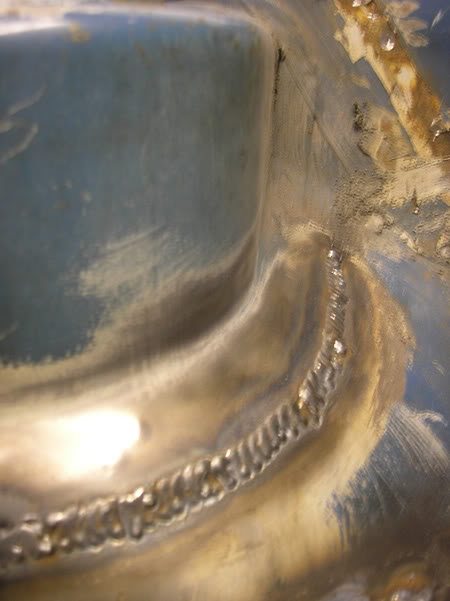
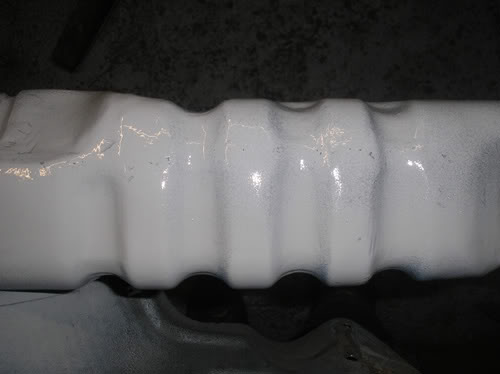
first removed the the seam sealer
welded seams togther - using quite big side to side movement on the torch to give a wide pool of weld
ground this back to start to give the shape i wanted.
bit of hammering here and there
then another pass with the welder to build up more metal where needed
ground this back and rewelded any low points etc
time consuming but imo worth it - trying to use as little filler as possible
bay has come on quite abit since then - will get some pics up soon - hopefully engine is arriving this week - woooooooooooooooooooooootishhh
mike
Posted
Local Hero

Posted
Settling In
Posted
Settled In
had the car back home now for 2 weeks progress is pretty good - pleased with how stuff has gone / is going
mainly been working on the pass side wing / chassis leg / bulkhead - smoothing / filing / deleting as i go
Got the gearbox mount capped and flushed off+ smoothed the internal section where its meets the chassis leg
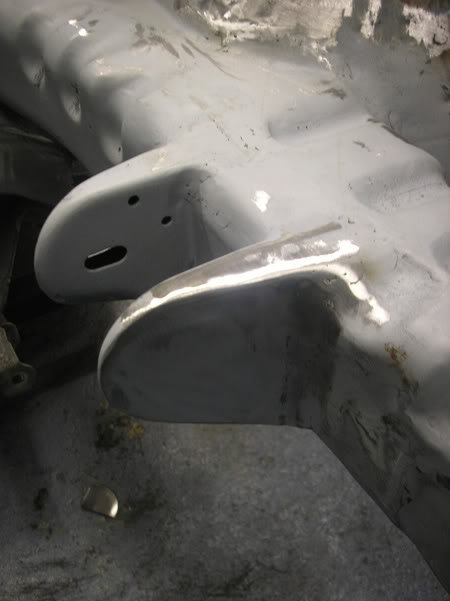
switched the captive nut over to the front of the mount so it bolts in from behind - hides the bolt head
capped the lower leg near the steering rack - bare metalled zinc'd and then welded
Hammered out the dimple on the passenger side inner wing - getting to grips with my body hammers - couple of very slighty low spots to chase till i'm 100% happy
Work on the bulkhead - holes for everything but the steering deleted
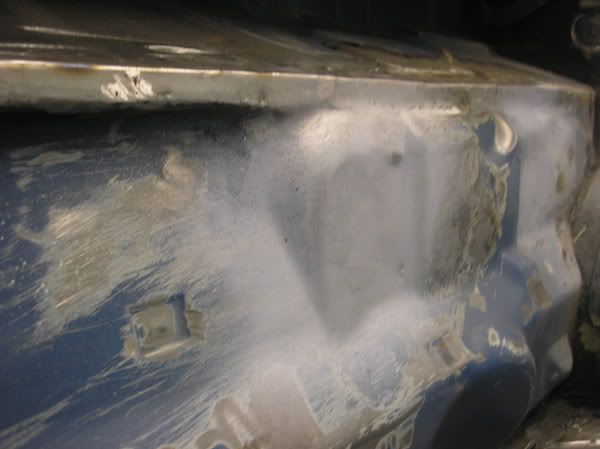
needs a final grind in some bits then hand sand / file in a couple of spots
had to replace a decent chuck of the bulkhead where the previous fella ground through cutting out the rain tray- muppet
made best out of a bad situation and smoothed out some of the crappy bend bits on the standard bay
finally
started seamwelding up the driver side turret
got some more of the major stuff planned for the car sorted in my and picked out some little details + choosen paint colour
fingers crossed engine will arrive this week - need to start mocking some bits up in the bay
Posted
Newbie

Posted
Settled In
but have made a bit of progress here and there
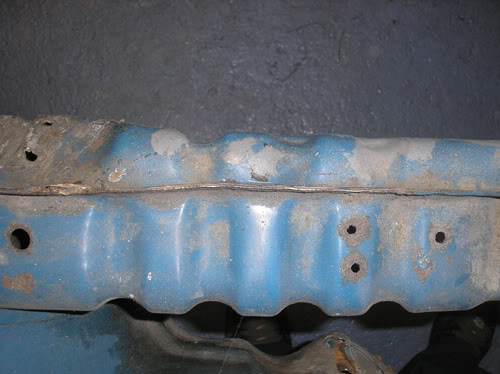
finished re aligining drivers chassis leg and de seaming it ( properly ) so you don't get left with a rubbish looking ridge down the middle
before
during
after
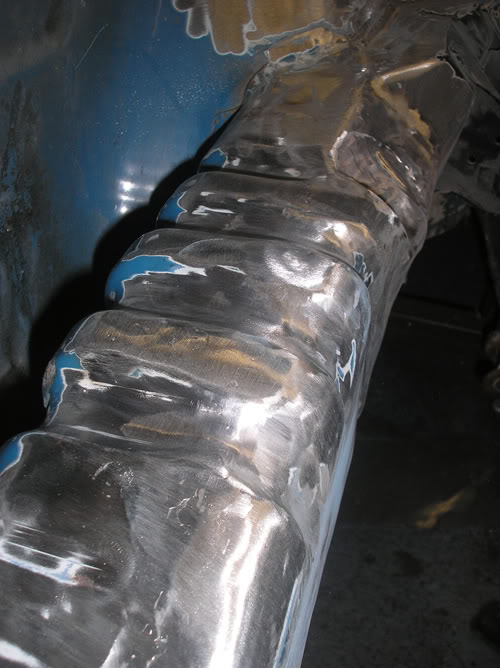
3/4 of chassis leg had been chopped off and re worked - no filler
sorted a little engine to power the car should be able to potter around nicley with this in

got a few little plans here and there
wire brush and angle grinder party over the weekend - rockstar lifestlye or what
got alot more of the car planned out in my head
can't wait to get cracking properly
mike
Posted
Local Hero
Rich
Posted
Settled In
great build by the way goin the same way as mine (light like lightning)
you seem to have more mates that are willing to help than me though all my mates are more interested in smoking weed lol
keep on dubbing
0 guests and 0 members have just viewed this: None.