


Kamei Retro Racer mk1 build

Posted

MOTY 2013

Kamei Retro Racer mk1 build
Hello my name is John and I'm a dub addict.
My wiring diagrams and other documents have moved here:
VAG Documents & Downloads
You'll need to sign into google/gmail for the link to work! (its free!)
My wiring diagrams and other documents have moved here:
VAG Documents & Downloads
You'll need to sign into google/gmail for the link to work! (its free!)
Posted
Settled In

http://www.clubgti.com…p?p=1682918&postcount=452
http://www.clubgti.com…p?p=1684649&postcount=470
http://www.clubgti.com…459&highlight=bbs&page=19
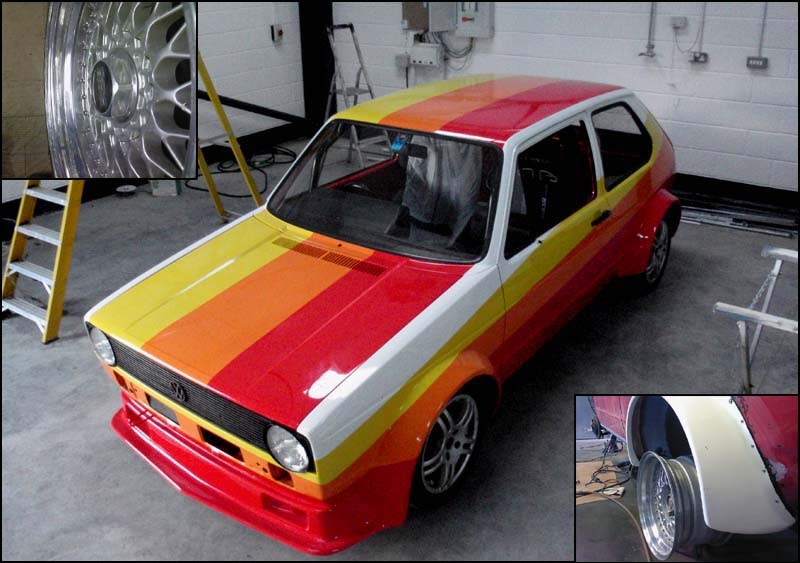
I need a new set of wheel bolts (the main 4 per) and the spigot rings for them….
thanks
mike

Posted
Settled In
Posted
Settled In
Replaced rear valves and nipples and bled rear.
Bled front passenger side.
Went to remove the nipple on the front drivers side and… SNAP…. bugger!!!!
Brakes are ok to use to get it to body shop on a trailer in about 1-2 weeks time but any ideas what to do about the snapped nipple?
Will i need to replace the caliper? phoned VW and guessed they would be obsolete with them but haven't looked anywhere else yet as not sure what people usually do in this case…
Brakes are TSR kit so 285mm disc and calipers with extension plates on them.
mike
Posted
Settled In
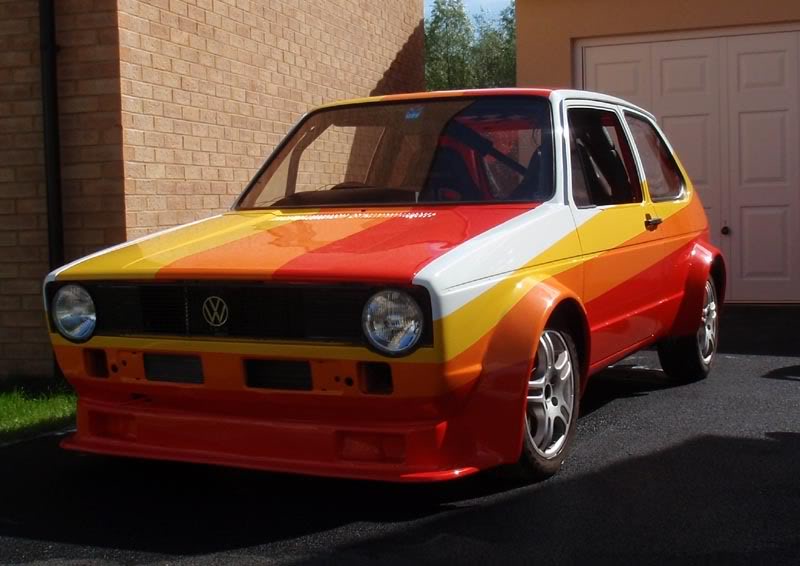
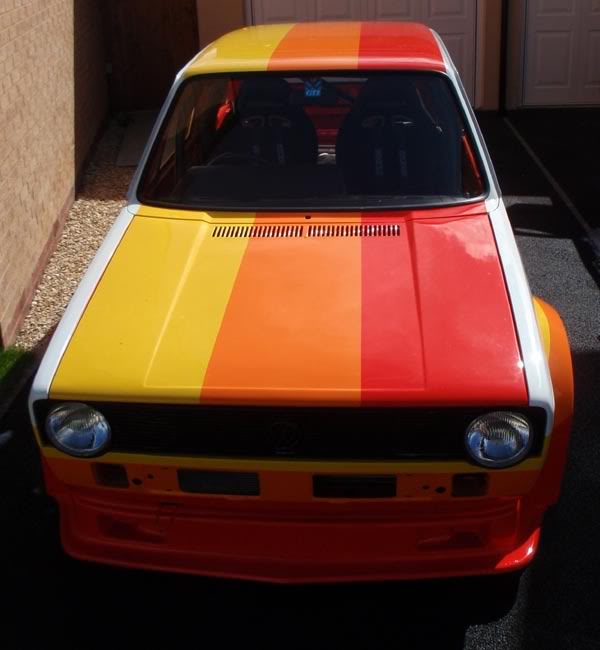
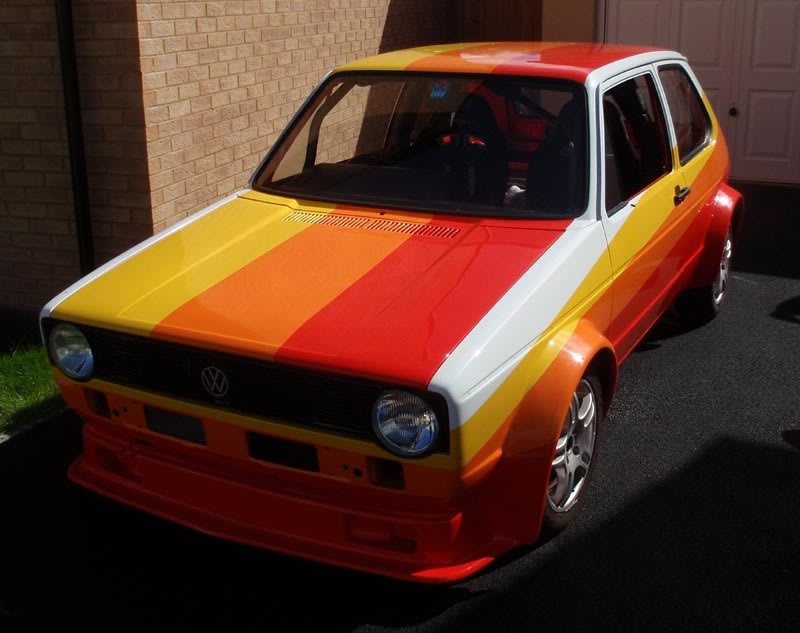
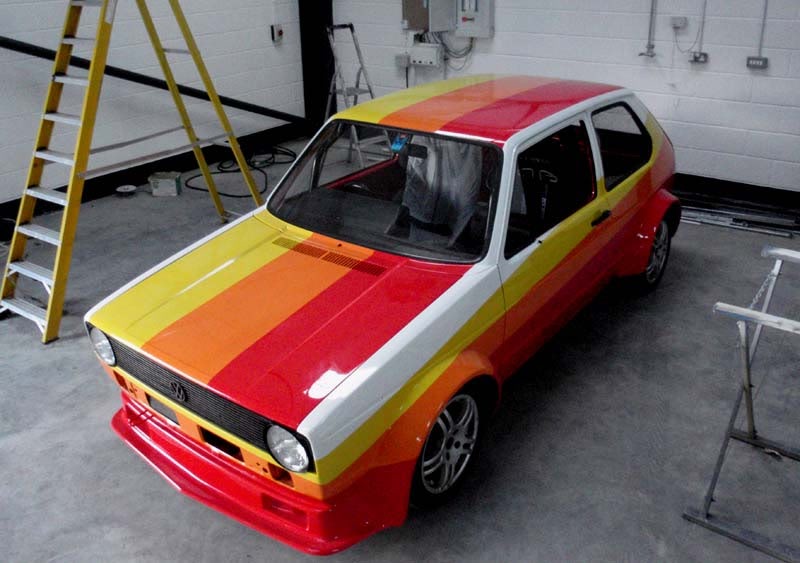
1st ever wash, and some sunlight lol.

Posted
Old Timer

Posted
Settled In
Posted
Settled In
Posted

Old Timer
fthaimike said

My WORD 8O
Absolutely amazing 8) 8) 8) 8) 8) 8) 8) 8) Can't wait to see it with the wheels on.
Posted
Local Hero

Posted
Settled In
just need to get the car to and from the bodyshop and graphics can finally be applied.
Posted
Settled In


We met in the café off J19 of the M5, found a nice comfy quiet corner, pulled out our laptops and my collection of memorabilia and chatted about Kamei history, the green hell and their racing times with various machinery including the Kamei Golf and the Kamei / Nothelle Audi.
Uwe took some notes about some details he can supply for my research and some more detail on the old historic German pictures on my historic thread on CGTI.
Hoping to meet up again next year with some cool Kamei plans here in the UK for 2012 and also during a trip to Germany, will update you as they come about.
We also chatted about some technicalities regarding some business i am getting involved with to supply some retro cool professionally designed kamei memorabilia for fans to purchase online (watch this space :redfaced:
 8) ).
8) ).Mike
Posted
Settled In
Got the rear side light working after a good earth made up, one headlight isn't coming on at the moment so need to check that (it has an uprated loom with 2 fuses & relays), replaced the fuses and tryed swapping relays over but no joy so far with one side, will try a tester on it next.
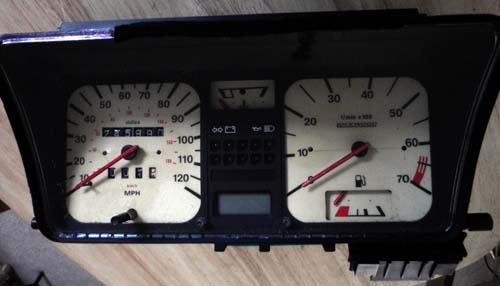
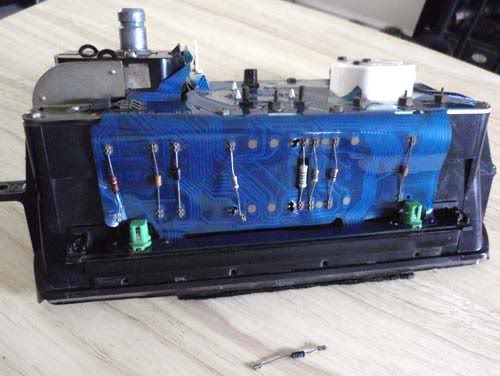
One major problem i have found is that the speedo must have been damaged in storage as the ribbon circuit on the top of the speedo has 2 connections broken on the resistors (one came away in my hand the other only connected at one end), will put some pics up of damage and maybe someone will know what they do.
Car going away to bodyshop sunday, weather permiting as door windows not in.
Posted
Settled In
Posted
Settled In
(yellow one torn away at one end)
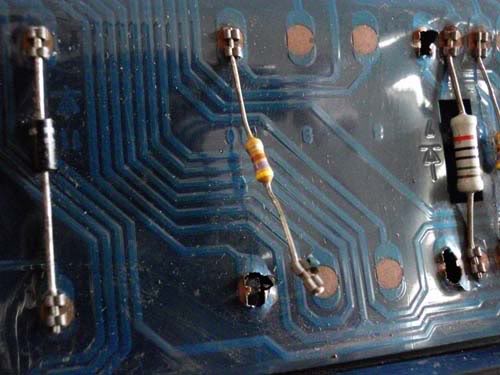
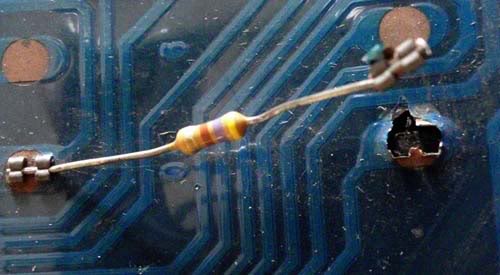
(black one torn away at both ends, (both holes can be seen in first pic above over to the right)
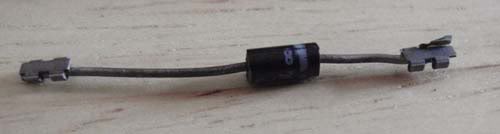
Anyone ever had any luck repairing one & is it possible to solder?
Posted
Settled In
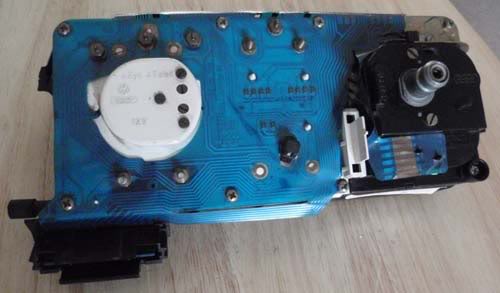
I have these around it:
Main plastic body:
171 919 035 HC
008/288//003
Plastic that has speedo connection:
12V W = 1505
104/9/49
Flexi Board:
88 481 370
X16.120/7728
White plastic sticking out to rear of rev counter:
4Zyl.4Takt 12v
12V 233Hz 230/121/2
Posted
Settled In
1. some marks on roof to tidy up and some marks on top of lacquer around car.
2. repair damage found on fuel filler cap lip (pipe behind is stainless steel so fine) and repair where the inner captive nut opposite for old belts was.
3. fit the flush fit bonnet catches and pins, (he thinks they may be stronger going acrosswards as apposed to forward facing due to what is underneath, probably where the rubber stops are) we mocked it up and i quite liked it and a bit different.
4. weld the battery cable to the rear cage bar and paint it as still unpainted.
5. adapt the hella mirrors to fit doors (he already had what looked like a good option).
6. paint and fit replacement channels into doors (the ones that seperate the door window from the triangle ones) and fit the lexan windows and all the rubbers around them. iirc the window has to be in the door before the channel.
7. repair a few small scratches around car.
I think that's about it for him…..

Posted
Settled In
I will still be on the look out for a spare flexi board if anyone finds one in case i get any problems with mine and it's looking a bit tired tbh.
Posted

Settling In

Posted
Settled In
;-)
There are too many online users to list.