


Engine Detailing

Posted
Settling In

Engine Detailing
75golf said
Wow - that looks just fantastic…. i'm plating some brake calipers right now with i think the same ebay kit - then i will passivate them yellow.
I hope they look as good as your stuff.. Really look forward to seeing your finished Engine.
Good luck with the calipers - plating is diffficult to get right on cast parts :wink:
Posted

Settled In


Golf Mk1 project
BMW 325i Touring
BMW 325i Touring
Posted
Settled In
where did you get your replacement rad fan sticker from
cheers
Chris
Posted
Old Timer

Slavic, the electrolyte solution will last a long time if stored properly. Keep the container sealed with a lid when not in use and top-up with deionized water when the level drops though evaporation. Also make sure when the parts go into the tank that they have been thoroughly rinsed with distilled water. You don't want to contaminate the electrolyte with drag though.
Chris, the fan sticker is from Fly Stickers. Great quality!
1990 MK1 Golf GTI Cabriolet
1983 MK1 Golf Campaign

1983 MK1 Golf Campaign
Posted

Settled In
When do you fancy coming up to costa-del-stockport to do mine, next week is good for me
 I do make a good brew
MK1 GTi Cab '91' H Black
Mars Red Campaign - work in progress
MK1 GTi Sportline '92' J Red
Mars Red Campaign - work in progress
MK1 GTi Sportline '92' J Red
Posted
Settled In
Can i pick your brains - i was the guy doing the calipers on the other thread with zinc, i went with your hydrochloric acid suggestion for the rust pretreatment and it works a treat - however it seems the surface then needed reactivating as i get all bubbles and no plate once it has been treated this way - did you use another bath to reactivate the steel once acid etched?
Thanks
Posted
Settling In
75golf said
Looks absolutely Spot on Mate. 8)
Can i pick your brains - i was the guy doing the calipers on the other thread with zinc, i went with your hydrochloric acid suggestion for the rust pretreatment and it works a treat - however it seems the surface then needed reactivating as i get all bubbles and no plate once it has been treated this way - did you use another bath to reactivate the steel once acid etched?
Thanks
IMO - you will not be successful in plating cast parts.
If you notice in this thread, all cast parts are painted, your other option is powdercoating, or polishing.
Posted

Old Timer
Matt
Posted
Newbie

Re: Engine Detailing
mo
Posted
Settled In
ERROR: A link was posted here (img) but it appears to be a broken link.
 http://www.vwgolfmk1.org.uk/modules.php?name=Forums&file=viewtopic&t=73039&highlight=
Posted
Old Timer
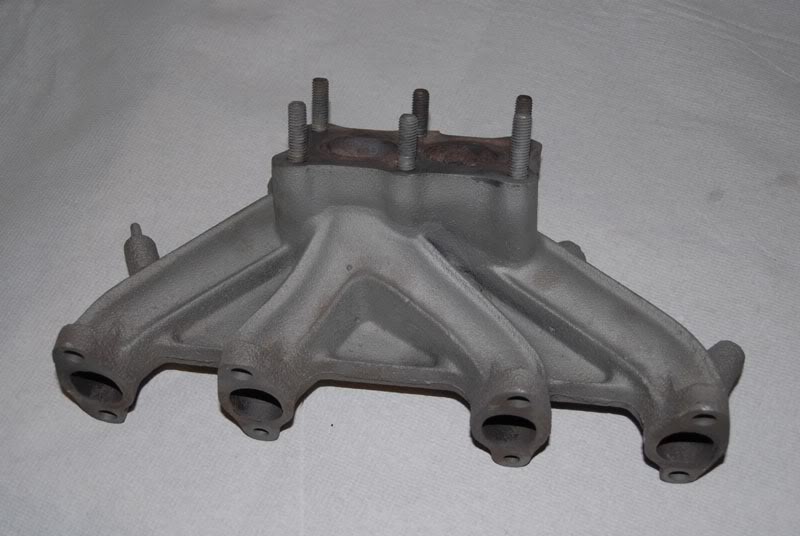
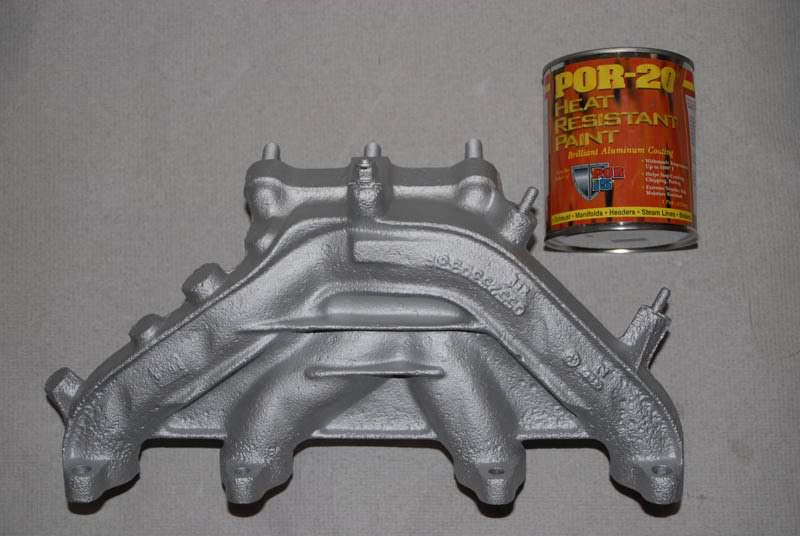
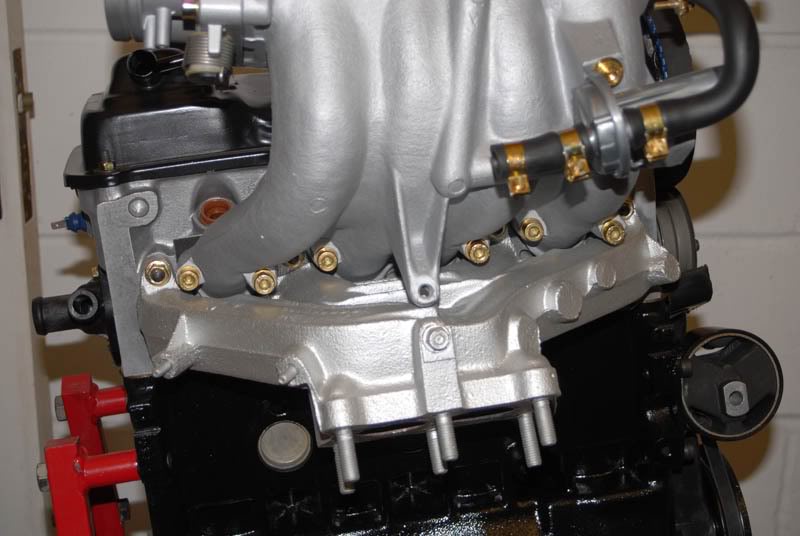
Sand blasted exhaust manifold.
Painted with two coats of Por-20 and left for 24 hours to set. Then put in oven at 200 degrees centigrade to harden then allowed to cool down.
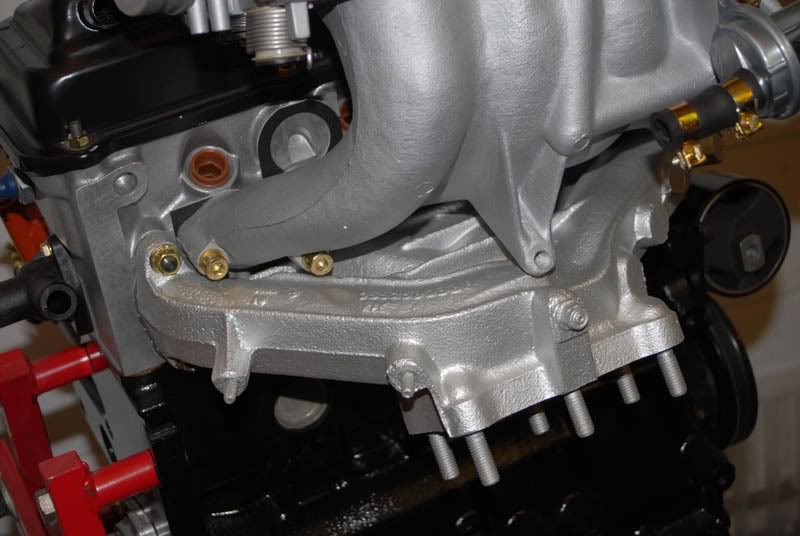
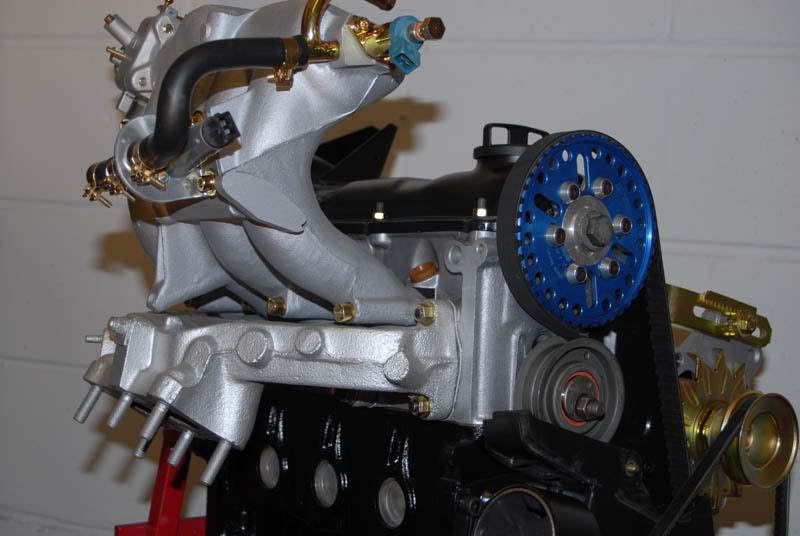
Fitted back onto head with new gaskets.

1990 MK1 Golf GTI Cabriolet
1983 MK1 Golf Campaign
1983 MK1 Golf Campaign
Posted

Old Timer

richievr said
all looking goooood so far, reminds me of my last winter !!!
did the same thing to mine, takes a while doesn't it!
i may have to visit that site to get some stickers for mine now though..
what a great picture………..great work dude
Posted
Local Hero

Are you going to drive it once it's finished?
Rich
Posted
Old Timer
Really great work will love to see this finished.
Slippy8v
Posted
Old Timer
Posted

Old Timer
Swallowtail_uk said
anymore updates? i love this thread…..bump to the top
I 2nd that
amazing workman-ship
Posted
Old Timer
Rebuilding the Wiring Loom
The wiring loom was not in a great state. The heat from the engine has degraded the wiring insulation over time caused cracking and resulting in electrical shorts.
The plan is to replace the Black PVC Sleeving that gone all brittle, remove all the multi-plug terminals and replace with original ones if still avalible or with replacement ones.
Ordered PVC Sleeving, Terminal Housings, Female & Male blades, Crimping Tool, etc… from Vehicle Wiring Products & The Tool Box Shop
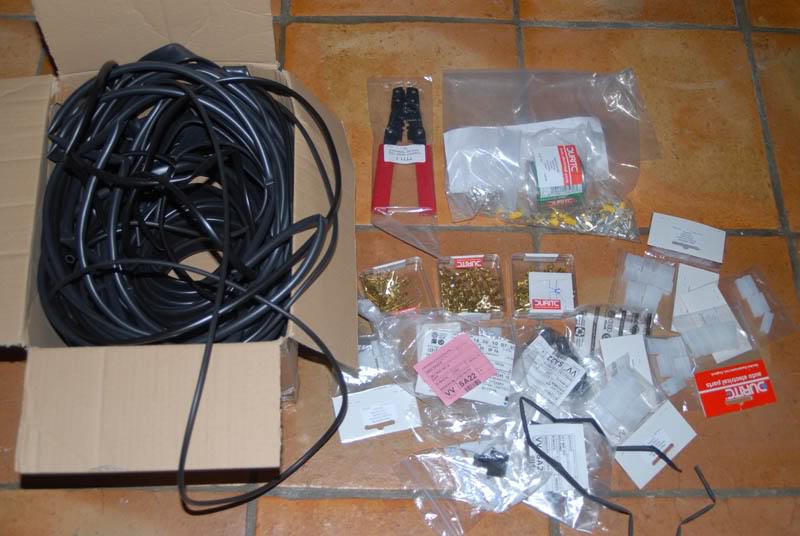
Stripping loom down. Taking careful notes of the wire colours, the plug type, crimp type and position of the originals.
Crimping Tool being used to crimp Junior Timer Contacts
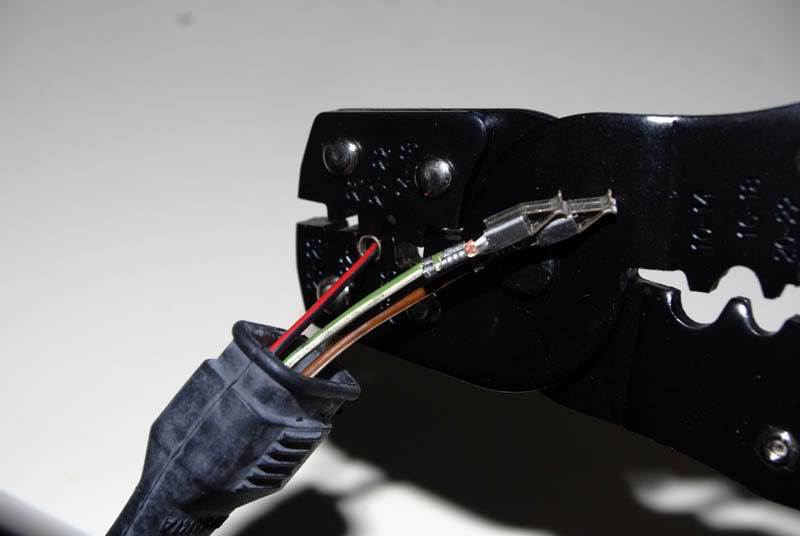
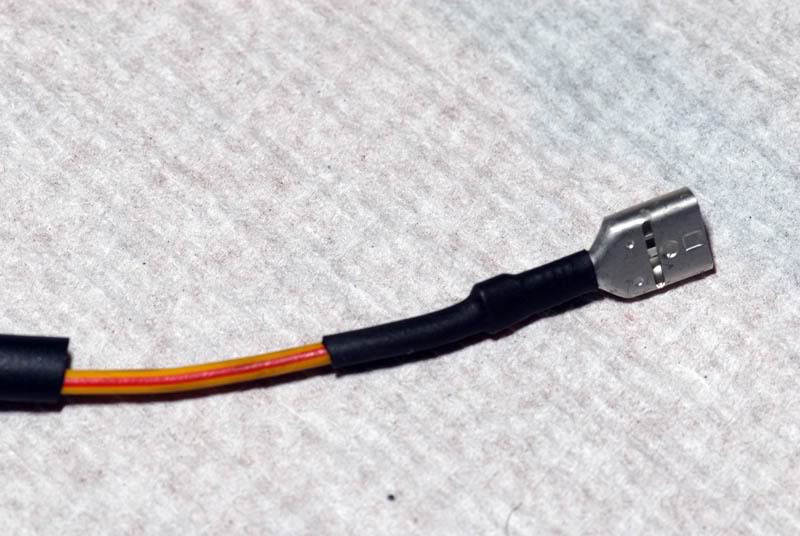
Completed terminal.
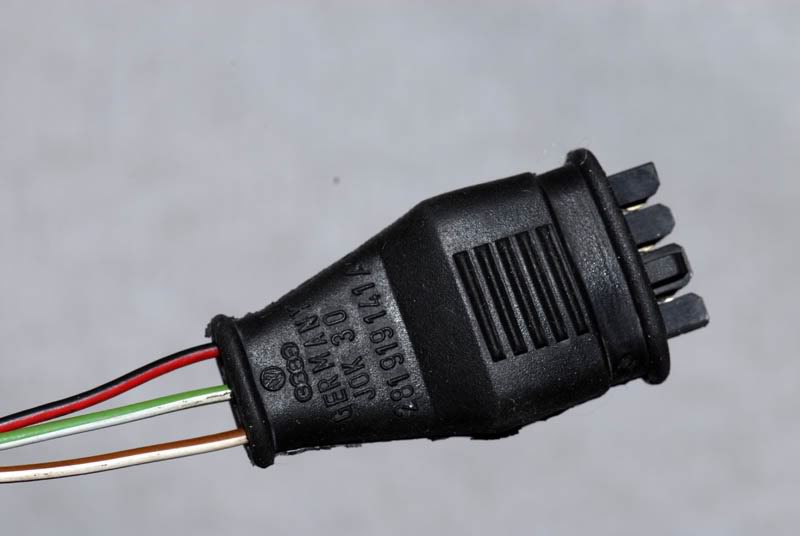
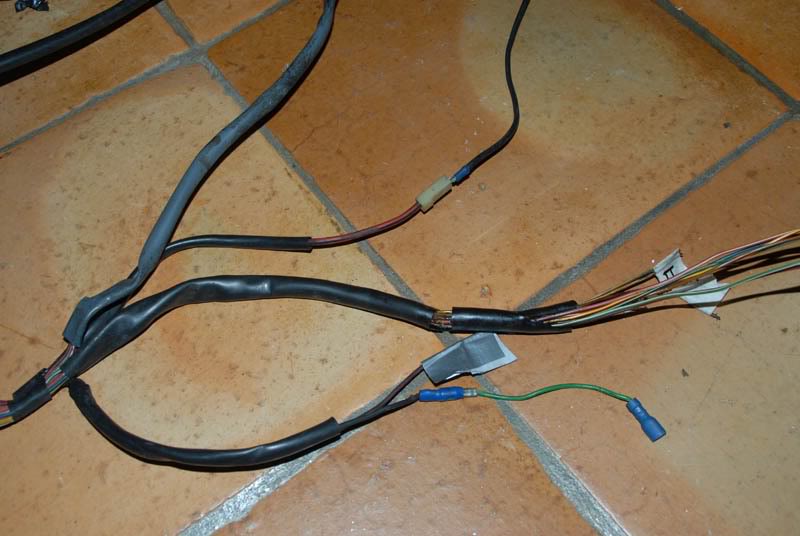
Here the Coolant Temp Sender has new PVC Sleeving, 6.3mm Female blade & Cable Shrink Wrap to finish it off
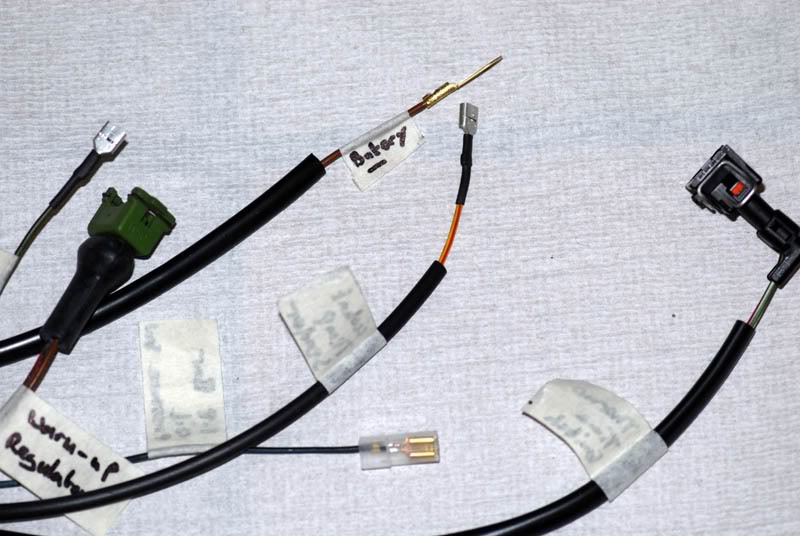
Completed section of loom, all labeled up.
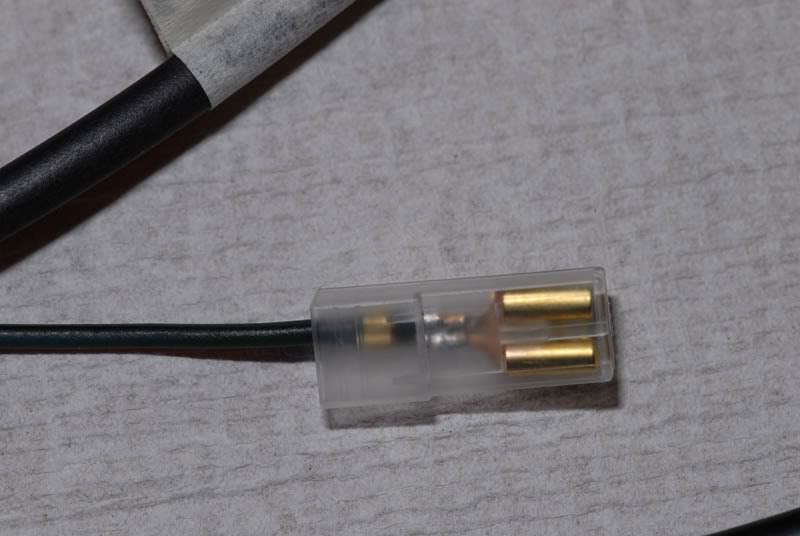
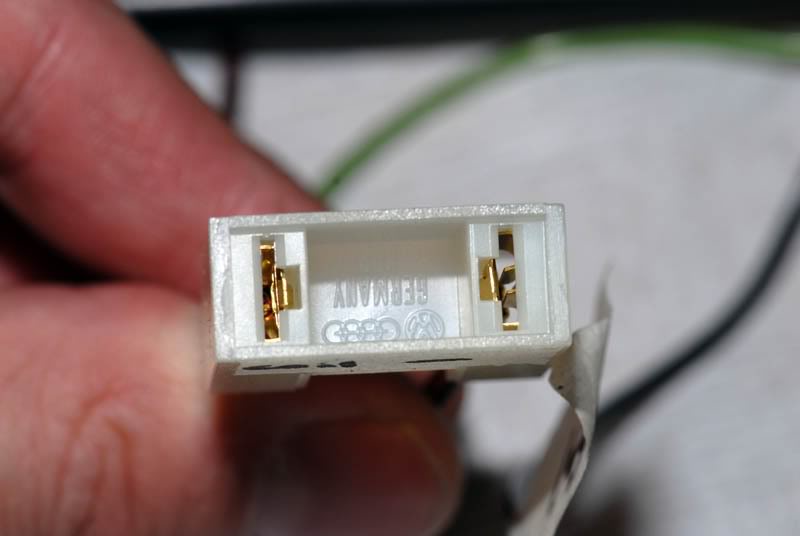
New Junior Timer
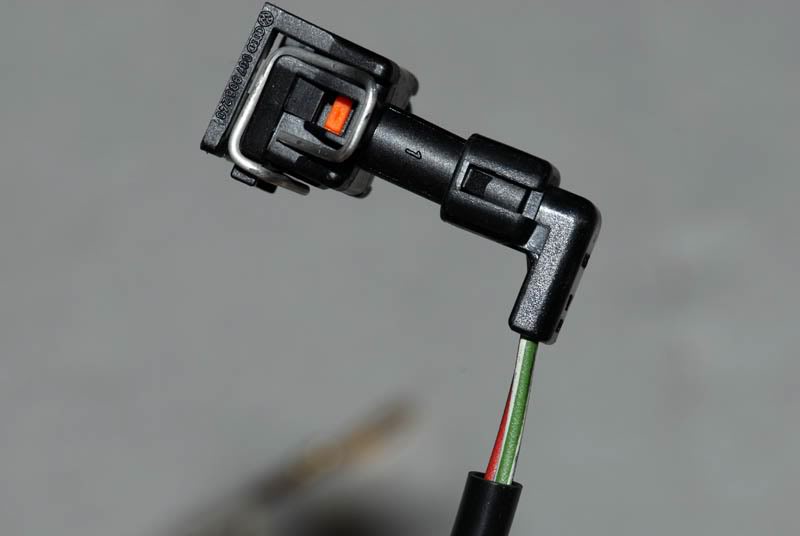
Finished loom. The key is to have lots of notes and photos before you start for reference.

1990 MK1 Golf GTI Cabriolet
1983 MK1 Golf Campaign
1983 MK1 Golf Campaign
Posted
Old Timer
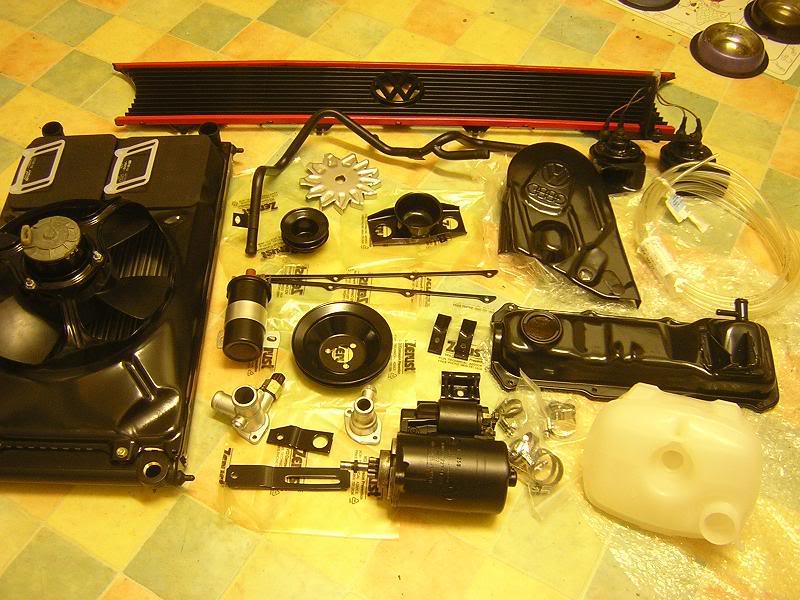
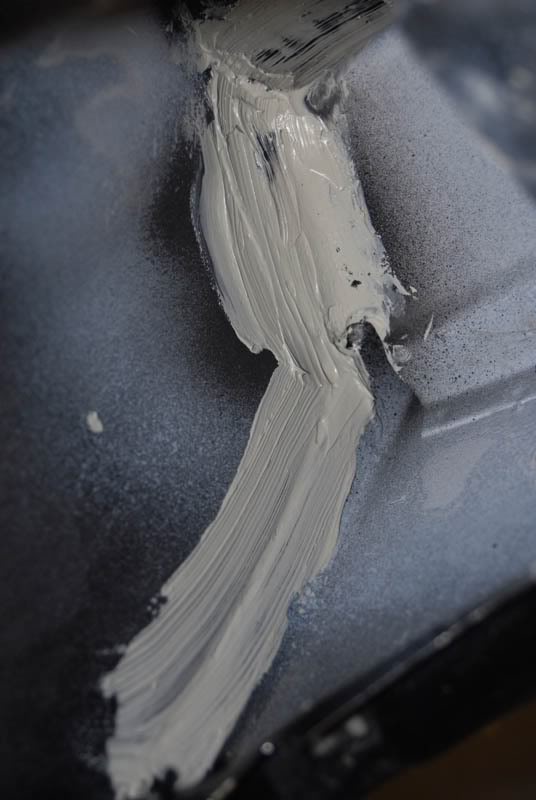
Engine Compartment Painting
Decided to restore the engine bay to its original hue.
The entire engine bay is sanded with 320-grit wet/dry paper
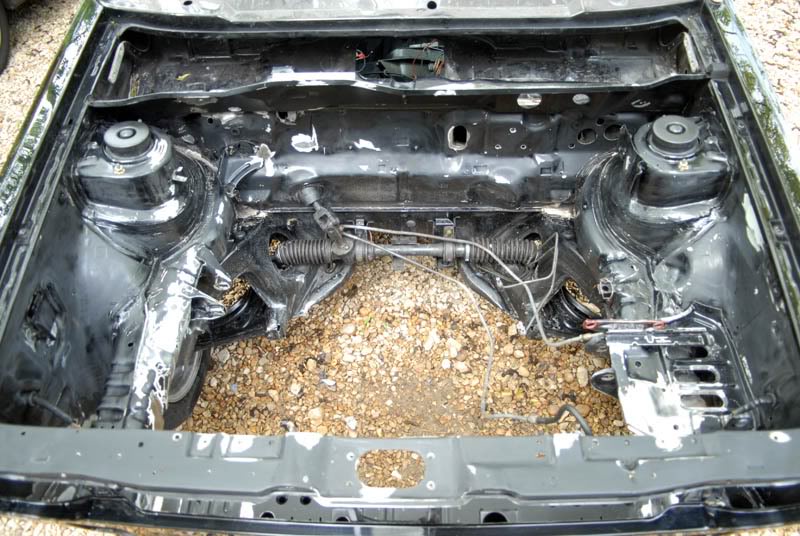
During this process, some rust bubbles were unearthed. This was removed with an 80-grit disc. Then the edges were feathered by hand with 320-grit paper.
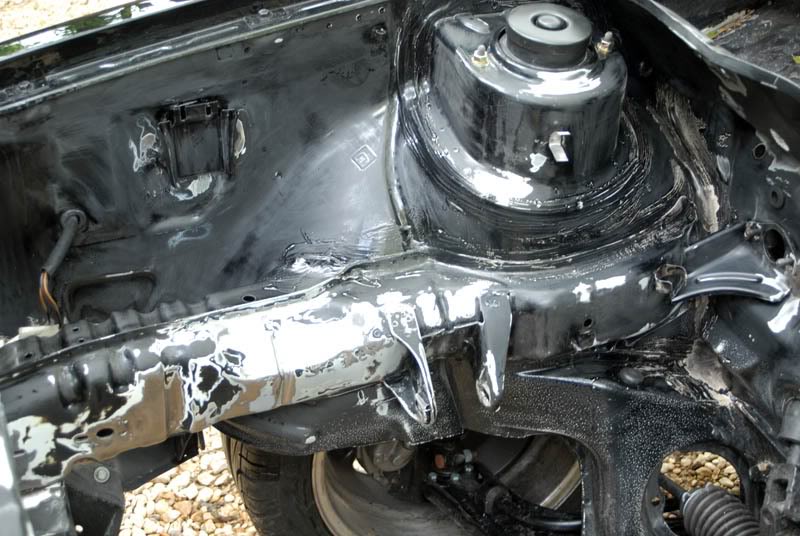
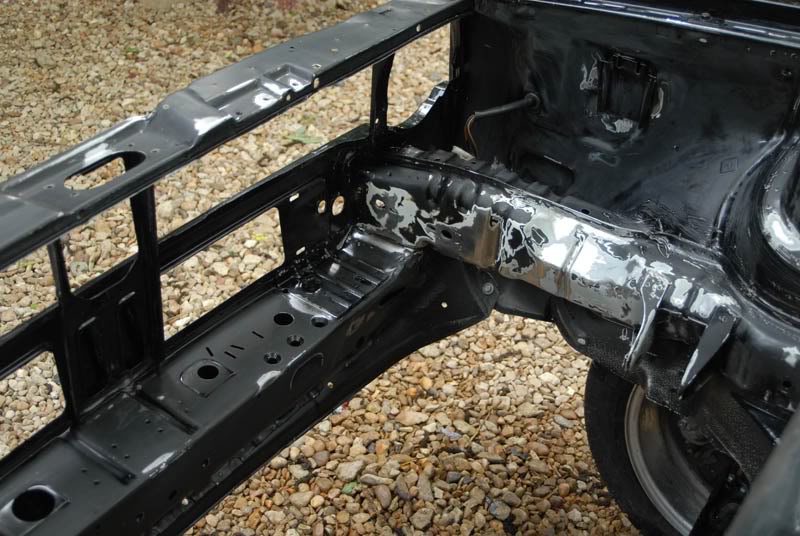
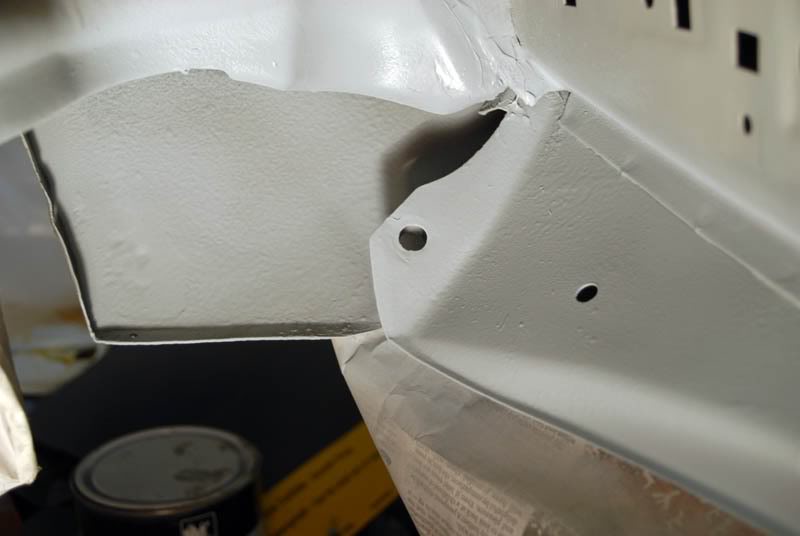
Bare metal is sprayed with Self Etching Primer

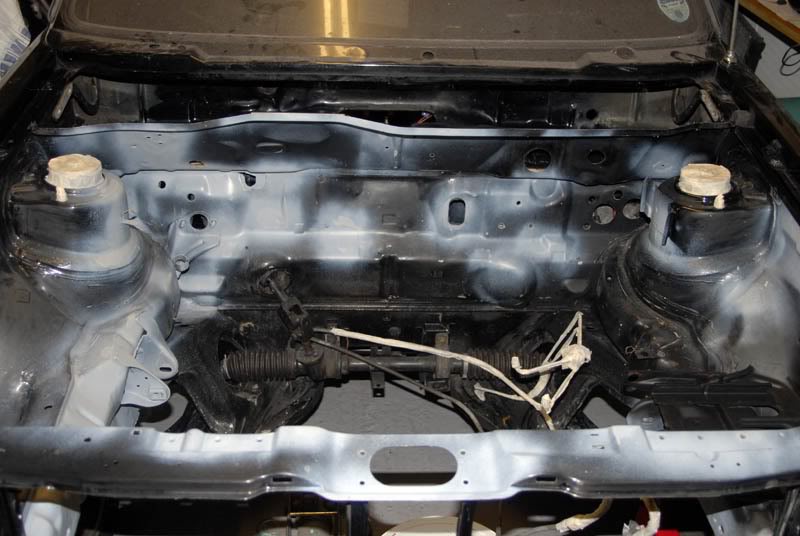
Next its masked and covered. Then the entire engine bay is cleaned with Eastwood Pre cleaner.
Seam sealer is applied where needed
The bay is primed in a 2K High Build Primer. It dries quickly and is ready to sand within one hour. The primer is flattened with 600-grit paper. Then the entire engine bay is wiped thoroughly with a tack cloth before top coating.
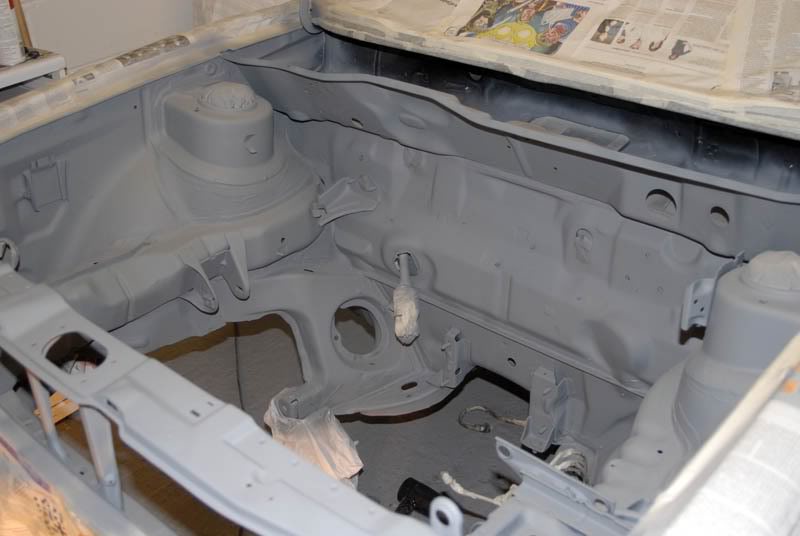
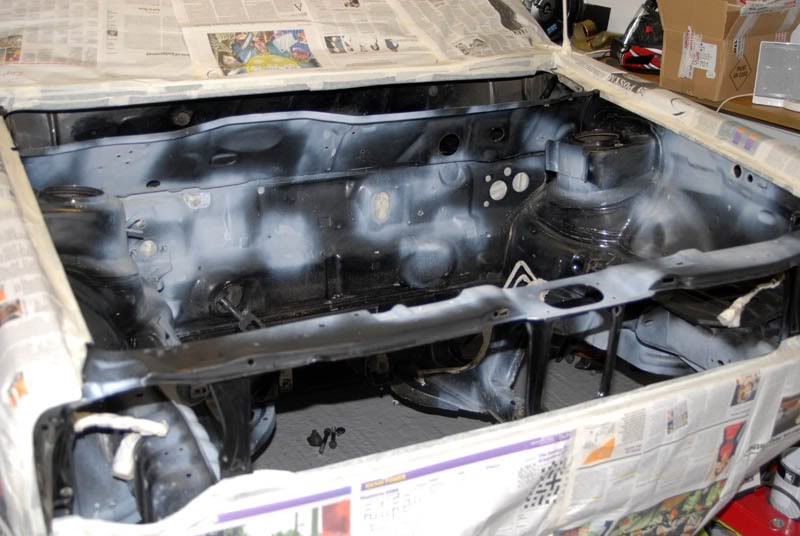
Anti stone chip is applied
Polyester basecoat, colour Schwarz 041 is sprayed until full coverage is completed 2-3 coats.
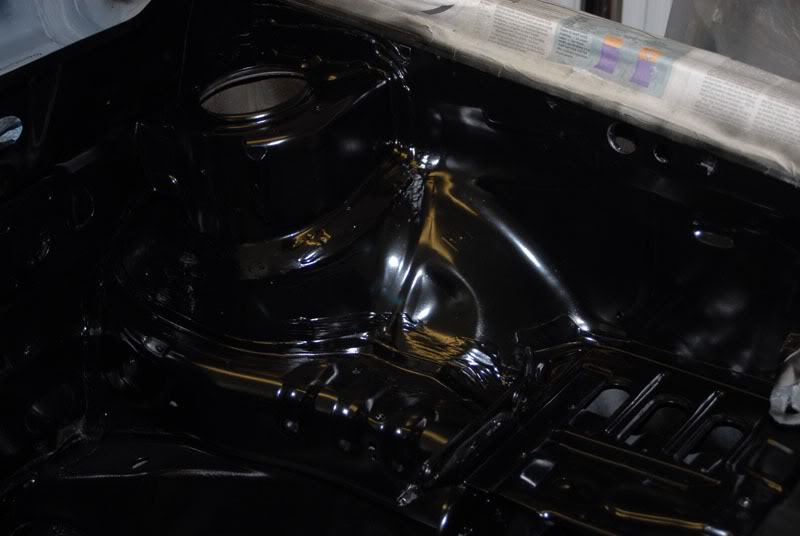
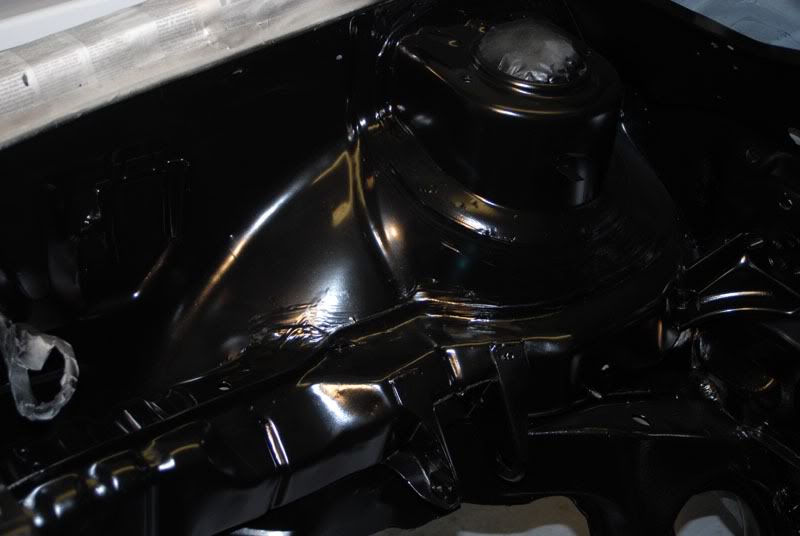
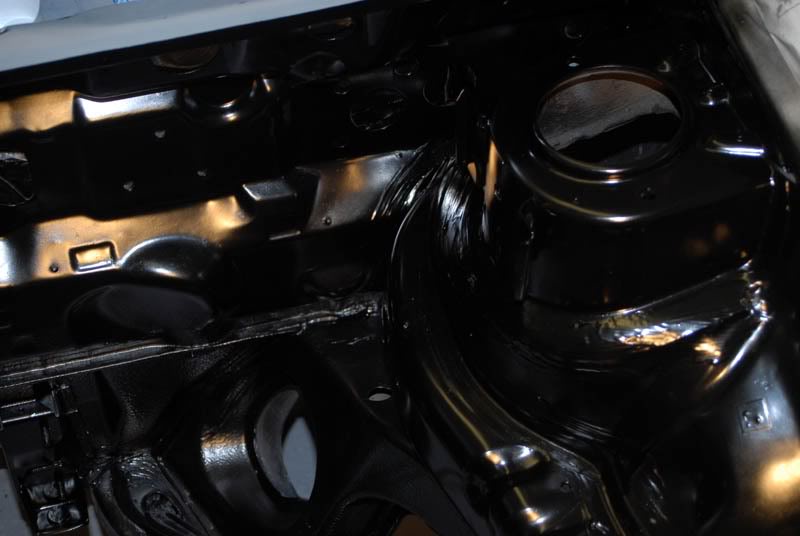
As soon as the base coat was dry, two coats of 2K Clear was applied five minutes apart
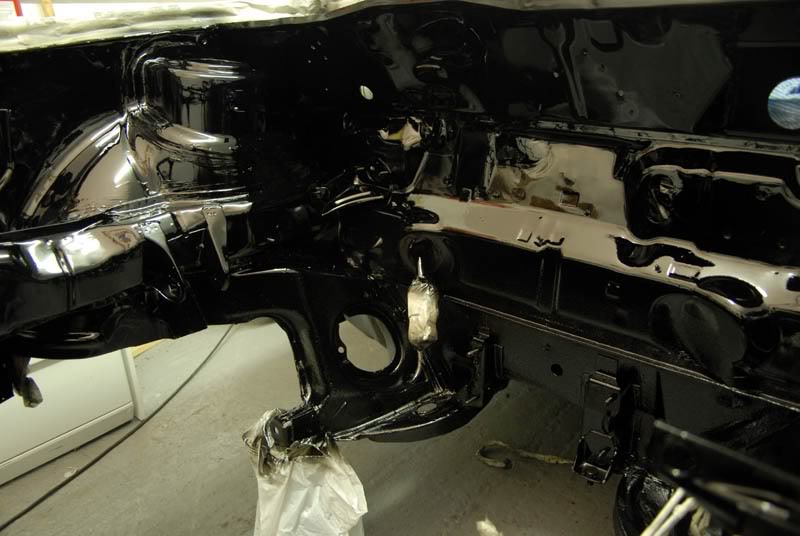
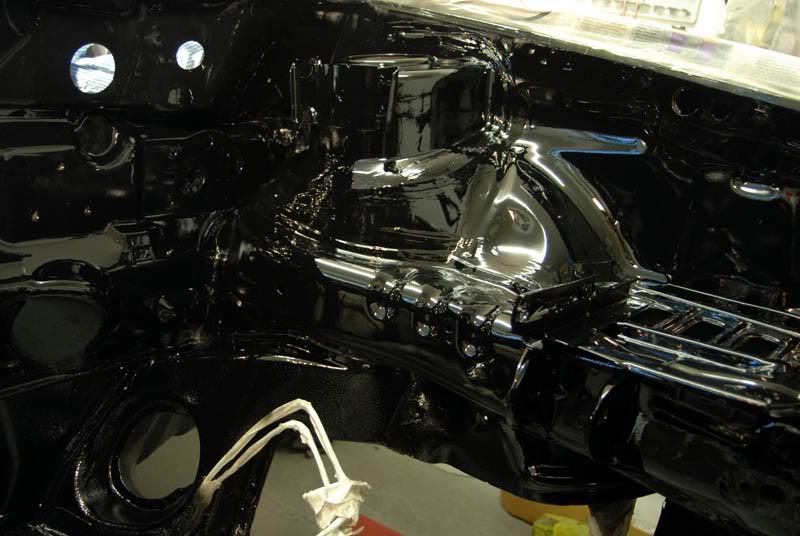
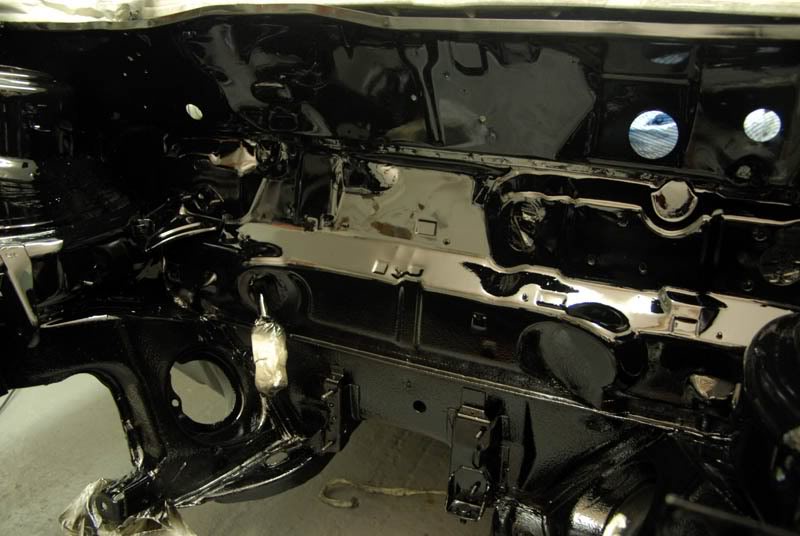
Now the fun begins I can start putting it all back together!
1990 MK1 Golf GTI Cabriolet
1983 MK1 Golf Campaign
1983 MK1 Golf Campaign
Posted
Settled In
mk1 golf - resto
mk3 polo breadie - daily banger
mk3 polo breadie - daily banger
Posted
Settling In
keep up the hard work it shall definatly pay off
mk4 golf gti with bora front end and lots more ,
mk1 gti project
mk1 gti project
0 guests and 0 members have just viewed this: None.