Fuse box disassembly
Posted
#1627524
(In Topic #223383)
Settled In

I decided to start up my golf today' as it's been a while since I've replaced the alternator.
One thing led to another' as it does and I find myself trying to shove the Conlog immobilizer out the way' in doing this the car wouldn't start lol.
I guess I really need to remove this so I've stripped back all the tape so I can see all the wires. I've pretty much got all the information I need relating to fuse box but wanted to ask is there any particular trick to remove the fuse box as I really need to have a good look at the wires.
Is it worthwhile removing the knee kick plate? is it easy to do ?.
thanks, chaps
Posted
Local Hero

It makes it a wee bit easier to see the upper bits as you unplug it.
1. Disconnect the battery.
2. Remove the lower screw.
3, lift it up to free the right hand side from the catch then wiggle it out of the left then carefully lower to move it about, as there are single spads take care not to knock one loose prior to looking about.
4. Take before Pictures so you know where things are located, and where to put them back on.
a2resource.com has nice diagrams of the front and back and the wire locations on these critters.
all mk1's and 2's from 85 and up
Electrical Systems
What do Divorces, Great Coffee, and Car Electrics all have in common?
They all start with GOOD Grounds.
Where are my DIY Links?
They all start with GOOD Grounds.
Where are my DIY Links?
Posted
Settled In

I must confess I may give it a miss and leave the knee bar in situ.
Thanks for you suggestions when researching a little more it could be a pain in $$$ to remove
Posted
Settled In

I've a had a go this morning for a few hours' my oh my, i wish i hadn't started it' well it needed to be done to be honest this way when I go cruising there's less to go wrong in the process I've chopped back lots of old cables which have been bodged.
one thing that was strange is some cabling from the conlog ran into the engine running to a relay, I remember looking at this when I had the car and been as it was sitting in the bay with no protection I knew that this was aftermarket' looking at it more closely I can see that it's to do with the starter motor, just don't understand why this was installed in the bay. It looks as if the cables run back to the ignition switch but haven't had a good look just yet .there's also other cables that run into the bay.
The main cables from the conlog have been identified and stripped ready for re-soldering, I wasn't expecting some of the smaller cables to connect to anything important.
I figure if I've got the fuse box out I may as well do a proper job.
Pictures to follow

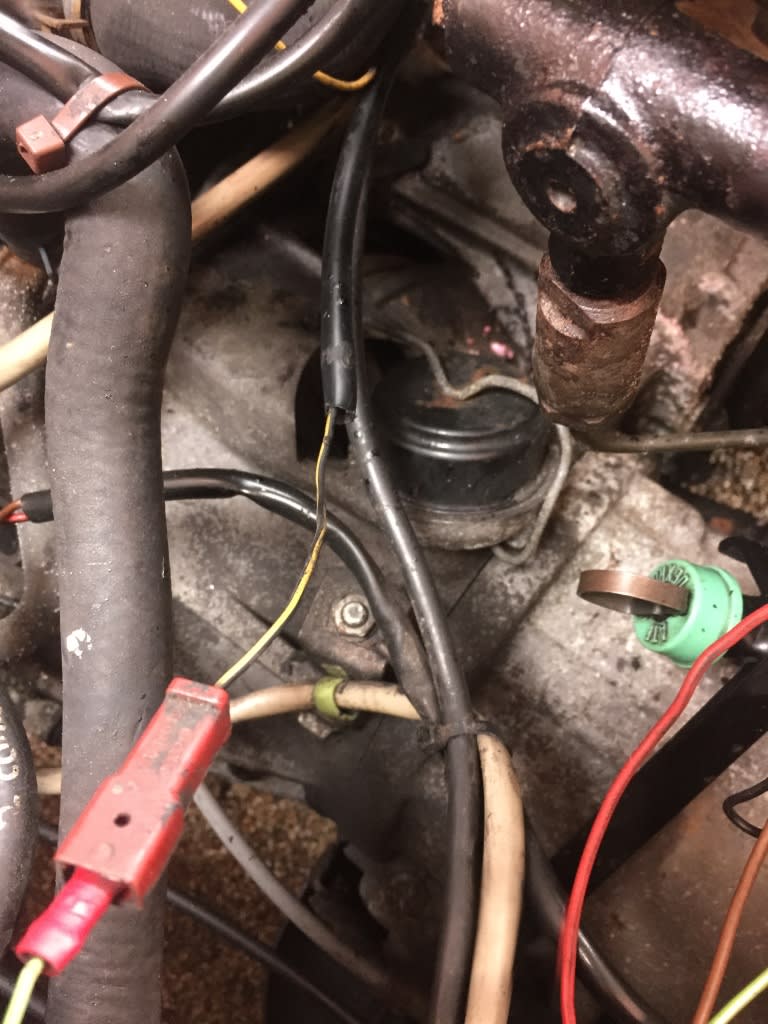

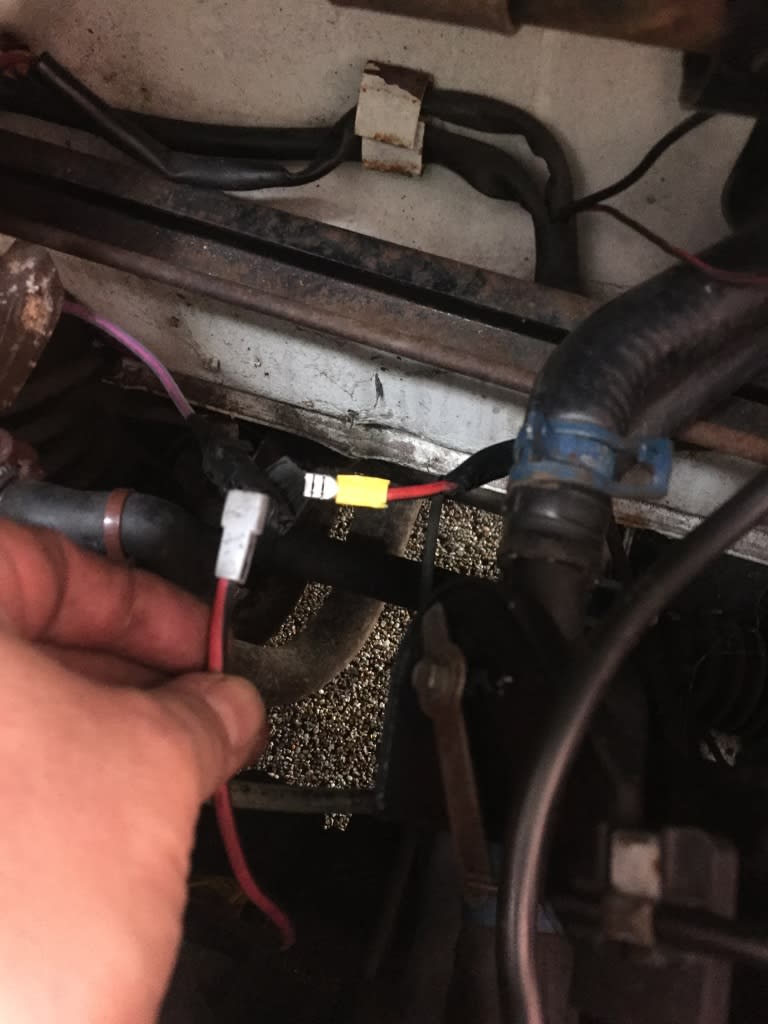

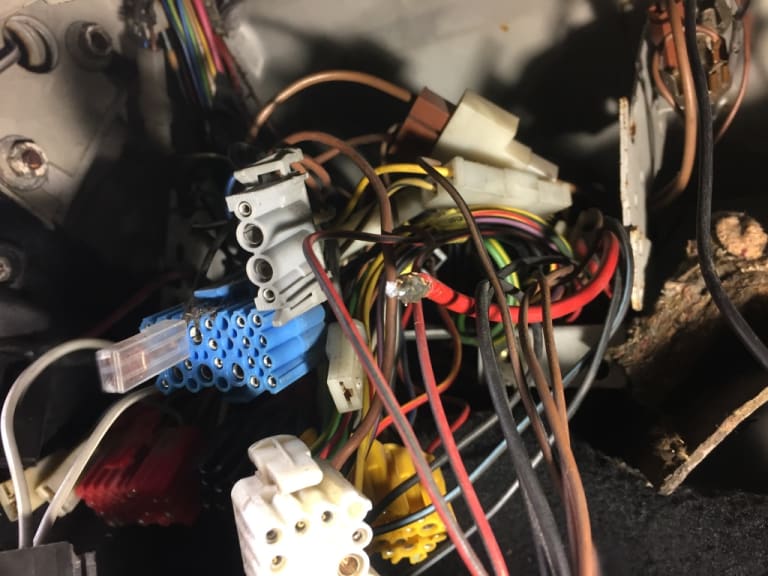

Posted
Settled In

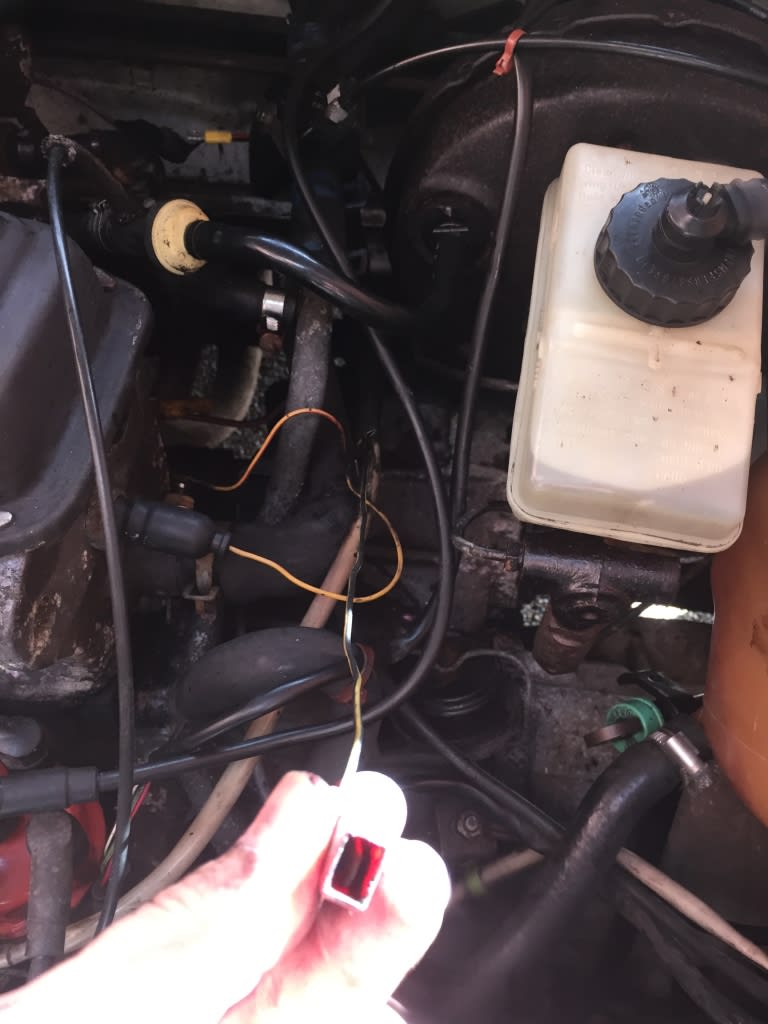
I've actually removed the starter relay' but glad I have as it needs installing properly' i think I can do a lot better job, there is still a cable that will need to be identified any ideas, gents ?
Posted
Settled In

 trying to identify?
any idea Briano ?? its the yellow and black wire with the red connector
Posted
Local Hero

The make and model or year and model would be nice..
As I don't remember any yellow and black on my Cabriolet save for the heater blower.
What do Divorces, Great Coffee, and Car Electrics all have in common?
They all start with GOOD Grounds.
Where are my DIY Links?
They all start with GOOD Grounds.
Where are my DIY Links?
Posted
Settled In

My car is a 1988 golf cabriolet 1.8 auto clipper
Really need to identify this before I progress with the fuse box as it's damn tight behind there
Posted
Local Hero

Same on the 90-93 Cabby…. It was the only yellow/black I could see.

What do Divorces, Great Coffee, and Car Electrics all have in common?
They all start with GOOD Grounds.
Where are my DIY Links?
They all start with GOOD Grounds.
Where are my DIY Links?
Posted
Settled In

Posted
Settled In

think I've found it what you think makes sense' given the alarm/immobilizer
 rip out
Posted
Local Hero

okmate said
Bri
think I've found it what you think makes sense' given the alarm/immobilizerrip out
nice to see the circuit…
Should of seen me last week when my Battery totally died on my Van, and it was POPPING security error on the warning panel….. (dealer only reset) no starter, nada so I took a look at the battery and it was 5yrs old….
Replaced it and it took care of everything. Shoot I couldn't even get my ODB scanner to read the ECU….
What do Divorces, Great Coffee, and Car Electrics all have in common?
They all start with GOOD Grounds.
Where are my DIY Links?
They all start with GOOD Grounds.
Where are my DIY Links?
Posted
Settled In

the ce1 fusebox suggests that the horn fuse is number 16 fuse? which should be grey horn wiring harness….. but theres no yel/blk cable to be found?
HMMMMMMM
Posted
Local Hero

The Horns are tied to 12V via the black/yellow wire from the battery via s18.
The horn relay switches the ground on/off with the button depression.
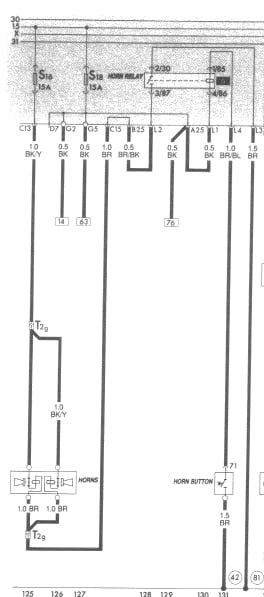
What do Divorces, Great Coffee, and Car Electrics all have in common?
They all start with GOOD Grounds.
Where are my DIY Links?
They all start with GOOD Grounds.
Where are my DIY Links?
Posted
Settled In

I'm a little confused now all the drawings I've saved seem to be wrong' what I need now is to understand where these cables connect to on the rear of the fusebox.
tell me if I'm wrong' i believe the yel/blk cable should connect to the yellow plug(C) on the back of the fusebox.
 Last edit: by okmate
Posted
MOTY 2013

Hello my name is John and I'm a dub addict.
My wiring diagrams and other documents have moved here:
VAG Documents & Downloads
You'll need to sign into google/gmail for the link to work! (its free!)
My wiring diagrams and other documents have moved here:
VAG Documents & Downloads
You'll need to sign into google/gmail for the link to work! (its free!)
Posted
Local Hero

rubjonny said
that red spade is the power feed to the autochoke heater on the original 2e2 carb. if its had a weber then its no longer used
Don't see too many Carbed OEM GOlfs over here, and my Bentley don't show those either… Thanks Rub…..I will keep that in mind.
What do Divorces, Great Coffee, and Car Electrics all have in common?
They all start with GOOD Grounds.
Where are my DIY Links?
They all start with GOOD Grounds.
Where are my DIY Links?
Posted
Settled In

Posted
MOTY 2013

Hello my name is John and I'm a dub addict.
My wiring diagrams and other documents have moved here:
VAG Documents & Downloads
You'll need to sign into google/gmail for the link to work! (its free!)
My wiring diagrams and other documents have moved here:
VAG Documents & Downloads
You'll need to sign into google/gmail for the link to work! (its free!)
Posted
Settled In

rubjonny said
yes the inlet heater thermoswitch is the one with a purple/black wire, and the carb heater wire with the red spade goes to the other thermoswitch
Rubjonny can you confirm what picture where looking at ? the only cable i need to trace is this one which i believe is part of the horn system.

0 guests and 0 members have just viewed this: None.


