


BMW 2002 Touring '74 Full restoration project


Old Timer

They slid out pretty easy by tapping on them with a hammer and big punch.
Got new from our local machine shop, cylinder 1,3 and 4 have minimal wear but cylinder 2 has more wear.
Turns out it's already bigger than first oversize so we'll need to go the 2nd overside.. Not really something I wanted to hear but oh well..
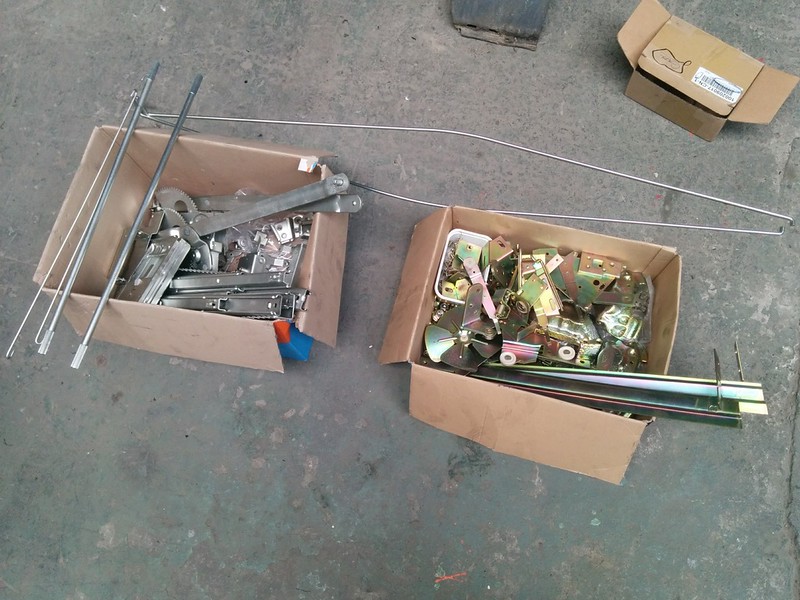
I also went through some of the old part boxes and sorted everything in a sorting cabinet.
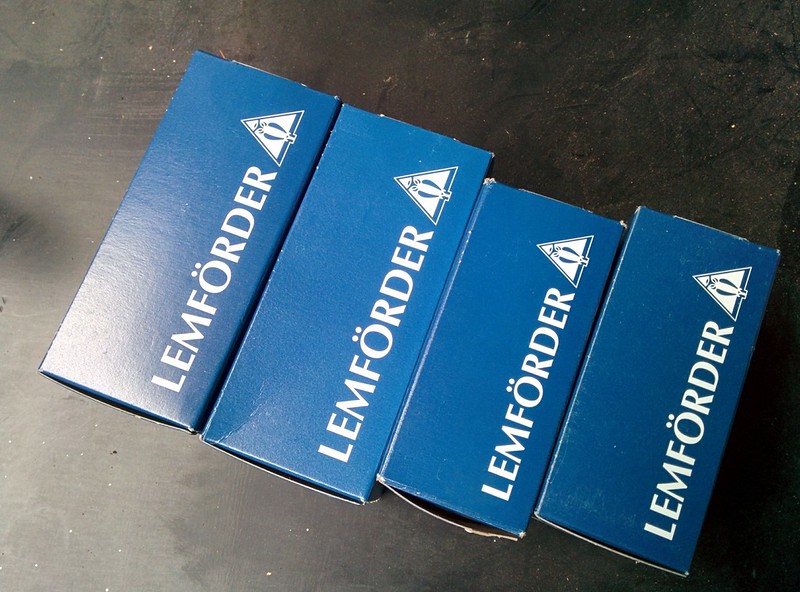
And of course got more parts

 Last edit: by D_Martijn
Posted
Old Timer
Today my brother made a little dust collector using a big bucket with some water in. when the dust gets sucked in the bucket, a tube that's just above the water surface prevents the dust from getting in the shop vac.
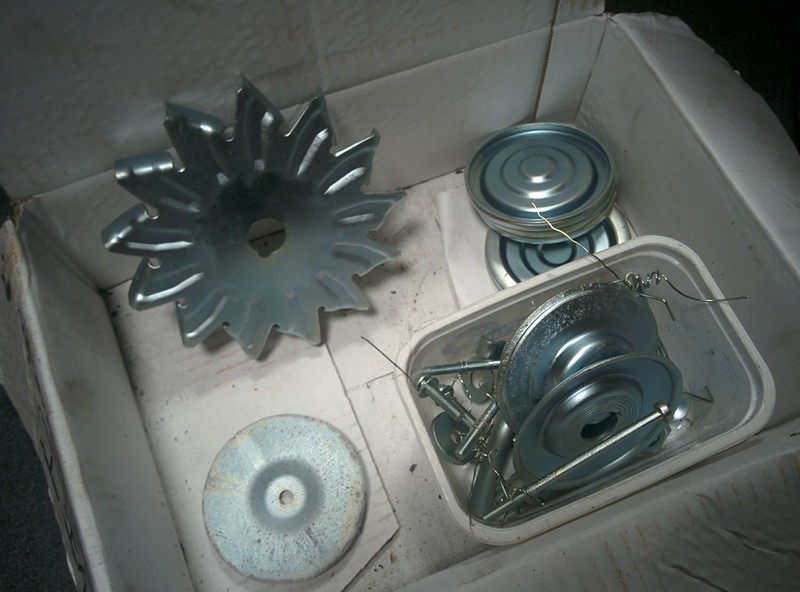
When he was doing that, I was organizing some of the other parts that we got with us from home that were stil laying in the garden shed.
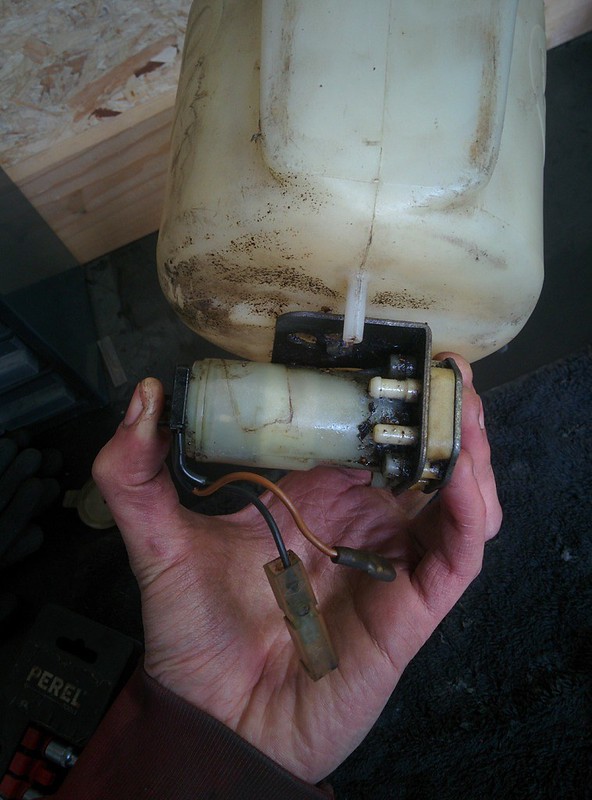
I started with cleaning and removing the windscreen wiper pump from it's container. These brackets and bolts will get plated too.

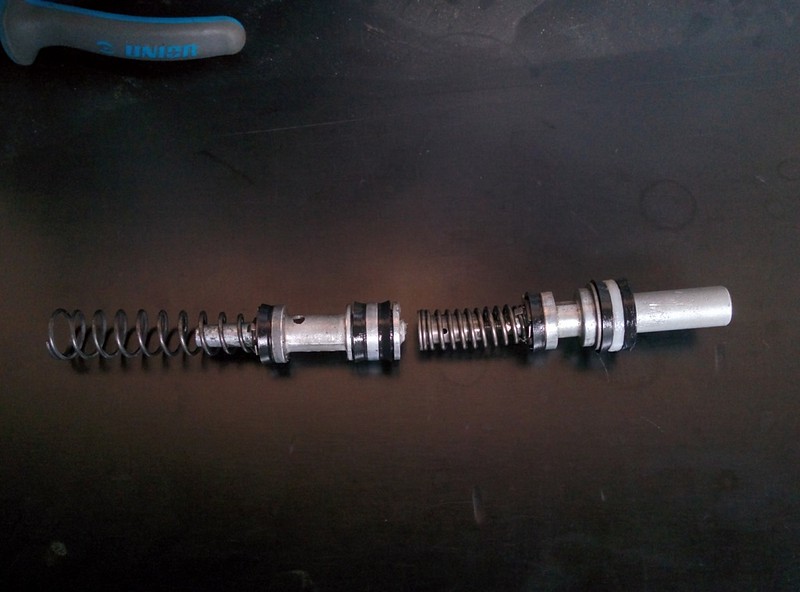
Then I removed the old seals of the master cylinder and replaced them with a set of new ones from Walloth Nesch.
Cleaned the aluminium tube of the right piece as it was a bit corroded
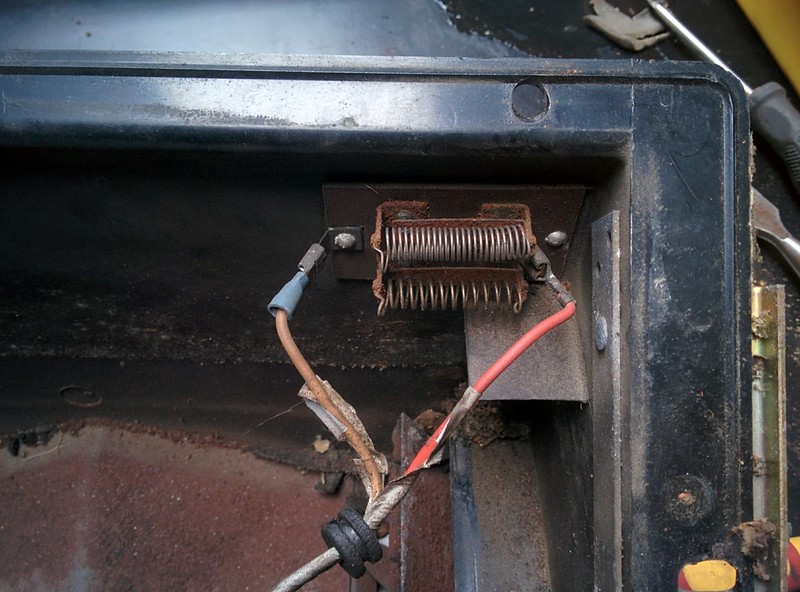
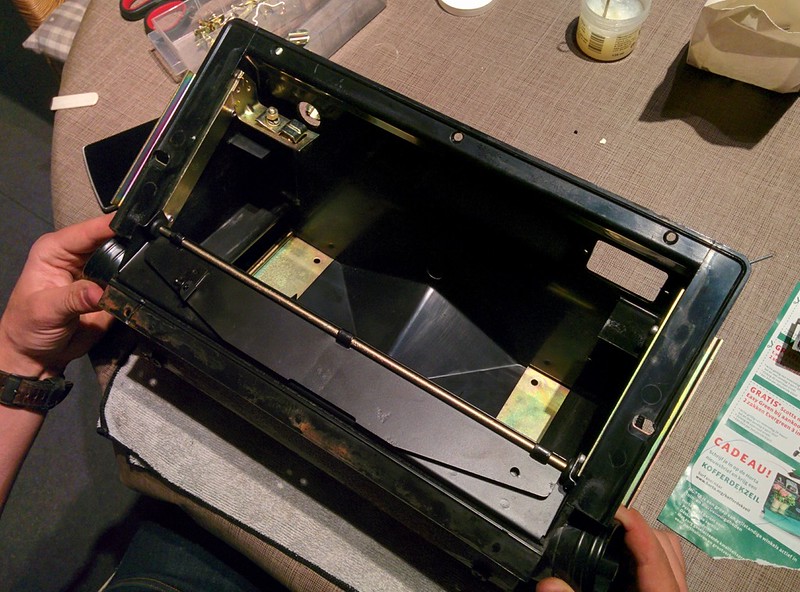
Meanwhile my brother took apart our heater core. The plastic casing has cracked but we have another one (earlier type) as a spare so we'll transfer the housing over

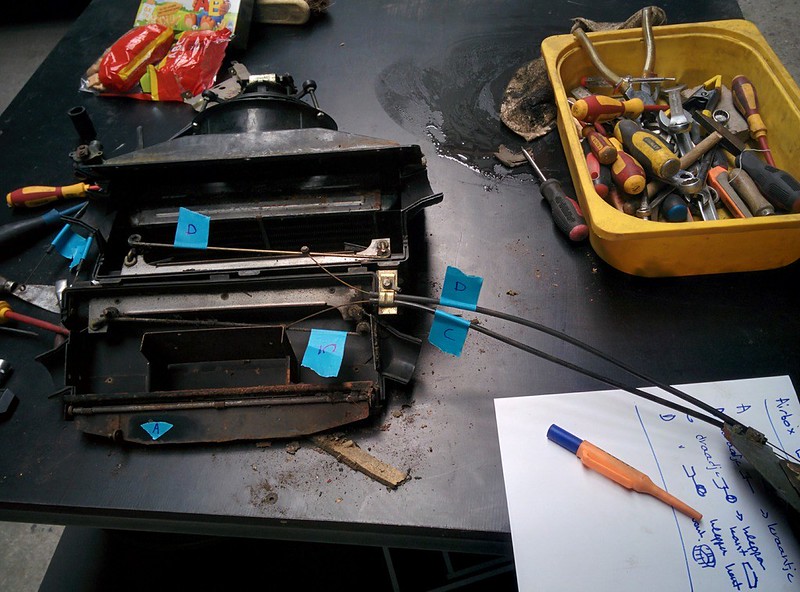
Resistors still in tact
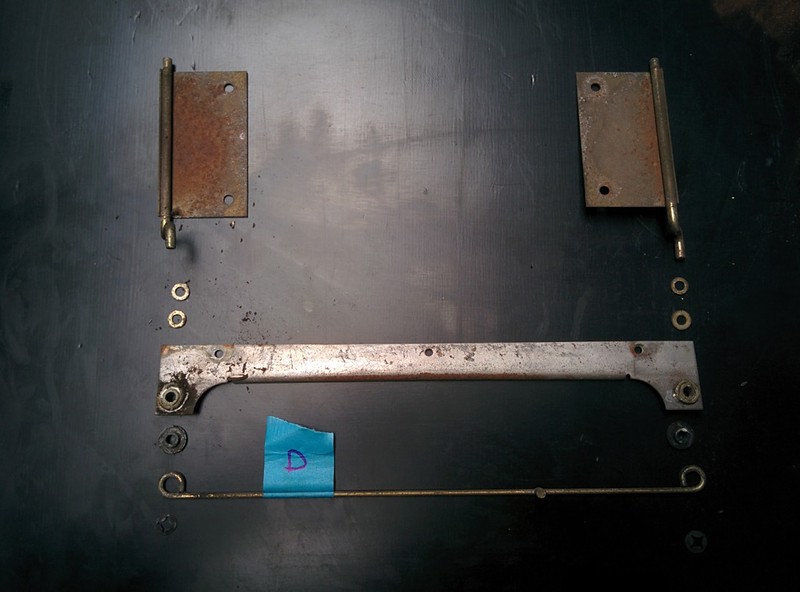
Everything laid out and labelled accordingly
In the evening we visited a older gentleman where our VW Golf mk1 had stayed over for the winter.
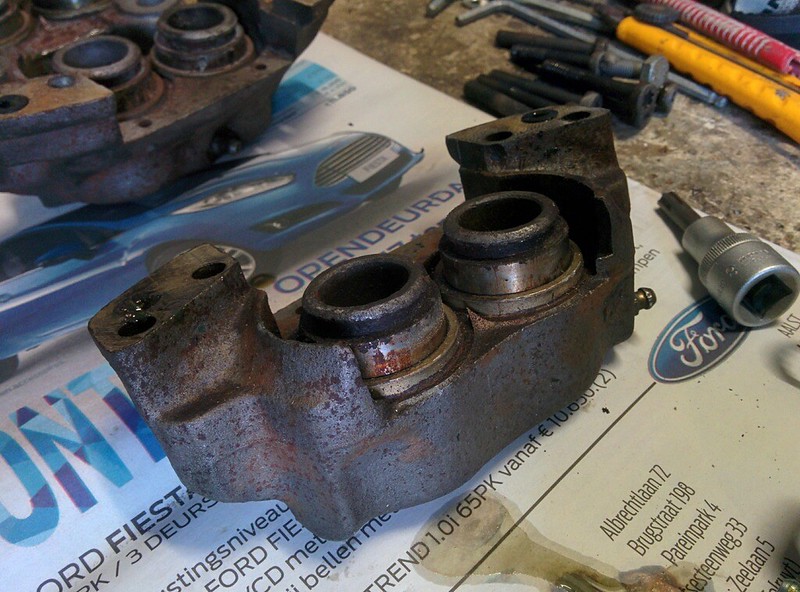
We took our front calipers with us and asked if we could lend his grease pump to push out the old pistons.
Went very easy, we'll pull them with a pulley removal tool for the final depth.
Last edit: by D_Martijn
Old Timer
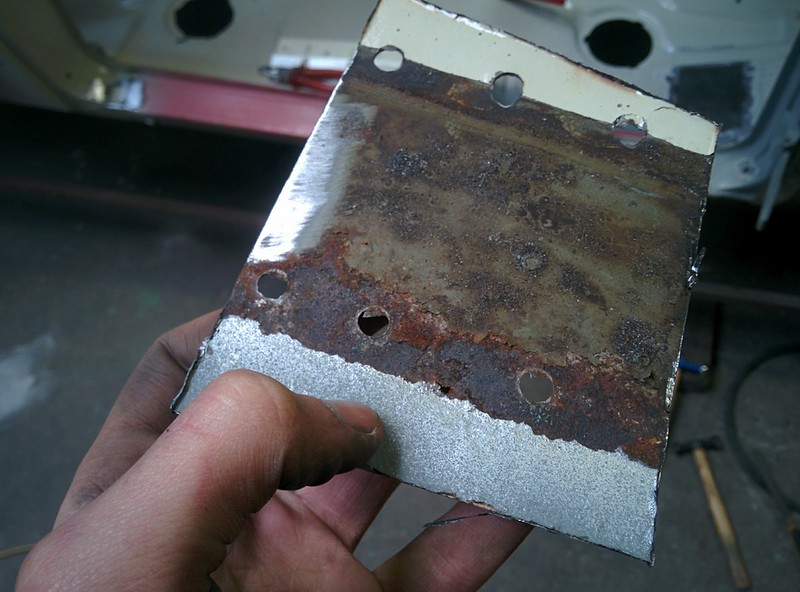
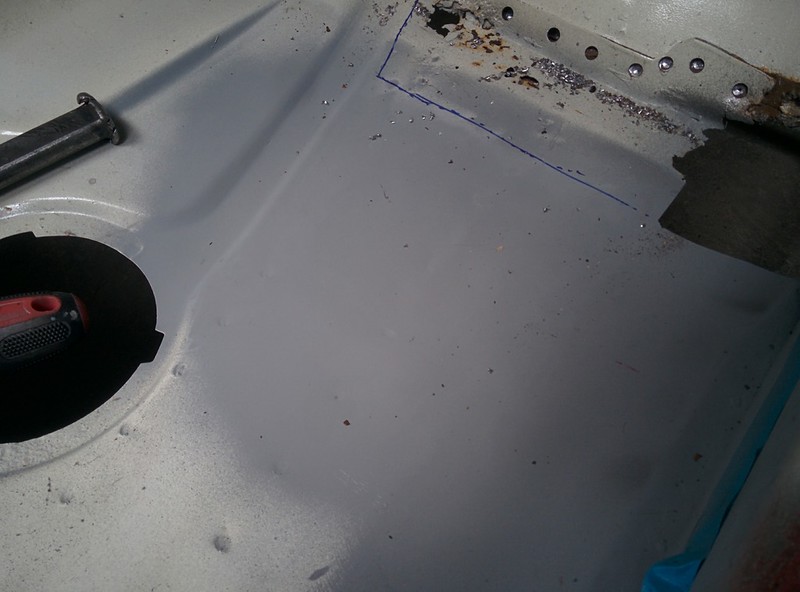
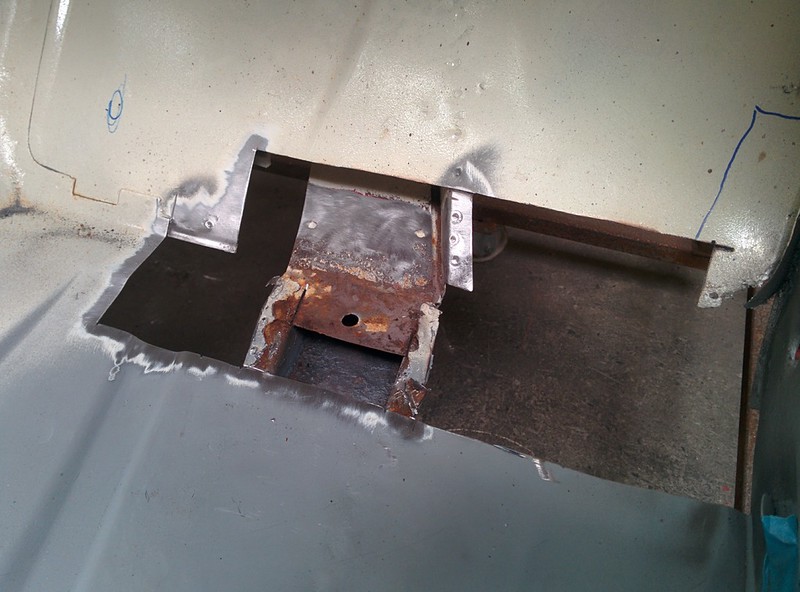
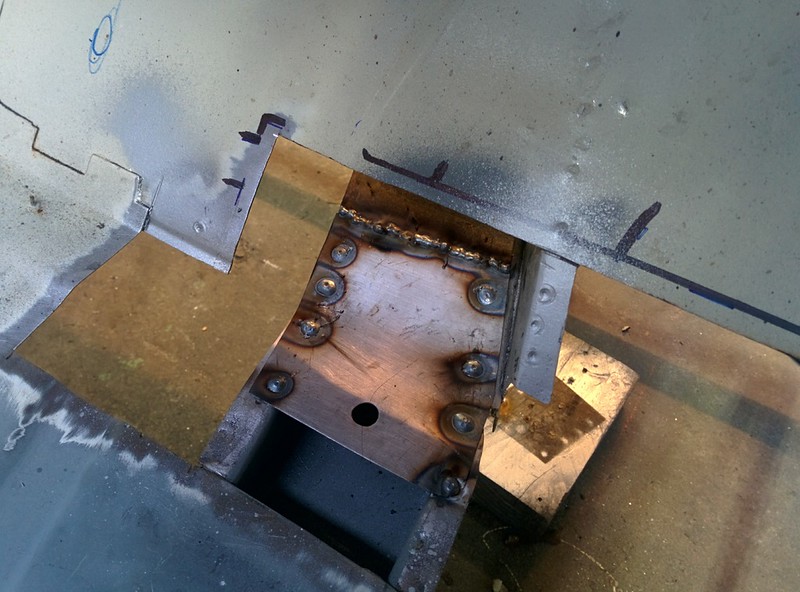
Today I got started with cutting out a little piece of of the front passenger floor. There was a small hole from inside. When looking under the car you could see the floor separating from the chassis rail.
Rust lurking between the floor and chassis rail
When I was cleaning out the inner sides of the chassis rail I noticed the previous owner also spayed some kind of tectyl/dinitrol in side of them.
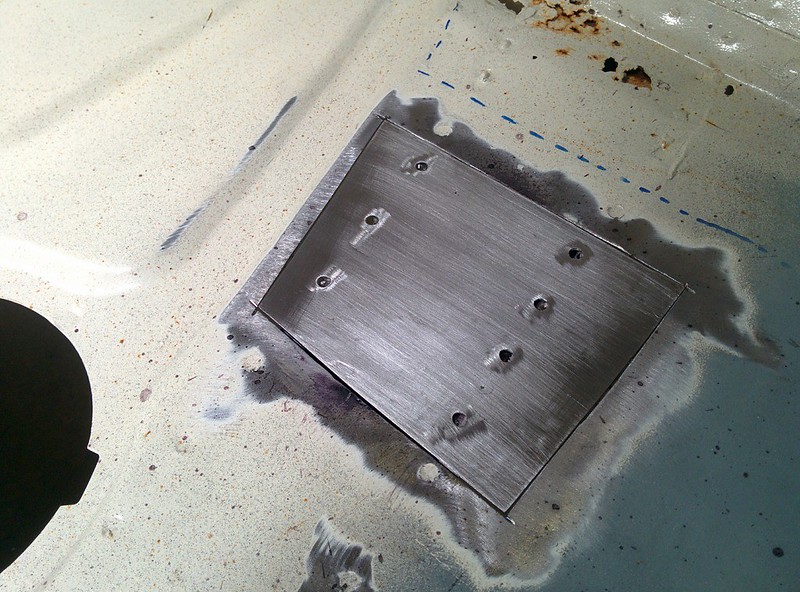
There was some small rust spots which I removed with the angle die grinder. I then sprayed brunox and zincspray in the chassis rail.
New patch panel
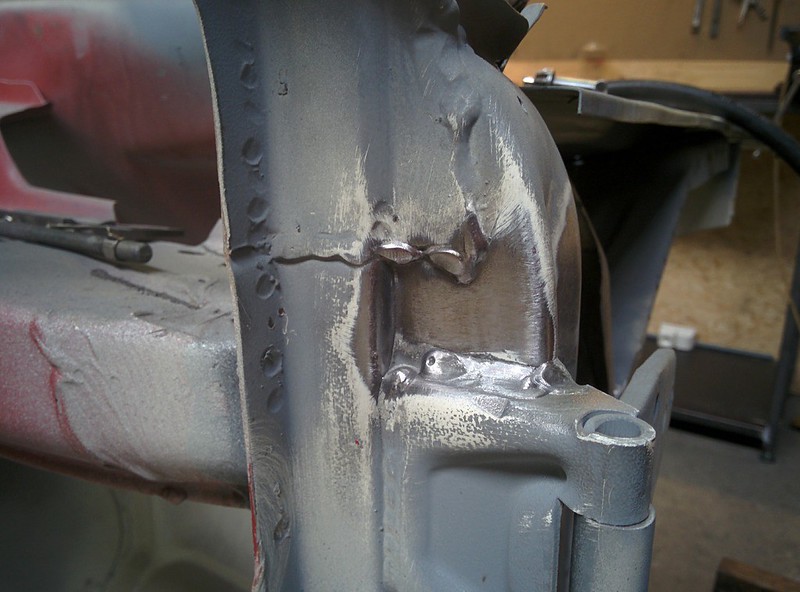
While the zinc spray was drying I ground the weld flat between the hinge and a pillar. The pneumatic powerfile came in handy for this


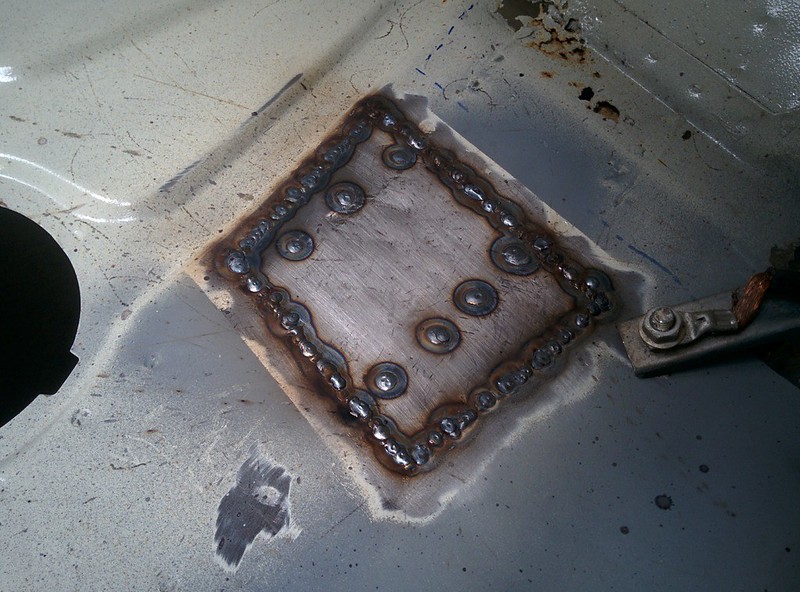
All welded in, I also ground the welds flat but don't have a picture of this..
Last edit: by D_Martijn
Old Timer
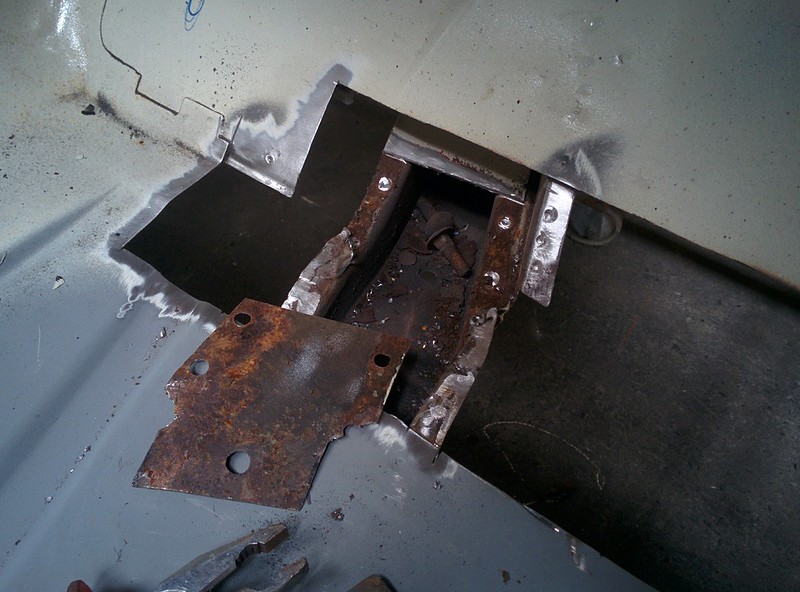
This part will get cut out, I started with drilling out the spot welds
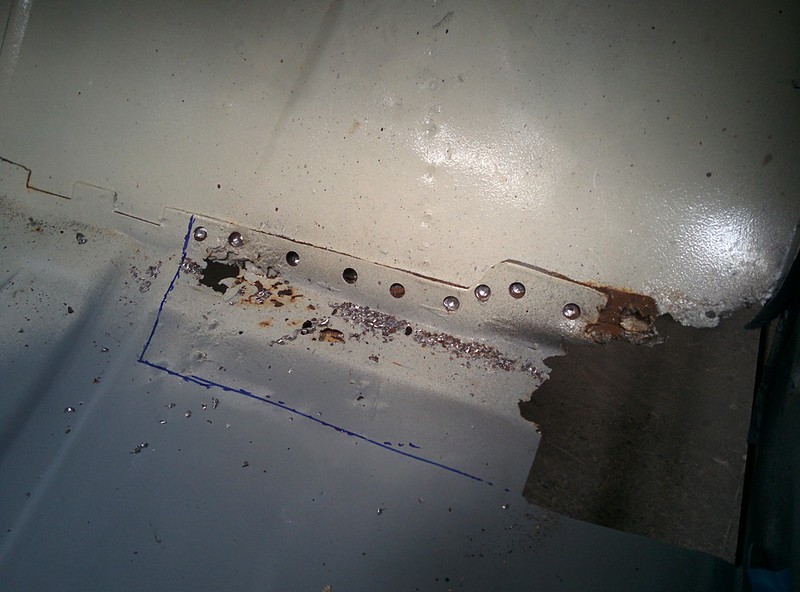
More rust, yay!
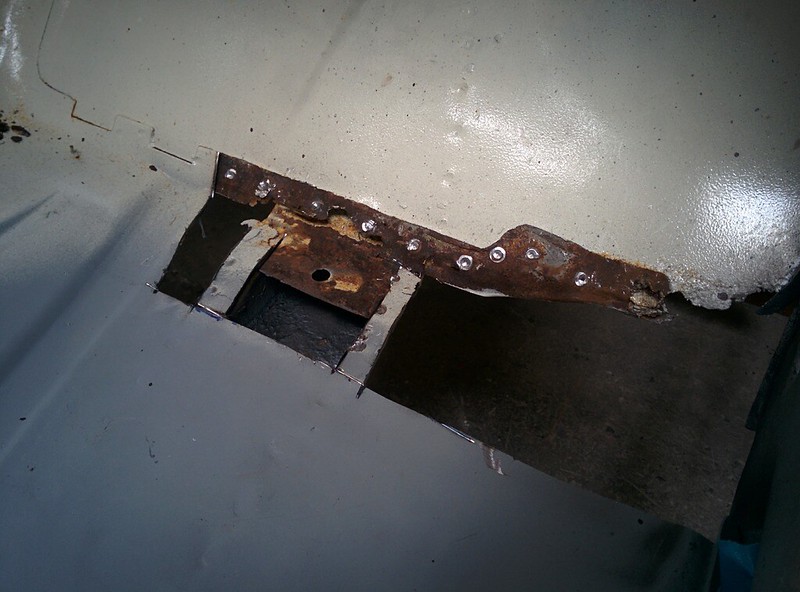
Decided to remove some more metal on the left side, just to be sure there was no rust lurking under the flanges

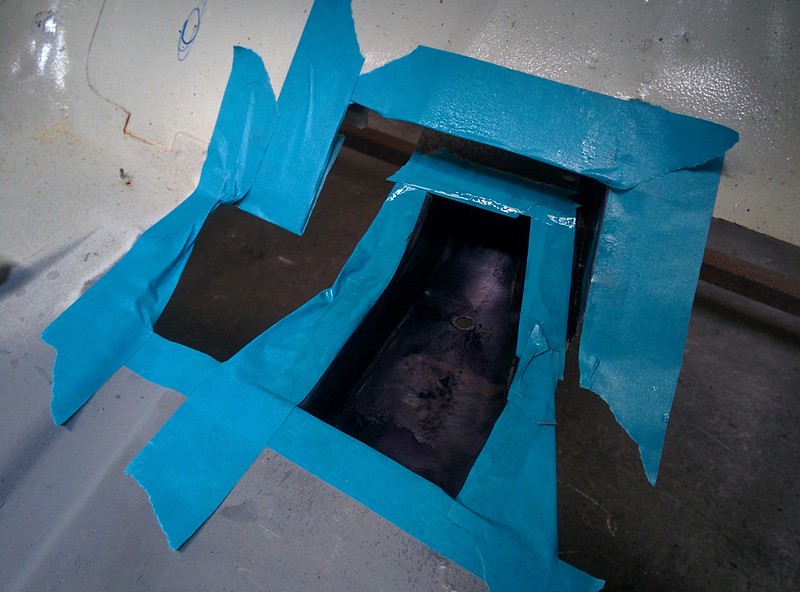
I then removed the upper part of the firewall
Found some bolts in the chassis rail when removing the upper sheet of the chassis rail

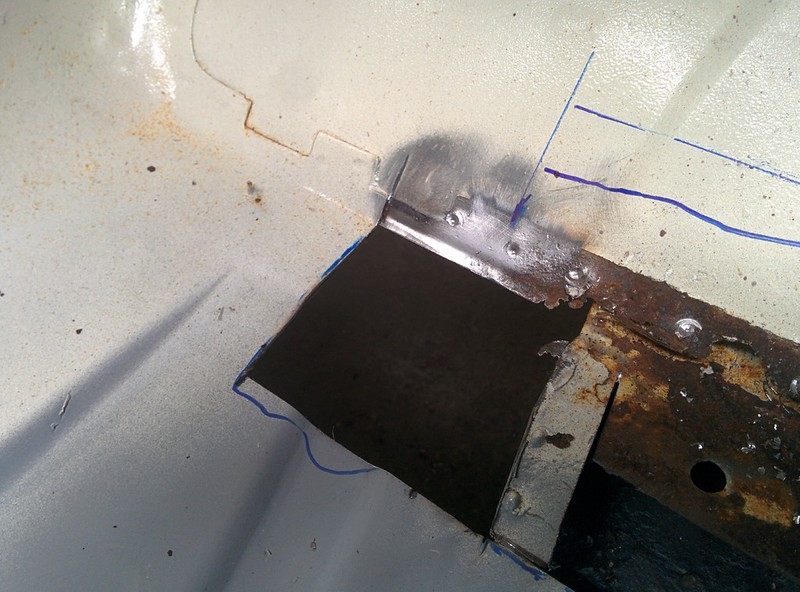
Cleaned out the chassis rail and sprayed some brunox inside. I already made a new patch for the chassis rail which I'll weld on tomorrow.
I'll then make a new piece for the firewall
Last edit: by D_Martijn
Old Timer
By shrinking the edge I was able to get the curvature pretty close.


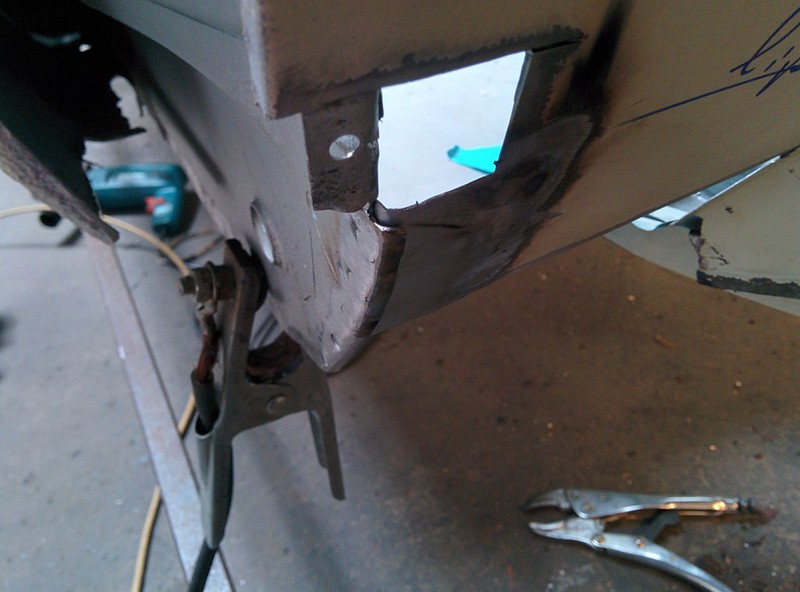
New patch welded in

Nice and tight agains the inner sill

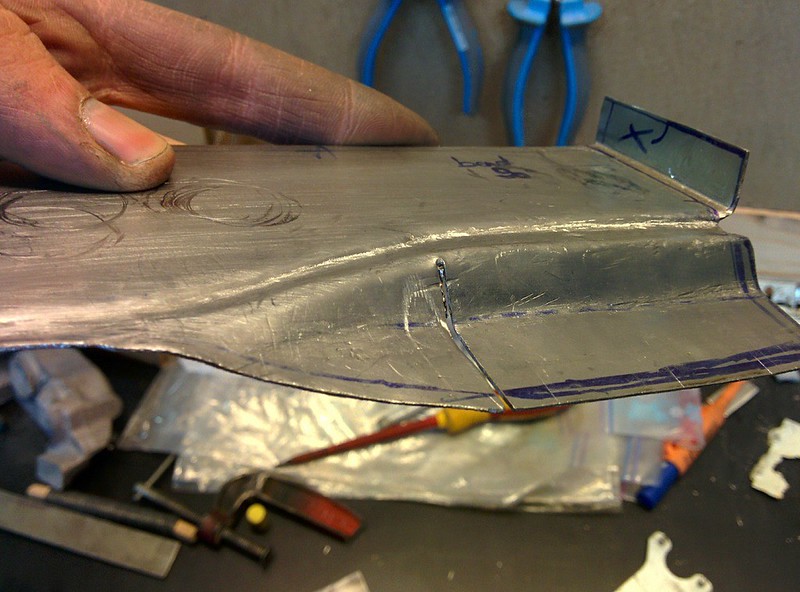
I then started with making the replacement panel for the firewall, the old piece had seen better days

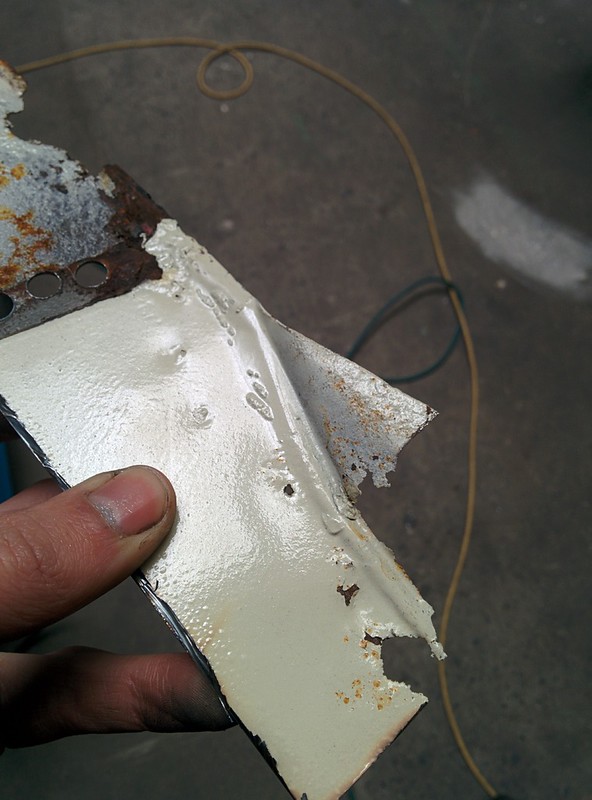
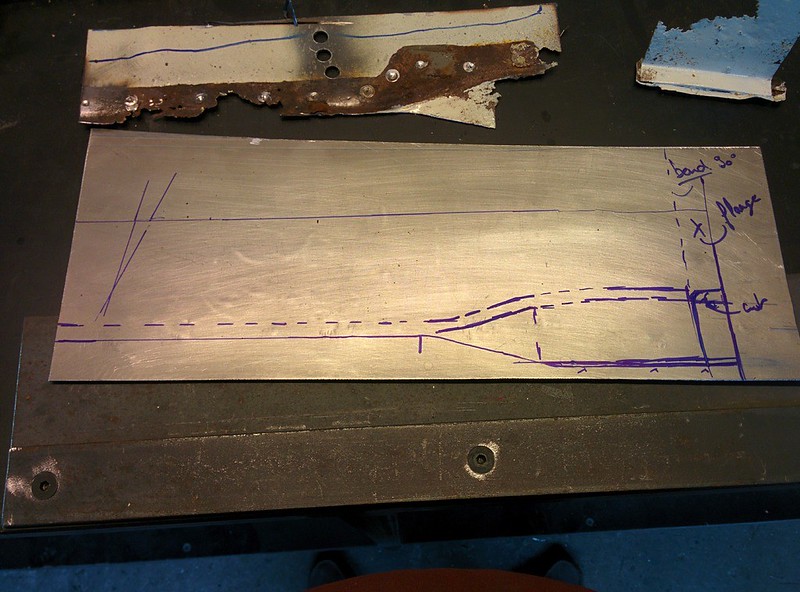
I hammered the old piece flat and laid it on a flat sheet of metal. By drawing on the metal I was able to copy the layout of the bends and curvatures.

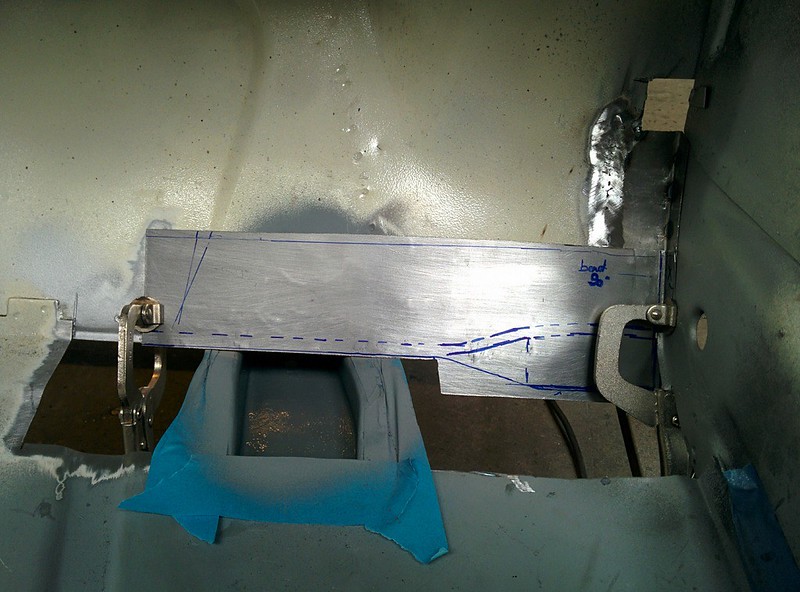
First time fitting the new panel after I bended the 90deg flange that sits agains the inner sill. The patchs is still too big here

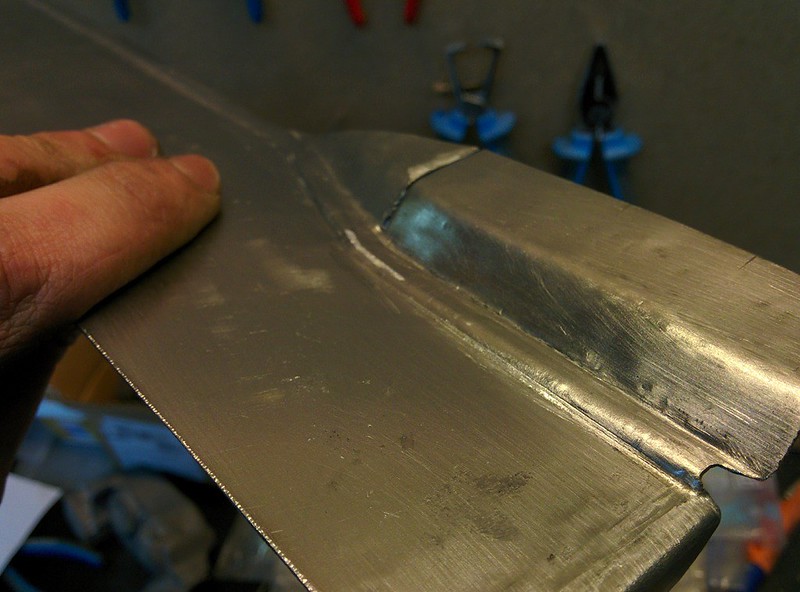
By placing two metal plates on each other, I was able to hammer a swage line in the sheet.

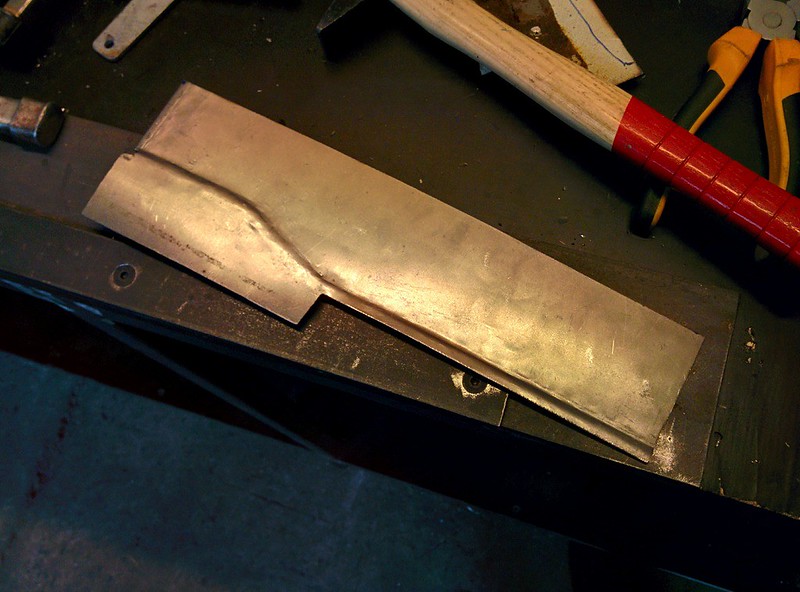
After hammering some more and defining the swage line, I bended the lower piece of the patch.

Other side
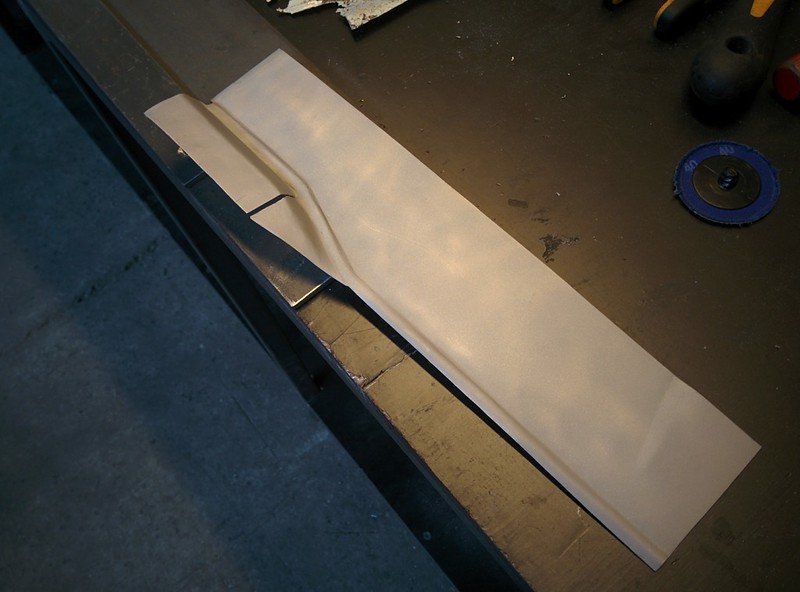
To see the lines easier I sandblasted the piece. I also welded the little slot (forgot to take a picture of this)

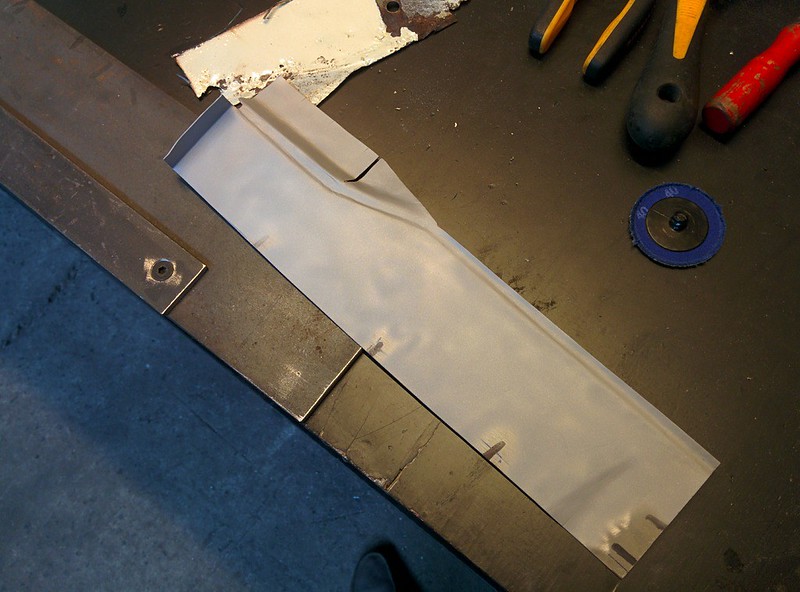
After making sure it still fits, I started on welding the patch for the chassis rail

Ground smooth

Tomorrow I'll weld this piece in and start making the floor piece
Last edit: by D_Martijn

Old Timer

Mars red 1.8 GTI tintop now MOT'd and on the road!
http://vwgolfmk1.org.uk/forum/index.php?page=topicview&id=projects%2Fyour-mk1-golfs_2%2Fwent-to-look-at-a-golf&kfs79=150
http://vwgolfmk1.org.uk/forum/index.php?page=topicview&id=projects%2Fyour-mk1-golfs_2%2Fwent-to-look-at-a-golf&kfs79=150

Local Hero


Andy
LINCOLNSHIRE REGION - https://www.facebook.com/groups/467122313360002/
1983 MK1 Golf GTI Campaign Model - Under (looooong) resto!
1962 Rover P4 80
2002 BMW 745i
2008 BMW Z4 2.5Si
LINCOLNSHIRE REGION - https://www.facebook.com/groups/467122313360002/
1983 MK1 Golf GTI Campaign Model - Under (looooong) resto!
1962 Rover P4 80
2002 BMW 745i
2008 BMW Z4 2.5Si
Old Timer
Saulty said
Good attention to detail and great fabrication skills. It's good to see updates to this thread again and keep the detailed updates coming, I find it quite educational for when I need to fabricate something!
Thank you! Still learning as I go

Hairyarse said
Fab-tastic Martijn
Thanks, Andy!
Old Timer
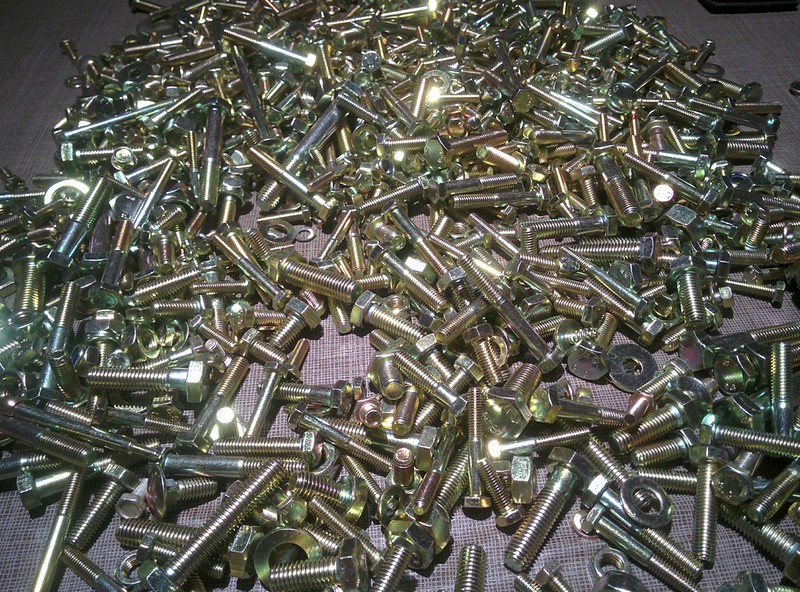
All the parts that need to get sorted
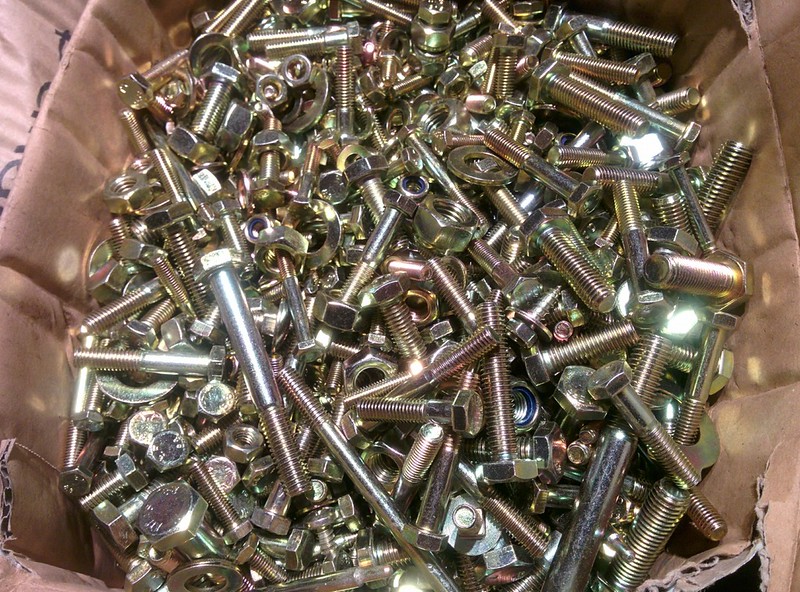
Box full of new nuts, bolts and washers

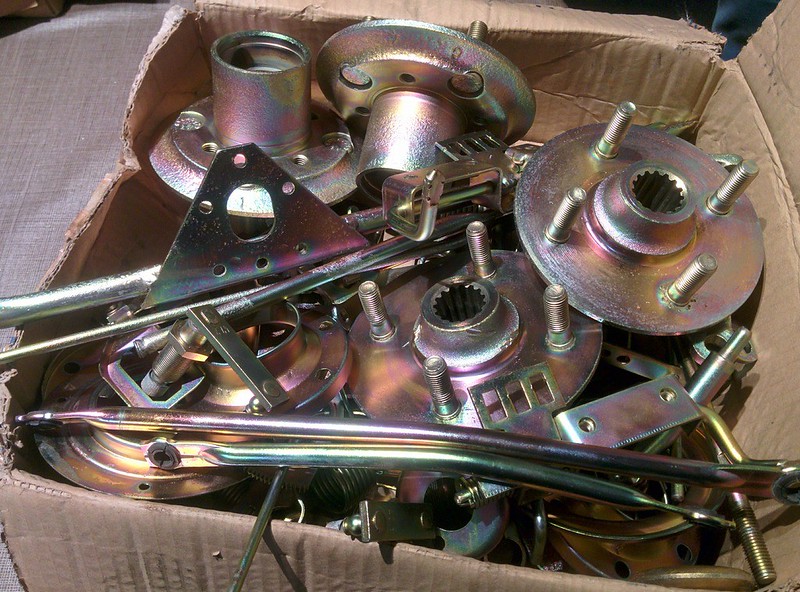
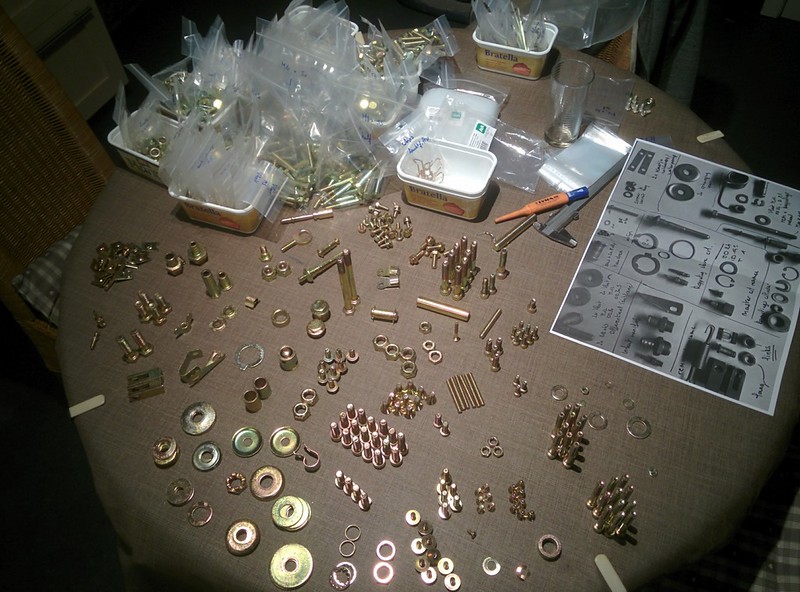
Car parts, hubs, rods, brackets…

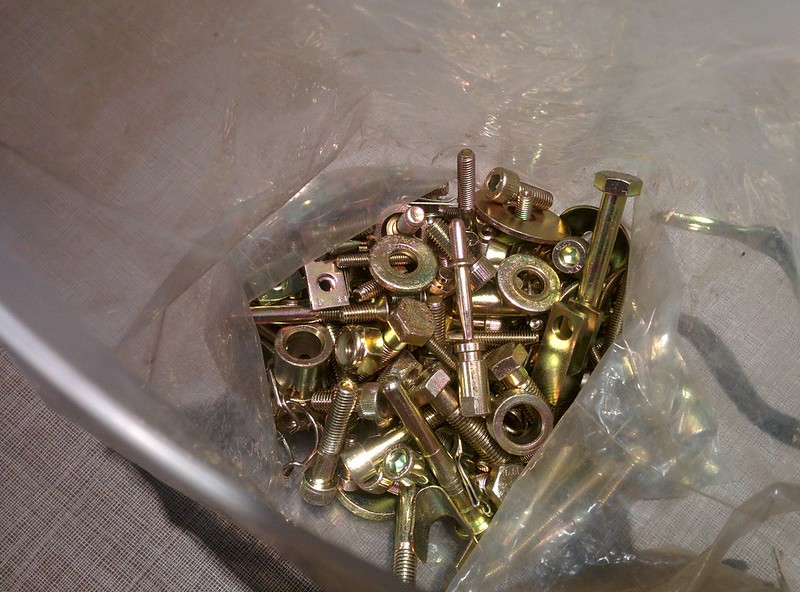
Some more specific nuts and bolts


And some white plated parts, mostly for the alternator. The plates for the horns didn't turn out great, looks like these weren't steel..?
I'll go ahead an blast these again and just paint them silver

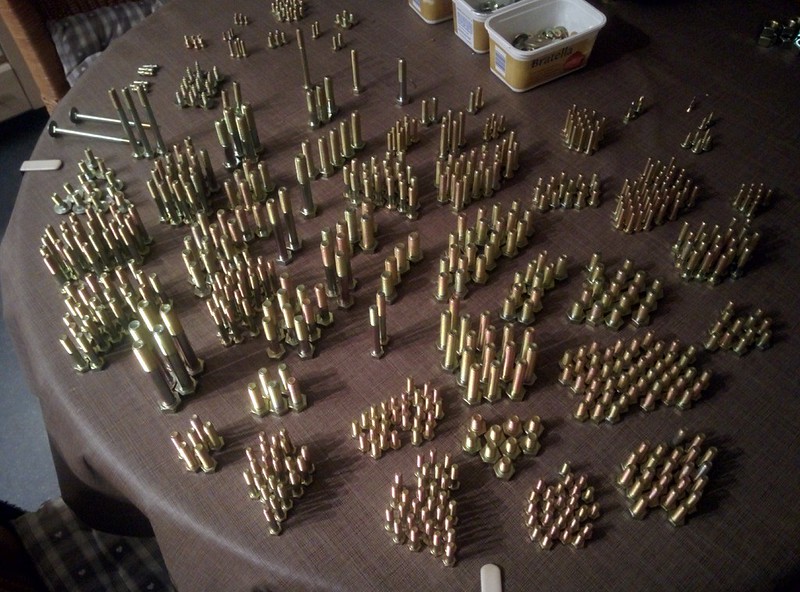
And the sorting begins!

By putting the bolts on their head, it's easy to put them together length wise

All nuts, bolts and washer in bags


And started sorting the more specific nuts and bolts.
By printing the pictures I took when sandblasting the parts it's very easy to sort everything!

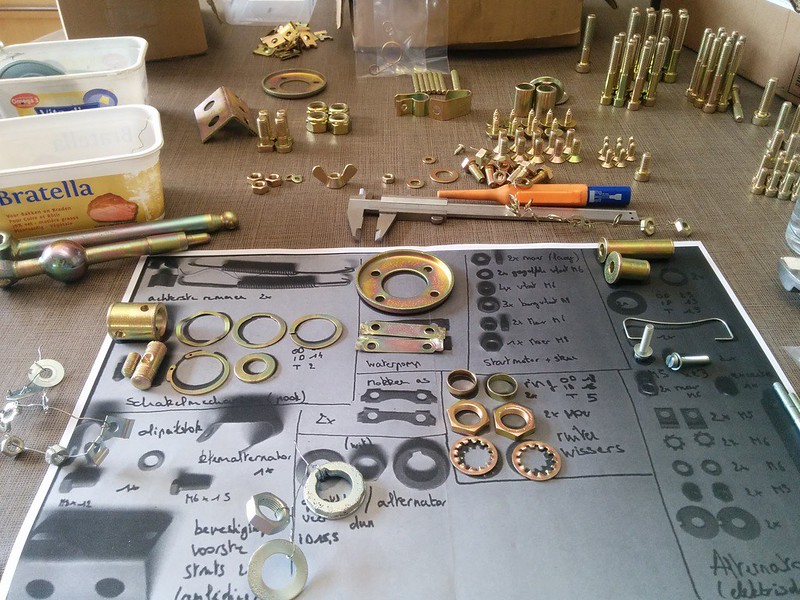
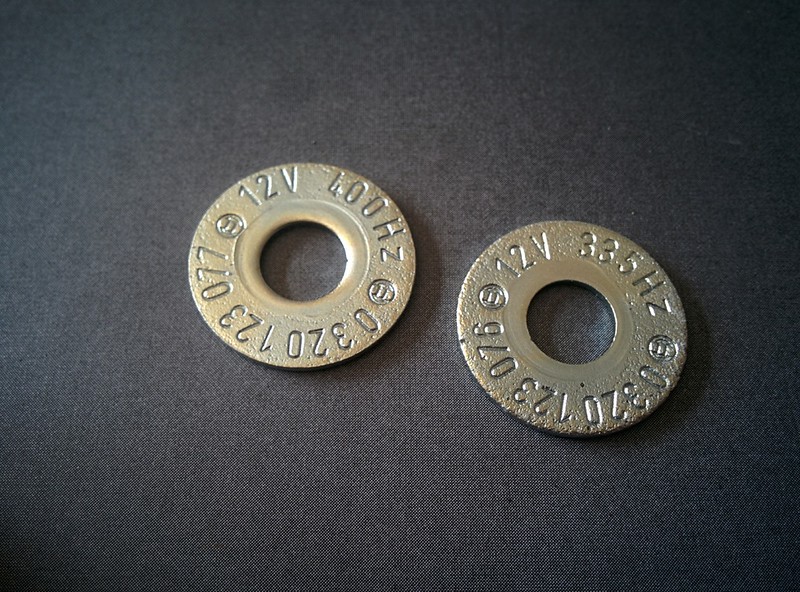
Gotta love details like these
Washers for the horns with their Hz rating

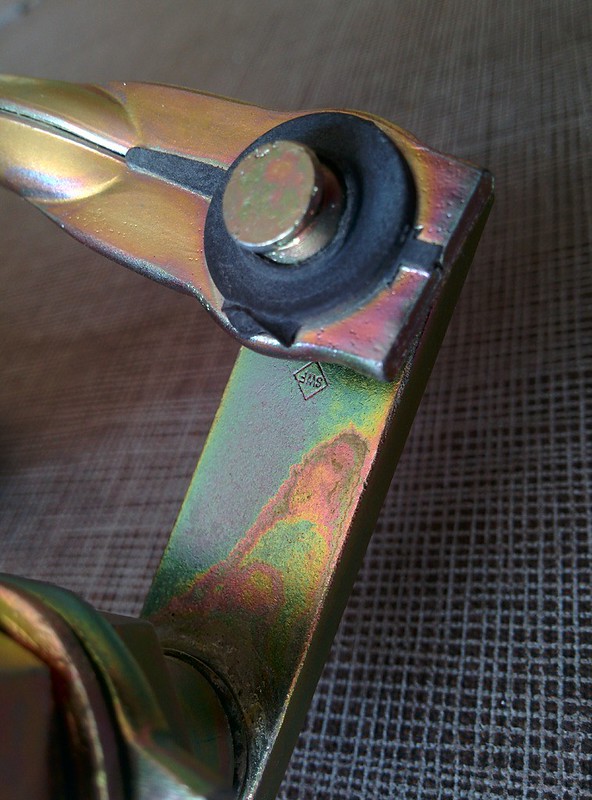
SWF (now Valeo?) marking on the wiper arms
Last edit: by D_Martijn
Posted
Settled In

List of past and present cars ive owned
1997 corsa 1.2 poop
2003 Ibiza 130 tdi hybrided to 240bhp
1991 Mk 2 jetta calypso green 1.6td
2001 MG ZT 190+ v6 in trophy blue…. Sold to my brother
2003 Golf GTI TDI 150 black leather heated recaros the
the
1997 corsa 1.2 poop
2003 Ibiza 130 tdi hybrided to 240bhp
1991 Mk 2 jetta calypso green 1.6td
2001 MG ZT 190+ v6 in trophy blue…. Sold to my brother
2003 Golf GTI TDI 150 black leather heated recaros
the
Old Timer
Thanks, Philip! Can't wait to start reassembling all the bits back togetherPhilipMcTDI said
I love your attention to detail, great project matey
After sorting the plated parts (at home) I went to the workshop and cleaned it up a bit since all the workbenches were full of glass from blasting.When my brother arrived we looked into pressing in the bushings, with some vaseline and the bench vise this went very easy.

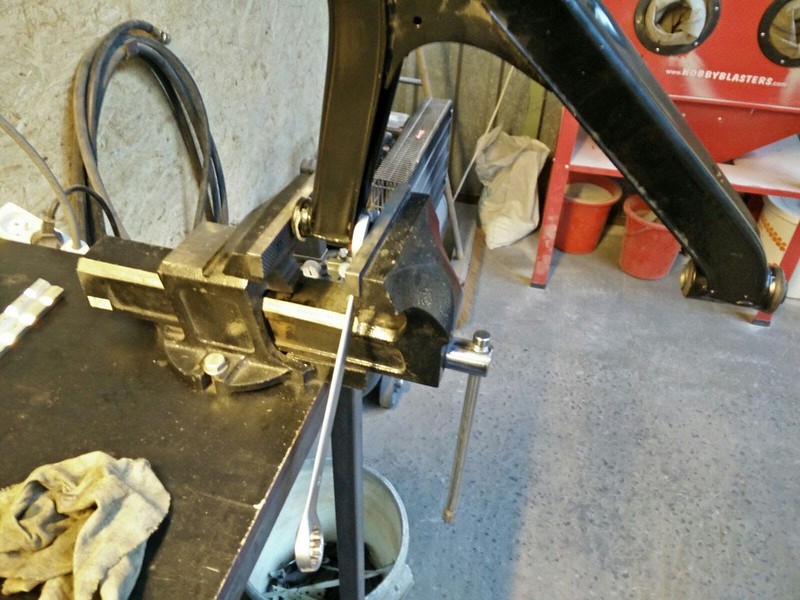
And done.

I also test fitted the parts on the rear beam but I don't have any pictures of this.
Last edit: by D_Martijn
Local Hero


Andy
LINCOLNSHIRE REGION - https://www.facebook.com/groups/467122313360002/
1983 MK1 Golf GTI Campaign Model - Under (looooong) resto!
1962 Rover P4 80
2002 BMW 745i
2008 BMW Z4 2.5Si
LINCOLNSHIRE REGION - https://www.facebook.com/groups/467122313360002/
1983 MK1 Golf GTI Campaign Model - Under (looooong) resto!
1962 Rover P4 80
2002 BMW 745i
2008 BMW Z4 2.5Si
Old Timer
Yes indeed! :pHairyarse said
That's a lot of nuts 'n' bolts!
___
Finally finished welding the passenger side floor.
Final piece was this panel I made out of some flat sheet by using the remainings of the original floor and based on the replacement panel from Walloth Nesch for the driver side floor

And welded in
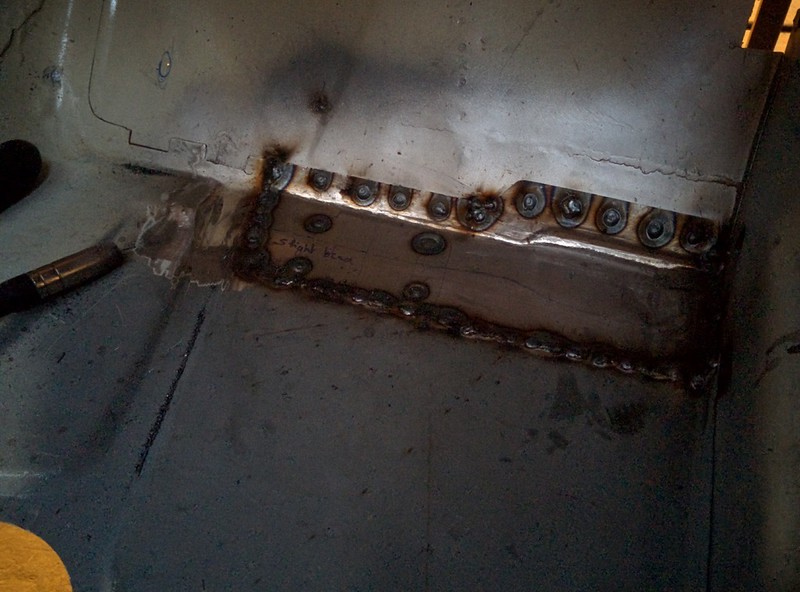
Still need to grind down the welds and clean up the panels. On to the A pillar!
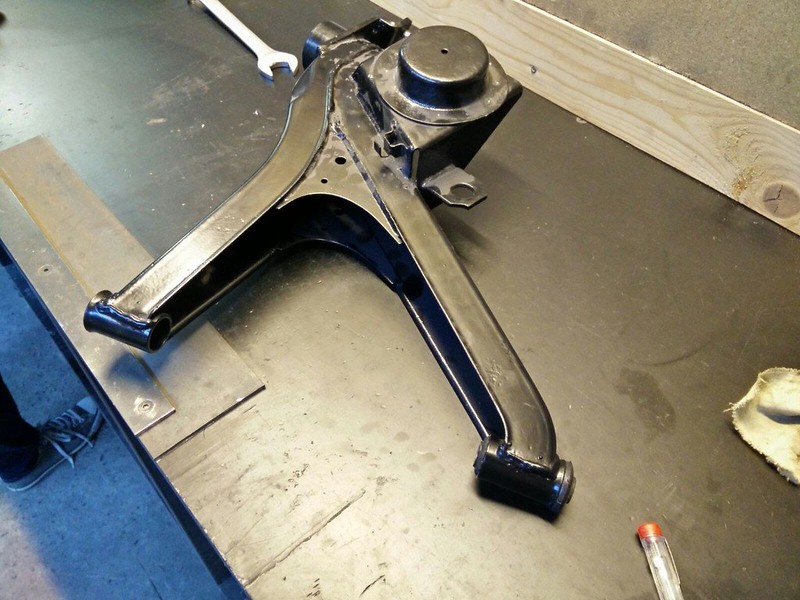
Also pressed in the bearings on the rear arms and poured some Por 15 inside of them. (Also did the rear beam)
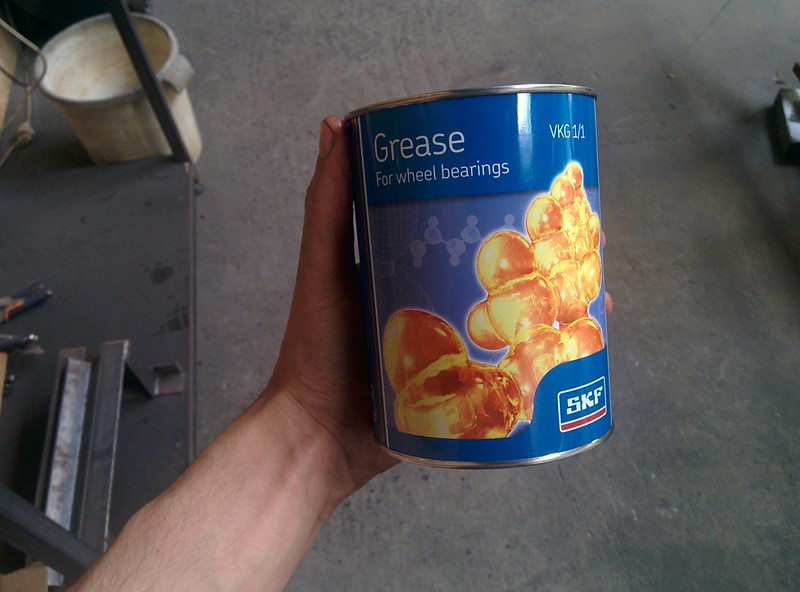
Got myself a nice bit pot of bearing grease

With my fingers I applied grease inside the grooves, making sure there was grease coming out of the bearing cage on the other side of the bearing. I then packed the other side of the bearing and tapped it in place with a big socket.

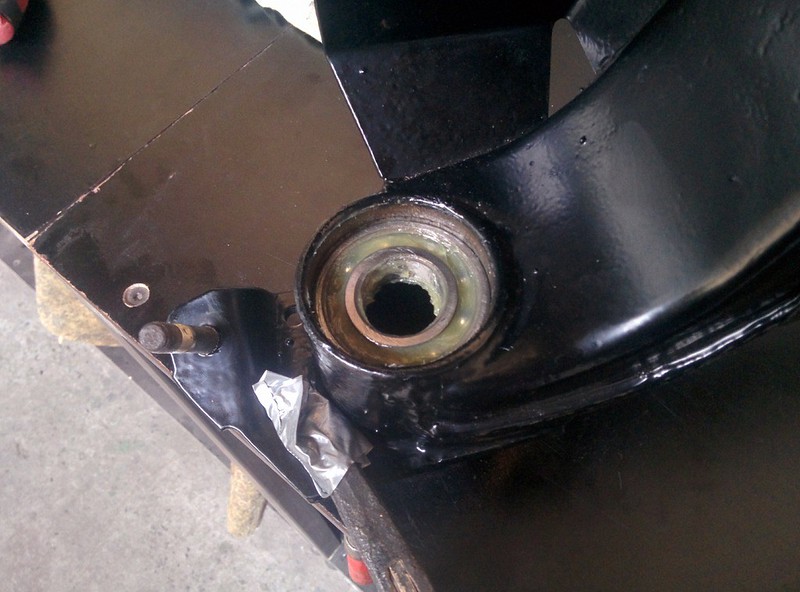
When installing the other bearing, BMW workshopmanual states to apply 35g of grease on the tube that sits between the bearings. It also says to measure the distance, I assume to make sure that the tube wont cause pressure on the inner bearing race?
You then add another washer and then finally tap the bearing in place.

Last edit: by D_Martijn
Old Timer


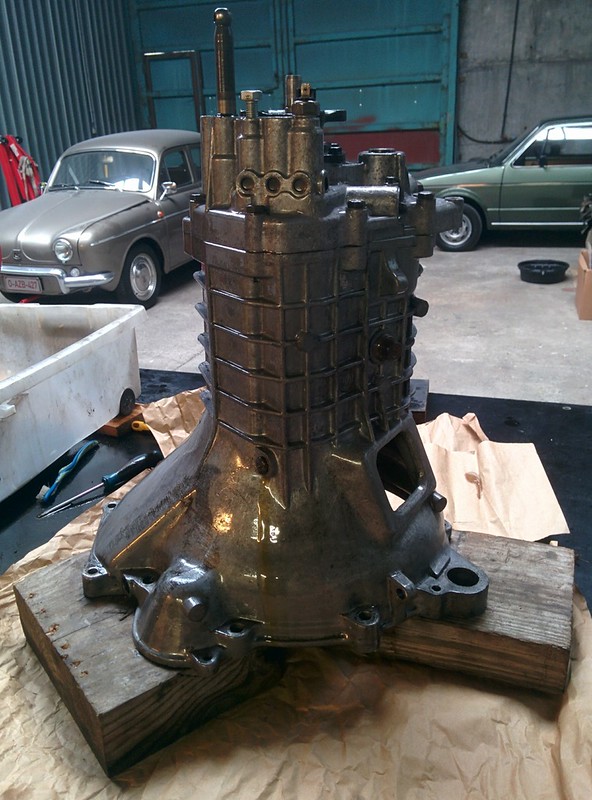
After I took this picture I noticed oil seeping out of the vent plug, decided to drain the transmission until I replace the seals.
The oil that was coming out was still very good! Looked almost new

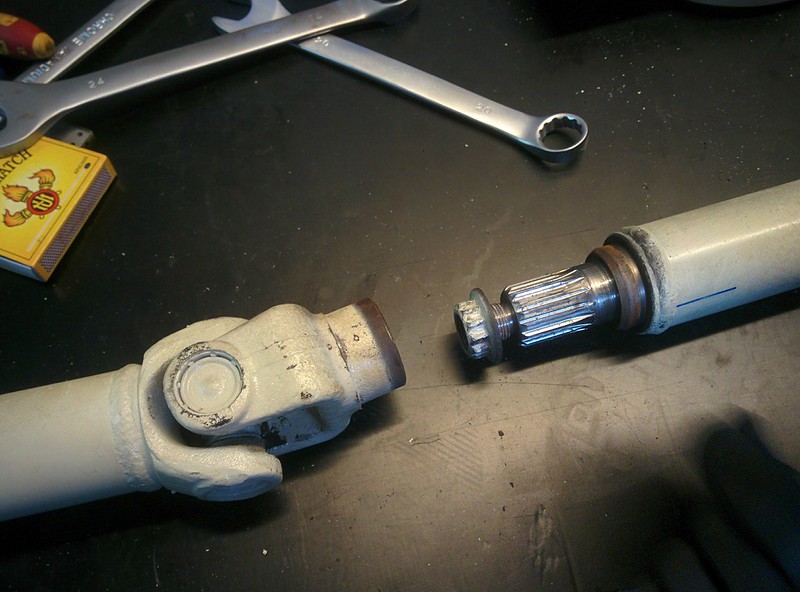
Removed the center bearing from the drive shaft.
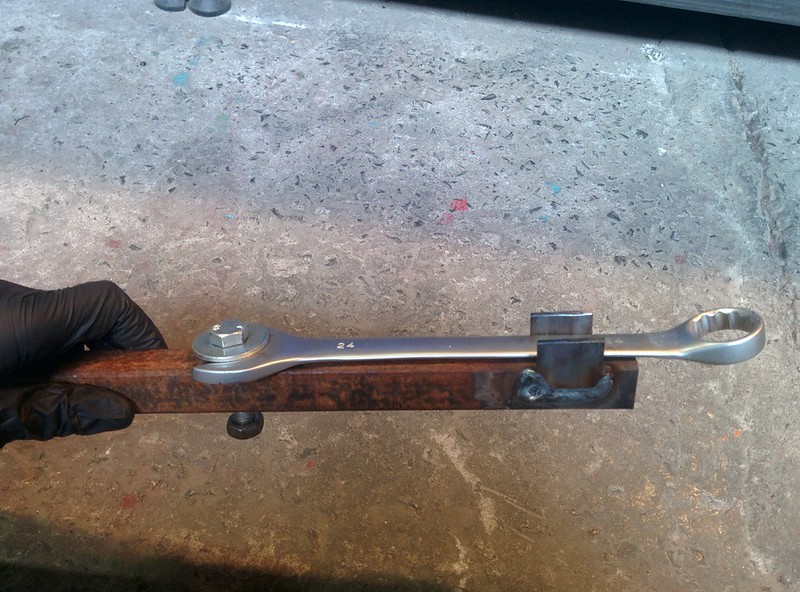
Since I do not have a big enough tube to slide over my wrench, I welded 2 short plates on a long piece of square tubing and drilled a hole through it so I could attach the wrench to the tube. Worked out great!
To make sure the drive shaft wouldn't spin, I use a steel L-profile and bolted the drive shaft to it, I then backed the car up on the L-profile using some wooden blocks.
The wrench

Both pieces removed, I'll first paint the driveshaft black before putting a new center bearing on.
Last edit: by D_Martijn
Old Timer
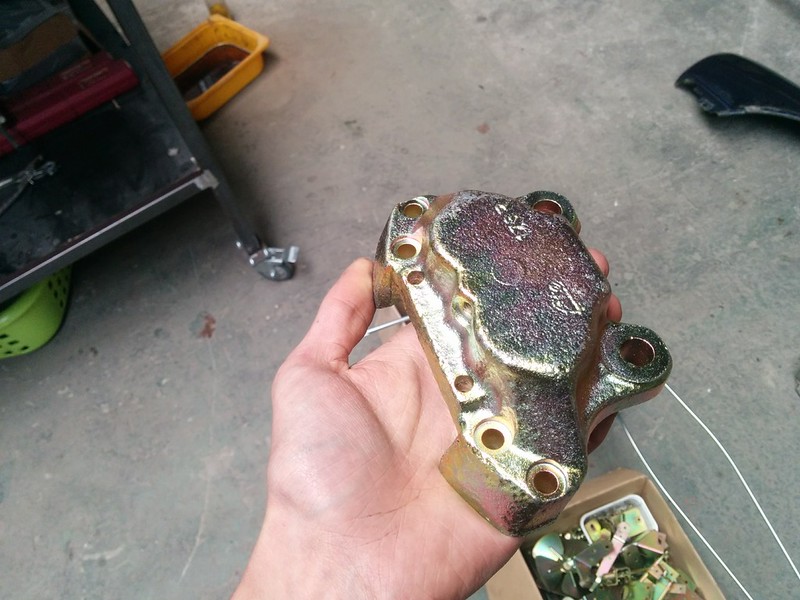
Got my second batch of plated parts for the Touring. Mostly interior parts and some stuff we forgot the first time.

Brake caliper

Last edit: by D_Martijn
Old Timer
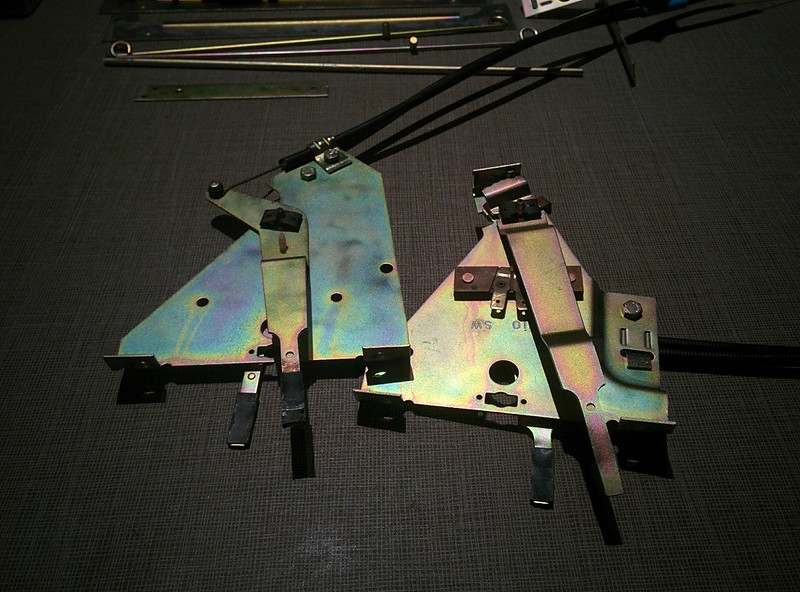
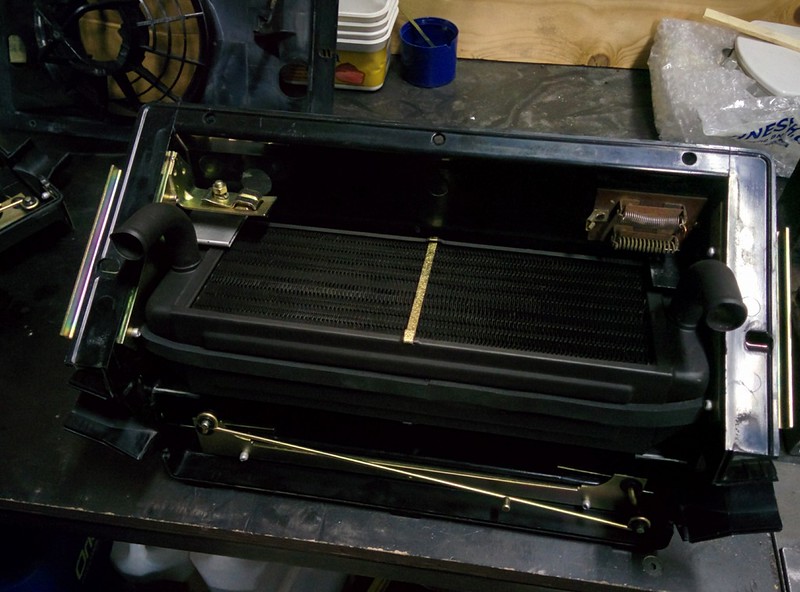
All the new parts pictured together

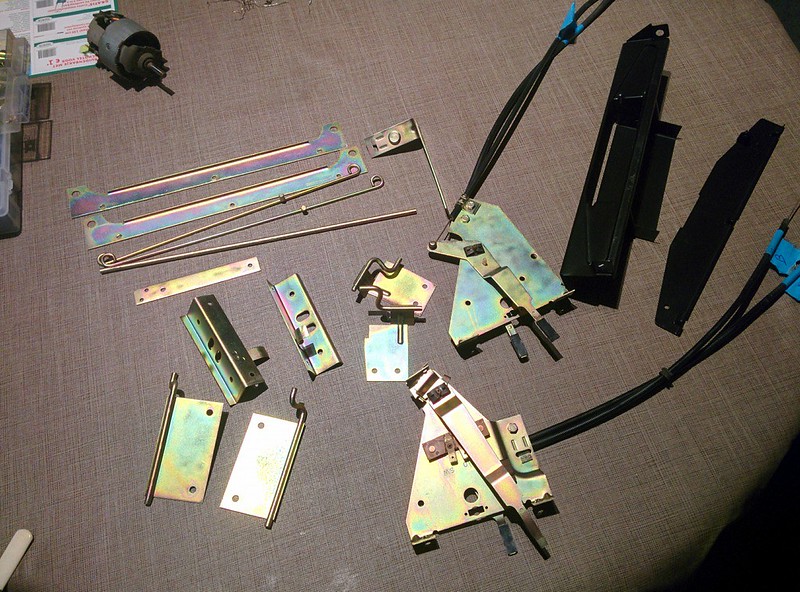
Controls

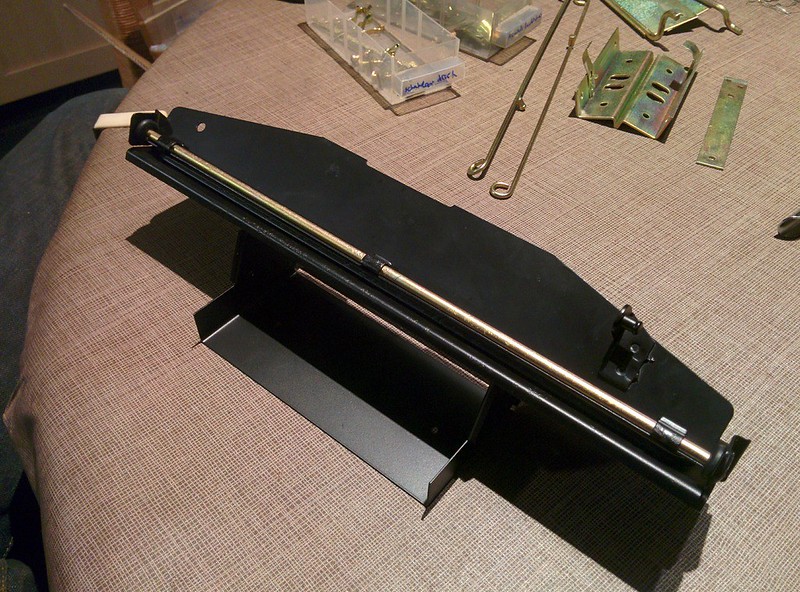
Also painted the big flap in black

I didn't revit the plated parts as it'll be easier to attach the foam


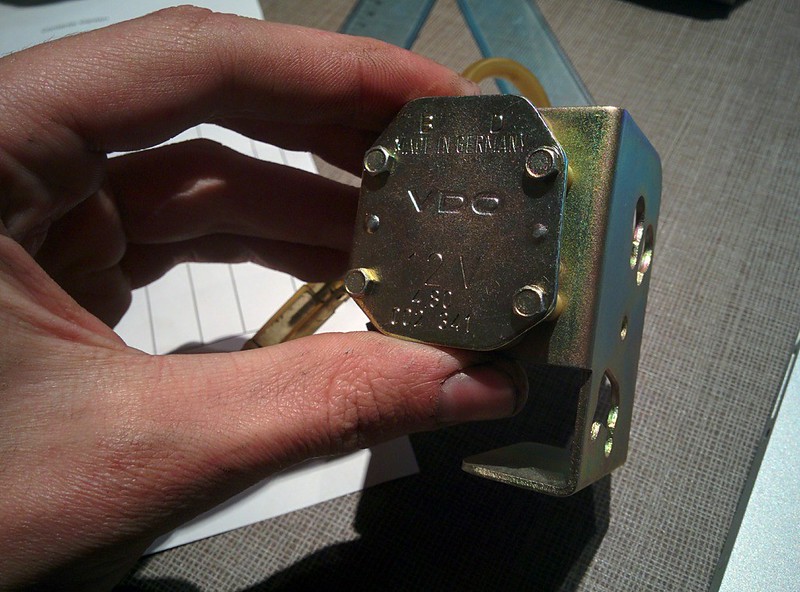
Also got the windscreen washerpump back together, gotta love these little details
Last edit: by D_Martijn
Old Timer

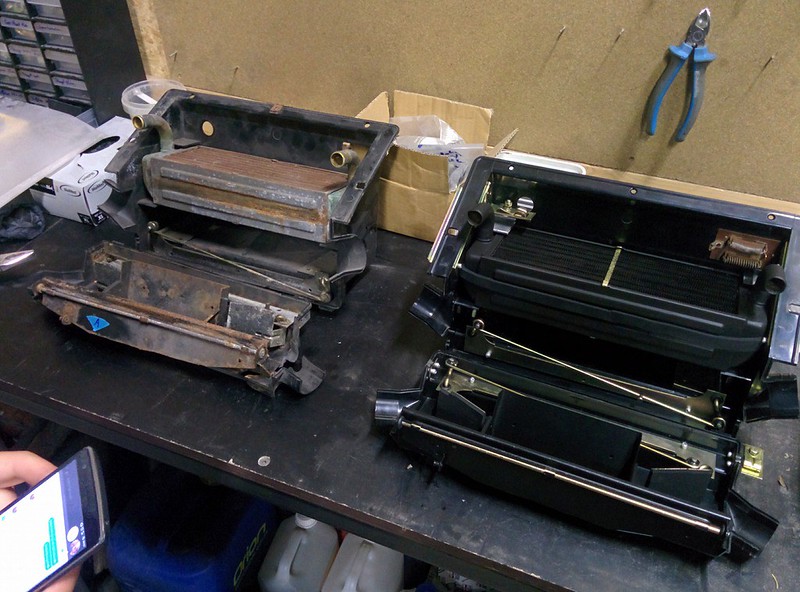
"Before" and after shot with an other heater box I had laying around. Turned out great!
Last edit: by D_Martijn
Posted
Local Hero


Andy
LINCOLNSHIRE REGION - https://www.facebook.com/groups/467122313360002/
1983 MK1 Golf GTI Campaign Model - Under (looooong) resto!
1962 Rover P4 80
2002 BMW 745i
2008 BMW Z4 2.5Si
LINCOLNSHIRE REGION - https://www.facebook.com/groups/467122313360002/
1983 MK1 Golf GTI Campaign Model - Under (looooong) resto!
1962 Rover P4 80
2002 BMW 745i
2008 BMW Z4 2.5Si
Old Timer
Hairyarse said
Attention to detail, as always, perfect
Thanks, Andy!
Haven't done much welding on the 02 as I'm pretty busy with the E30 atm.
Posted
Old Timer
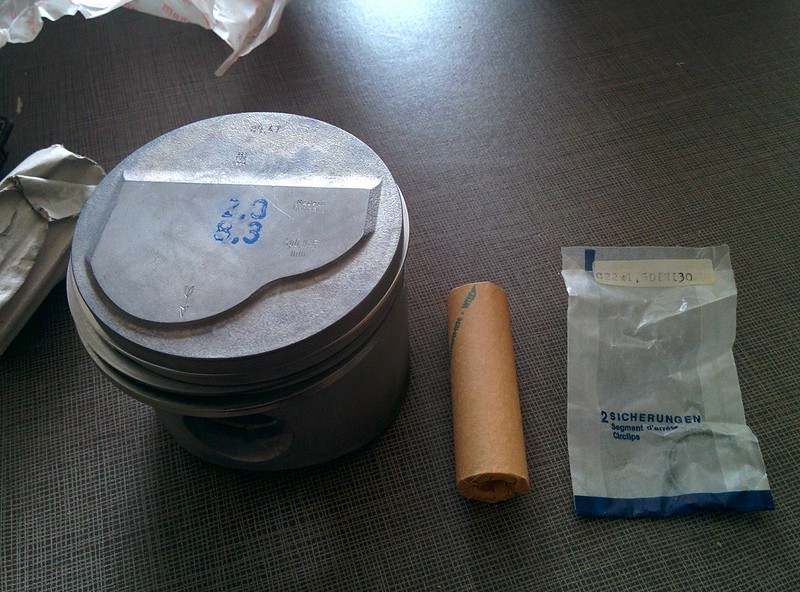
I stubbled by coincidence on a still sealed set of Mahle pistons partno 0820402. By searching the number on google it confirmed these were the lower compression pistons + it crossed referenced with the BMW part no.
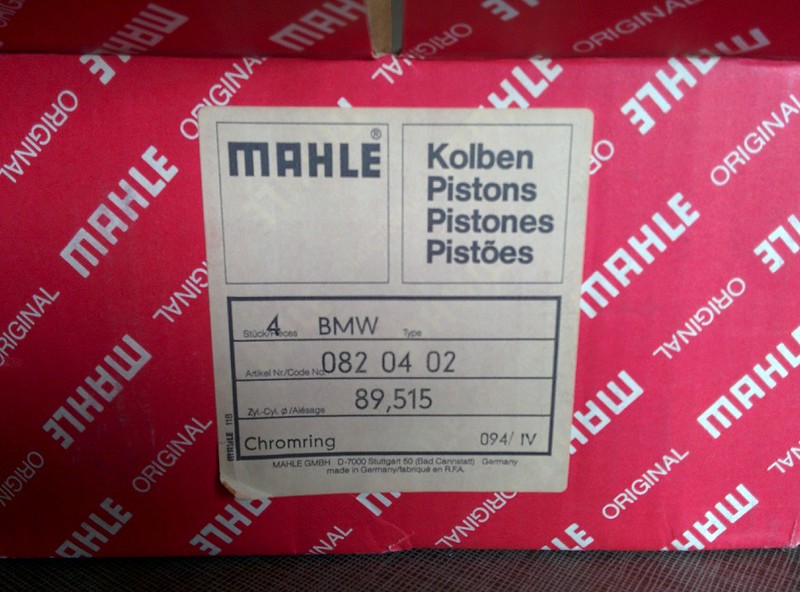


The box also had a little paper inside with a number/code of who packaged the pistons

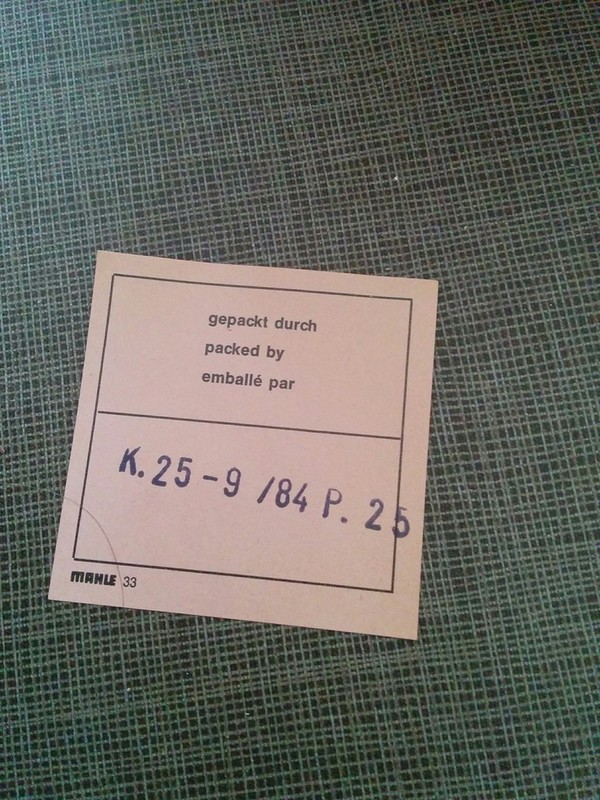
Last edit: by D_Martijn
0 guests and 0 members have just viewed this: None.