Pistolpete's Mars Red Mk1 GTi restoration
Posted
#1407121
(In Topic #185049)
Old Timer


Restoration thread for my 1983 Y-reg Mars Red GTi, non-sunroof model
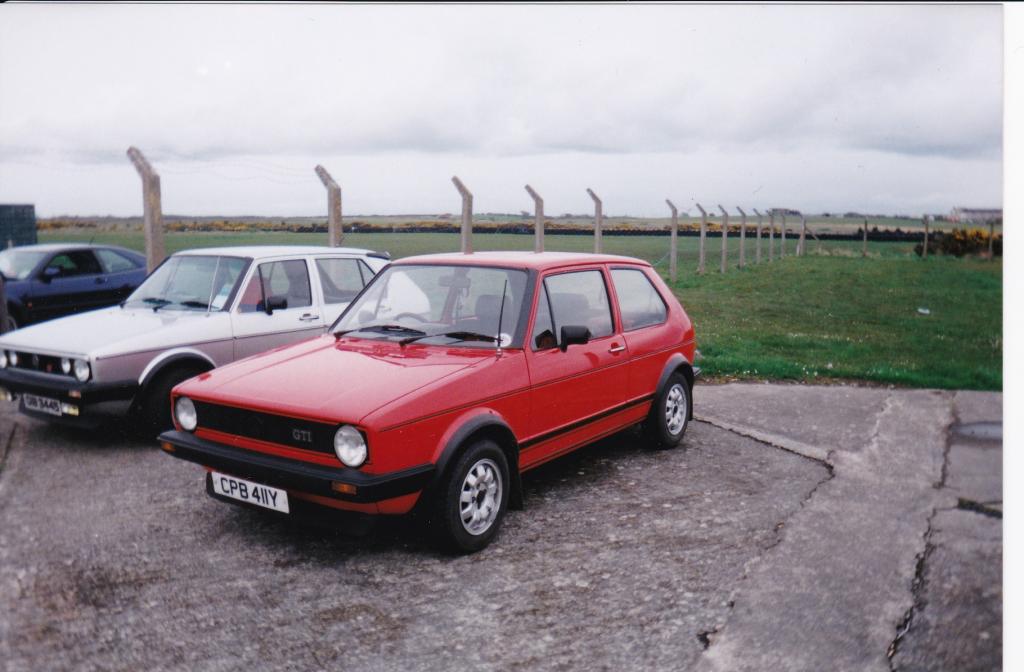
I knew this car for several years before I owned it, as it belonged to a local woman in a nearby town and I used to see it all the time. I always wanted it, and one day I chanced upon an ad in the Belfast Telegraph newspaper for a red Mk1 GTi. At this stage, the car was with a new owner as the previous lady sold it on, and it was only when I arrived to view that I recognised it and knew it was a good one. The car had originally come across from England in 1993, so the history prior to that is unknown (although I would love to find out). Anyway, a deal was struck and I took ownership of CPB 411Y….that was August 2000, she had 82,500 miles from new and was a cracking wee motor, very genuine and lovely to drive.
This is how it looked when I got it:-
And this was taken at a very old Limerick Show in the south of Ireland:-
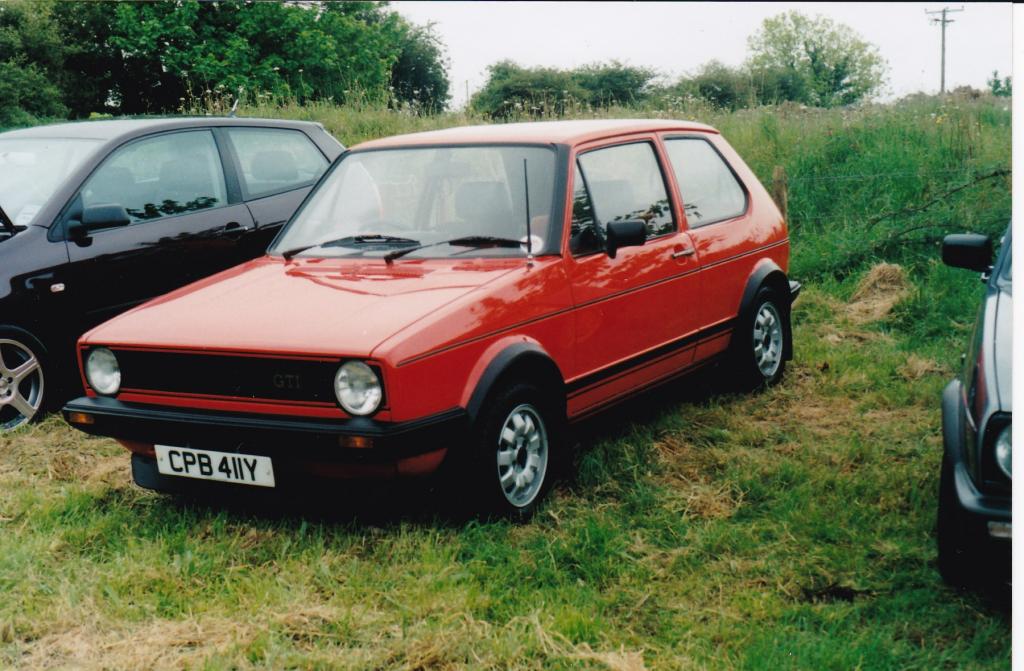
It stayed like this for quite some time, as I was still using the Mk1 Driver as a daily. However, once the insurance would allow, I started using my Mk1 Gti as my daily driver. The only changes I made were the addition of lowering springs and Boge turbogas shocks, uprated servo/master cylinder and brackets to fit 280mm discs, and a set of 15" BBS RA's.
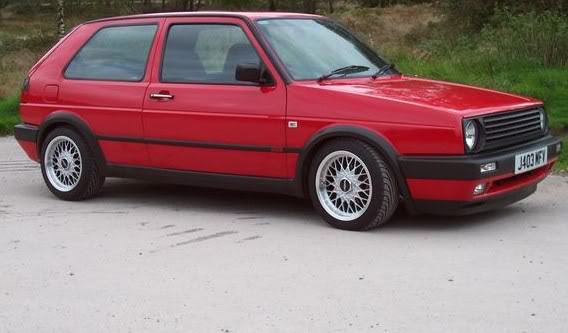
The real work began around 4 years ago, when I decided to take her off the road as my daily, and bought a Mk2 GTi.
The plan for the Mk1 was always a proper respray. The bodywork was generally excellent, however there were a few dings/dents and some rust on the bottom of the doors. Because of the red paint fading as they do, I was always reluctant to paint local areas as it would be very obvious, so I would wait until I could do the job properly and get it all done. The problem was finding someone to take on the job, in Northern Ireland we don't have as big a network of specialists and bodyshops to take on the older cars. Eventually, I persuaded my dad's friend Davey to do it for me. He's a very experienced bodyshop man with his own place and his work is excellent. And so starts the restoration story. By the way, I am by no means an expert so if you see anything that you think could be better or can advise on how best to do something, I am keen to hear it. I will be asking for advice as things progress no doubt.
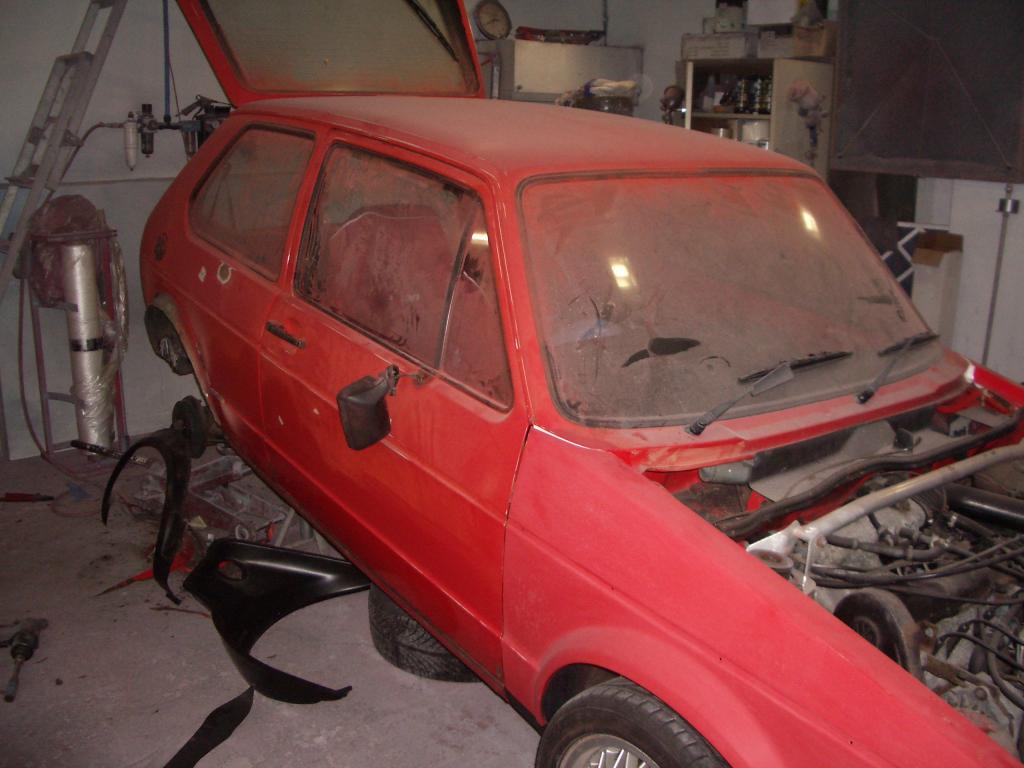
So, off she went to Davey's bodyshop for what was to be a very long time. I wasn't in any great rush, as long as it was a quality job at the end of it. And so to start stripping:-
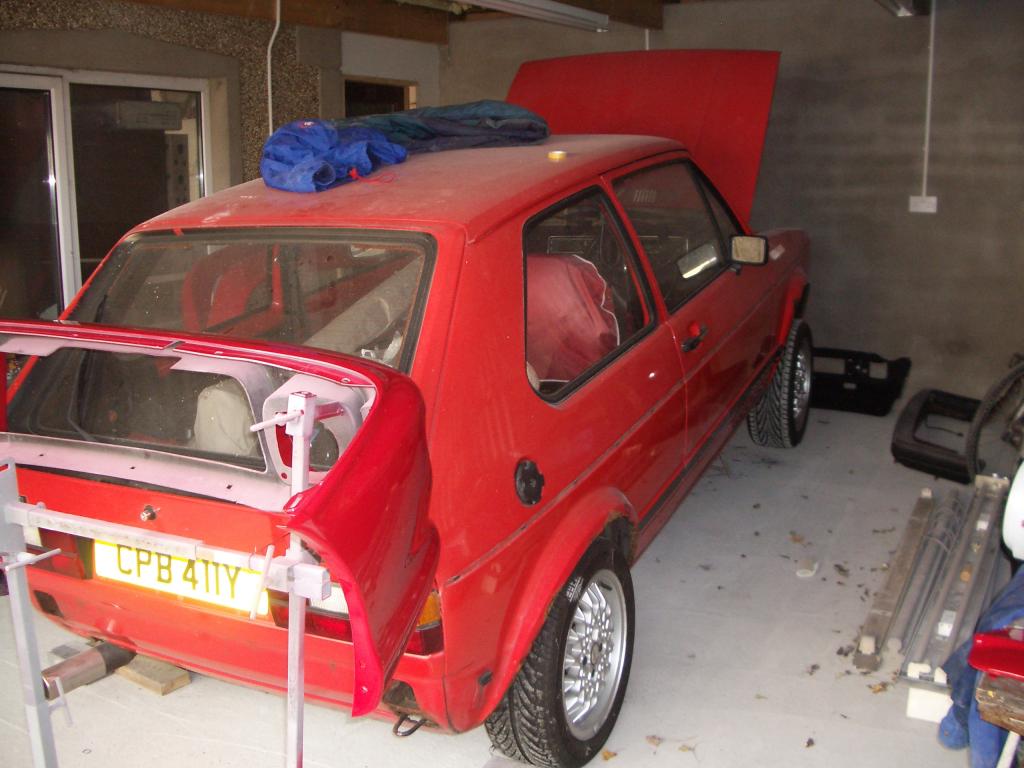
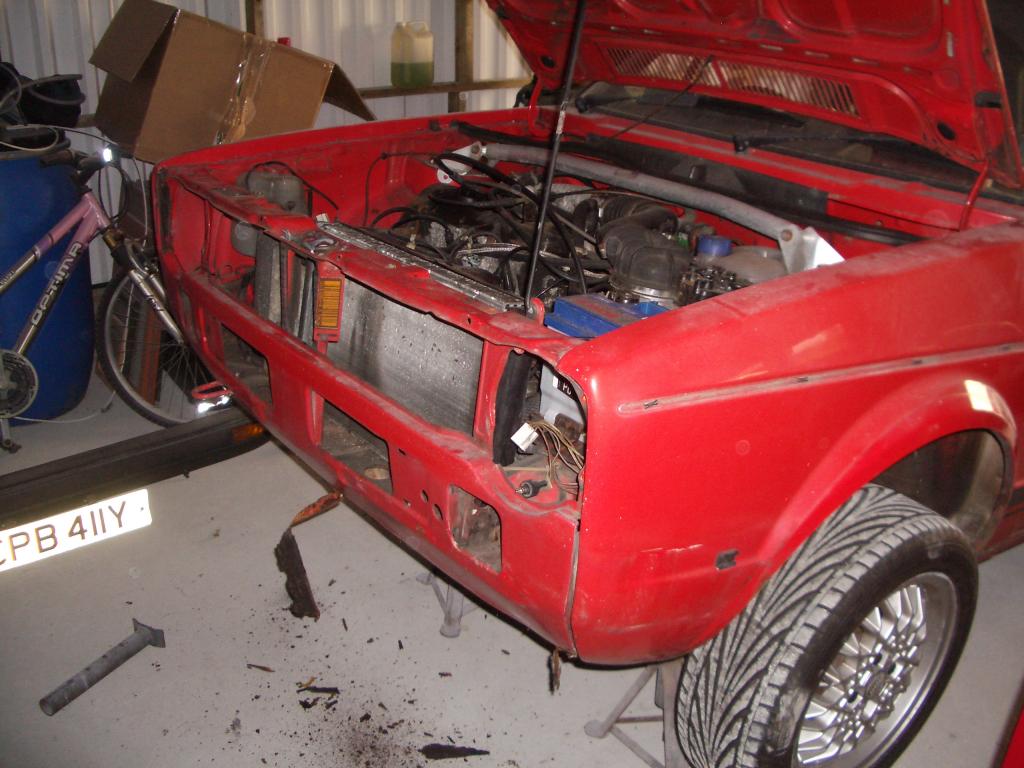
Front panel was to be replaced, it had been repaired previously.
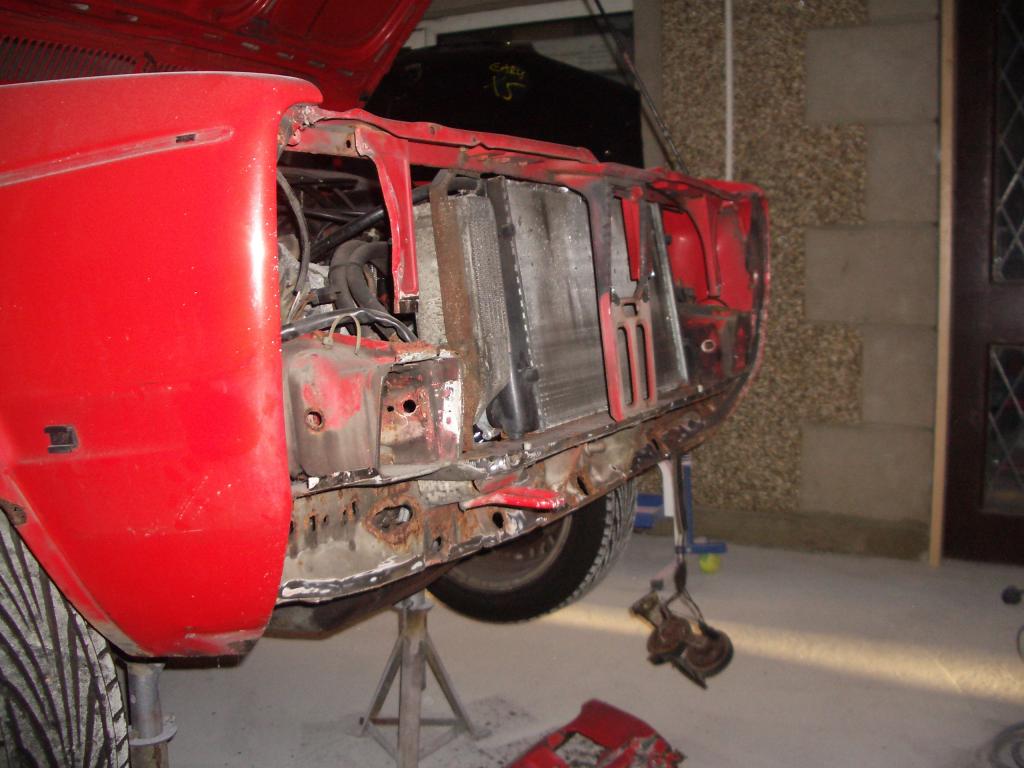
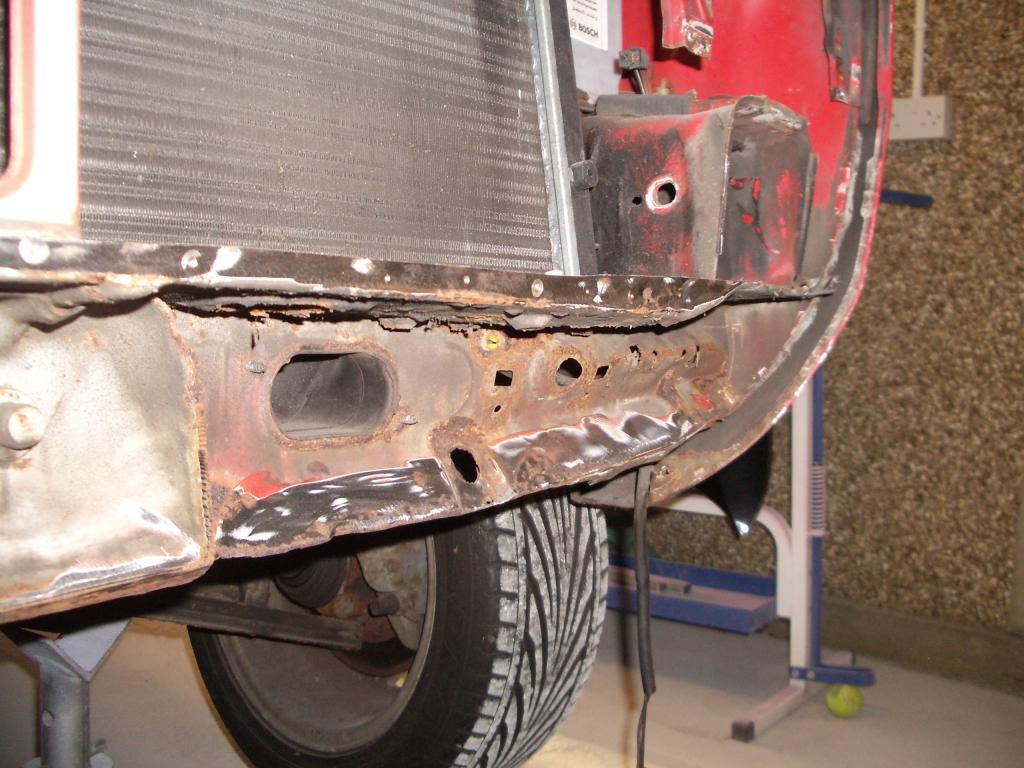
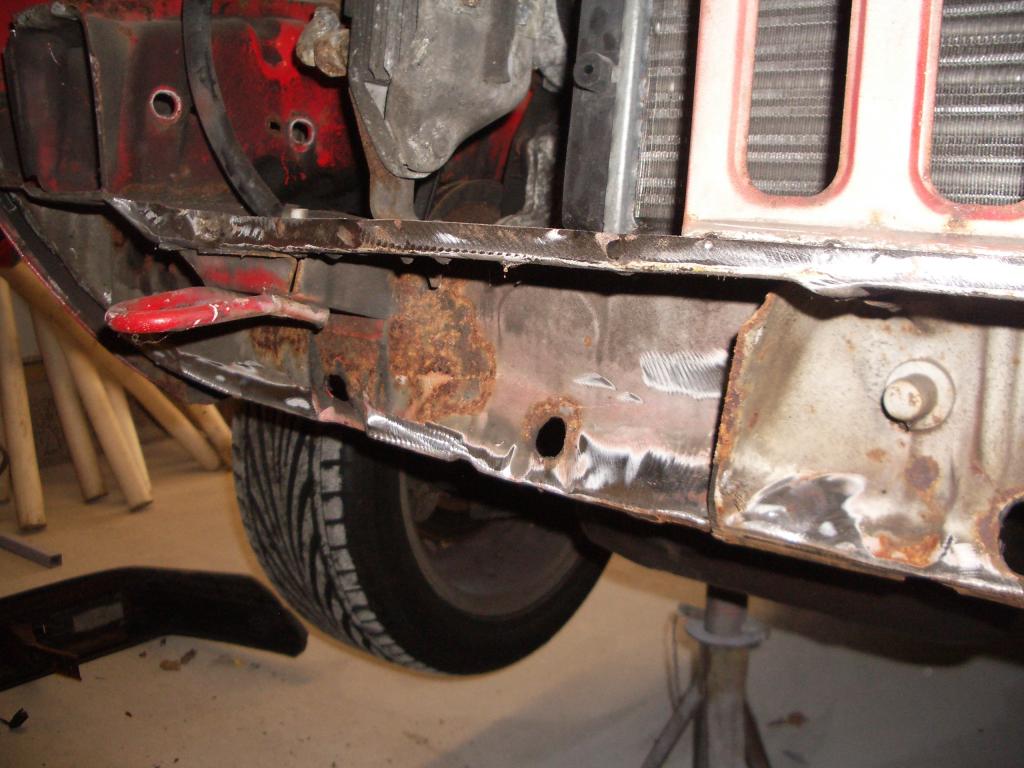
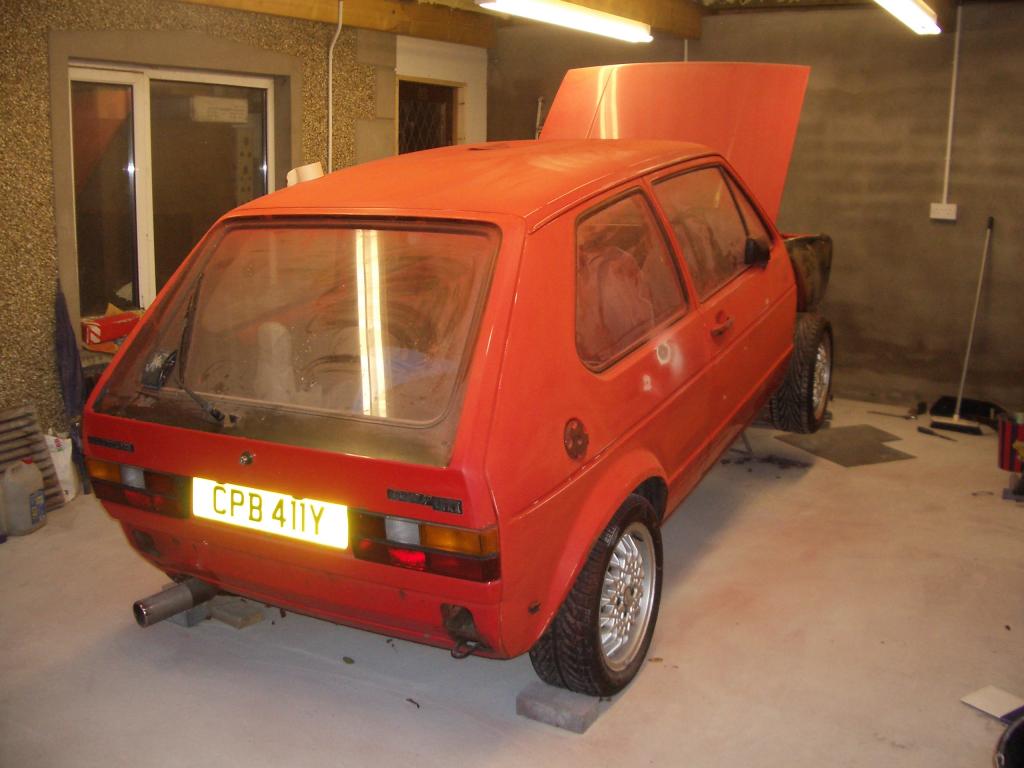
Both front wings were to be replaced. The inner wings were still in amazing condition thankfully, the 83 model underseal much better than previous years.
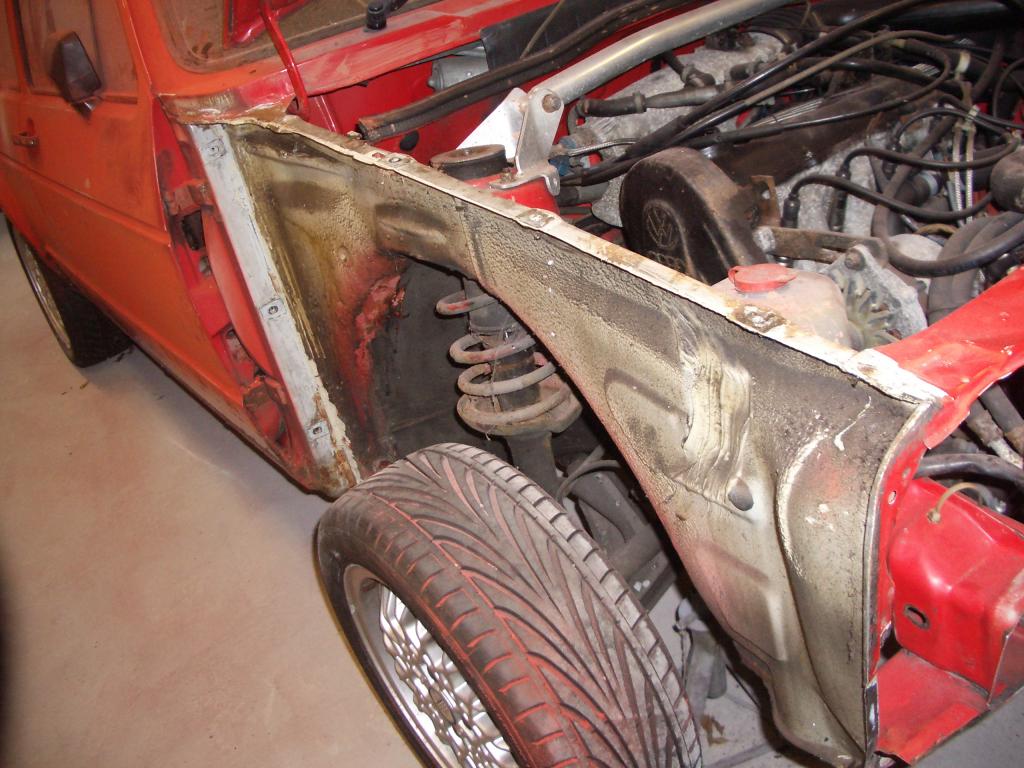
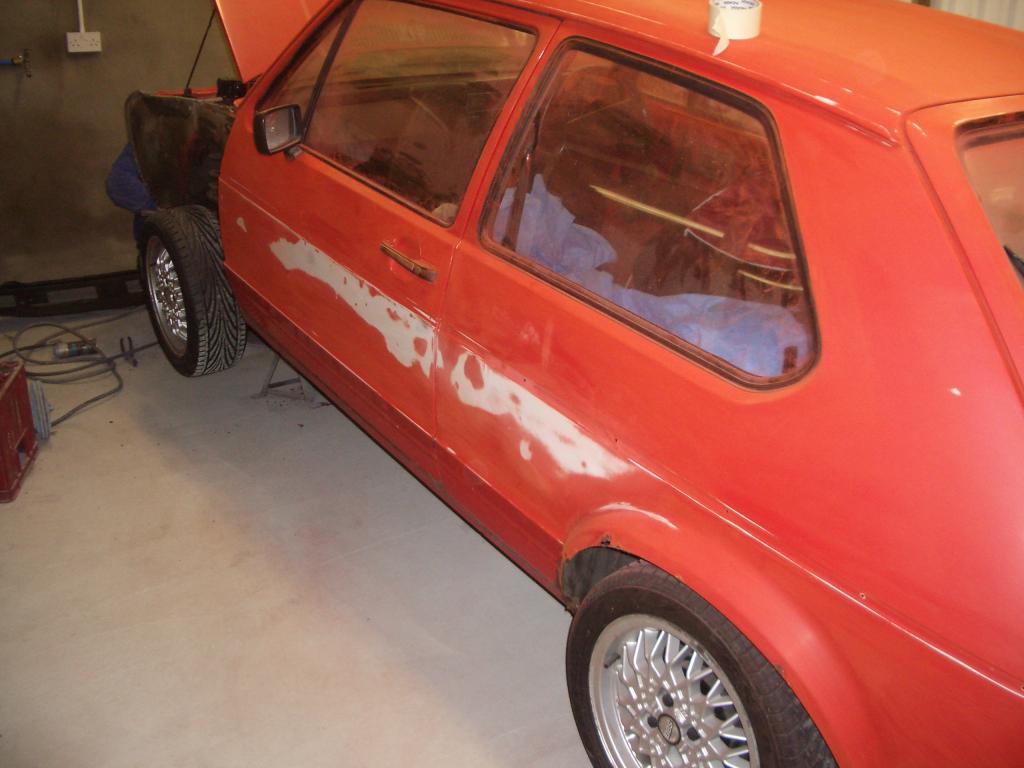
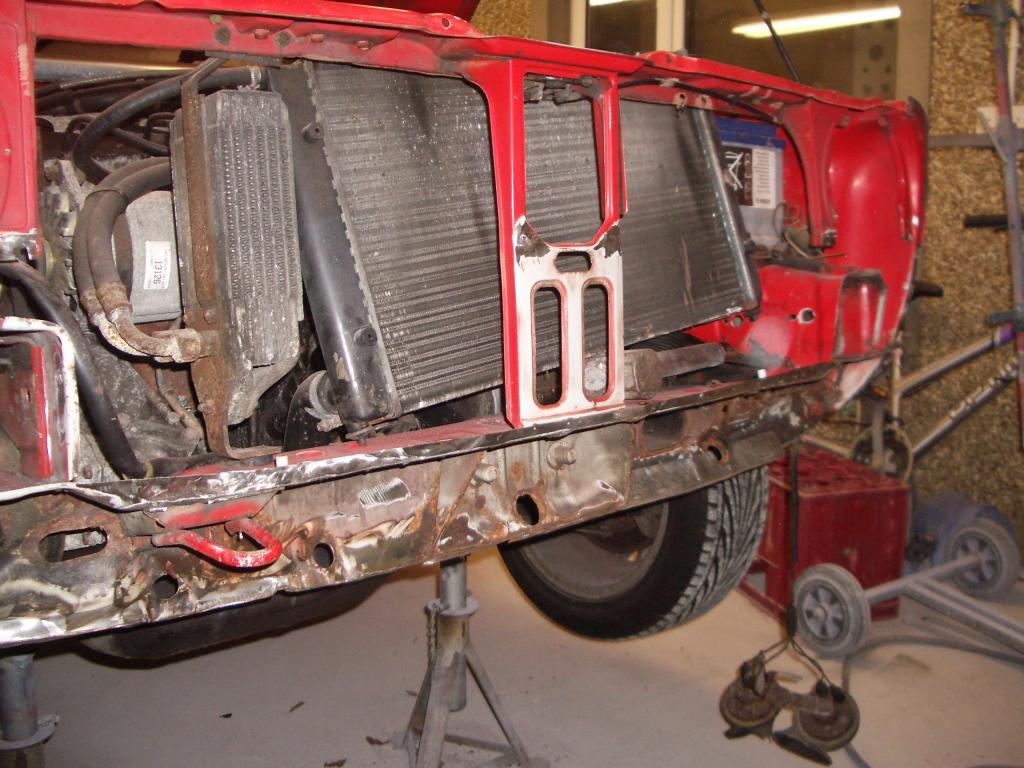
I couldn't get genuine replacement wings at this stage, so had to make do with pattern parts. However, Davey is a patient man and he eventually got them to line up quite well.
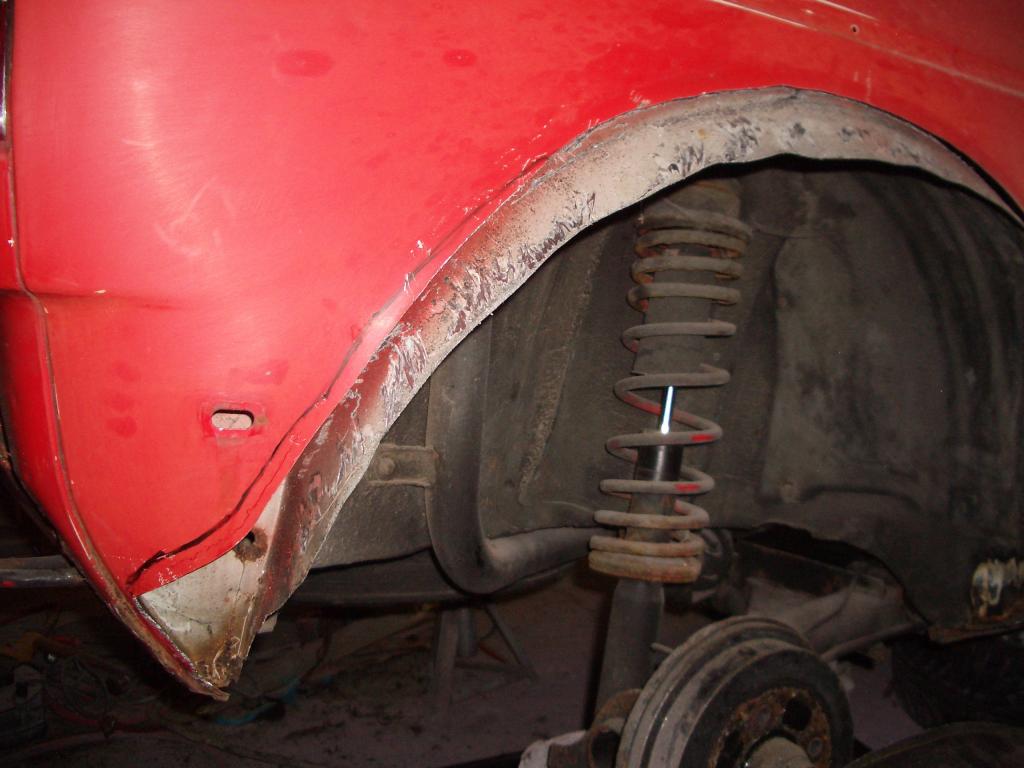
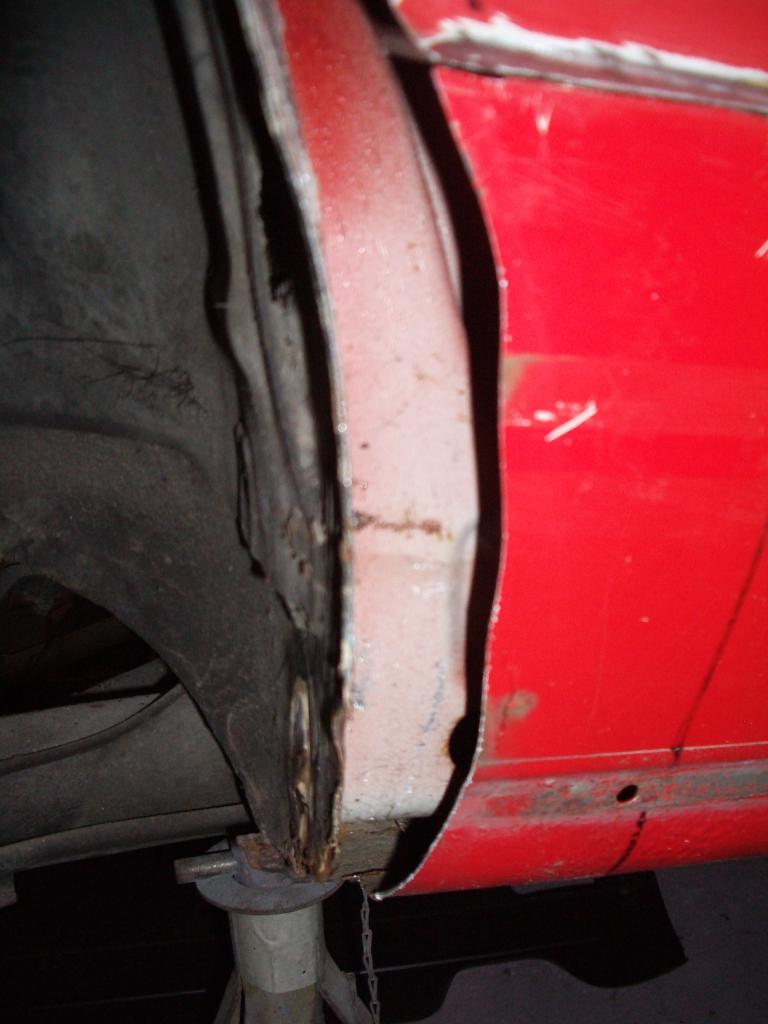
As expected, he had to graft in new inner and outer rear arches.
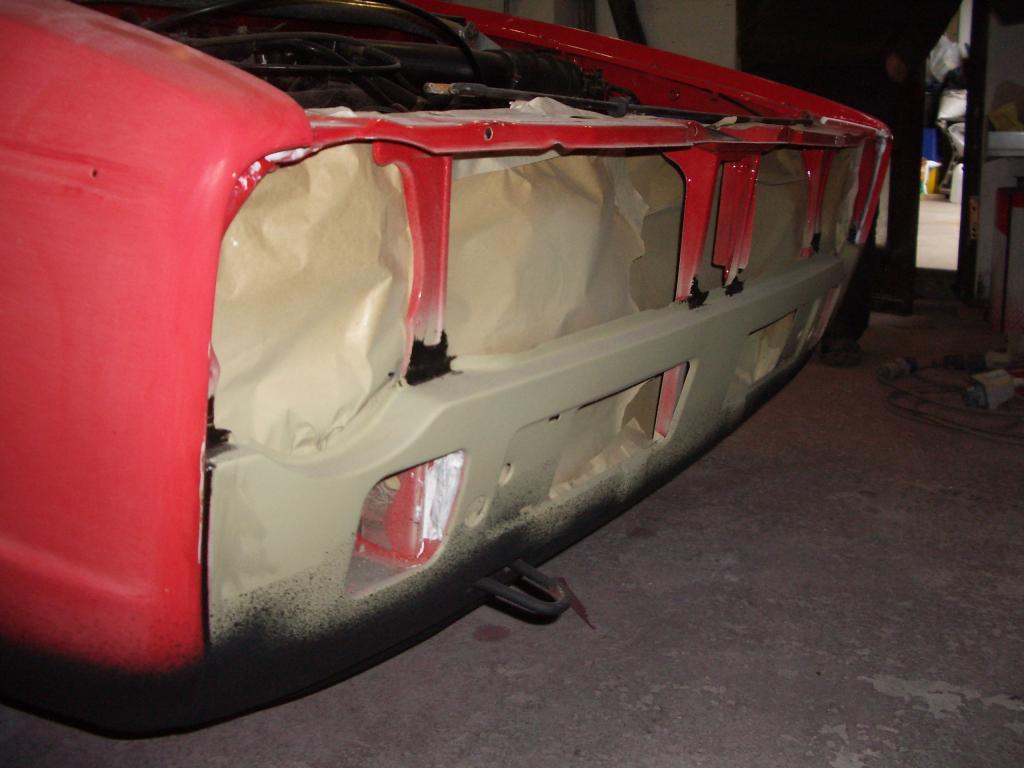
New front panel in place:
Lower rear panel was also shot, so new section grafted in.
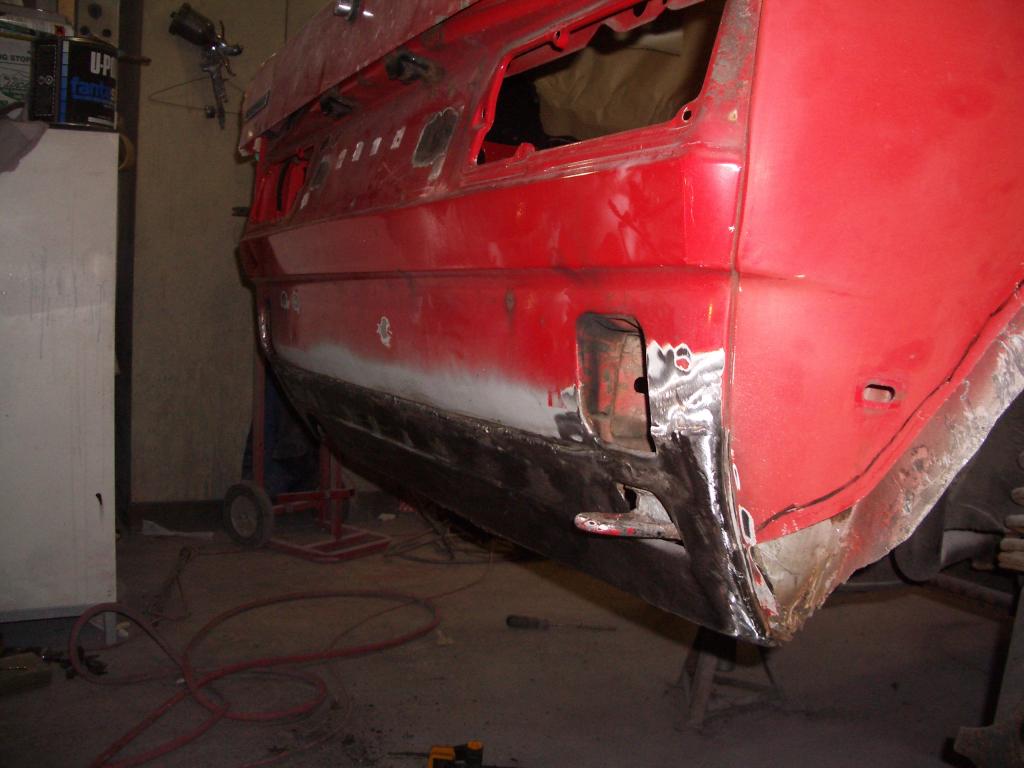
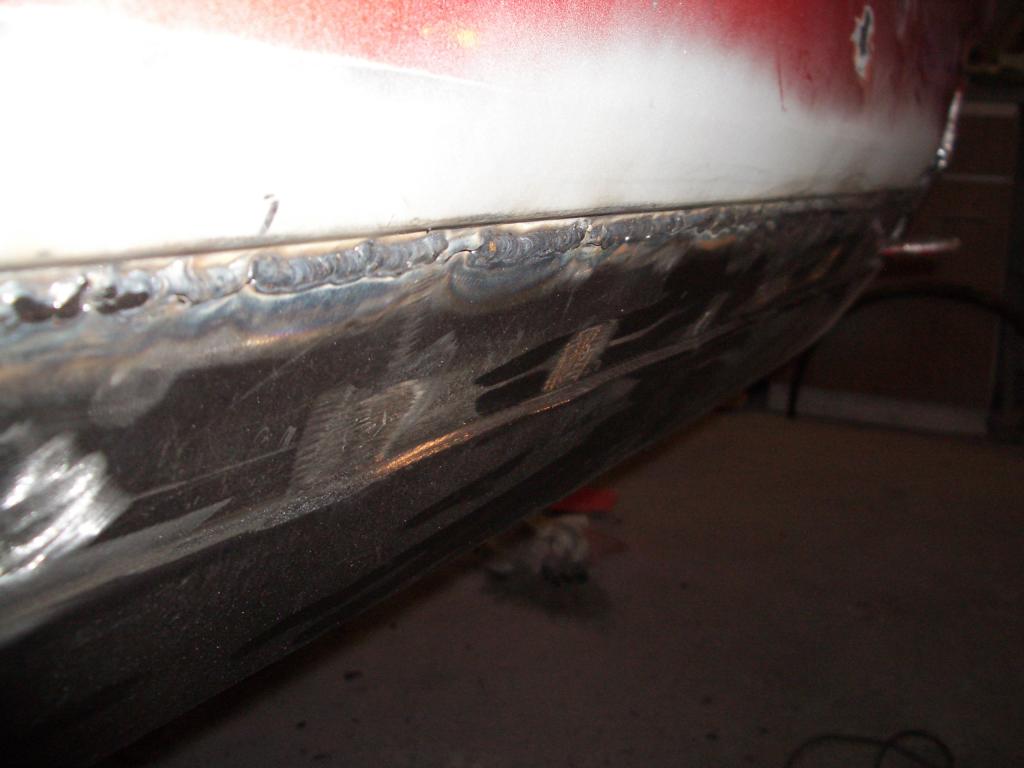
Starting to take shape now at the rear:-
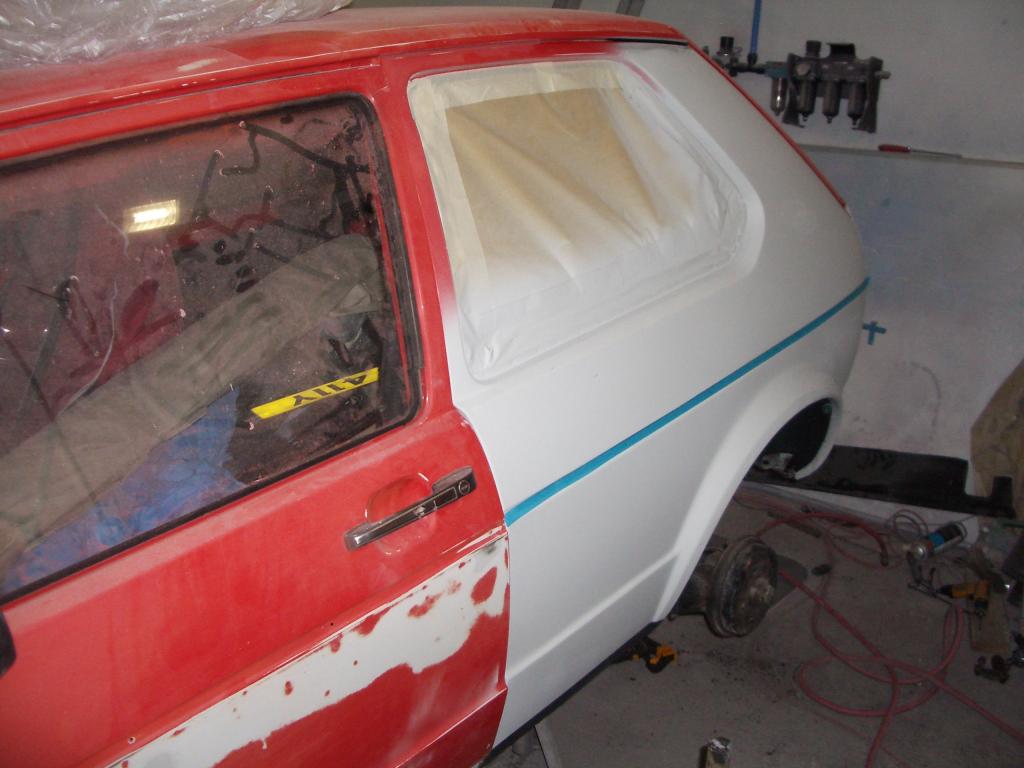
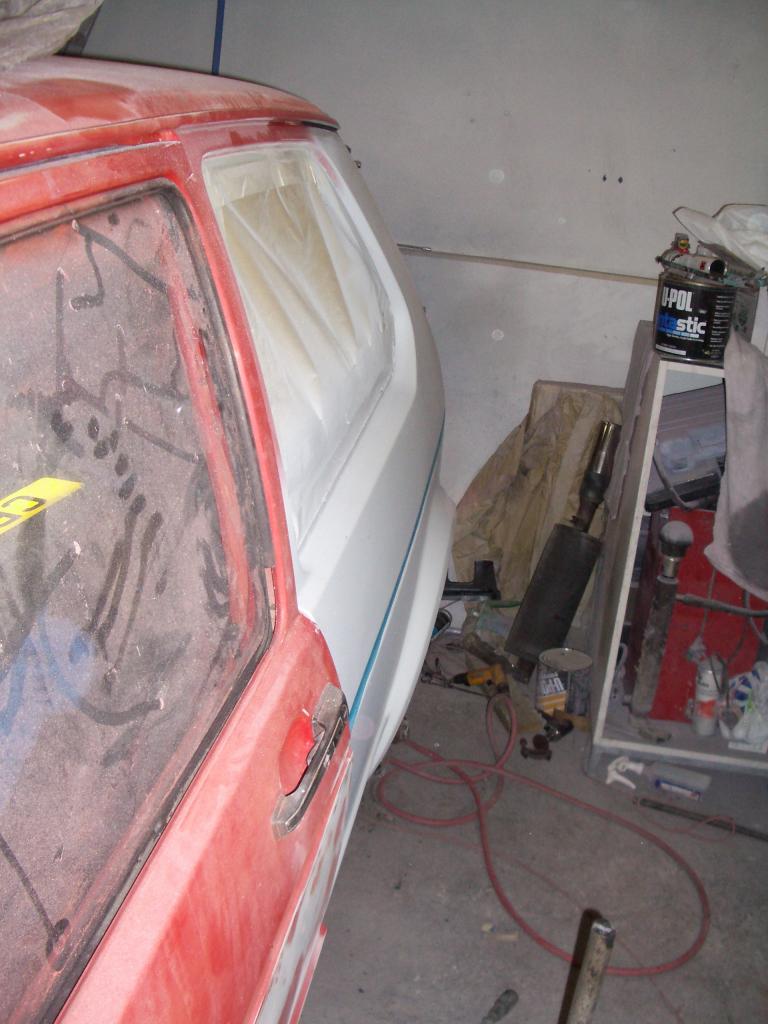
Trial fit of the arch trim to make sure its all ok.
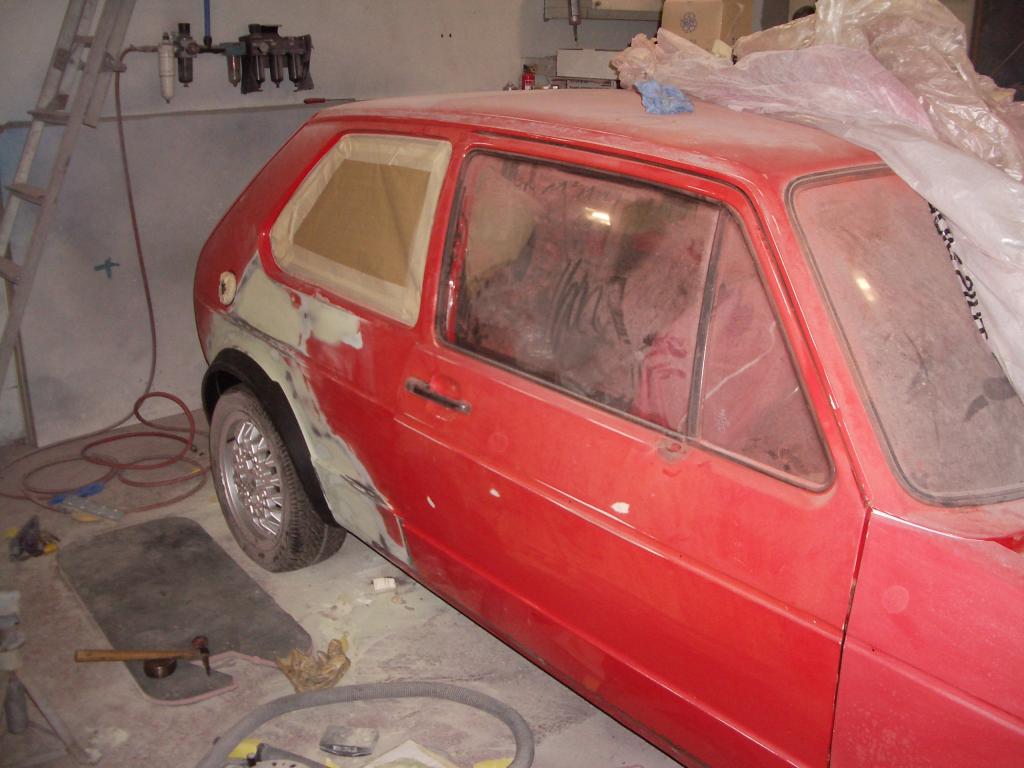
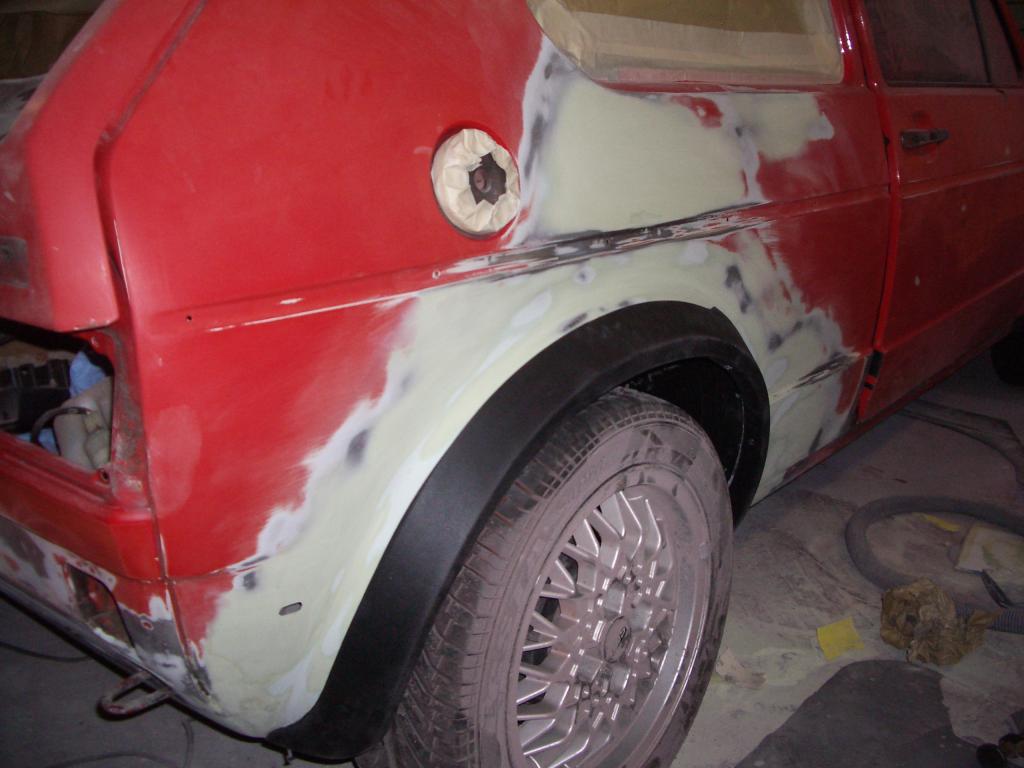
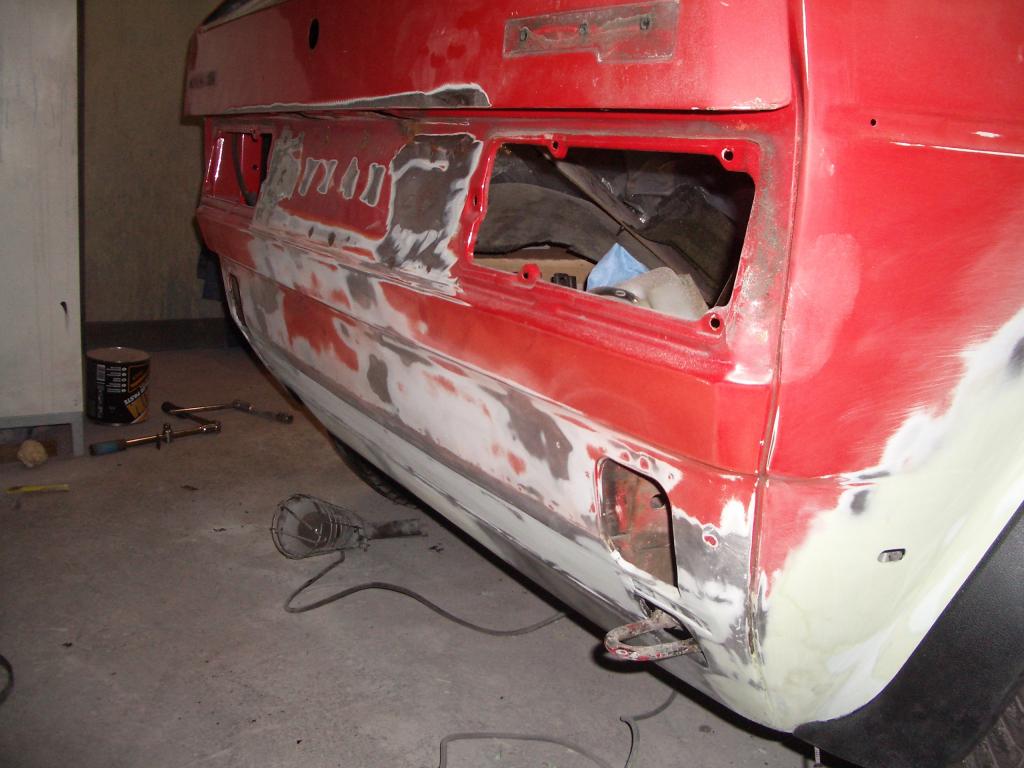
Rear panel smoothed and skimmed with filler
I knew the Ronal LS rims were going to be a tight fit, with 7.5" x 15" and ET25, so stuck one on just to see how it sat in the arches.
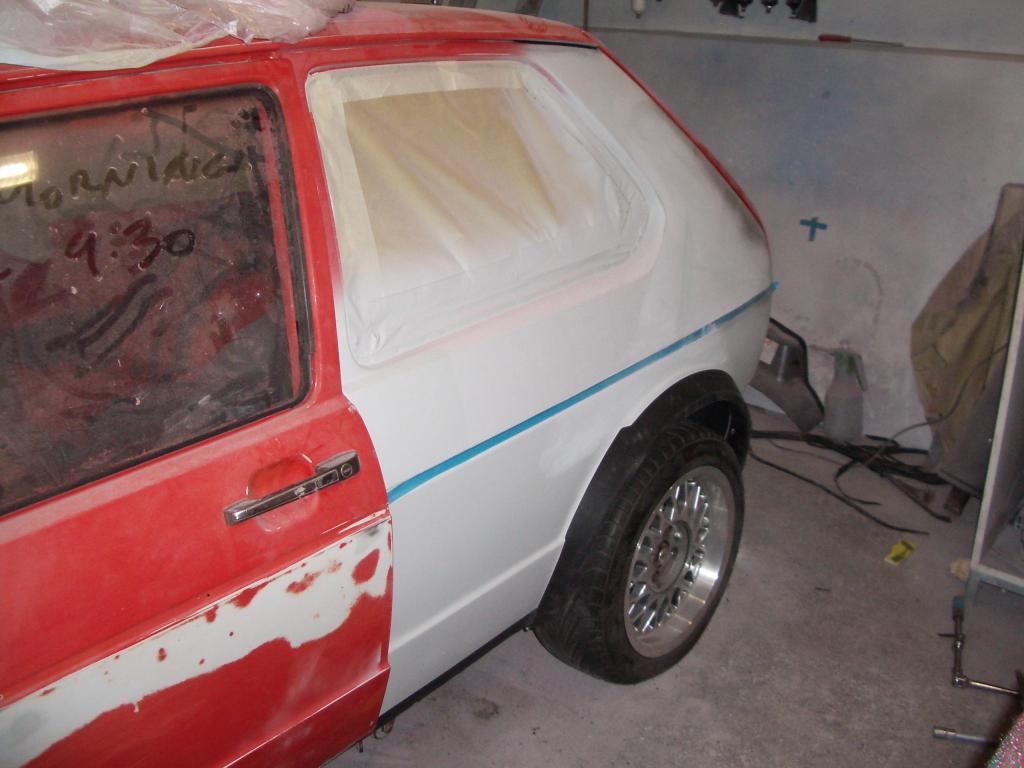
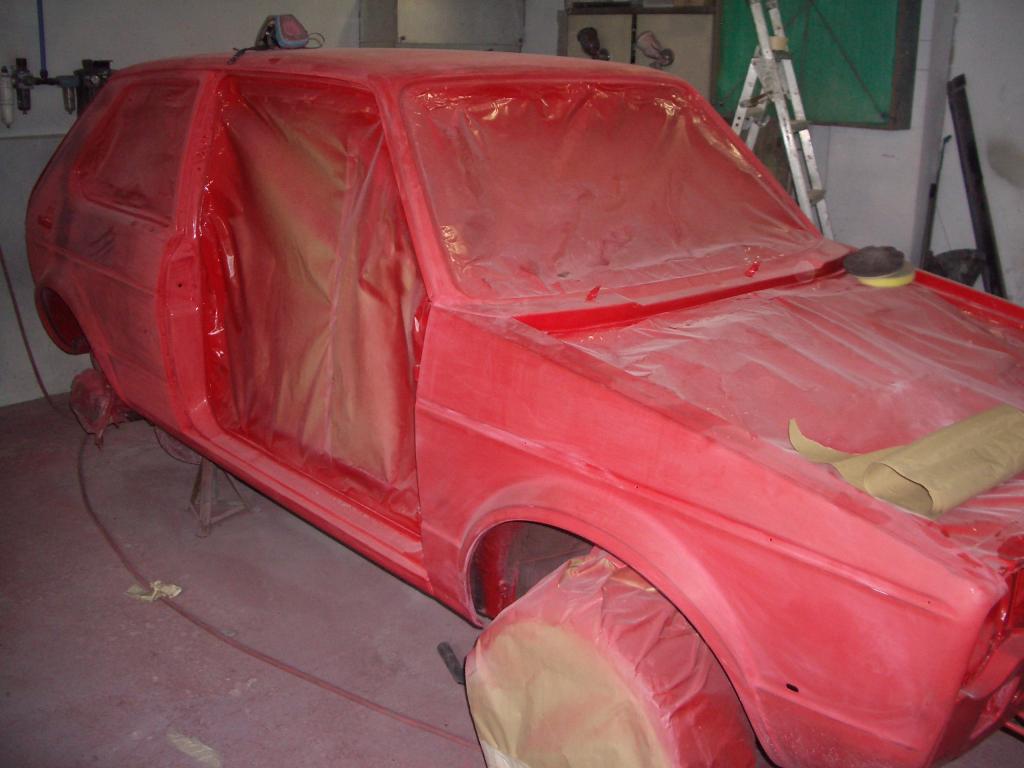
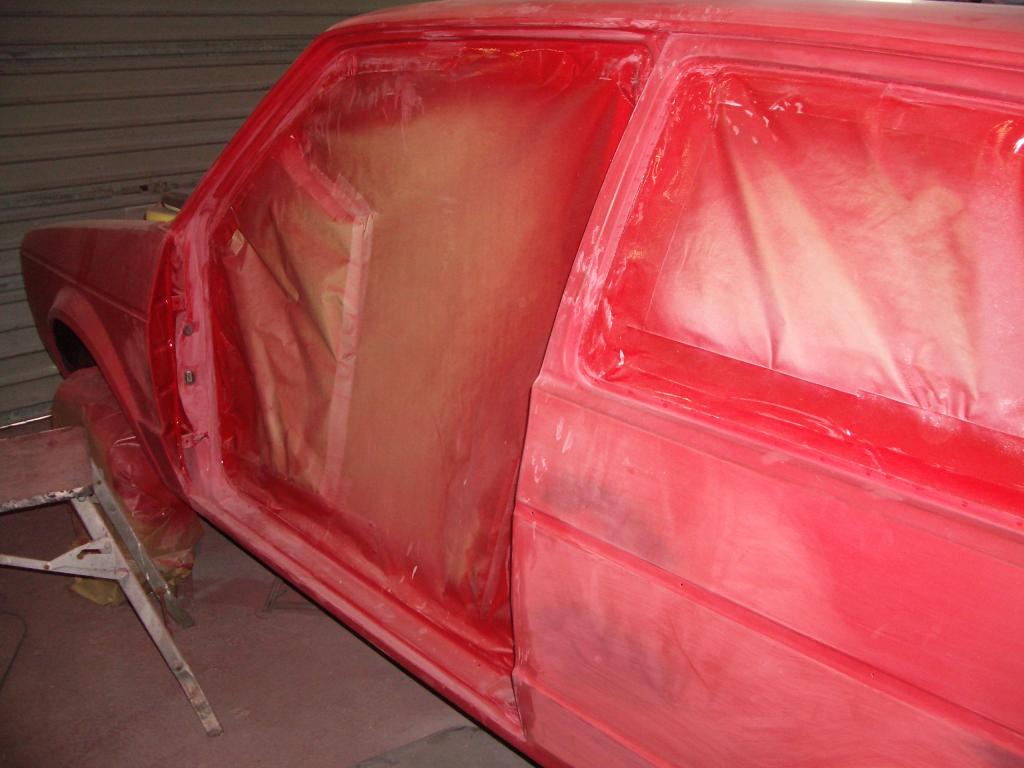
At last, some colour going on
Nut & Bolt Resto Complete (Mars Red GTi original): https://vwgolfmk1.org.uk/forum/index.php?page=topicview&type=misc&id=projects%2Fyour-mk1-golfs_2%2Fpistolpete-s-mars-red&start__keyed=
Nut & Bolt Resto in Progress (Lhasa 16v): https://vwgolfmk1.org.uk/forum/index.php?page=topicview&type=misc&id=projects%2Fyour-mk1-golfs_2%2Fpistolpete-s-lhasa&redirected=1
Nut & Bolt Resto in Progress (Lhasa 16v): https://vwgolfmk1.org.uk/forum/index.php?page=topicview&type=misc&id=projects%2Fyour-mk1-golfs_2%2Fpistolpete-s-lhasa&redirected=1
Posted
Old Timer


New front and rear bumpers from Crazyquiffs
New genuine green tint front windscreen
New side stripes, rear hatch decals, filler surround decal
All new window seals
I gathered about 4 different sets of replacement wheel arch trims until I was finally happy with the quality
New badges
New genuine driver and passenger door handles
New rear hatch strut
New sill trim kit from Crazyquiffs (I've kept the original waistline trims as they are in good shape).
I also bought some Forever Black and refurbed the original grille, A-pillar deflectors, wing mirrors. This stuff is amazing.
I rubbed down and re-painted the red grille surround, this really makes a big difference to the look of the front end.
Wiper arms removed and sent for blasting and painting.
Lots of other little plastic caps, grommets, rubbers etc.
The one thing I haven't done is re-fitted an aerial, I just couldn't bring myself to drill a hole in a new wing. I don't think it will bother me!
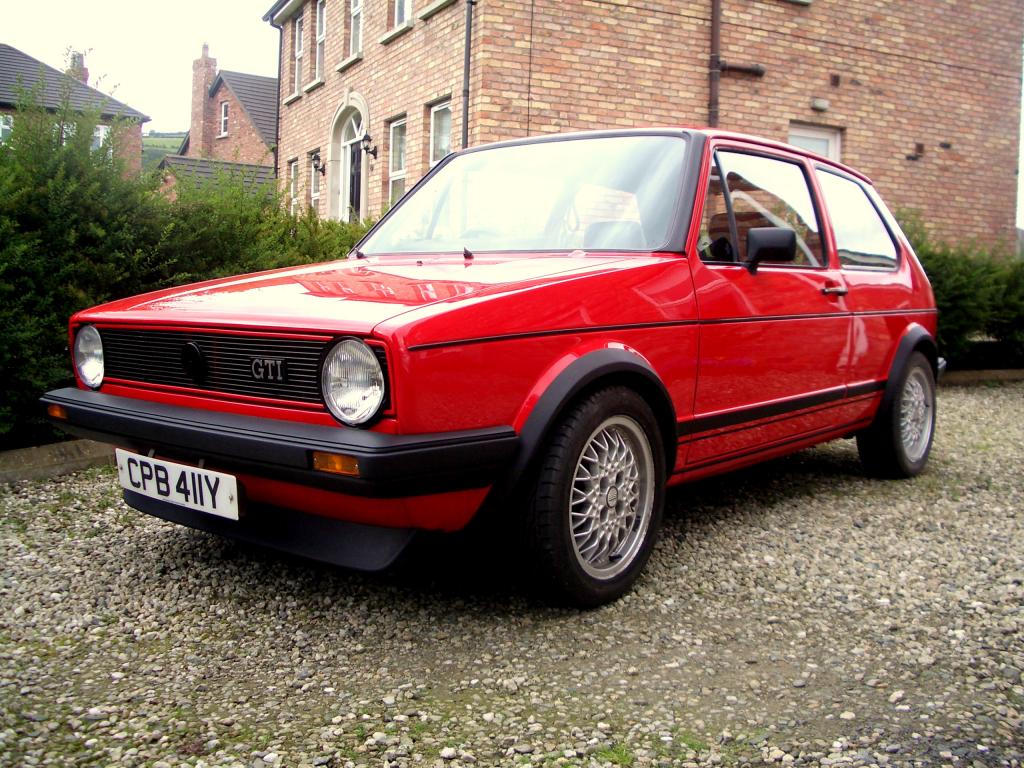
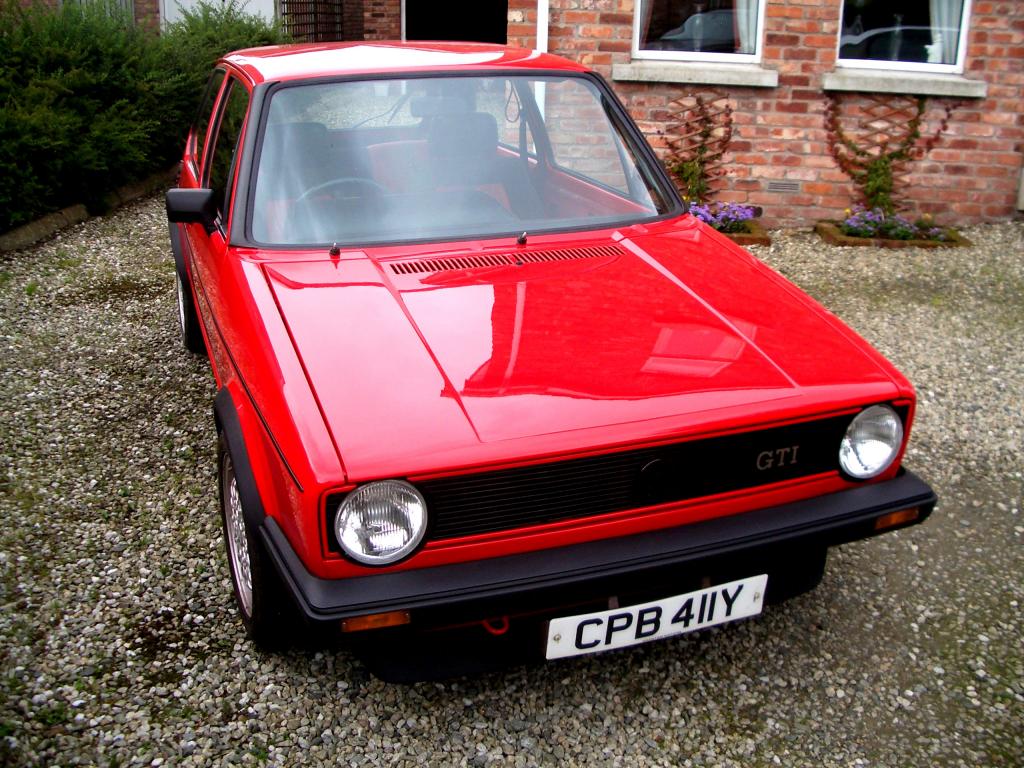
And so once it was all put together (or partially put together at least), it looked like this:-
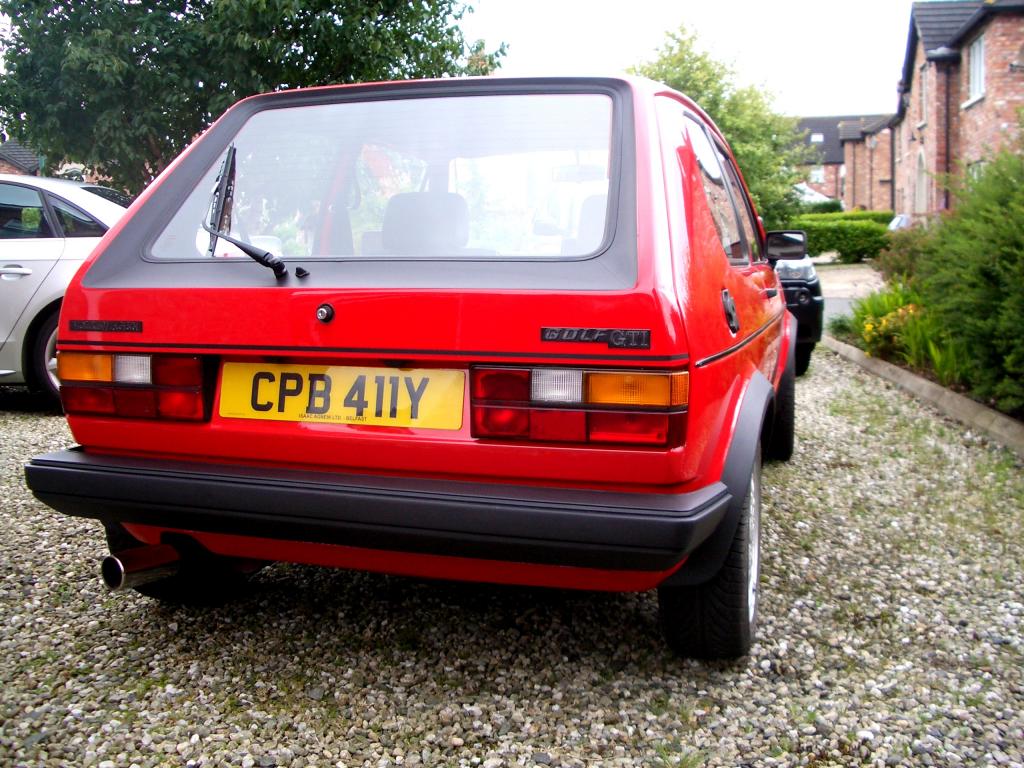
Lots more to follow!!
Nut & Bolt Resto Complete (Mars Red GTi original): https://vwgolfmk1.org.uk/forum/index.php?page=topicview&type=misc&id=projects%2Fyour-mk1-golfs_2%2Fpistolpete-s-mars-red&start__keyed=
Nut & Bolt Resto in Progress (Lhasa 16v): https://vwgolfmk1.org.uk/forum/index.php?page=topicview&type=misc&id=projects%2Fyour-mk1-golfs_2%2Fpistolpete-s-lhasa&redirected=1
Nut & Bolt Resto in Progress (Lhasa 16v): https://vwgolfmk1.org.uk/forum/index.php?page=topicview&type=misc&id=projects%2Fyour-mk1-golfs_2%2Fpistolpete-s-lhasa&redirected=1
Posted
Old Timer


I also treated myself to a genuine Ebay bargain, Momo steering wheel.
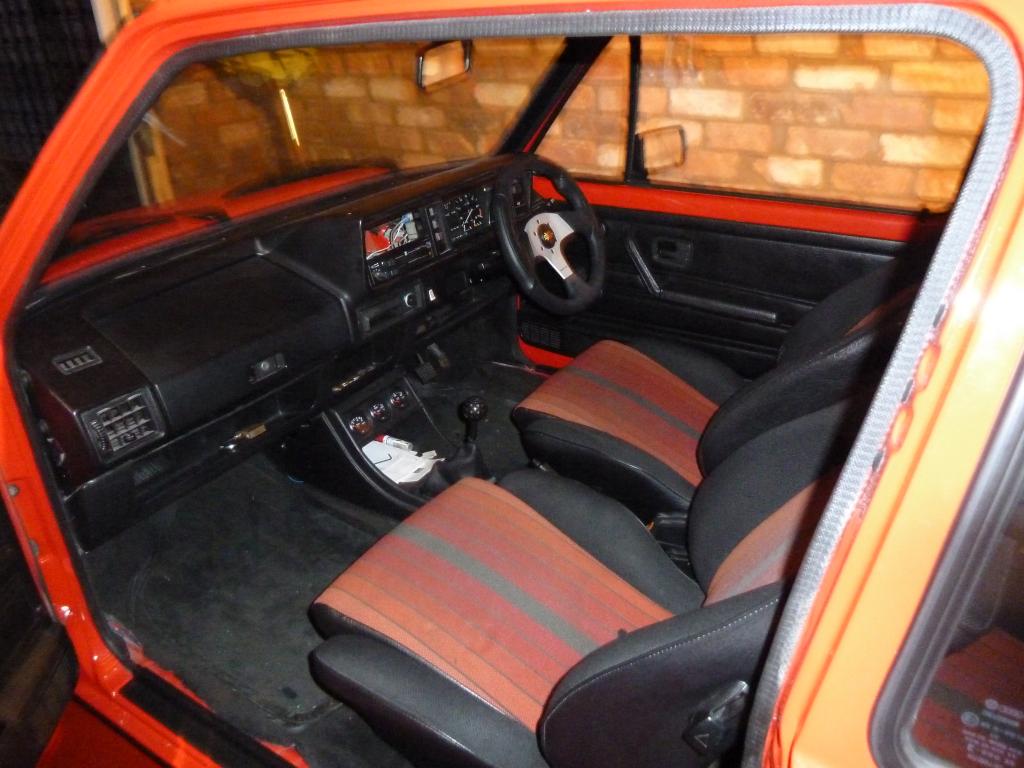
Passed the MOT first time with no problems, was good to hear the tester giving her some good comments. So that was at least her back on the road after too long.
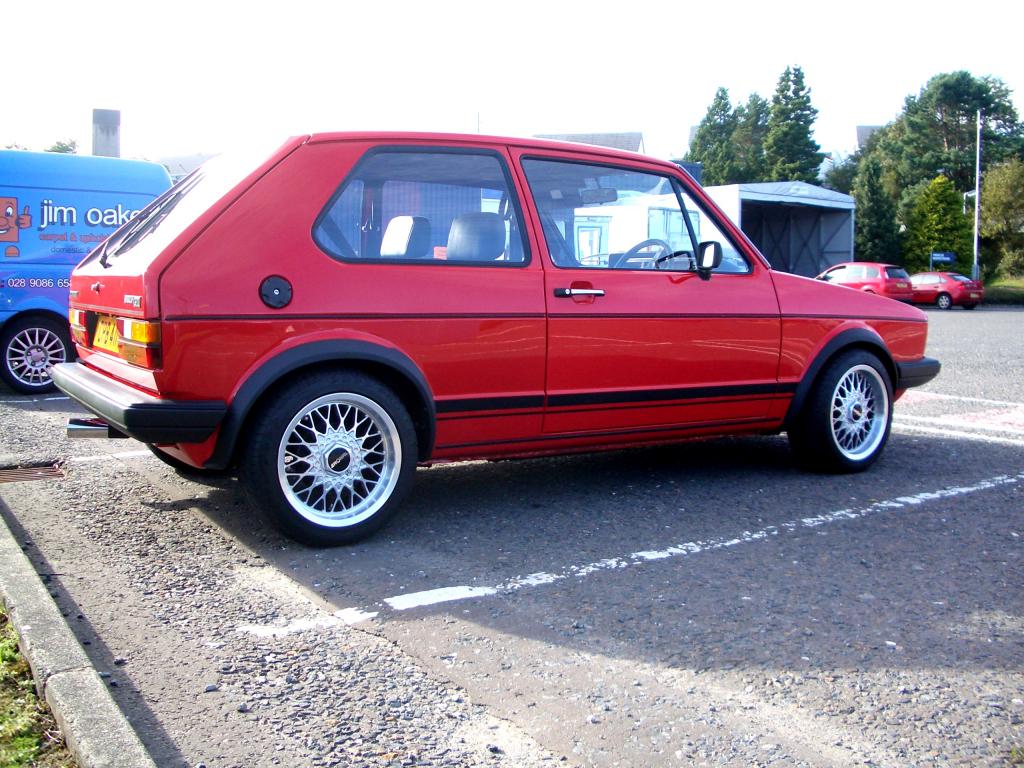
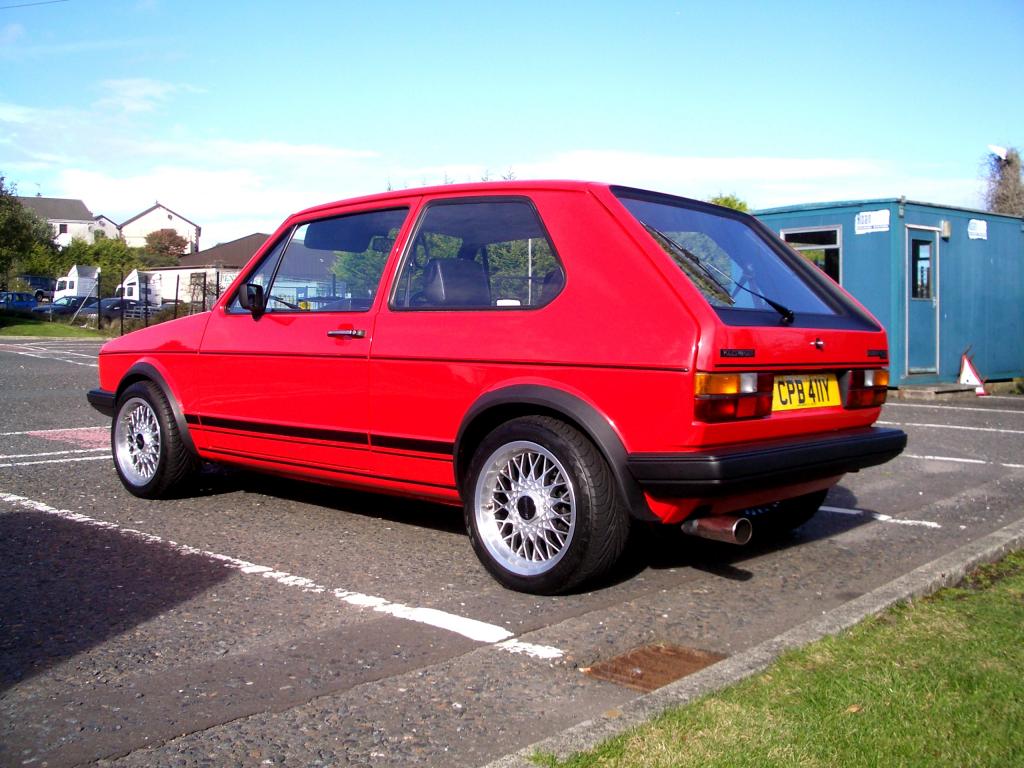
Nut & Bolt Resto Complete (Mars Red GTi original): https://vwgolfmk1.org.uk/forum/index.php?page=topicview&type=misc&id=projects%2Fyour-mk1-golfs_2%2Fpistolpete-s-mars-red&start__keyed=
Nut & Bolt Resto in Progress (Lhasa 16v): https://vwgolfmk1.org.uk/forum/index.php?page=topicview&type=misc&id=projects%2Fyour-mk1-golfs_2%2Fpistolpete-s-lhasa&redirected=1
Nut & Bolt Resto in Progress (Lhasa 16v): https://vwgolfmk1.org.uk/forum/index.php?page=topicview&type=misc&id=projects%2Fyour-mk1-golfs_2%2Fpistolpete-s-lhasa&redirected=1
Posted
Old Timer


I couldn't believe my luck when I came across another genuine Ebay bargain, a refurbished set of RS001's with polished lips and gold bolts. They came from London, from a gent called Leeroy, so I had an anxious wait after handing over a fair sum of money and hoping they would arrive via courier safely enough. Thankfully, he really was a gent and the rims were better than I had expected.
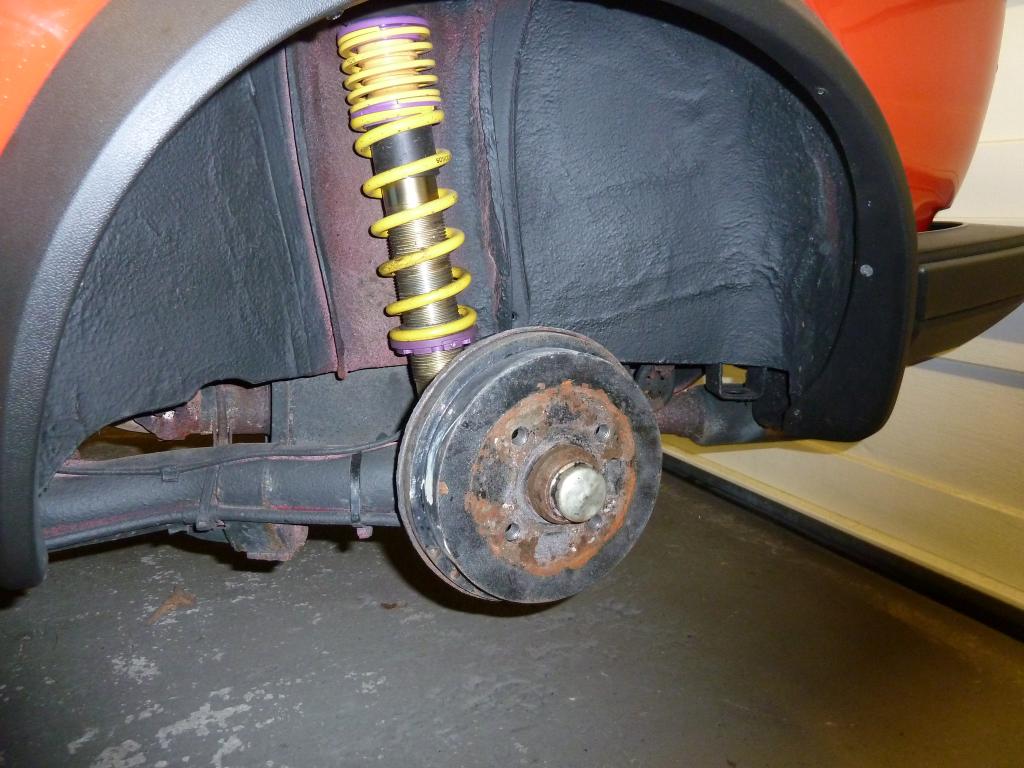
As with all these things though, I couldn't fit a set of RS001's without having the car sitting nicely on them, so a call to G-werks over Edition 38 weekend bagged me a set of KW Variant 1 coilovers for a special "show" discount price, even though I didn't go to the show and simply phoned them!
Rear coilovers
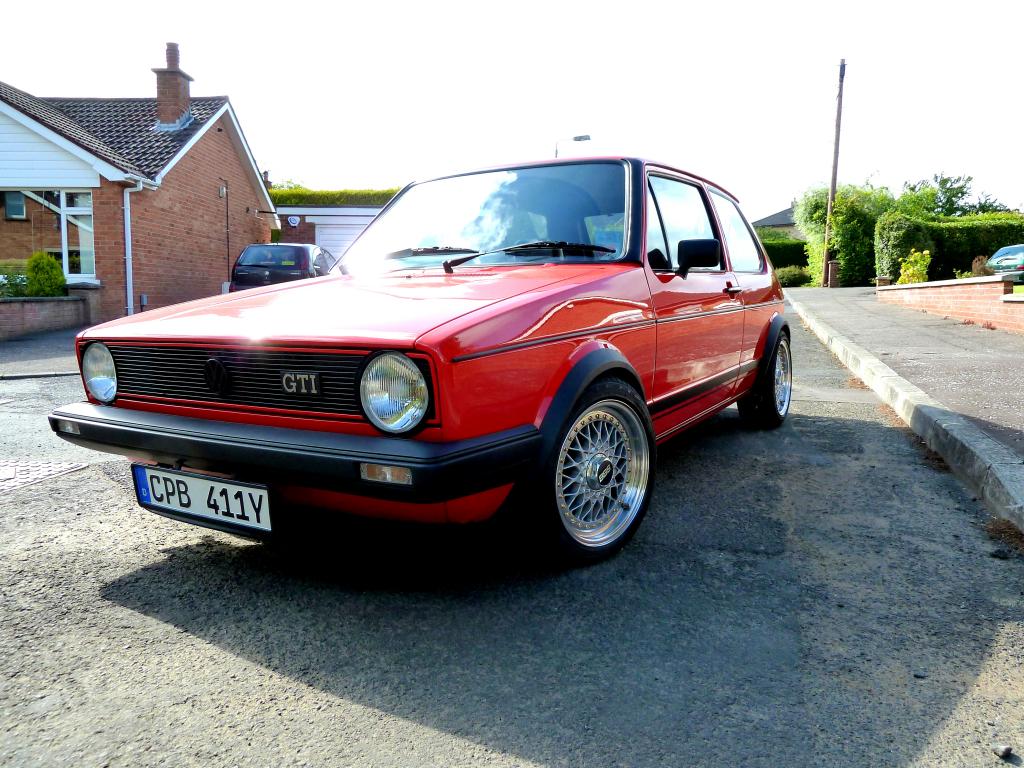
So finally I had the car sitting exactly as I wanted it. I also fitted some clear front indicators and a set of pressed plates. First outing was Dubshed 2011.
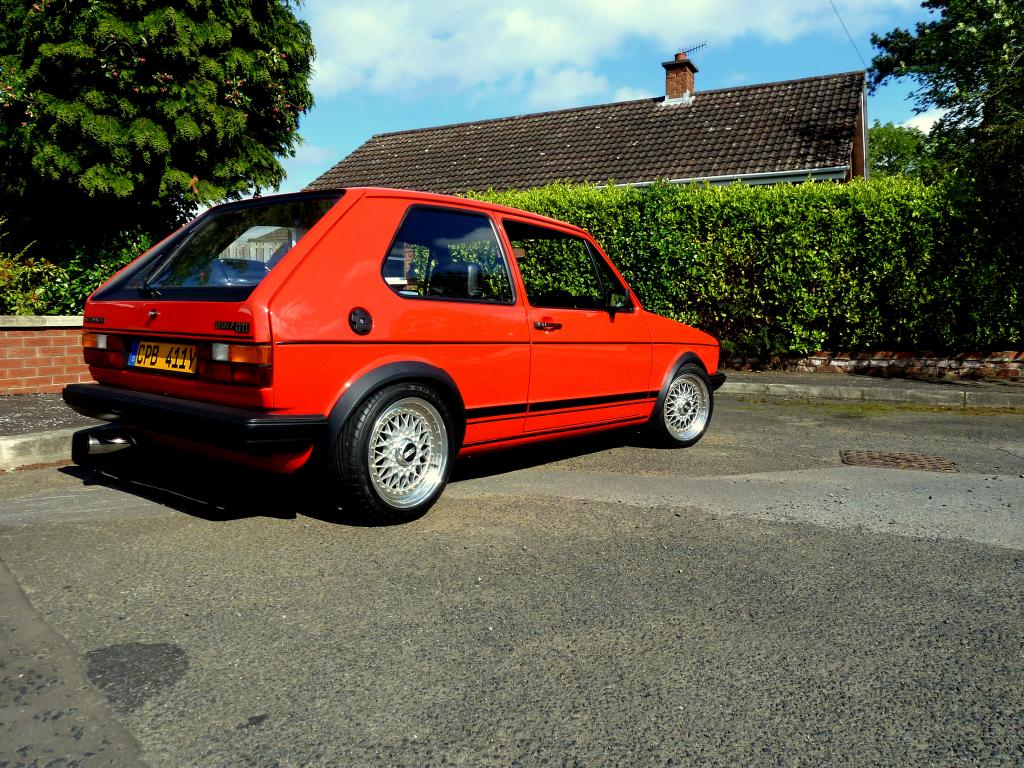
Was very chuffed to walk away with overall Show and Shine win at Castlewellan 2013.
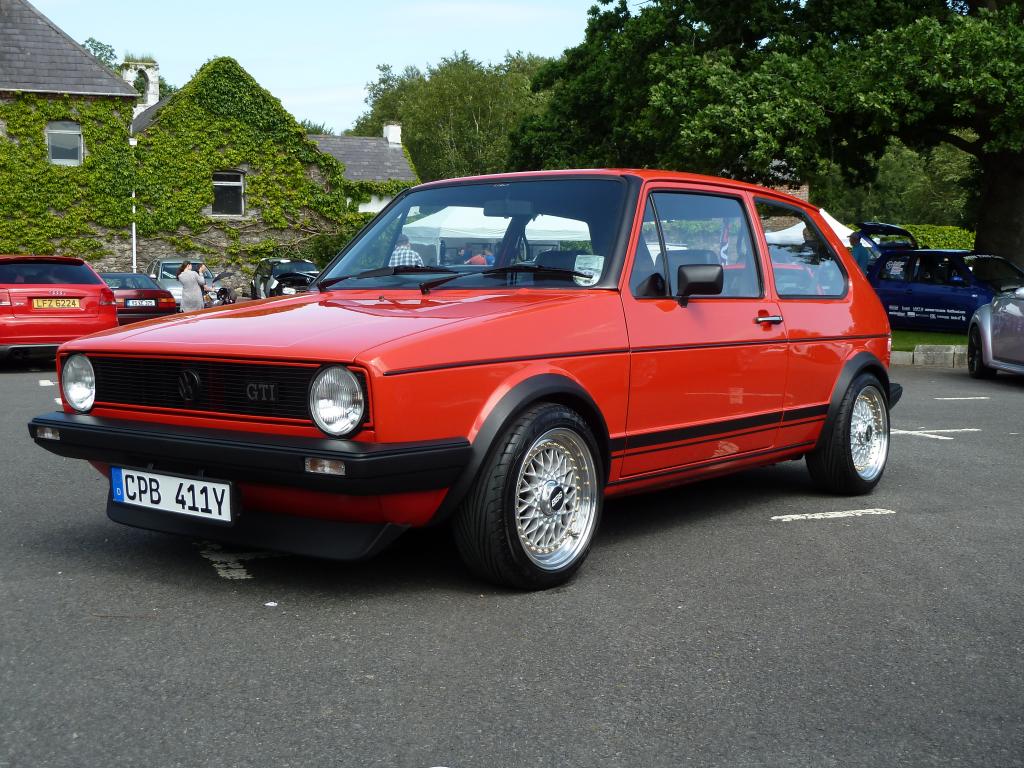
And I just like these 2 pics!

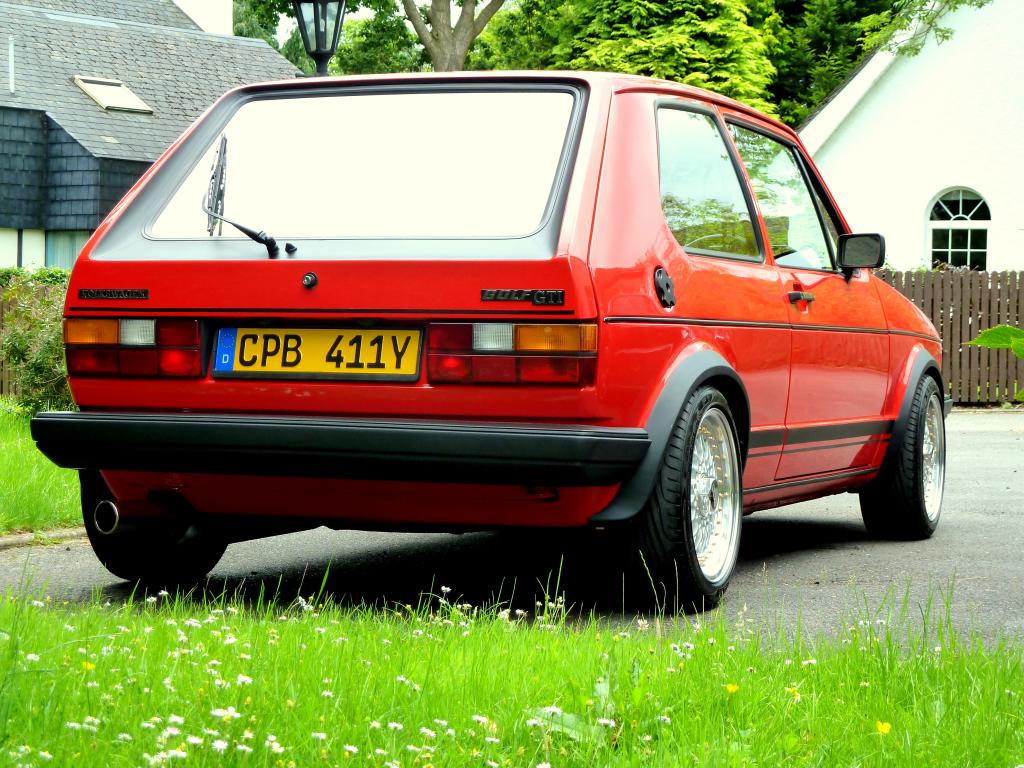
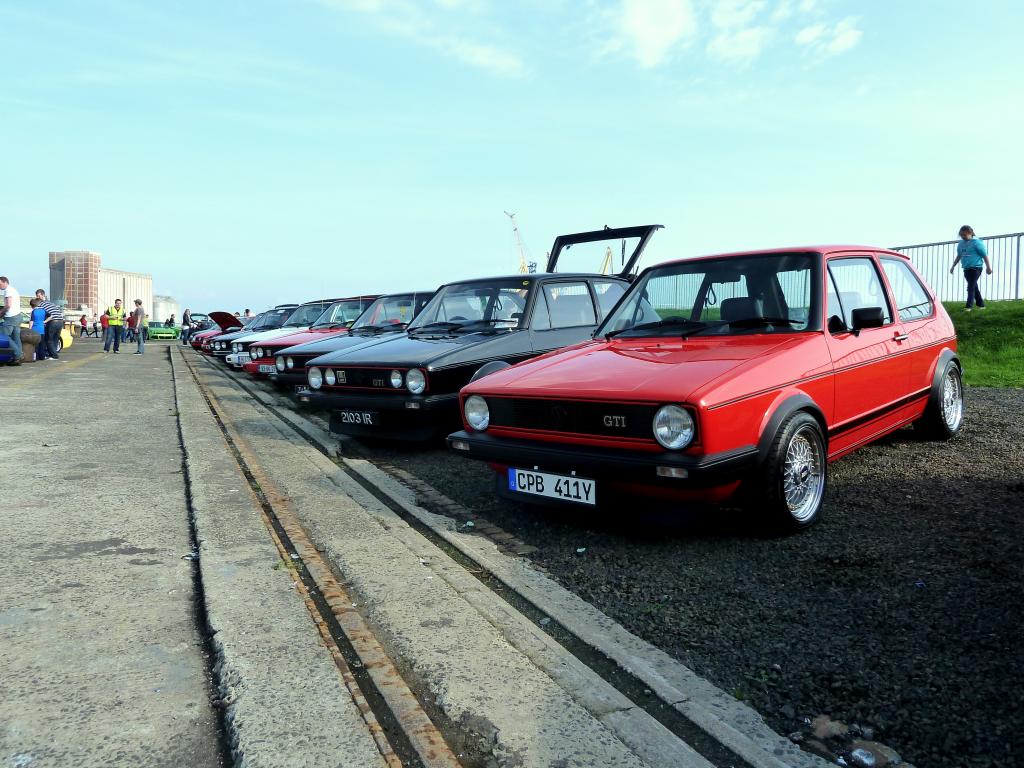
Finally, Titanic Dubs 2013
Nut & Bolt Resto Complete (Mars Red GTi original): https://vwgolfmk1.org.uk/forum/index.php?page=topicview&type=misc&id=projects%2Fyour-mk1-golfs_2%2Fpistolpete-s-mars-red&start__keyed=
Nut & Bolt Resto in Progress (Lhasa 16v): https://vwgolfmk1.org.uk/forum/index.php?page=topicview&type=misc&id=projects%2Fyour-mk1-golfs_2%2Fpistolpete-s-lhasa&redirected=1
Nut & Bolt Resto in Progress (Lhasa 16v): https://vwgolfmk1.org.uk/forum/index.php?page=topicview&type=misc&id=projects%2Fyour-mk1-golfs_2%2Fpistolpete-s-lhasa&redirected=1
Posted
Old Timer


I was never really satisfied with the 280mm brakes on the front as they used the original calipers on spacer brackets. So the original reason for working on the car was to fit a set of 256mm 16v discs with the Girling 54 calipers from a late Mk2 16v and the correct Audi caliper carriers to bolt it all together. I found a set on Ebay with the correct 75mm hole spacing, and whilst the calipers looked in good shape, I exchanged them for a fully reconditioned pair from ECP.
So, into the garage to start tinkering
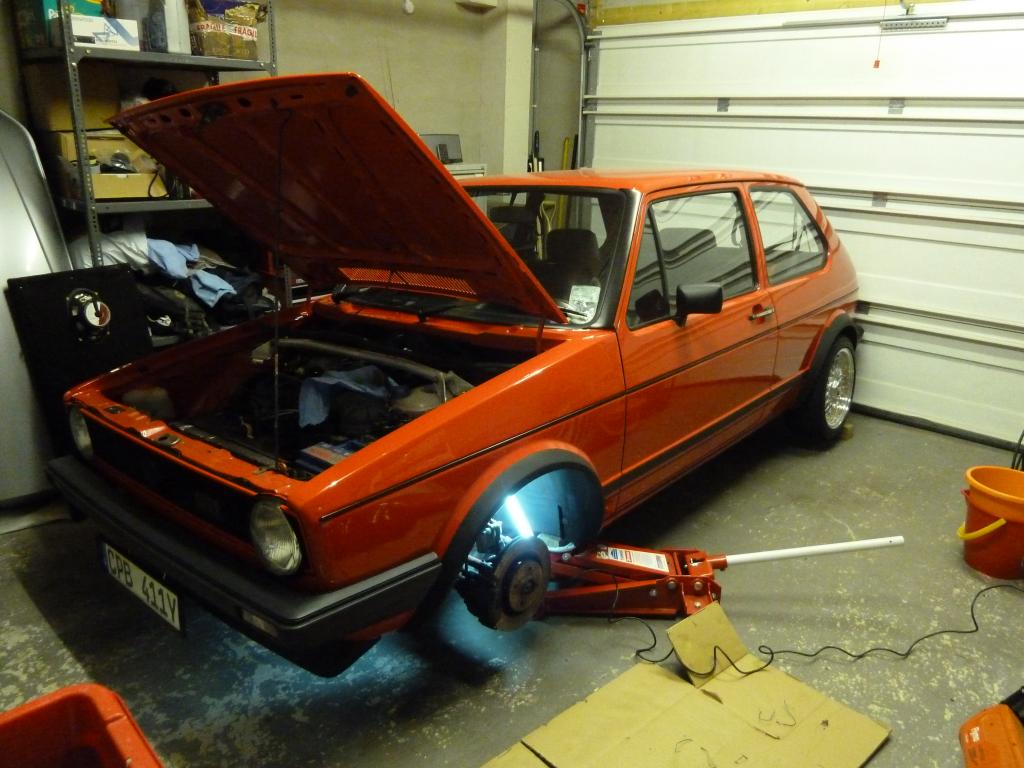
Should have been a simple swap:-
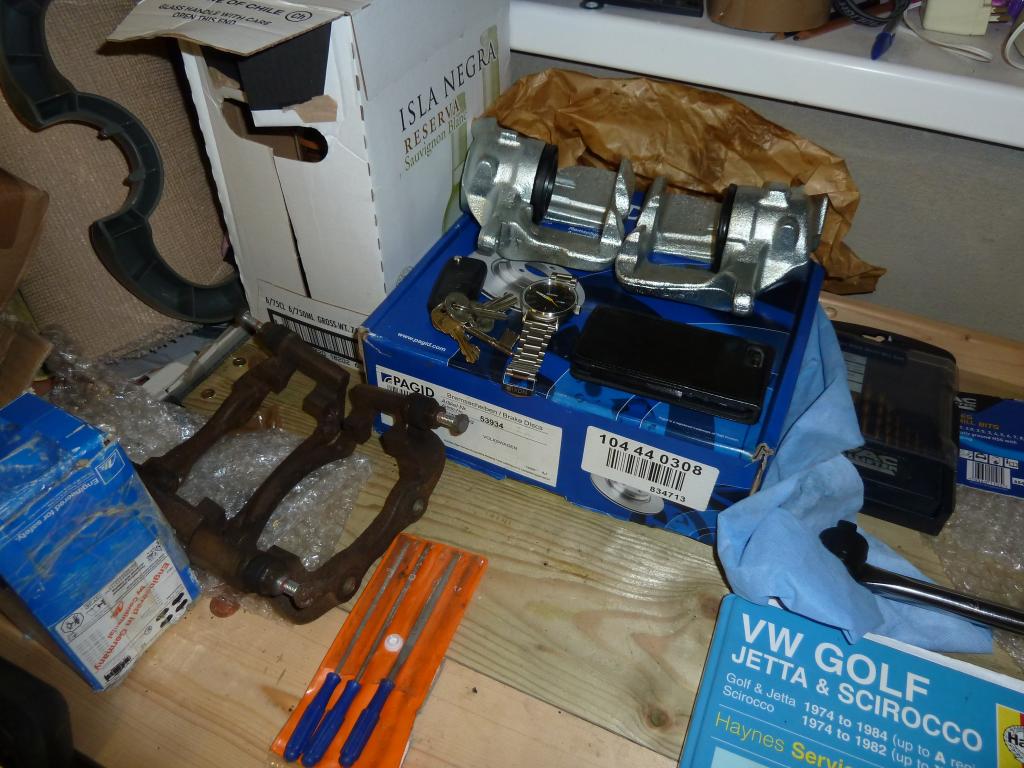
Off with the old
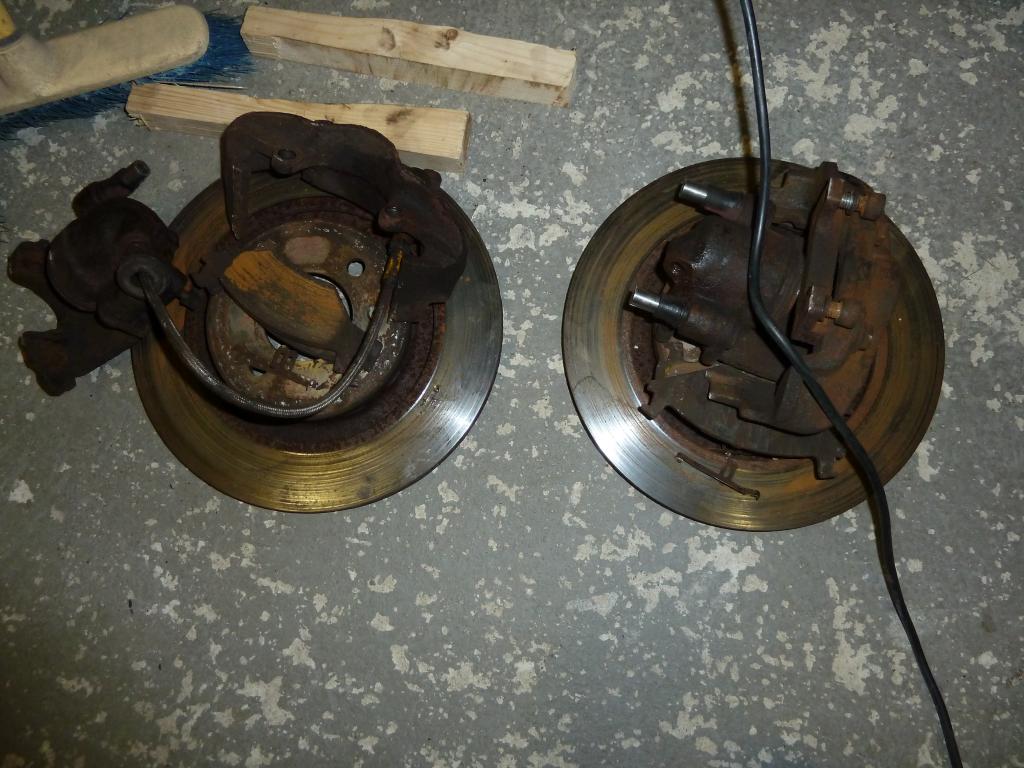
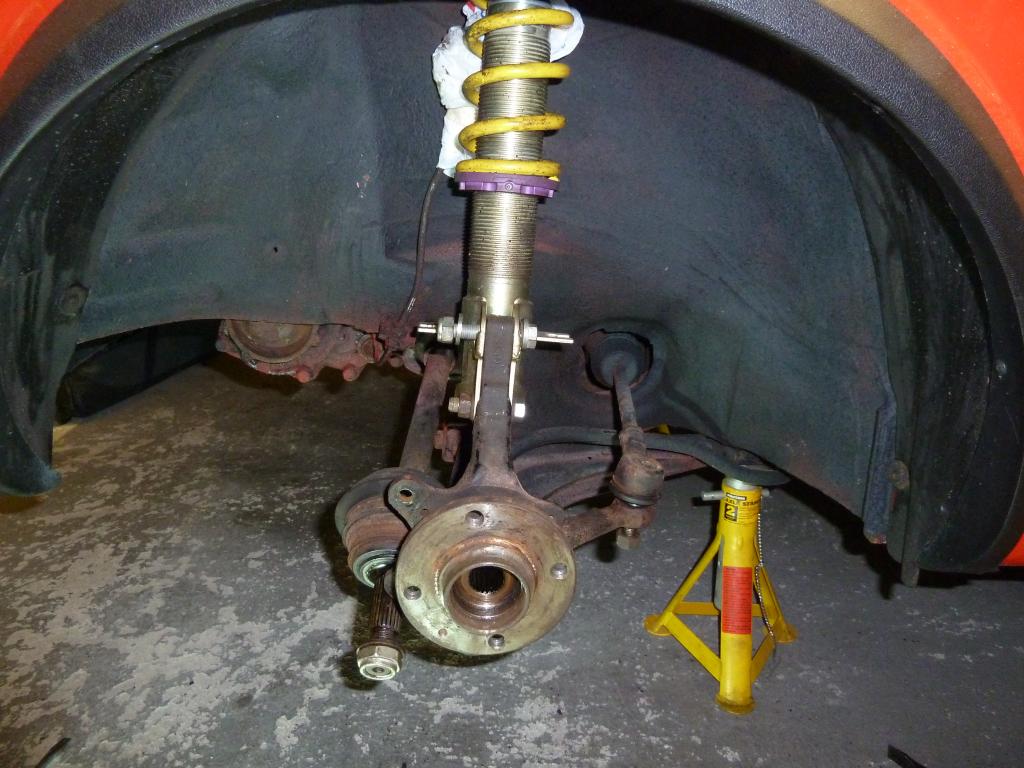
However, problem number 1: The hub carrier threaded holes for mounting the caliper carriers to were stripped. So, at this point I was going to have to start stripping anyway to remove the carriers and have them helicoiled, so I decided to go the whole hog and start a full underbody resto….which would then be followed by an engine out and tidy/paint the engine bay before rebuilding with some new goodies and a lot of powdercoating and painting on the way.
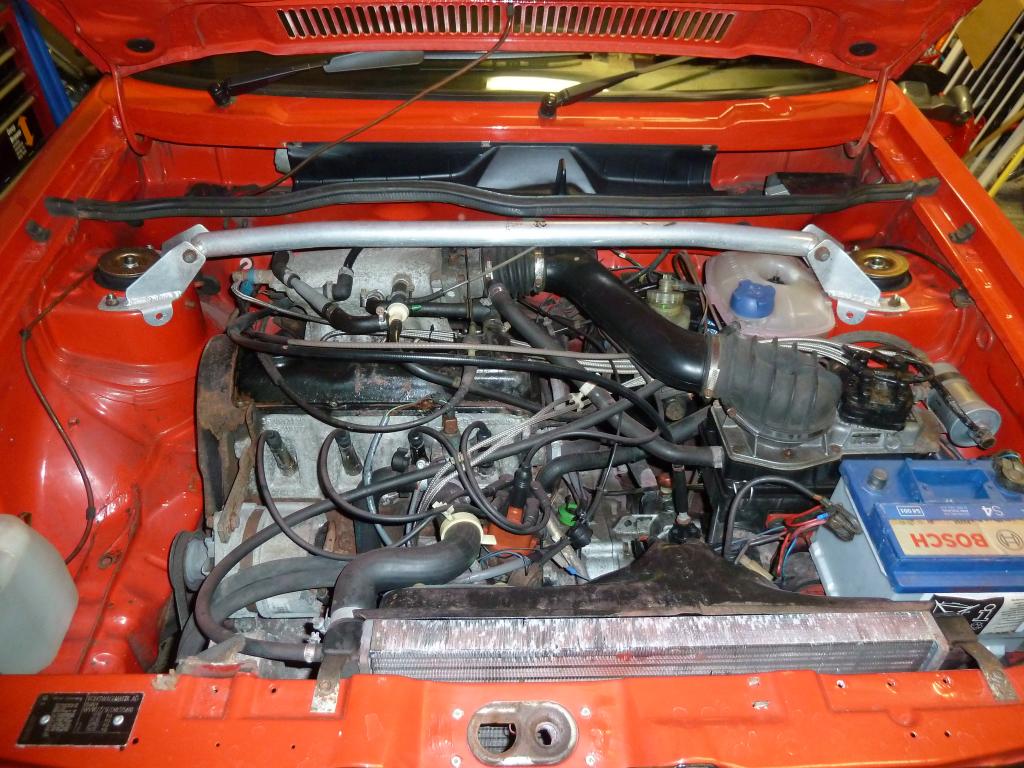
The engine bay, not bad for being totally original.
Quite a bit of overspray managed to get underneath, as well as it needing a good clean and tidy anyway.
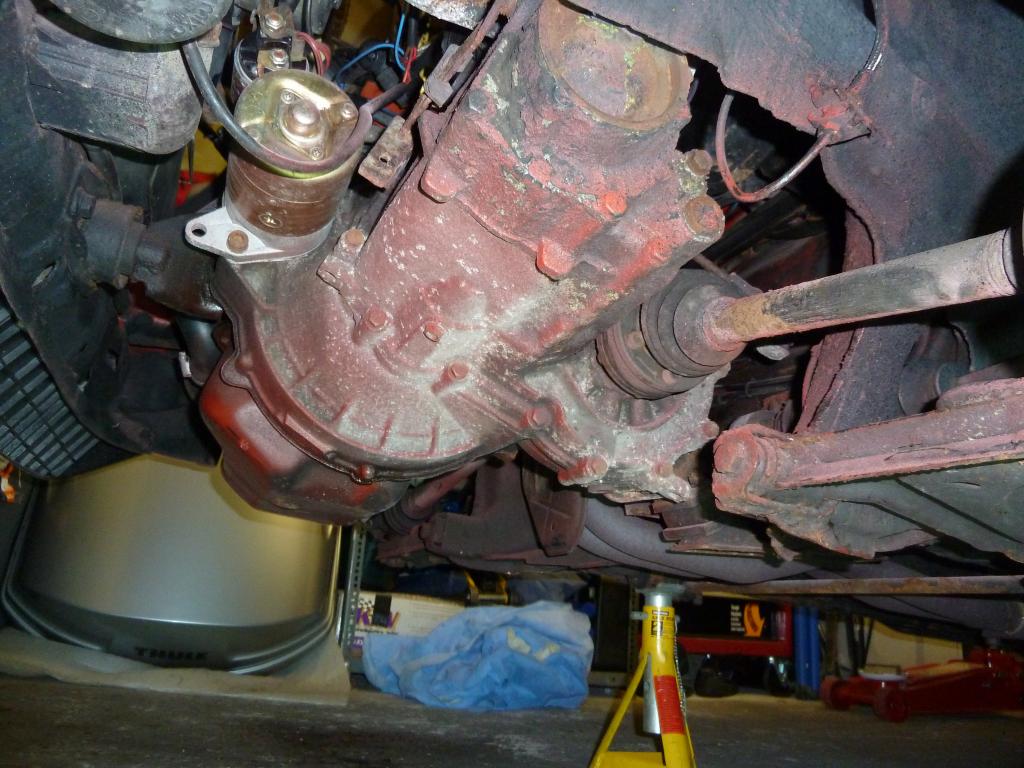
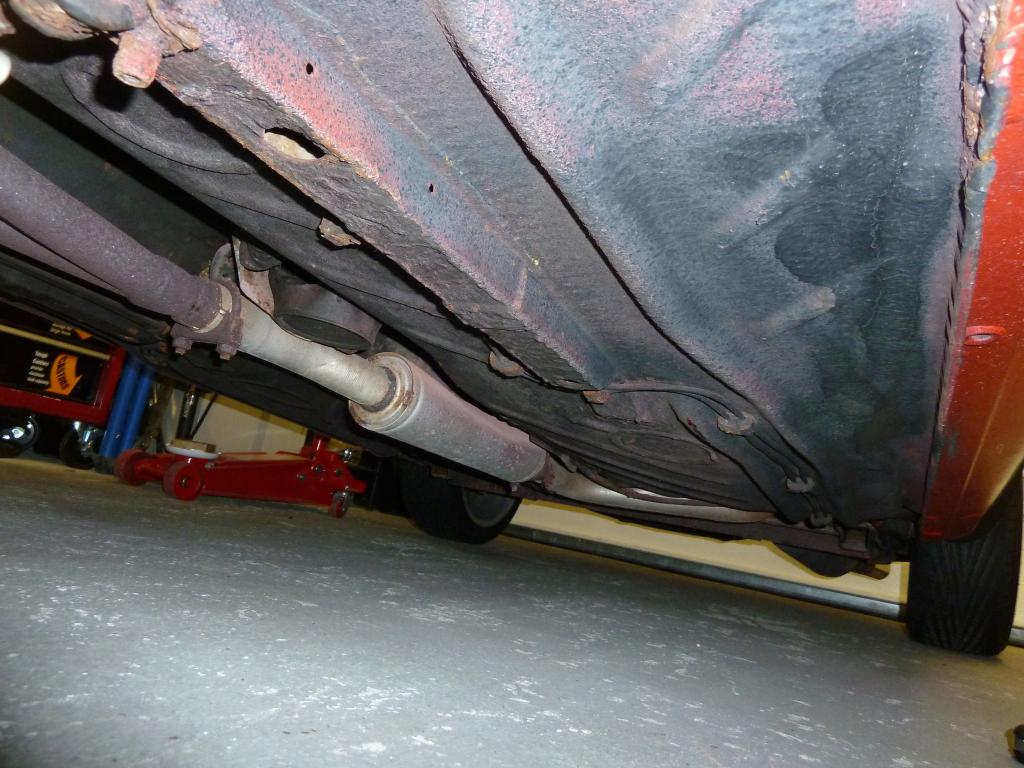
The underside of the car was waxoyled quite extensively around 2005 by my good mate Arty McKee who helped me out loads in the early days with fixing stuff. So it was still in very good shape.
Time to get the garage in order so I could keep track of everything coming off and knew exactly where it came from. I think that is key to these type of things, you have to be very methodical.

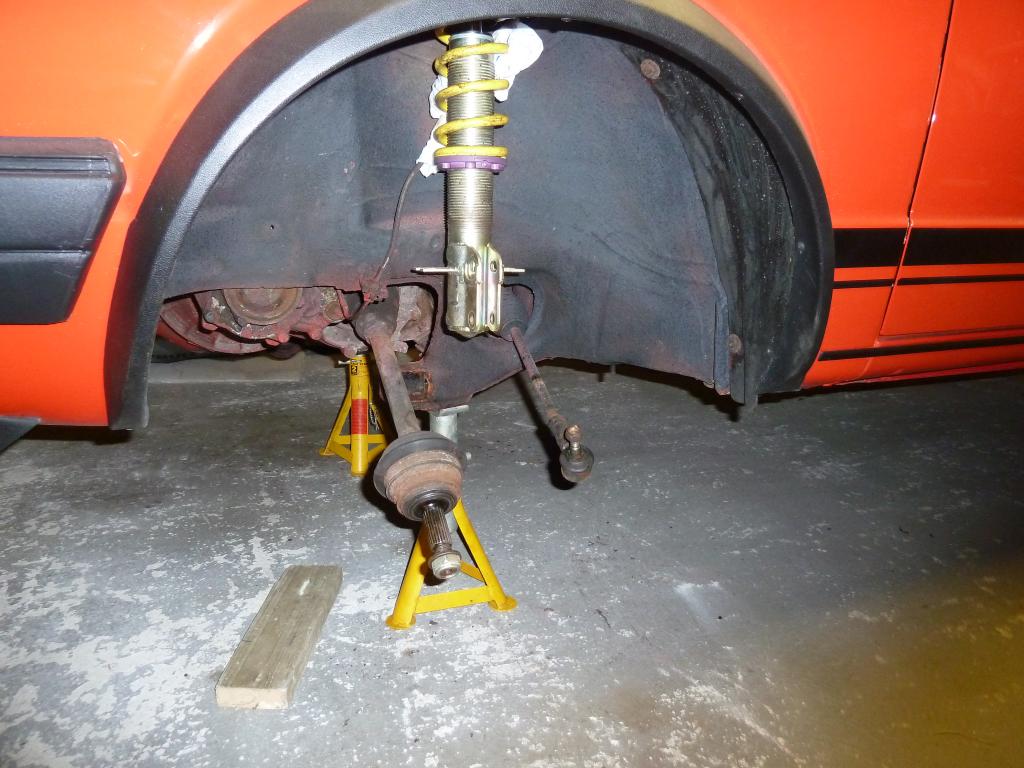
Hub carriers removed and sent to OD Cars for helicoiling and removal of the old wheel bearings ready for powder coating. Everything else also removed, wishbones, anti roll bars, track rods etc.
Nut & Bolt Resto Complete (Mars Red GTi original): https://vwgolfmk1.org.uk/forum/index.php?page=topicview&type=misc&id=projects%2Fyour-mk1-golfs_2%2Fpistolpete-s-mars-red&start__keyed=
Nut & Bolt Resto in Progress (Lhasa 16v): https://vwgolfmk1.org.uk/forum/index.php?page=topicview&type=misc&id=projects%2Fyour-mk1-golfs_2%2Fpistolpete-s-lhasa&redirected=1
Nut & Bolt Resto in Progress (Lhasa 16v): https://vwgolfmk1.org.uk/forum/index.php?page=topicview&type=misc&id=projects%2Fyour-mk1-golfs_2%2Fpistolpete-s-lhasa&redirected=1
Posted
Old Timer


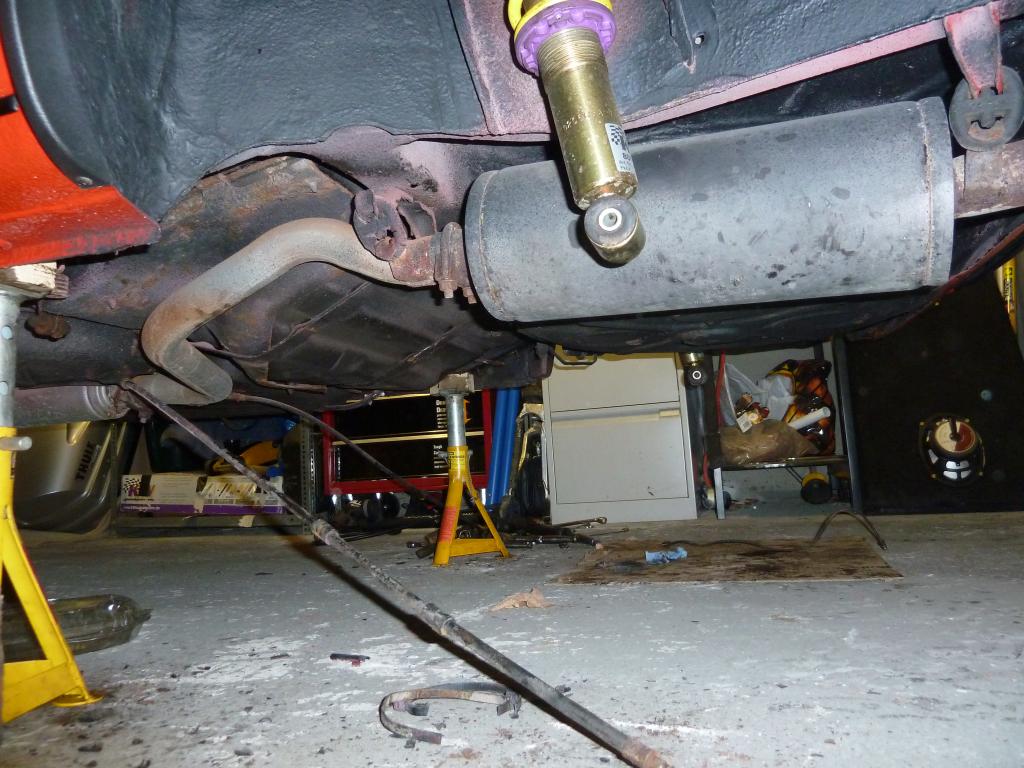
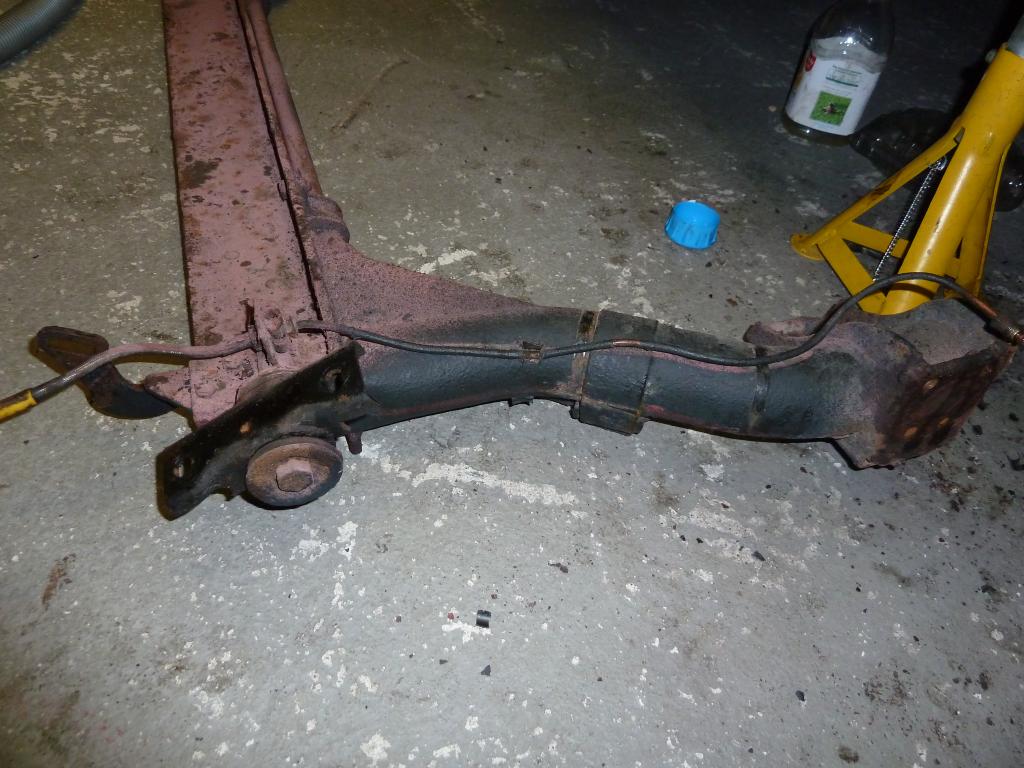
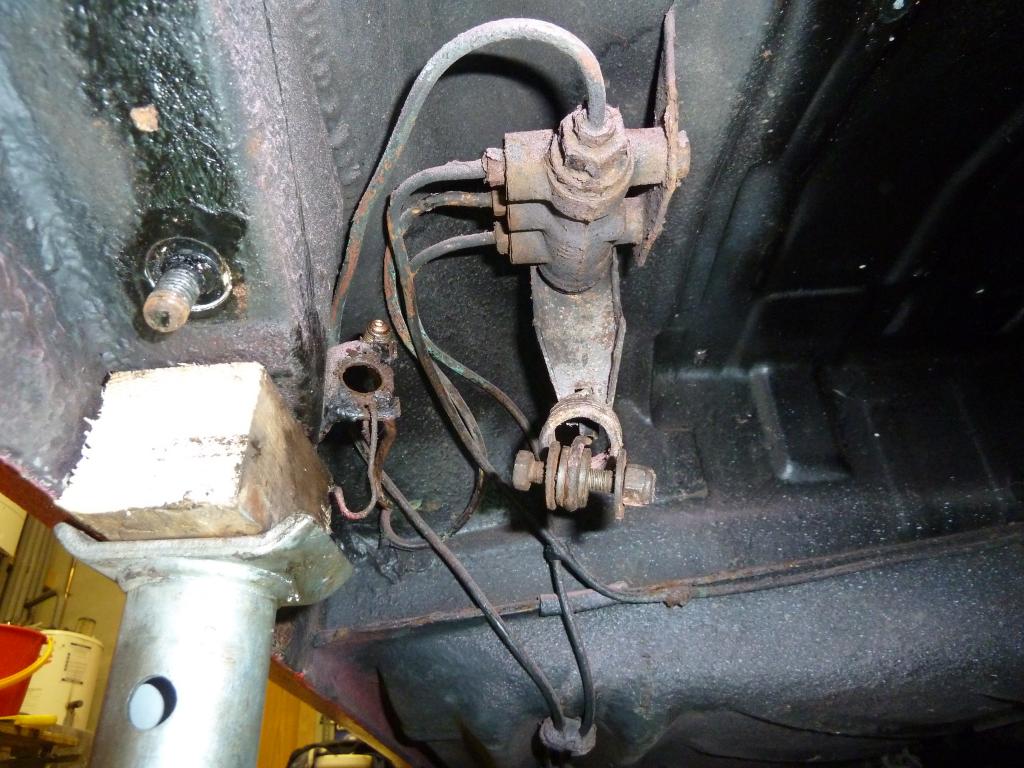
Rear brake compensator removed…eventually. I had to cut 3 of the brake pipes as the fittings were seized solid. Have since managed to free them off in the vice so will be reusable.
Fuel tank removed. You can see the good condition under there from Arty's previous undersealing job for me.
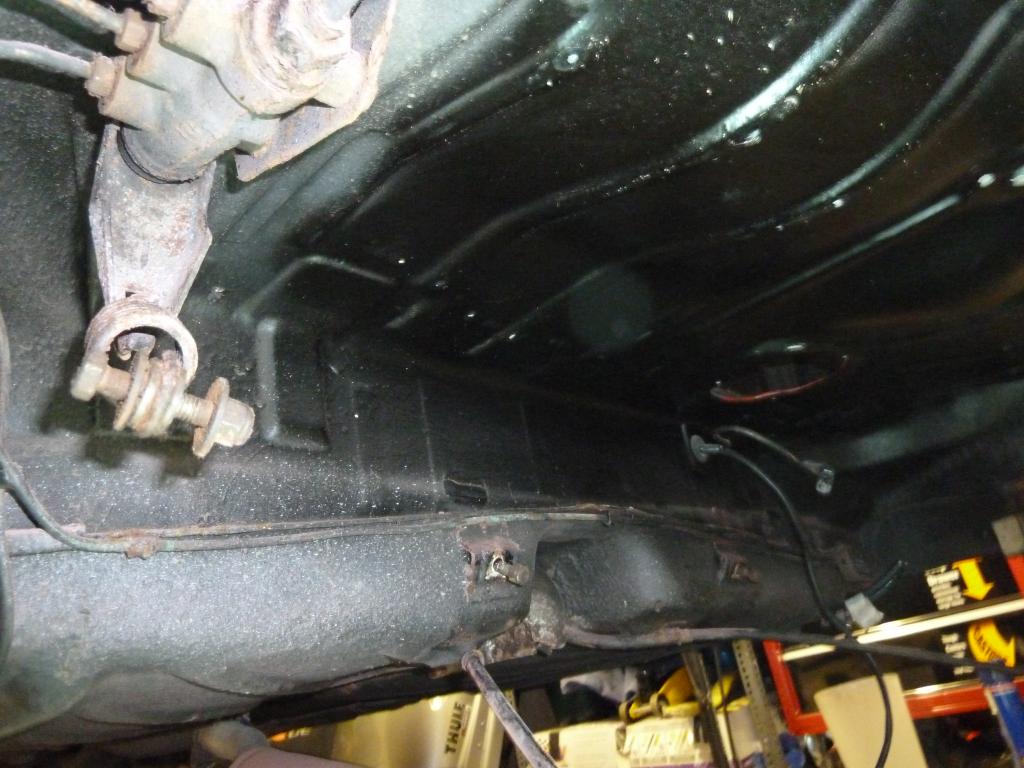
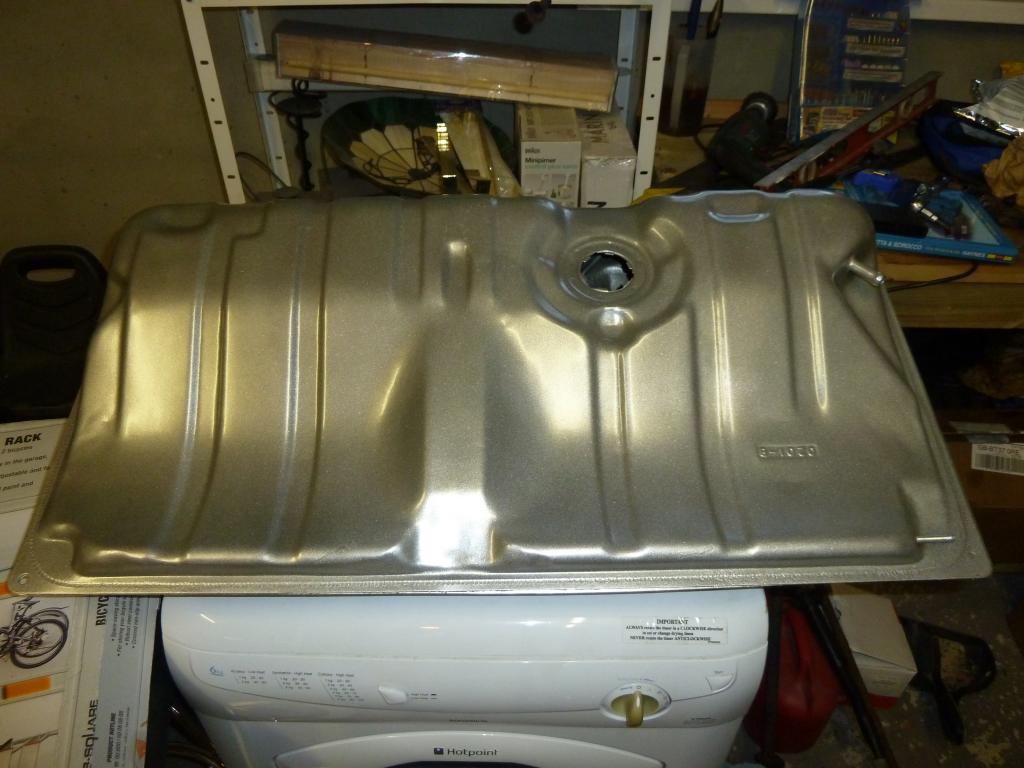
The tank would be going to the powdercoaters in due course.

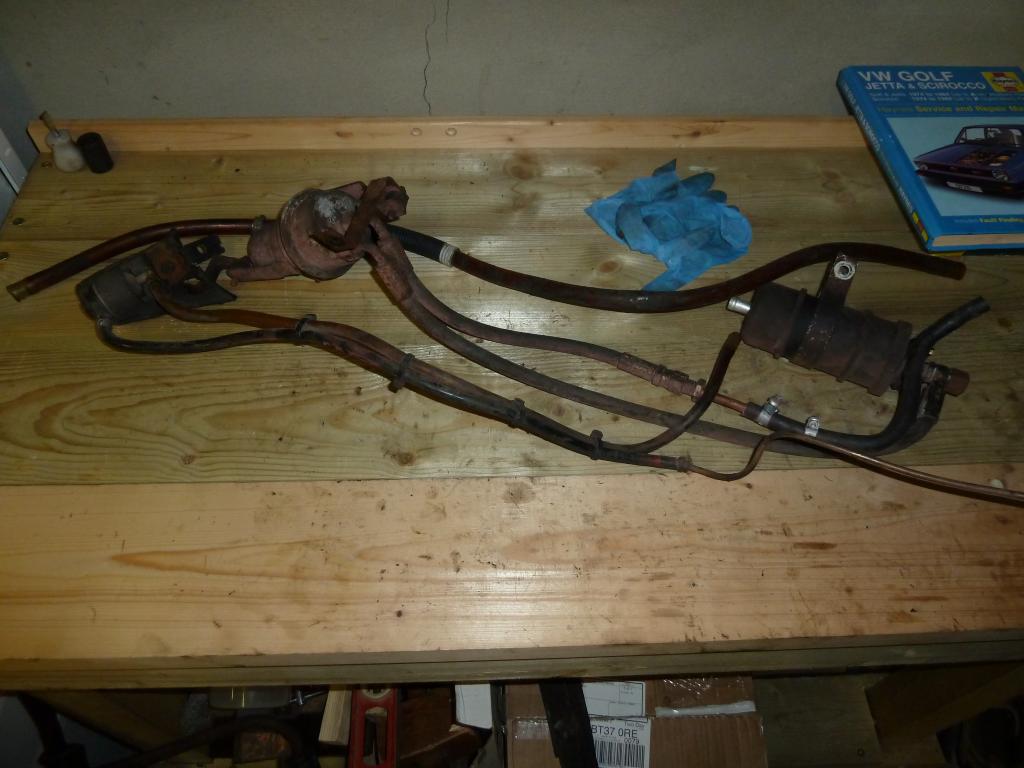
Fuel pump, accumulator and gravity valve assembly all removed. When I rebuild I will probably go back to the original style fuel pump mounting bracket from Crazyquiff and the correct foam holder for the pump. I have a set of Crazyquiff's braided fuel supply and return lines to go on.
Nut & Bolt Resto Complete (Mars Red GTi original): https://vwgolfmk1.org.uk/forum/index.php?page=topicview&type=misc&id=projects%2Fyour-mk1-golfs_2%2Fpistolpete-s-mars-red&start__keyed=
Nut & Bolt Resto in Progress (Lhasa 16v): https://vwgolfmk1.org.uk/forum/index.php?page=topicview&type=misc&id=projects%2Fyour-mk1-golfs_2%2Fpistolpete-s-lhasa&redirected=1
Nut & Bolt Resto in Progress (Lhasa 16v): https://vwgolfmk1.org.uk/forum/index.php?page=topicview&type=misc&id=projects%2Fyour-mk1-golfs_2%2Fpistolpete-s-lhasa&redirected=1
Posted
Old Timer


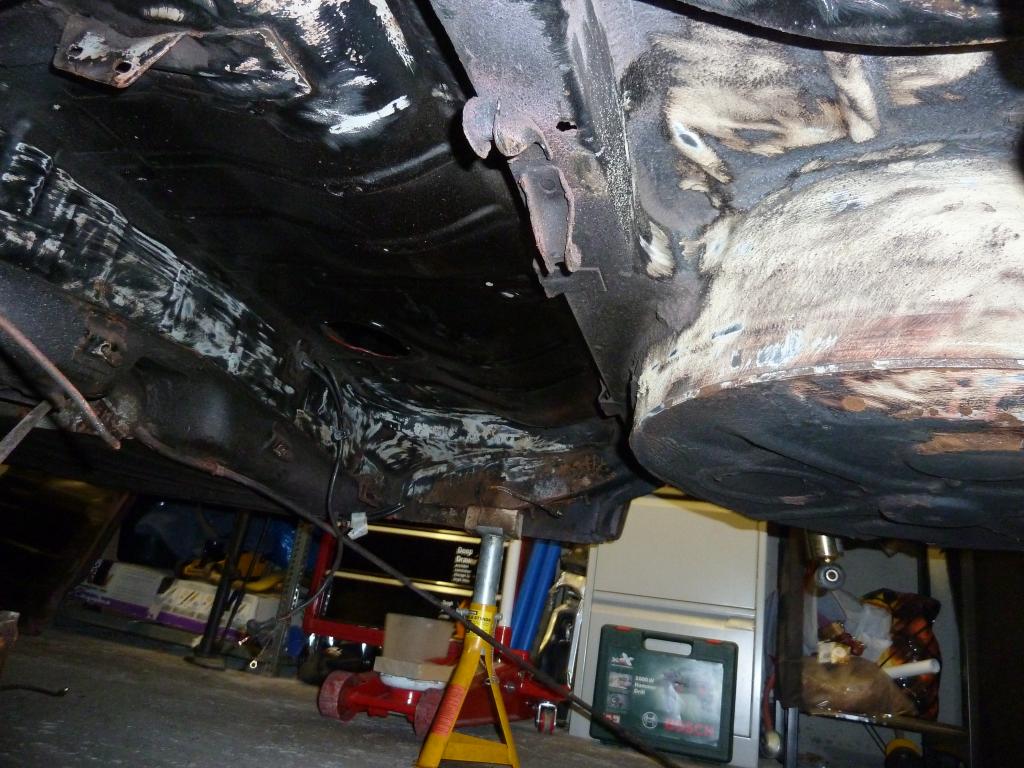
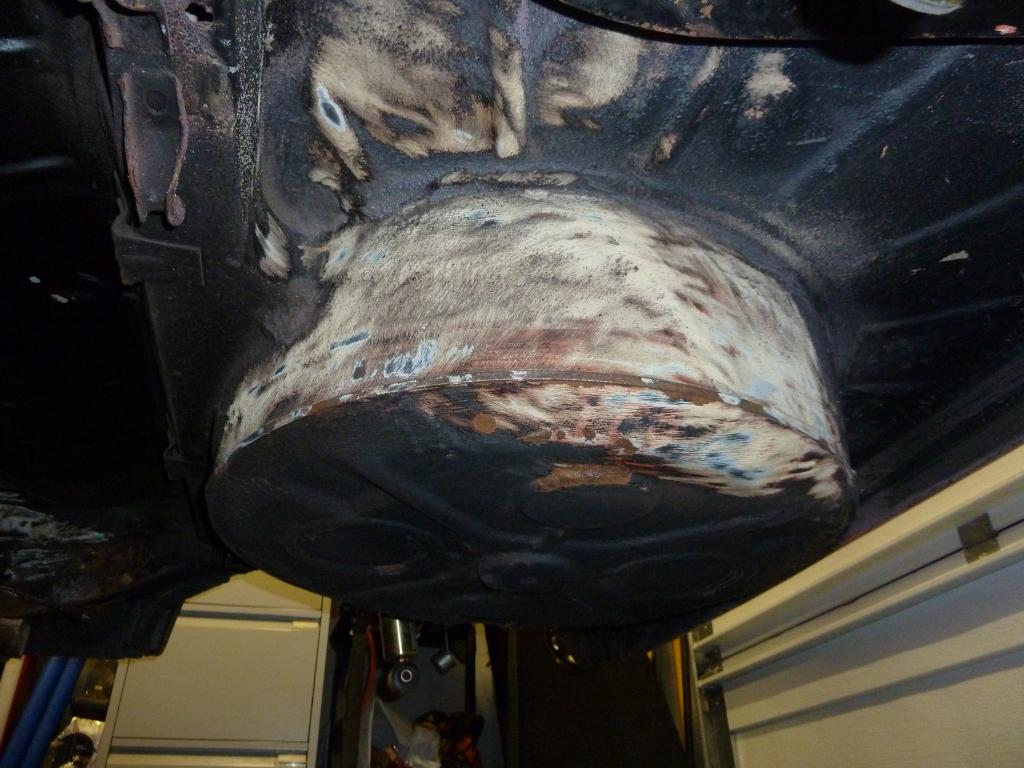
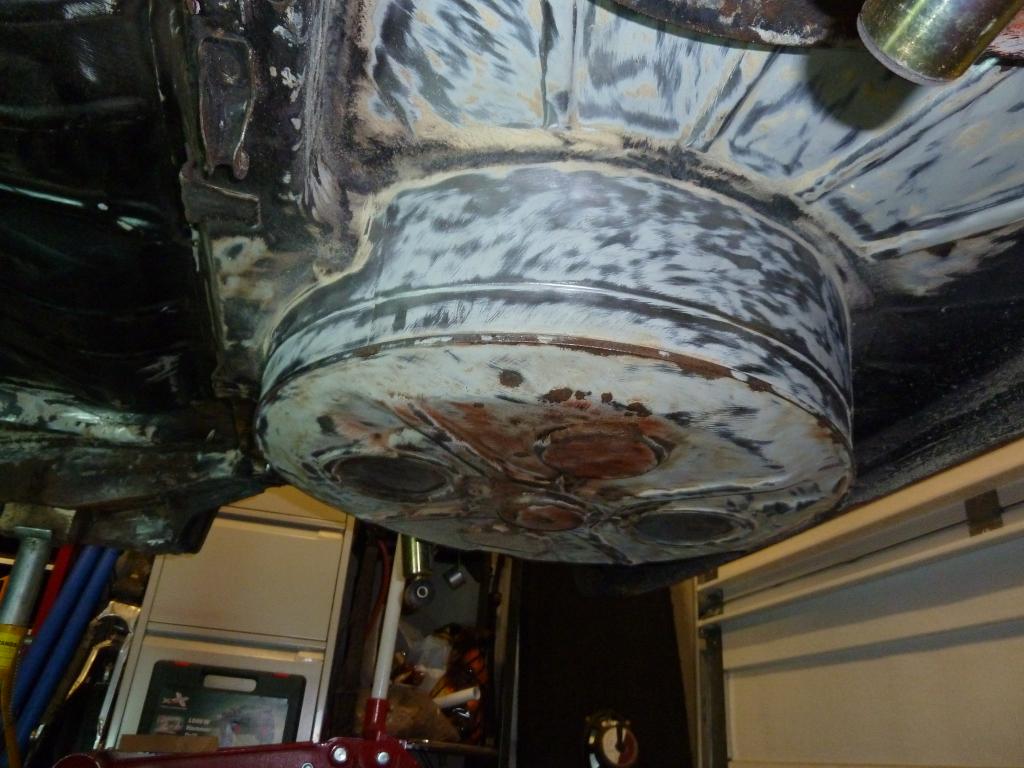
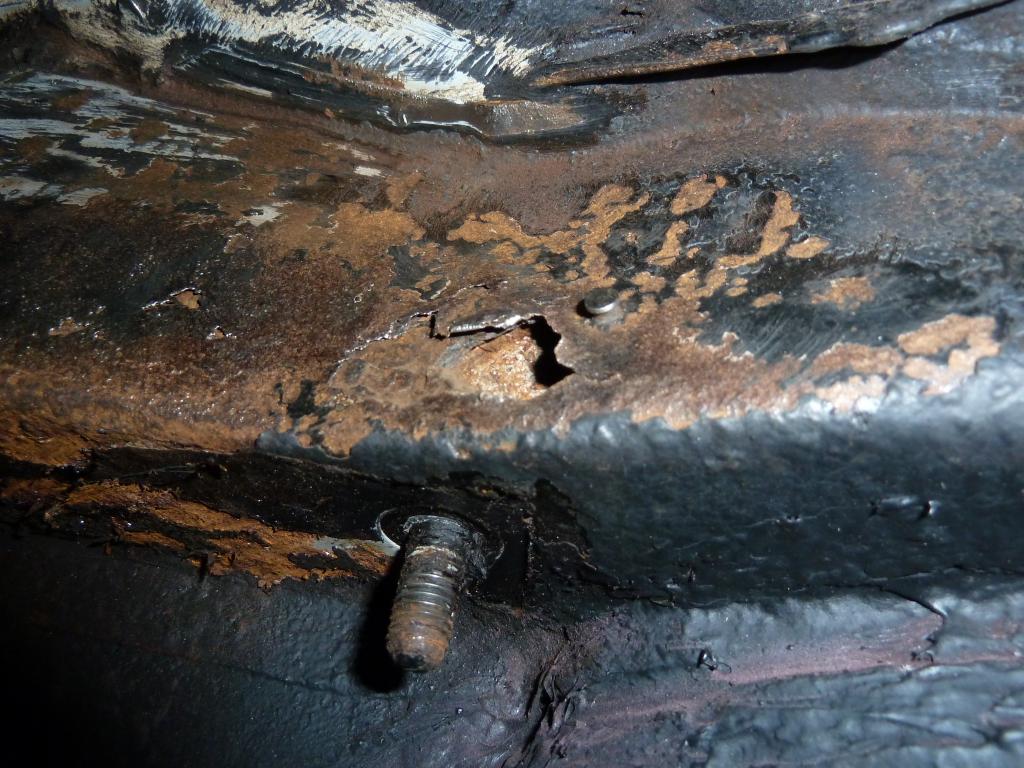
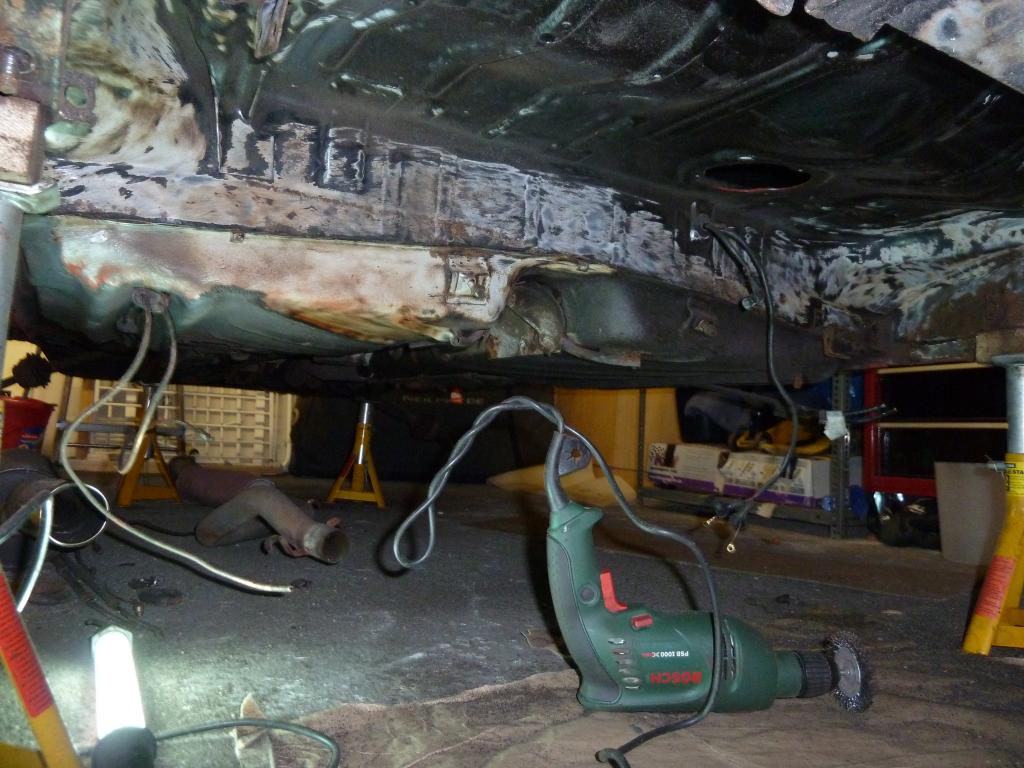
Problem number 2: a small bit of welding will be required on the drivers side rear chassis leg. Thankfully it all looks reasonably sound around the remaining area and just finding this before it was allowed to get any worse has made the job worth it so far already:-
And that is everything pretty much up-to-date as far as the project goes. Obviously progress will slow down considerably as I have limited time to work on the car, but I'm happy to keep plugging away at it. Any advice or tips along the way will of course be greatly appreciated.
Nut & Bolt Resto Complete (Mars Red GTi original): https://vwgolfmk1.org.uk/forum/index.php?page=topicview&type=misc&id=projects%2Fyour-mk1-golfs_2%2Fpistolpete-s-mars-red&start__keyed=
Nut & Bolt Resto in Progress (Lhasa 16v): https://vwgolfmk1.org.uk/forum/index.php?page=topicview&type=misc&id=projects%2Fyour-mk1-golfs_2%2Fpistolpete-s-lhasa&redirected=1
Nut & Bolt Resto in Progress (Lhasa 16v): https://vwgolfmk1.org.uk/forum/index.php?page=topicview&type=misc&id=projects%2Fyour-mk1-golfs_2%2Fpistolpete-s-lhasa&redirected=1
Posted
Old Timer


You might also notice the box the parts are sitting on - I bit the bullet and ordered an uprated Eibach anti-roll bar kit from C&R Enterprises.
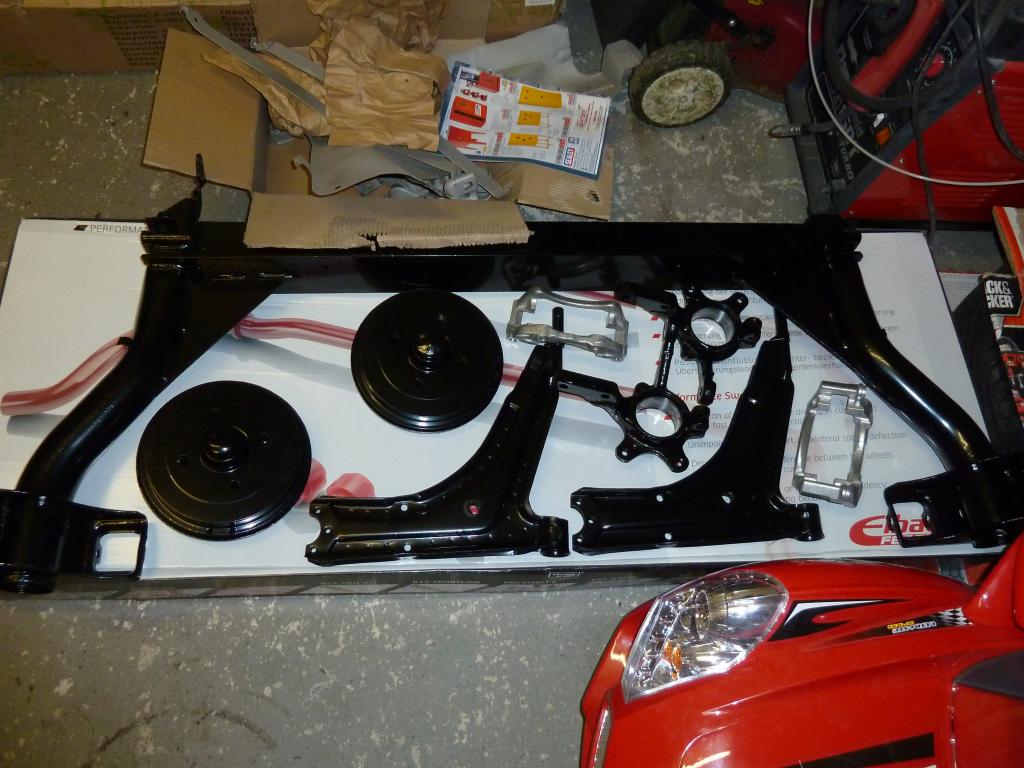
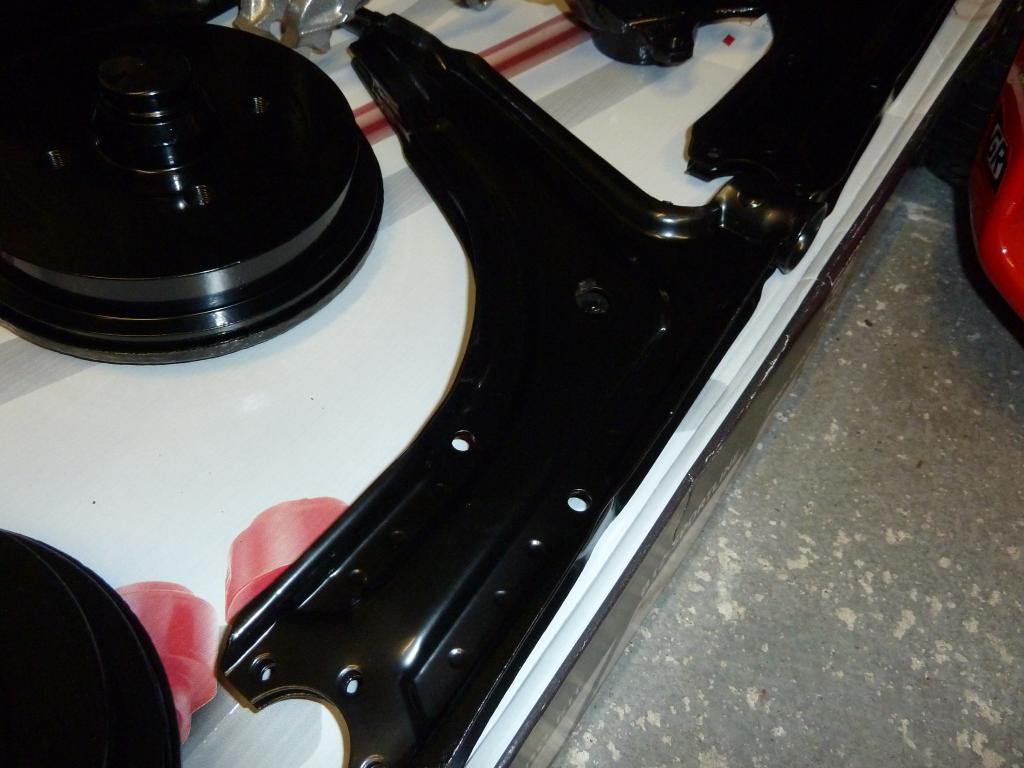
Wishbones and drums came up better than new
Fuel tank
Nut & Bolt Resto Complete (Mars Red GTi original): https://vwgolfmk1.org.uk/forum/index.php?page=topicview&type=misc&id=projects%2Fyour-mk1-golfs_2%2Fpistolpete-s-mars-red&start__keyed=
Nut & Bolt Resto in Progress (Lhasa 16v): https://vwgolfmk1.org.uk/forum/index.php?page=topicview&type=misc&id=projects%2Fyour-mk1-golfs_2%2Fpistolpete-s-lhasa&redirected=1
Nut & Bolt Resto in Progress (Lhasa 16v): https://vwgolfmk1.org.uk/forum/index.php?page=topicview&type=misc&id=projects%2Fyour-mk1-golfs_2%2Fpistolpete-s-lhasa&redirected=1
Posted
Settling In

Posted
Local Hero


Andy
LINCOLNSHIRE REGION - https://www.facebook.com/groups/467122313360002/
1983 MK1 Golf GTI Campaign Model - Under (looooong) resto!
1962 Rover P4 80
2002 BMW 745i
2008 BMW Z4 2.5Si
LINCOLNSHIRE REGION - https://www.facebook.com/groups/467122313360002/
1983 MK1 Golf GTI Campaign Model - Under (looooong) resto!
1962 Rover P4 80
2002 BMW 745i
2008 BMW Z4 2.5Si
Posted
Local Hero


Andy
LINCOLNSHIRE REGION - https://www.facebook.com/groups/467122313360002/
1983 MK1 Golf GTI Campaign Model - Under (looooong) resto!
1962 Rover P4 80
2002 BMW 745i
2008 BMW Z4 2.5Si
LINCOLNSHIRE REGION - https://www.facebook.com/groups/467122313360002/
1983 MK1 Golf GTI Campaign Model - Under (looooong) resto!
1962 Rover P4 80
2002 BMW 745i
2008 BMW Z4 2.5Si
Posted
Old Timer


Nut & Bolt Resto Complete (Mars Red GTi original): https://vwgolfmk1.org.uk/forum/index.php?page=topicview&type=misc&id=projects%2Fyour-mk1-golfs_2%2Fpistolpete-s-mars-red&start__keyed=
Nut & Bolt Resto in Progress (Lhasa 16v): https://vwgolfmk1.org.uk/forum/index.php?page=topicview&type=misc&id=projects%2Fyour-mk1-golfs_2%2Fpistolpete-s-lhasa&redirected=1
Nut & Bolt Resto in Progress (Lhasa 16v): https://vwgolfmk1.org.uk/forum/index.php?page=topicview&type=misc&id=projects%2Fyour-mk1-golfs_2%2Fpistolpete-s-lhasa&redirected=1
Posted
Moderator


Hairyarse said
Great story and thread, thanks for putting this up!It's a mighty fine looking MK1 and glad to see it

I can only 'Ditto' the above, that is one of the most impressive rebuilds I've seen!
That and the finished article looks the Dogs 'GONADS'!
Sent by a smartphone and not a smartperson!
Play Guess the Asking Price 'SEASON 4' as of Sunday the 29th of October 2017.
https://vwgolfmk1.org.uk/forum/index.php?page=topicview&id=chat%2Fmk1-golf-chat_2%2Fguess-the-asking-price_2
OLD.
https://vwgolfmk1.org.uk/forum/index.php?page=topicview&id=chat%2Fmk1-golf-chat_2%2Fold-guess-the-asking
Ever wondered who's behind the scenes of this forum?
https://vwgolfmk1.org.uk/index.php?page=committee
Mike
There's me building mine 28 years ago, almost finished!
Be proud of your VW Golf Mk1, it's very special!
Play Guess the Asking Price 'SEASON 4' as of Sunday the 29th of October 2017.
https://vwgolfmk1.org.uk/forum/index.php?page=topicview&id=chat%2Fmk1-golf-chat_2%2Fguess-the-asking-price_2
OLD.
https://vwgolfmk1.org.uk/forum/index.php?page=topicview&id=chat%2Fmk1-golf-chat_2%2Fold-guess-the-asking
Ever wondered who's behind the scenes of this forum?
https://vwgolfmk1.org.uk/index.php?page=committee
Mike
There's me building mine 28 years ago, almost finished!

Be proud of your VW Golf Mk1, it's very special!
Posted
Premium Yam Yam

Posted
Moderator


Be sure to check out our ring of kerry trip/thread in september - it might be of interest to you?
Keep up the good work.
Posted
Old Timer


Shughy said
PistolPete great to see the pics of the work you have put into this car. Its looks absolutely brilliant and your attention to detail is spot on. The powdercoating is a tasty job. Well done.
Be sure to check out our ring of kerry trip/thread in september - it might be of interest to you?
Keep up the good work.
Cheers Hugh. I have seen the thread on the Kerry trip and would love a run out, especially if there's a convoy heading down from the North. It just depends on whether car is finished by September and work/family commitments at the time.
I'll keep you posted, and you'll know from this thread if it's anywhere near finished by then!!
Nut & Bolt Resto Complete (Mars Red GTi original): https://vwgolfmk1.org.uk/forum/index.php?page=topicview&type=misc&id=projects%2Fyour-mk1-golfs_2%2Fpistolpete-s-mars-red&start__keyed=
Nut & Bolt Resto in Progress (Lhasa 16v): https://vwgolfmk1.org.uk/forum/index.php?page=topicview&type=misc&id=projects%2Fyour-mk1-golfs_2%2Fpistolpete-s-lhasa&redirected=1
Nut & Bolt Resto in Progress (Lhasa 16v): https://vwgolfmk1.org.uk/forum/index.php?page=topicview&type=misc&id=projects%2Fyour-mk1-golfs_2%2Fpistolpete-s-lhasa&redirected=1
Posted
Local Hero

Keep the great updates coming
Posted
Old Timer

Matt
Posted
Old Timer

also you had to grind half the pad away to fit them otherwise they wouldnt fit, no wonder they went bust
i just tapped them out to m12 x 1.5 and stuck as to what to fit atm
Posted
Old Timer


Nut & Bolt Resto Complete (Mars Red GTi original): https://vwgolfmk1.org.uk/forum/index.php?page=topicview&type=misc&id=projects%2Fyour-mk1-golfs_2%2Fpistolpete-s-mars-red&start__keyed=
Nut & Bolt Resto in Progress (Lhasa 16v): https://vwgolfmk1.org.uk/forum/index.php?page=topicview&type=misc&id=projects%2Fyour-mk1-golfs_2%2Fpistolpete-s-lhasa&redirected=1
Nut & Bolt Resto in Progress (Lhasa 16v): https://vwgolfmk1.org.uk/forum/index.php?page=topicview&type=misc&id=projects%2Fyour-mk1-golfs_2%2Fpistolpete-s-lhasa&redirected=1
0 guests and 0 members have just viewed this: None.


