


Borednow's Cabby - New Season new pics!

Posted

Moderator


93 Clipper Cabrio
Still waiting fir the cup washers for the rear beam from heritage

So as everything has come to a grinding halt I thought i'd re-do some of the stuff i've done already under the idea of a quick fix, properly. The original plan was to MOT the car quickly and then sort out it out properly when I could move it around easily. But this hasn't happened so here we are

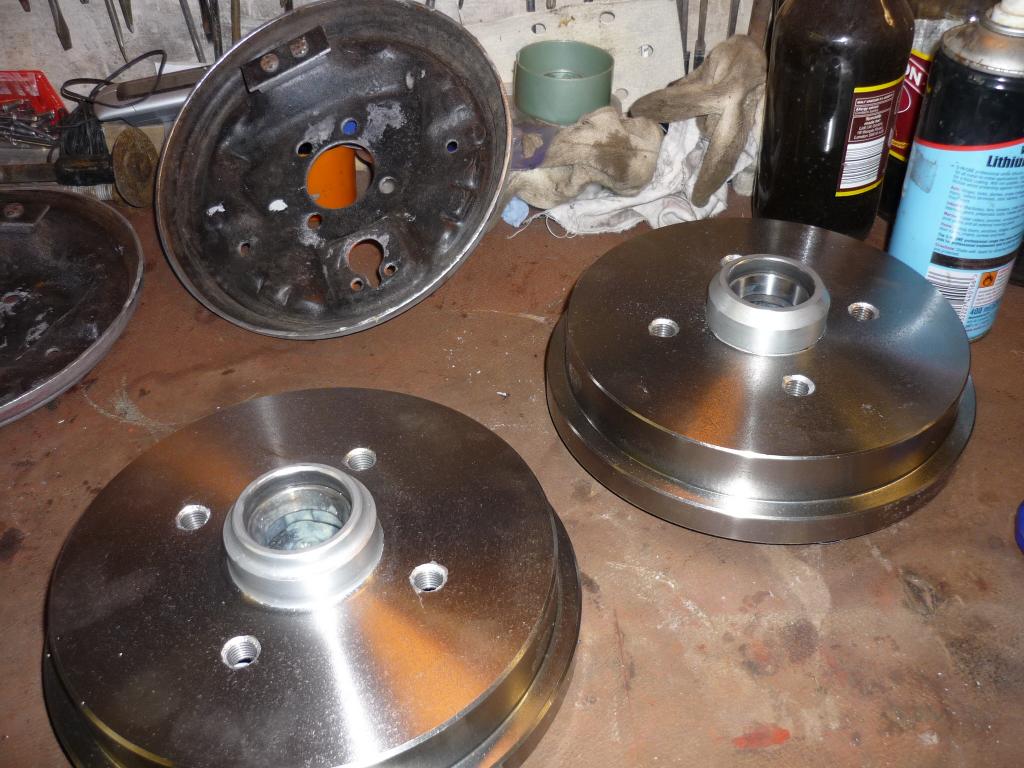
First up for the re-do were the rear brakes. I had given them a quick blast with a wire brush, red oxided em and painted em black
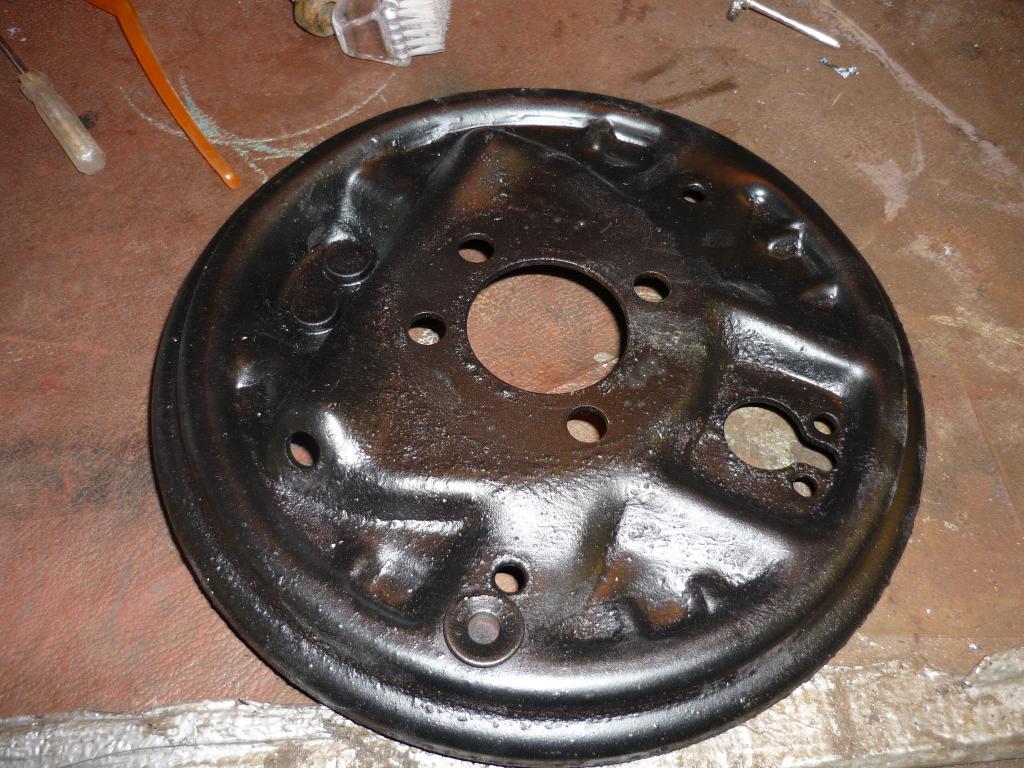
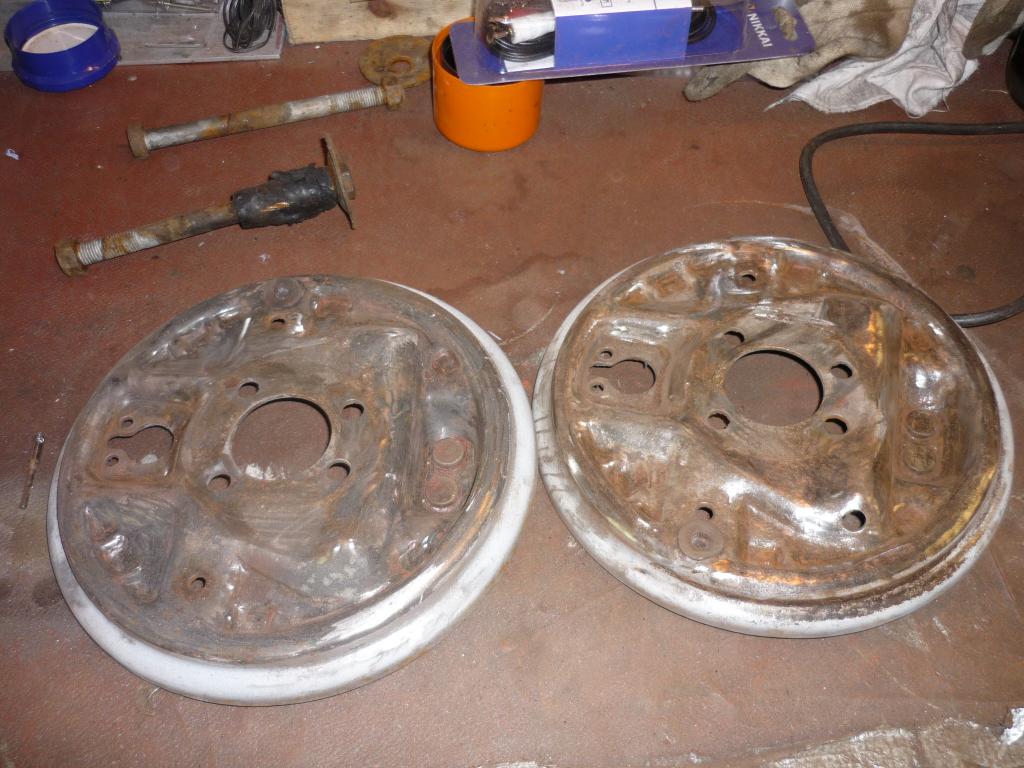
They are a bit 'bubbly' around the edges so to do them properly the edges were all ground back to bare metal and smoothed out, then media blasted to get all the residual paint and rust off
Then painted with some silver high heat paint and as I was really bored at the time some bright orange detailing (well no one will ever see it except you)
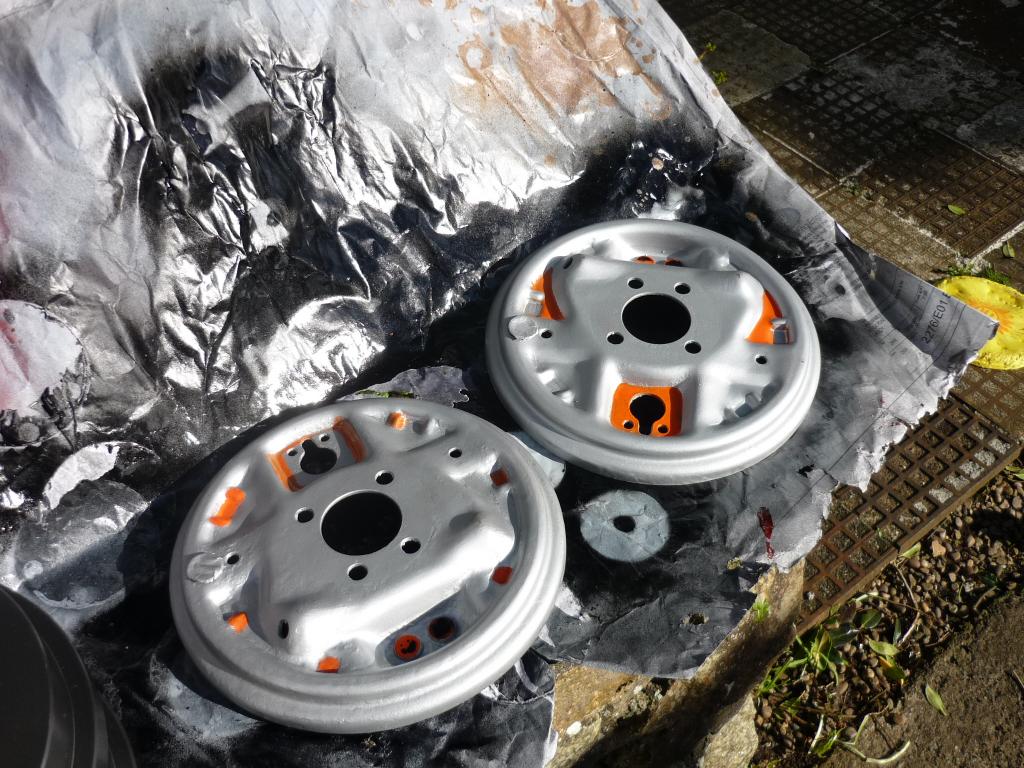
and then laquered.
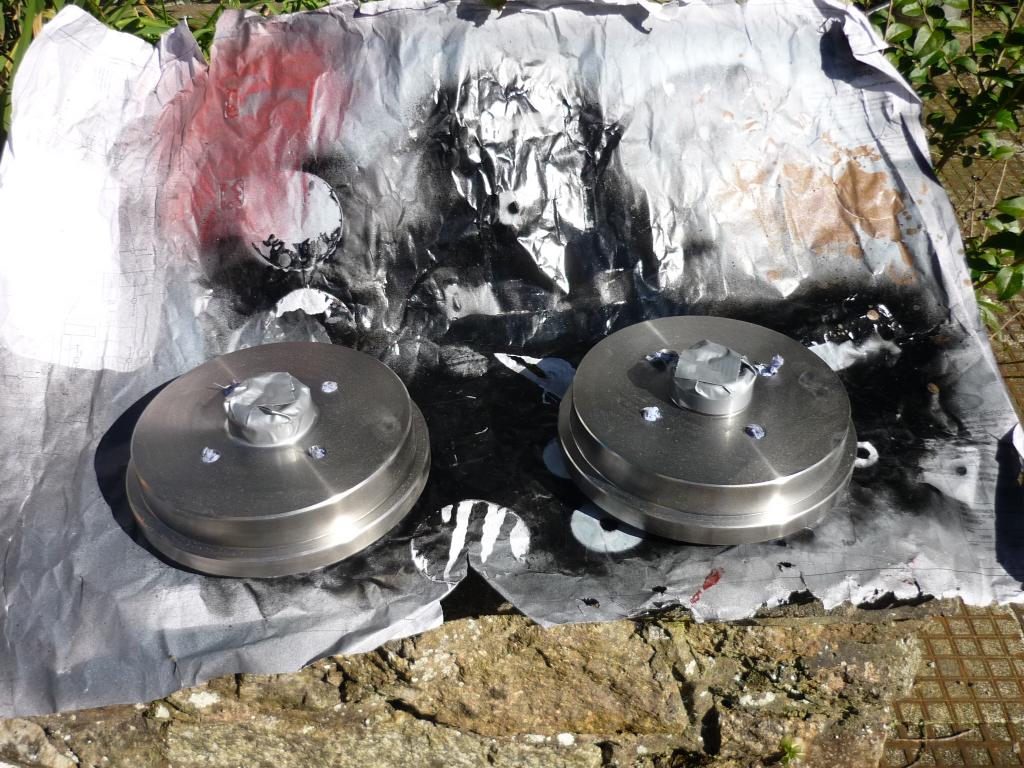
Mean while the drums were also lacquered with high heat lacquer and the higher wear areas painted with a chrome enamel paint
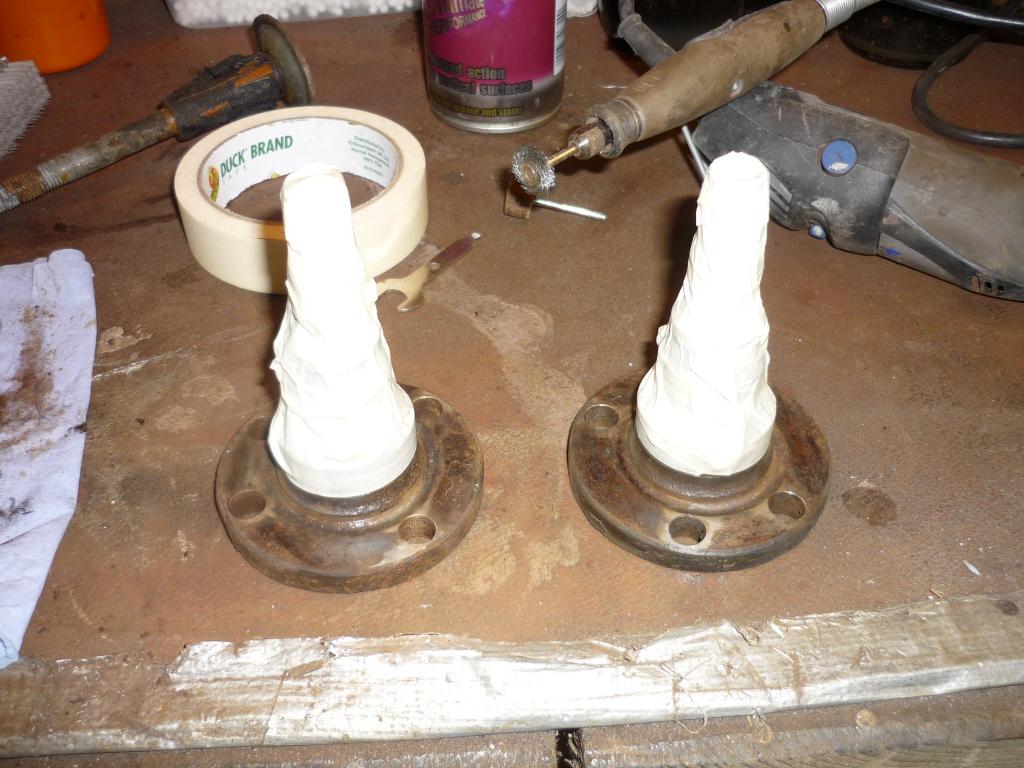
The new bearing races were then 'installed' (belted with a big hammer) as per the advice given by JSeaman in his guide to re-furbing the rear end. The guide was awesome and by following the advice given everything went in perfectly. Thanks mate!
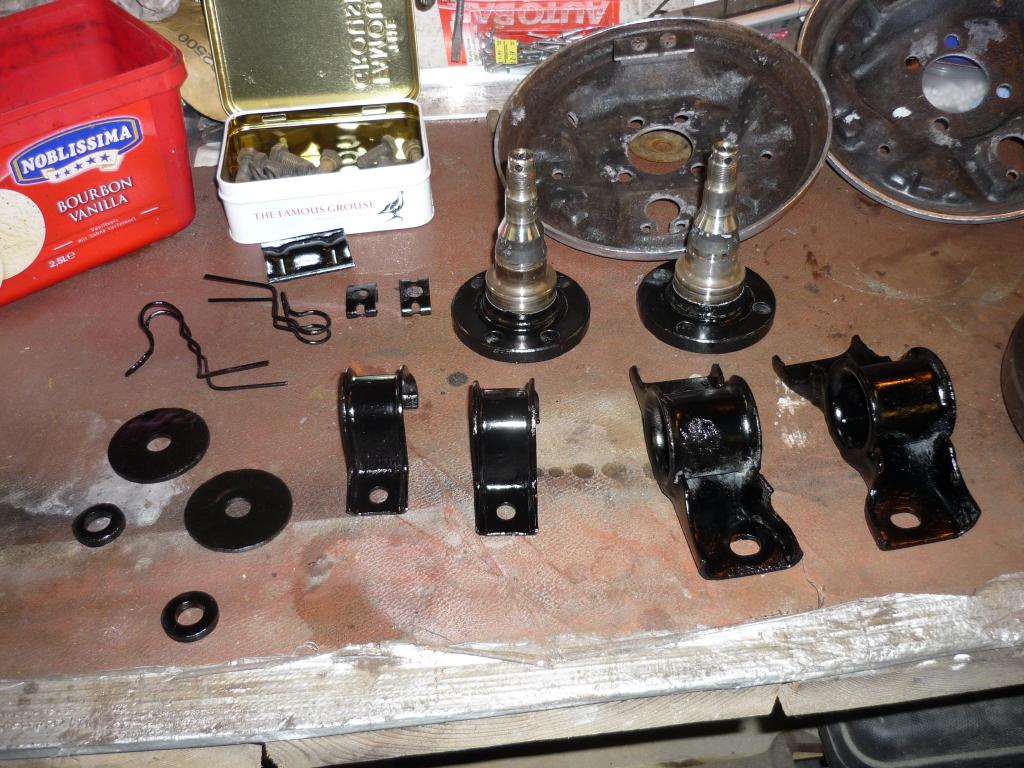
I thought i'd give the stub axles a bit of love too. So all degreased, cleaned, checked. smoothed polished and painted
along with all the brackets, brake pipe clips etc being re-painted properly
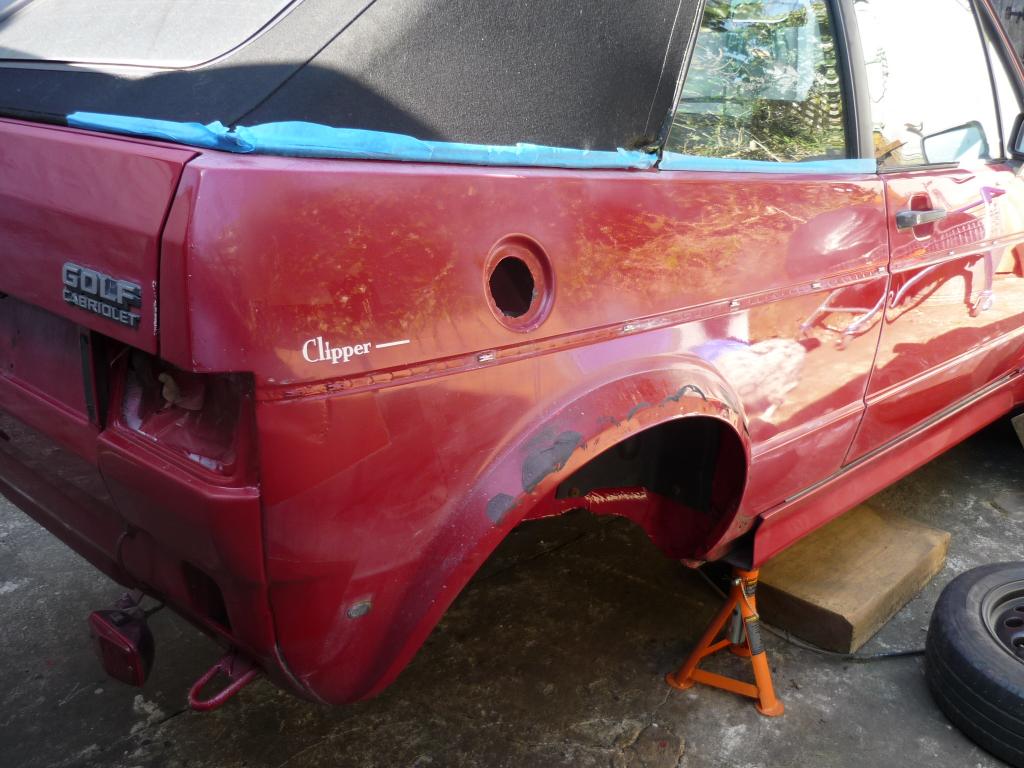
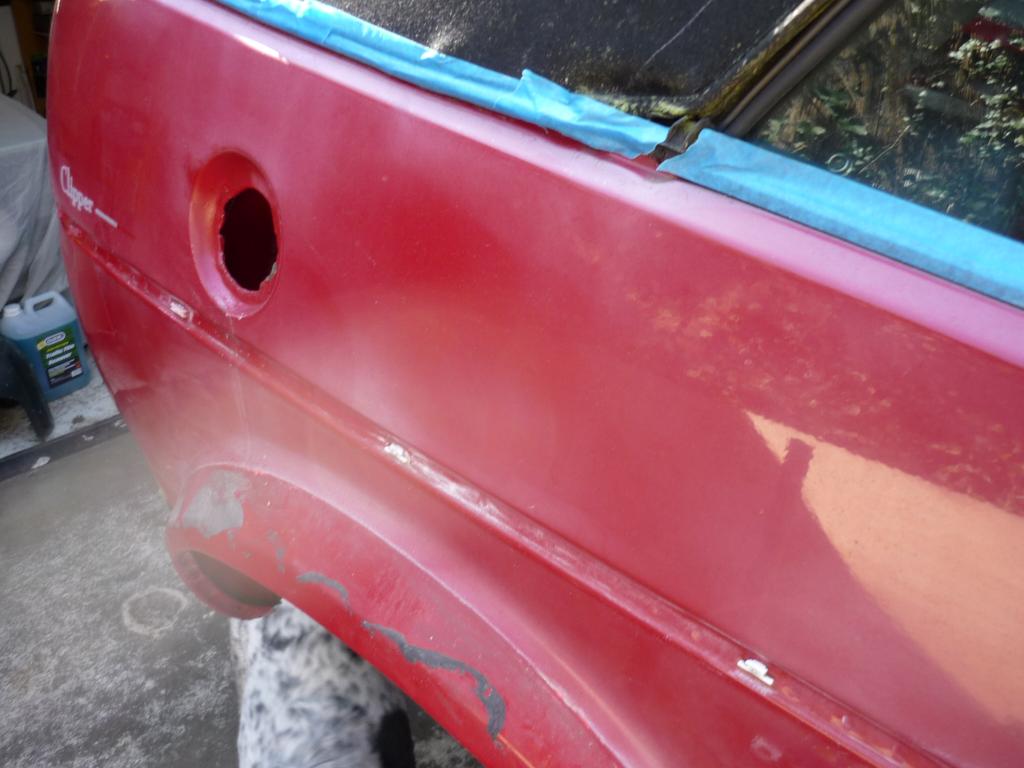
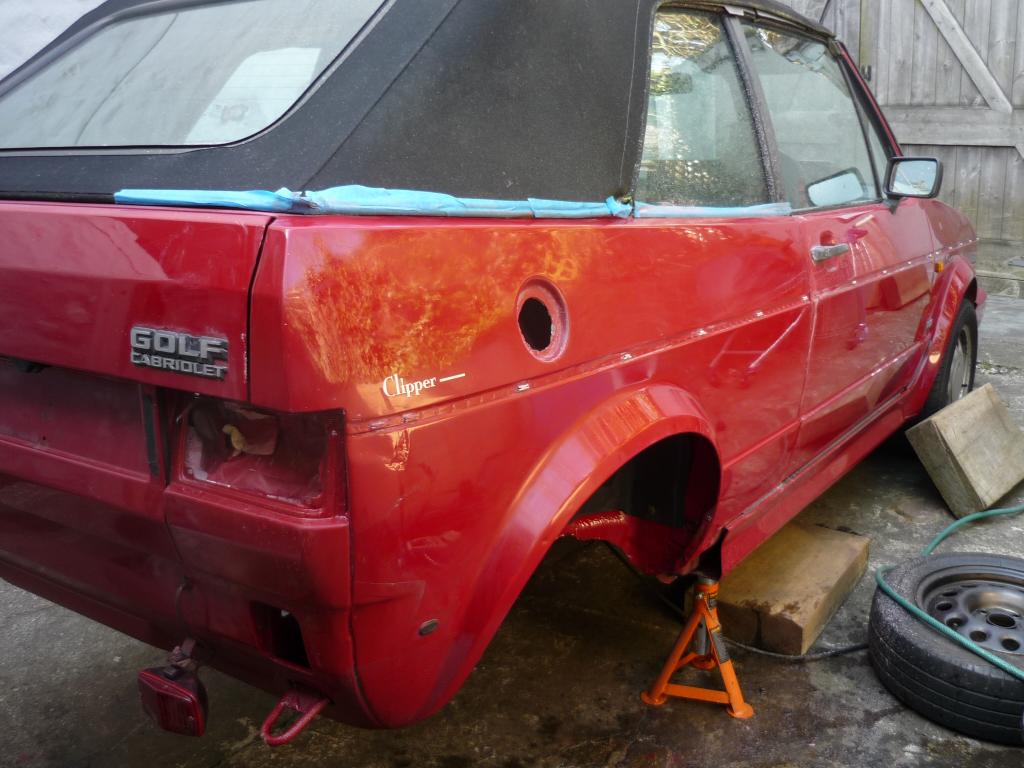
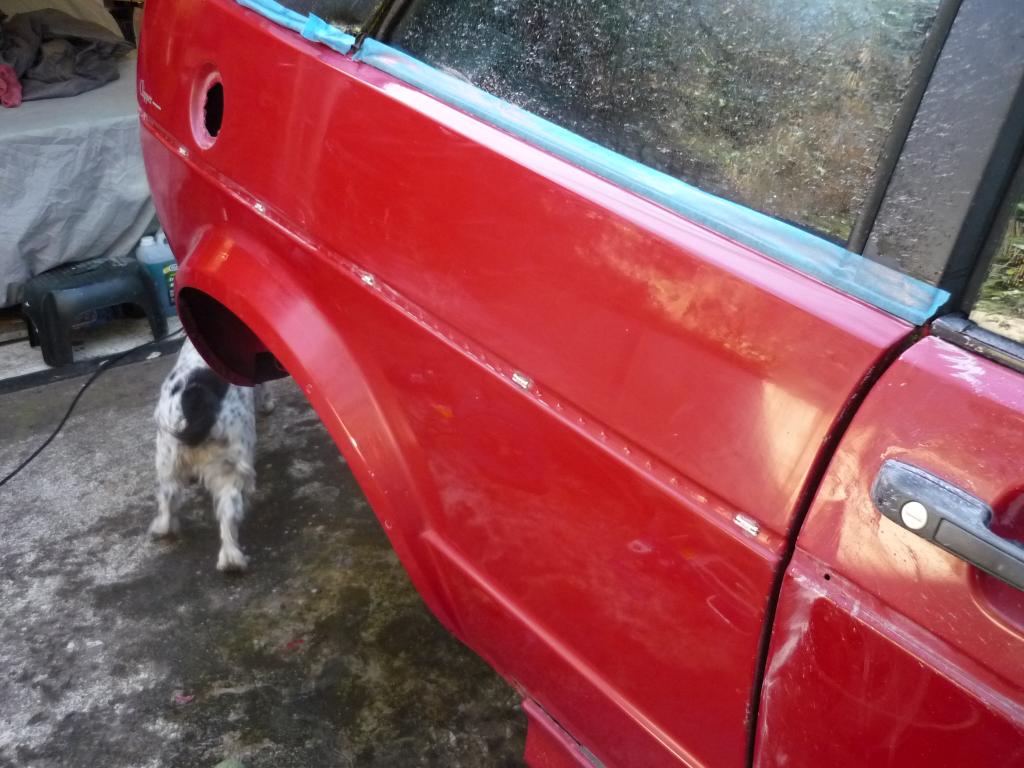
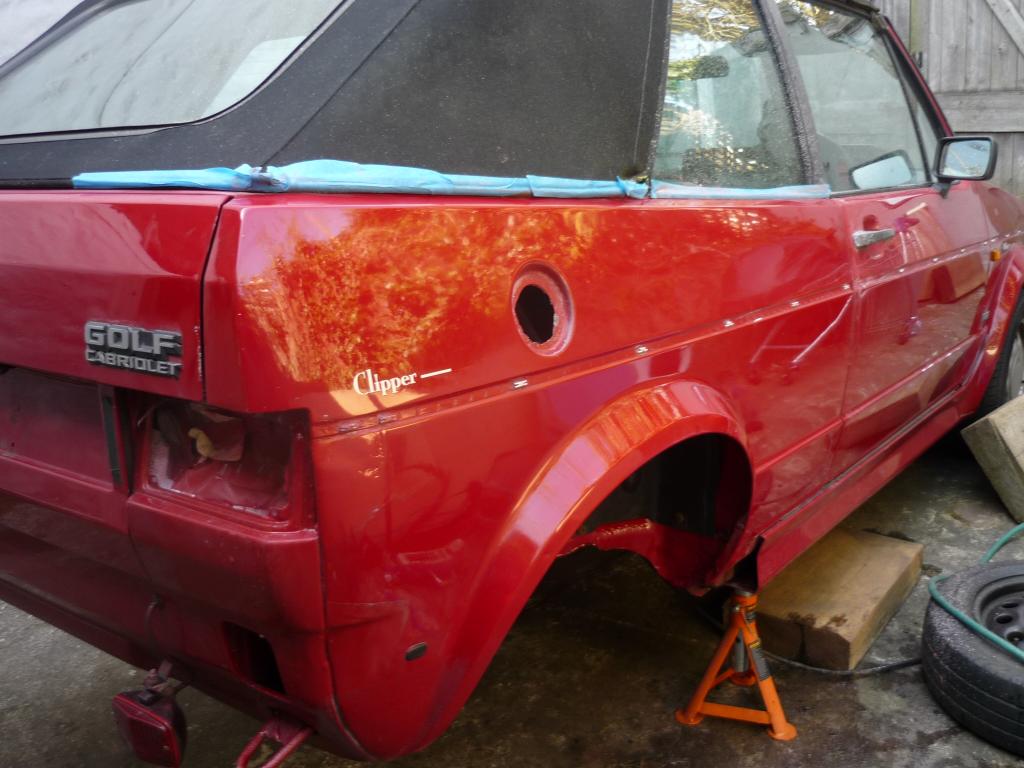
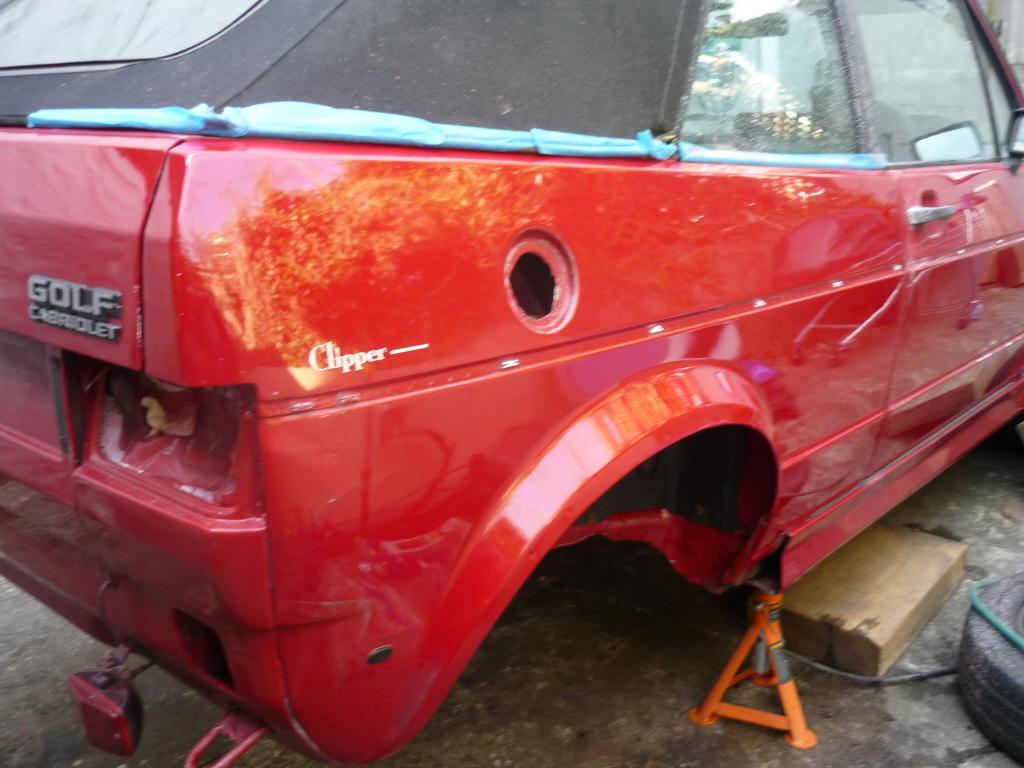
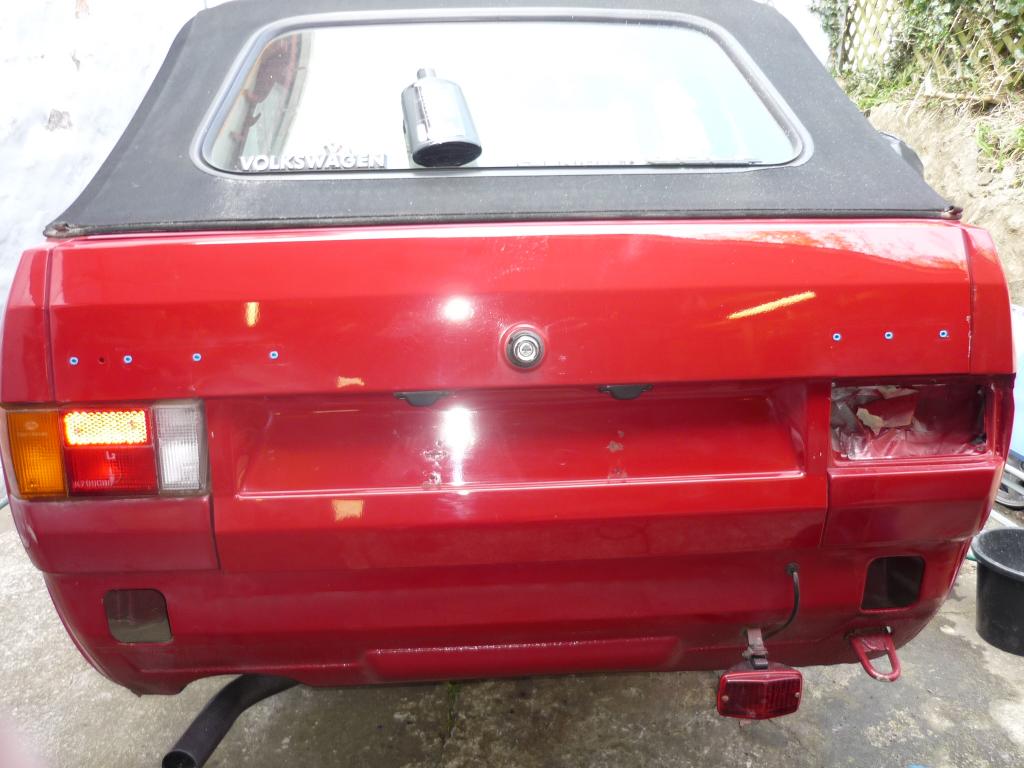
Also on the agenda was trying to complete the temp repairs to the rear corner. After doing some investigation works it looks like i need a new rear panel and some new metal welding in to the corner as well. This will have to wait for a minute till the re-spray is viable. So it's been temporarily sorted (or at least shouldn't get any worse) using a combination of chemical metal and a small amunt of filler.
Looks ok from about 40 yds out
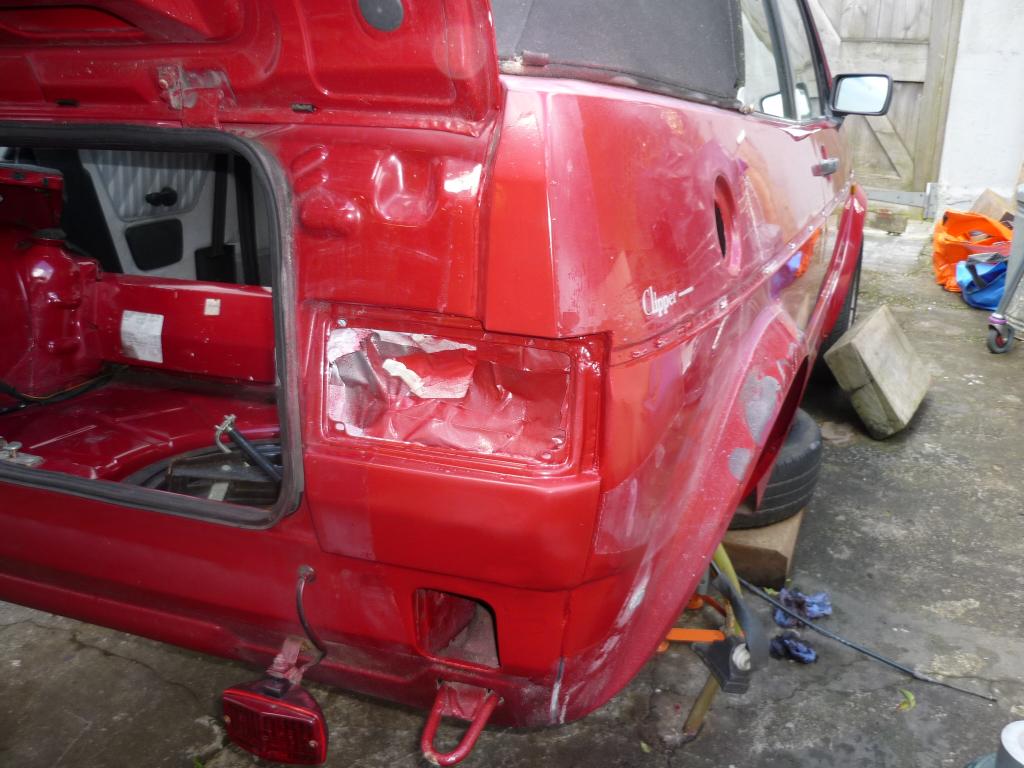
I must point out that the paint mixed by Halfords does seem to match this time, so credit where it is due ( I had 4 cans of inari Silver for the Derby made up at the same time as each other which were all different!)
So that's about it really. A bit rubbish for a full weekends work but at least I'm doing some things the way I prefer to do them. Perhaps 4 hours on drum back plates might be considered a bit strange though.
E

Posted

Moderator
Good luck getting it all back together.


Posted
Moderator
The cup washers for the rear beam mounts finally arrived. I'd ordered a set through VW Heritage that needed to come from Germany and after weeks of waiting i found some others on ebay from a guy in greece and ordered those as well. Typically both sets arrived arrived on the same day
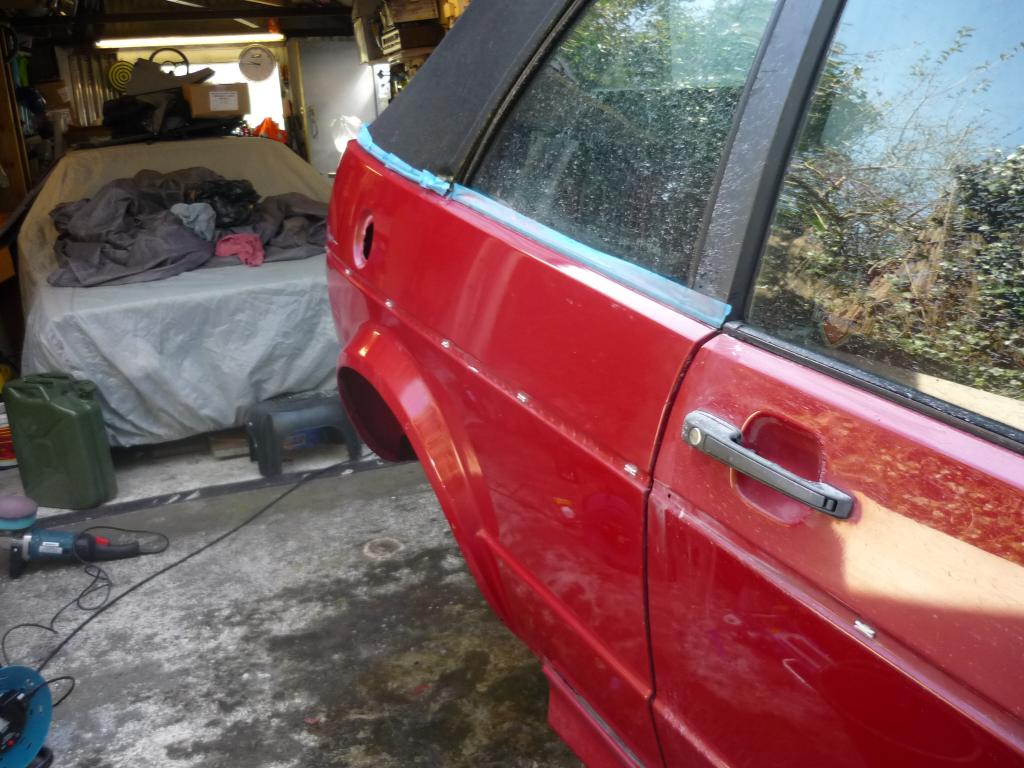
still never mind eh! At least i can crack on with getting the car back on all four wheels.While I was waiting I thought I'd do a bit of body work stuff
Before
Add one of these and some of this

and a bit of picking to remove black stuff and a bit of 2500 grit wet sanding
Followed by some McGuires lighter grade compound
Then some polish, again from Mcguires
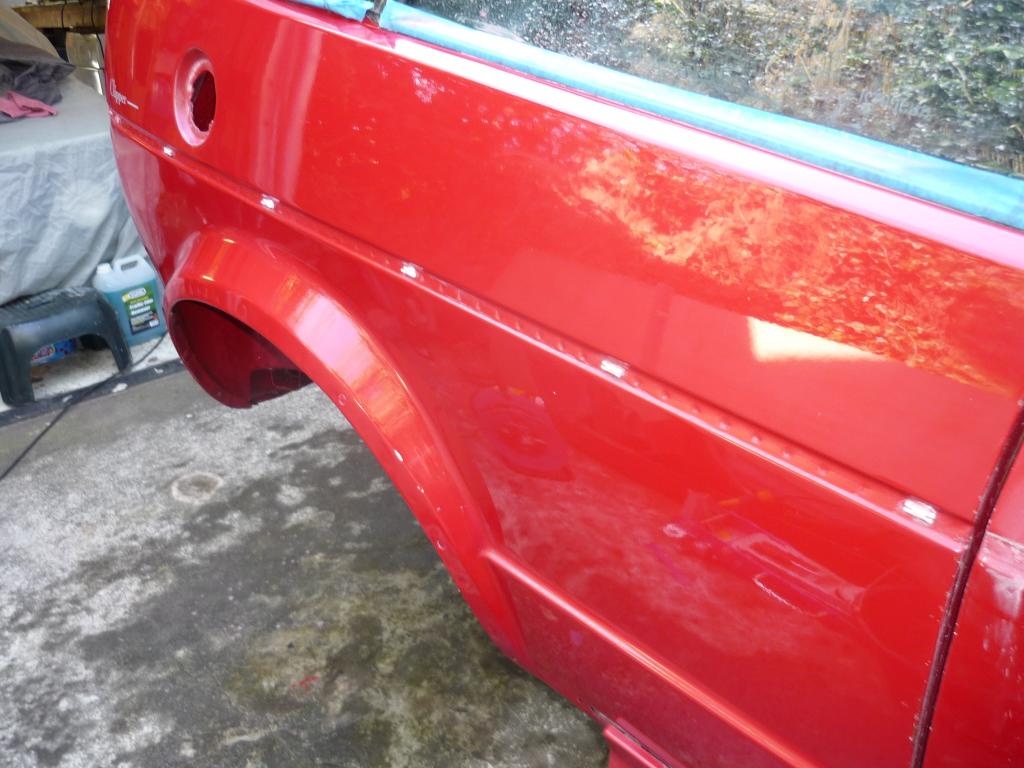
rear panel also done
Took apart the number plate lights as well, a bit cruddy

so painted them up and sanded down the connection points
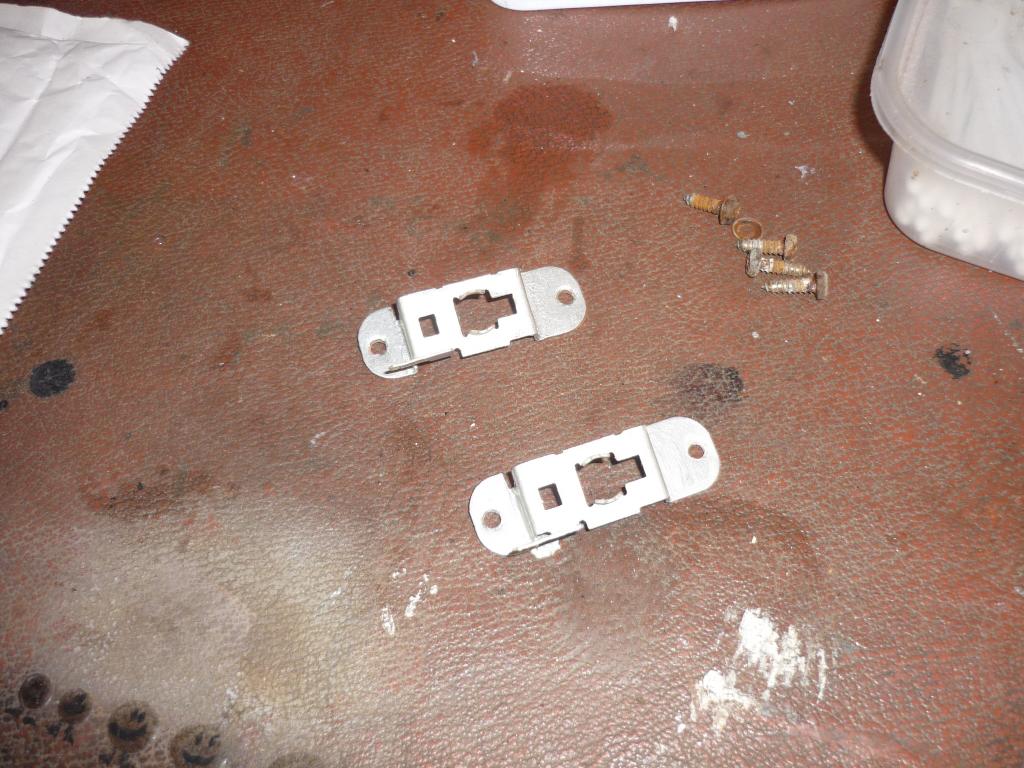
The lenses were also cleaned and treated to some black paint and then all re-fitted.
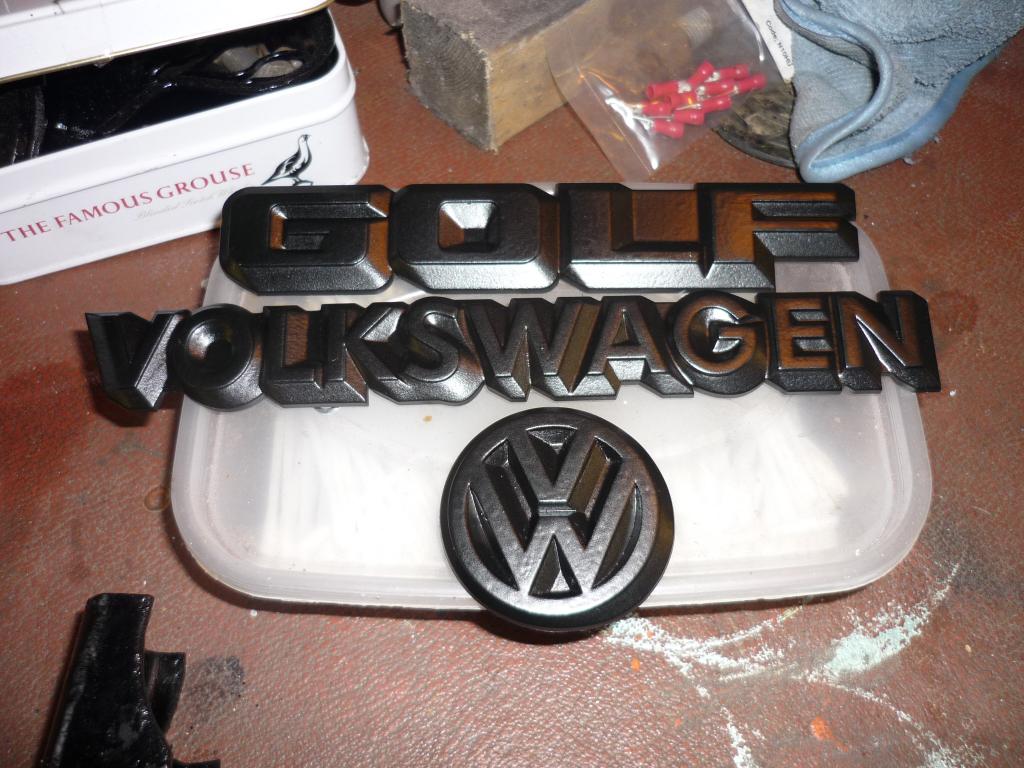
Badges also removed and re-painted in satin black (the idea is that all outside black trim will be satin black
The inner arches have also been de-rusted and painted, the arch liner put back in kinda and filler neck test fitted.
Also managed to get these little suckers sorted
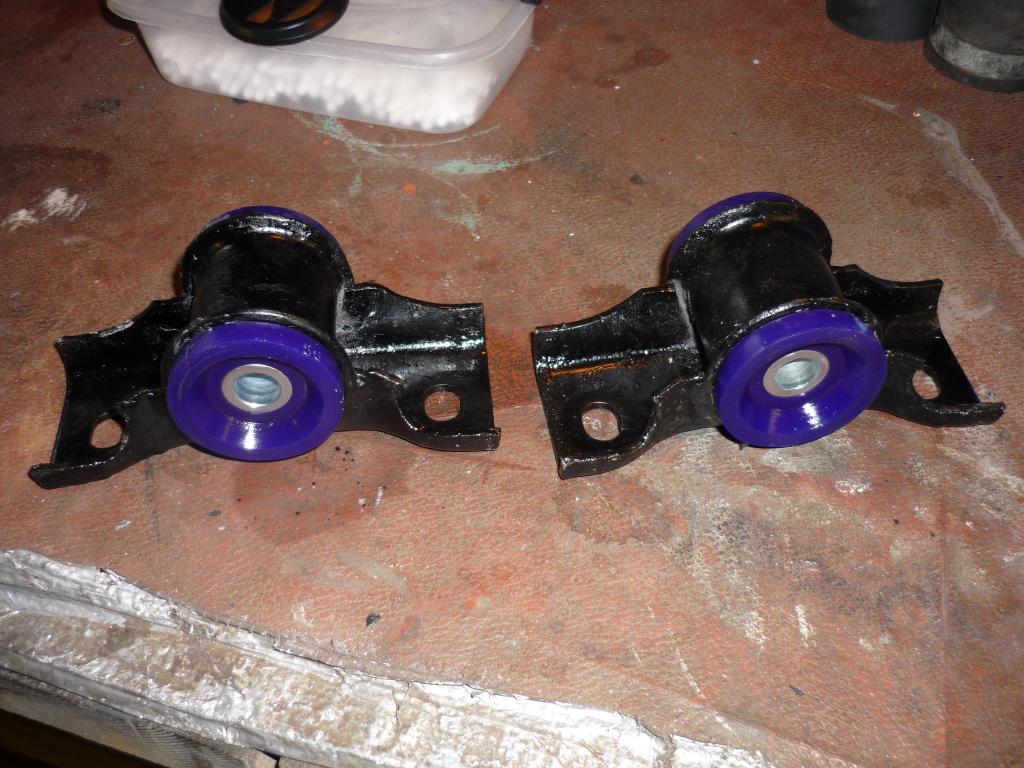
1hr and 38 mins for the first one and about 98 seconds to get the second one in. At least I know how to do it now!
Plans are to get the back end re-built over the next couple of weekends and then start on the front end. Wish me luck!
Thanks for reading
E
Posted
Moderator
Glad you asked
Managed to get the rear end sorted out and everything back together again! I think. Handbrake still needs to be attached so we'll see. Sorted out the fuel filler neck too and got the coilies on.

Found a small hole in the passenger side inner sill so me mate came round and welded a plate in for me. It was only dinky so all in all, given that this was the only hole found so far underneath I think I'm doing well!

The handbrake lever didn't seem to want to play ball so I took it off to have a look. The spring seemed to want to want to make it's way down the iinside of the shaft so fixed that with a couple of washers. The hook for the actual mechanism was facing the wrong way! so no wonder it didn't want to hold on the rachet
and while it was off thought it could do with a clean up 
Rear passenger arch last some of the paint when removing the body kit. Looks like when it was painted they didn't bother painting the arch fully, so theres a bad lip in the paint too. Oh fun!

So still in the middle of the prepping and painting at the mo.


So time to move onto the front end at last!
After removing the wheel with the idea of 'just' replacing the dics, pads and suspension I was greeted with this rusty mess!

The pads had rusted to the discs and also into the carriers and of course the brake shield was rusted on, holey and all nuts virtually non existent
Loads of rubbish removed from within the front wheel arch and I ended up having to remove the shield with a combination of drilling out and beating with a hammer. Doh!

Of course the calipers are also rusted together and unuseable.

But Mr Cavs came to the rescue with a spanking set! Cheers Mr Cavs! Beers are on me sometime in the future! So they'll be going on sometime over the weekend.

Front coilies all built up and the threads all nicely greased up. After buying second hand sets for the Derby in the past and having spent many hours trying to free up rusted threads I'd suggest this to everyone before fitting! It's a life saver.

So with the Bank holiday looming large plans are to get the front end sorted chassis wise, remove the front bumper and final arch bits from the body kit, finish the painting of the rear panel and clean up the front end!
Wish me luck
E
Posted
Moderator
Then i found that the front camber was way out of adjustment and the tyres were solid against the adjusters on the coilies and there was me thinking there would be loads of room at the front of a golf.

Of course I didn't mark the position of the camber when I took it all apart, so much head scratching will be required. Any suggestions would be most welcome.
E

Posted

Moderator


Posted
Moderator
Posted
Moderator

Posted
Moderator
Body kit finally completely removed including the front bumper. i found out why my kit looked so bad in comparison to others out there………the bumper irons look like an elephants been dancing on them!

Oh well never mind. looks like i'll be bumperless for a bit.

I take it the front lip isn't supposed to bow out like that?
Plus one of the front spots is also smashed so that will either need replacing or a single light grill finding instead. It's obviously been a while since she last washed properly. A spider has made a lovely nest in the top of the grill. Ah sweet 
Generally a bit manky under the bonnet and along top of the inner wings just with years of grime and dirt. Hopefully it'll all come up ok.

So that was given a coat of TFR and left to soak for a bit.
So the plan is to get it MOT'd and back on the road by the Bank Holiday weekend and get off the last Run to the Sun.
Only a few jobs to do:
Sort the interior
Finish the body work and painting
Sort the front camber
Adjust the height to make it 'drivable'
Pain the wheels
Change the tyres
MOT
Tax
Insurance
Re-fit badges
Do stereo install
Make and fir carpets and sound deadening
Plate the dreaded 'clutch cable hole' in the bulkhead
Check over the engine to make it sound less like a bag of spanner (tappet adjustment? Are they self adjusting or manual adjusting on these?)
MOP and wax
oh yeah, find and stop the bloody roof leak
Think that's about it. Plain sailing?!
Wish me luck
E
Posted
Moderator
Posted
Moderator
Posted
Moderator
Posted
Local Hero
whatever way feel free to join the convoy back down south on Sunday :-)
SOUTHWEST Regional Host. Bristol Meet - 1st Friday of the month - Toby Carvery Bradely Stoke Bristol Bristol Region Facebook Group
1.8T CABBY
TINTOP THREAD (SOLD 2016) SPORTLINE THREAD (SOLD 2015) CLIPPER THREAD (SOLD 2012)
1.8T CABBY
TINTOP THREAD (SOLD 2016) SPORTLINE THREAD (SOLD 2015) CLIPPER THREAD (SOLD 2012)
Posted
Moderator
As the family lives in Derby I've been ordered home for Family duties between days of playing
Ta for the offer on the way back.
See ya there!
Ian
Posted
Old Timer

Good stuff

'83 Formel E aka Oreo!
Posted
Moderator


and the seats have come out again as it's leaking still despite different door and top of door seals. It's also going a bit green but I'll sort that little lot out when the car ports up!

So lots of work to be getting on with during the rainy winter months.
Posted
Moderator
As the wifes car (a Fiat……yes I know I did try to explain prior to buying it) decided to throw a wobblie and break it's front suspension, I had to get the golf out of hibernation.
Basically this involved drilling holes in the floor to let the 8" of water out (still leaking), 3 hours of mould removal from the interior, checking to see if there was any oil in it (there was. Admittedly it's black. Note to self must do service on Golf), attach battery and start it up.
Unbelievably she started and ran for 20mins on tickover with no problems! Bit of smoke and lots of steam but apart from that all good. To say I was amazed is a bit of an understatement!
Given that I'd also chopped up the front seats at this point I also had to make up the sub frames for the replacement seats and get them in too.
I'll give you a bit of a teaser for the seats. they are from a Porsche.
A prize goes to the person who correctly guesses which Porsche.

More to come soon and I'll actually get some piccies too.
Posted
Moderator

Posted
Moderator
Wheels. We never did discuss wheels did we? I'd had a set of 15x6.5's knocking about for ages. They were a good buy at £30 but in need of total refurb. The chap I bought them off didn't even know if they were straight or not. So first job was to get them spun up on a balancing machine and check they were all ok. Turn out a very slight buckle in one wheel. Nothing that the weights won't sort. Not ideal but close enough
The wheels are 'Tantrum' by Konig. Ooooooooooooooooooooooooooooooooooohhhhhhhhhhhhhhhhhhhhhhhh
hhhhhhhhhhhhh. I know this because I spent many hours, erm well looking at the badge on one of the spokes

This is how they started out life

Not in the best condition obviously!
But where there's a will there's a way……….So a bit of sanding of the powder coat and prep and ready for paint. Now given the size of the chunk in the lips I thought I'd add a bit of filler and sand it all nice a flat. Well that was the initial idea anyway

Next question 'What colour and style shall we go for?' hmmm. Something classy and understated maybe? Nah. Stone Fleck!! Yeah baby yeah!

Easy right? Stone fleck will help hide the imperfections in the original finish (couldn't afford to get them dipped to remove the original powder coat and trying to sand it off takes days! I know 'cos I've done it before), no finishing works so should just be spray and go right?
Erm nope, not exactly. Turns out 'Stone Fleck/effect paint works almost as a 2 part paint. Glue and 'bits'. Without the glue having something to be absorbed into the 'bits' just kinda fall off. So after leaving them out in the sun for several days they did eventually begin to dry a bit. Wahoo

To help protect the effect I then emptied a couple of cans of laquer onto each wheel which sealed up the wheels. it still allows the rough texture to be seen and felt. It's a bit odd really

Tyre wise 195/45 at the front and 195/55 at the back (rake, baby, rake) Of course on the tyre fitting machine they manage to strip the paint off the edge of the rim when popping the tyre on
 So a case of getting back and grinding down the edge, removing all the filler (remember the original idea!) and then polish up the rims. Took flaming ages, especially as I was having to miss the tyres as well! Still got there in the end
 Just had to sort out the badges then. So sprayed them up in the Paprika Red of the car

it was just a matter of polishing the paint off the raised lettering part and glueing back into position on the wheels.
Et voila
Ta for looking.
Posted
Moderator
My how the time flies!
So with a year of ownership under the belt and no problems at all to report. Okay so that's not exactly true. Loose suspension meant a no go for the Sunday of the AGM
and a VERY scary 300 mile drive back. Car tended to wander at every bump, cats eye and change of surface. Made it one piece though. Oh and the loss of a caliper bolt meaning that one front brake wasn't really attached. The steering rack also came loose…….but apart from these minor little inconveniences it's all been good Given the fact that the garage extension/car part is a little behind schedule (done nowt yet
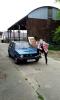
) 'Clive' as the car is now known spent the winter filling with water and being home to spiders. Given the fact I'e just treated myself to a digital SLR (horahhhhh) and the fact that Clive had to come out of hibernation due to Mrs Borednow breaking her Fiat (she ended up in a ditch but it definitely wasn't her fault ) I thought I'd better do some work and get some photo's. yippee I hear you cry
First some random piccies on the drive


Shiny shiny

a Mrs B encoutrament

After taking out the all the seats and ipping them to pieces I finally got around to making up the sub frames and fitting the seats from a Porsche 914. Work really well (Phew. Had em for about 5 years and never got around to using them!) and are pretty comfy too. Mot importantly Mrs (very short) Borednow likes them

Fits the theme that I built the rest of the interior around


All home made door cars, rear 'bench', re-covered parcel shelf etc. Cos Clive like to have water in the floor wells we've gone for the rubber mat carpet approach. Works but does get a little warm from the exhaust though!
Due to no carpets I didn't want the electric switches for the roof and windows in a grey plastic console on the floor. a bit of jiggery pokery later and……

Details of the stereo install will come; oh yes indeed they will
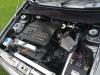
Tomorrows exciting installment will involve the engine bay. Ooooooh exciting stuff
0 guests and 0 members have just viewed this: None.