020 Gearbox Flange Removal Tool
Posted
#1637427
(In Topic #226894)
Newbie

Using a television wall mounting bracket
I'll write this 'for dummies' because that's exactly what I am, I spend my day working at a desk doing emails and have only recently started playing with my car.
It takes me longer to grasp the gist with these things, so I thought I'd put my learnings up here in as basic terms as I could so that future me could understand them.
I will focus mainly on the flanges and the tool I made as I did this on a spare gearbox that my friend let me practice on, if this does alright or gets decent feedback, I'll do a guide on the driveshaft removal/seal replacement part when I get round to doing it on my car (this week hopefully!).
This is wordier than I wanted however I like words and feel detail is important.
The flanges:
The flanges are seated in the sides of the gearbox/transaxle. They attach to the drive shafts to make them turn and spin the wheels in gear/under power.
The base of the flange (the bit that inserts inside the gearbox) is spring loaded to create pressure, and held in place by a c-clip/circlip/spring clip (normally a spring clip without holes).
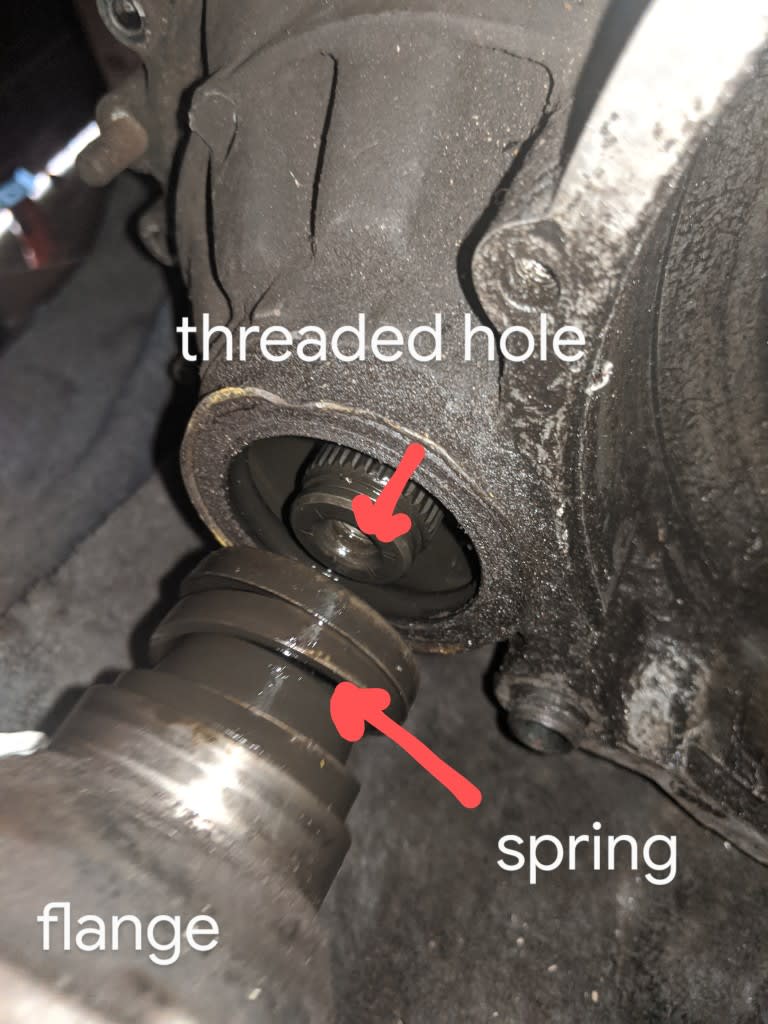
This clip acts as a stopper once the flange is compressed into its housing, preventing the flange from falling/springing out. It is the primary reason you need to make a special tool.
In order to remove the clip, you must relieve the pressure of the flange spring on the clip by pushing the flange inward and keeping it under pressure.
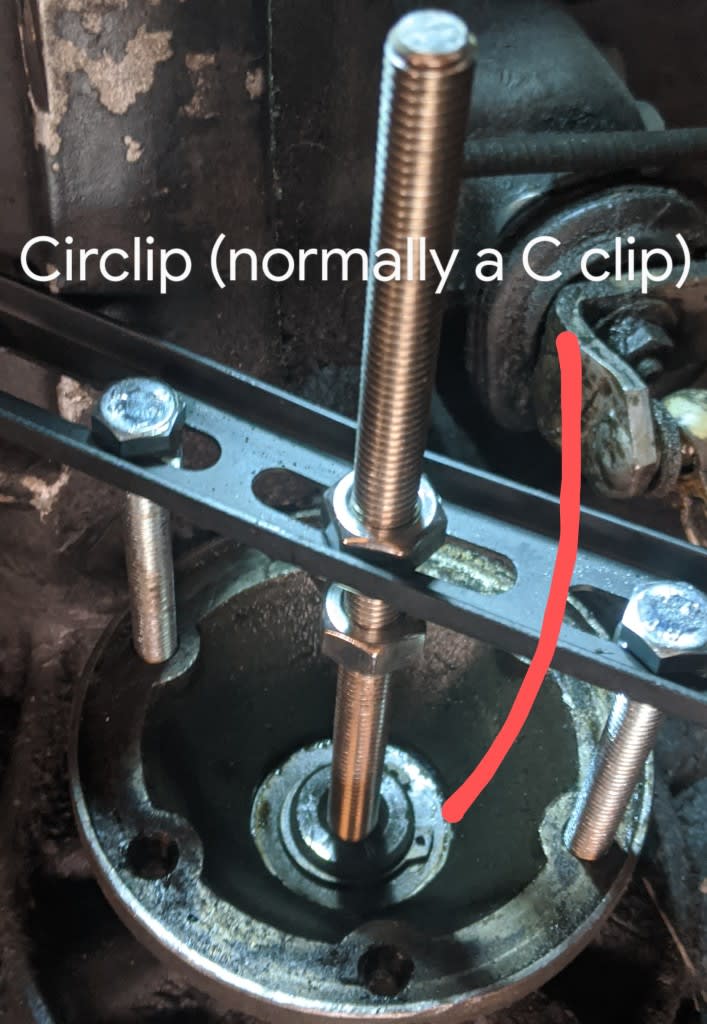
In order to get to the clip, you must remove the dust cap in the centre of the flange. It can be worked loose with a flat blade screwdriver (carefully) or punched through the centre with a flat blade screwdriver and popped out (again, carefully).
So, the tool!
To make the tool, I used:
1 x 130mm long, M10 threaded bar, a nut and a washer. I bought this from Amazon as a kit.
2 x 70mm long, M8 bolts (full thread) and 2 nuts (B&Q).
1 x piece of flat metal bar (old television wall bracket!).
For the metal bar, I used a television wall mounting bracket arm. It was on the wall and unused. The holes were big enough to accommodate M8 bolts. There were also three elongated holes to allow for longitudinal adjustment (they move sideways).
Any flat metal box section will do, around 130mm long, 40mm wide, although drilling and cutting will be required to ensure the bolts line up with the flange M8 holes and the central M10 hole.
I hacksawed off the part of the television bracket arm with the three elongated holes for my tool. The middle hole is for the M10 threaded bar, the outer holes for the M8 bolts. The central M10 bar hole needed some filing to allow the threaded bar to fit through (in middle of hole).
In order to compress the flange, the M8 nuts are placed through the outer holes of the bar (bar should be flat side out - in the pic it's the other way and the bar bent slightly), the nuts are fitted and done up loose to the the bar, this allows the bar to press against the nuts and depress the flange spring.
The M8 bolts should then be screwed into the outer flange holes (opposite eachother) and tightened up till they emerge flush from behind the flange. They need to be level (this can also be achieved by adjusting the nuts if needed) to ensure the bar is straight and the flange is compressed evenly.
Once done, the M10 thread should be fed through the middle hole and screwed into the gearbox at the centre of the flange (the gearbox hole is threaded for this purpose). Once tight (hand tight), fit a washer and the nut over the end of the M10 bar.
Tighten the nut to the top of the bar and use a spanner to tighten the nut. It shouldn't take too many turns to compress the flange spring and release the clip (took me 4 or 5 half turns).
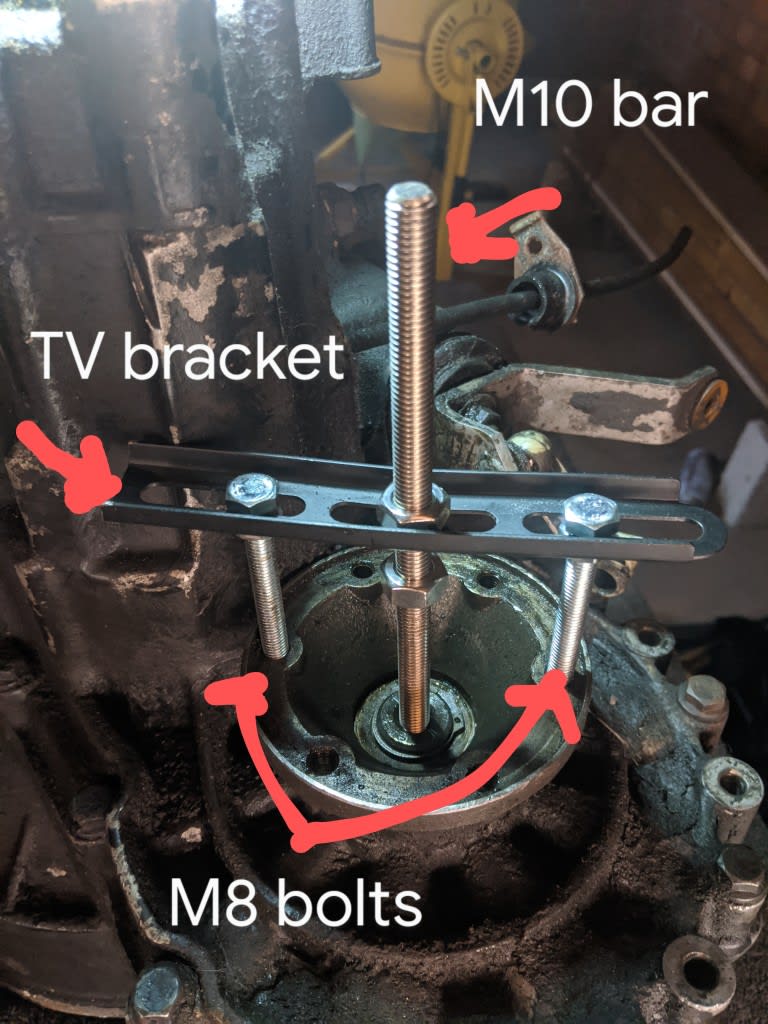
This force presses the M8 nuts down and compresses the spring of the flange, this releases pressure from the circlip and allows you to go at it.
Going at the clip was easy on this box as they were circlips (my mate had done these before). However the standard ones are spring/c clips and will take some fiddling to remove and will likely ping off, so wear glasses.
Once the clip was removed, I slowly loosened the M10 nut to ease the pressure from the flange spring, using some grips to hold the bar where needed. The flange is then free to be removed and may pop out due to the spring load (although by doing it slowly it came out fairly slow and easy for me).
With the flange off, you can access the seals and do what you need to do.
I was careful not to damage any surfaces and took my time with the process.
Wore gloves and glasses.
All in all a fun thing to do and a nice sense of achievement.
I hope it made sense to anyone who reads it, feel free to get in touch. I have added pics now. More if requested.
Correct me wherever I'm wrong please! I'm still very much a novice at this.
 Last edit: by Jocomea36
Posted
Moderator


Posted
Newbie

borednow said
Very nice mate.
If you could add some pics I'm sure that would help people even more
Ian
Thanks man! I'll keep doing these as I go. They're good fun.
Has the upload worked? Are the pictures clear enough?
Posted
Old Timer


Posted
Newbie

paceman said
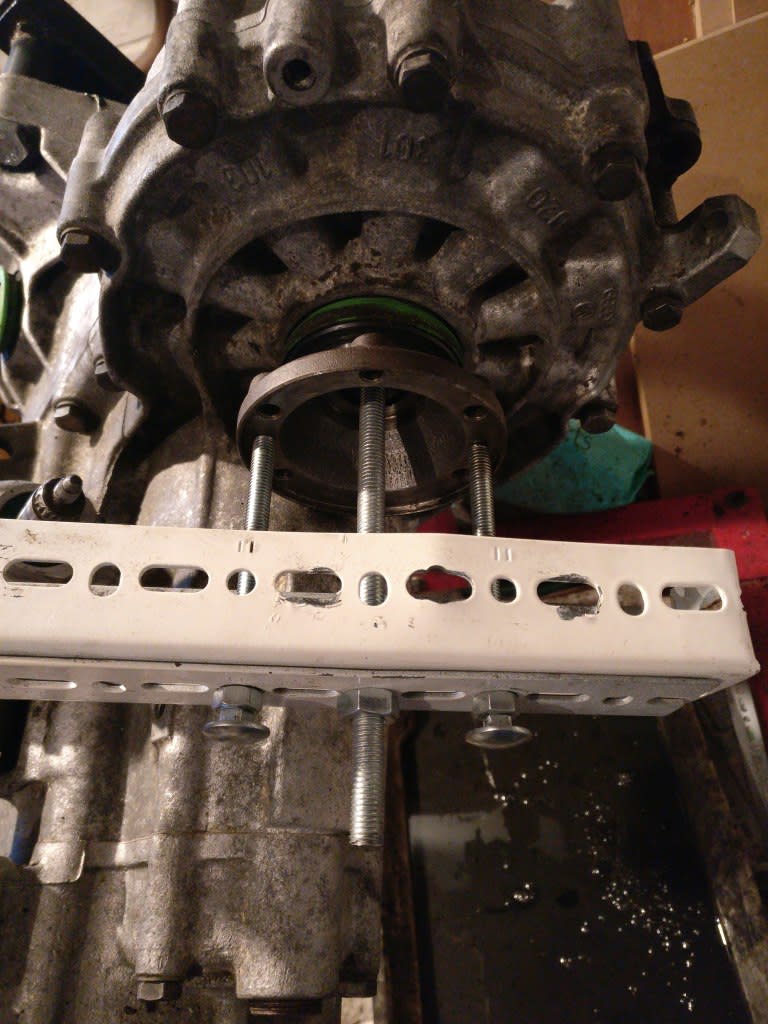
Nice - looks tidier than mine!

That's brilliant mate!
The real challenge comes this week when I do it for real on the Clipper… Both seals gone after sitting for a few years unused, now steadily dripping post warm up.
I like what you did with the coach bolts, I wish I'd thought of that, I've got loads in my shed!
Posted
Local Hero

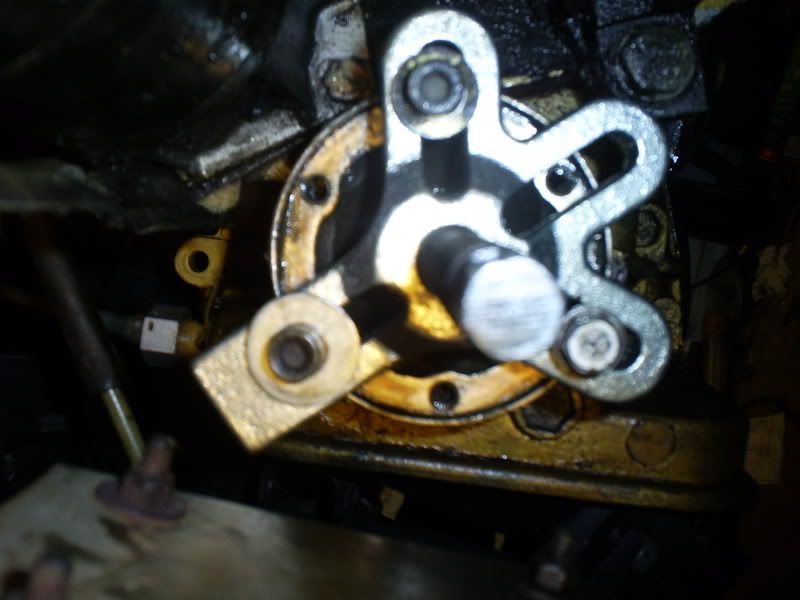
I have used a 3 finger puller
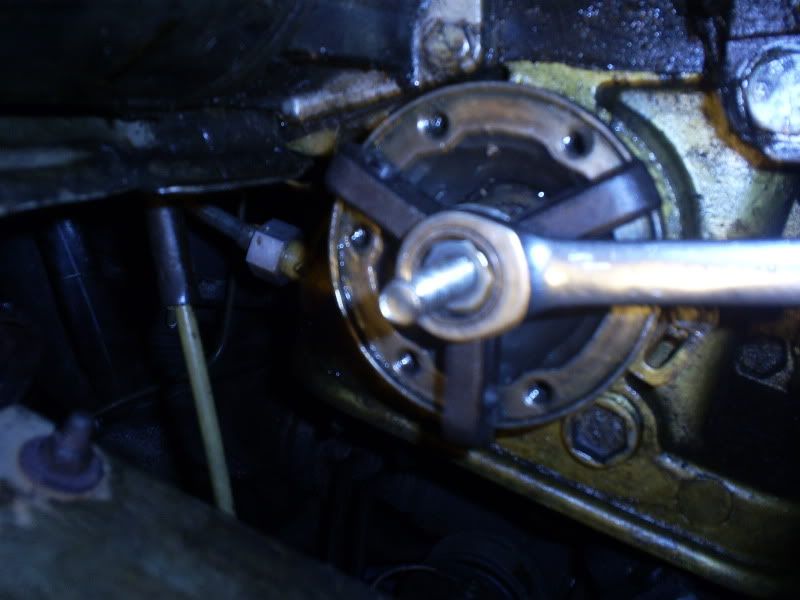
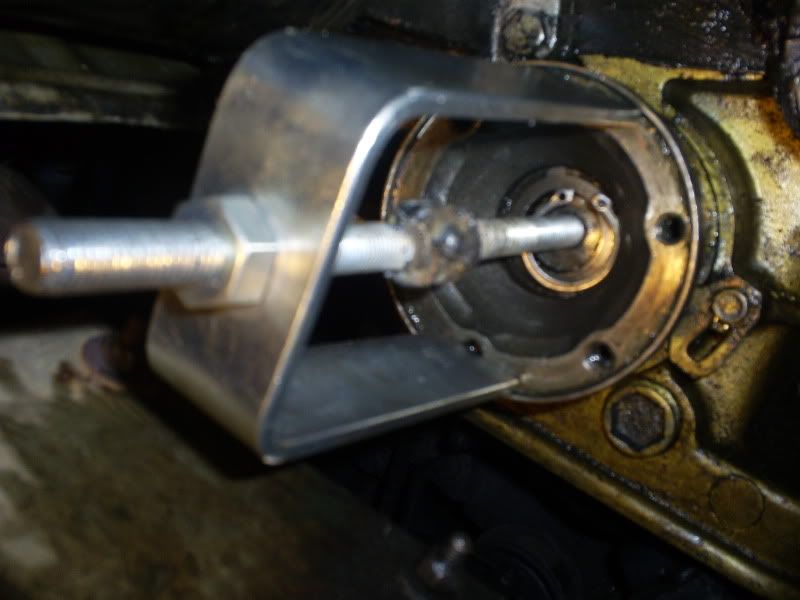
Best one I found was a modified Ford Steering Wheel lock tool.
What do Divorces, Great Coffee, and Car Electrics all have in common?
They all start with GOOD Grounds.
Where are my DIY Links?
They all start with GOOD Grounds.
Where are my DIY Links?
Posted
Settling In

i will need to change my diff seals at some point
0 guests and 0 members have just viewed this: None.


