


.GUIDE : Refurbishing your gear linkage

Posted
#794935
(In Topic #95501)
Settled In

GUIDE : Refurbishing your gear linkage
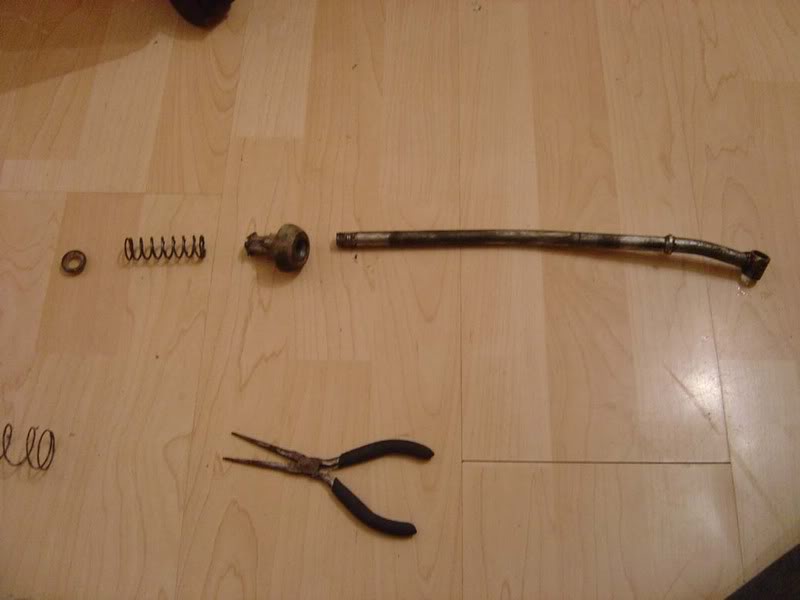
When doing a shift bushing rebuild, it's worth spending the extra ?10 ish on doing the ball assembly too. You don't have to do this but it seems silly to have it all stripped down and only do the basic bushes. I recommend the GSF kits either way because they are pretty comprehensive (unlike the ebay ones) and are cheap too. Make sure you get mk1 bush kits because the mk2 kits are slightly different.
The bushes alone are about ?5 to do whereas the kit with the base of the gearstick is more like ?15. Money well spent and can restore your gear feel completely, especially if you are having trouble engaging gears and slipping into reverse instead of first etc. My car couldn't get fifth at all, first was almost impossible and generally it was awful, the linkage gave me all five gears and a much (much) firmer shift.
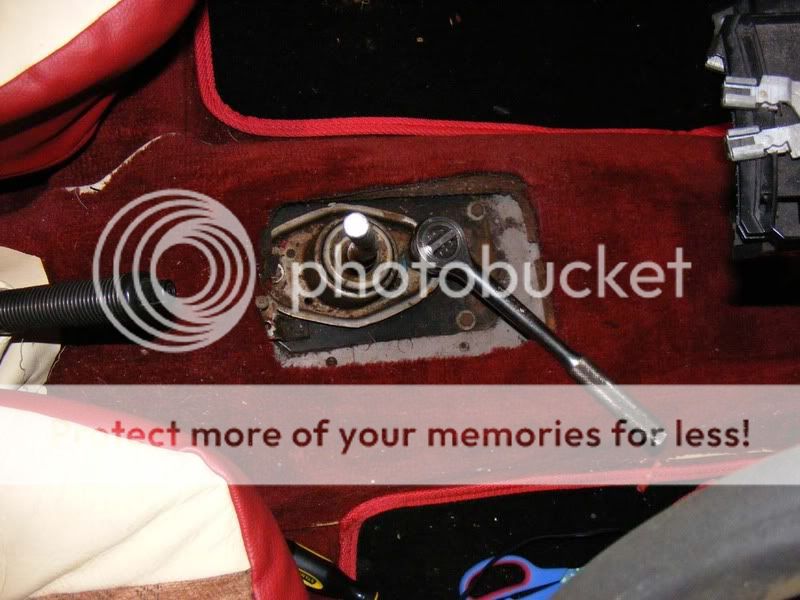
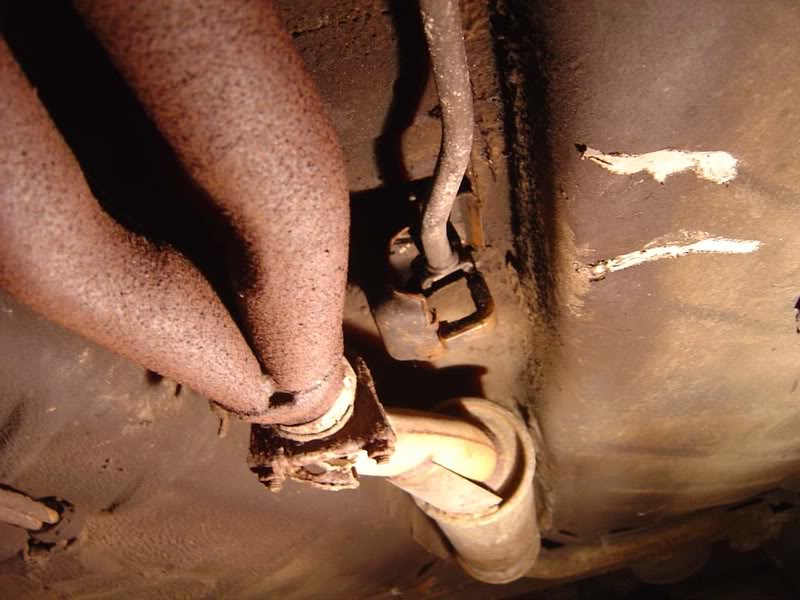
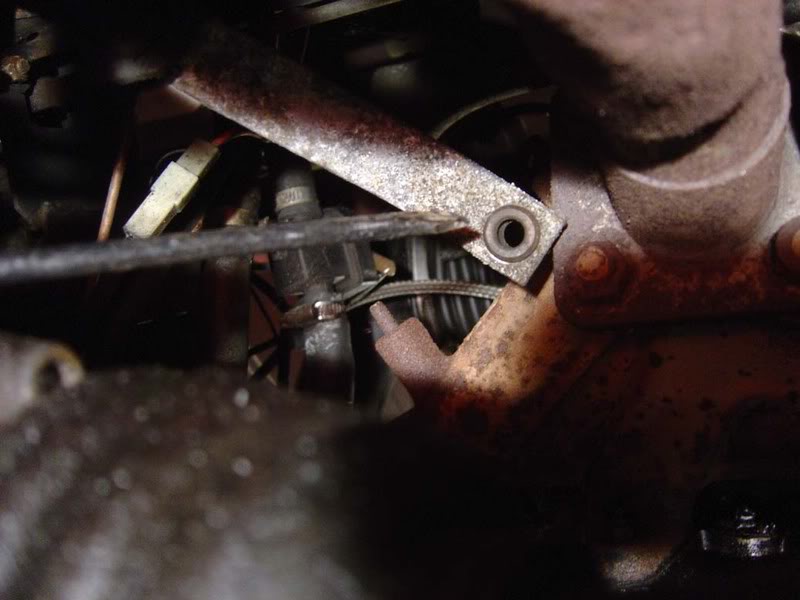
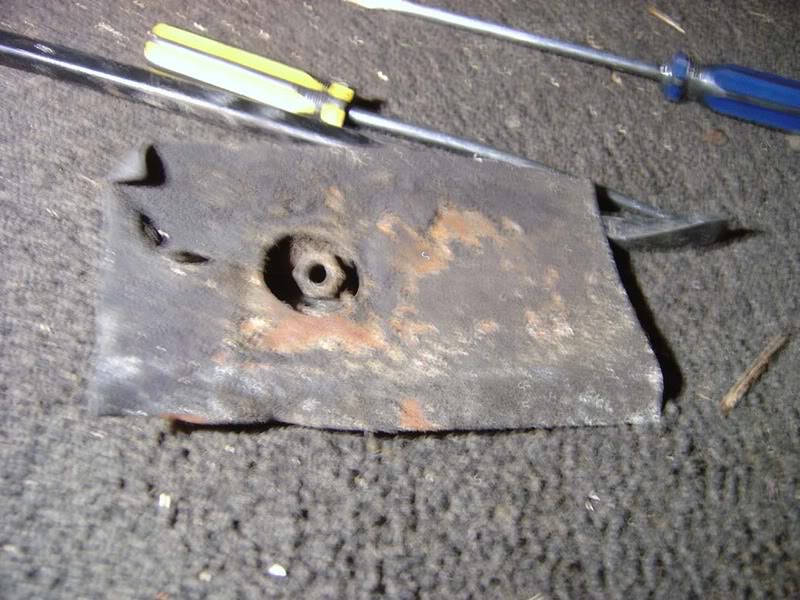
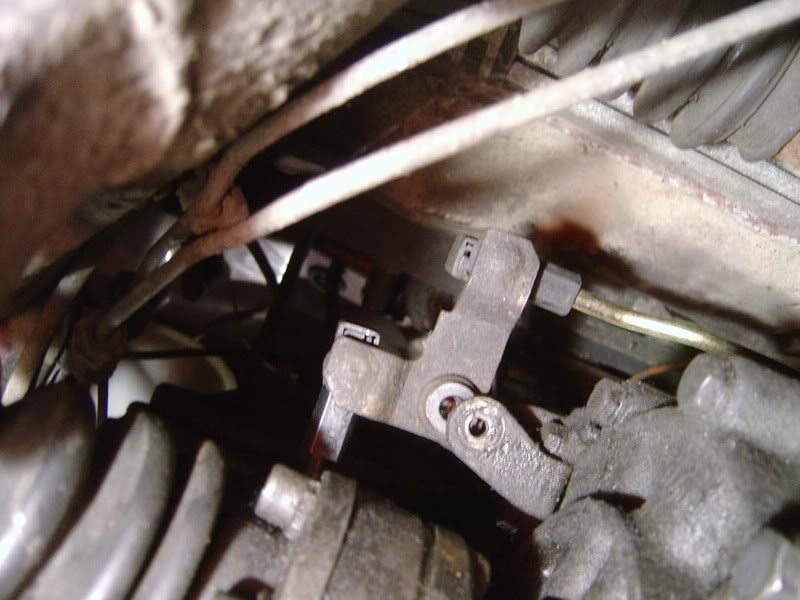
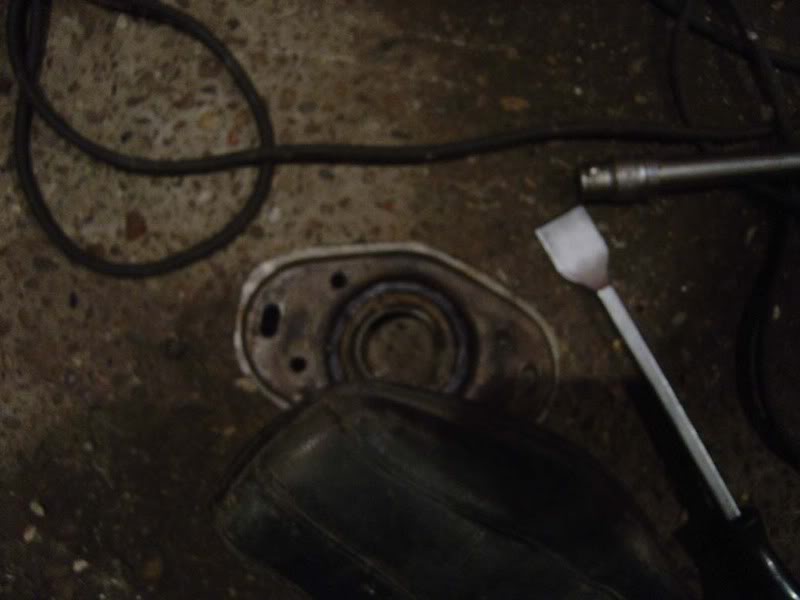
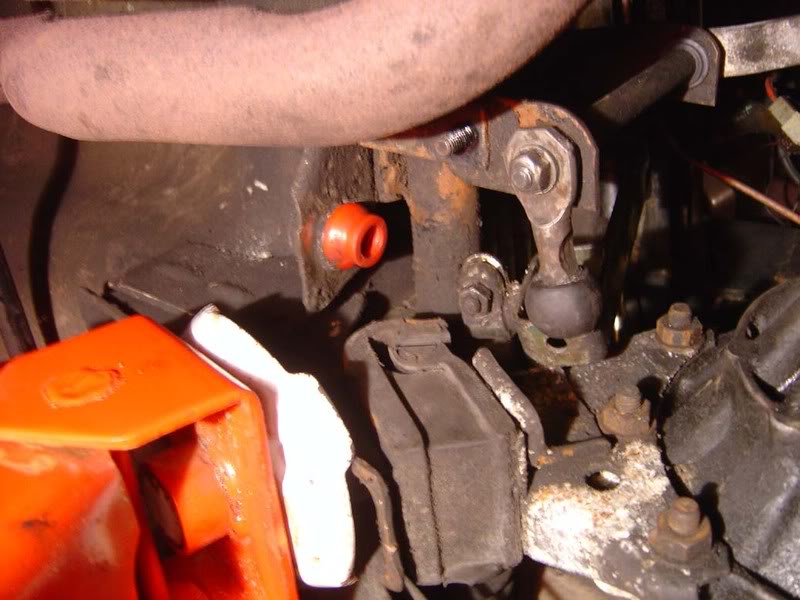
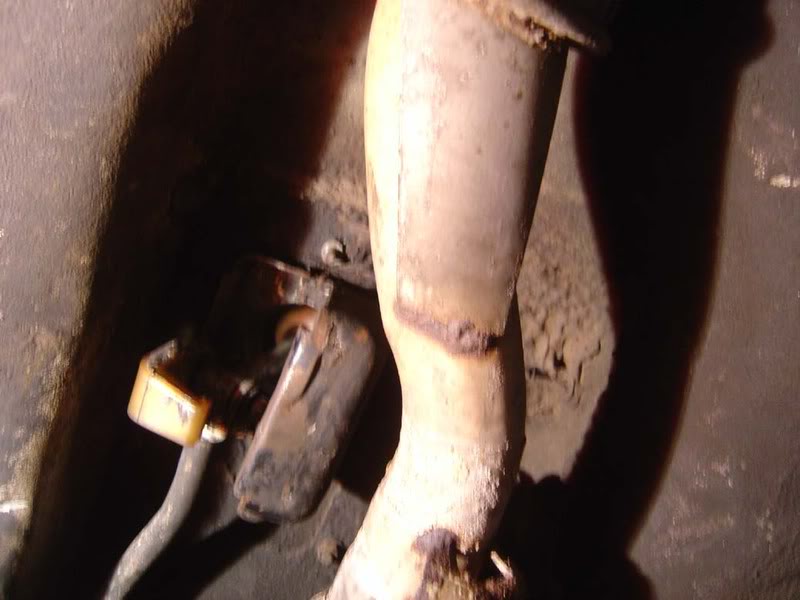
Step 1 - Gain access to the base of the gear stick. Unfotrunately I didn't have any of the trim on here so can't tell you how! Once you've got to the bracket and bolts shown in the picture, remove the 2 bolts holding the plate down
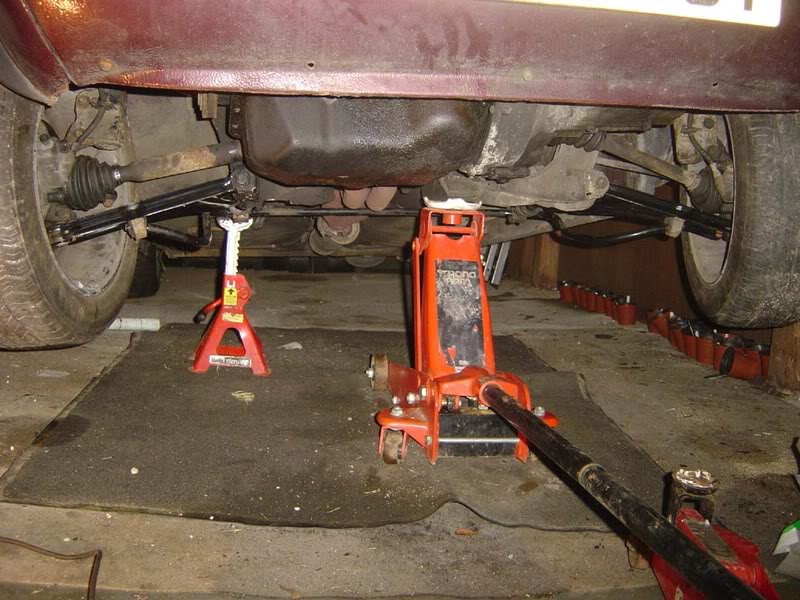
Step 2 - Jack the car up as high as you can, the higher you get it the easier this job is (use axle stands)
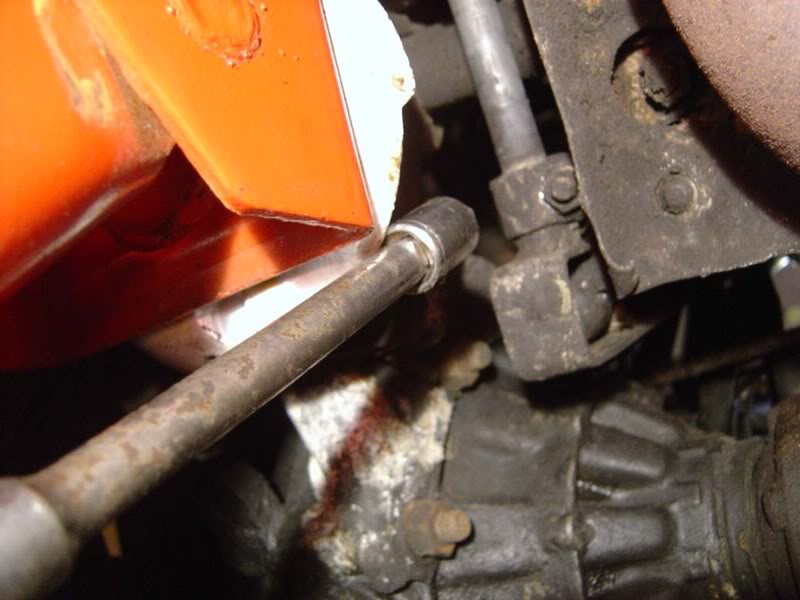
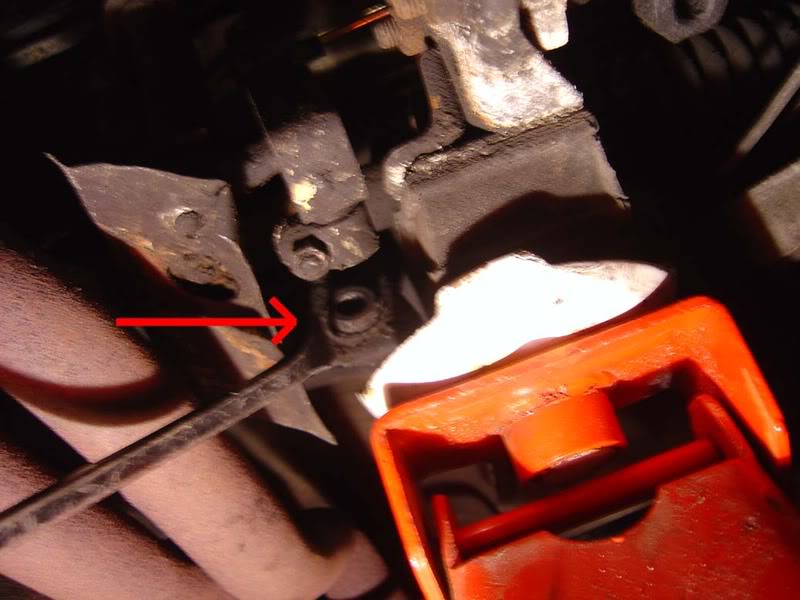
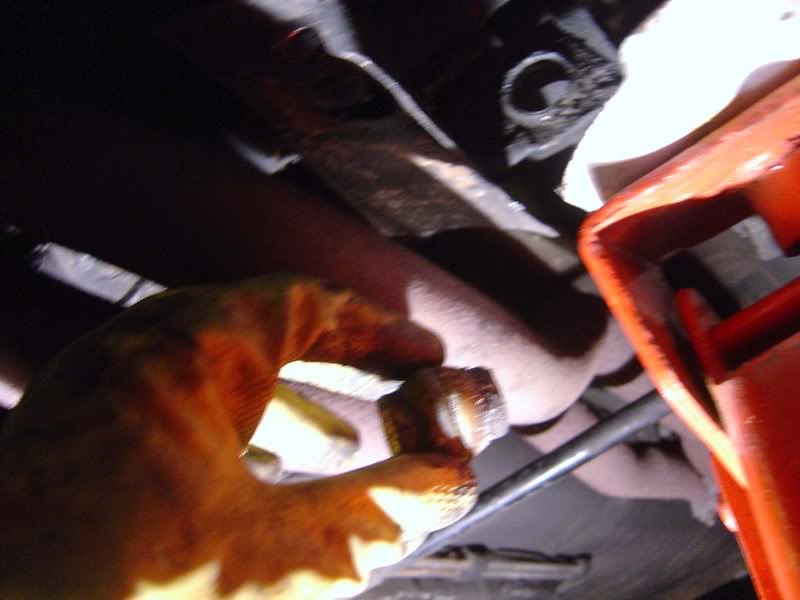
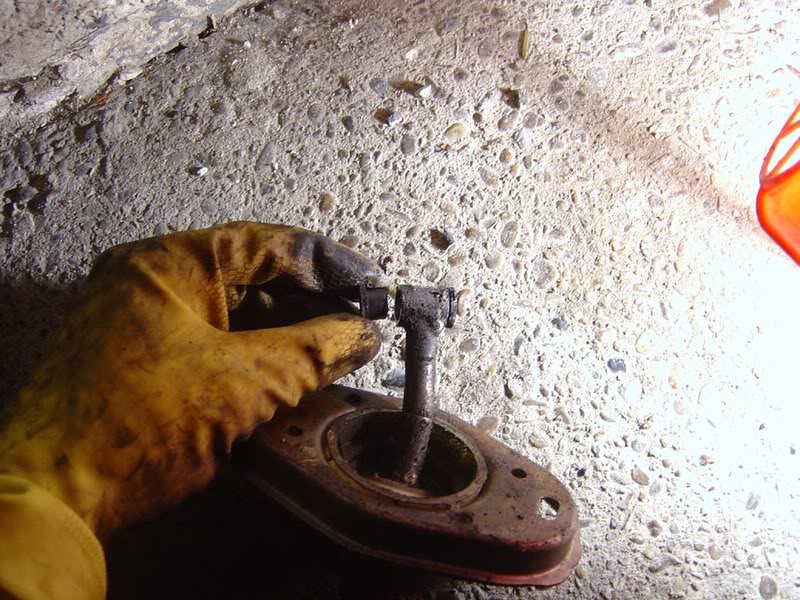
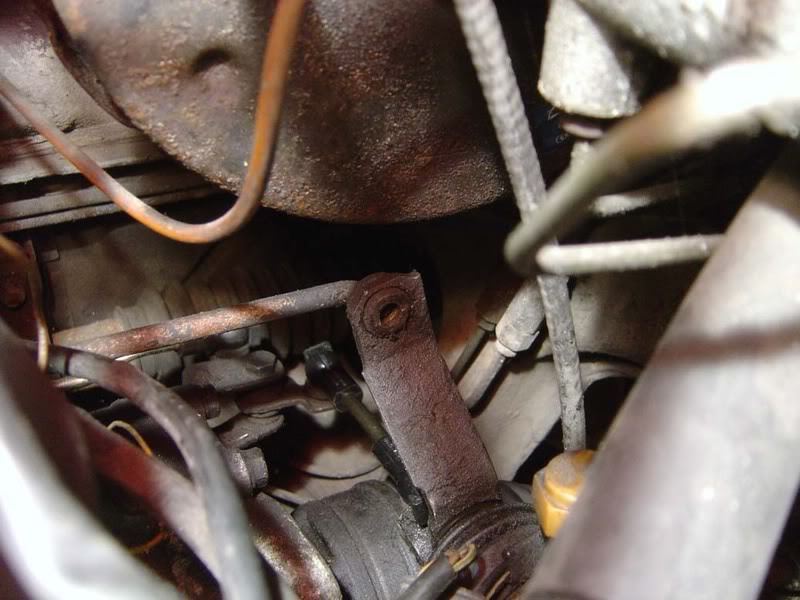
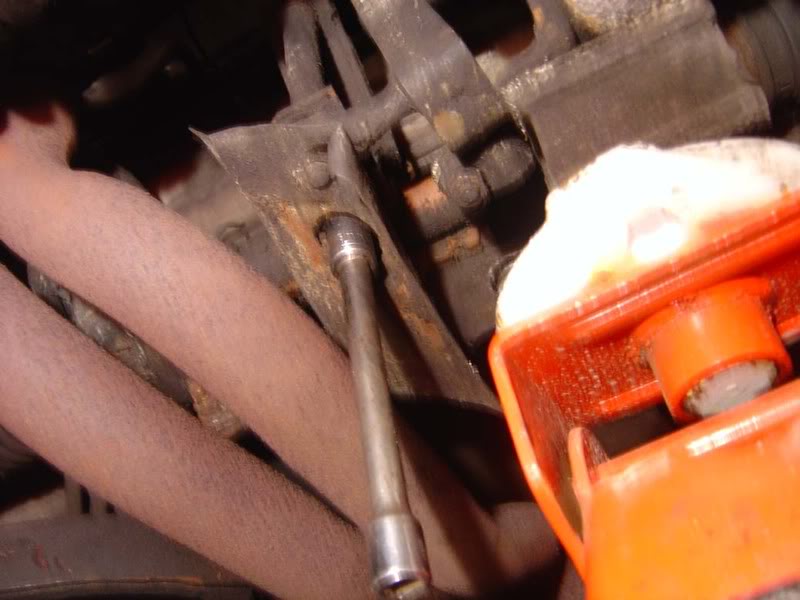
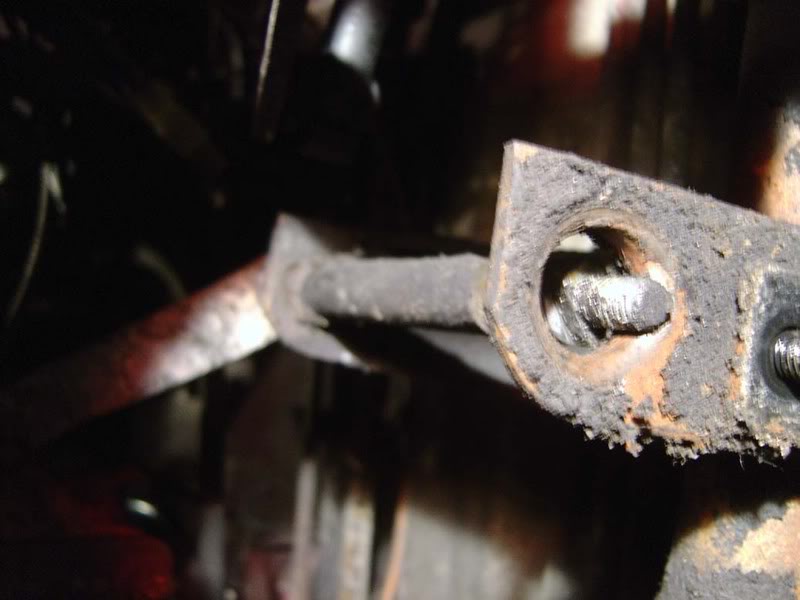
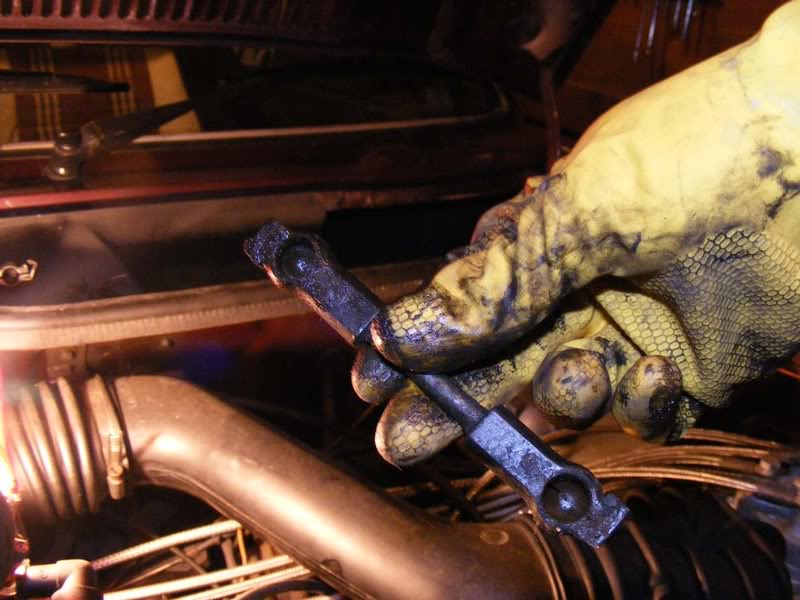
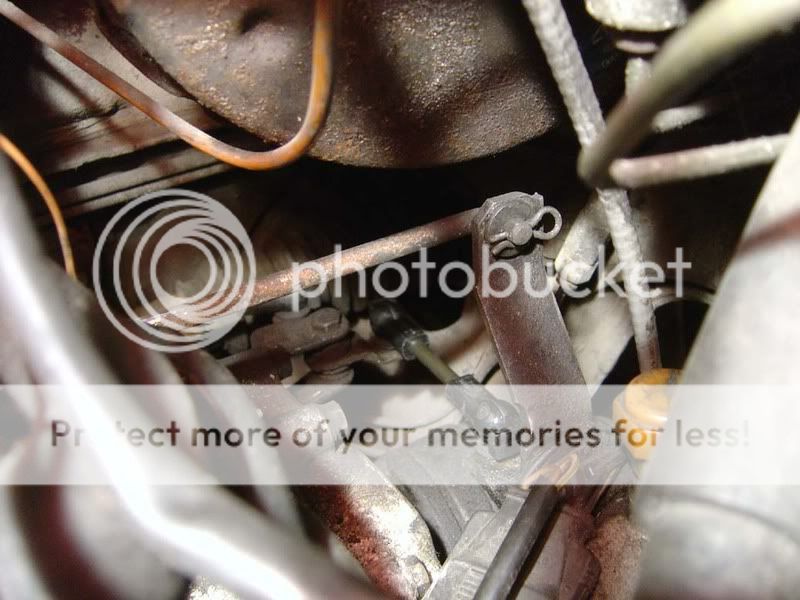
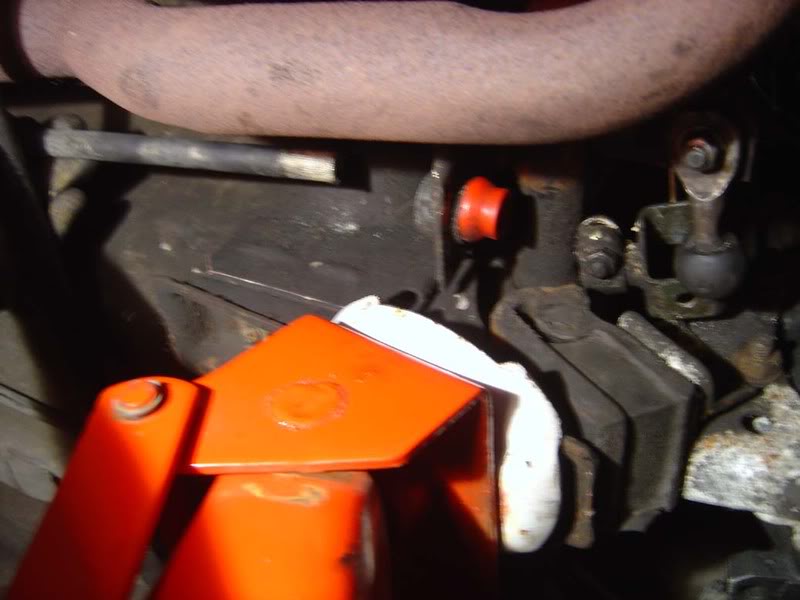
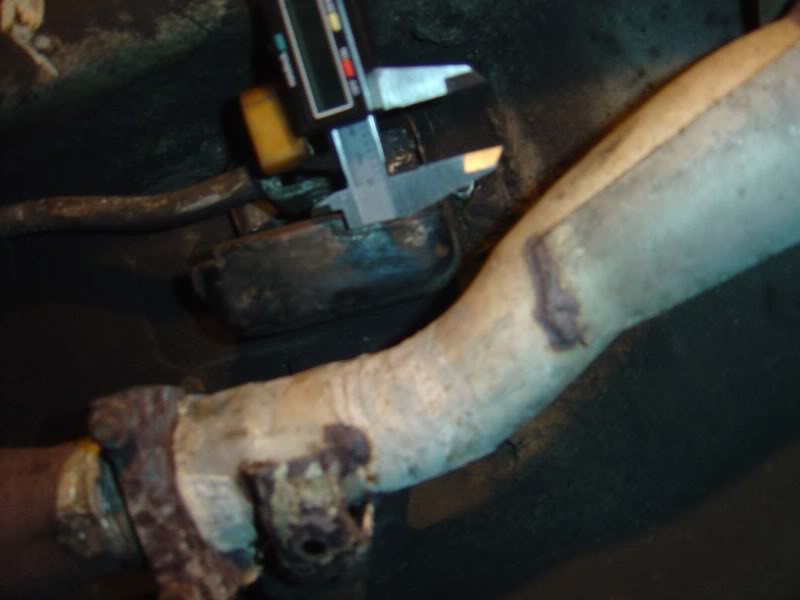
Step 3 - Looking up near the front of the linkage you will find the shaft from the gear lever ends in a box/ball mechanism. Remove the 13mm pinch bolt that holds the rod in place
Posted
Settled In
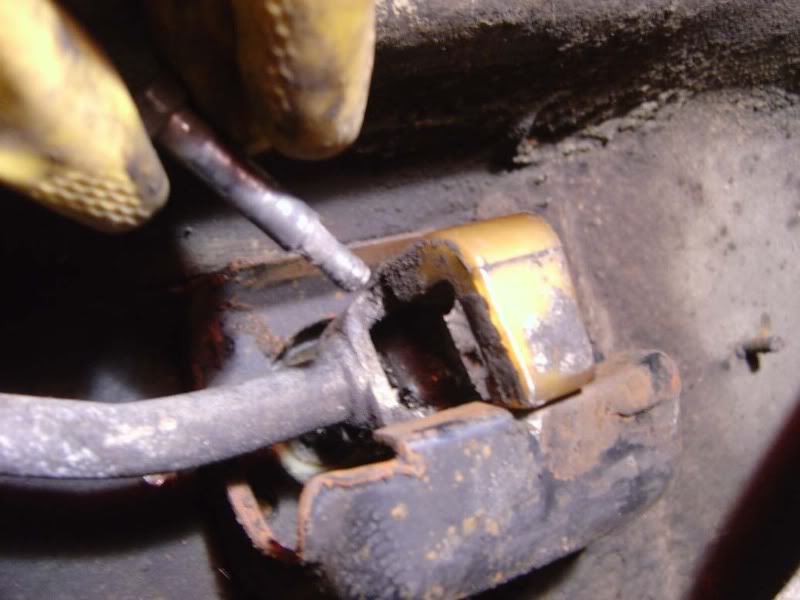
Step 5 - Now look up to the other end of the shaft (where it meets the gear stick) and you should find a rubber housing of some kind. Again, I didn't have this so can't tell you any more than that! Remove it to gain access
Step 6 - Using a 10mm spanner and a 13mm spanner, remove the bolt holding the linkage and bushes together
Posted
Settled In
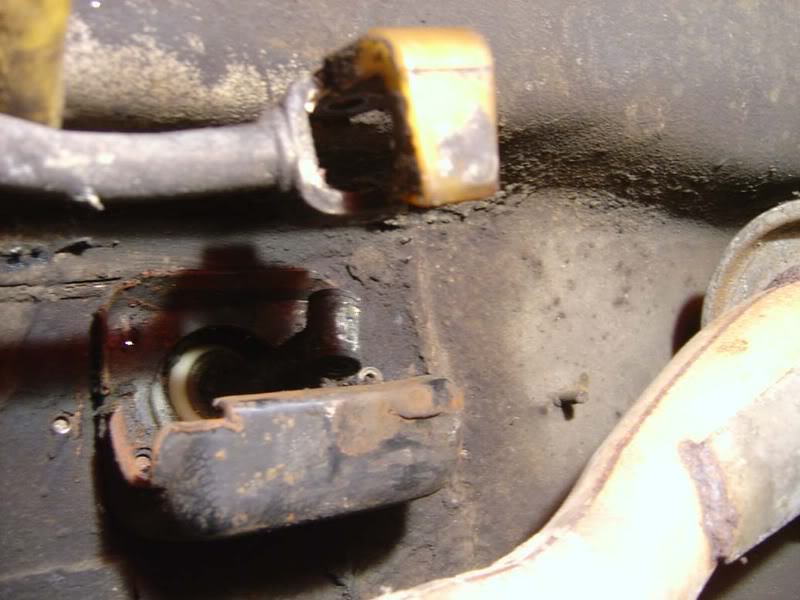
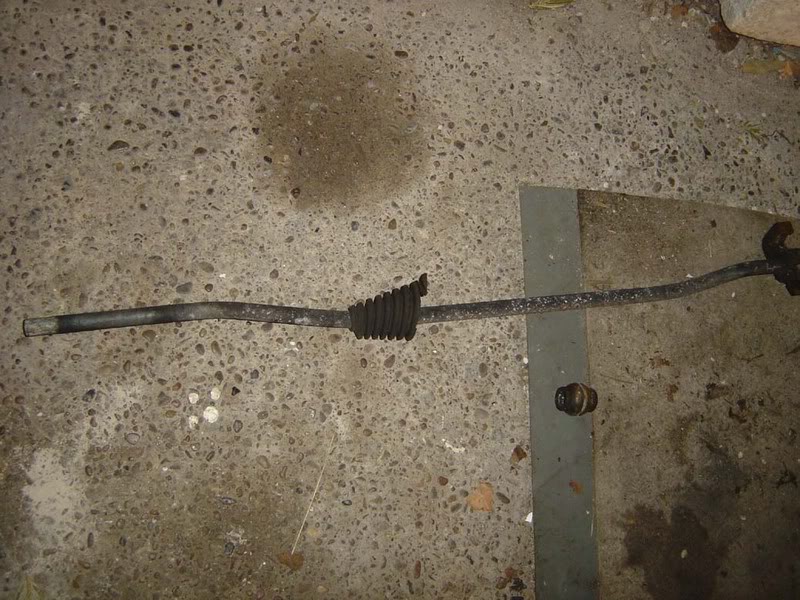
step 8 - Moving back to the end of the rod that we removed in step 4, pull this all the way back towards the rear of the car so it falls out this centre bush
Step 9 - Use a flatblade screwdriver or pry bar to push the centre bush out
Posted
Settled In
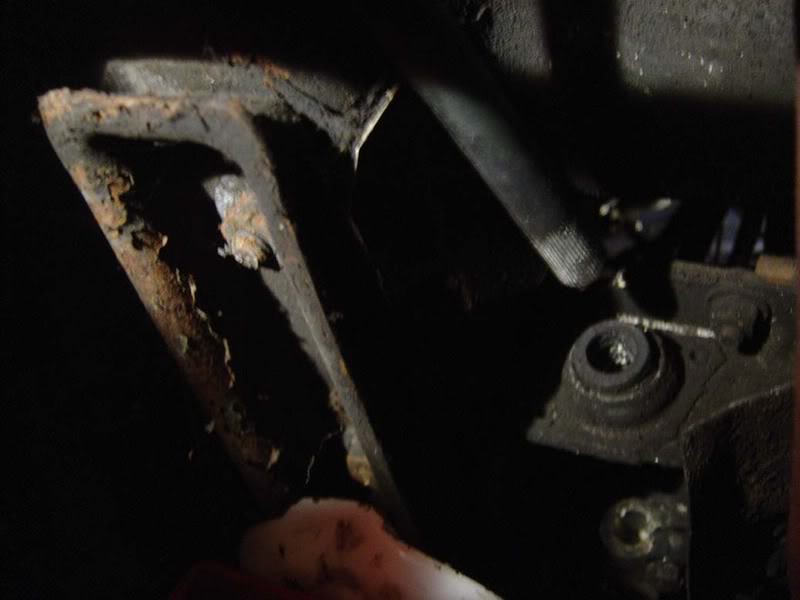
Step 11 - The gearstick will be flopping about in the car somewhere now so go and grab that
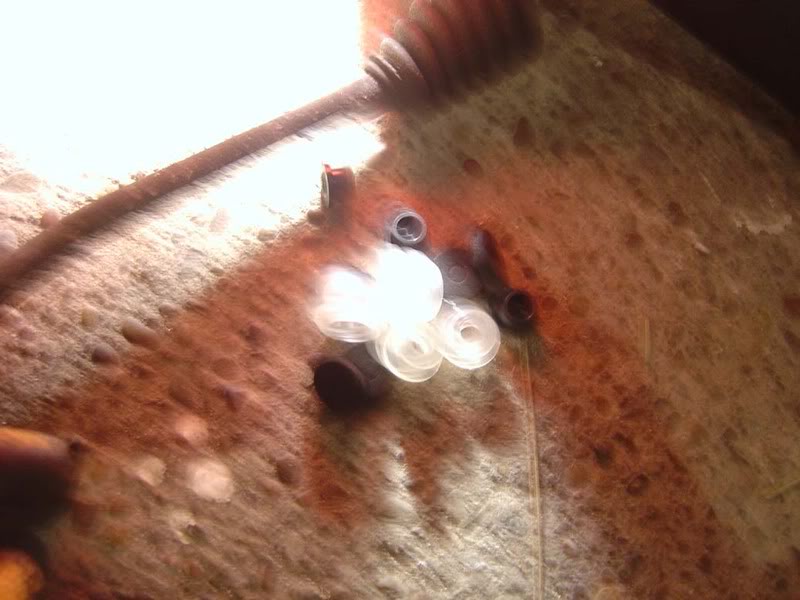
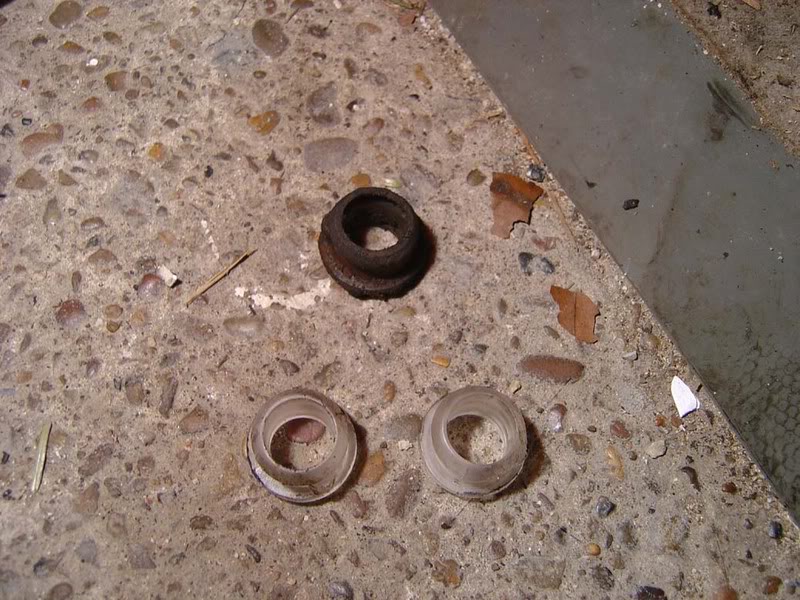
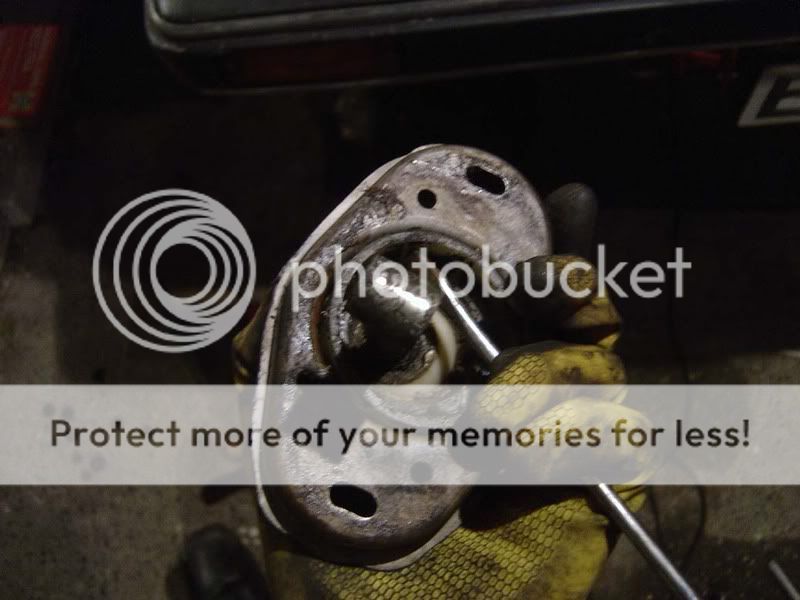
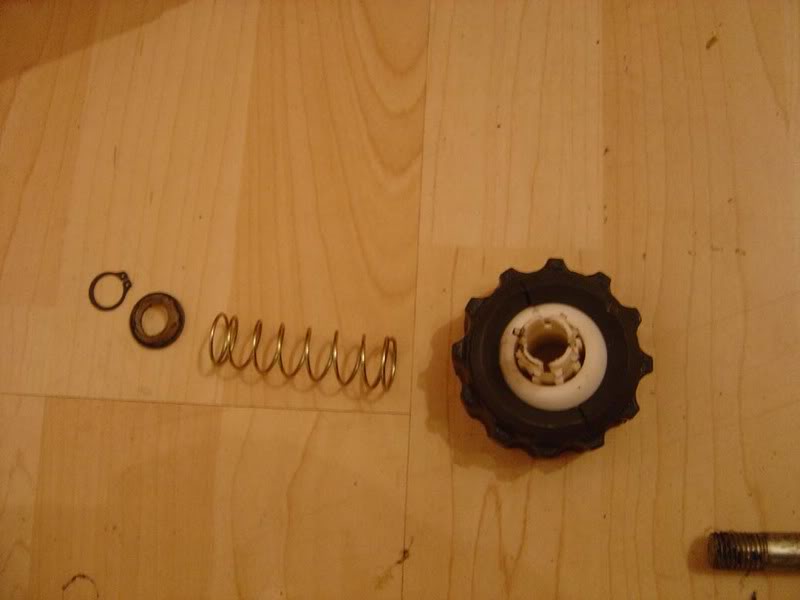
Step 12 - There are two 'top hat' bushes in the base of the gear stick as shown in the picture. Remove these (they will slide out easily)
Posted
Settled In
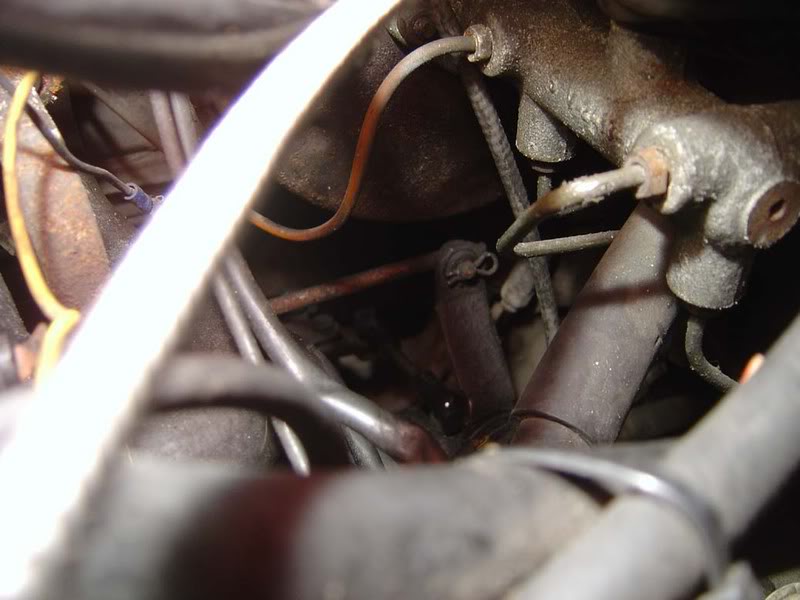
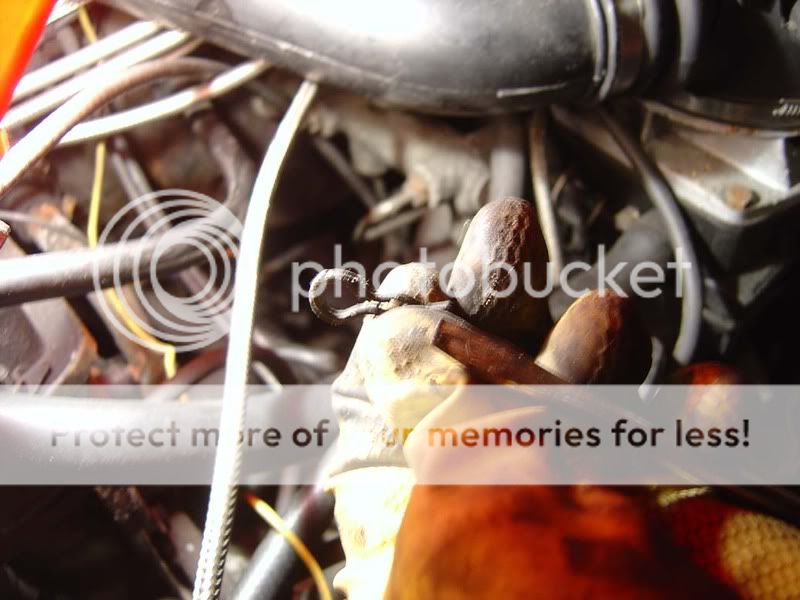
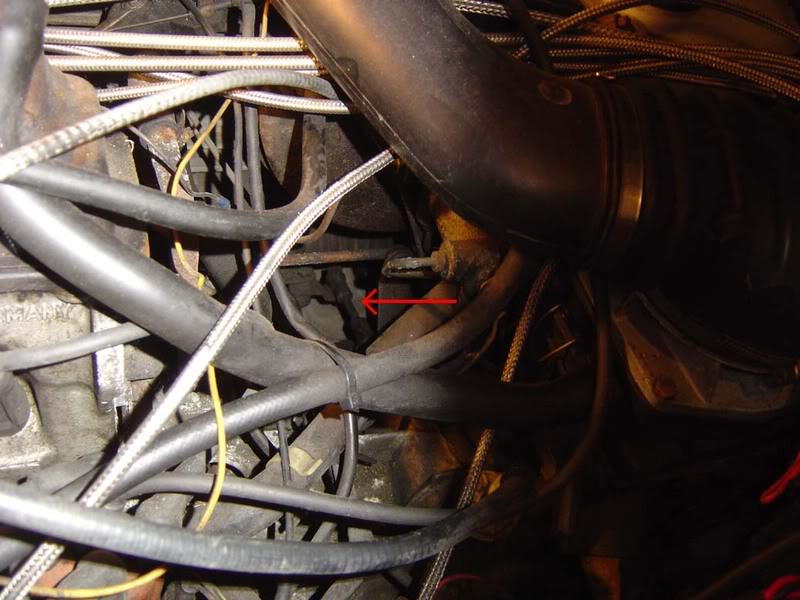
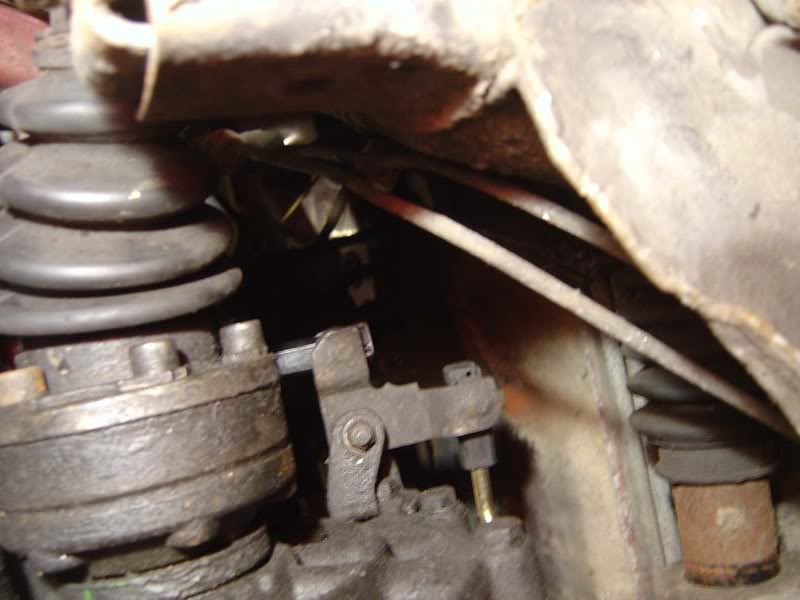
Step 14 - Looking in the top of the engine here on the passenger side you can see down to one of the arms on the linkage that has a spring clip retaining it (picture 1). Remove this using a flatblade screwdriver (picture 2), being careful it doesn't spring off and get lost. The rod should then push gently out from the bush (picture 3)
Posted
Settled In
Step 16 - You can now slide this out complerely
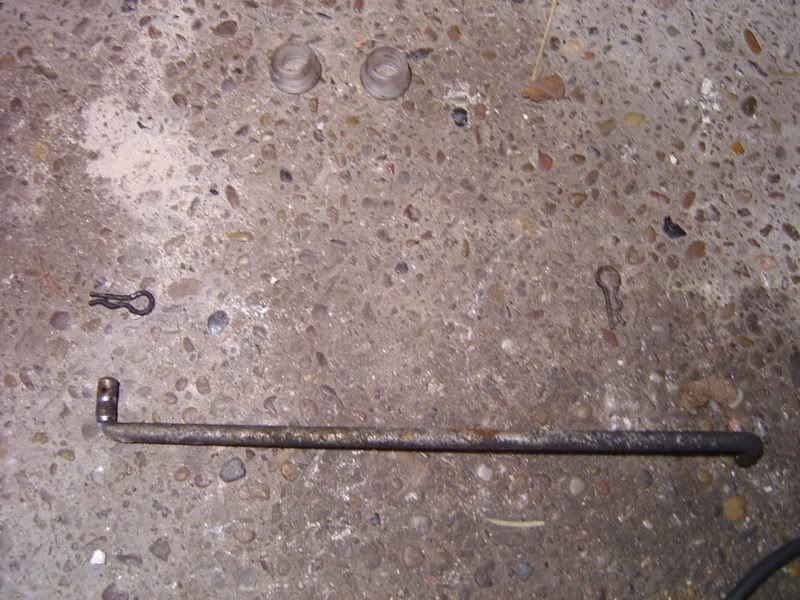
Step 17 - Replace the bushes at both ends of the rod. First, push them out with a screwdriver
Posted
Settled In
Step 19 - Push the bush in by hand, make sure it's lined up flat and then give it a firm press with the thumb, a little stiff but nothing too difficult
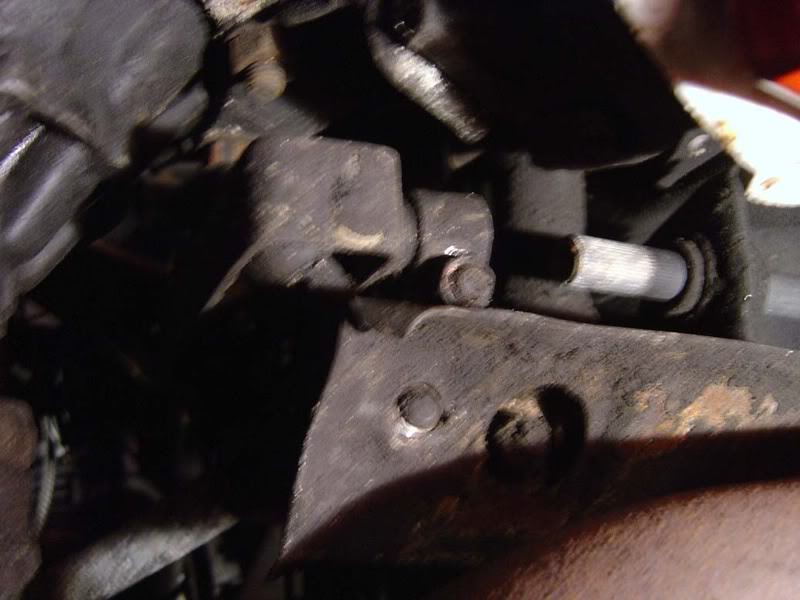
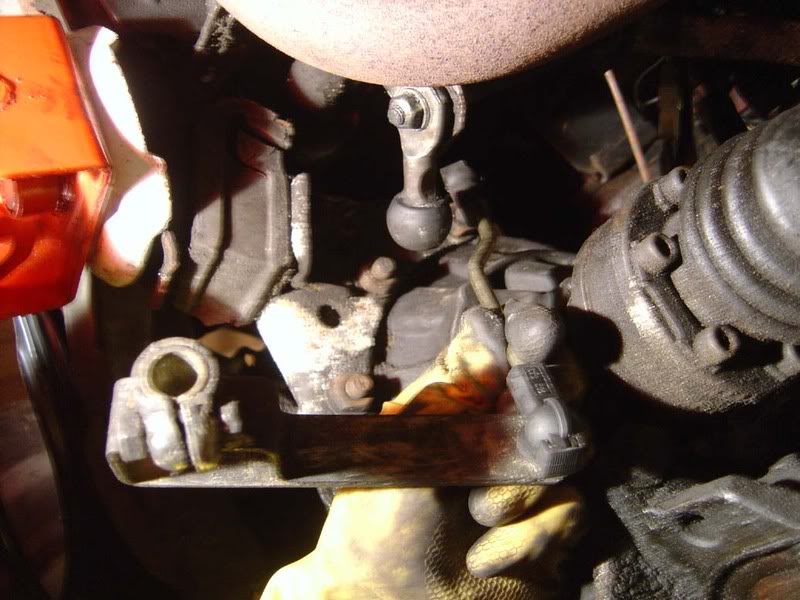
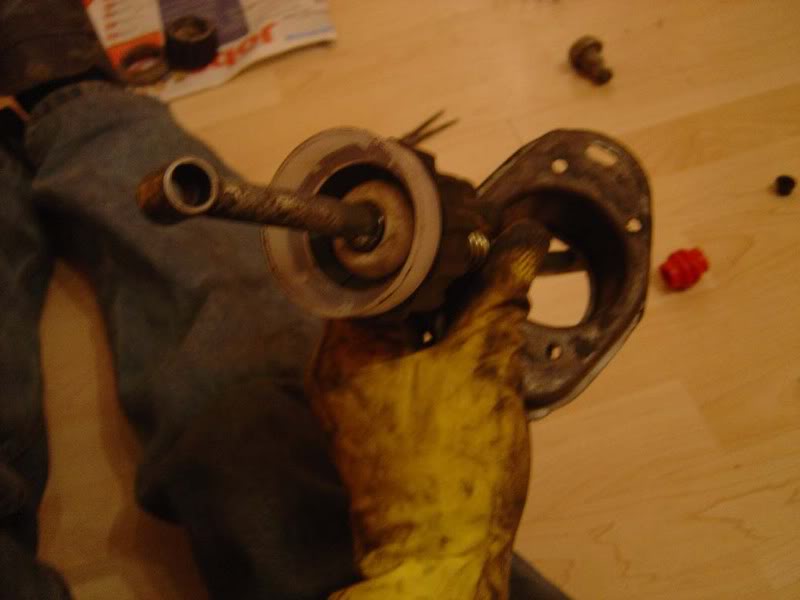
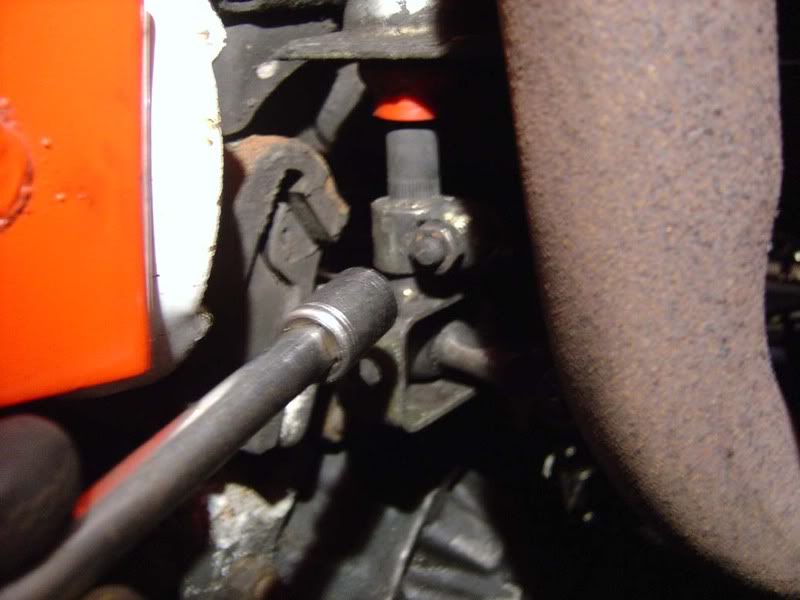
Step 20 - Next up, remove the cover plate next to the ball / cage mentioned in step 3, this is a single 13mm nut
Posted
Settled In
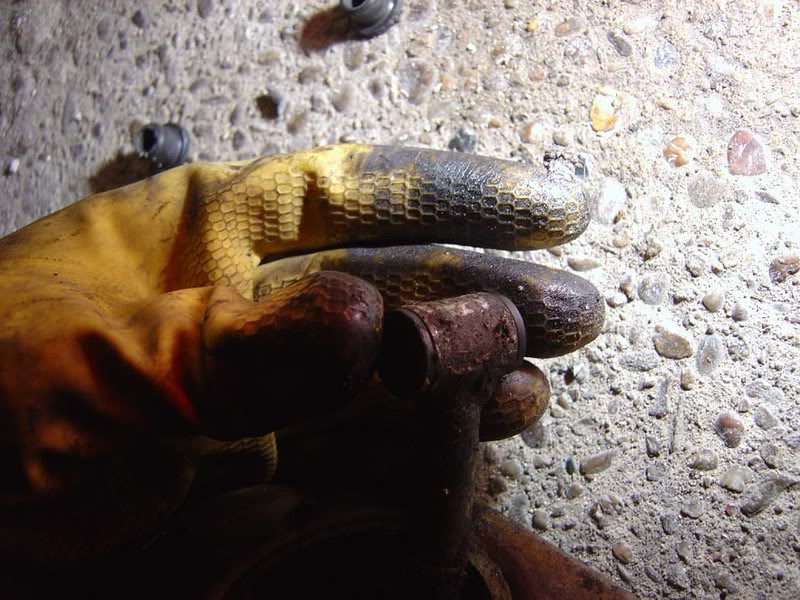
Step 22 - With this removed, slide off the arm completely and make sure you don't drop and lose the washer (assuming it's not stuck on with dirt like mine!)

Step 23 - Now simply push the metal rod up through both the bushes and remove it completely
Posted
Settled In
Step 25 - Grab another two fresh bushes from your set and push them into place
Posted
Settled In
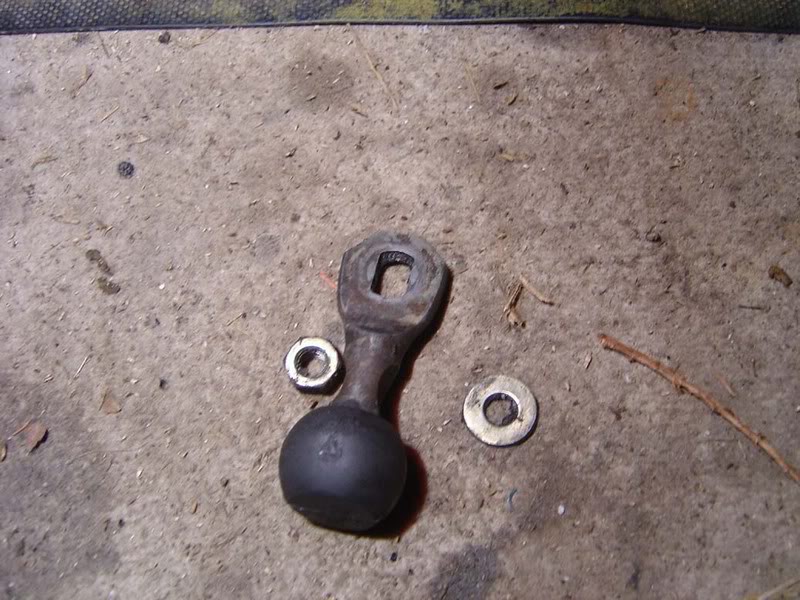
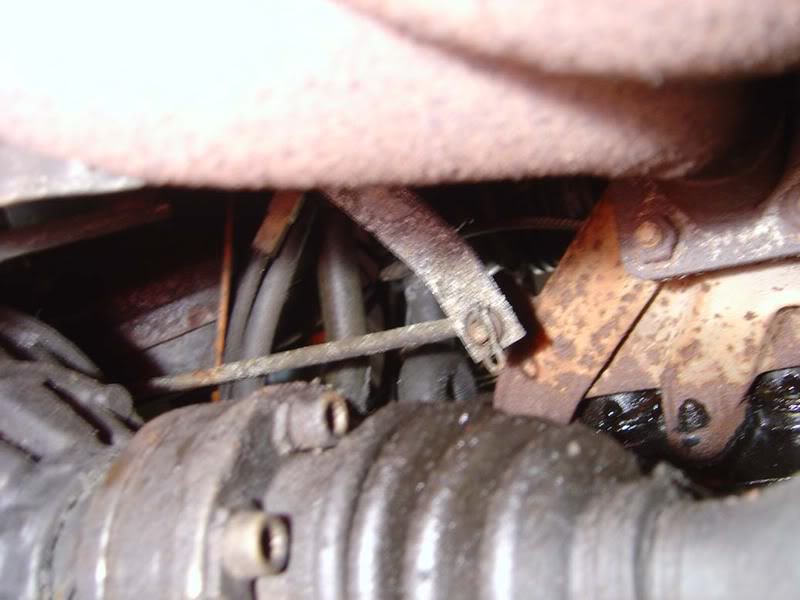
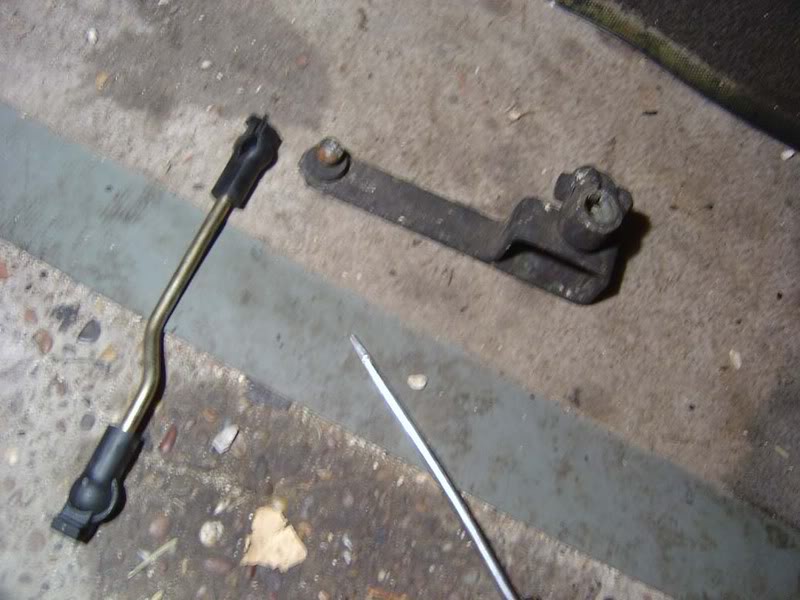
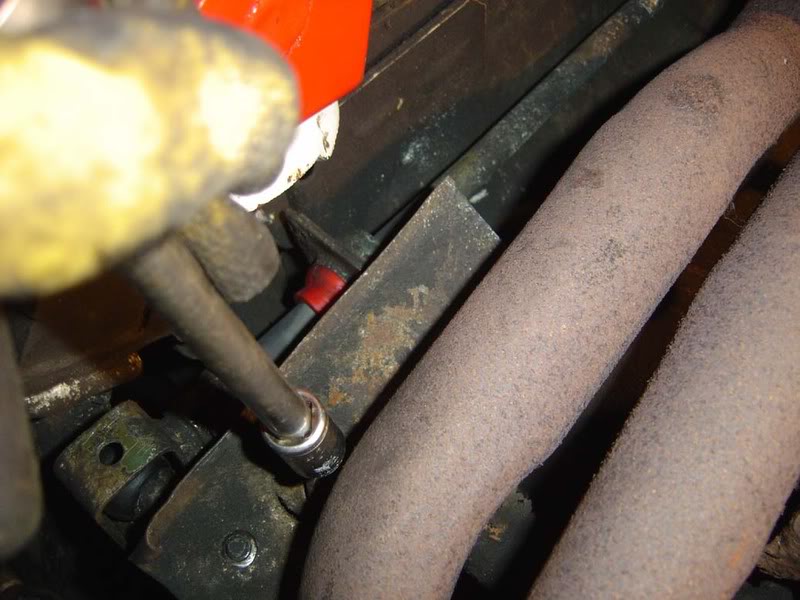
Step 27 - Locate the small rod shown in the picture. There are two ball joints at the end and you can either unclip the plastic at the end of the rod then pull it off or simply pull it off, either works.
Step 28 - There is a second, longer arm, attached to the cage that surrounds the ball as mentioned in step 3 and 20. If you remove the cage and disconnect the rod it is easier to fit

Posted
Settled In
the bars simply push onto the balls and then have a plastic clip on the end that clips shut to hold them in place


Posted
Settled In
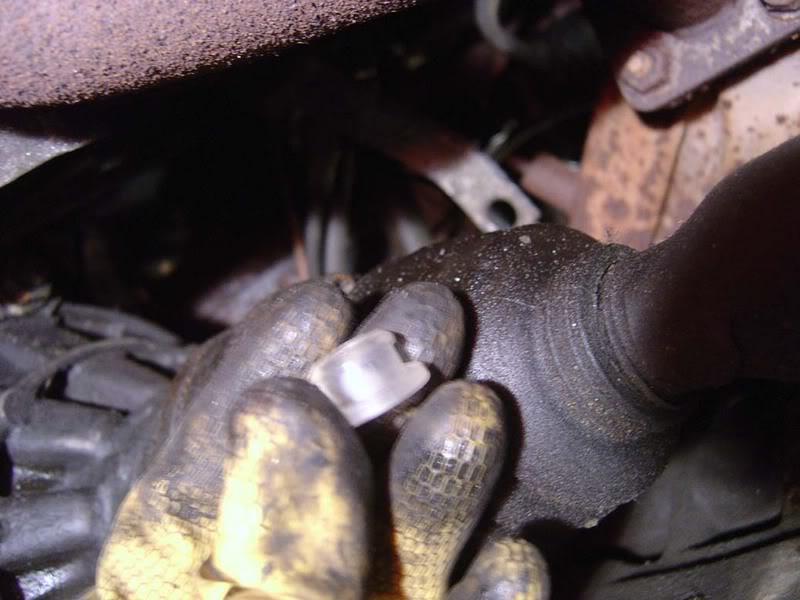
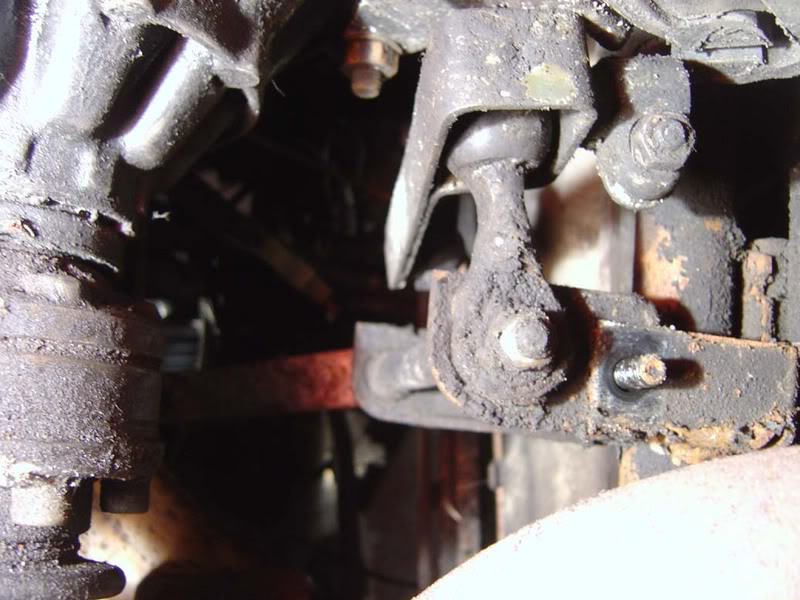
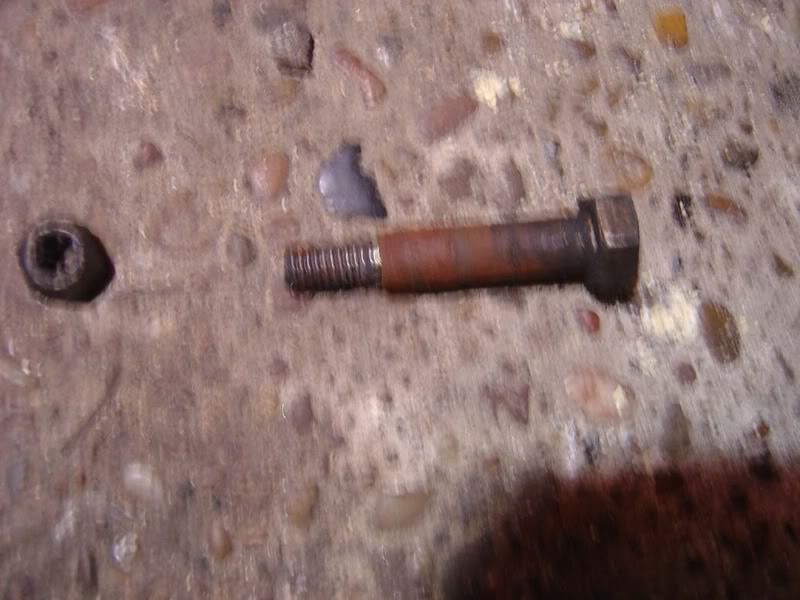
Step 31 - With the bolt removed (picture 1), you will be able to slide the pivot out of the bushes (picture 2). Simply slide out the 2 top-hat style bushes and refit new ones then pop the nut/bolt back together
Step 32 - Back up the gear stick now, this should simply lift out the car because you've already disconnected the bottom part of the linkage. Turn it upside down and use a flatblade screwdrive to turn the bottom plastic fitting and remove it.
Posted
Settled In
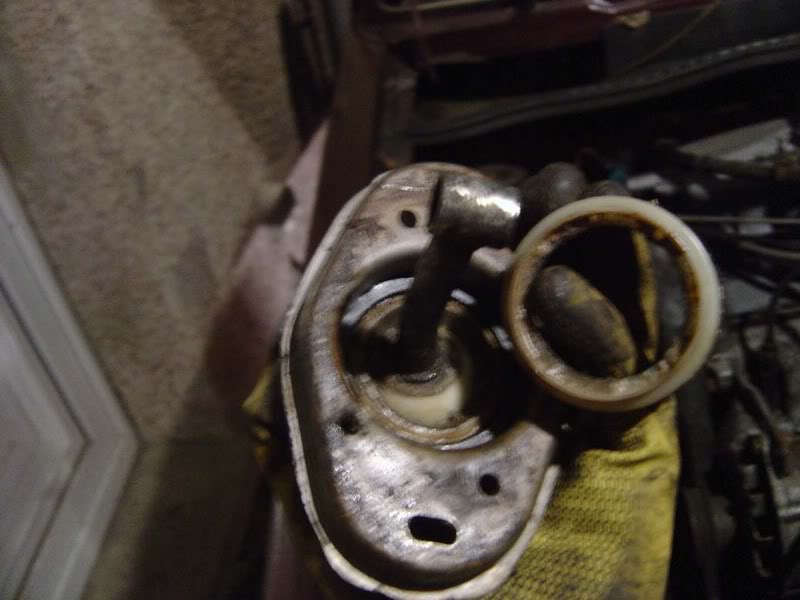
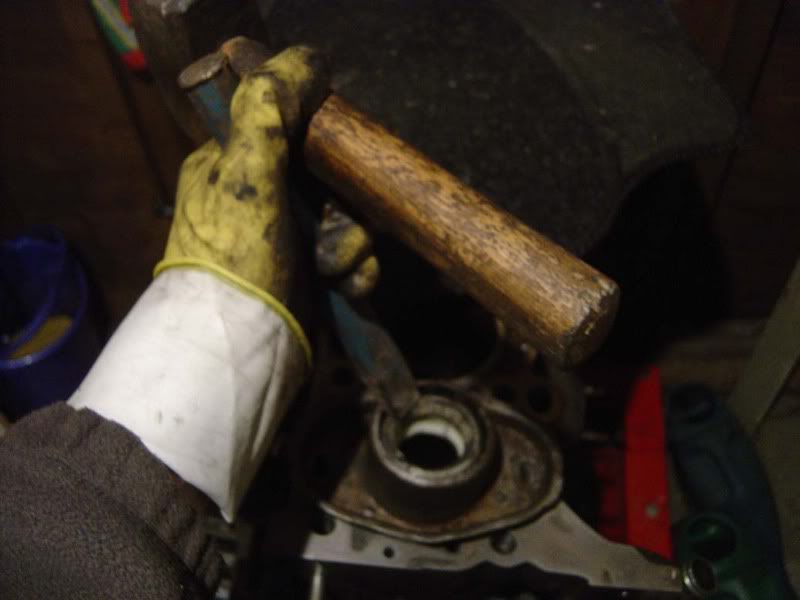
Step 34 - You now need to remove the large rubber bush in the shifter base. I just placed it on the floor and trod on it to break the seal (picture 1) then just tapped it the rest of the way with a chisel (picture 2). The final picture shows it removed
Posted
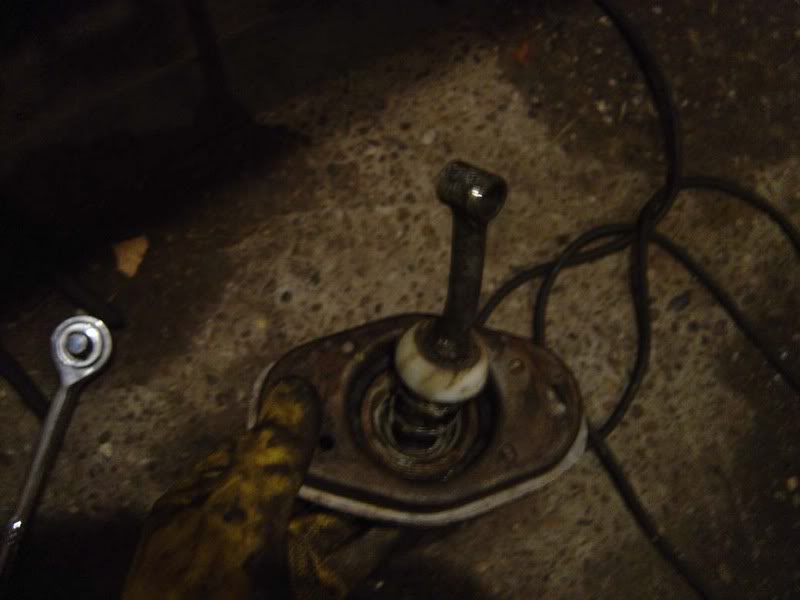
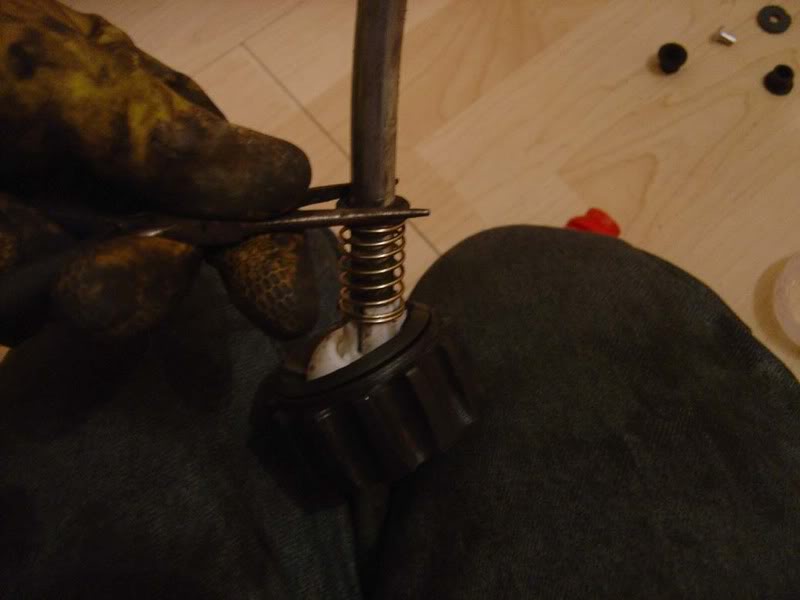
Settled In
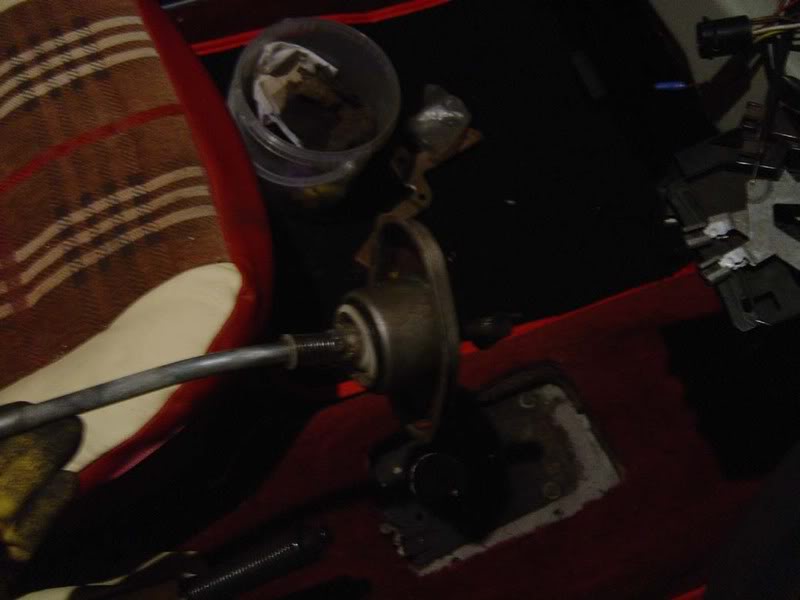
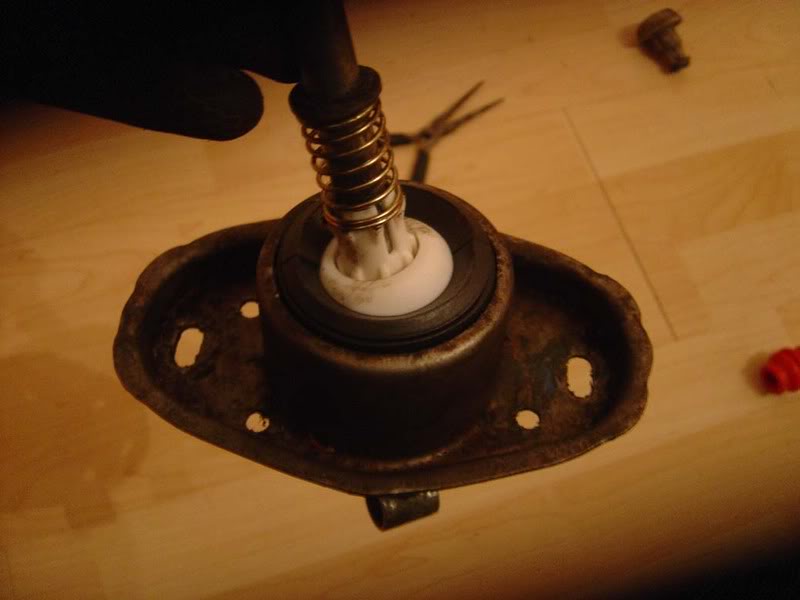
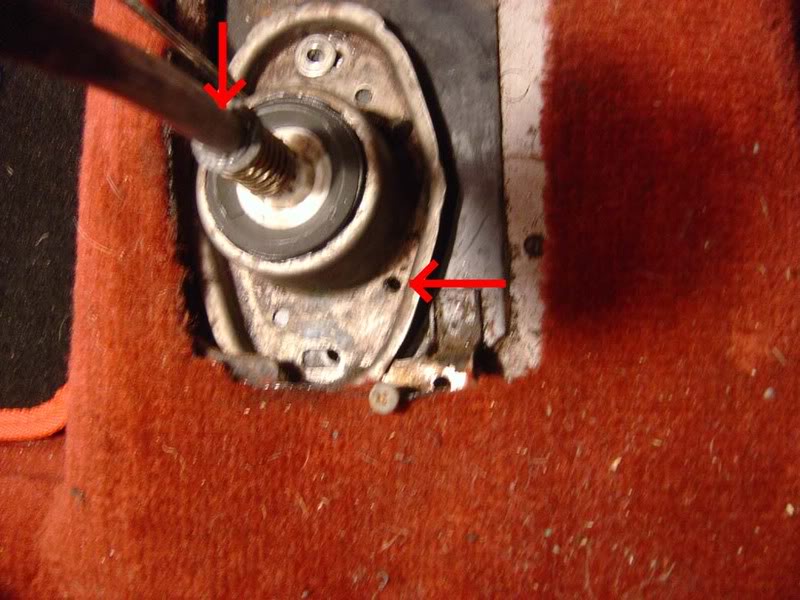
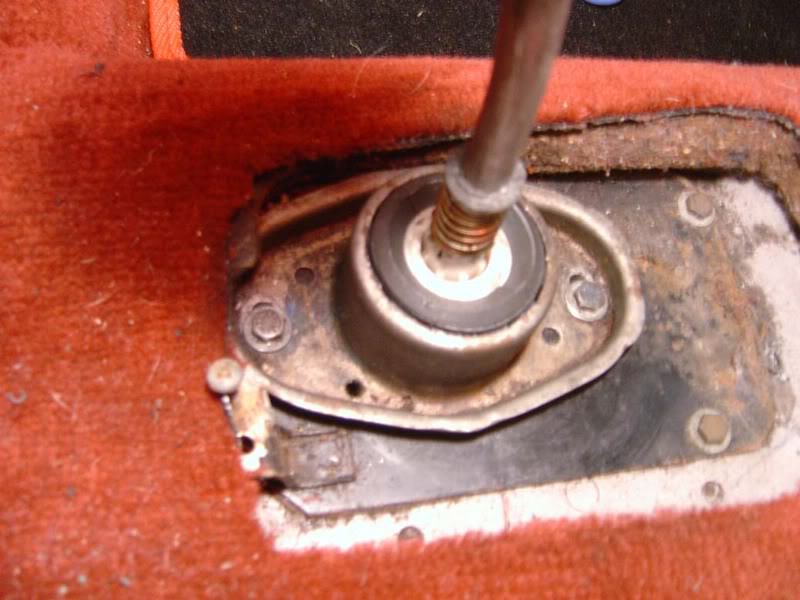
Step 36 - With the circlip removed, you can slide off the cap, spring and plastic ball then clean up the gearstick a bit
Step 37 - Now grab the new bits from your kit as shown and put them back on
Posted
Settled In
Step 39 - Now push your new shaft assembly through the large rubber bush and into the base of the shifter
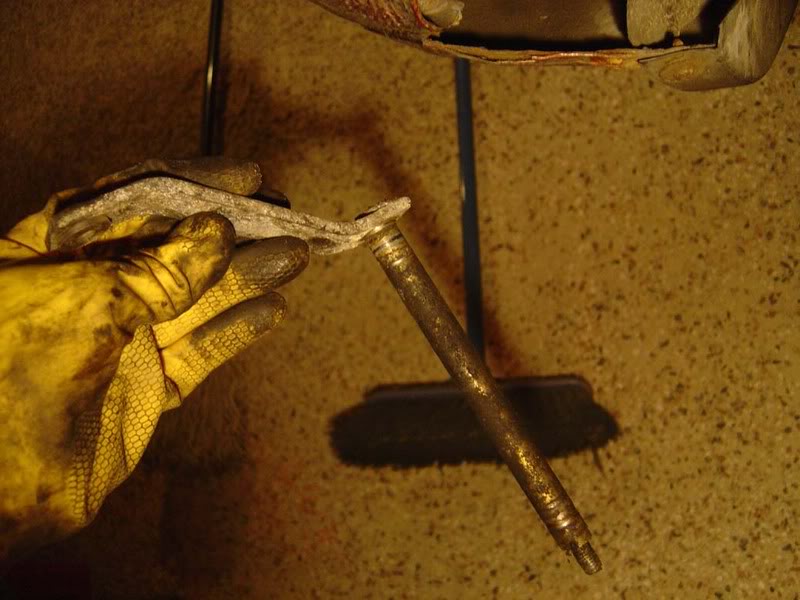
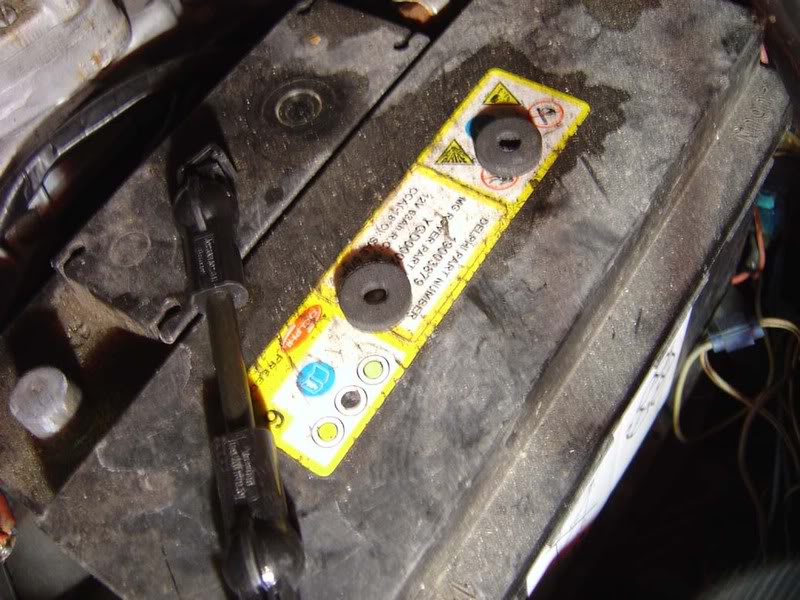
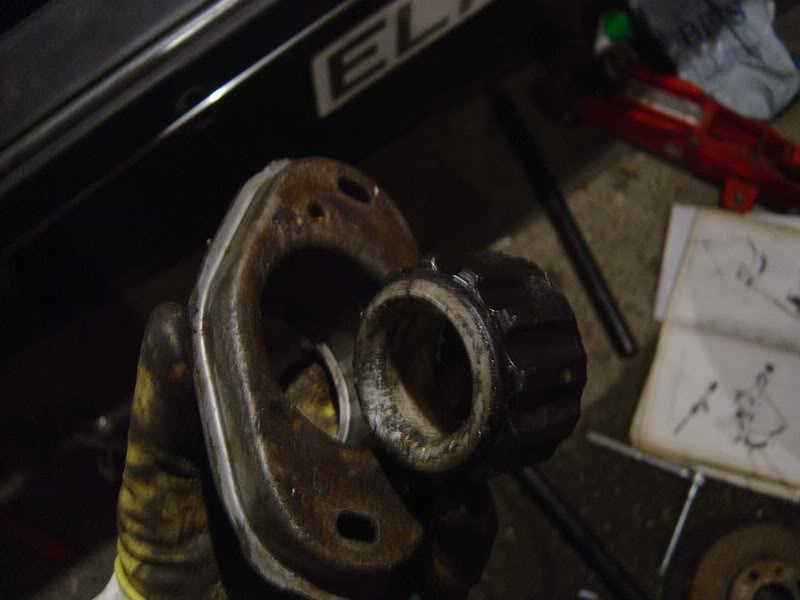
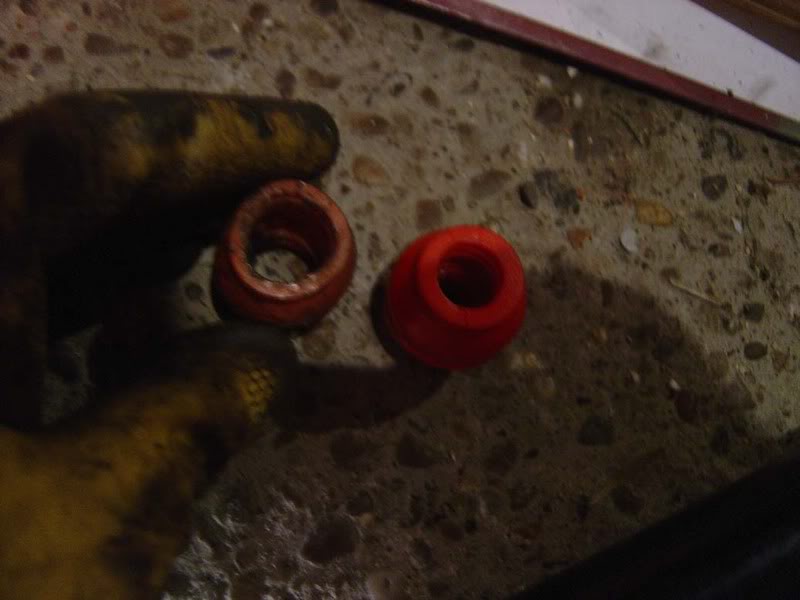
Step 40 - The final bush is an important one, make sure your kit has this red on ine (some of them don't). Also, as the first picture shows, the mk2 golf bush isn't the same-it's quite a lot bigger so make sure you get a mk1 bush.
you are given two rivets as part of the kit but I didn't realise until afterwards, I guess this bracket must be riveted on. Either way, you can remove the old bush with a large flatblade screwdriver and simply push it straight out as shown in the second picture
Posted
Settled In
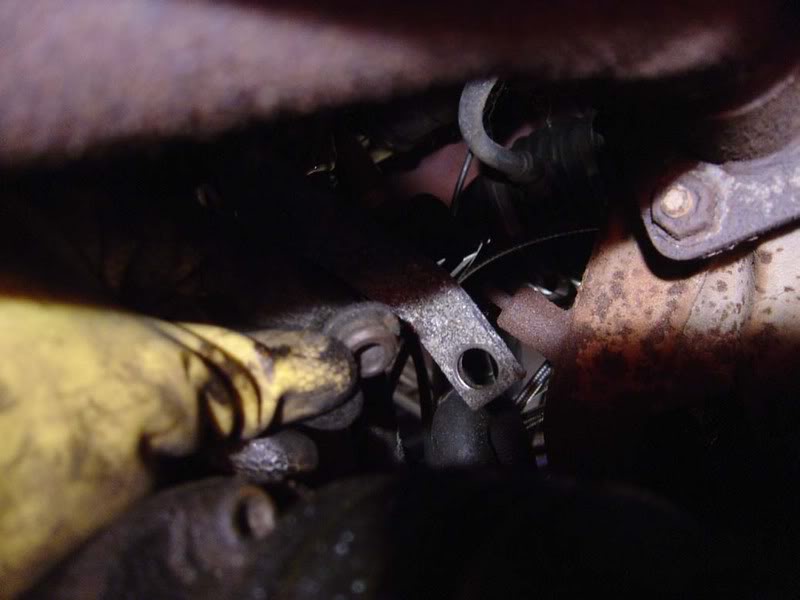
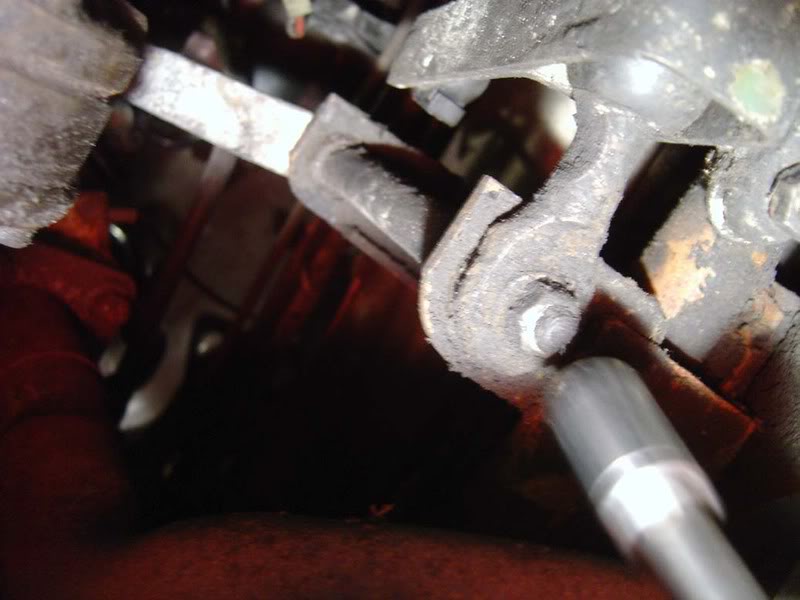
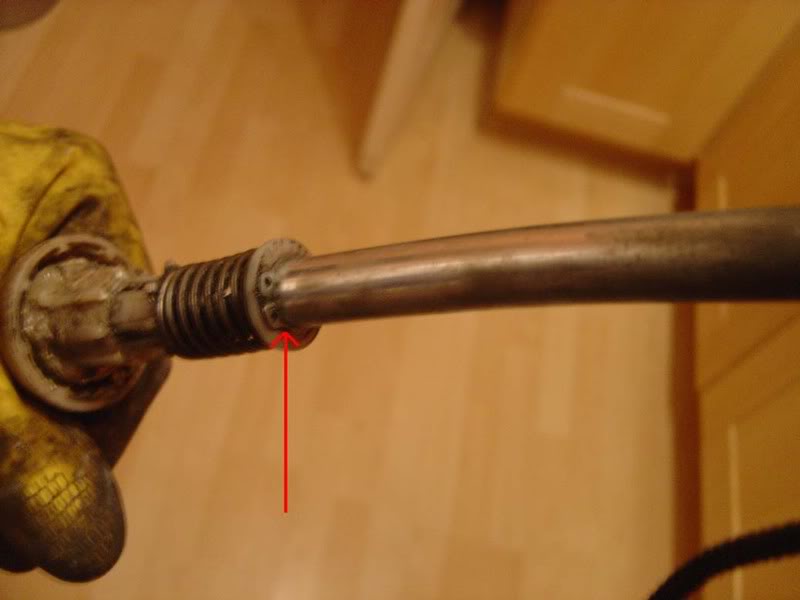
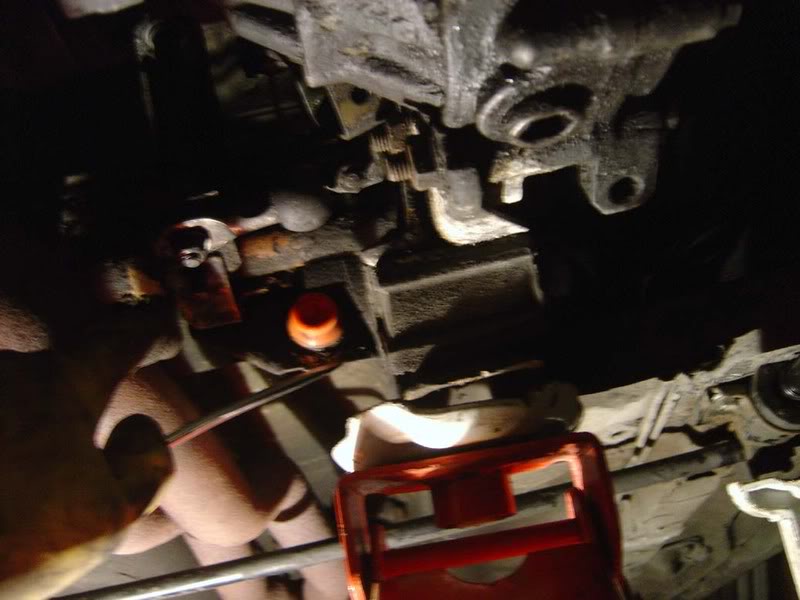
Step 42 - Now slide the shift rod through the bush with the splined end heading towards the pinch joint from step 3. Slide it into the joint but don't tighten the pinch bolt (you'll need to rotate the shaft in a little while to set up the gear linkage)
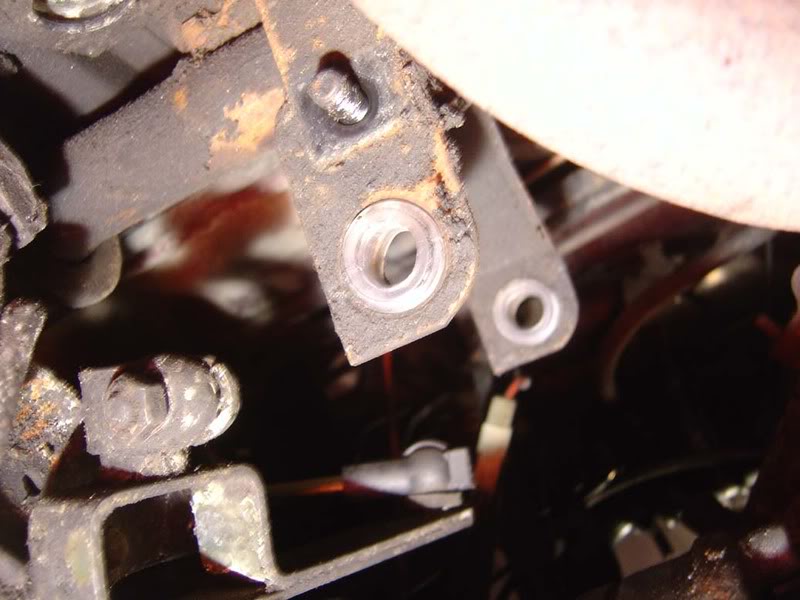
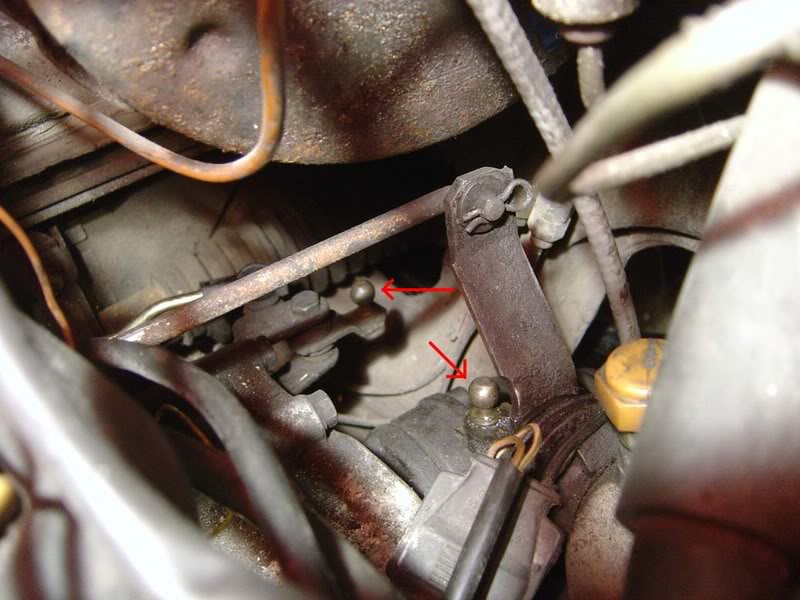
Step 43 - Back up inside the car and drop the gearstick back in. Make sure the holes line up on the flange and the car (see arrows). If you can't see the threaded holes at either end of the plate then rotat through 180 degrees.
Posted
Settled In
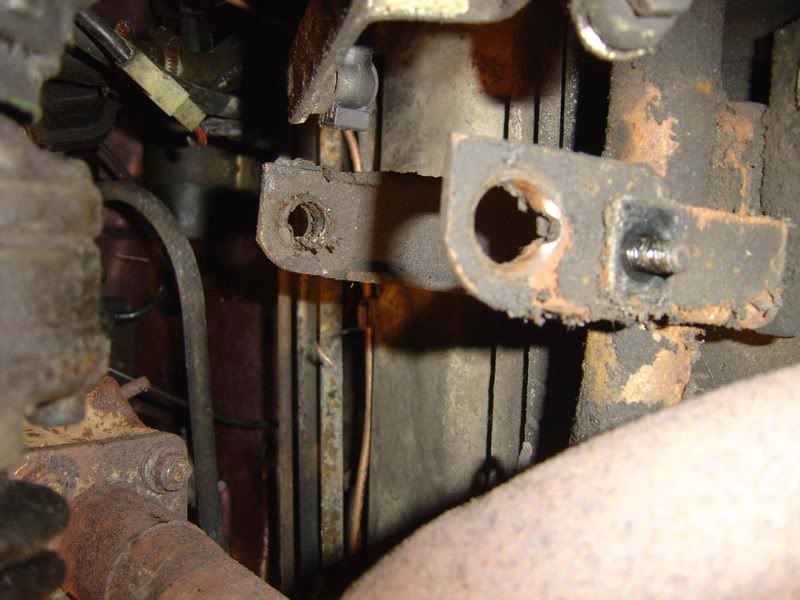
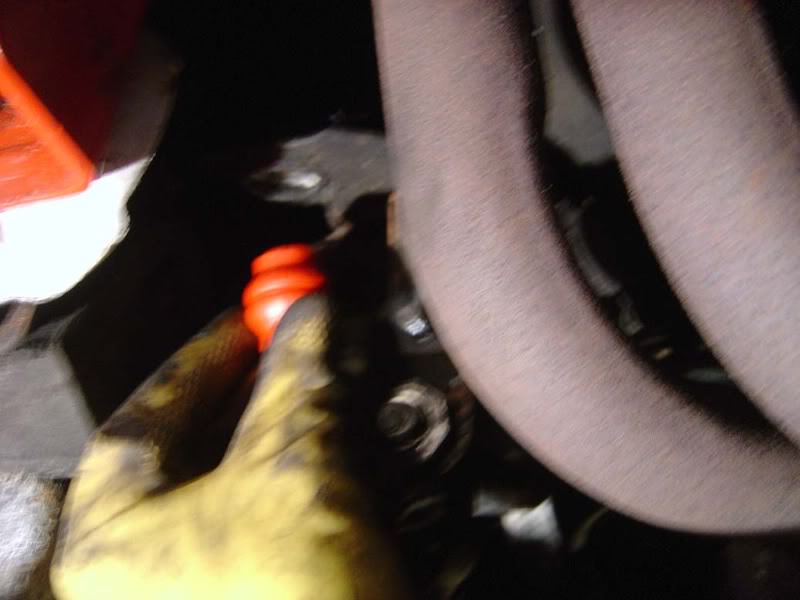
Step 45 - Jump back underneath and slide the bar from step 42 into place so that the two bushes (from step 13) fit inside the bracket from the shifter. Tighten the bolt (10mm / 13mm nut+bol assembly) that holds this all together

Step 46 - Make sure the 'finger' (or 'funny plastic bit in a sort of L-shape') sits half way along the metal plate i.e. it should be in the middle
Posted
Settled In

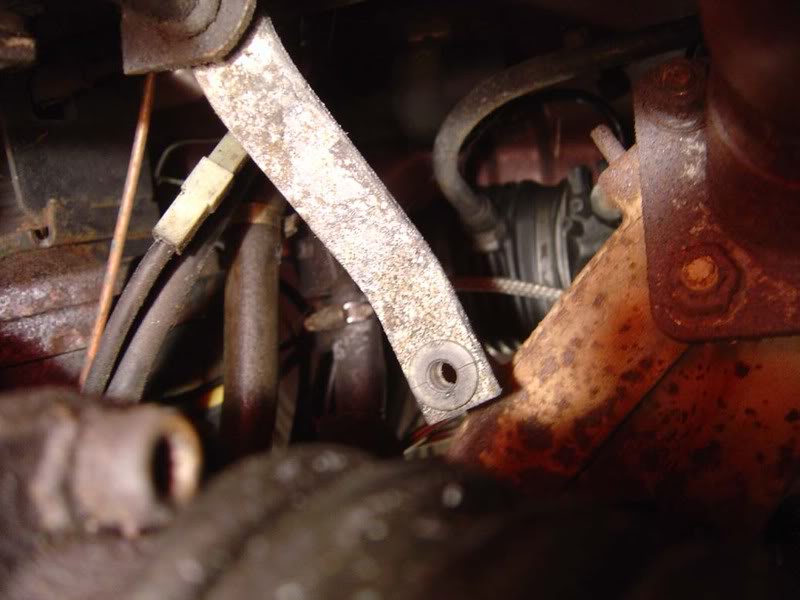
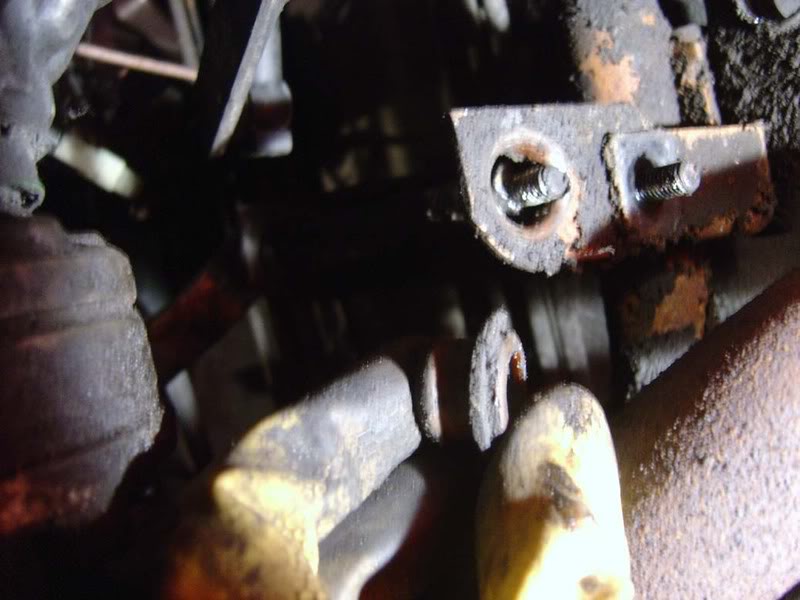
Step 48 - Once you have set your 19mm clearance, move to the front of the car and carefully tighten the pinch bolt without moving the mechanism
Step 49 - At this point I refitted the cover plate with the single 13mm bolt at the front of the car and checked all gears engaged properly.
Hopefully you could follow all that and also it improves the feel of your bearbox. It's well worth doing a fluid change too while you're spending all this time making things feel better, it's an often-neglected service item.
Posted

Local Hero

as a quick note. mark the splined shaft before you remove it with tipex or something to make it easier to realign later.
and give it all a good clean and grease before refitting anything.
use copper slip on any bolts to make it easy the next time.
you can remove the plate which holds the red shaft bush (ball) from the car which can make it easier to change.
if you can't do as jseaman has done a force the ball back in you can drill out the old rivets and refit with small bolts and locktight them inplace if it's easier than rivets.
if the plastic caps for the shift rods can slip over the ball joint without being undone these are worn and really need replacing.
i'f your rubbers are ok under these caps then take them off clean them and put both the new and old one's back on to help stiffen up the shift.
the spring on the gear lever is a bit weak compared to the old spring. i packed mine down a bit to give a stronger depression on the reverse movement.
the walk though is fantastic and well worth following as this is basically the method i used for mine.
the bent bar with the r clips (shift rod) can be weighted to give a better feel changing gears. for the real lazy wrap it in lead roof clading and use jublie clips to hold it tight. then you can add more or remove till you get the correct weight. :mrgreen:
Posted
Settled In
0 guests and 0 members have just viewed this: None.