LCD Clock
Posted
#1672071
(In Topic #241566)
Settling In


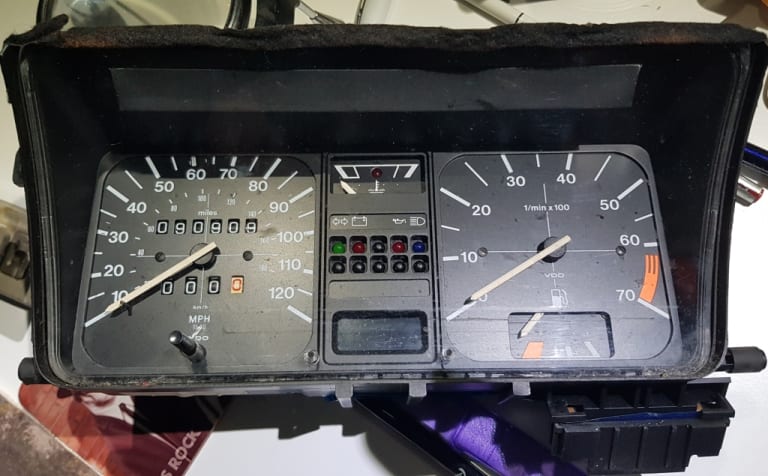
Car is a 93 Cabrio. This is the display: -

This started as an exercise to investigate a non-functioning temperature gauge. Following several threads, (Notably Briano – thanks again!) I have now isolated the gauge, applied 9v and found that it works OK. Thus, my problem is elsewhere in the wiring between the head sensor and the gauge. Investigations are ongoing and will proceed further when the better weather returns!
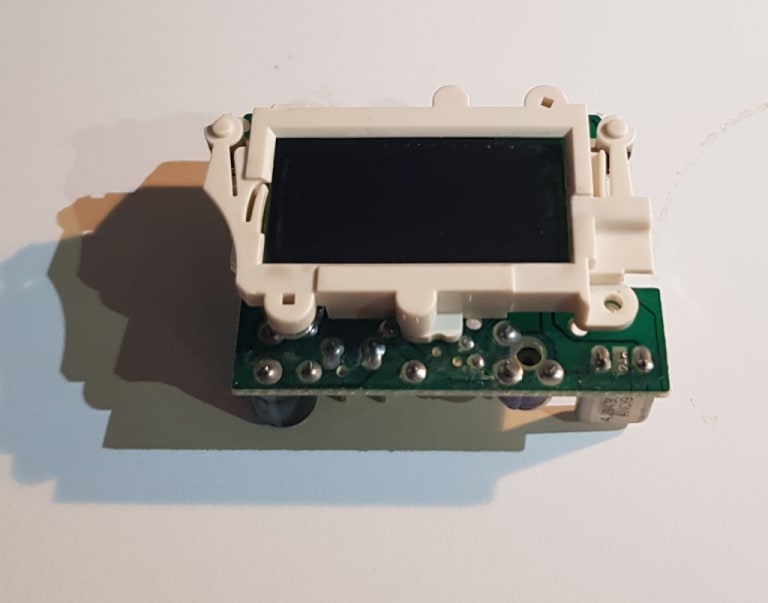
Whilst in the vicinity I thought I would strip out the LCD Clock and see if that would operate with 9v across the terminals. Answer – NO!
Looking at the display there appears to be evidence of “bleed”, so I suspect I’m looking at a new one. Not surprising given that the car has been off the road for some years.
I’ve located several sources of the “Repair Screen” but I’m unclear how I progress from here and/or how that fits into what I have now stripped out. This as far as I have got: -

Does anybody have: -1. A spare working clock assembly at a reasonable price?2. Any experience of replacing the display?3. Any suggestions for a source of new parts? VW Heritage offer this https://www.heritagepartscentre.com/uk/161919203-digital-clock-display-kit.html I’ve found similar at “Campervan Culture”.
Any help or advice gratefully received!!
Posted
Settling In


LCD Clock
I replaced my LCD years ago when the original bled and stopped working
Sent from my SM-G981B using Tapatalk
Posted
Settling In


I have located and ordered a "Clock Repair Screen" - I'll let you know how I get on with fitting it.
Have also managed to fry my two Red LED's. Srupid Boy!
Posted
Settling In


As well as being considerably cheaper than other sources, their tech guy was very helpful and they provide clear and concise instructions vie YouTube.
Fitted today and we have a Display!!
Very impressed and highly recommended!!
Posted
Old Timer


I've a suspicion I might be looking back at your post when the time comes to sort my own out, thanks for updating.
Posted
Settled In


LCD Clock
‘81 Golf GTi Mk1 TSR1600 tintop
'90s Chesil Speedster on '70 VW Beetle Chassis
‘14 Golf GTi Mk7
'90s Chesil Speedster on '70 VW Beetle Chassis
‘14 Golf GTi Mk7
Posted
Settled In


LCD Clock
Sent from my iPhone using Tapatalk
‘81 Golf GTi Mk1 TSR1600 tintop
'90s Chesil Speedster on '70 VW Beetle Chassis
‘14 Golf GTi Mk7
'90s Chesil Speedster on '70 VW Beetle Chassis
‘14 Golf GTi Mk7
Posted
Settling In


I spotted your first post but I've just had a busy couple of days…
I can't really comment other than to say that I wanted to do as you suggest but didn't because I couldn't identify the terminals and was afraid to fry the new display with reversed polarity.
I wish I had because - despite what I had read - although I now have a display it has never "settled down" and I still don't have a correct display.
I was - and still am - reluctant to strip it all again because the flexible PCB is sooooo fragile.
So - if you can work out a way of testing the display before reassembly - it would a VERY good thing to do.
Sorry I can't be more help
Posted
Local Hero

What do Divorces, Great Coffee, and Car Electrics all have in common?
They all start with GOOD Grounds.
Where are my DIY Links?
They all start with GOOD Grounds.
Where are my DIY Links?
Posted
Settled In


LCD Clock
‘81 Golf GTi Mk1 TSR1600 tintop
'90s Chesil Speedster on '70 VW Beetle Chassis
‘14 Golf GTi Mk7
'90s Chesil Speedster on '70 VW Beetle Chassis
‘14 Golf GTi Mk7
Posted
Local Hero

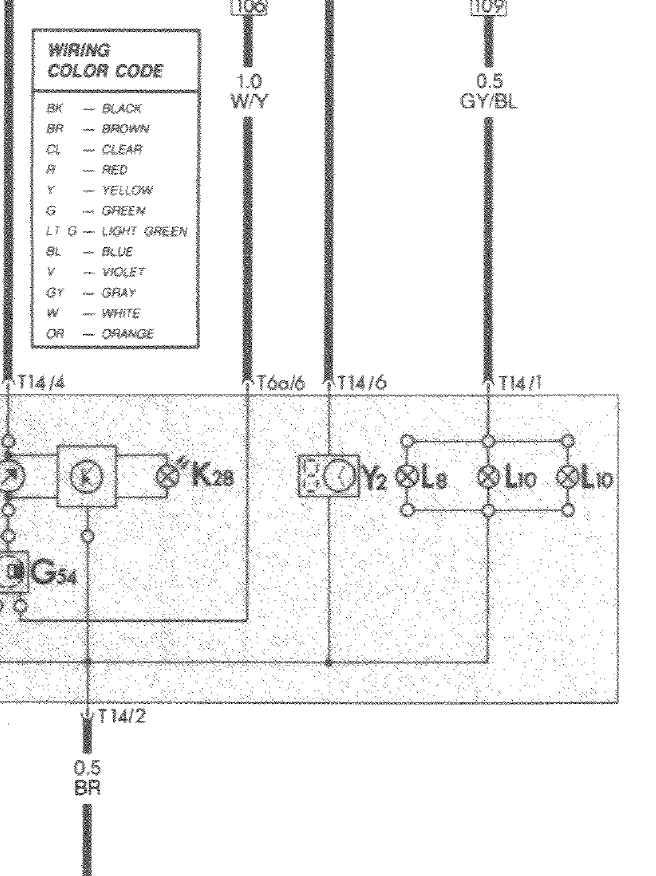
Not specifically on the lcd assembly but on the back of the cluster it should be: the red wire and the brown pin 2, If you are working on the lcd outside of the cluster look for the two pins that mate to the cluster mylar, and that would be where you jump it with the battery,,if you reverse polarize it just reverse the leads.gregpank said
Thanks. Do yuo know which pins on the long connector would power the LCD up?

 Last edit: by Briano1234
What do Divorces, Great Coffee, and Car Electrics all have in common?
They all start with GOOD Grounds.
Where are my DIY Links?
They all start with GOOD Grounds.
Where are my DIY Links?
Posted
Settled In


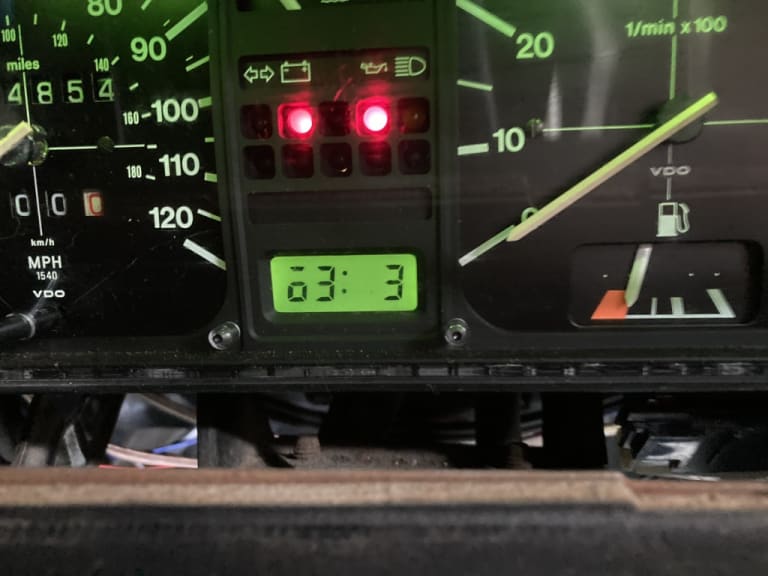
I just went ahead and reassembled everything. Everything works including a complete LCD screen (no missing pixels), but i have these characters and the HH and MM buttons have no effect.
Is this an error code of some sort? Or more worryingly did i put the new LCD screen in the wrong way around (pretty sure I didn't!)..?!?
‘81 Golf GTi Mk1 TSR1600 tintop
'90s Chesil Speedster on '70 VW Beetle Chassis
‘14 Golf GTi Mk7
'90s Chesil Speedster on '70 VW Beetle Chassis
‘14 Golf GTi Mk7
Posted
Settled In


LCD Clock

Sent from my iPhone using Tapatalk
‘81 Golf GTi Mk1 TSR1600 tintop
'90s Chesil Speedster on '70 VW Beetle Chassis
‘14 Golf GTi Mk7
'90s Chesil Speedster on '70 VW Beetle Chassis
‘14 Golf GTi Mk7
0 guests and 0 members have just viewed this: None.


