


1.6D temp gauge

Posted
#1583745
(In Topic #214959)
Settling In

Anyway, the temperature gauge does not work inside the cab and there is a manual switch to the radiator fan.
The wiring is bodged to put it politely. There's even bits of speaker cable in use all over the engine bay.
I would like to sort the temp gauge right now though as I use this to commute to work daily now.
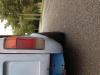
Please can you look at the photos and see if you can tell me if it looks right??
There is one sender on the back right of block I think it's on the cab heater pipes that has no wire connected and no wire close by that could be used for it.
The front sender/temp switch is new on the main rad pipe but a thin blue/white wire is in the same protective sleeve as two thicker cables which have been snipped off.
I know I'm gonna have to buy a Haynes manual and scrape the bottomless pit of the internet to research.
But hoping something simple stands out to someone.
Thanks in advance.


Posted

Local Hero

You didn't mention if your fuel gauge was working, as the fuel gauge and the water gauge are both powered off the 10V stabilizer on the Cluster, if that is bad then neither gauge will work.
You als didn't mention if the other things in the cluster are working as in the Turns indicator hi-beam, oil, and battery light?
As if those don't work as well then you are looking at a ground issue on the cluster, and possible 12V from the battery as being missing.
So You will need to take the cluster out so you can verify the following.
12V battery positive on the black wire into the cluster.
pin 2 (brown wire) is frame ground.
Then you need to turn the key on, and verify that the 10v stabilizer had 12v to ground on one leg, and the other leg has @ 10V the middle leg is ground or tied to pin2 brown wire.
There is also the issue that the water gauges can get bad solder connections internally. You can test that by placing a 9vdc battery to the 2 big studs on the rear of the cluster with out power on in the car. when you have the battery connected you should get full deflection on the guage. If the gauge dosen't go 3/4 to full scale, then your gauge has the cold solder conections I mentioned earlier.
In the archive section there are a few threads or links to how to test and repair your flaky water gauge. That shows you how to take it apart and re-solder the cold solder joints. This is very common to the Cabriolets as I have had 3 and had to repair 3 of them then actually replace one that went bad.
look for the electrical section in the following link.
View topic: My DIY list of things for a 90ish Cabriolet (digifant2) part 1 - The Mk1 Golf Owners Club
What do Divorces, Great Coffee, and Car Electrics all have in common?
They all start with GOOD Grounds.
Where are my DIY Links?
They all start with GOOD Grounds.
Where are my DIY Links?
Posted
Settling In
And yes, sorry i forgot to mention everything else on the cluster works ok mate.
Posted
Local Hero
New one or they also sell 2nd at £16
http://www.classic-vw.co.uk/scuttle-rain-tray-171819415f-genuine-mk1-golf-jetta-caddy-15085-p.asp
I would get the cover back on the cam belt as it will save any pipes or fuel lines getting caught in the belt, how old is the cam belt as it looks very shinny but that might be because it's not got a cover on it.
1988 Mk1 Golf GTi Cabriolet 1.8cc DX, K-jet. Daily drive. 317,000 miles and counting
1978 Mk1 Scirocco GLS 1.6cc FR, Webber carb. Weekend toy.
1978 Mk1 Scirocco GLS 1.6cc FR, Webber carb. Weekend toy.
Posted
Settling In
It starts on the button which I love for a workhorse engine that's 27years old, and can't see any reason to change the engine as the previous owner intended to.
Little things like the original engine are what I like most about vw commercial and I make it a hobby to learn as much as I can about them to get them running right and save them from being scrapped. So I'm going to invest a lot of time and a little money in rewireing and tinkering and lots of cleaning to get the engine and all ancillaries tiptop.
Posted
Settling In
I say kinda as the needle is very slow to move up and also is not moving out of the box on the gauge - or is that normal temperature range?
It really does need a complete re-wire as previous 8 owners have butchered and bodged it beyond a joke.
What I need now is for the bloody rain to lay off for a full weekend so I can get cracking!!!
Posted
Settling In
Would they have gone to the fan?
The fan has been wired to an internal switch and will never auto come on once I fix properly the yellow wire.
I'll have to try splicing some wires to test it , and most likely blow some fuses

So, what would the blue/white wire be for please??
Posted

MOTY 2013
for the radiator fan its simplicity itself. the thermoswitch needs a live wire from the fusebox, what pin depends if its ce1 fusebox or earlier ceramic type. then there is 1 or 2 wires fro mthe thermoswitch to the fan, and an earth for the fan to the battery or tapped to the main battery earth inside the headlight loom.
Hello my name is John and I'm a dub addict.
My wiring diagrams and other documents have moved here:
VAG Documents & Downloads
You'll need to sign into google/gmail for the link to work! (its free!)
My wiring diagrams and other documents have moved here:
VAG Documents & Downloads
You'll need to sign into google/gmail for the link to work! (its free!)
0 guests and 0 members have just viewed this: None.