


How I refurbished my badges!

Posted
#1428311
(In Topic #188347)
Old Timer


A guide to make your badges look spanking!
I have just finished refurbishing my Volkswagen badge and I must say, I am extremely happy with the results!
The reason I have decided to refurbish them is because I can't find a new Golf CL badge, I know I can get new a Volkswagen badge but I thought I would trial run the process on a badge that I can replace if it goes wrong, so I started with the Volkswagen one..
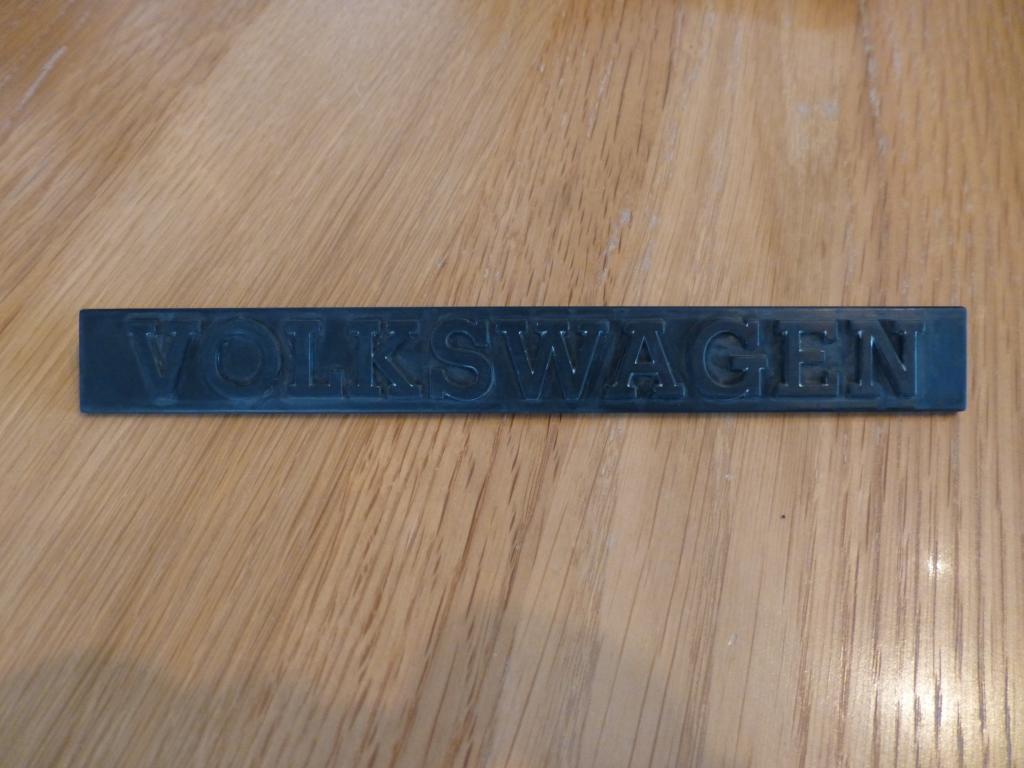
My badges had already been painted with silver nail varnish (don't ask) so I needed to remove this first.
I used 1200 grit wet and dry to rub the entire badge, I then used a degreaser (Jizer) to clean up the badge and remove any polish/wax residue. Cotton buds came in handy for this bit.
Using a tack cloth I wiped the entire badge to ensure that there was no dust or dirt on there.
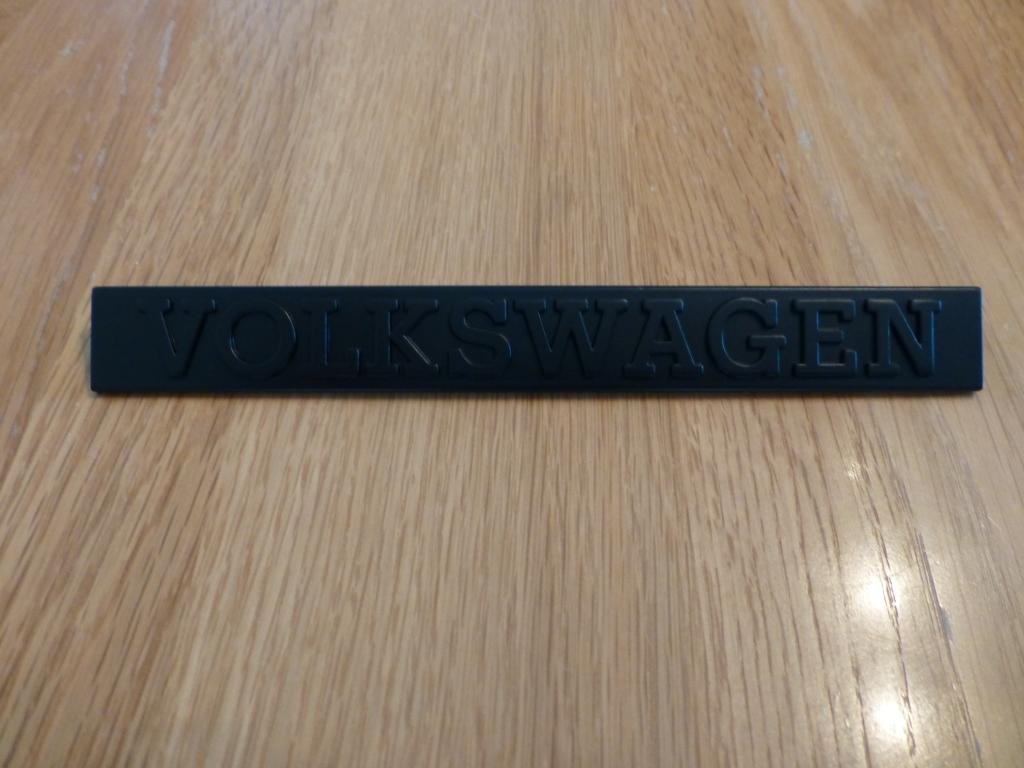
I then gave the badge 5 very thin coats of satin black spray paint so that it looked like this
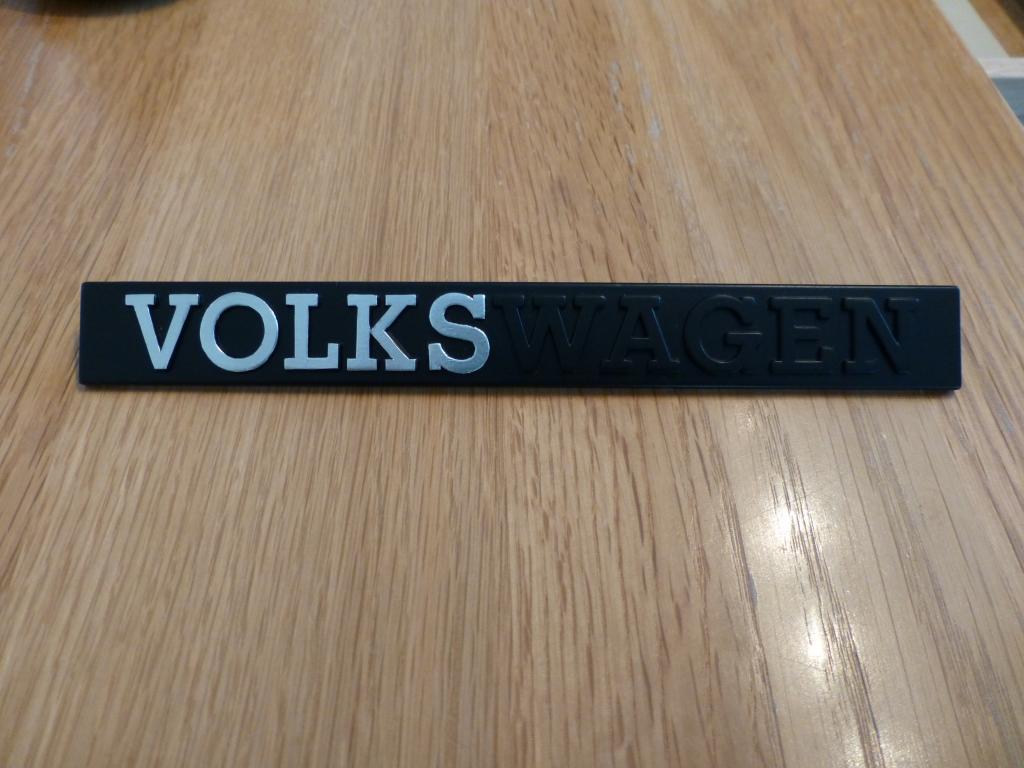
Once dry I could start the tricky bit, I placed a small piece of sticky backed foil over the first letter and gently, with a cloth, rubbed the foil down so that I could see the letter underneath.

Using a craft knife (I suggest a good quality knife for this bit) I carefully cut around the letter until I could remove the excess foil.
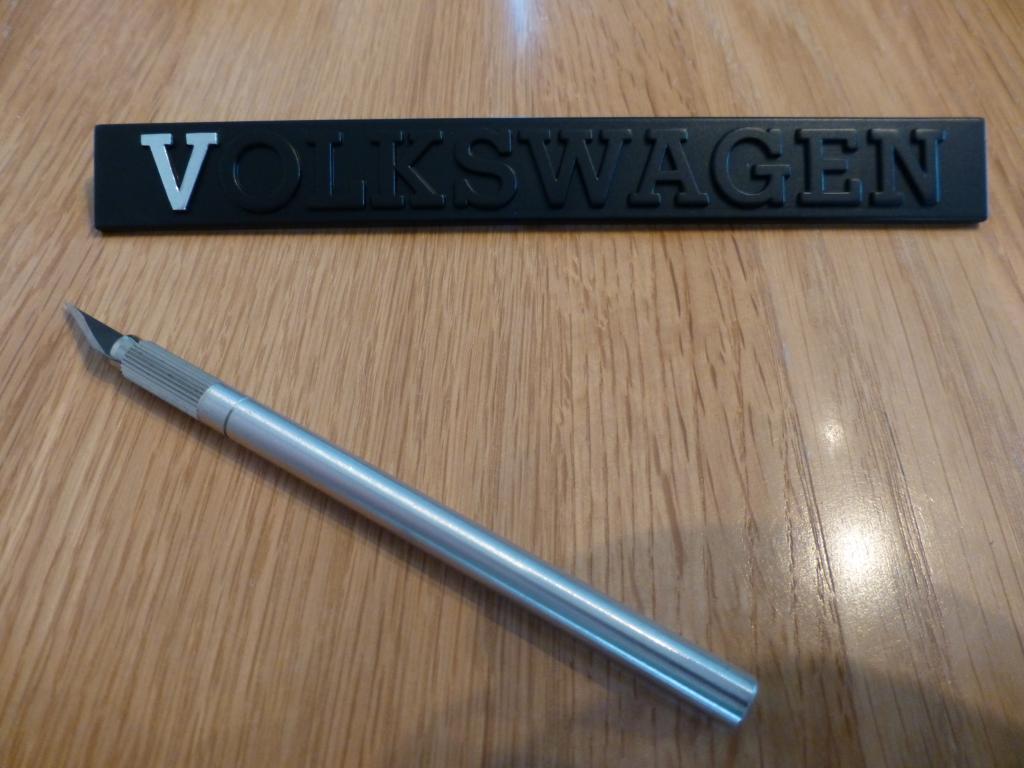
I continued with this method until I had finished all of my badge
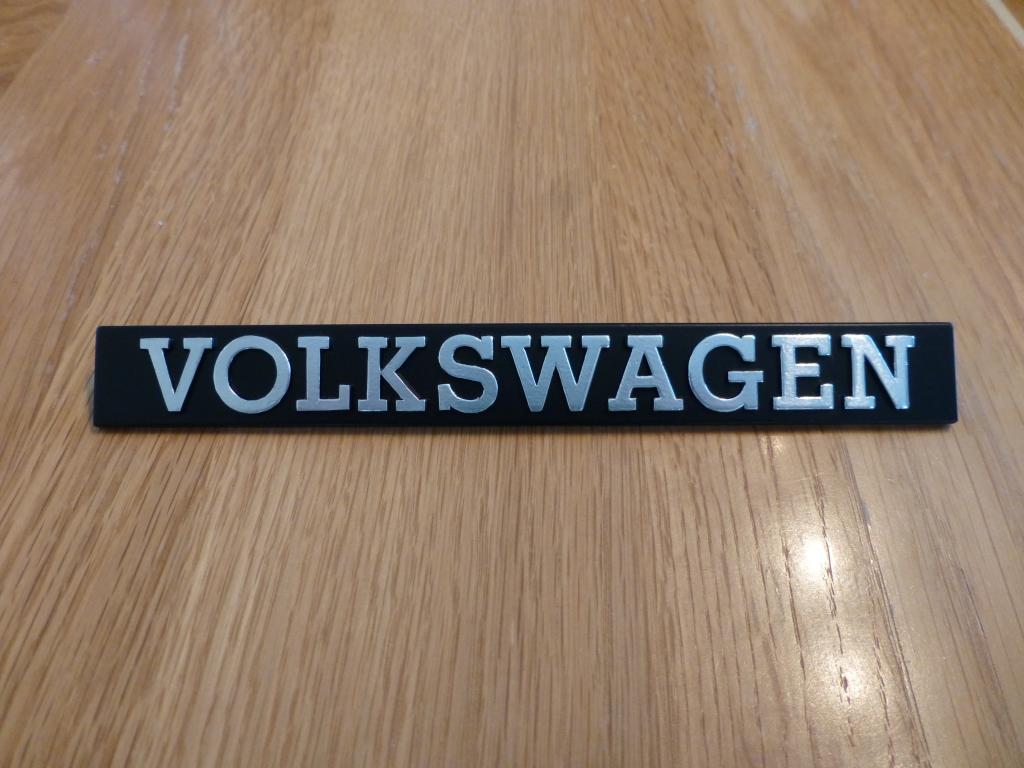
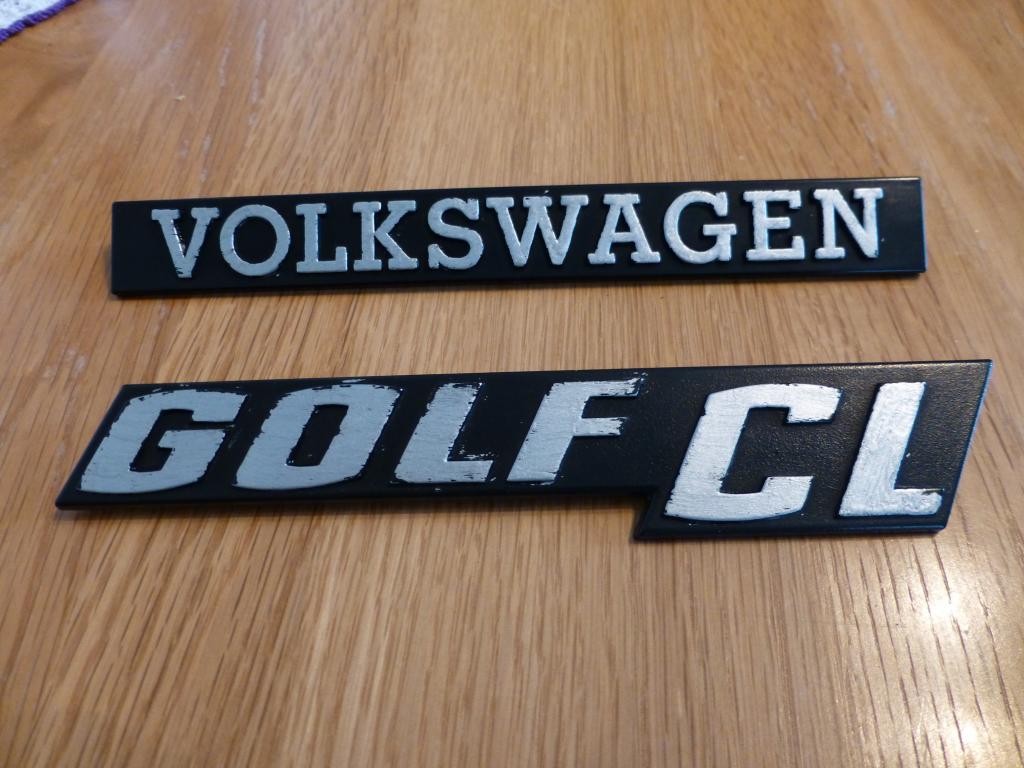
I am extremely happy with my results and I will be starting my Golf CL badge tomorrow, once complete I will post a picture up of that badge too.
It has taken a lot of patience which I do not normally have and it was a struggle at times but I managed to get a good technique and after spending 45 minutes doing the first 5 letters it only took me 15 minutes to do the last 5 I'm still thinking about putting clear coat over the top for extra protection so I will let you know what happens if I do this.
Overall it has cost me less than £10.00 and I could probably do another 50 badges before I run out of paint or tapeGood luck if your having a crack at this and the best bit of advice I can give is to take your time, give the badge lots of thin coats of paint and don't get stressed if you make a mess with the foil, just rip it off and start again. 
The reason I have decided to refurbish them is because I can't find a new Golf CL badge, I know I can get new a Volkswagen badge but I thought I would trial run the process on a badge that I can replace if it goes wrong, so I started with the Volkswagen one..
My badges had already been painted with silver nail varnish (don't ask)
so I needed to remove this first.
I used 1200 grit wet and dry to rub the entire badge, I then used a degreaser (Jizer) to clean up the badge and remove any polish/wax residue. Cotton buds came in handy for this bit.

Using a tack cloth I wiped the entire badge to ensure that there was no dust or dirt on there.
I then gave the badge 5 very thin coats of satin black spray paint so that it looked like this

Once dry I could start the tricky bit, I placed a small piece of sticky backed foil over the first letter and gently, with a cloth, rubbed the foil down so that I could see the letter underneath.

Using a craft knife (I suggest a good quality knife for this bit) I carefully cut around the letter until I could remove the excess foil.

I continued with this method until I had finished all of my badge


I am extremely happy with my results and I will be starting my Golf CL badge tomorrow, once complete I will post a picture up of that badge too.
It has taken a lot of patience which I do not normally have and it was a struggle at times but I managed to get a good technique and after spending 45 minutes doing the first 5 letters it only took me 15 minutes to do the last 5
I'm still thinking about putting clear coat over the top for extra protection so I will let you know what happens if I do this.Overall it has cost me less than £10.00 and I could probably do another 50 badges before I run out of paint or tape
Good luck if your having a crack at this and the best bit of advice I can give is to take your time, give the badge lots of thin coats of paint and don't get stressed if you make a mess with the foil, just rip it off and start again.
Goly The Golf, a 1983 5dr 1.3cl having a full resto.
Cherub, a 1985 Mk2 Polo Breadvan.
1995 Rover Mini Sprite (wife's daily)
Cherub, a 1985 Mk2 Polo Breadvan.
1995 Rover Mini Sprite (wife's daily)
Posted

Settled In

Thats excellent mate,great idea & alot of work you put into it 
Posted
Settling In

GolyTheGolf said
Overall it has cost me less than £10.00 and I could probably do another 50 badges before I run out of paint or tape
I'll send mine over then ; ) Great job!
MK1 Campaign Helios Blue, MK2 Rallye Blue Pearl, MK1 Clipper Cabriolet Black & Corrado VR6 Storm Mystic Blue
Posted
Settled In
where did you get the silver foil from?
Posted
Old Timer
skipper1 said
Thats excellent mate,great idea & alot of work you put into it
Thanks skipper1
Mr_Rossy said
I'll send mine over then ; ) Great job!
My brother wants his doing on his Mk2 Polo saloon first 
shepp said
where did you get the silver foil from?
Hi Shepp,
It is available from Toolstation http://www.toolstation.com/shop/Adhesives+Sealants/Tapes/Aluminium+Foil+Tape+50mm+x+45m/d180/sd2420/p97723 , I'm not sure if you can get it from places like B&Q but I guess they will be more expensive anyway.
I've started sanding the Golf CL badge and is it sad that I am excited about how it is going to turn out?

Would you guys put some clear coat over the finished item to make them last longer?
Goly The Golf, a 1983 5dr 1.3cl having a full resto.
Cherub, a 1985 Mk2 Polo Breadvan.
1995 Rover Mini Sprite (wife's daily)
Cherub, a 1985 Mk2 Polo Breadvan.
1995 Rover Mini Sprite (wife's daily)
Posted
Settled In
Top work im going to have to give this a go
im going to have to give this a go
Posted

Settling In
This looks fantastic. I was trying to work out how to do something like this and now you have given me the solution. Thank you
Posted
Old Timer
das_auto said
Top work
allenrobin2002 said
This looks fantastic. I was trying to work out how to do something like this and now you have given me the solution. Thank you
Thanks
I managed to get the CL badge done yesterday! I think I could have made it a little better but I'm just being picky! I'm going to put clear coat over the Volkswagen badge later to see how it looks.

Goly The Golf, a 1983 5dr 1.3cl having a full resto.
Cherub, a 1985 Mk2 Polo Breadvan.
1995 Rover Mini Sprite (wife's daily)
Cherub, a 1985 Mk2 Polo Breadvan.
1995 Rover Mini Sprite (wife's daily)
Posted
Website Manager


I did exactly the same to mine a few years ago, using the same technique.
I did not clear coat the first attempt and after a while in the elements the aluminium foil showed signs of oxidation.
So I did them all again and clear coated the second time.
Then some brand new genuine badges became available and I just couldn't resist !!
I did not clear coat the first attempt and after a while in the elements the aluminium foil showed signs of oxidation.
So I did them all again and clear coated the second time.
Then some brand new genuine badges became available and I just couldn't resist !!
Cheers,
Ade

Ade
Posted
Old Timer
lhasadreams said
some brand new genuine badges became available and I just couldn't resist !!
This is exactly what I will do
I'm just struggling to find a Golf CL badge at the min.
Goly The Golf, a 1983 5dr 1.3cl having a full resto.
Cherub, a 1985 Mk2 Polo Breadvan.
1995 Rover Mini Sprite (wife's daily)
Cherub, a 1985 Mk2 Polo Breadvan.
1995 Rover Mini Sprite (wife's daily)


Moderator

Nice job - looks spot on.
Well done. I also ended up buying new ones.
Well done. I also ended up buying new ones.
Cheers Hugh.
www.vwgolf1.com - vw golf parts and genuine accessories!
www.vwgolf1.com - vw golf parts and genuine accessories!
Posted
Old Timer
Shughy said
Nice job - looks spot on.
Well done. I also ended up buying new ones.
Thanks Hugh,
Keep your eyes peeled for a new Golf CL badge for me if you can! I've not managed to find one yet but I'm sure one is out there!
Goly The Golf, a 1983 5dr 1.3cl having a full resto.
Cherub, a 1985 Mk2 Polo Breadvan.
1995 Rover Mini Sprite (wife's daily)
Cherub, a 1985 Mk2 Polo Breadvan.
1995 Rover Mini Sprite (wife's daily)
Settled In
What a great idea and really glad you took the time to share you work. I too will be giving this a go and would prefer to refurb mine rather than buy new just for the satisfaction. I would finish with clear coat to protect the foil.
1985 GL Cabriolet - Long Gone
Several GTI Tintops - Long Gone
Mitsubishi L200 Barbarian 2013 - Daily Workhorse
Several GTI Tintops - Long Gone
Mitsubishi L200 Barbarian 2013 - Daily Workhorse
Posted
Old Timer
ridders said
What a great idea and really glad you took the time to share you work. I too will be giving this a go and would prefer to refurb mine rather than buy new just for the satisfaction. I would finish with clear coat to protect the foil.
Thanks
 ridders
, I have given them a spray with clear coat today and I am very happy with the results They will not be going on Goly until she is out of the bodyshop and I hope that they last a good few years before I need to do them again.
ridders
, I have given them a spray with clear coat today and I am very happy with the results They will not be going on Goly until she is out of the bodyshop and I hope that they last a good few years before I need to do them again.
Goly The Golf, a 1983 5dr 1.3cl having a full resto.
Cherub, a 1985 Mk2 Polo Breadvan.
1995 Rover Mini Sprite (wife's daily)
Cherub, a 1985 Mk2 Polo Breadvan.
1995 Rover Mini Sprite (wife's daily)
Posted
Settling In
Can you share some photos of the completed badges? It would be good to see the finished standard.
Posted
Old Timer
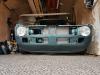
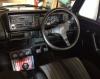
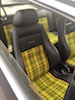
I positioned them on my Golf last night after putting clear coat on, just to see how they looked, so these are the only photos I have at the minute. Please ignore the state of my car, its having a bare shell respray next month so she will be looking spanking by this time next year


Goly The Golf, a 1983 5dr 1.3cl having a full resto.
Cherub, a 1985 Mk2 Polo Breadvan.
1995 Rover Mini Sprite (wife's daily)
Cherub, a 1985 Mk2 Polo Breadvan.
1995 Rover Mini Sprite (wife's daily)
Posted

Local Hero
I can second this approach, it's the way I did them a few years back and have just redone them recently. the movie prop makers love aluminium tape, they use it all the time as it makes things shiny on screen.
I didn't paint the plastic as without etch primer and the right paint it tends to flake off over time, a light sand (800 grit) and a clean with a tack cloth was enough to let the tape stick fast, didn't clear coat and wont be doing it this time either, the tape is designed for use on HVAC ducting, a days curing and it's stuck for a long time.
I didn't paint the plastic as without etch primer and the right paint it tends to flake off over time, a light sand (800 grit) and a clean with a tack cloth was enough to let the tape stick fast, didn't clear coat and wont be doing it this time either, the tape is designed for use on HVAC ducting, a days curing and it's stuck for a long time.
Posted
Old Timer
 JackGraceMK1
Just thought I would share this thread so when you get the badge you can make it look like new.
JackGraceMK1
Just thought I would share this thread so when you get the badge you can make it look like new.
Goly The Golf, a 1983 5dr 1.3cl having a full resto.
Cherub, a 1985 Mk2 Polo Breadvan.
1995 Rover Mini Sprite (wife's daily)
Cherub, a 1985 Mk2 Polo Breadvan.
1995 Rover Mini Sprite (wife's daily)
0 guests and 0 members have just viewed this: None.