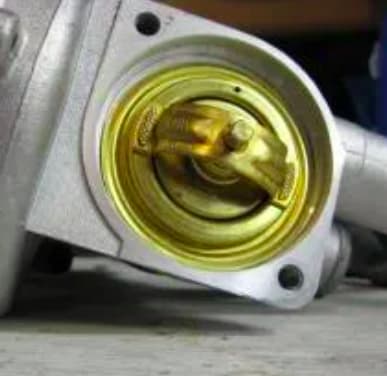
thermostat and coolant dirty and clean
Posted
#1647922
(In Topic #232322)
Old Timer


So long story short, went to change the injector seats and one rounded off, tried nursing it out but started to get some small fragments break off
When I drained the coolant from the radiator side and it came out light brown in colour for pink coolant, next I took the thermostat side off and the coolant is still pink, looks brand new
Is it normal for the coolant to be so much different in colour???
Have put the thermostat in a pan and heated up and opens at 88 as stated on the base of the thermostat.
Car ran fine by the way, never overheated & fan kicks in when it should.
lhasa green 83 gti tintop MOT passed Aug '14 after nearly 12 years!
swb transporter 6.1 Highline 150
swb transporter 6.1 Highline 150
Posted
Local Hero

Well depends on how long it was sitting, when was the last time that you flushed or Backflushed your coolant system.
Hoses, and such can discolor things as there is a difference in where it sits.
Drill a 1/8 or 1/16 inch hole in the lip of the t-stat to prevent the air bubble on filling.
lip drilled and properly positioned in the WP.

As I am typing this I have remembered that there are 2 different o-rings that I have gotten for the t-stat cover, and well one is thicker than the other. I wish I could remember what the p/n's are for the thicker ones, as they hold the t-stat in place better so you can place the cover on easier.
Since you have so much off, I would replace the t-stat, and test the new so you know it is good. Then you can flush and Back flush your cooling system keep the expansion jug cap off, and well you could remove it to clean it out if you want.
Replace place the cover on the t-stat no t-stat or o-ring required.
Remove the upper radiator hose loose from the Radiator, as well as the upper outlet flange.
Use cling wrap to Protect the Dizzy by encircling it with cling wrap to keep the water at bay.
Insert a Garden hose in to the hose and attach it to the radiator and allow the water to circulate out the upper water outlet, then reverse the process to insert the hose in to the upper outlet and allow it to flow out the upper radiator hose connection, do this about 3-4 times to get the water to run clear…. But wait there is more.
Take the Heater matrix hoses off, and plug one end of them left or right it don't matter….
On the Free end pour some Vinegar into the hose slowly and let it sit for about 1 hour. Flush the matrix the same way from one end to the other and reverse till it runs clear.
Now that you have a clean matrix, reattach it to the Valve and the by-pass.
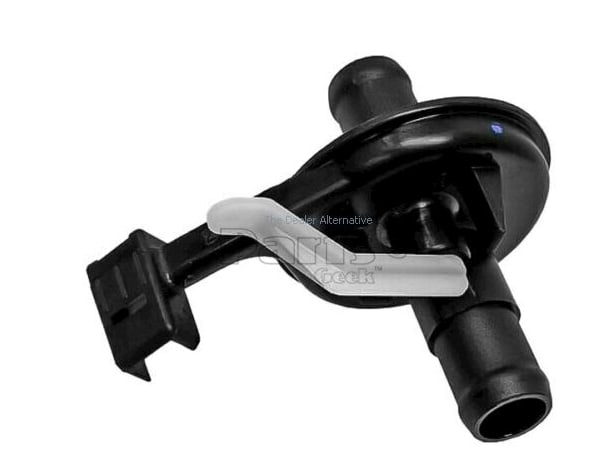
If you want to replace the heater matrix valve at this time, may I suggest that you use a 1988 Porschie Valve as it is circular gate valve similar to the original in 81, and it is a better design as well as easier on your cables. pn 944 572 085 02 . You do have to use it a tad different to get the cable to fit better.

After replacing a few of the oem valves on my Cabby, and having them blow apart or leak at the same area, as well as being difficult to move, the Porsche is a better valve.
Remove the t-stat cover, replace the t-stat and housing re-attach the hoses.
Reconnect all hoses and tighten the things, then fill it via the upper hose 1/2 through the leave the upper hose loose so you can fill the thing fill open the heater to full hot allow to run, then when it opens the t-stat and cycles the fans twice, allow to cool and top it off.
I have a how do I do that in the archive section click the link in my signature, but remember that my how to is on a "Merican" fully loaded 90 ish.
Hoses, and such can discolor things as there is a difference in where it sits.
Drill a 1/8 or 1/16 inch hole in the lip of the t-stat to prevent the air bubble on filling.
lip drilled and properly positioned in the WP.

As I am typing this I have remembered that there are 2 different o-rings that I have gotten for the t-stat cover, and well one is thicker than the other. I wish I could remember what the p/n's are for the thicker ones, as they hold the t-stat in place better so you can place the cover on easier.
Since you have so much off, I would replace the t-stat, and test the new so you know it is good. Then you can flush and Back flush your cooling system keep the expansion jug cap off, and well you could remove it to clean it out if you want.
Replace place the cover on the t-stat no t-stat or o-ring required.
Remove the upper radiator hose loose from the Radiator, as well as the upper outlet flange.
Use cling wrap to Protect the Dizzy by encircling it with cling wrap to keep the water at bay.
Insert a Garden hose in to the hose and attach it to the radiator and allow the water to circulate out the upper water outlet, then reverse the process to insert the hose in to the upper outlet and allow it to flow out the upper radiator hose connection, do this about 3-4 times to get the water to run clear…. But wait there is more.
Take the Heater matrix hoses off, and plug one end of them left or right it don't matter….
On the Free end pour some Vinegar into the hose slowly and let it sit for about 1 hour. Flush the matrix the same way from one end to the other and reverse till it runs clear.
Now that you have a clean matrix, reattach it to the Valve and the by-pass.
If you want to replace the heater matrix valve at this time, may I suggest that you use a 1988 Porschie Valve as it is circular gate valve similar to the original in 81, and it is a better design as well as easier on your cables. pn 944 572 085 02 . You do have to use it a tad different to get the cable to fit better.

After replacing a few of the oem valves on my Cabby, and having them blow apart or leak at the same area, as well as being difficult to move, the Porsche is a better valve.
Remove the t-stat cover, replace the t-stat and housing re-attach the hoses.
Reconnect all hoses and tighten the things, then fill it via the upper hose 1/2 through the leave the upper hose loose so you can fill the thing fill open the heater to full hot allow to run, then when it opens the t-stat and cycles the fans twice, allow to cool and top it off.
I have a how do I do that in the archive section click the link in my signature, but remember that my how to is on a "Merican" fully loaded 90 ish.
What do Divorces, Great Coffee, and Car Electrics all have in common?
They all start with GOOD Grounds.
Where are my DIY Links?
They all start with GOOD Grounds.
Where are my DIY Links?
0 guests and 0 members have just viewed this: None.


