


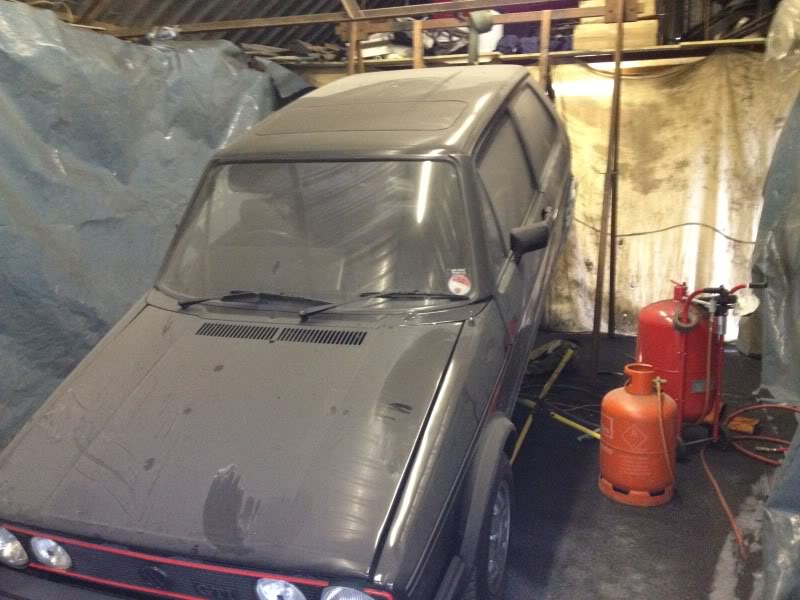
1983 Standard GTI Concours 42000miles

Posted
Settled In

Posted

Local Hero


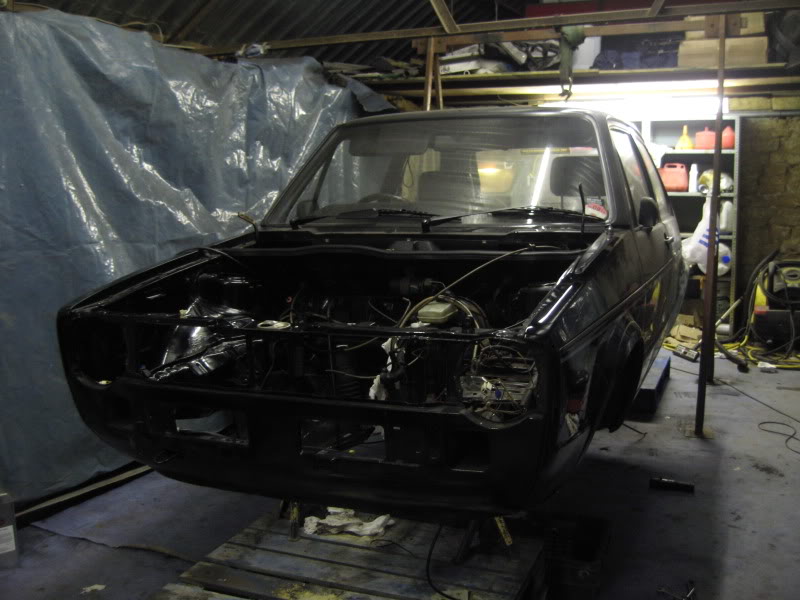
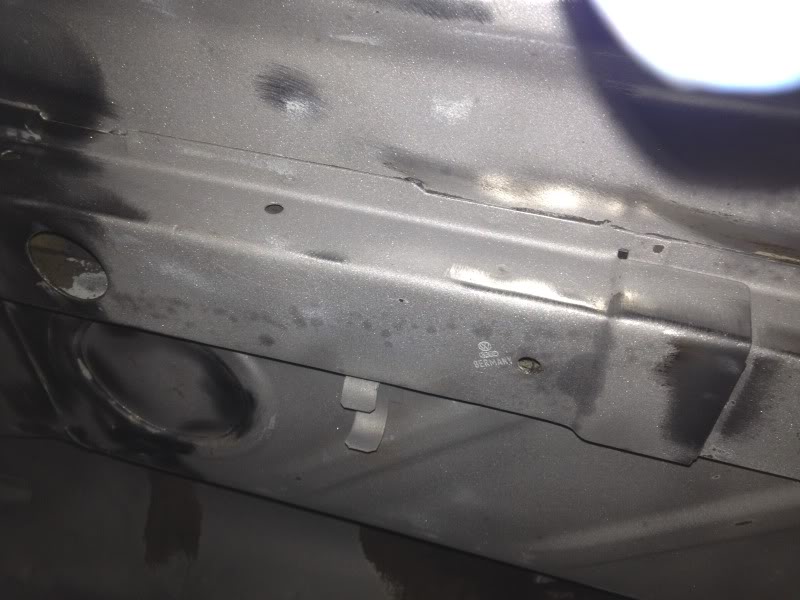
After being let down twice by 2 different shot blasting companies, I decided to buy one myself and get on with it. Messy job mind!
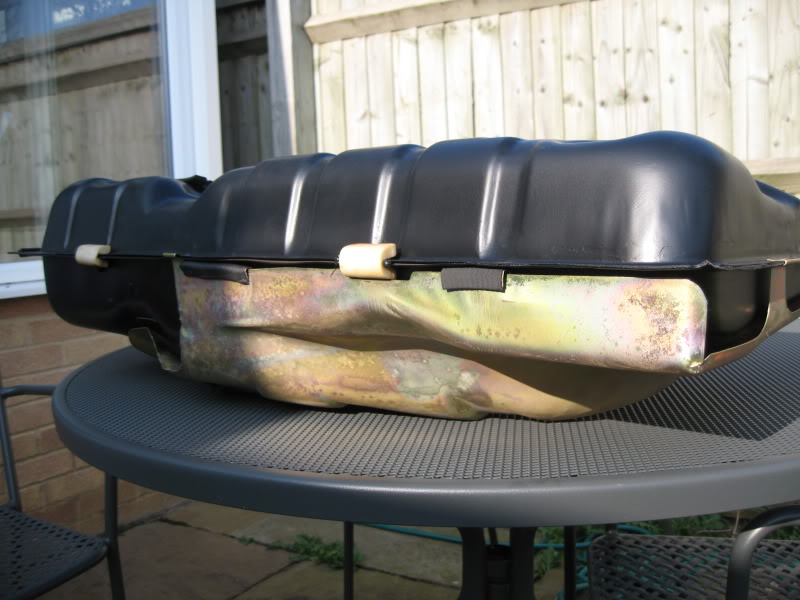
Alot of hidden surface rust under the underseal. The car is fairly low mileage at 44K but the underseal degrading is down to age not mileage.
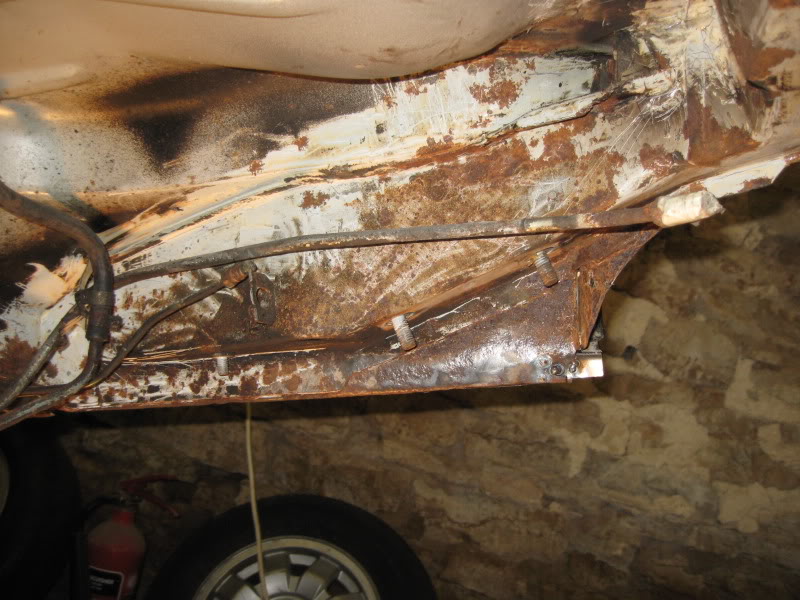
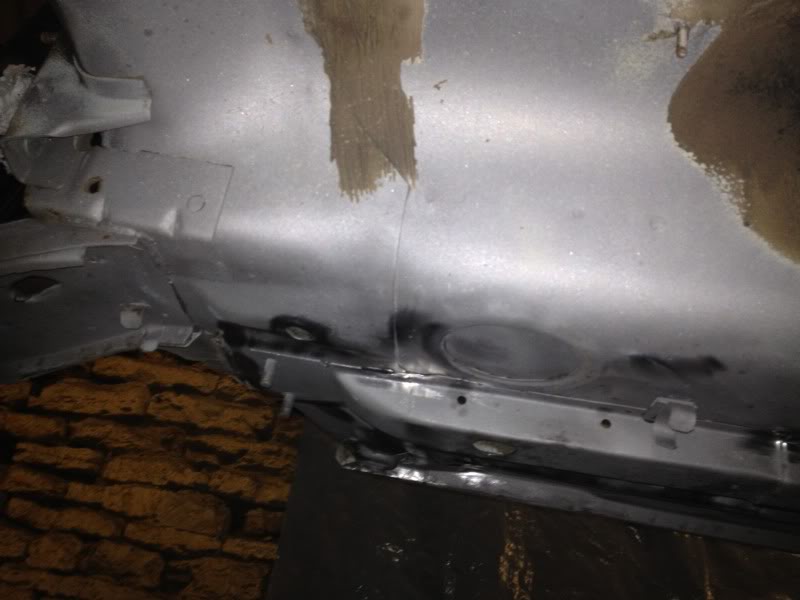
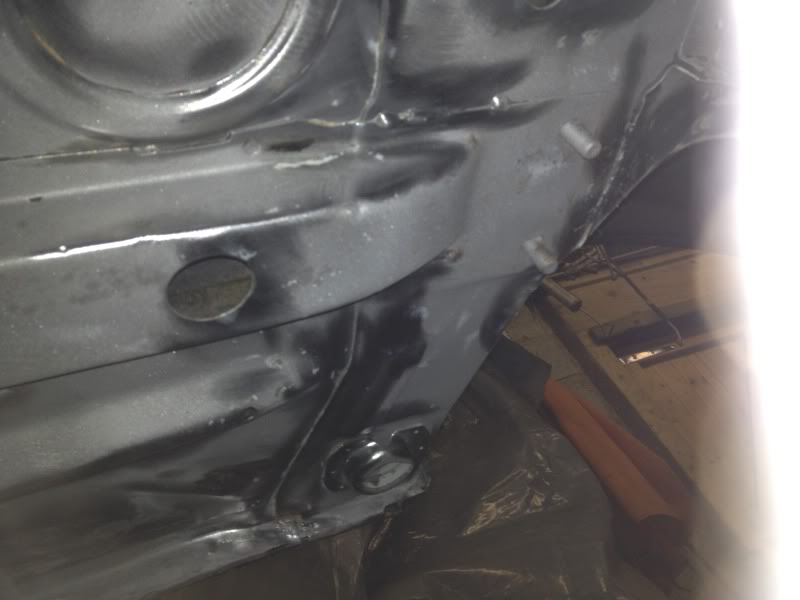
The results…..
The set up……
Tempted to do the rest of the underside as the edge between the sills and the floor pan have surface rust along them.
Basically, could be turning into a full resto but need to crack on as its off to Germany come August! :?
Posted
Local Hero
 cure a little surface rust now is better than new floors n sills in 3/4 years time.
Regards Volkswarren
X2 1983 A REG EW CAMPAIGN In WHITE(Awaiting full rebuild solid body) & T Reg S1 GTi Project, Still Looking for Series 1 GTi's or a 16S Oettinger to restore (Complete Cars only) or an A reg Lhasa Green or White Gti to restore, also consider Black, Red or Blue, Also Golf Driver Project Wanted anything considered WHY
X2 1983 A REG EW CAMPAIGN In WHITE(Awaiting full rebuild solid body)
& T Reg S1 GTi Project, Still Looking for Series 1 GTi's or a 16S Oettinger to restore (Complete Cars only) or an A reg Lhasa Green or White Gti to restore, also consider Black, Red or Blue, Also Golf Driver Project Wanted anything considered WHY
Posted
Old Timer

Posted
Local Hero
I don't want to be repainting the engine bay as I quite like the original paint in the bay complete with original waxoyl. I'm trying to do a sympathetic restoration without it looking restored if you know what I mean.
Taking the mechanicals and protection completely off the back end I have worked out at what stages VW applied the different undercoatings during the production process.
After the shell had been primed in an off white, the rubbery underseal was spray applied to the, floorpan centre tunnel, the wheelarches, rear chassis rails (but not the rear axle mounts), the spare wheel well (but not the bottom of it) and inside the rear valance.whilst still wet the underseal was then brushed into the seams where panels joined to ensure good penetration into the joints.
I'm not sure which underseal to use as the modern equivilents don't seem to produce such a thick coat but I shall probably use either U-Pol Gravitex or Teroson 3000. Both have a fairly high solids content. But before applying the underseal I plan to etch primer and then 2K primer before scotch briting. I might even use Epoxy Mastic 121 having read good results about this.
The floor pans had a different substance applied to them, more of a hard wax. This was applied after all the mechanicals had been fitted as the underside of the fuel tank and heatshield was covered in it along with, fuelpipes and brake lines.also the underside of the wheel well had this hard wax.
To get total originality rather than concours I will probably replicate this wax coat but it almost will seem a shame to cover all the freshly plated and painted parts.
I think this stuff is as close as you can get to the OEM wax applied. Dinitrol 4941
Posted

Old Timer

Posted
Old Timer
Posted
Local Hero
Phataz1 said
P.s. Epoxy Mastic is the don! 8) I used it on my mk1 and I won't use anything else since! You probably won't need any underseal after using it either, its very very tough stuff and it doesn't chip like normal paint.
Ordered some Epoxy Mastic today on your recommendation!
Posted
Local Hero
volkswarren said
Go 4 it
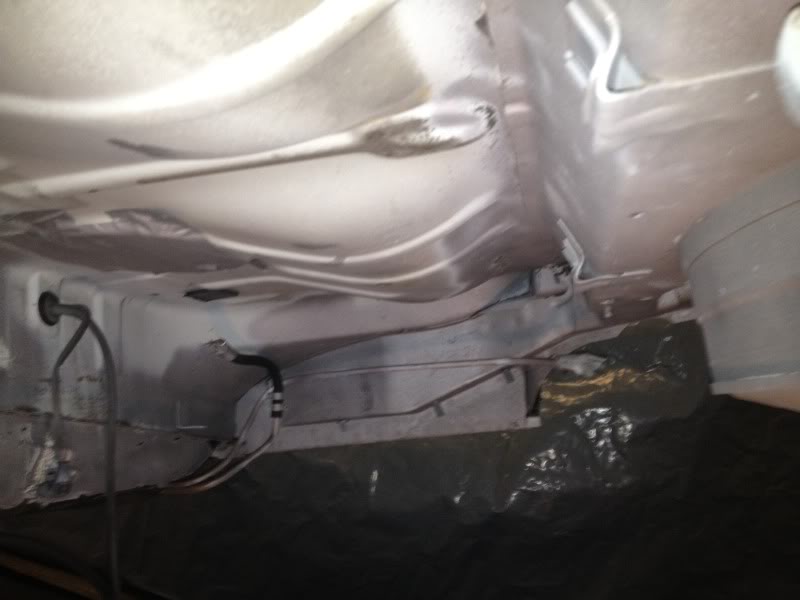
I have decided to clean and refurbish the floor pans upto the steering rack now. Decided to drop the engine as it seemed the only way to get at the area around the steering rack, Made it easier to extract the fuel lines without bending them as well.
Will it be ready by August?? :? !!
Posted

Old Timer
Posted
Moderator
Are you getting the paint done aswell?
Ever growing range of new mk1 golf parts www.classic-vw.co.uk
Posted
Local Hero

Sand blasting is the pits! Should have had it on a spit outside really as you need as much light as you can get.
My workshop now has a layer of black dust over it. :roll:
Finished off the little bits I missed (due to lack of visibility!) with a whirly wire wheel which is why it looks a bit patchy. No rot found which is good. Not touching the sound deadening along the tunnel as this is sound (and as thick as hell!)
While the weather is good, I'm going to try and get the epoxy mastic on it this weekend.
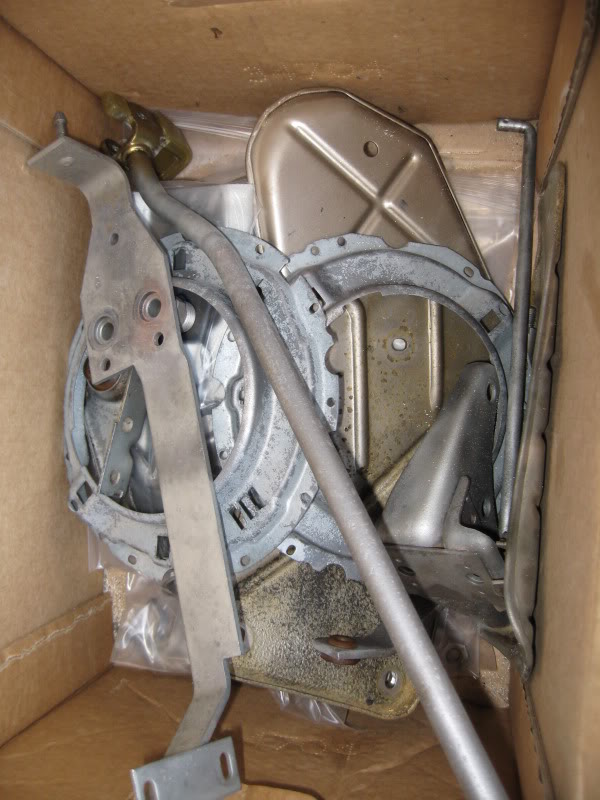
Also logged and sent to the platers 180 more parts for re-zinc plating.
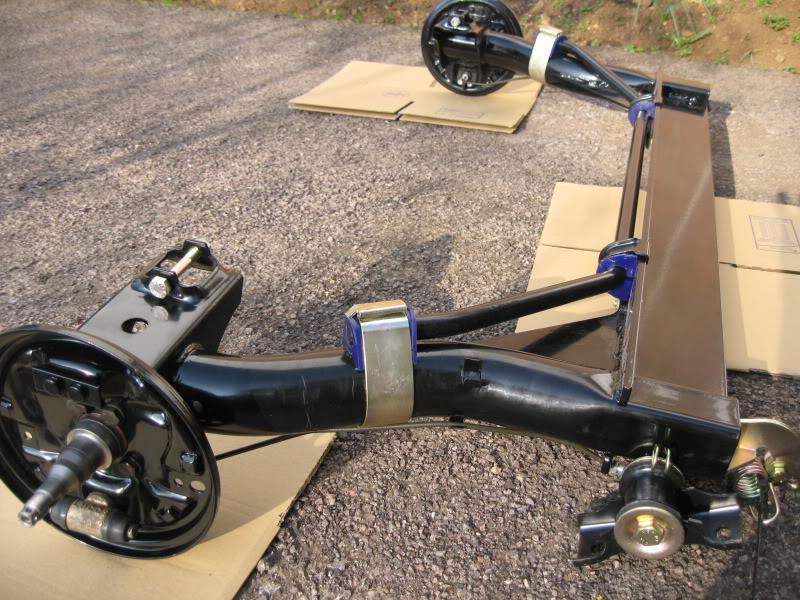
Axle and Fuel tank waiting to go back in….
Posted
Moderator
Ever growing range of new mk1 golf parts www.classic-vw.co.uk
Posted
Local Hero
funk-star said
That rear beam is exactly how i want to do one, who does your plating? is it expensive?
Your at an advantage as the platers are in Aylesbury!!
Quality Electro Depositors Ltd
Shield House Gatehouse Close Gatehouse Industrial Area
Aylesbury, Buckinghamshire HP19 8DE
United Kingdom
tel: +44 (01296) 426214
fax: +44 (01296) 487787
It goes through the guys that do my steel fabrications so it sort of gets lost in amongst other things …..ahem.. Its not dear though. I had 90 parts done last time and it cost around £50. Everything from washers to the tank heat shield.
In fact I need to speak with them cause I'm not sure the plastic on the gear linkage rod will go through the process ok.
I do spend time taking photos of each part or set of bolts/nuts/ washers etc, make a note of the photo file number an explanation of what it is and where it came from and how many there are. That way I can just chuck every nut n bolt in a box and know exactly where it came from when it comes back from them.
I also have a vapour blaster unit that I use to pre clean all the parts although I'm not sure if I really need to do it as the platers dip it all in acid to clean and deplate. The photo above of the box of bits took about 2 hours to blast.
The parts look good when replated but it does go off - as it did originally.
Posted
Moderator
Ever growing range of new mk1 golf parts www.classic-vw.co.uk
Posted
Local Hero
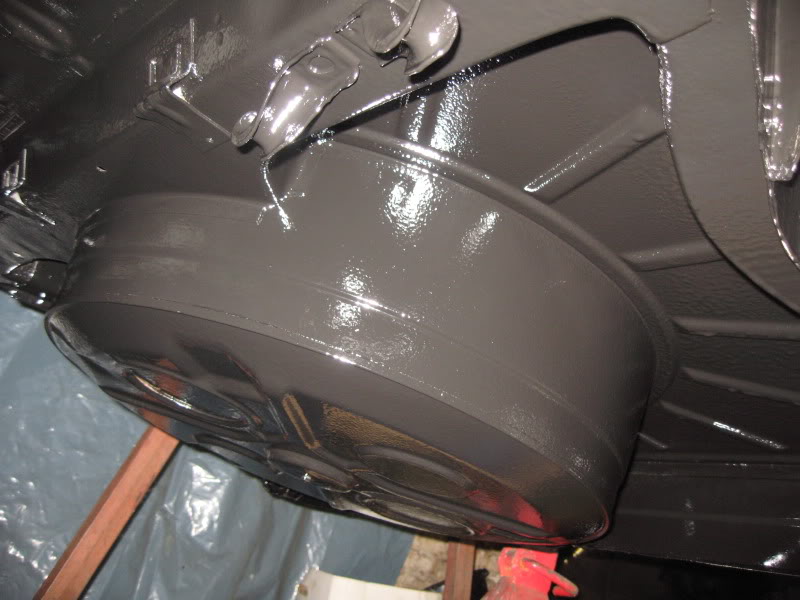
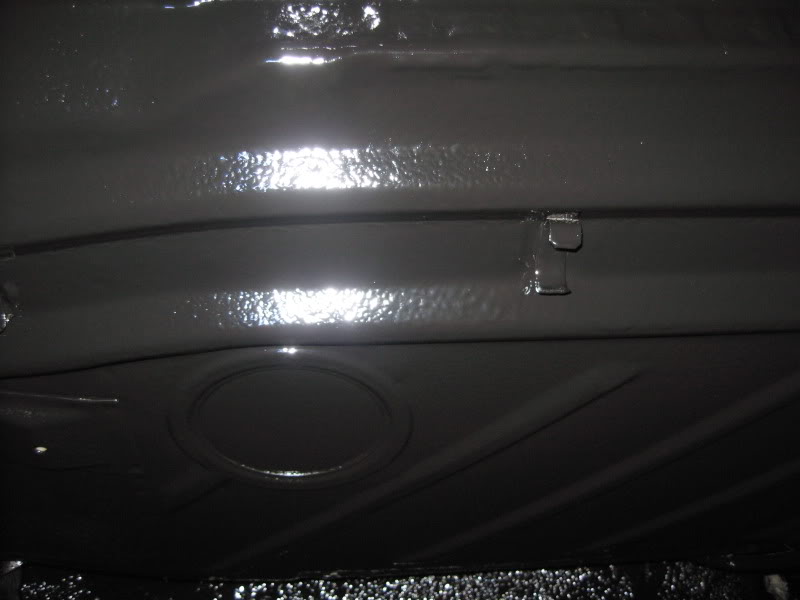
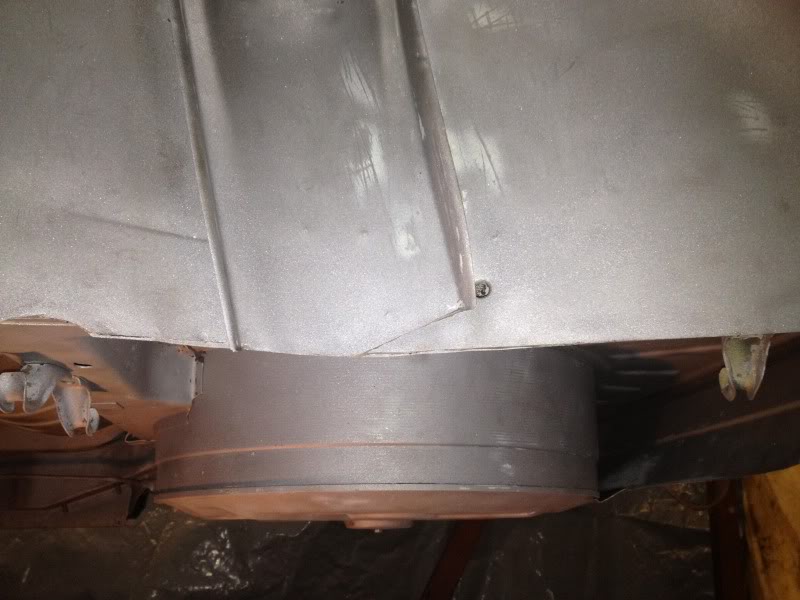
Very pleased with the results and you can tell by the way it goes on that it'll be a tough covering.
Going to let it harden off for a few days before I spray the sound deadening/stone chip into the arches and other areas where it was applied originally.
Looking forward to screwing some bits back on finally! :dance:
Posted
Old Timer
Looks like I need to get myself a spraygun! That finish is really good. I've only ever brush applied mine and it doesn't compare to that! :redfaced:
Posted
Local Hero
Phataz1 said
NICE 8) 8) 8)
Looks like I need to get myself a spraygun! That finish is really good. I've only ever brush applied mine and it doesn't compare to that! :redfaced:
I bought a pressure fed gun because of all the angles and doing it from underneath I wouldn't be able to use my gravity fed gun and I think a suction type wouldn't have been any good as it was quite thick paint even when thinning to their maximum recommendation. Standard 1.6mm nozzle used.
I used the whole 2 litres supplied which suprised me and would've required more if I was doing the front arches as well. Also had to touch in a couple of areas with a brush where I couldn't get the gun in.
Posted
Local Hero
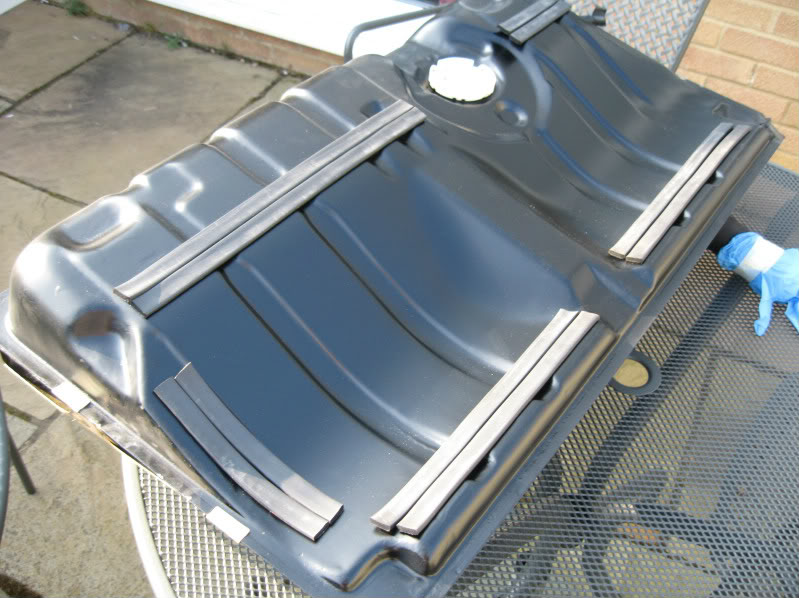
This seemed to be the closest match to the original wax coating which was applied to the underside.
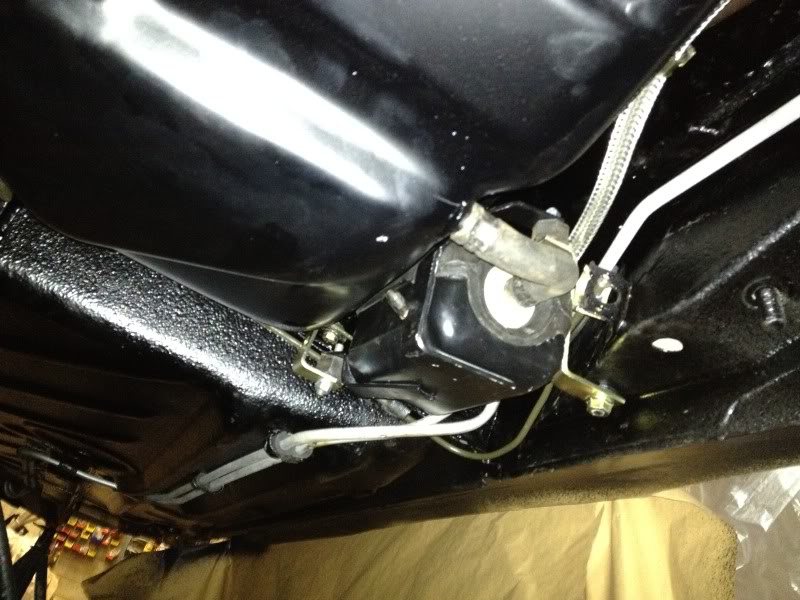
Refitted the blasted and zinc painted fuel lines and bent the new brake pipes I bought from Crazyquiffs. Original type which have a green coating on them.
refitted the fuel tank, fuel pump and accumilator.
 Last edit: by Yomp
Posted
Old Timer
0 guests and 0 members have just viewed this: None.