


It started with a leak! upgrade interior and suspension

Posted
#1194550
(In Topic #142748)

Settled In

It started with a leak! upgrade interior and suspension
That was 6 years ago and other than having the car fully resprayed after a neighbours daughter creased the drivers door and and rear quarter have had loads of plans none of which i have gotboff the ground. Amyway I have now just a started the project. To include but not limited to the following:
Powder coated rear beam and wishbones
Poly bushes front and rear
Ap coilover suspension
Eibach front and rear anti roll bars
20mm spacers
JL audio components in the doors and 4" coax in the rear jl 4 channel amp to run the fronts and the hurtz sub in the boot.
3 point rear seatbelt conversion(courtesy of crazy quiffs)'
4 pot willwood calipers and 280 mm cross drilled discs
Mk2 16 v disc conversion with Mk4 calipers and cross drilled discs with a mk2 23.3 mm master cylinder and 9" servo.
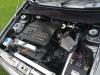
Detail and fit the 169bhp AMD Technik tuned kr engine sitting on my garage floor (eventually)!
Fit new scrapers on the doors to stop the water peeing in
Get autoglass to sort the leaking windscreen
Get TEchnicar in Sheffield to refit the Clifford alarm as now I have the dash off it looks like a 6 year old fitted it.
Install the full recaro leather interior ( brand new never sat on!) door cards, carpets, dynamat the interior.
Blag it with the missus as to how much this is is costing
Well that is about it for the kick off I will post some photographs of the kick off tomorrow as I have stripped out the interior ..enough muck in there to grow potatoes so spent most of the day hoovering and cleaning the paintwork.
I also sat in the car when it was peeing down to find where the water was coming from in the drivers
footwell. And having removed the dash found it was my new windscreen ..bugger!
Also having removed the door cards I have found the window seals leak like a sieve. The scrapers are obsolete now so having looked on the site found a T25 scrapers,fit after cutting down. £72 from for the 4 front ones from VW I will post the part numbers later.
AP coilovers arrived today bit of a difference between the the ones that are on there at the moment.
New brakes , bushes and the rear beam should arrive next week.
Well p*^#¥d off about the leaks as I can not finnish the dynamat with water leak from the windscreen.
More to come tomorrow
Posted
Settled In
Getting started

Found the leak !! on the windscreen and Auto glass came round and put some sealant around the whole seal, which hopefully should sort it. if not I have a new seal on the way, which they say they will fit for nothing if it still leaks…not a bad service since I had the screen fitted over a year ago! He also left me the rest of the tube of sealant to sort out the leaks at the front quarter window seals..nice bloke!
The dash on this car rattles and squeeks so loudly you have to turn the radio up a few notches so Dynamatted the dash and the inside of the glovebox lid. Since it rained all day. What a difference! …no matter how much you shake or twist the dash it no longer makes any noise I would recommend this to anyone.

I also rebuilt the new door cards from Newton commercial…I must admit I did not buy these as they came with the leather recaro courtesy of Brian in Huddersfield a card carry VW nut. I was a little disappointed with these as none of the holes in the card for attaching the door pocket match up. Anyway after quite a while of measuring and marking out got them to fit OK and installed the new JL Audio components in the front and the 4" co ax in the rear which comes with an adaptor plate to fit the 6 x 4 hole in the card..makes for a very neat job. Installed the sound deadening on the back of the cards to try and cut down on harmonics and noise cancelling.

Adaptor for the rear cards
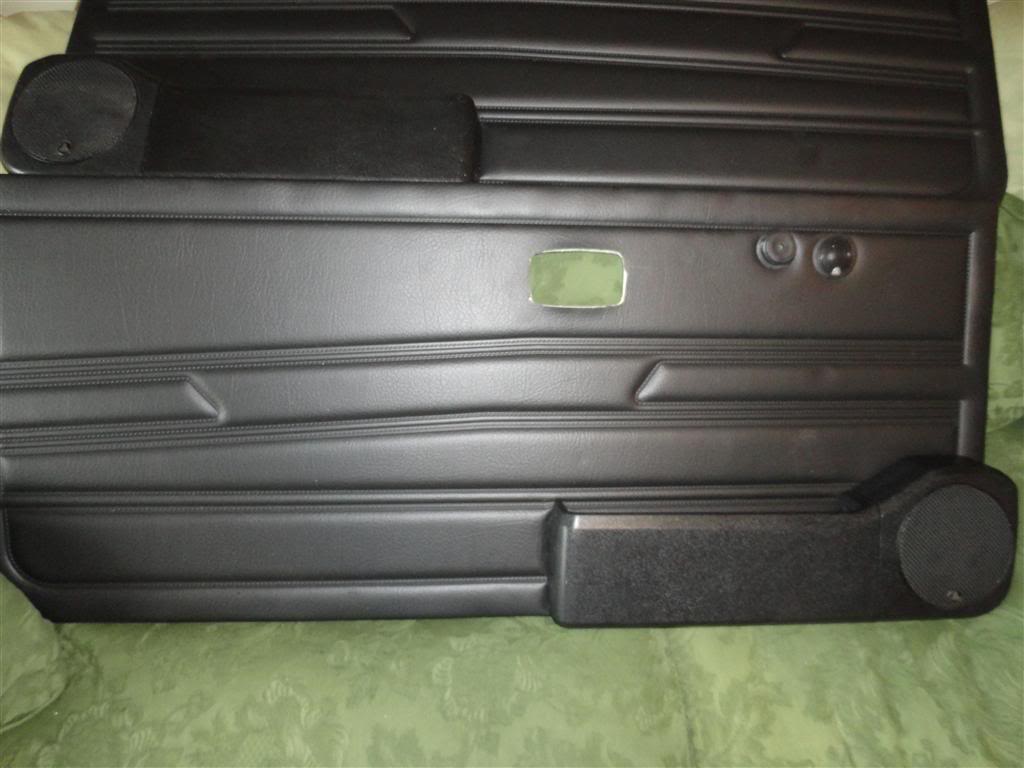

finished cards
I would also highly recommend the 'Gtechniq C4 permanent trim restorer'..who ever invented it was is a god as this stuff is amazing it makes all your plastic look new again. I was told about it by Matt at Halfords at Corton Wood. Get some of this and throw your 'back to black in the bin.
Below is the link to the web page:
http://gtechniq.com/shop/3s-for-cars/exterior-coatings/c4-permanent-trim-restorer/
Well lots of things I have ordered have arrived my garage is getting fuller and fuller
Carpets and rear seatbellt conversion arrived from Crazy Quiffs
AP Coilovers have arrived
Powdercoated wishbones and rear beam mounts too, and the tracking arms
I also have a Sportline interior for sale. I will give it a couple of days to see if anyone wants it from the site before I put it on e-bay
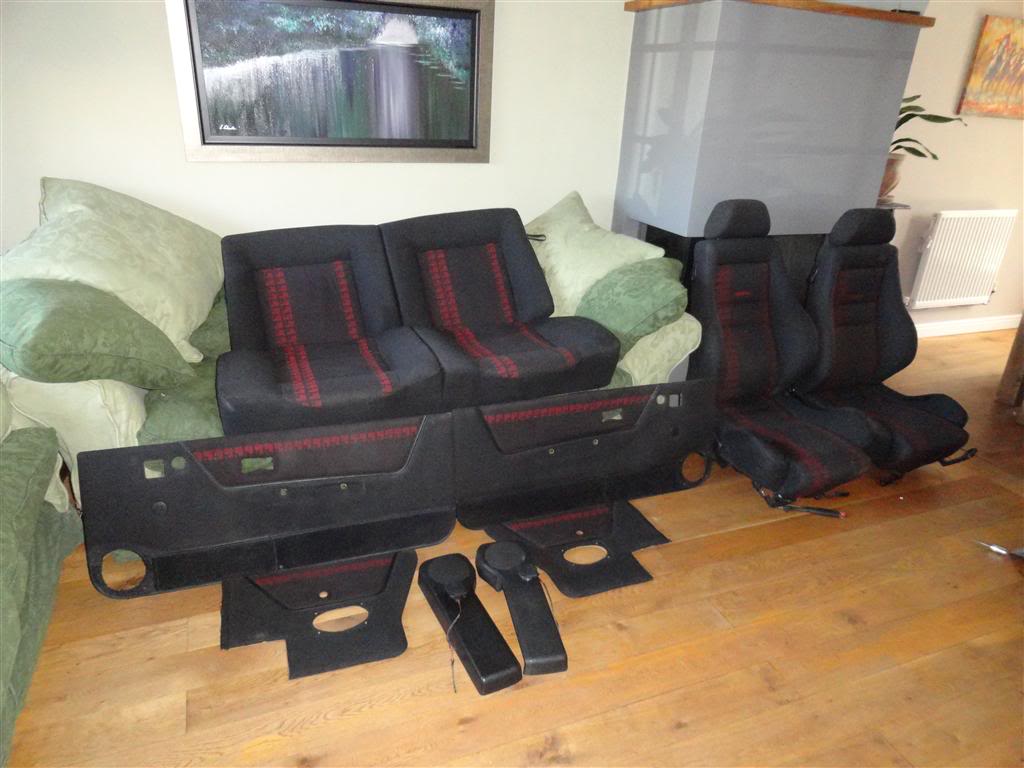
Anyone interested drop me a pm
Posted
Settled In
Posted
Local Hero


Rich
SOUTHWEST Regional Host. Bristol Meet - 1st Friday of the month - Toby Carvery Bradely Stoke Bristol Bristol Region Facebook Group
1.8T CABBY
TINTOP THREAD (SOLD 2016) SPORTLINE THREAD (SOLD 2015) CLIPPER THREAD (SOLD 2012)
1.8T CABBY
TINTOP THREAD (SOLD 2016) SPORTLINE THREAD (SOLD 2015) CLIPPER THREAD (SOLD 2012)
Posted
Settled In
The outside
The car was in really good condition when we got her and always managed to turn a few heads when we were out and about but there were a few things that bothered me a little dent at the front of the bonnet, a daft little ariel in the frame above the winscreen (mobile phone I think) and the senseless damage caused by inconsiderate people in supermarket car parks etc.
The car is always parked in the garage or undercover on the drive normally but on this day I had parked it on the road and left it while we went up to see out friends in York. Came out of his house and someone had creased the rear wheelarch of my RS4 Avant and driven off !..well livid!! arrived home to find the side strip lying on the road and a creased rear quarter and door…two cars in the space of 6 hours?
Fortunately they had put a note through the door of the house

The damage.
I had a nightmare with the insurance company as I did not want to use their approved repair company as they said we cant get this bit or that bit and we will have to do this and that which would have totally changed the exterior. I said no so they kicked their teddies everywhere and did everything they could to slow things down.
I found a local guy, Lee at Dearne Bodyworks who is a bit of a restorer to say the least. He a MK1 mexico worth 35k that goes everywhere on a trailer. I asked him for a quote to get rid of the areil and the do the whole car in addition to the repair and having agreed a price the work started. The black plastic side strips were all removed and resprayed satin black and a new red coach stripe applied and the little niggley things put right. I had to get new sportline decals and the side trim clipset, but had a nightmare trying to get the stone chip protector but found it eventually. The paint job took around 6 weeks as Lee was very busy and he was doing it 'as and when', but since it was september the weather was on the change it was no big deal.
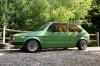
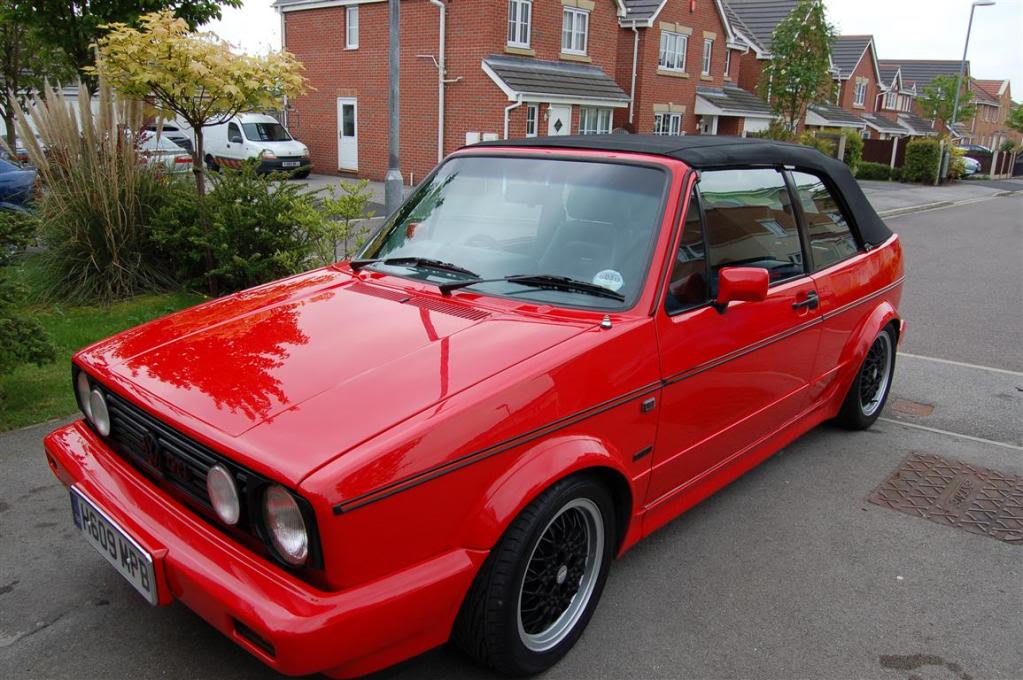
Anyway when we got her back she looked like this. I then put her to bed for the winter in the garage until two weeks ago. I started reading DJrussf1's thread while I was away at work about 3 weeks ago and took my inspiration from that and spotted a full leather interior on ebay which I just had to have and could not wait to get home and get cracking on all the things I had wanted to do to the many Mk1's and Mk 2's in thr past but bnever got around to doing. The tonneau cover was in having a new elasticated popper strap stitched on:

Back from the paintshop.
I started doing some of the interior plastic trim with the G Techniq C4 trim restorer..the stuff is amazing see what you think to the finish, according to the blurb it is permanent.

Recieved the Polybush set today and some rear calipers from a 1.8T Mk4 golf can anyone hlp me out with the pads. I assume I need the pads to suit the calipers the rear discs are 10 or 12 mm tarrox cross drilled for an 90 Mk2 16v. Anybody done this conversion who can highlight any specific pitfalls.
I just wish this rain would give it a rest as I am doing all my work outside as the garage is wedged with parts. Not got a great deal done today as I have been buggering about arguing with Doncaster Audi as they have done something to my wifes 2L TDI quattro S-line when it was serviced last week and it has not run right since.
Hopefully get the dynamatting cracked tomorrow and get the dash back in.Checked the repair to the winscreen with the hose pipe this morning …no leaks!!..sorted I hope.
Posted

Settled In
Great idea with the dash dynamat.
That trim stuff looks ace. May have to get some for when it's time for cleaning.
Keep it up. I'll be watching your progress.
P.s nice neat job on the audio too. JL are superb speakers.
Mk1 Gti Cabby project on the go! Detailed engine, roof off, leather interior, 16's, painted, now getting put back together!
http://www.vwgolfmk1.org.uk/modules.php?name=Forums&file=viewtopic&t=103263&start=0&postdays=0&postorder=asc
http://www.vwgolfmk1.org.uk/modules.php?name=Forums&file=viewtopic&t=103263&start=0&postdays=0&postorder=asc
Posted
Settling In

Re: Getting started
Pincher said
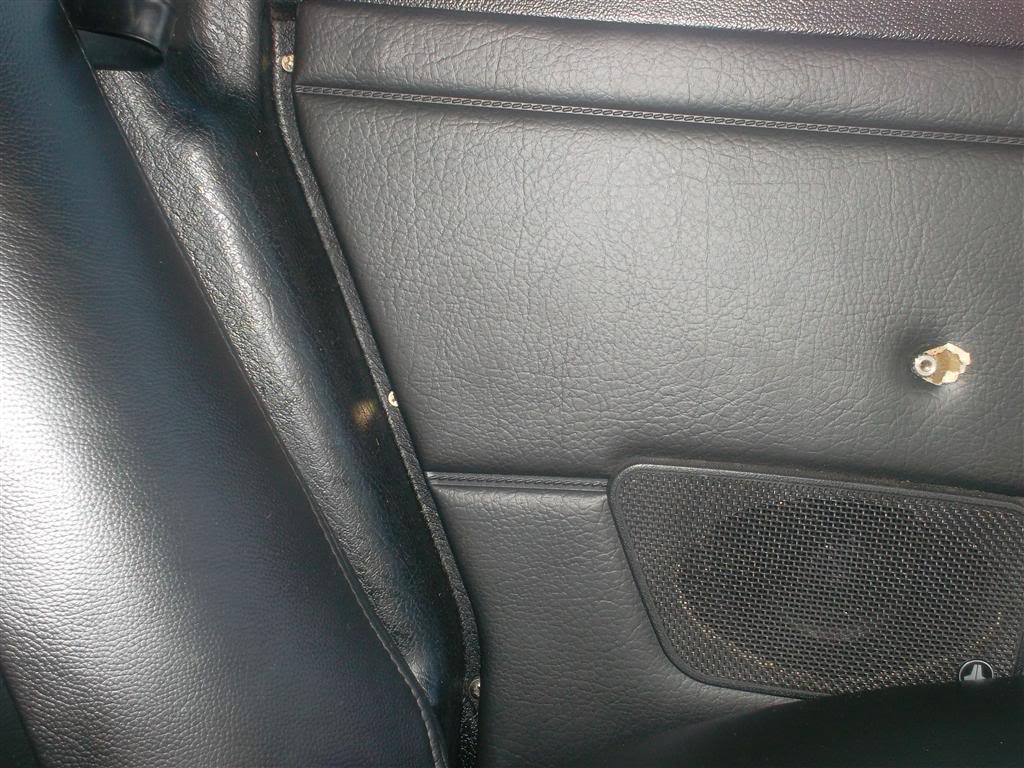
Dashboard removed to locate the source of the drivers footwell swimming pool

Found the leak !! on the windscreen and Auto glass came round and put some sealant around the whole seal, which hopefully should sort it. if not I have a new seal on the way, which they say they will fit for nothing if it still leaks…not a bad service since I had the screen fitted over a year ago! He also left me the rest of the tube of sealant to sort out the leaks at the front quarter window seals..nice bloke!
The dash on this car rattles and squeeks so loudly you have to turn the radio up a few notches so Dynamatted the dash and the inside of the glovebox lid. Since it rained all day. What a difference! …no matter how much you shake or twist the dash it no longer makes any noise I would recommend this to anyone.

I also rebuilt the new door cards from Newton commercial…I must admit I did not buy these as they came with the leather recaro courtesy of Brian in Huddersfield a card carry VW nut. I was a little disappointed with these as none of the holes in the card for attaching the door pocket match up. Anyway after quite a while of measuring and marking out got them to fit OK and installed the new JL Audio components in the front and the 4" co ax in the rear which comes with an adaptor plate to fit the 6 x 4 hole in the card..makes for a very neat job. Installed the sound deadening on the back of the cards to try and cut down on harmonics and noise cancelling.
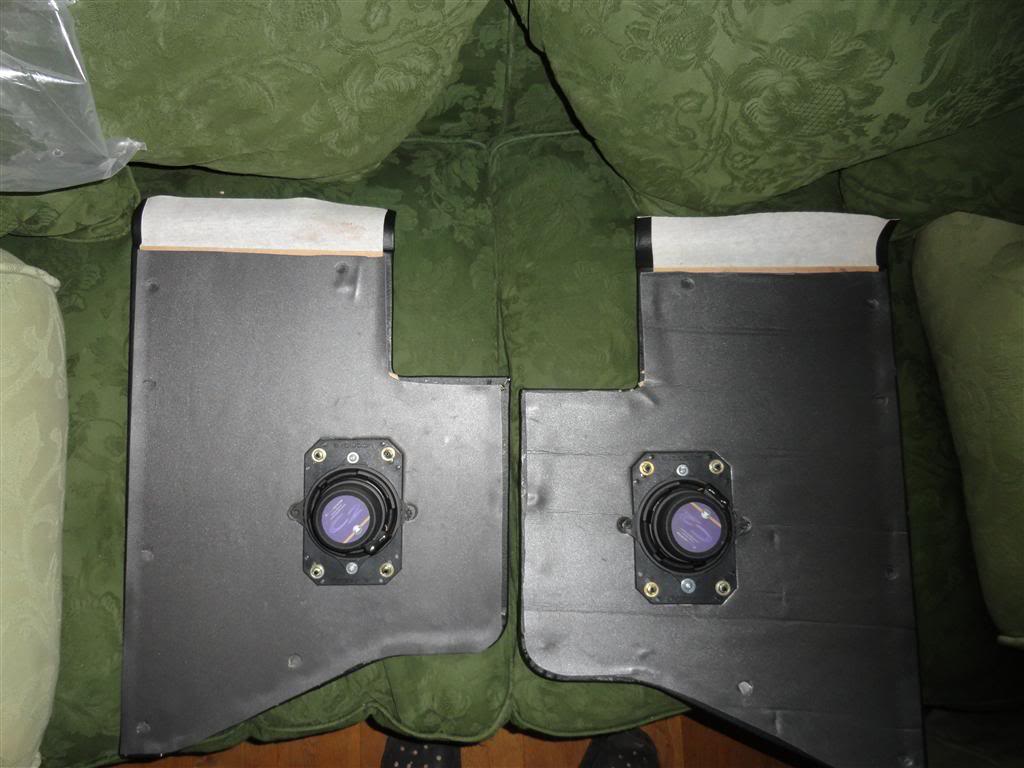
Adaptor for the rear cards

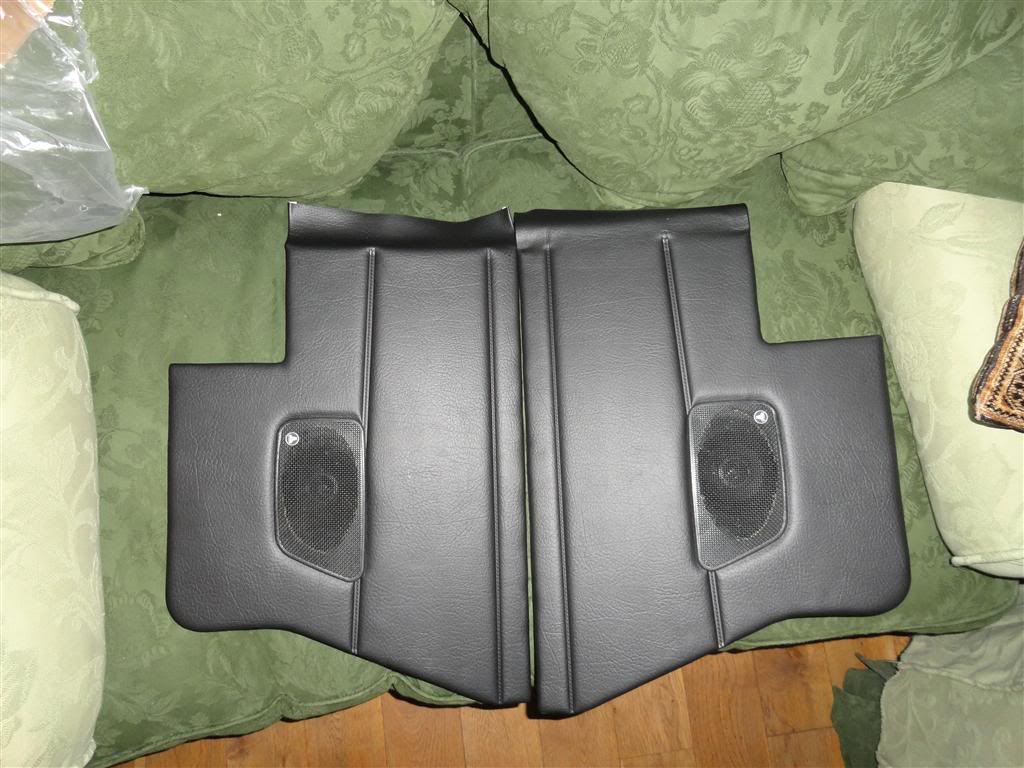
finished cards
I would also highly recommend the 'Gtechniq C4 permanent trim restorer'..who ever invented it was is a god as this stuff is amazing it makes all your plastic look new again. I was told about it by Matt at Halfords at Corton Wood. Get some of this and throw your 'back to black in the bin.
Below is the link to the web page:
http://gtechniq.com/shop/3s-for-cars/exterior-coatings/c4-permanent-trim-restorer/
Well lots of things I have ordered have arrived my garage is getting fuller and fuller
Carpets and rear seatbellt conversion arrived from Crazy Quiffs
AP Coilovers have arrived
Powdercoated wishbones and rear beam mounts too, and the tracking arms
I also have a Sportline interior for sale. I will give it a couple of days to see if anyone wants it from the site before I put it on e-bay

Anyone interested drop me a pm
how much for the Sportline interior
Posted
Settled In
I posted a separate thread for it. The link is below:http://www.vwgolfmk1.org.uk/modules.php?name=Forums&file=viewtopic&p=776529#776529
Posted
Settled In
Water tight
I also changed the inside and outside scrapers. Did a hose pipe test on bothe doors at last no leaks so I now feel confident enough to carry on with the dynamat in the footwels and the fwd bulkhead.
But first I wanted to exchange the passenger door electric window regulator as the back bottom runner guide bush was damaged. I obtained a replacement from 'funkstar' along with a few other bits and bobs.
The original one has Studs for fixing to the door which made it an absolute pig to get out as there is very little margin to push the regulator back far enough to clear the studs to take it out. Anyway after a lot of swearing and a further doination of skin from my hands it was out. Which ever design engineer thought that was a good idea needs a good hard kick in the pants with along run up.

Studs on the old unit.
The other thing that caused a lot of chin rubbing was the fact that the orientation of the motor was 180deg out on the replacement

It went in no problem then had to come out again several times before I realised the lower, rear runner has to go in before it is bolted up. I also needed to source some M6 bolts to and the only one's I could find were 10mm too long but after a bit of attention with the dremmel and cold galv spray were the right length

Its in wired and tested ( new bolts/washers and motor below the pinion not above it like the original)

Confident that all the leaks were sorted I started on the sound proofing again and pretty much got the the floor pan and forward bulkhead and installing the audio wiring


I have run out of dynamat so a trip to 'The Source' audio in sheffield ( for any of you serious car audiophiles check them out as they have some srious quality components there ..one of the amps on sale is £8000…way beyond my budget) is on the cards for this morning after I have dropped my daughter off at ballet. Just few bits on the dash steelwork, the two doors and the boot to do …only! my hands are in bits!!
I have decided to put the JL audio amp under the passenger seat as I want abit of useable space in the boot and have a slimline Hertz sub to attach to the rear crossmember. Fitted the the return power cable to the crossmember and tested the earth continuity to ensure a good bond. I ground off the paint and used some heat sink paste under the washer…the same stuff you you would use on a CPU in a computer.Sprayed it with zinc primer and then gave it coat of flash red before I finished off the dynamat and dropped the underlay.

I was abit dissapointed with these tailored underlay..I got them with the white cab donor car I bought from a top bloke in Doncaster which I acquired for the engine. I think I will being going to the carpet shop in the village to see if heahas any good quality underlay offcuts.
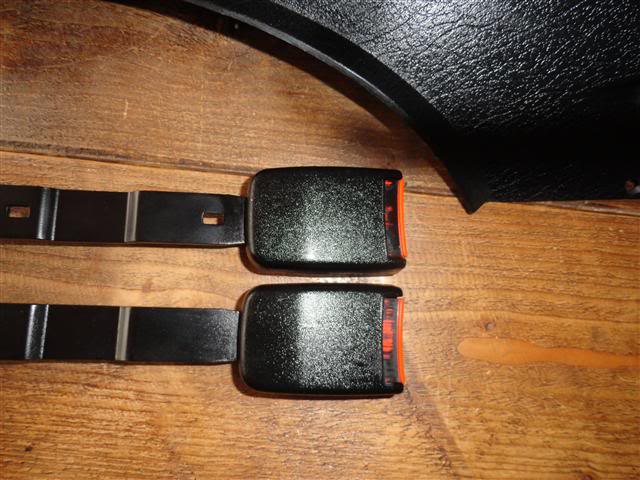
Todays Job is; install the rear seatbelt 3 point conversion (Out with the grinder) and then finish of the dynamat in the boot door and dash.
Posted
Settled In
3 point seat belt conversion

Floor pan completed and all the wiring done for the amp and speakers
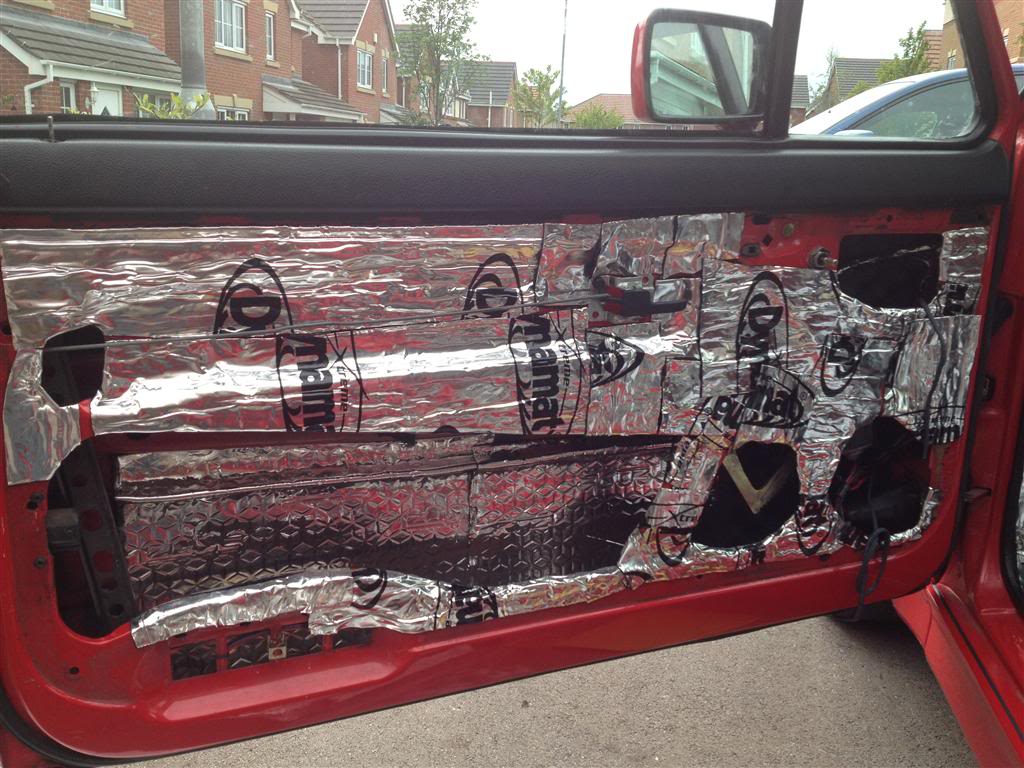
Door sound proofing done
Installed the 3 point seat belt conversion for the rears today, Great set of instructions from the supplier of the kit 'Crazy Quiffs'
Did the install in about 2 hours roughly an hour aside with abrief interlude to allow the primer and paint to dry on the cut and drilled steel

Both belts installed
I then covered the parcel shelf with sound proofing and accoustic carpet around the exposed steel. I think it looks quite good to be honest very pleased with it and well worth the money


Installed the carpets and the rear seats and went to fit the rear door cards AAArgh! they dont fit!!!! The hole centres for all the pins are 10 mm too far forward. I spoke to the VW guy at Newton Commercial who supplied these and said I will knock up an autocad drawing and take some photographs of both the orginals and the replacements to enable a pattern for later model cabs to be produced by them.
Gap at the back
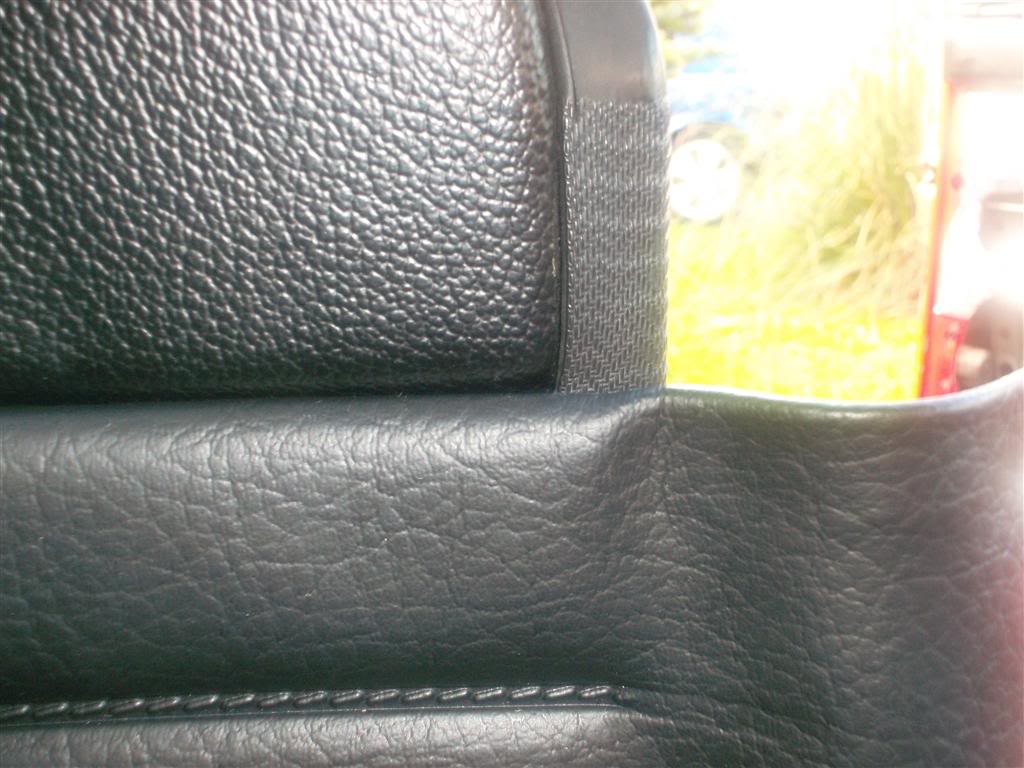
To far forward to enable correct fitting

Rear Seats and belt conversion in.

Font door cards on.
I wanted to fit the crome surrounds for the door pull but in the end I could not since there was not enough material left at the cut out as chrome surrounds are smaller.
I am waitng for A 4.5mm Chrome trim to replace the red trim on the door handles before I put them back on.
The car is in the odyshop for a few days to get the nearside wing repainted as my wife opened the rear door of her A3 onto it. This will give me a few days off and time to dremmel out the slots for the fixing holes on the rear cards.
Got one of the Wilwood calipers out of the box they look massive. I hope they fit under the rims!

I have got all the bits to do all my upgrades undeneath but it looks like I will run out of time to do anything in that respect before I have to go back to work for 4 weeks
Posted
Settled In
It started with a leak- interior is in and hood re-proofed.
However I got the interior in and the damage to the front wing repaired.


I also decided to clean the hood, apply some renovator and re - proof it. I used some stuff I used many years ago when I was into racing MG's and was a memeber of the MG owners club. The Renovo product range was sold by them on line.
I bought the cleaner, renovator in black (also available in blue) and the ultra re-proofer.
http://www.renovointernational.com/
Takes quite a while to do but the results are worth it on a Doiuble duck hood as it brings up the nap on the material again and with the re-proofer water beads on the surface instad of being absorbed
I also noticed when I was washing off the cleaner with a hose that my windscreen is still leaking at the bottom right hand corner. I wll have to get autoglass out again. I also bought a new seal from Crazy Quiffs just i case so I guess I will get them to fit that.
My daughter is over the moon her very own recaro childseat fits in the back after the seat belt conversion. Not sure about sitting there as an adult as it feels a bit vulnerable without head restraints. Maybe something to look at in the future.
I also cleaned up the wheels with some maguires alloy cleaner, …big mistake as it watermarks all the black which is a pain to get off. Removed all the stains the leaking rear brake cylinder had made.


Posted
Local Hero
look forward to keeping an eye on this, gona be one sorted motor !
Cheers
Rich
SOUTHWEST Regional Host. Bristol Meet - 1st Friday of the month - Toby Carvery Bradely Stoke Bristol Bristol Region Facebook Group
1.8T CABBY
TINTOP THREAD (SOLD 2016) SPORTLINE THREAD (SOLD 2015) CLIPPER THREAD (SOLD 2012)
1.8T CABBY
TINTOP THREAD (SOLD 2016) SPORTLINE THREAD (SOLD 2015) CLIPPER THREAD (SOLD 2012)
Posted
Settled In
I have loads to do before the end of the summer, including getting the AMD KR engine in to have the head cleaned new valve stem seals, valves re-seated, take the bore out to 1.9, lighten and balance the flywheel an crank. And then carry out the detail work on the engine and the bay.
I do not have time to do the actual conversion myself so I was thinking of taking it to Crazy Quiffs as one option do you know of any companies or individuals that are good at this?
thks
Lee
Posted
Local Hero
Sportlines came with a lower front strut brace from the factory, and they don't really need one in the rear as cabriolets have the strengthening panel running between the wheel tubs.
Looking forward to your updates.

Gav
Posted
Settled In
Thanks for your comments and the info on the strut braces. Looks like I have wasted a few quid…bugger
Cheers
Lee
Posted
Local Hero
Which braces did you buy? I'm thinking of buying one of the anthracite OMP upper front ones off ebay. I've tried a few different ones now and none give decent clearance to get the expansion tank cap off.
Posted
Settled In
I was also thinking of fitting 20mm concentric spacers a lifting the back a little when I fit he AVO's as it is too low to do a tracking check as the gear will not fit on it. I have put 195 50's on the rims instead of the 185 55's which I think is an improvement to the way the car sits on the road
what do you think?
Posted
Moderator
Oh and car looks very nice!! interiors amazing
Ever growing range of new mk1 golf parts www.classic-vw.co.uk
Posted
Local Hero
I'd probably stick the braces on before getting your tracking done - especially if you change the front lower one as you have to remove the wishbone bolt to remove old one/fit new one. It might not affect the tracking but for what it's worth I'd get it all done before taking it in.
I've got Toyo 195/50's on mine, never ran mine on 185/55's but the 195/50's have always been spot on and are nice and cheap to buy compared to other sizes.
I've got some hub centric 20mm spacers too but I haven't tried them with the RA's, just used them on my RM's, they fill the rear arches out nicely though. I could stick one on and take some pics at the weekend if you want to see how they'd sit?
Posted
Settled In
Thanks for the advice I think you are right as fitting them after could change the geometry and throw it all out
Cheers
Lee
0 guests and 0 members have just viewed this: None.