My latest project MK1 1.8t Quattro Build
Posted
#1665099
(In Topic #238322)
Settling In

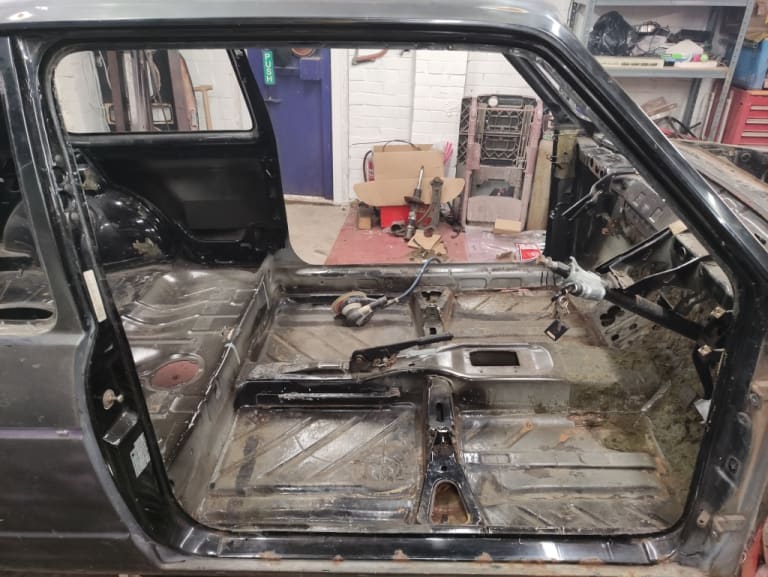
Despite looking shabby, its actually pretty solid, and only really needs a few repairs to get it back to where it should be, ready for me to start work on the conversion.
It did come with doors and a boot lid, but i got a bit excited, and took them off before i got any pictures.


The only bits of rot ive seen so far that need attention, rear valance/corner, floor/sill, and a bit next to the rear seatbelt mount, shouldnt be too difficult to fix i hope, and it will give me some time to ponder how im going to go about all of this


Handily, someone had already taken most of it apart, which has made the job of stripping it pretty light work, so i had it completely in bits within a few hours.


If anyone knows where i can get a replacement for this panel above , that would be great, otherwise ill be repairing it.
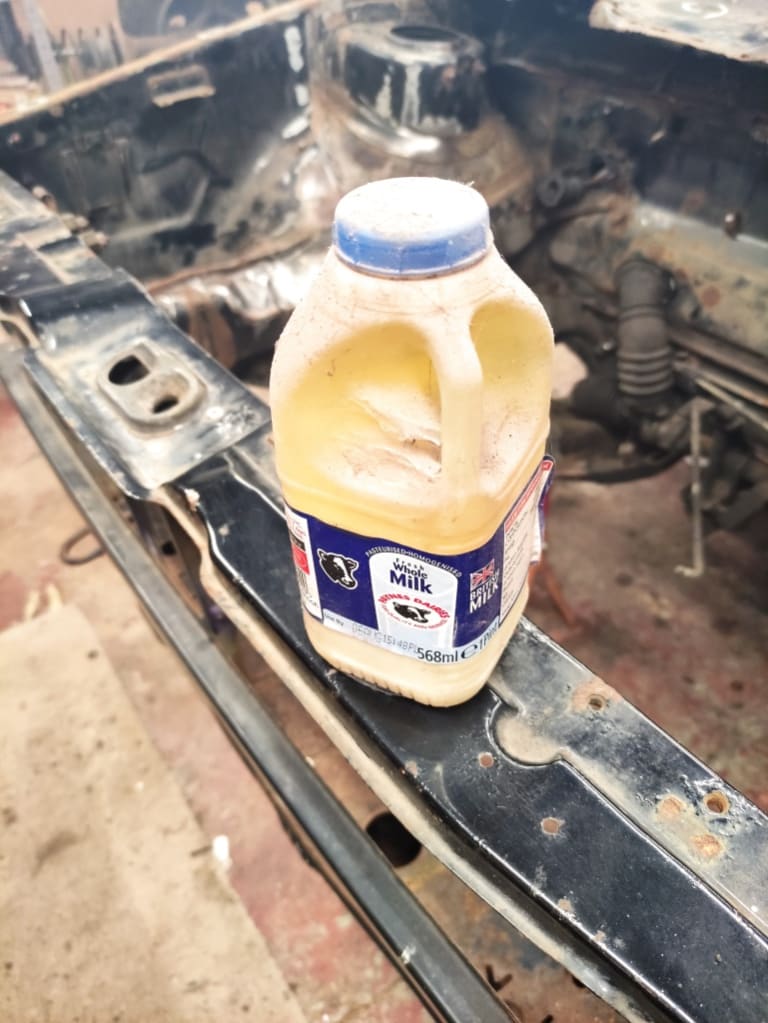
This is Milky, he's my workshop manager, if you look carefully in my previous build thread , you might spot him overseeing things
RX8 Cosworth conversion - PassionFord - Ford Focus, Escort & RS Forum Discussion

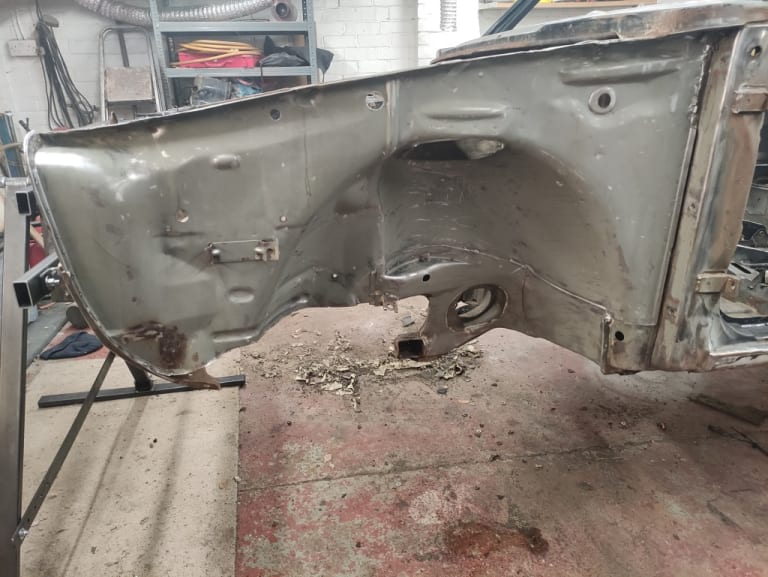
First job now that i have a bare shell is a shitty one, underseal removal, no matter how you do it, it sucks, i've got the front inner wing all cleaned up, the rotisserie also arrived today, so ive got it up i
in the air. Hoping this will make the job easier.


Thats about where i stand for the moment, i'll be on the lookout for an Audi TT as a donor, and reading some threads to see how everyone else is going about this.
Posted
Settling In

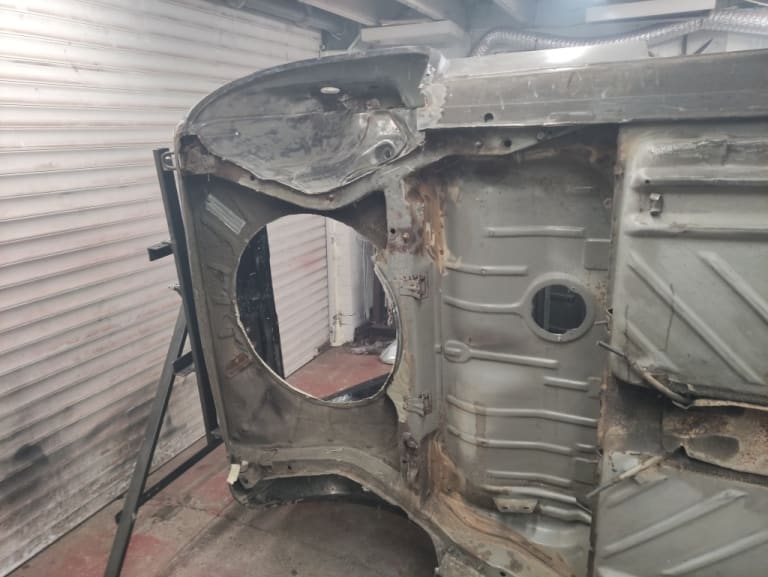
Spare wheel well has been unpicked and removed, both to give better access to the tight bits around the underneath of the boot floor for cleaning, and to make space for the haldex and associated gubbins.


Ive also sourced a donor car, a TT roadster. Found it locally at a pretty reasonable price, it has a few issues (mainly terrifyingly bad brakes, which i suspect is a vacuum leak somewhere) but nothing thats gonna be an issue for what i want from it. Theres plenty of service history with it, and the engine, gearbox and 4wd all work fine.

For the moment, its just going to sit outside, until ive got the body to where i want it, I'd like to basically end up with a good solid repaired body, in etch primer before i start offering up bits of TT and chopping lumps out.
Ive done a lot of thinking recently on how im going to do the actual conversion, it seems most use a golf mk2 syncro rear axle. I dont think ill be going this route, Theyre very pricey, and to buy and refurb one with new bearings, bushes etc, its gonna be 1500+ quid,
After a bit of measuring, using the complete TT rear suspension/haldex assembly *should* go with a little jiggery-pokery, i will need to find approximately 45mm per side to get the wheels into the arches, I think i will be flaring the arches by around this much, but i can make some of it up with a different offset wheel if needed. As for the front end, i'm thinking i may use the complete TT front subframe, this will ensure i wont have any issues with the prop and the standard golf steering rack being in each others way, and will give me the correct width to match the rear. It should also allow me to keep the power steering, brakes, wheel speed sensors etc. The strut tops on the TT are only around 50mm further apart, so it shouldnt require too much work to get them in the correct place and maintain correct geometry. The only way to know for sure though will be to offer everything up and see how it fits (or doesn't)
Posted
Old Timer

Posted
Settling In

Re:
Hopefully I won't be one of thoseabfmk1 said
Sure i have seen more than one 4wd conversion started on here, but after a while the updates stop happening and i assume project gets abandoned for what ever reason, so good luck…

I'm 100% committed to getting this done, might take a while, but it will happen

Anyway, I haven't had a huge amount of time to work on the car this week, but I've got a couple of different types of media to do a bit of blasting, and had a little test run around the engine bay. Someone had already started wire wheeling around the bay In the past, and it has rusted again on the exposed metal. I found kiln dried sand was pretty good on the light surface rust, but its slow going on paint, and doesn't even touch the leftover seam sealer. Medium crushed glass however makes fairly quick work of paint and even gets off seam sealer as long as its only smallish bits. A mixture of the two seems to be the sweet spot. Did the slam panel as a tester, and it seems to be doing the job.

Sealed with a coat of etch primer

The mess after just 10 minutes or so of blasting really was quite spectacular, so I've got myself another one of those blue plastic sheets and made myself a makeshift blasting area, this should help me to recover the media more efficiently, all I need to do now is find some sort of sieve with the right sized screen to sift the lumps/tab ends etc out of the media before I dump it back in the blaster. I think I'll also try to borrow a second compressor to backup mine as its using a lot of air. Mine will hold 80psi or so with the blaster going, but it would be nice to be able to maintain 120+psi as it works much quicker at higher pressure.


I've also spent a fair bit of time mulling over my options for brakes, I'd like to ditch the original servo and that gobbley linkage, and I'll probably go down the route of a ready made pedal box for simplicity, whether I go with a remote servo or just try to size up the master cylinders to get the pedal right remains to be decided. If I'm using both front and rear subframes and hubs etc from the TT, It would also be nice to make use of the abs sensors, some early mazda Rx8's apparently came with a Sumitomo ABS module which can be wired in to run as a standalone, however they seem to be pretty rare, and I'd need the connector to go with it to splice into. I'll be on the lookout for one of these and doing some research regarding pinouts etc.
Sent from my M2007J17G using Tapatalk
Posted
Old Timer


tab ends - brilliant. Proper old school garage work!
Love the makeshift booth - neccisity is the mother of invention as they say.
Posted
Old Timer


Afaik having seen previous TT MK1 converted, it's not straight forward as the track width etc all needs work.
I would love a 4wd MK1. Looking forward to see you make progress on this.
Posted
Settling In

My latest project MK1 1.8t Quattro Build
It's been freezing in the garage, and my DIY diesel heater has finally given in, after multiple attempts to either gas me or blow soot everywhere. I've been limping it along for too long and the flue has rotted out and been mostly replaced with aluminium tape, and I suspect its now burned through the chamber inside. For the moment I'm using a little Chinese diesel heater, at some point though I'll resurrect this when I find the required scrap


Got a bit done around the engine bay, blasting has been grim going, but I've got a fair bit round there cleaned up, and removed the battery tray and a few other ugly bits.
Some of the tight corners and stuff are a nightmare to get into and scrat/blast seam sealer out of, so I've got some industrial paint stripper to soften it. This stuff is pure evil, and when the inevitable happens and a bit gets on your skin you get this strange cold sensation for a short time, followed by a pretty nasty burning/multiple bee stings kind of feeling. The sealer doesn't exactly drop off, but it does make it soft enough to come off with a lot less effort. I want to get all of it off, as there's been a few spots where the sealer was actually hiding a bit of rust.
Did the boot floor with the paint stripper as a test and to try and soften the bead of sealer between the valance and the boot floor, as there's definitely a bit of rust crept in there, nothing serious, but wants dealing with.

Taking a break now from the boredom of scraping and cleaning to do a few rust repairs and patching up.
Passenger outer sill patched up in a couple of places, and a little reverse keyhole surgery on a small hole in the inner. I call it reverse, as its me putting something that looks like a tumour back in through a small hole

Obviously I ground it back to look something like right before closing off the hole.


Next jobs for tomorrow are to deal with the inner sill and floor in the that same area, and the bottom front corner of the rear arch.


Sent from my M2007J17G using Tapatalk
Posted
Settling In

My latest project MK1 1.8t Quattro Build
Did the small rust repairs to the rear arches whilst the car was still on the rotisserie.


The TT has now been stripped of all the parts I want, and the rest of it cut up into manageable sized chunks and weighed in.
The tunnel has been cut out, along with a few inches of excess floor.
I'd initially planned to cut out all the mounting points for the rear subframe with the boot floor to keep as kind of a jig, but I'm short of space as it is, so I just took measurements for all the mounting points.
Turns out destroying a car is pretty fun, although it was actually pretty hard work, with it being a convertible there was a lot of support inside the sills, so it took me a fair while to cut through them.
Results of a few days of vandalism:


More to follow

Sent from my M2007J17G using Tapatalk
Posted
Settling In

My latest project MK1 1.8t Quattro Build
The whole process took me and a friend a good few hours ensuring it was perfectly level on both planes, this was made a fair bit more difficult due to the slope of my garage floor. Everything was lined up firstly with a laser level, and then checked/confirmed with a straight edge and spirit levels.
Once it was all level, and the stands all tweaked to make sure they are all carrying the same load to avoid any twisting of the body, I sprayed round the outline with paint and wrote which corner they're under on the stand. Strike lines were drawn onto the threads of each stand so I can take it on and off the stands and re-level more easily.


First swing in with the engine and box, at the moment I'm just eyeballing where I'd like things to go, and deciding what will fit and where I'll need to remove a bit of golf.
Surprisingly roomy in there…

The bulky TT mounts need to go, as they're right in the way, I'll just make my own to suit once I know for certain where I'll be mounting it, but, I won't know that until the subframe is in, so I thought I'd best have a look at that.

Obviously there's a lot of material to remove from below the chassis legs before I can get it fully up into position, but for the moment, just jacking it roughly into place will do.
I made a quick and dirty jig to hold the struts in roughly the right place, I know from my previous measurements that the TT strut tops were 52mm wider than the golf, I'd like to maintain the TT suspension geometry as much as possible, but I'd also like to have my struts in the centre of the strut tops. After much deliberation I've decided I'll be removing 26mm from both sides, this gets me a bit nearer to the width of the golf, but much more importantly, narrows the gap between the rear trailing arm mounts. I'll make up a pair of adjustable front wishbones and all the rear control arms, and shorten the driveshafts accordingly (I have a plan for this
 )
)
One thing imagine not sure I'll be be able to maintain is the TT"s castor angle, I might struggle to get it quite as laid back as it was, and end up closer to the Golf's, I'm hoping some adjustment in the wishbones and strut tops will give me some wiggle room to get the setup how I like it.

Trying on a wheel to look at where the subframe will land, the position of the front hubs basically sets out where I'll be mounting the subframe and the position of that will set where the engine is.

Sent from my M2007J17G using Tapatalk
Posted
Settling In

My latest project MK1 1.8t Quattro Build

Used the old mucky finger technique to mark out the holes from the old block mount onto paper, then transferred to some plate

Kept the spacers as short as possible to get it nice and close to the timing cover, and to stay away from the chassis leg on the gearbox side


Next job, more levelling.
Old straps and blue rope are ok to get a starting idea, but what I need here is the engine to hang from the hoist and be just as level as the car, so I swapped to chains and shackles and went about getting the whole engine and gearbox assembly to hang perfectly level, I used the cylinder head as reference in one direction, and the propshaft flange to find level in the opposite the opposite direction. Fine adjustments can be made by twisting the chain links.
With the engine level, I then put a plate on threaded bars to the cam covers and adjusted this to be level. This will be my reference point for ensuring the engine sits level on its mounts, and once I find exactly where it is, I will mark the centreline down it. VAG threw me a bit of a curveball here, I the prop actually runs slightly off centre down the car, so what I'd initially thought to be the centreline, actually isn't.


Had another swing in with the engine, and called it a day. I actually feel like I might just about have half an idea what I'm doing now


Next job… Brace the shell ready for some surgery
Sent from my M2007J17G using Tapatalk
Posted
Settling In

Good progress so fare . . . . . keep it up!
Posted
Settling In

Re:
Thanks man, got a long way to go yet, but I'll get there eventuallyjoelaurence said
Inspiring stuff - you put my skills to shame.
Good progress so fare . . . . . keep it up!

Sent from my M2007J17G using Tapatalk
Posted
Settling In

My latest project MK1 1.8t Quattro Build

Luckily I'm a bit of a sad case and actually had (almost) the correct part.
Tacked in a couple of crossbraces to hold things in place when I start cutting away at the tunnel.


Then removed both crossmembers from either side of the tunnel. I didn't make any effort to save these, as I'll be making new ones to suit the new tunnel, and I'll be using the TT's seats, so I'll need to work them around the seat runners.

Then decided to chuck the tunnel in and get an idea of what I'm going to end up with.
It's actually very close to fitting, so close it's almost perfect


Sent from my M2007J17G using Tapatalk
Posted
Settling In

My latest project MK1 1.8t Quattro Build


As with the front, even with just a spacesaver thrown on, it looks extremely wide, bear in mind though that I'll be narrowing it by the same 26mm as the front.
Adjustable control arms are available to buy

I'll end up making something similar myself, minus the 26mm. The top arms may need to be made in a similar shape to the mk5 platform to avoid fouling the strengtheners running across the boot floor (or I'll move/modify the floor in those areas).
I now need to start thinking about making up proper jigs for the front and rear suspension, and some mock up control arms, wishbones and track rods

Sent from my M2007J17G using Tapatalk
Posted
Newbie


Posted
Newbie

My latest project MK1 1.8t Quattro Build
Sent from my SM-S908B using Tapatalk
Posted
Settling In

My latest project MK1 1.8t Quattro Build
To get the subframe exactly where I want it, I thought it would be best to make the new wishbones so I can get everything in place and have a look/mess around with geometry.
Started out by making a jig for the new wishbones. I've used a golf mk4 wishbone as a starting point to make a basic jig,

The part where the ball joint fits was made movable so that you could remove a portion of the width so I had the - 26mm starting point to build the new wishbones from

I was originally planning to make my own poly bushes for these, but decided rod ends would be a simpler solution. I went with 3/4 UNF as the fine threads offer more precise adjustment.

Next step was to make some spacers and bungs which I can weld into the tubing I'm going to use to make the new wishbones, this is what I came up with.


Sent from my M2007J17G using Tapatalk
Posted
Settling In

My latest project MK1 1.8t Quattro Build

Here's what I've ended up with (the centre 'pivot' bolt is temporary, and will be replaced with something more substantial later on)
These will allow me plenty of adjustment once everything is together and needs aligning


Also purchased some 'maxpeadorodding' adjustable top mounts, I think these were for some kind of subaru, but they were 20 quid, and with a bit of chopping around, they worked fine for temporary top mounts, allowing me to mess around with caster and camber and work out where everything is going.

Sent from my M2007J17G using Tapatalk
Posted
Settling In

My latest project MK1 1.8t Quattro Build


Sent from my M2007J17G using Tapatalk
Posted
Settling In

My latest project MK1 1.8t Quattro Build

Once happy with all of this, I tacked the subframe in place, and added a couple of temporary supports to hold everything until I have the proper mounting points fabricated.
Put the shell back on its stands and swung the engine back in to have a look at how everything fits.
The engine was a little further forward than I liked, so I had a little mess around with the gearbox dogbone to see if I could lose an inch or so. Luckily this thing had a huge floppy bush in it, which was pretty simple to remove and cast some polyurethane replacements which move the engine back slightly in the bay, and stiffen things up a bit.


Sent from my M2007J17G using Tapatalk
0 guests and 0 members have just viewed this: None.


