


My first mk1


Settling In


After being a leech for a few months I figured I should start a bit of a build thread of my own…. Mostly as I’ll be asking a million questions no doubt.
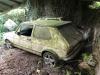
I dragged this out of a barn in November last year… my first mk1 gti. It’s a 1983 1.8.


It had been stood for about 20 years so was a few days of prep to be able to get a jcb any where near to tow it out.
I plan on doing all engine, fuel, brakes and suspension etc to get it on the road. Then in a year or so when I can afford a proper job, I’ll get it resprayed. For now, I kinda like the patina and rust effect… that’s what i tell myself anyway…

Ignore the ducting…. Previous tenants of the unit I’m renting were ummm horticulturists!
So far I have engine bay empty apart from brakes and fuel lines and loom. Prepped and painted the bay to tidy it up a little.


I have fitted new wishbones, front suspension, wheel bearings and hubs and got the front end back on the ground. Sent loads of bits off to powder coaters. This week I’ve removed the rear axle to get access to the tank to see what state that is in. Rebuilt the rear brakes ready for when rear axle goes back on. Removed accumulator and fuel pump. Ordered new pump bracket and some other bits.
Stripped the engine and found a big end bearing had worn almost to nothing and damaged the crank and a broken valve spring in C1 intake. The head is stripped and has been skimmed ready for reassembly. The block is currently at the machinist having barrels honed and crank ground and balanced. Hoping to have it all back together by end of feb ready to go back in the car.
Ill hopefully be making good progress over the next few months ( money permitting) as I set my self end of March for MOT ready……. Optimistic I know!!!
I would love any words of advice from experience or any input at all really.
will update as often as I can with any progress, fails or frustrations
Dom
�
Posted
Old Timer

I love a good build thread, so keep the updates coming.
Good luck with it.
J
Posted
Settling In
paceman said
Looks like a good find that one!
I love a good build thread, so keep the updates coming.
Good luck with it.
J
Thanks. It was actually yours I was reading earlier that inspired me to start my own.�
Need to go back and finish reading yours this eve.�
Posted
Old Timer
Posted

Settled In
 Gilbertdfx
Saving a Mk1. Thanks for the posts - we love the updates.
Gilbertdfx
Saving a Mk1. Thanks for the posts - we love the updates.
Current Mk1's
1992 VW Citigolf CTi 1.8i (SA)
Previous MK1's
2006 VW Velociti 1.6i (UK)
1992 VW Mk1 Golf Clipper 1.8 carb (UK)
2000 VW Mk1 Citigolf Life 1.6i (SA)
1991 VW Mk1 Citigolf Sport 1.8 carb (SA)
1983 VW Golf Mk1 GTS 1.6 carb (SA)
1992 VW Citigolf CTi 1.8i (SA)
Previous MK1's
2006 VW Velociti 1.6i (UK)
1992 VW Mk1 Golf Clipper 1.8 carb (UK)
2000 VW Mk1 Citigolf Life 1.6i (SA)
1991 VW Mk1 Citigolf Sport 1.8 carb (SA)
1983 VW Golf Mk1 GTS 1.6 carb (SA)
Posted

Local Hero

These days every other MK1 is either a pristine nut and bolt no expense spared concours d'elegance or a maxpower bright purple metal flake 20v turbo with 22inch chrome wheels and dustbin exhaust….
1983 Mars Red 1.8 Golf GTI
1987 Alpine White 1.8 Clipper Cabriolet
The trouble with doing nothing is that you never know when you are finished.
1987 Alpine White 1.8 Clipper Cabriolet
The trouble with doing nothing is that you never know when you are finished.
Posted
Old Timer
Early-1800 said
Looking good, if and when I do another restoration I'm thinking it will be more of a recommissioning. Just do enough to make it reliable and rust proof like it was a daily driver back in the day.
That was what I set out to achieve with mine. Granted some elements had more effort than others but it was hard not to get carried away. Everytime I read through one of the really concourse level projects I'd get itchy, but I manged to keep it about right. If I'd made it super nice I'd be scared to take it out.
Posted
Settling In
Early-1800 said
Looking good, if and when I do another restoration I'm thinking it will be more of a recommissioning. Just do enough to make it reliable and rust proof like it was a daily driver back in the day.
These days every other MK1 is either a pristine nut and bolt no expense spared concours d'elegance or a maxpower bright purple metal flake 20v turbo with 22inch chrome wheels and dustbin exhaust….
Thanks. That's what I'm aiming for… something reliable that I'm not scared to drive.�
So this weeks progress…
Cleaned and painted rear axle, rear arb and mounts
Made up some new brake lines from drum to flexi.�
Had new braided hoses made for accumulator�
Painted engine mounts�
Tried to clean the tank but decided to order one from
Heritage.�
Placed another �1,000,000 order for parts I didn't consider when I started.�
Hopefully spend �a few hours on it this weekend if I get the time… and permission�
Posted
Local Hero
Sort of sums up many pattern parts, you are better cleaning up and repairing the original where ever possible.
1983 Mars Red 1.8 Golf GTI
1987 Alpine White 1.8 Clipper Cabriolet
The trouble with doing nothing is that you never know when you are finished.
1987 Alpine White 1.8 Clipper Cabriolet
The trouble with doing nothing is that you never know when you are finished.
Posted
Settling In
The original has a fair amount of sludge and rust flakes knocking around in it and also what looks like gravel…. No idea! Couldn't find a company locally that would clean my tank out so decided just to send it on a new one. Thinking I will get the original cleaned out professionally and refit but it would put everything on hold for a few weeks and I want to get the rear done and get on with the rest ha ha.�
Posted
Local Hero
Gilbertdfx said
Yeah I spent hours reading about the new tanks and the different set ups different years have.
The original has a fair amount of sludge and rust flakes knocking around in it and also what looks like gravel…. No idea! Couldn't find a company locally that would clean my tank out so decided just to send it on a new one. Thinking I will get the original cleaned out professionally and refit but it would put everything on hold for a few weeks and I want to get the rear done and get on with the rest ha ha.�
Sounds like it had suffered from a rotten filler neck that has allowed water and road debris in to tank. Unless it was bad rusted inside (not just rust from the filler pipe) I'd try and clean it out.
1983 Mars Red 1.8 Golf GTI
1987 Alpine White 1.8 Clipper Cabriolet
The trouble with doing nothing is that you never know when you are finished.
1987 Alpine White 1.8 Clipper Cabriolet
The trouble with doing nothing is that you never know when you are finished.
Posted
Settling In
Early-1800 said
Gilbertdfx said
Yeah I spent hours reading about the new tanks and the different set ups different years have.
The original has a fair amount of sludge and rust flakes knocking around in it and also what looks like gravel…. No idea! Couldn't find a company locally that would clean my tank out so decided just to send it on a new one. Thinking I will get the original cleaned out professionally and refit but it would put everything on hold for a few weeks and I want to get the rear done and get on with the rest ha ha.�
Sounds like it had suffered from a rotten filler neck that has allowed water and road debris in to tank. Unless it was bad rusted inside (not just rust from the filler pipe) I'd try and clean it out.
Current filler neck is fine but not original one. I don't know the history of the car really so hard to tell. I will keep the original with the intention to clean and refit. Will just buy me some time to get on with the rest…. Funnily enough engineering shop has just called. Block and crank are ready. Time to get a move on!!!�
Posted
Settling In

Posted
Old Timer
Posted

Regional Host NE

Re:
paceman said
I see that you will be fitting new core plugs. I'd recommend a smear of hermitite red when fitting the new ones as I ended up with small leaks from two of them that I didn't discover until the engine was in. Let me tell you, changing them in-situ was a real pita!

Sent from my SM-G960F using Tapatalk
Do not know a lot but willing to help if possible
1989 Sapphire Blue Mk1 Cabriolet KR
1985 Atlas Grey Mk2 GTI 2.0 ABF
1989 Sapphire Blue Mk1 Cabriolet KR
1985 Atlas Grey Mk2 GTI 2.0 ABF
Posted
Settling In
paceman said
I see that you will be fitting new core plugs. I'd recommend a smear of hermitite red when fitting the new ones as I ended up with small leaks from two of them that I didn't discover until the engine was in. Let me tell you, changing them in-situ was a real pita!
Noted… thank you.�
Posted
Settling In
Fitting a fuel tank on the floor… on your own…. Not a fan.�
Got the new fuel tank fitted and plumbed in. Fitted new fuel pump in a shiny new fuel pump bracket. Refitted filler neck.�
Made up some brake line that was damaged in the strip down.�
Waiting on new accumulator bracket to arrive before fitting rear axle back in so there's more room to plumb stuff in.�
Starting to put block back together tomorrow.�
Placing another mega order this week for last few bits.. water pump, rad etc.�
Still aiming for running by end of March so hope to make good progress next few weeks…… and make a shopping list for stuff for Bristol swapMeet in a few weeks.�
Posted
Settling In
�
Back end is all back together. New accumulator bracket and accumulator fitted. All fuel and brake lines plumbed in.
Rear axle painted and back on with new bushes and clamps all round. �
Rear brakes all rebuilt with new handbrake cables all set up. �
Block and head all rebuilt, assembled and timed up.
�

�Gearbox back from the shop all serviced / rebuilt.
� New driveshafts arriving tomorrow as needed cv joints and wasn't much in the price to get whole new set up…. And comes assembled! Bonus!
�
Hoping to put engine back in this weekend and see what happens. �
Posted

Settled In
My first mk1
 . You in the Brizzle areal? The rate youre going you’ll have it ready for Volksfest in June!
‘81 Golf GTi Mk1 TSR1600 tintop
'90s Chesil Speedster on '70 VW Beetle Chassis
‘14 Golf GTi Mk7
'90s Chesil Speedster on '70 VW Beetle Chassis
‘14 Golf GTi Mk7
Posted
Newbie

This is my 2nd golf mk1 cab.�

0 guests and 0 members have just viewed this: None.