


Mk1 Tin top project


Settling In


New bilstein shocks, springs and top mounts blasted and painted
Settling In


Back plates blasted and painted, new flexi brake hoses, brake pipes cleaned and painted standard dark green, new cylinders
Posted
Settling In


Fuel accumulator and brackets blasted and painted
Waiting for new mounts and braided fuel lined from CQ's
Settling In

Sunday morning job complete, Hubs back on with new shoes, bearings and loads of grease !�
Difficult to get the handbrake cable onto the shoes by yourself, but after a few attempts a brew they finally surrendered.
Posted
Local Hero

1988 Mk1 Golf GTi Cabriolet 1.8cc DX, K-jet. Daily drive. 317,000 miles and counting
1978 Mk1 Scirocco GLS 1.6cc FR, Webber carb. Weekend toy.
1978 Mk1 Scirocco GLS 1.6cc FR, Webber carb. Weekend toy.
Posted
Settling In

I'll just pop to the garage and fit the long seat cable I thought! 2 hrs later! First attempt ' it too short by about 50mm' thats when I saw the top guide loop on the RHS of the seat. �
Settling In


Having shortened the stainless manifold to give an extra 20mm of clearance for the steering rack gator, you guessed it I had to gain it further on the exhaust. I didnt realise how 20mm could make such a difference! 😉
So had to make and weld a 20mm stainless strip to the end of the coupler. Right then lets try the exhaust again. Third or is it fourth time lucky�
Posted
Old Timer


Nut & Bolt Resto Complete (Mars Red GTi original):��https://vwgolfmk1.org.uk/forum/index.php?page=topicview&type=misc&id=projects%2Fyour-mk1-golfs_2%2Fpistolpete-s-mars-red&start__keyed=
Nut & Bolt Resto in Progress (Lhasa 16v):� https://vwgolfmk1.org.uk/forum/index.php?page=topicview&type=misc&id=projects%2Fyour-mk1-golfs_2%2Fpistolpete-s-lhasa&redirected=1
Nut & Bolt Resto in Progress (Lhasa 16v):� https://vwgolfmk1.org.uk/forum/index.php?page=topicview&type=misc&id=projects%2Fyour-mk1-golfs_2%2Fpistolpete-s-lhasa&redirected=1
Posted
Settling In


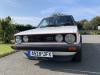
Any idea where this may have come from ? Found it in the boot while cleaning? 🤔

Settled In

Posted
Settling In
�bleed the brakes ✔️
Fit new exhaust ✔️
Adjust brake pedal ✔️
Fit new rear strut bottom bolts✔️
Clean and polish interior ✔️
The list is getting smaller a few more weeks and it'll be MOT time me thinks
Posted
Settling In
👍Cushti said
A game of Monopoly?
Posted
Settling In
Pistol said
Some great work going into this Mk1, and you seem to be getting through it very quickly.
Pistol, have just seen your restoration project! wow attention to detail is amazing, where did you get the zinc plating kit from? I have tried making one in the past but struggled to get the bright yellow finish. Any info or guidance would be really appreciated
Posted
Settling In
Next was the timing now that I got the engine running sweet after deciding to replace �all the fuel lines with crazy quiff braided kit. Timing done onto the final hurdle.
Rear vinyl stickers. Local graphics company D&P ltd did the biz! Great job Dave 👍. Boot lid back this eve, window in rear wiper motor on.
Whats left ? Original P slots refurb. Rims have been welded (slight curb damage) they have been blasted hoping �have them prepped �and re painted as per original spec next week. 5 new Pirelli tyres ready to pop on and away we go for an MOT.�


Posted
Settling In
 Those that are interested here is how I by passed the oil pressure circuit
1 take the clocks out
2 remove the oil pressure pcb L shaped board
3 make a jumper link out of 1mm mig wire to place inside the connector that should go into the PCB between pin 3rd from the left and 3 rd from right ( see photo)
4 replace oil pressure switch on oil filter with the same type as that on the side of the head. Its the red one from vw heritage.
5 cut the yellow / white cable that goes to the dash connector ( this is the one from the head oil switch) splice / solder / crimp it onto the blue and black cable
Theis is the one from the oil switch on the oil filter housing.
Hey presto ! When either oil switch ever drops below .3 bar the Led flashes.

Posted
Settling In
Posted
Local Hero
1988 Mk1 Golf GTi Cabriolet 1.8cc DX, K-jet. Daily drive. 317,000 miles and counting
1978 Mk1 Scirocco GLS 1.6cc FR, Webber carb. Weekend toy.
1978 Mk1 Scirocco GLS 1.6cc FR, Webber carb. Weekend toy.
Settling In


Rims welded, wheels sand blasted, primed, painted and matt lacquered. A lengthy process but well worth it.
Settling In


Posted

Settled In
Excellent!

0 guests and 0 members have just viewed this: None.