


The older blokes meccano set


Settling In

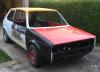
But with Christmas leave commencing I thought what better way of freezing myself than pushing the shell into the garage and starting the long rebuild process. I purchased the shell with a load of parts about 4/5months ago and have spent the interim time researching paint types, bodywork and engines. Now I am totally confused it seemed apt to commence!
so I bought the shell as an unfinished project. Some welding has been carried out on the shell and some new panels replaced - new front wings, new front panel, new rear valance, new fuel tank (obviously the tank isn't a panel, but hey we'll include it on the list!). The car has no engine, or any ancillaries attached. It's is like starting a build from scratch. So what is the plan…
starting with the engine bay. I was going for a smooth bay and follow the usual trend, however recently I have rethought that and am now going for a clean original look albeit with battery and washer bottle relocated inside the car. I will do away with the header tank too. That way if I change my mind in future on engines and originality it's easy to go back.
my approach is to go along 'less is more' going for minimum weight (without getting silly) and fun. It is only a weekend car for me and will be a project to test my skills! I was going to get the shell painted professionally but having failed to get anyone to quote me and being a bit particular I have decided to do everything myself. Not sure how this will turn out but I have painted before and my theory is that by the time I pay to get it done professionally I can mess it up a good 3/4 times myself and still be in pocket and will have developed new skills. Good theory, lets put it to practice…..
So i have started sanding down the engine bay and filling some minor marks etc. I have removed some sealant patches and almost ready to epoxy primer ..
photos to follow
Settling In


Posted
Settling In

Then whilst waiting for some filler to dry in the engine bay, i had a look at the inside.
My the theory is: get engine bay and inside prepped, primered and painted. Then I can start reassembling stuff before moving onto the outside. Also I practice prep and paint on the less obvious parts so by the time I get to the outside I will be an expert!
So I had a look at the front pasenger floor pan:

And almost finished cleaning up:

Posted
Settling In
First one - the car came with coilovers fitted but being a bit older and needing comfort over lows I want to get rid of the coilovers and go standard type setup of damper and spring. Am i right in saying people recommend Bilstein shocks with Eibach springs as best comfort and handling? Open to comments / thoughts. I do want to be able to push on in the car, so want something decent, not just std kit.
What is the general thoughts on best lowering distance to improve handling whilst not making the car a bone shaker?
2nd question
Best ARB options? Std spec or larger / smaller. I seem to remember reading a smaller diameter bar at the front is advantageous and stops wheels lifting?
I am going disc rear conversion as it's already 90% done. Can an aftermarket brake bias adjuster be fitted internally to get over the issues with the std one? That's way have adjustability for track days etc.
Am going with Lupo rear calipers as recommended as being less aggressive than mk4 calipers. Lupo are also.alloy calipers rather than the mk4 cast iron anchors! They run a 32mm piston rather than 36/38 of the mk4 option, thus more gentle touch, hopefully avoiding too much rear lockup. With the bias adjuster should be able to rune out lock up issues…
So no mention of engines yet……
Nope….. not yet😎
Posted
Settling In
Posted

Moderator


Your 'factory but cleaner' sounds exactly like my plans for Mynx. I think it works rather well personally.
I also did a rear disc conversion but with the mk4 alloy calipers. I did try a bias adjuster but couldn't get the rear brakes to bleed properly and failed the MOT on them. In the end I ditched it with a 'well we'll see what happens' approach. I also removed the brake servo as well though………
I can't get the rears to lock up, even on a wet road. Admittedly I haven't tried whilst in a corner.
Nice work so far

Ian
Settling In


I'll investigate the Eibach option a bit more. Hopefuĺly someone local might have a mk1 with this setup so i can see what it's like….
Posted
Settling In

Better:

Posted

Settling In
The older blokes meccano set
Sent from my iPhone using Tapatalk
Posted
Settling In
Posted
Settling In
The older blokes meccano set
Sent from my iPhone using Tapatalk
Posted
Settling In

Swapping the servo for a larger 9" from mk2 16v. Mastercylinder will be replaced with new 22mm, again from 16v mk2. Was going to do away with servo but general consensus is that is a bad idea due to poor feel on the road.

Sanded down and primered the servo:

Now the issue. The brake bar has swivel bearings on the ends - one is shot. Anyone converted their car to non servo and got a spare bar connector like this, but with good bearing?

👍
Posted
Settling In
Servo part number: 172 612 105 M

Posted
Settling In

And after a further clean up of the drivers footwell, a bit of primer on that too:

Just got to keep this momentum going…
Posted
Settling In

Posted
Settled In


DANBOY.
Mk1 Golf cabrio "Golf+ absolutely cabulous"
fresh 20vt rebuild well underway https://vwgolfmk1.org.uk/forum/index.php?page=topicview&id=projects%2Fyour-mk1-golfs_2%2Fmy-old-white-cabby#post_1402754

Mk1 Golf cabrio "Golf+ absolutely cabulous"
fresh 20vt rebuild well underway
https://vwgolfmk1.org.uk/forum/index.php?page=topicview&id=projects%2Fyour-mk1-golfs_2%2Fmy-old-white-cabby#post_1402754
Posted
Settling In

To this:

Need a rest from sanding so i'll get the brake bar components back together before I forget how it all came apart!🤣 I also need to sort out servo amendments to fit the 16v servo clevis pin.
Lot of work to do. Glad I haven't written a job list, I think I'd give up!🤣
Posted

Old Timer


Webby! said
2 hours of scraping and sanding and we go from:
To this:
Need a rest from sanding so i'll get the brake bar components back together before I forget how it all came apart!🤣 I also need to sort out servo amendments to fit the 16v servo clevis pin.
Lot of work to do. Glad I haven't written a job list, I think I'd give up!🤣
Nice work 👍
Follow me on Instagram, scottyr_mk1golf
Posted
Settling In

The previous owner had just blown over everything with matt black to make it look better/further progressed than it was. Albeit no structural corrosion found so far…
Posted
Settling In

Welded it up:

Cleaned up last footwell:


0 guests and 0 members have just viewed this: None.