


BMW 2002 Touring '74 Full restoration project

Posted
Old Timer

Hey Mike,mike.d1979 said
I'm struggling to picture what it will look like once put back togethen, love the back end of it though, it'll look amazinf with a load of chrome trim and on some decent alloys �Amazing attention to detail �
�
Thank you for your comment.
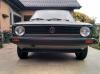
Yes, I too love the back end of the car, much prettier than the sedan version of the 02. At least that's my opinion.
Plan is to keep is stock for now, only change that we'll do is placing some Bilstein shocks under it. Gonna rock the stock steelies for a while, we might swap these out for some alpina wheels.. but that's for in the future. �

Posted
Old Timer
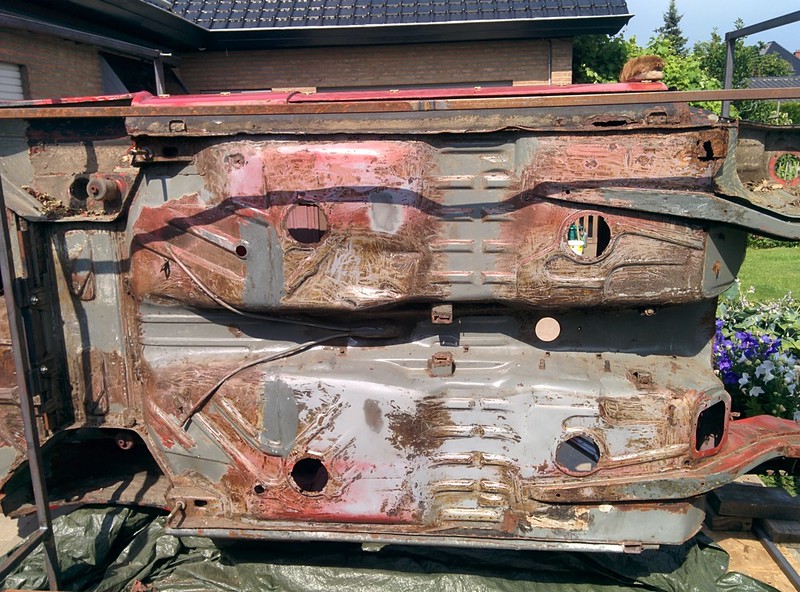
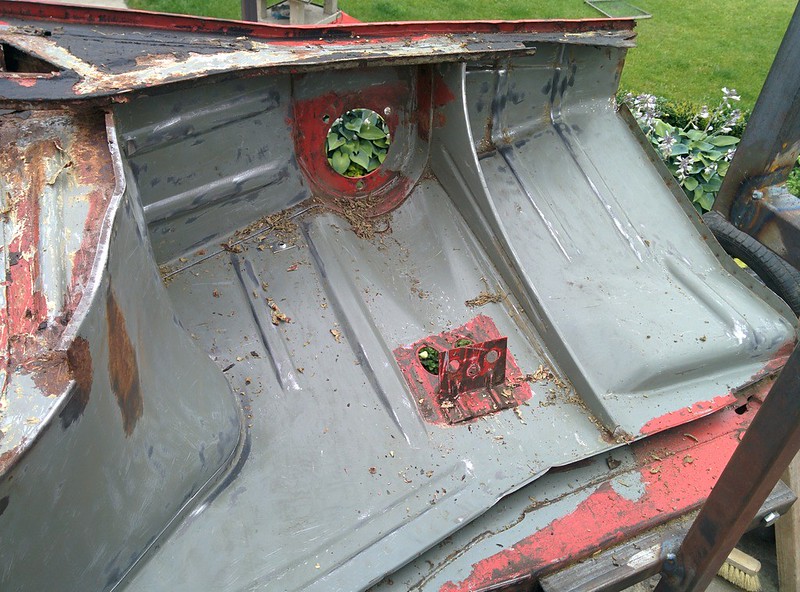
On Monday we cleaned the underside of the car (and got a pretty bad sunburn haha
 )
)The jig I welded up does come in handy with removing this stuff.
We did discover a small hole on the rear driver sides floorpan, but nothing bad. Otherwise some bits of surface rust.
Now you can see clearly how bad the previous owner repaired the drivers side floorpan and part of the inner sill.
A before shot:


After:


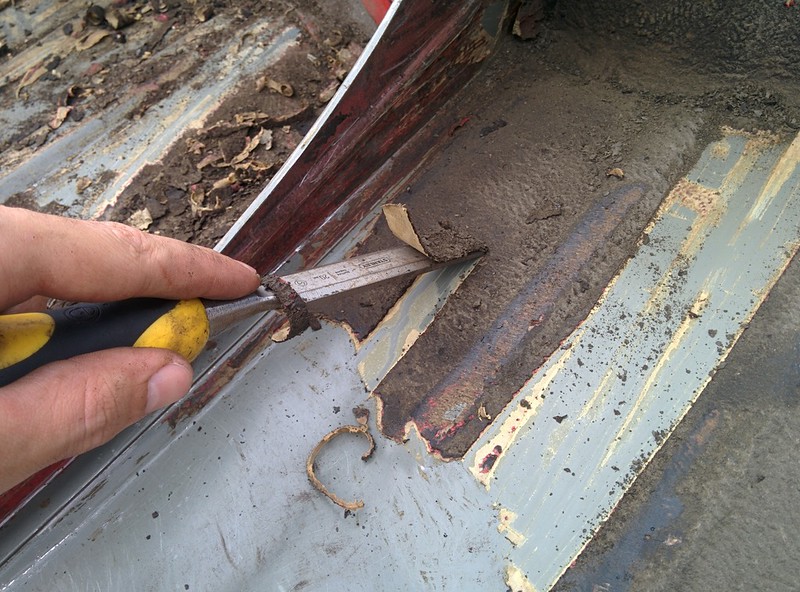
We tried cleaning it up with a bit of acetone since it was quite sticky, shouldn't be a problem when blasting though.
Tuesday we too hot 34�C so we did nothing to the car..
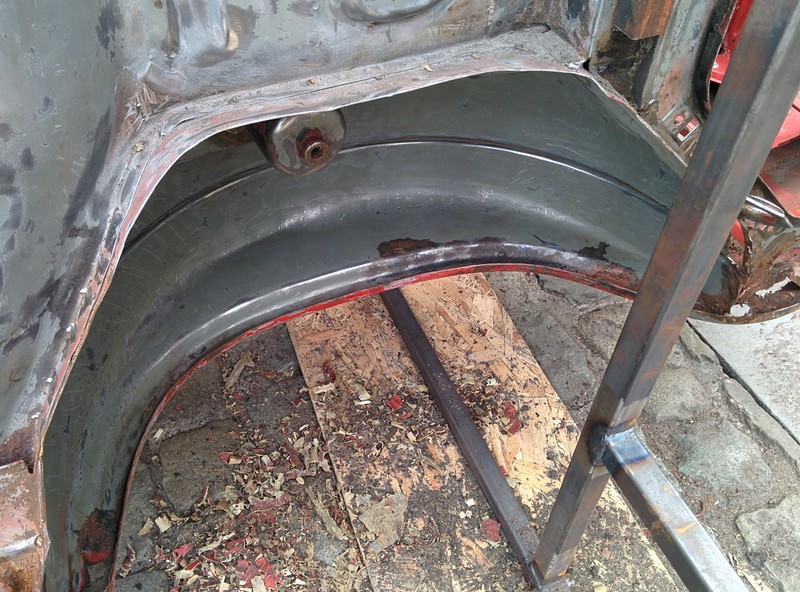
Today we stripped the undercoating inside the wheel wells. My brother did the rear wells, I did the front.
Not too bad to get this stuff off, looks like the same stuff that was used on the Golf Mk1.
You can remove quite nice strips on the flat spots, tight curves are a bit harder though, needs a bit more fiddling around.
After a few minutes you end up with something like this, a wire wheel on the angle grinder will take off all the remaining little bits.
I don't have a picture of the clear well so this will have to do for now
 Last edit: by D_Martijn

Old Timer

Went over the whole floor with a wire wheel. I think this will make the sandblasting much easier and faster since you only have to remove the remaining paint and not little bits of undercoating. I also experimented a bit with a little dent removal kit I bought a few weeks ago to remove a few little dents etc of some of the floor pans. Turned out pretty good if I say so myself.
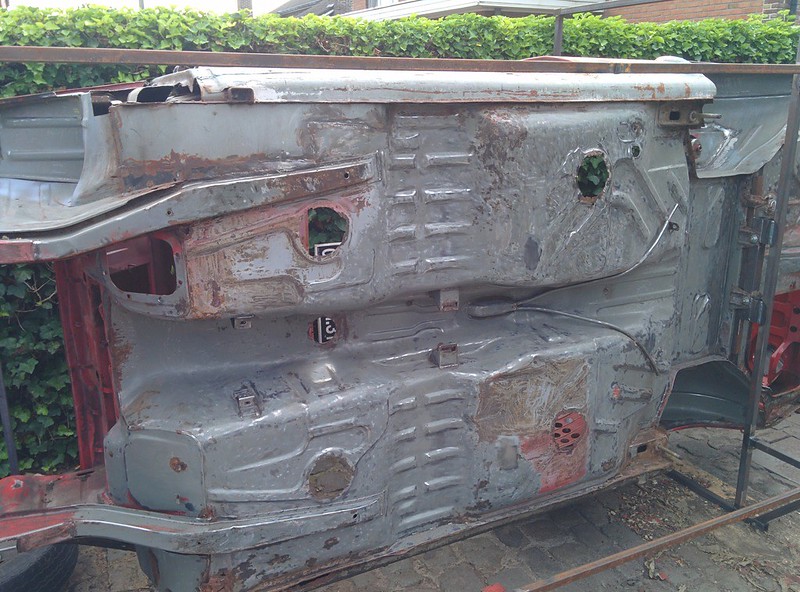

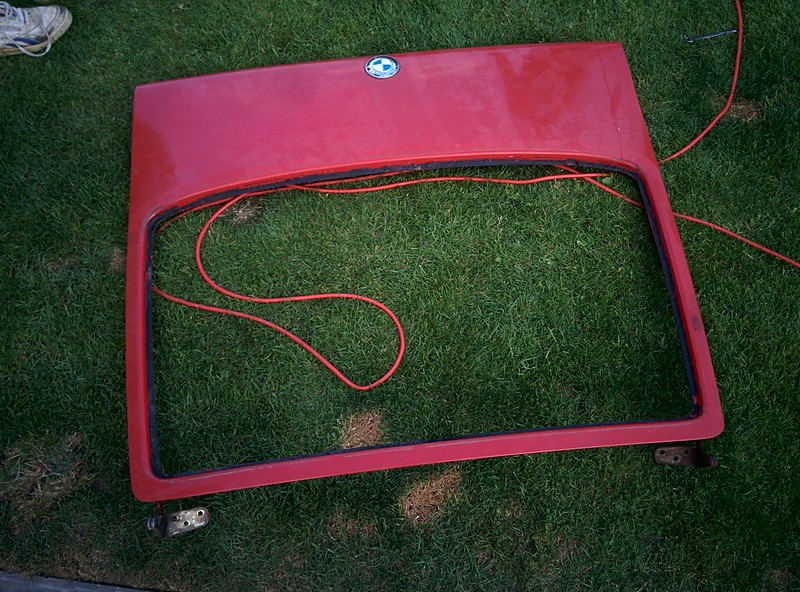
Last thing we did was removing the rear window out of the trunk lid.

We'll now brace and strengthen the shell with some square tubing, remove some of the panels that we'll replace anyways, this way the sandblaster can blast the underlaying panels.�
�
Last edit: by D_Martijn
Posted

Settled In

Mind boggling what you're achieving with what is a great car - or will be!
Michellotti styled??
Posted
Old Timer
RichieS said
Amazing!!!
Mind boggling what you're achieving with what is a great car - or will be!
Michellotti styled??
Thank you! I hope so

Yes, he was the designer of the 02, I think it might have been together with Wilhelm Hofmeister which designed the Neue Klasse. Not 100% sure
Posted
Settled In

Old Timer
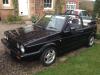
Saw this one at a local meet.

Posted
Old Timer
 watson
I like the color, although I not sure what's on the roof?
watson
I like the color, although I not sure what's on the roof? Yes, you don't really see them around that much.
_____
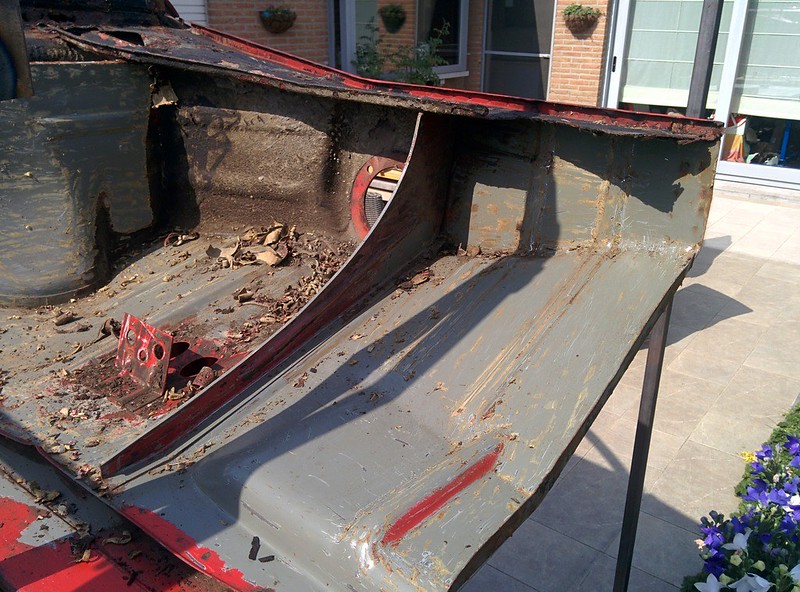
Weather hasn't been great this week, today we only have time to add some bracing bracing inside the shell , we'll probably add some more once we start replacing some of the panels.
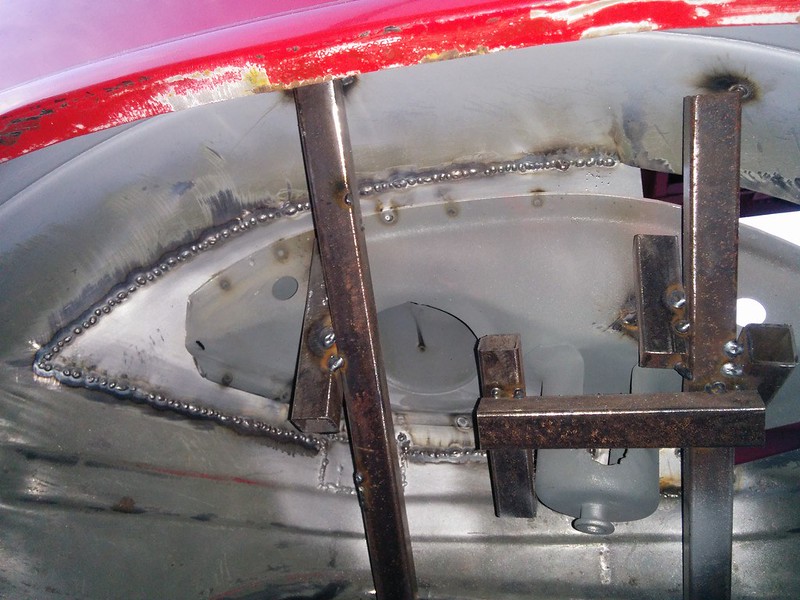
I also braced the rear shocktower so we can remove the rusted sheet metal plate on top.


Old Timer
 In the meantime we started with removing some of the rusted bits like the front side supports and the water scuttle.
We first started with drilling out all of the spot welds

Then we cutted the bottom section off so we had easier exces on the spot welds on top.
What rust hole? �


By tilting the car onto it's side it was pretty easy to remove all of these spot welds.
Other side also done

I though there would be much more rust behind these panels, good thing there isn't
we'll let the guy sandblast the inside of these bits too.After that was done, I started with removing the rain scuttle since the underside was too far gone and it would have been very hard to patch this up when it's attached to the car.
The middle of the scuttle is in the worst condition, both the upright piece and the bottum is rotted.
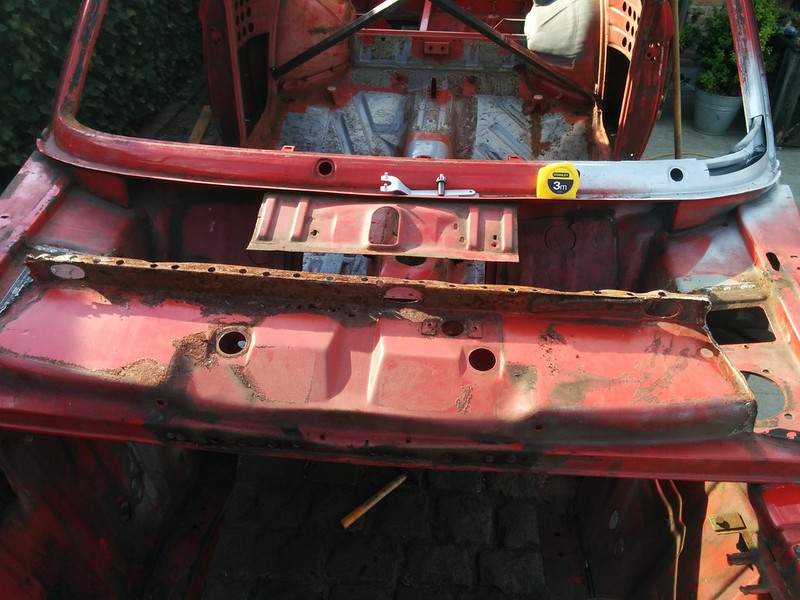

The firewall will also have to be patched a bit.
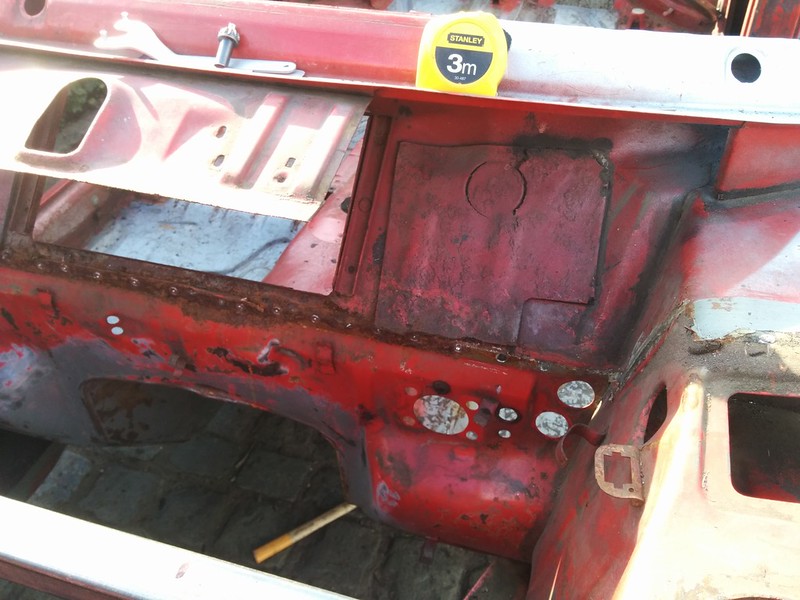
I did went over it with a wire wheel to remove some of the loose chunks of rust. I also removed the sound deadening on the firewall.
Last edit: by D_Martijn
Posted

Settled In
Keep up the good work.
76 ?
78 gls
83 gti 5v
78 gls
83 gti 5v
Posted
Old Timer
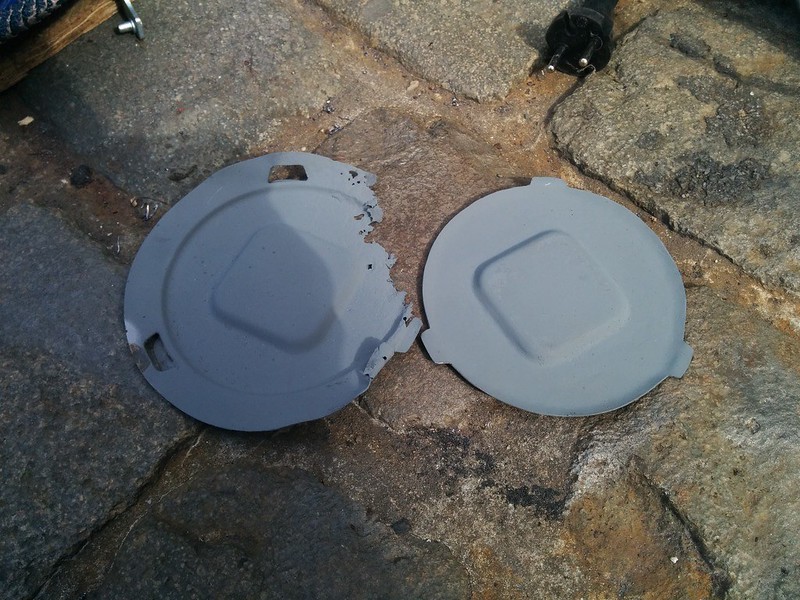
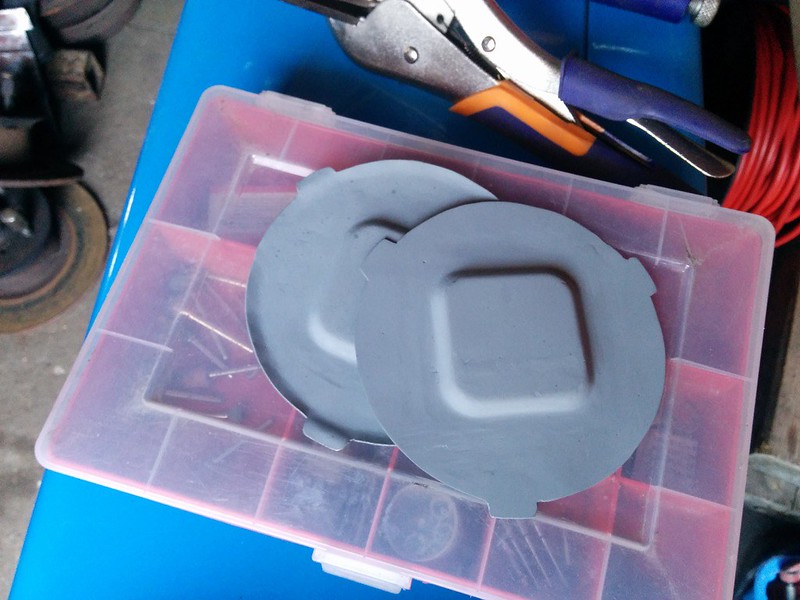
I needed to make 2 new ones since we'll replace 2 floorplates. I wanted to included the indentation to make it more "factory".
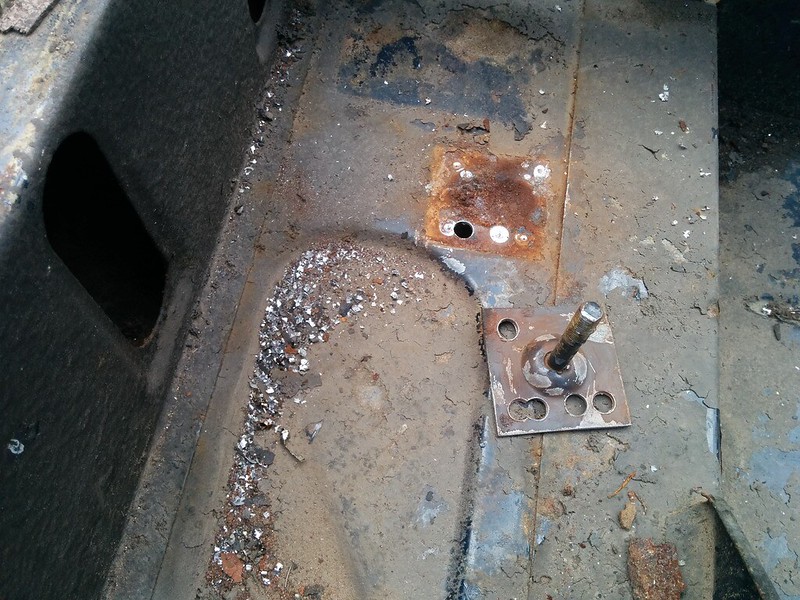
Old plug on the left, seen better days. New fabricated one on the right, turned out pretty good.

For the second one, I have to cut 2 plugs to make a good one.
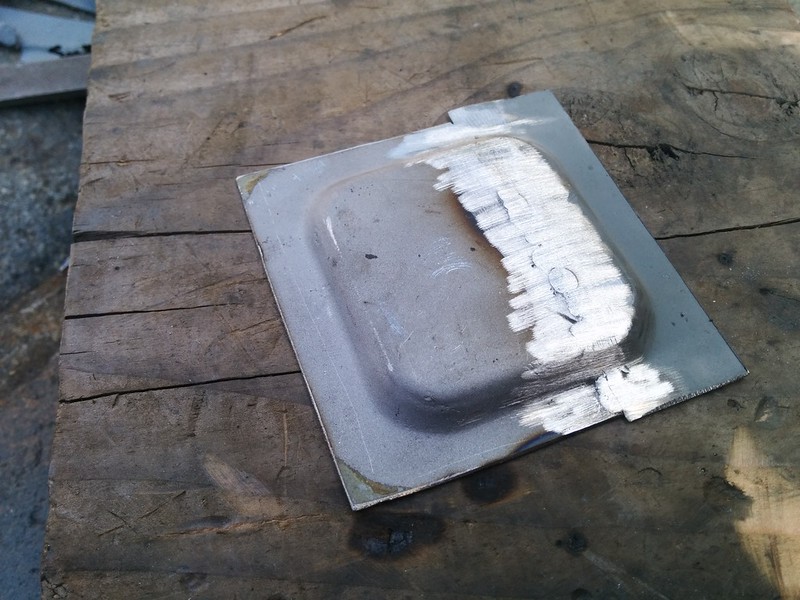
Hole cut, ready to tack weld
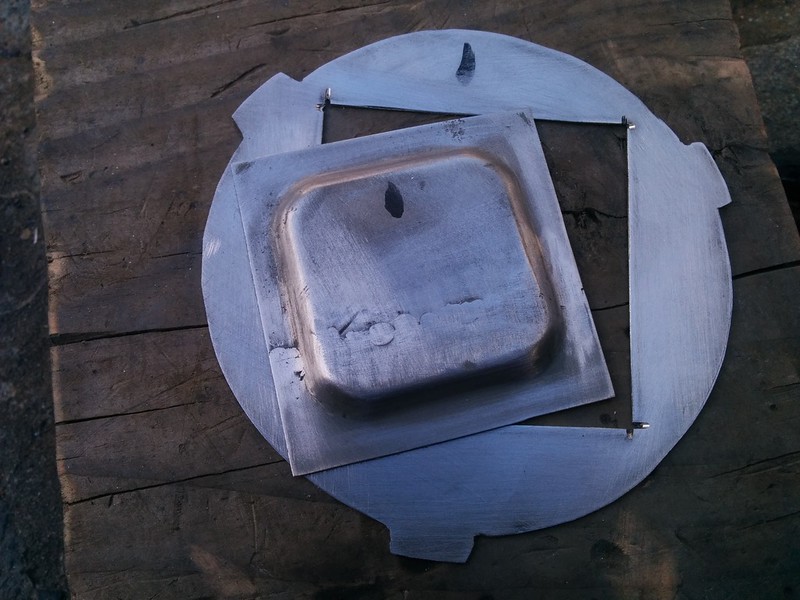
Finished plate
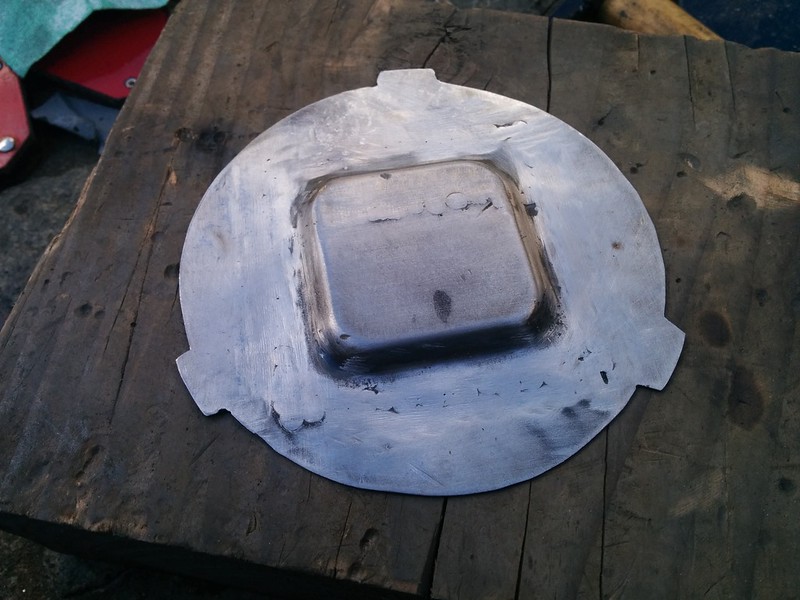
Both plates finished and coated in zinc primer.
I make a little flange on one of the plates because on the repair panel for the drivers side from WallothNesch the plug sits a little lower than on the repair panels for the rear.
Last edit: by D_Martijn

Local Hero


Andy
LINCOLNSHIRE REGION -�https://www.facebook.com/groups/467122313360002/
1983 MK1 Golf GTI Campaign Model - Under (looooong) resto!
1962 Rover P4 80
2002 BMW 745i
2008 BMW Z4 2.5Si
LINCOLNSHIRE REGION -�https://www.facebook.com/groups/467122313360002/
1983 MK1 Golf GTI Campaign Model - Under (looooong) resto!
1962 Rover P4 80
2002 BMW 745i
2008 BMW Z4 2.5Si
Posted

Old Timer
BMW 2002 Touring '74 Full restoration project

Sent from my iPhone using Tapatalk
Mars red 1.8 GTI tintop now MOT'd and on the road!
http://vwgolfmk1.org.uk/forum/index.php?page=topicview&id=projects%2Fyour-mk1-golfs_2%2Fwent-to-look-at-a-golf&kfs79=150
http://vwgolfmk1.org.uk/forum/index.php?page=topicview&id=projects%2Fyour-mk1-golfs_2%2Fwent-to-look-at-a-golf&kfs79=150
Old Timer
Old Timer
Everything is still nice and shiny, although we found some rust on the bottom of the door but compared to the door that were on our car these are in much better shape!
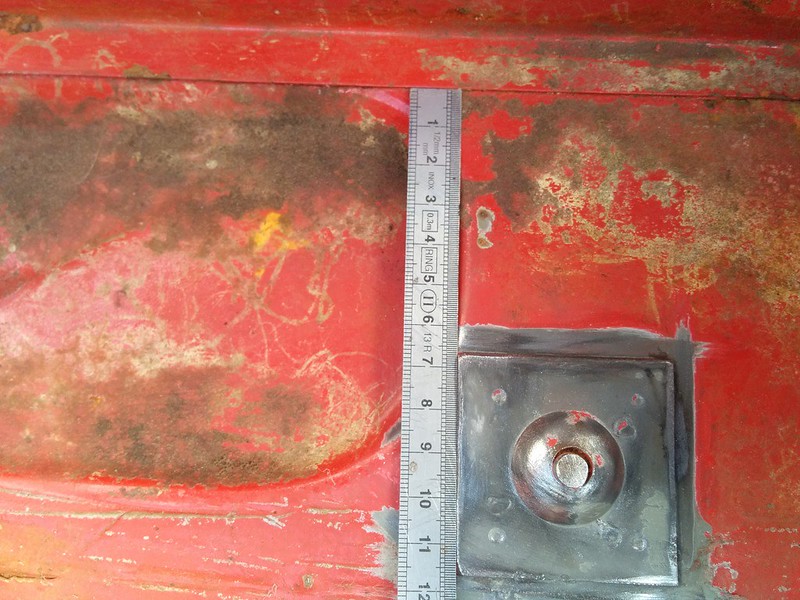
While he was busy, I removed the other bracket for the front fender, again first taking some measurements then removing the spot welds.
This went a lot better since there were a lot less spot welds compared to the other side and also we got a new spot weld cutter and drill.
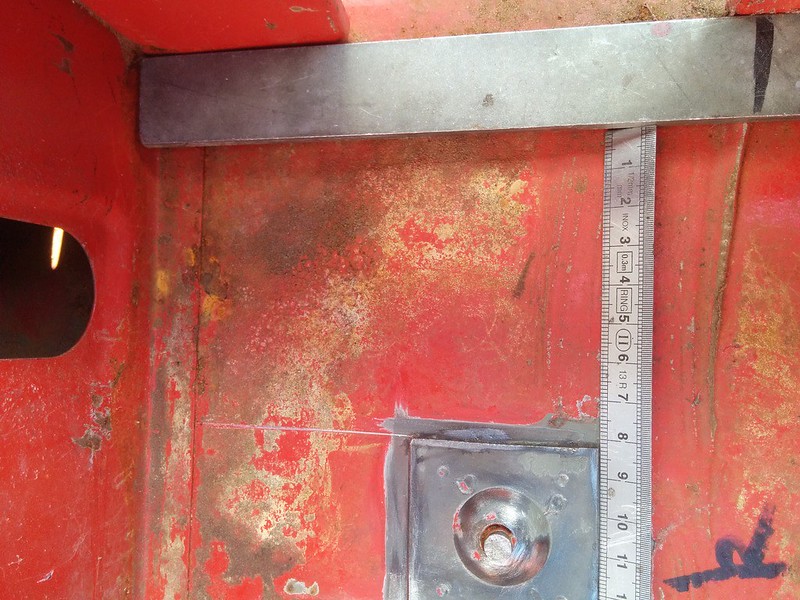
After this I removed the bracket for the jackstand in the boot from our donor shell. Measured and cut out the damaged one from our car.

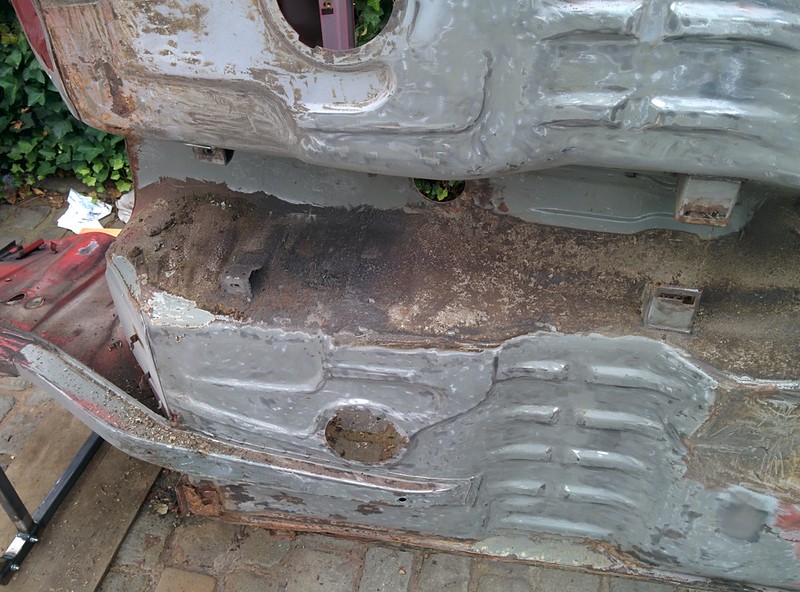
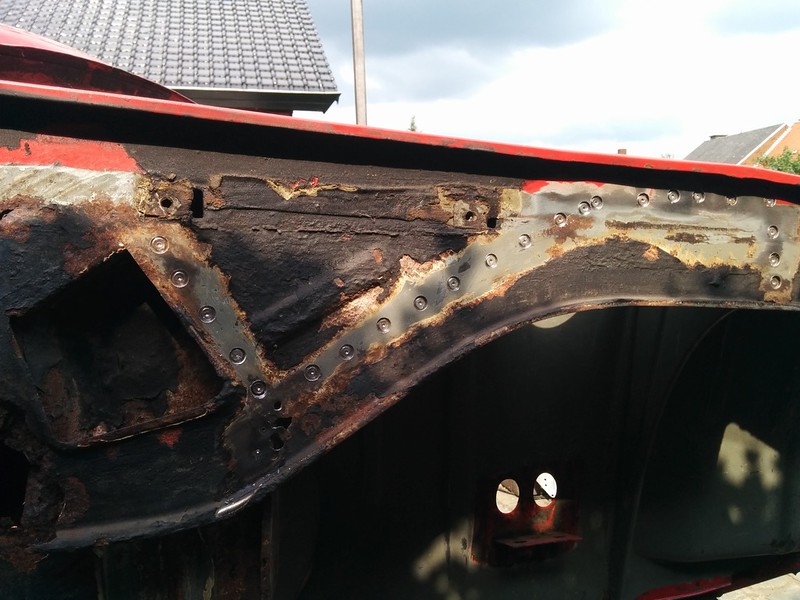
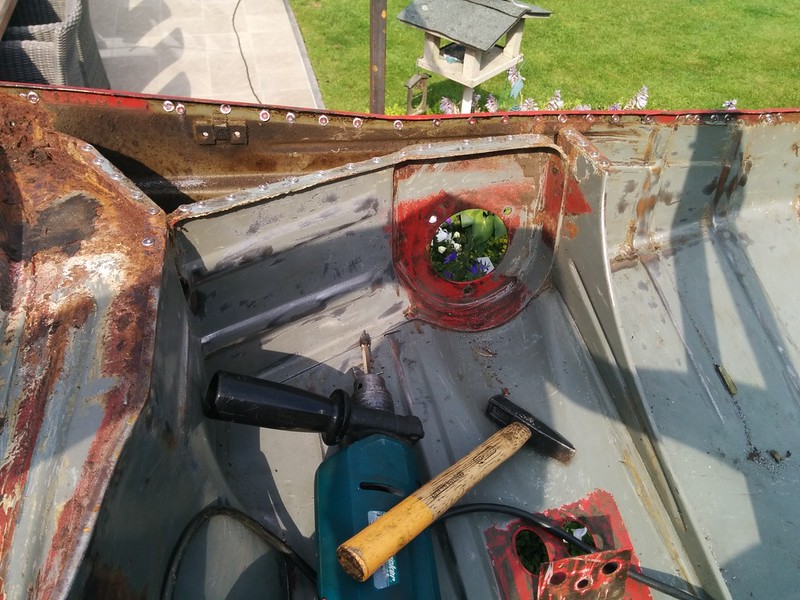
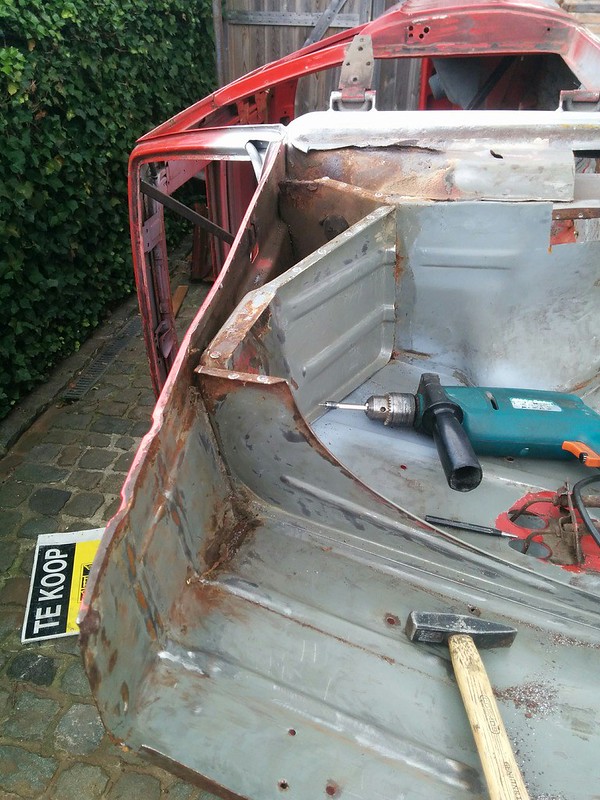
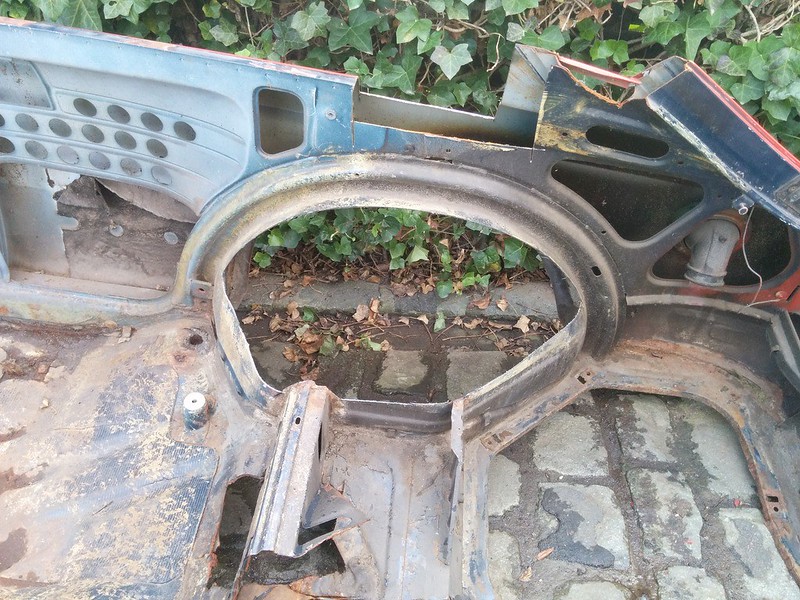
In preparation of sandblasting the car I got started with removing the outer sheet metal on the rear shock tower, so the inside can be sandblasted too
I first measured the location of the tower and then cut a little door in the upper sheet, didn't look too good so I removed the whole lot.
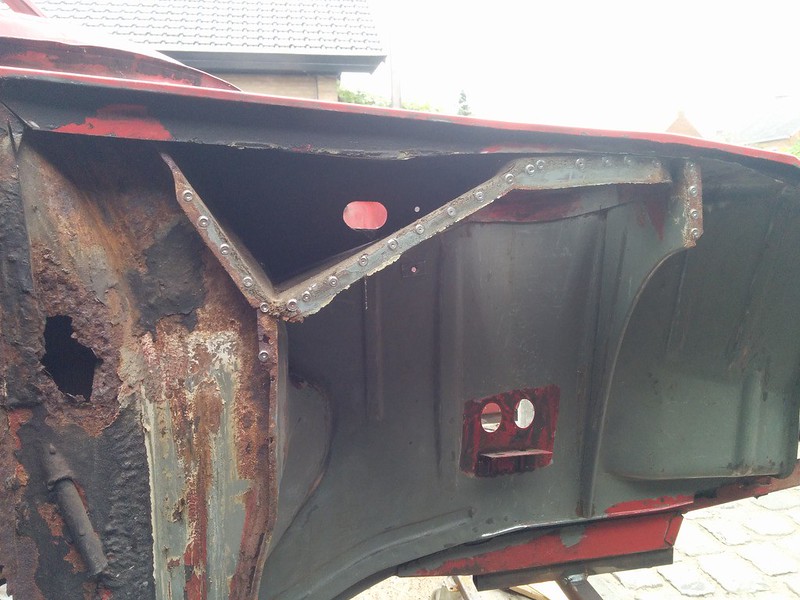
SURPRISE!!

This had to be cut out (obviously).
I first measured the whole lot again, it still was in the same place, looks like the jig works.
I do find it weird that the other side was in much better shape than this side..
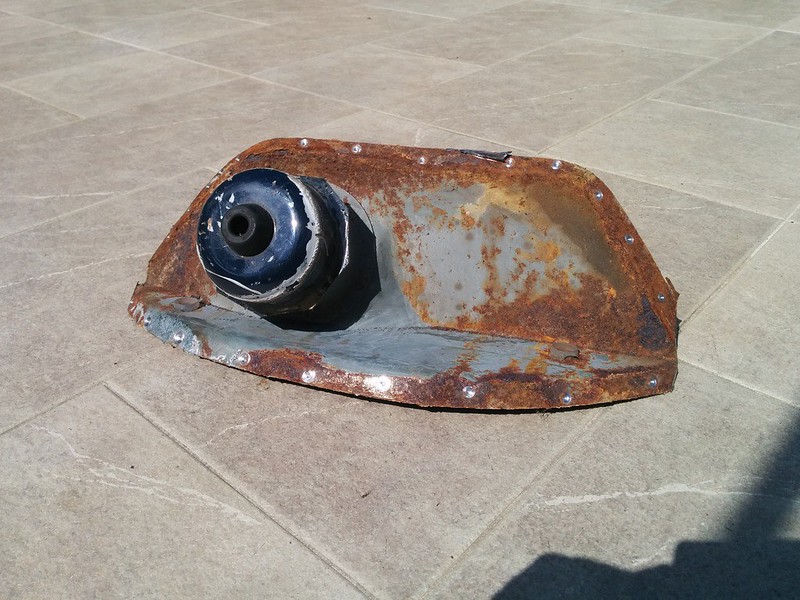
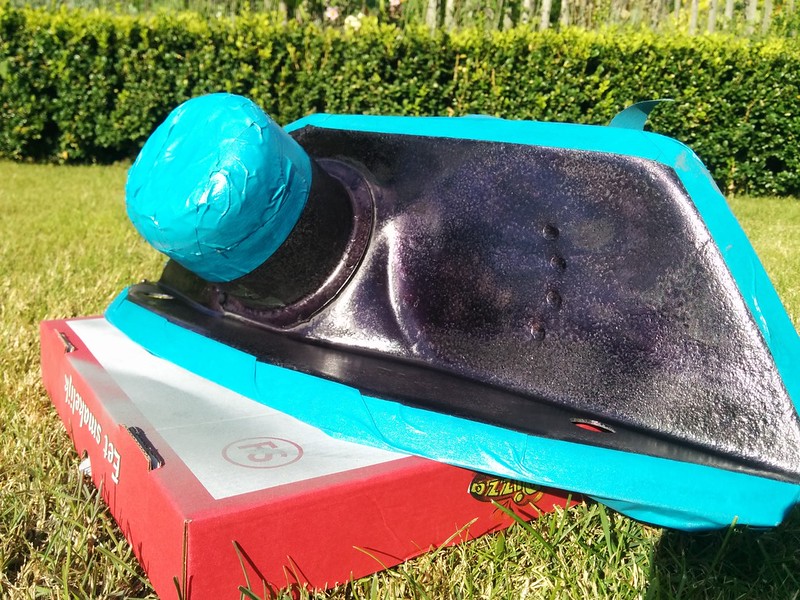
I removed the shock tower from our donor car and my brother sandblasted the whole thing.
We then sprayed a few coats of Brunox on the inside and finally a good coat of zinc primer.
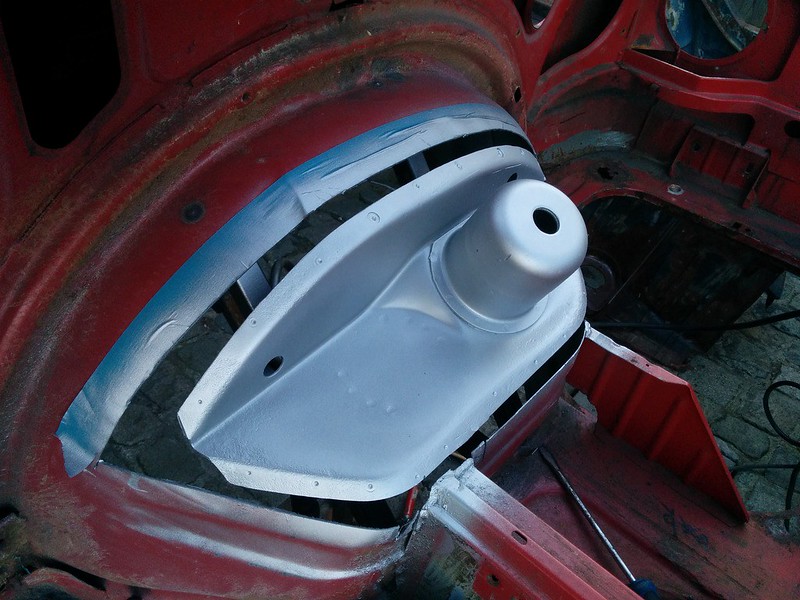
For fitting the inner piece we adjusted our jig so we could place and clamp the new piece in the same exact spot.
Some measuring, adjusting and more measuring and it's in the same place like the old one.�


We got started with replacing the upper sheet metal but had to stop since it got too late to make a lot of noise..
I'll continue fitting the replacement panel tomorrow.�
�
Last edit: by D_Martijn
Old Timer
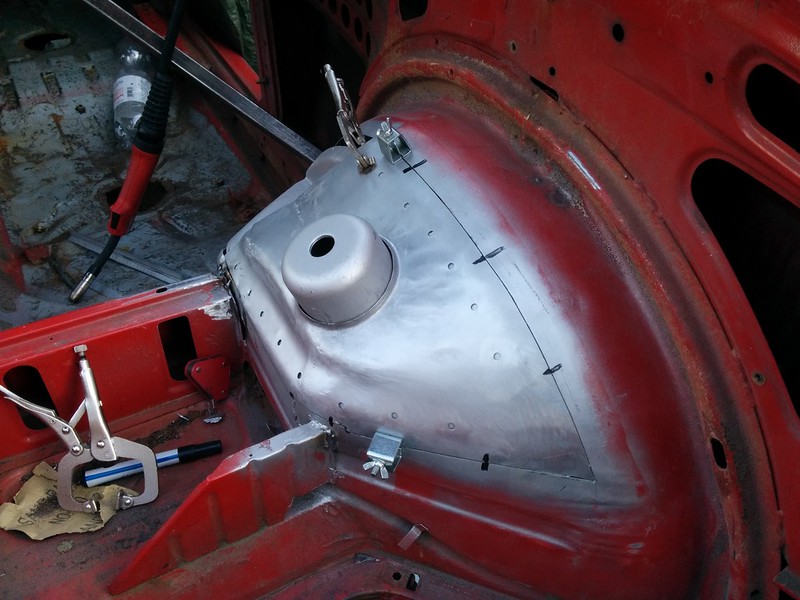
Today I got started with fitting the upper replacement panel for the rear shock tower.After cutting the rot out on the support pieces on the side of the tub and fitting some fresh metal, I fitted the replacement panel.
It was still a bit too big at this stage but overall it fitted pretty good.

I scribed a line from underneath and cutted the exes off.
Getting closer on the fitment.
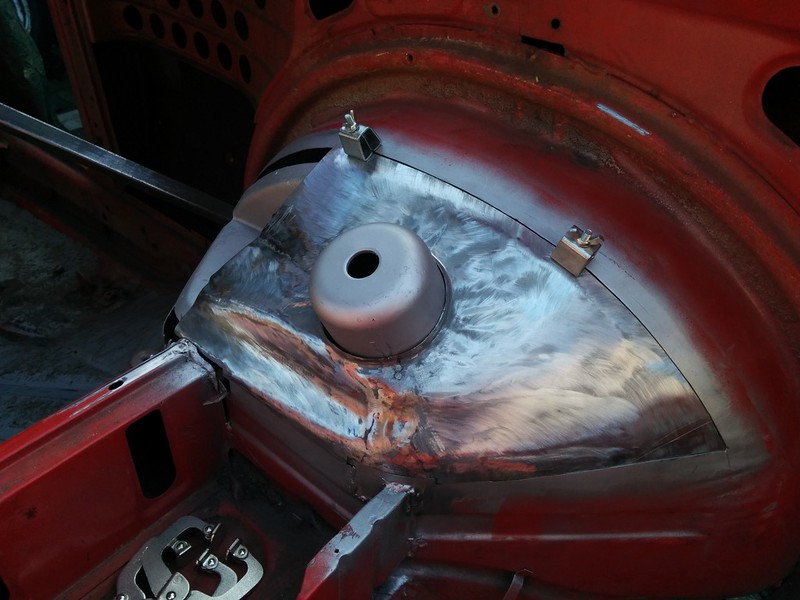
After much adjusting and fiddeling I was pretty happy with the placement, scribed an other line agains the inner piece so I could drill some holes for plug welds.

After that I got started with the tack welding, making sure jumping from place to place and checking the measurements several times.
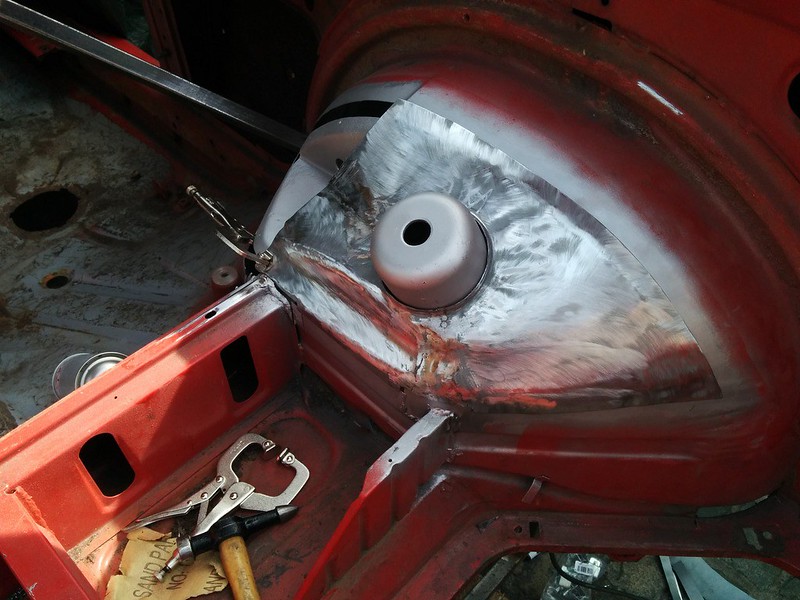
When I was done I cleaned up the welds with a brass brush and finally gave it a coat of zinc primer.

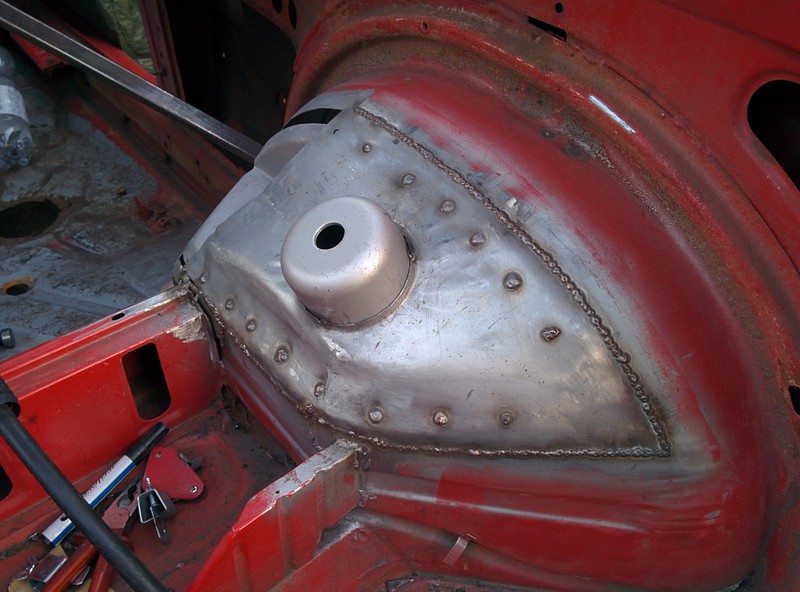
Good wled�penetration on the backside of the tub.

As it was too late to start grinding the welds down, I cleaned everything up.
Tomorrow I'll further weld the remaining bits of the tub (towards the front) I'll have to get creative and form some sheet metal myself�
Last edit: by D_Martijn
Posted
Old Timer
�You two should become the founders and owners of a professional historic vehicle company as its evident that nothing is beyond your capabilities…fantastic stuff…
Posted
Local Hero
Andy
LINCOLNSHIRE REGION -�https://www.facebook.com/groups/467122313360002/
1983 MK1 Golf GTI Campaign Model - Under (looooong) resto!
1962 Rover P4 80
2002 BMW 745i
2008 BMW Z4 2.5Si
LINCOLNSHIRE REGION -�https://www.facebook.com/groups/467122313360002/
1983 MK1 Golf GTI Campaign Model - Under (looooong) resto!
1962 Rover P4 80
2002 BMW 745i
2008 BMW Z4 2.5Si
Posted

Old Timer
i pressed the little red button
Old Timer
0 guests and 0 members have just viewed this: None.