Saulty's 1983 Tintop 1.8GTI
Posted
Old Timer


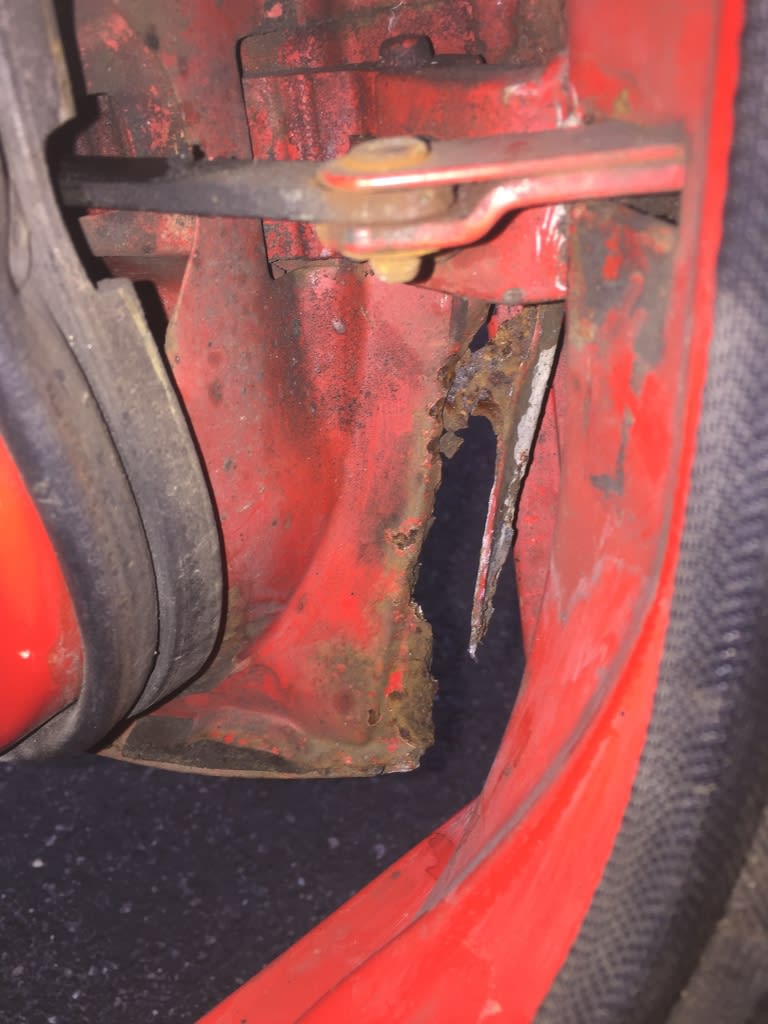
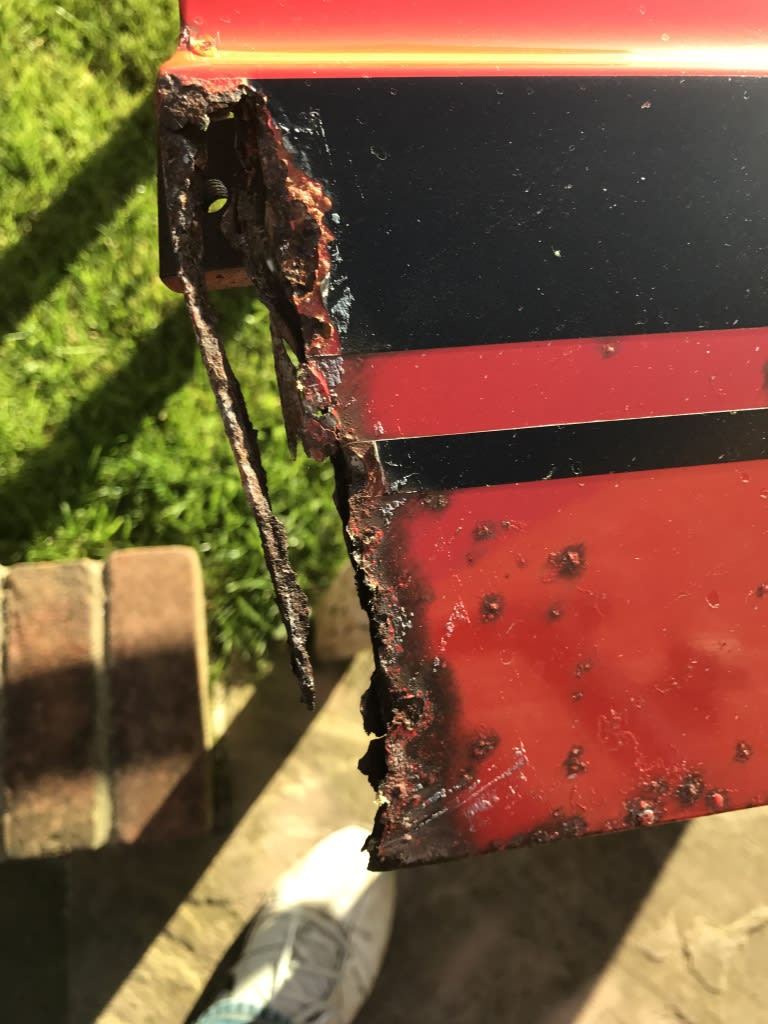
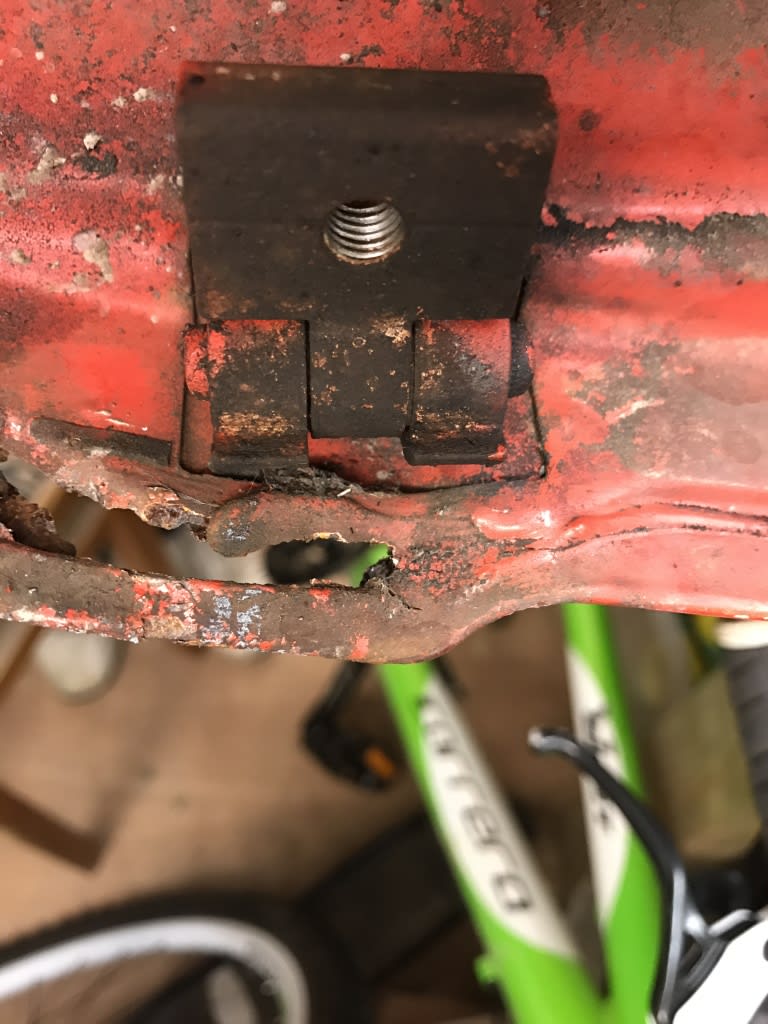
Mars red 1.8 GTI tintop now MOT'd and on the road!
http://vwgolfmk1.org.uk/forum/index.php?page=topicview&id=projects%2Fyour-mk1-golfs_2%2Fwent-to-look-at-a-golf&kfs79=150
http://vwgolfmk1.org.uk/forum/index.php?page=topicview&id=projects%2Fyour-mk1-golfs_2%2Fwent-to-look-at-a-golf&kfs79=150
Posted
Old Timer


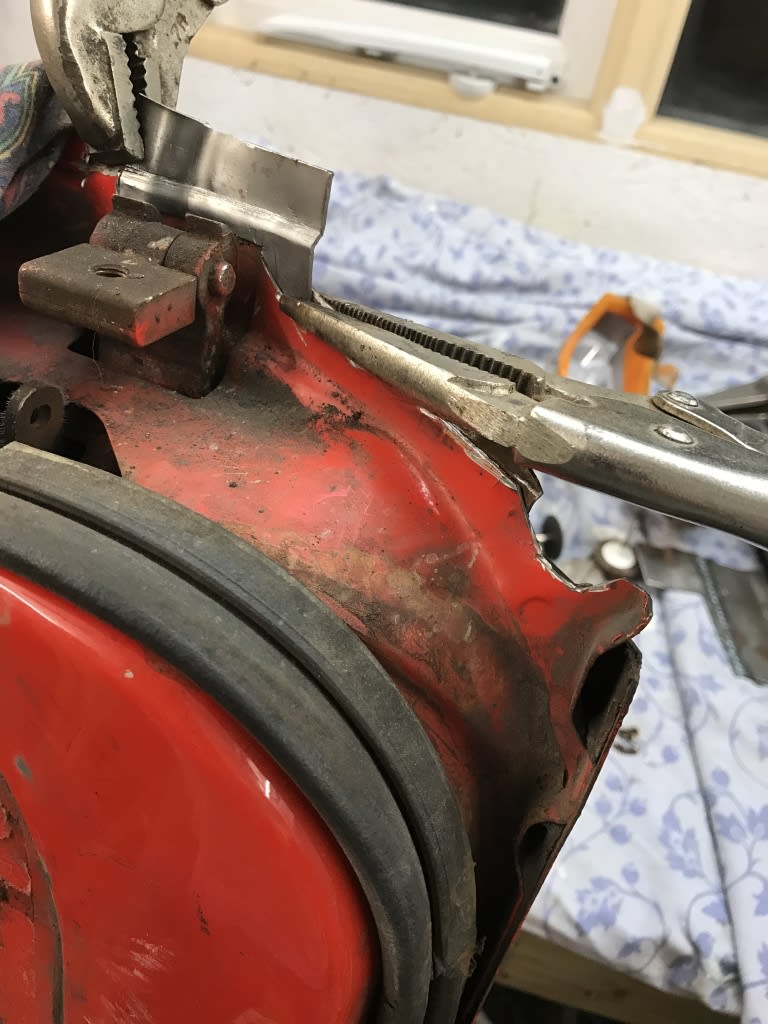
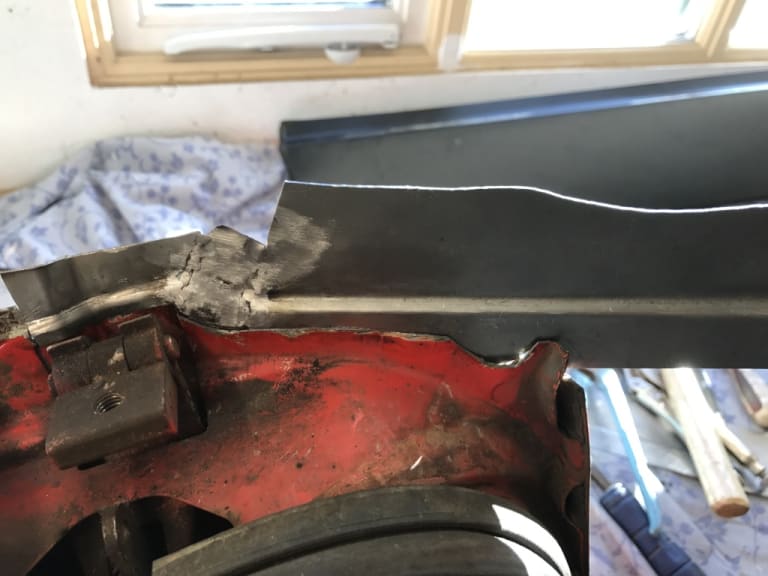
Once I had got the angles correct and welded I ground down the welds with a dremel and then cut it to shape so that I could but weld it to the existing skin and then zinc primed it
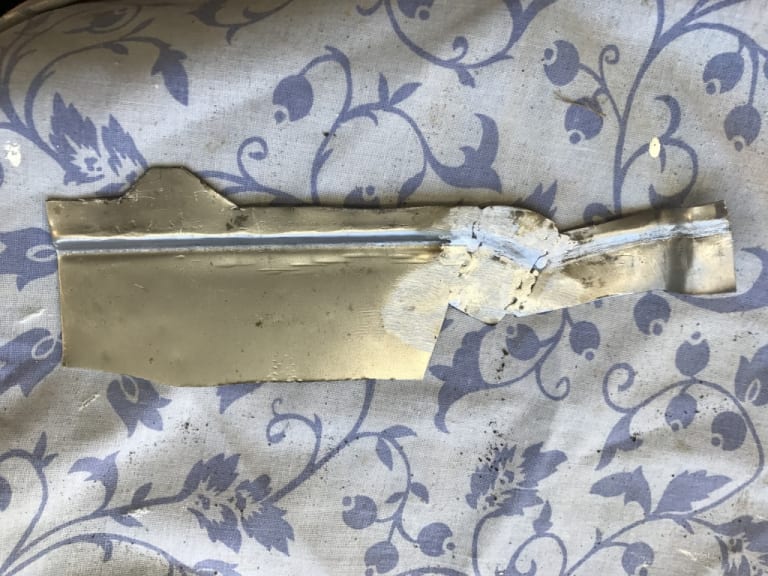
I then welded the new section to the existing skin and ground down the welds with the dremel. That took some time as well.
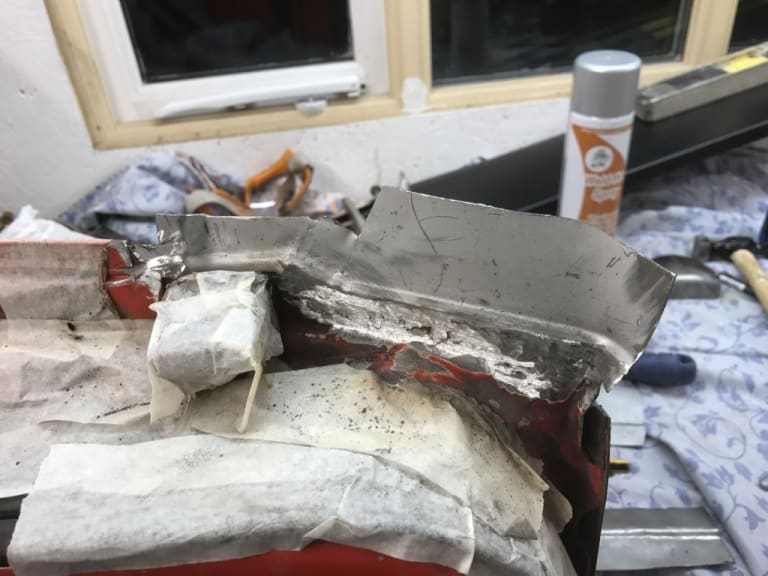
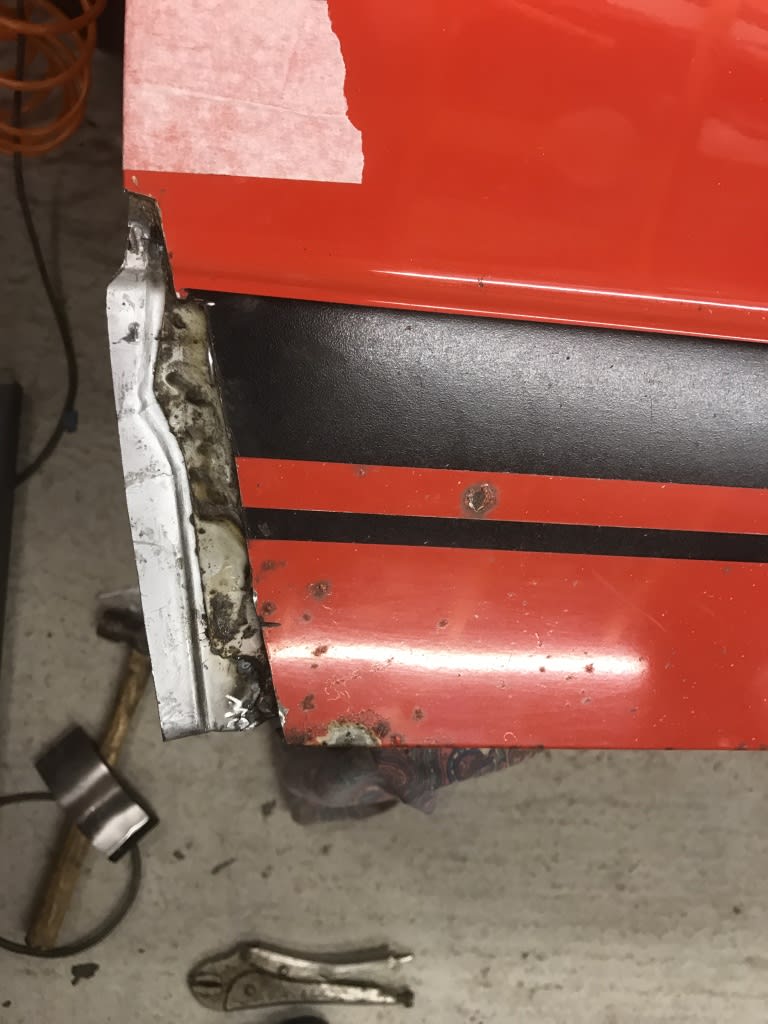
I then cut the new section to shape, I made a mistake here by cutting it in a straight line rather than to the line curved line of the doors original shape, this became obvious later when I folded the outer skin around the inner.
Mars red 1.8 GTI tintop now MOT'd and on the road!
http://vwgolfmk1.org.uk/forum/index.php?page=topicview&id=projects%2Fyour-mk1-golfs_2%2Fwent-to-look-at-a-golf&kfs79=150
http://vwgolfmk1.org.uk/forum/index.php?page=topicview&id=projects%2Fyour-mk1-golfs_2%2Fwent-to-look-at-a-golf&kfs79=150
Posted
Old Timer


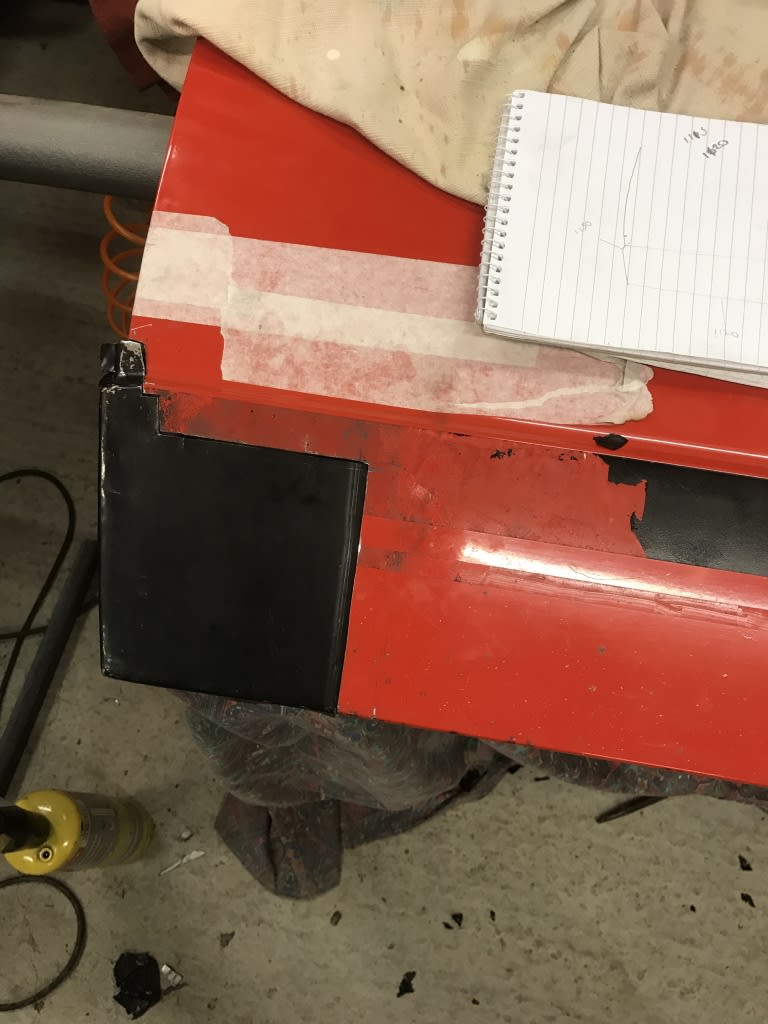
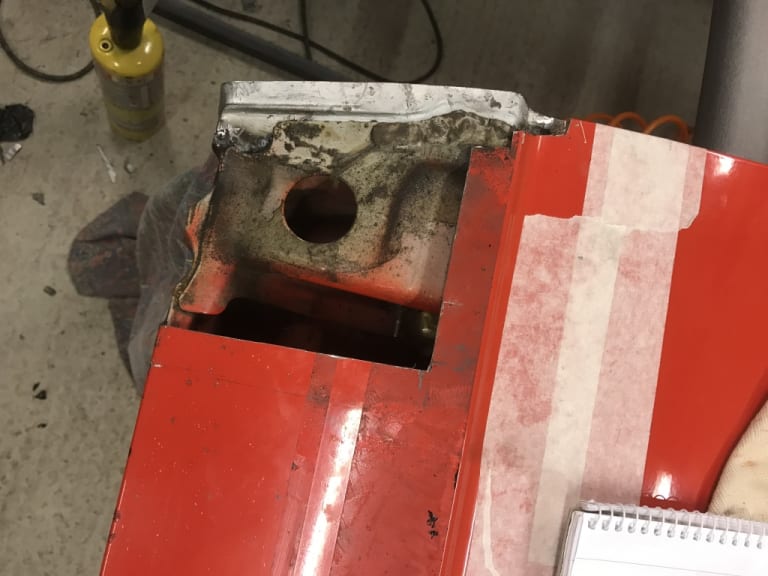
Once I had welded the new section I folded it around the inner skin on the leading edge and put a generous amount of sealer in there and then ground down the welds.
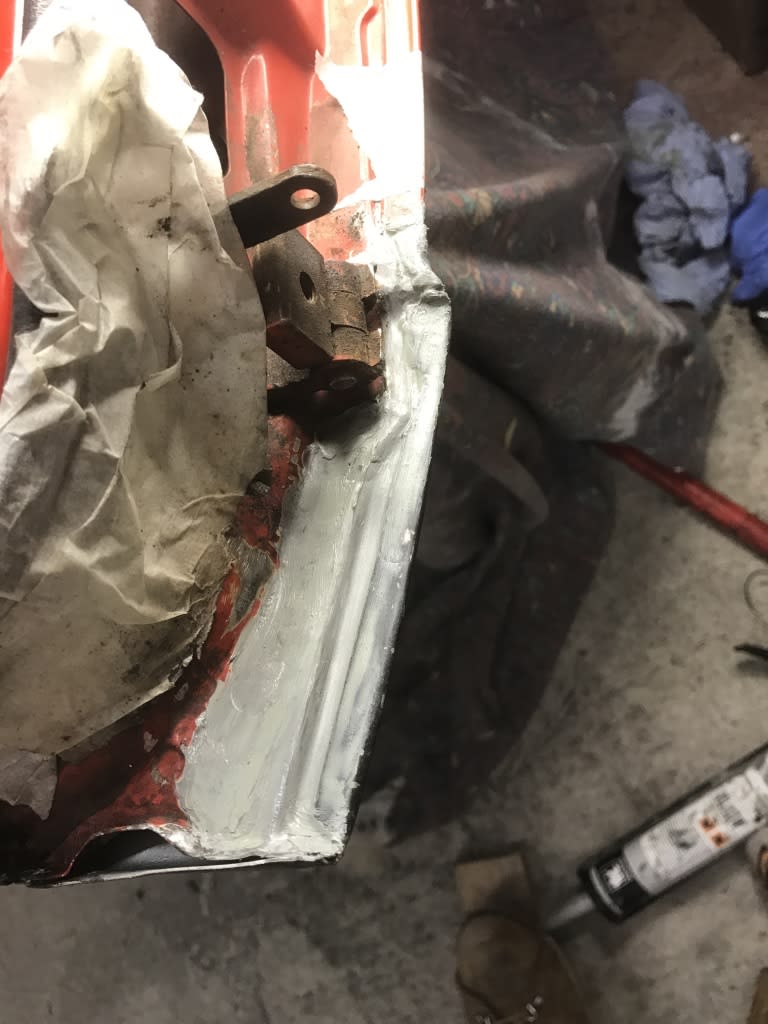
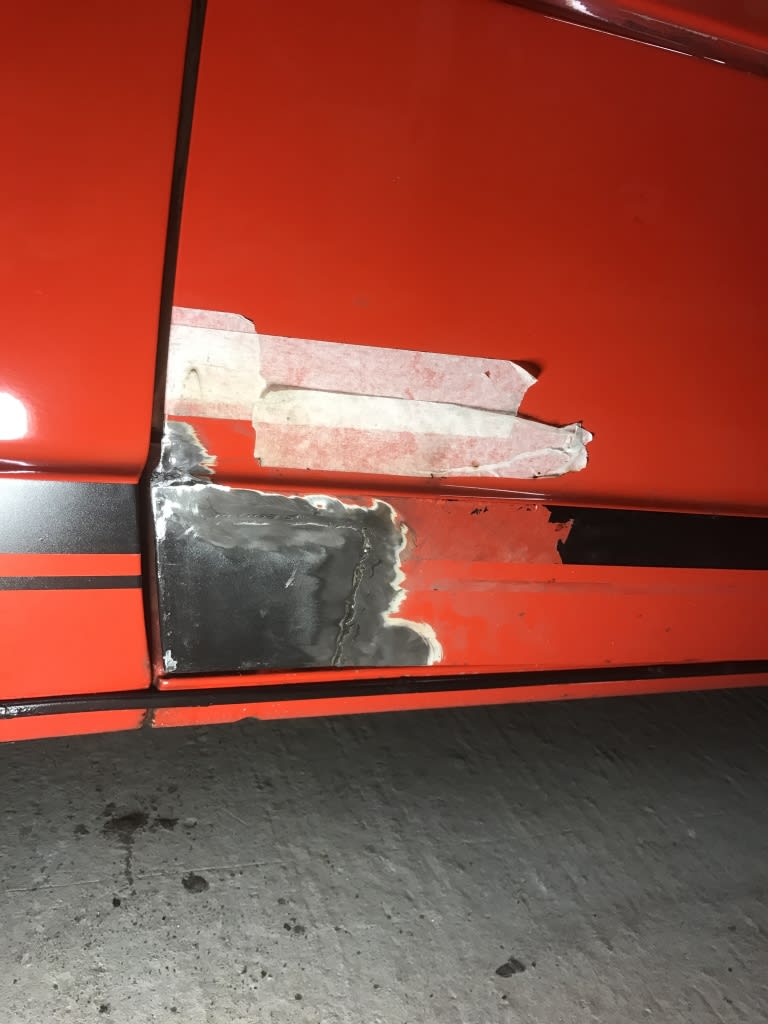
Then I removed the old stripes and paint all along the door bottom and filled ready for paint! I seem to have been slack on the photos when filling as I don't have any. I also hate it and I'm not that confident in doing it.
Then came the rattle can spray job!
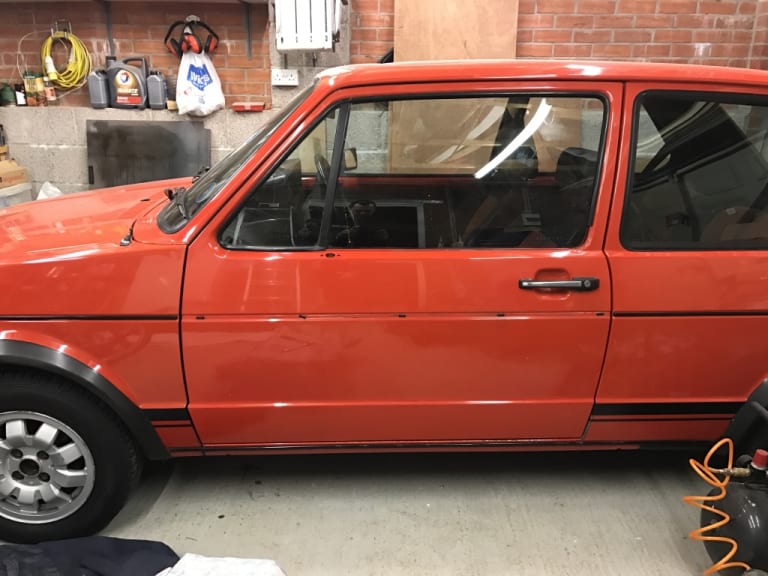
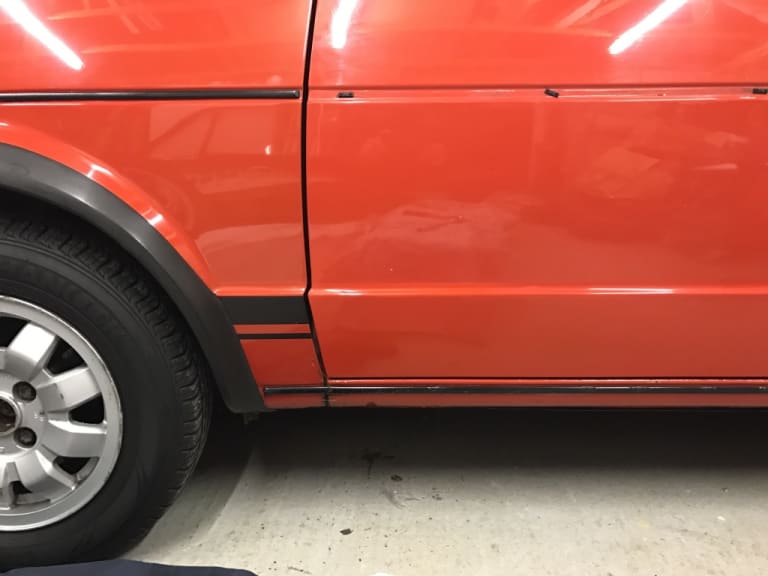
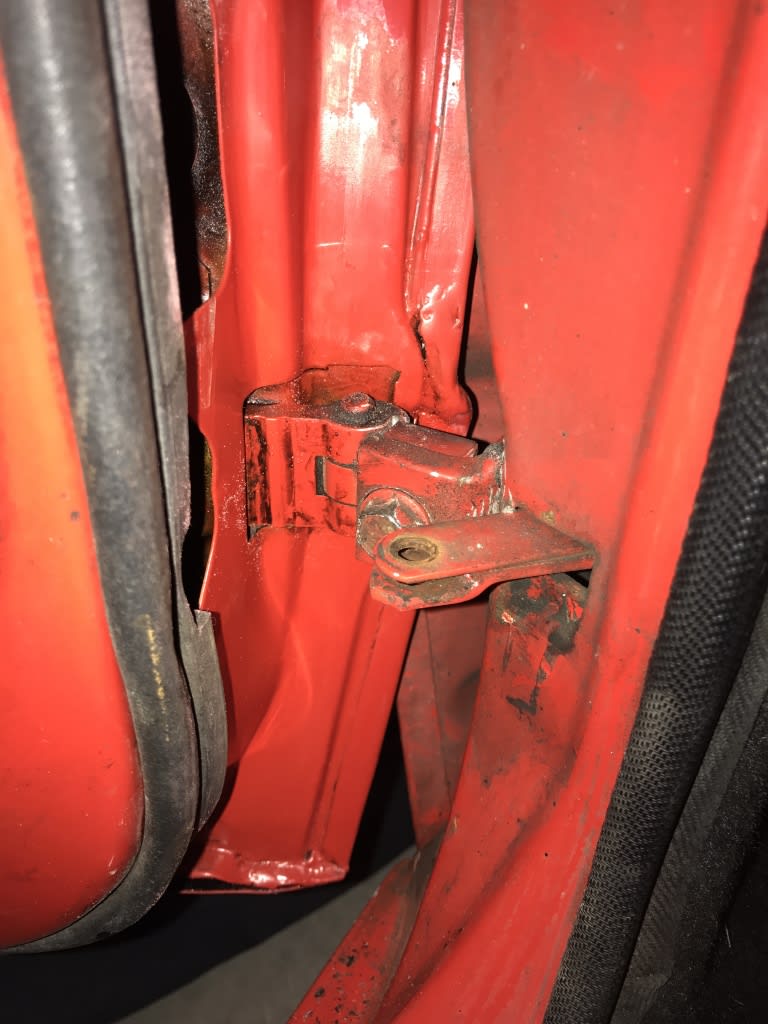
All in all I am quite pleased with it. The line of the leading edge is too straight and the rattle can spray job is not the best but hopefully it will hold out and look good once I have the stripes on! I also gave it a very generous amount of cavity wax to help protect it from the inside!
Mars red 1.8 GTI tintop now MOT'd and on the road!
http://vwgolfmk1.org.uk/forum/index.php?page=topicview&id=projects%2Fyour-mk1-golfs_2%2Fwent-to-look-at-a-golf&kfs79=150
http://vwgolfmk1.org.uk/forum/index.php?page=topicview&id=projects%2Fyour-mk1-golfs_2%2Fwent-to-look-at-a-golf&kfs79=150
Posted
Local Hero

1988 Mk1 Golf GTi Cabriolet 1.8cc DX, K-jet. Daily drive. 317,000 miles and counting
1978 Mk1 Scirocco GLS 1.6cc FR, Webber carb. Weekend toy.
1978 Mk1 Scirocco GLS 1.6cc FR, Webber carb. Weekend toy.
Posted
Settling In

Saulty's 1983 Tintop 1.8GTI
Sent from my iPhone using Tapatalk
Posted
Settled In

Well impressed!! What filler did you go for in the end and did you get a long sanding block?
Posted
Local Hero


Saulty's 1983 Tintop 1.8GTI

Sent from my iPhone using Tapatalk
Andy
LINCOLNSHIRE REGION - https://www.facebook.com/groups/467122313360002/
1983 MK1 Golf GTI Campaign Model - Under (looooong) resto!
1962 Rover P4 80
2002 BMW 745i
2008 BMW Z4 2.5Si
LINCOLNSHIRE REGION - https://www.facebook.com/groups/467122313360002/
1983 MK1 Golf GTI Campaign Model - Under (looooong) resto!
1962 Rover P4 80
2002 BMW 745i
2008 BMW Z4 2.5Si
Posted
Old Timer


Onto the drivers door next!
Mars red 1.8 GTI tintop now MOT'd and on the road!
http://vwgolfmk1.org.uk/forum/index.php?page=topicview&id=projects%2Fyour-mk1-golfs_2%2Fwent-to-look-at-a-golf&kfs79=150
http://vwgolfmk1.org.uk/forum/index.php?page=topicview&id=projects%2Fyour-mk1-golfs_2%2Fwent-to-look-at-a-golf&kfs79=150
Posted
Settled In

Posted
Old Timer


Mars red 1.8 GTI tintop now MOT'd and on the road!
http://vwgolfmk1.org.uk/forum/index.php?page=topicview&id=projects%2Fyour-mk1-golfs_2%2Fwent-to-look-at-a-golf&kfs79=150
http://vwgolfmk1.org.uk/forum/index.php?page=topicview&id=projects%2Fyour-mk1-golfs_2%2Fwent-to-look-at-a-golf&kfs79=150
Posted
Old Timer
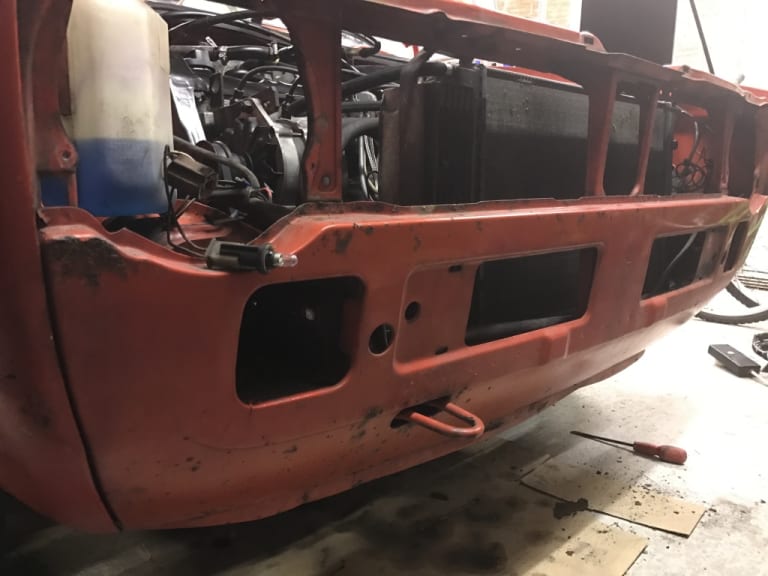
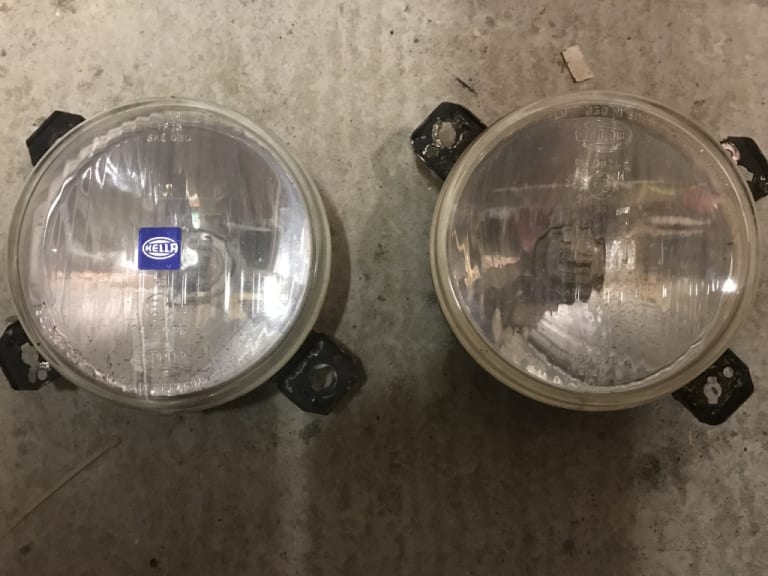
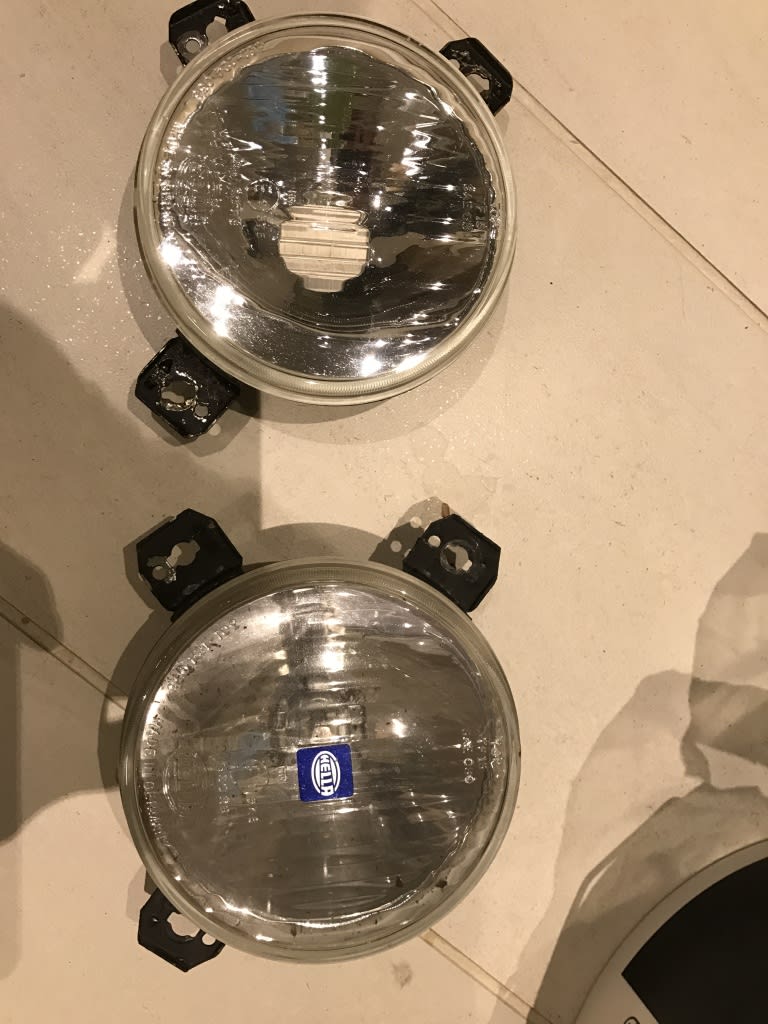
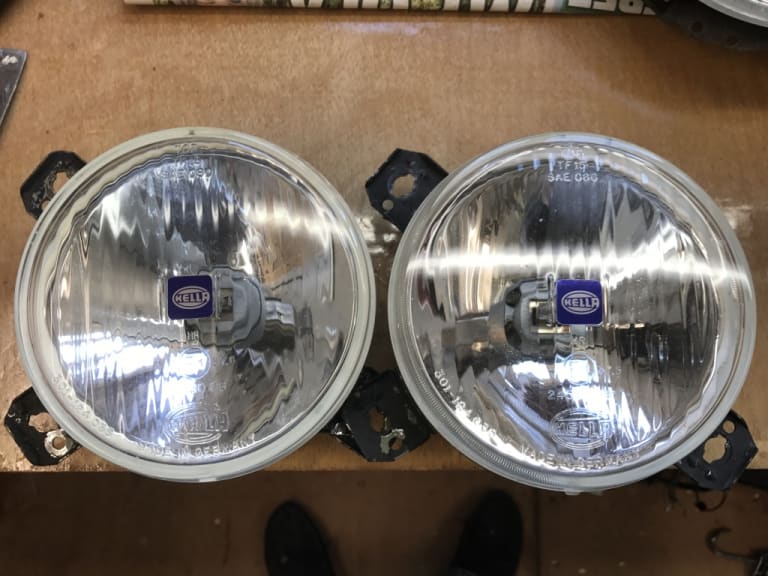
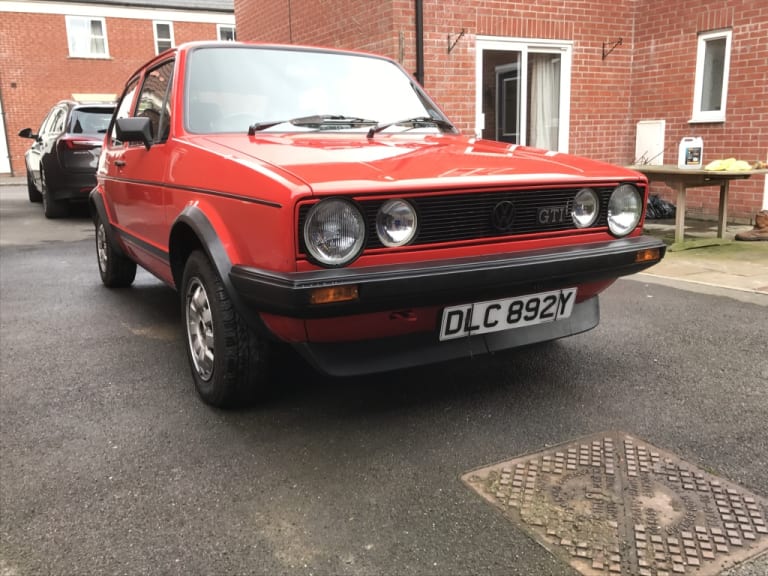


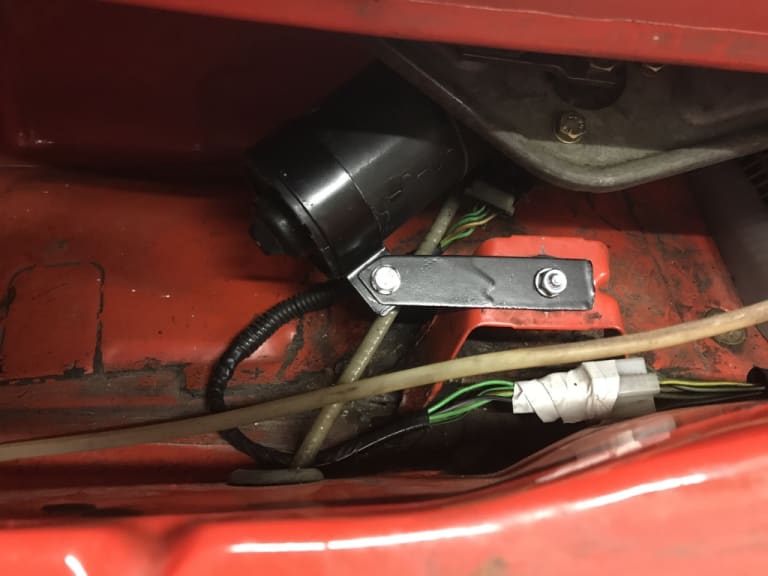
Here's a pic!
Mars red 1.8 GTI tintop now MOT'd and on the road!
http://vwgolfmk1.org.uk/forum/index.php?page=topicview&id=projects%2Fyour-mk1-golfs_2%2Fwent-to-look-at-a-golf&kfs79=150
http://vwgolfmk1.org.uk/forum/index.php?page=topicview&id=projects%2Fyour-mk1-golfs_2%2Fwent-to-look-at-a-golf&kfs79=150
Posted
Local Hero


Andy
LINCOLNSHIRE REGION - https://www.facebook.com/groups/467122313360002/
1983 MK1 Golf GTI Campaign Model - Under (looooong) resto!
1962 Rover P4 80
2002 BMW 745i
2008 BMW Z4 2.5Si
LINCOLNSHIRE REGION - https://www.facebook.com/groups/467122313360002/
1983 MK1 Golf GTI Campaign Model - Under (looooong) resto!
1962 Rover P4 80
2002 BMW 745i
2008 BMW Z4 2.5Si
Posted
Old Timer


Hairyarse said
Tidy job. I agree that you want the bracket there. Having the scuttle flexing due to the motor can't be a good thing
Thanks Andy, i know others have left out the bracket but there was quite a bit of movement and I just wouldn't have been happy driving it too far with the motor swinging about on it's mountings.
Going to attempt a few more pics in a minute!
Mars red 1.8 GTI tintop now MOT'd and on the road!
http://vwgolfmk1.org.uk/forum/index.php?page=topicview&id=projects%2Fyour-mk1-golfs_2%2Fwent-to-look-at-a-golf&kfs79=150
http://vwgolfmk1.org.uk/forum/index.php?page=topicview&id=projects%2Fyour-mk1-golfs_2%2Fwent-to-look-at-a-golf&kfs79=150
Posted
Old Timer


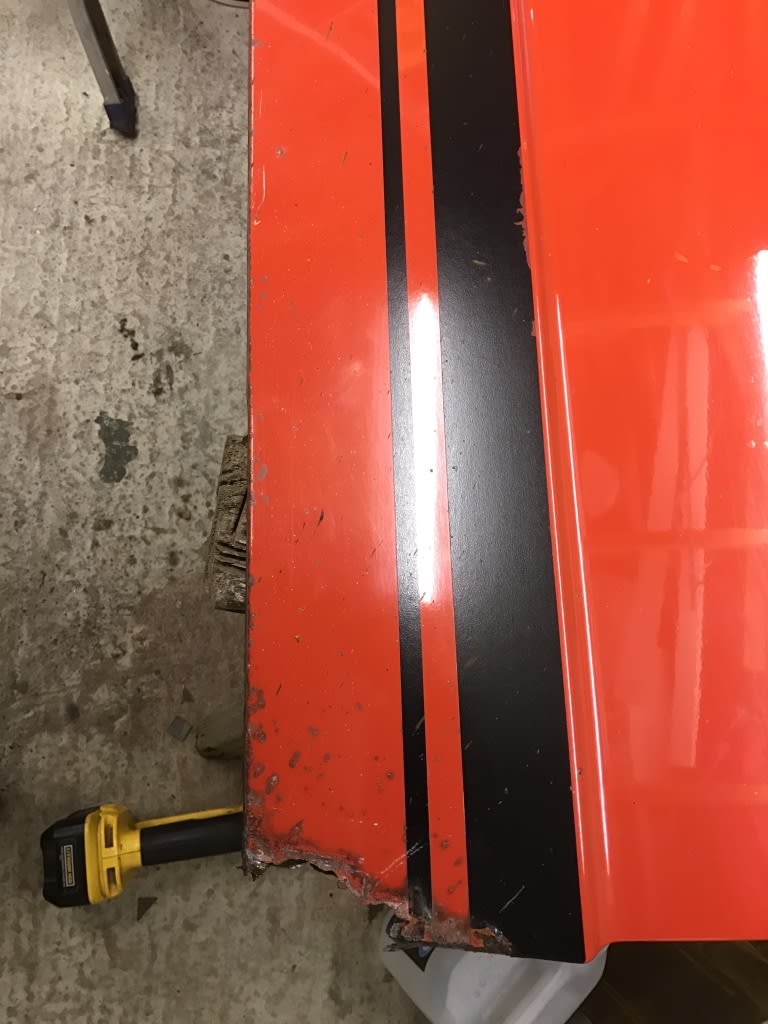
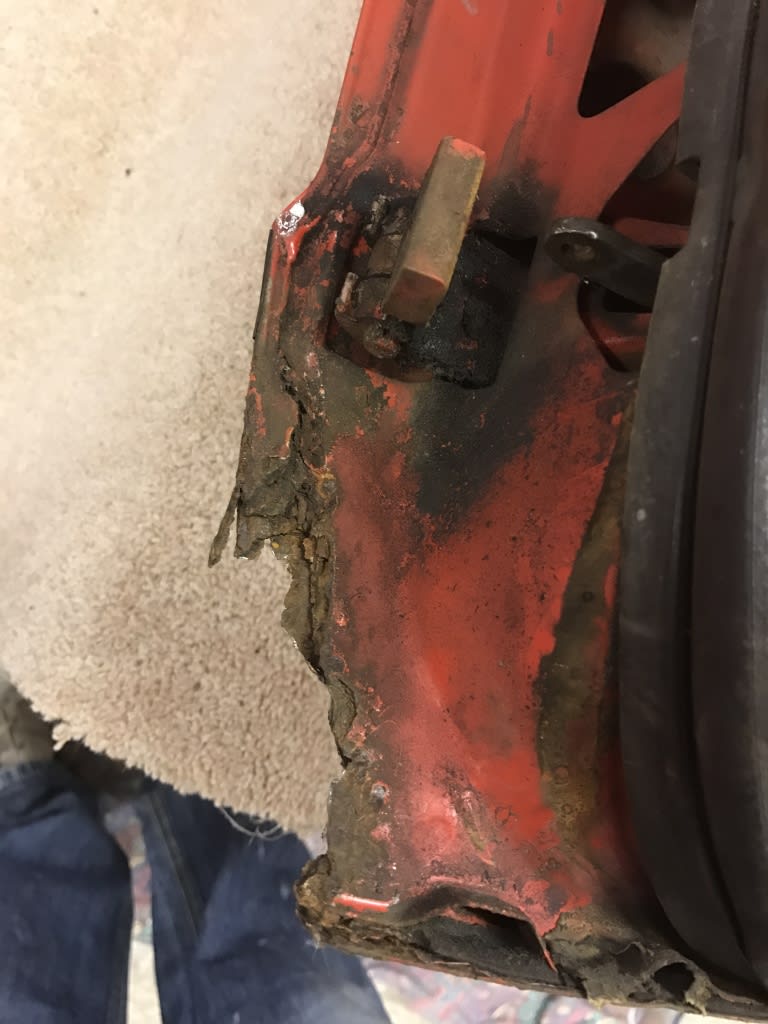
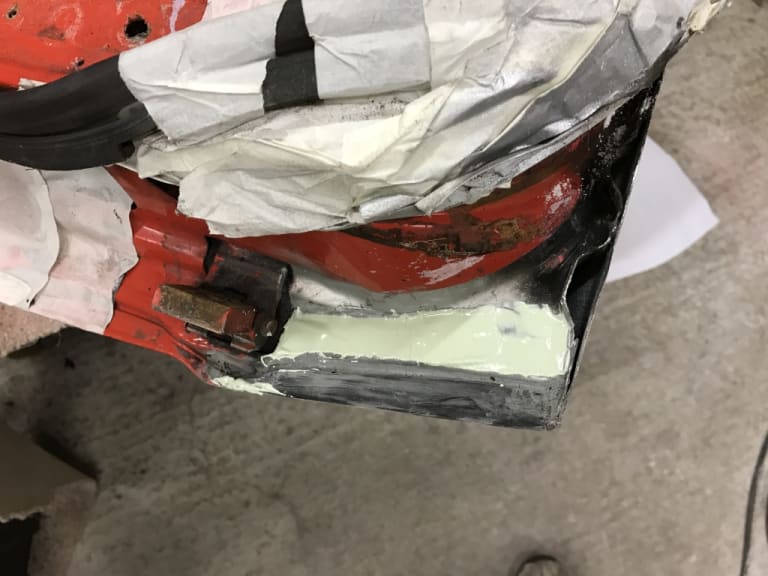
Cut out the rusty metal…..
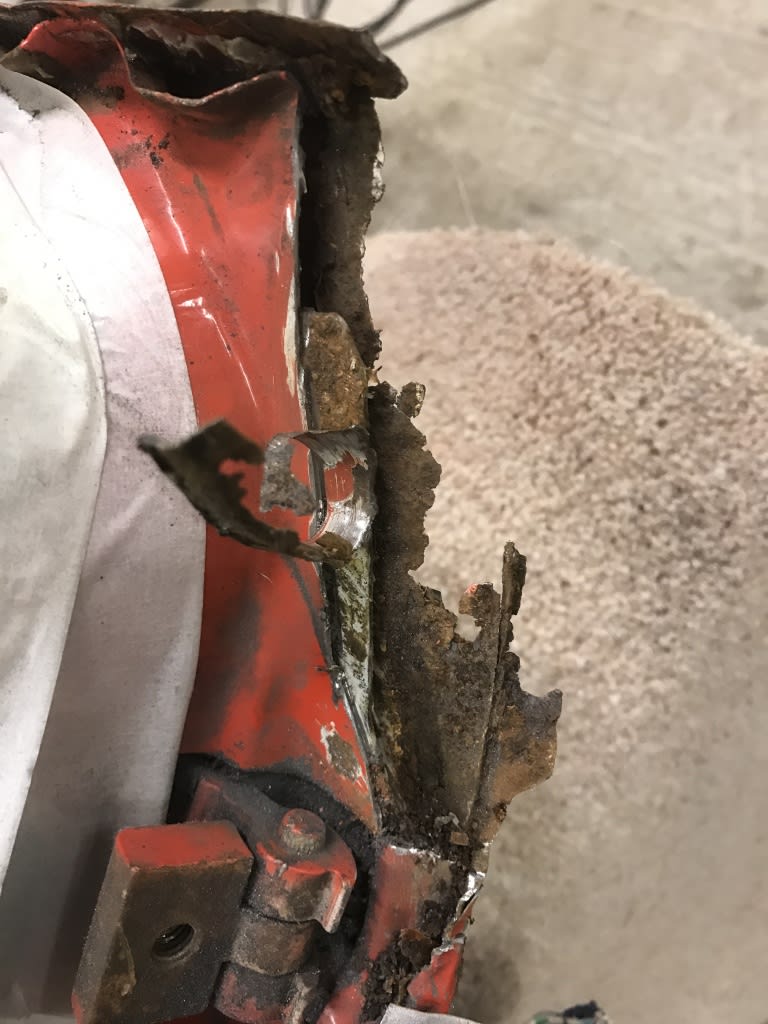

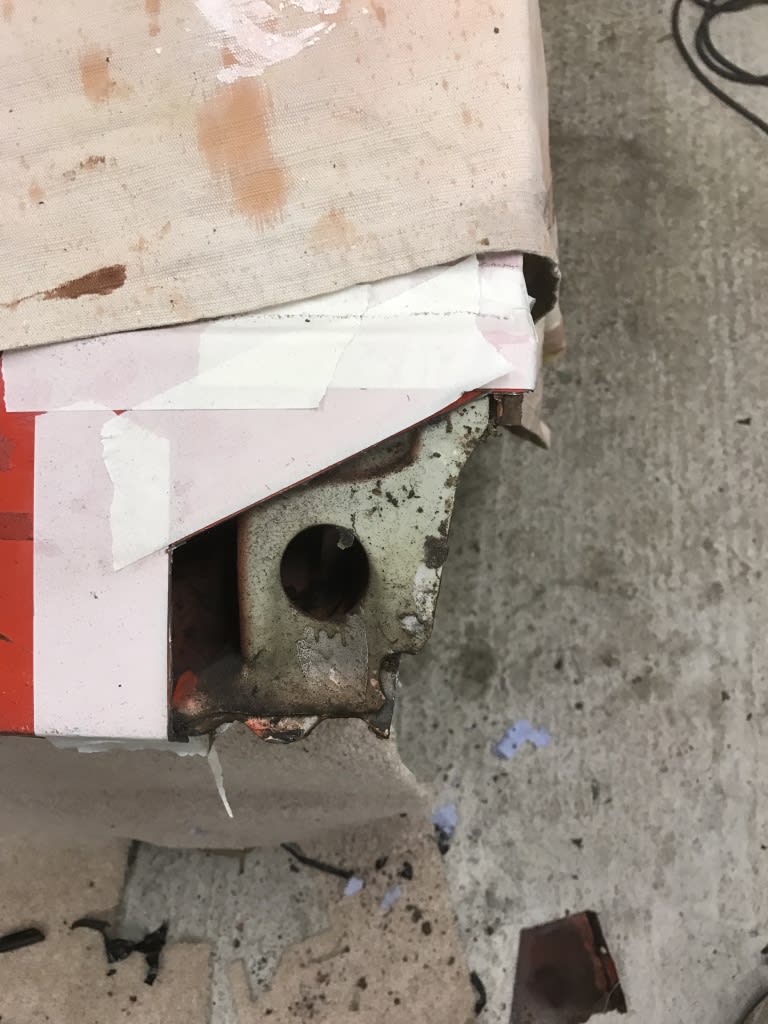
…..and cut to shape and welded to get the right angles a repair section for the inner skin I made when I did the passenger door and welded it to the inner skin.
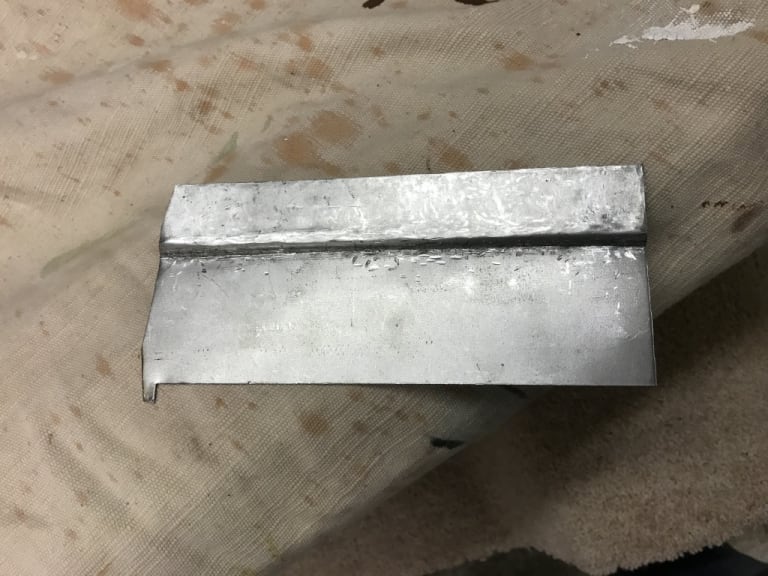
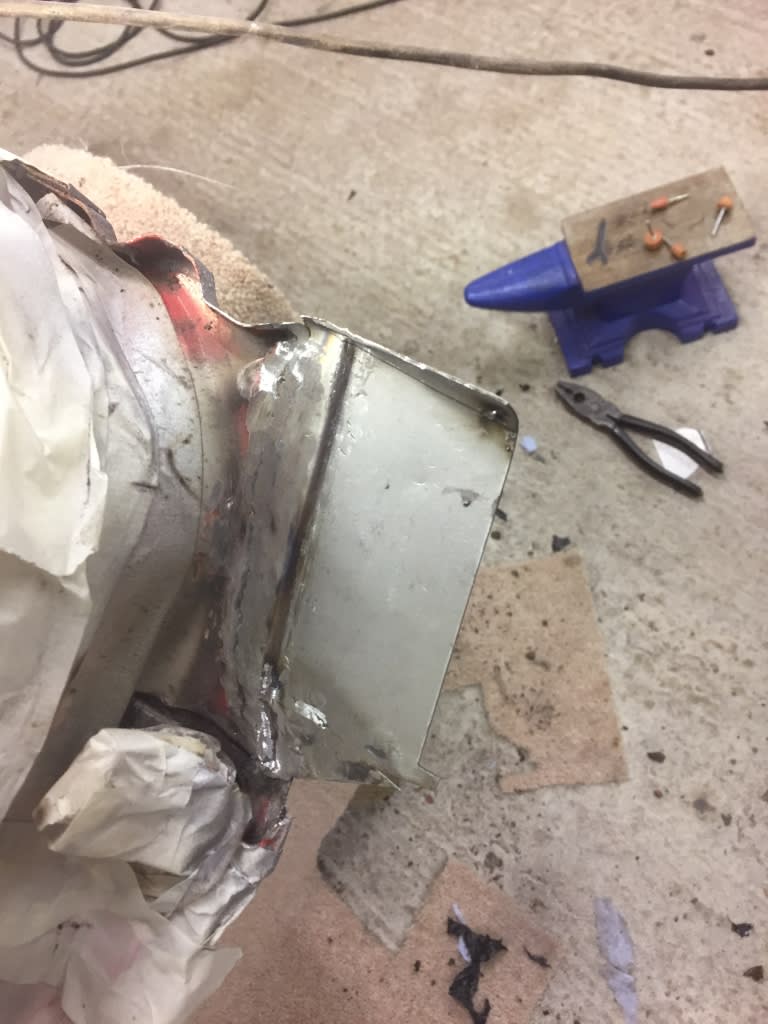
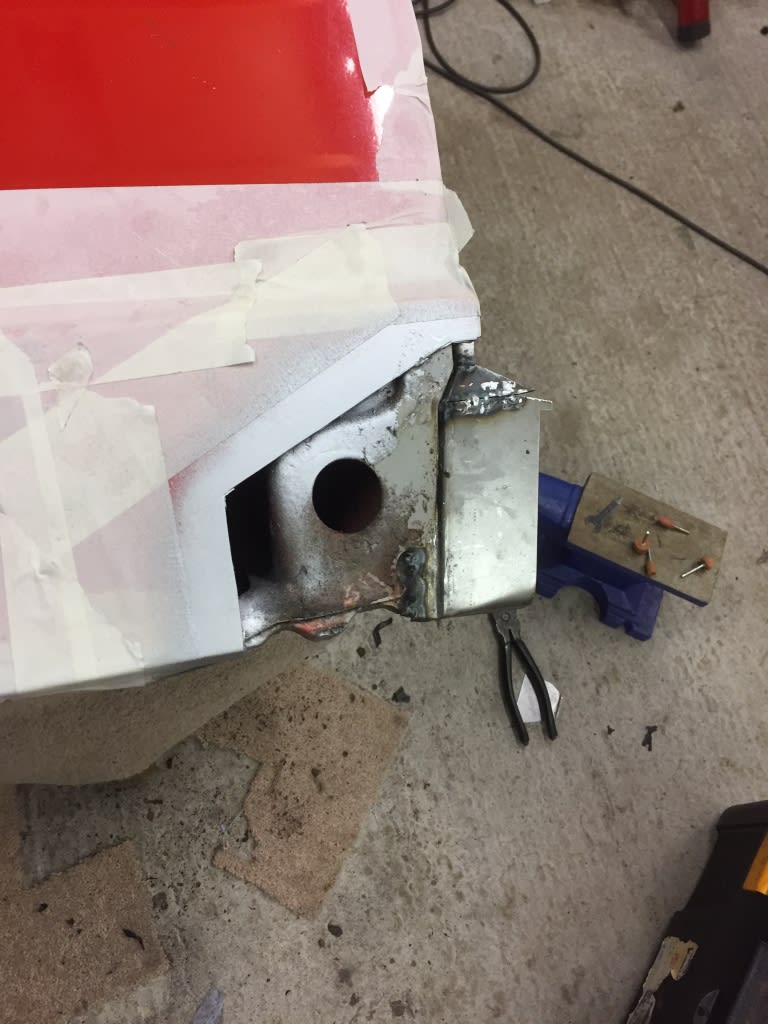
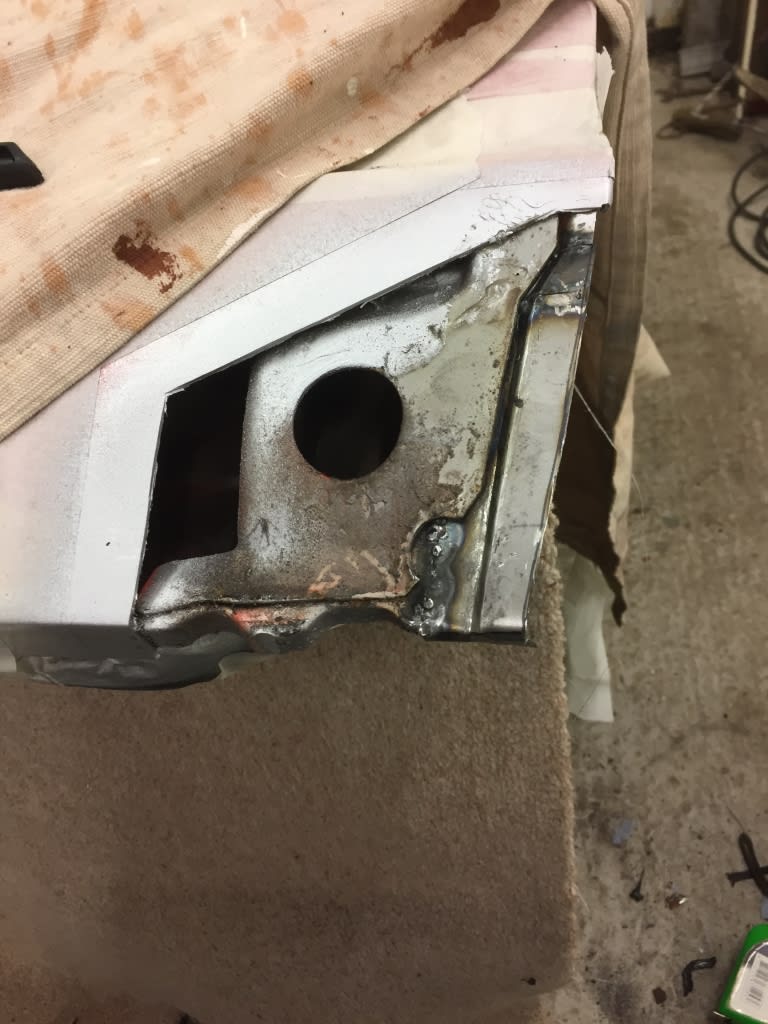
When I did the passenger door I cut out the old metal to a line parallel to the swage line but when I welded in the repair section I had a bit of heat distortion in the swage line which was hard work to get right so this time I cut at an angle to get as far away from the swage line as possible. I tacked the repair section into place and refitted the door to check the gaps and then removed the door again to weld the section in fully. I then re-hung the door again before the sealer went off between the inner and outer skins to check the gaps.
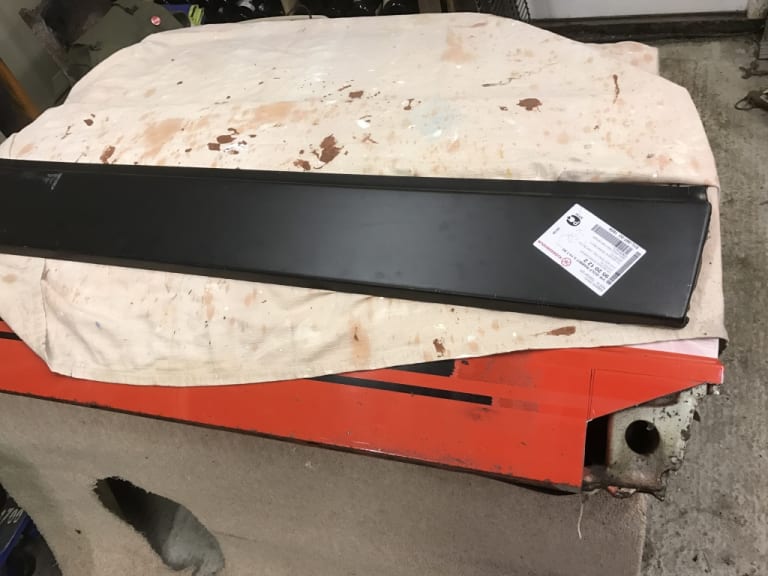
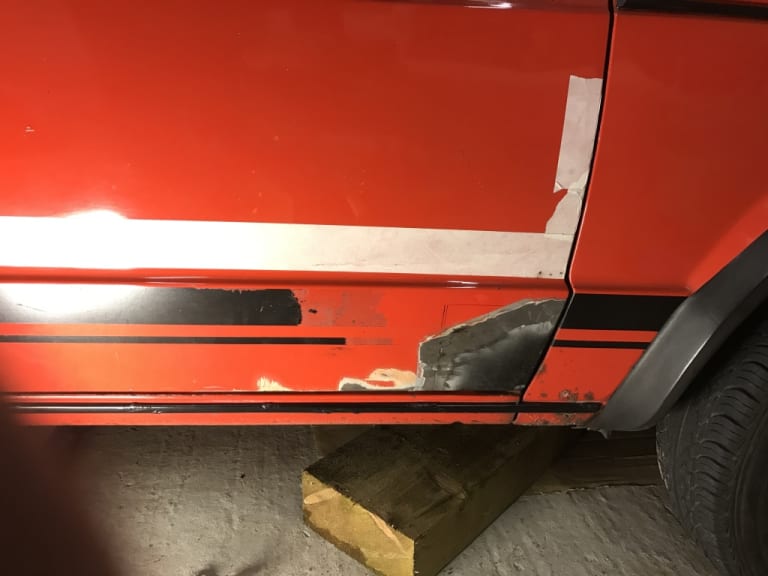
Mars red 1.8 GTI tintop now MOT'd and on the road!
http://vwgolfmk1.org.uk/forum/index.php?page=topicview&id=projects%2Fyour-mk1-golfs_2%2Fwent-to-look-at-a-golf&kfs79=150
http://vwgolfmk1.org.uk/forum/index.php?page=topicview&id=projects%2Fyour-mk1-golfs_2%2Fwent-to-look-at-a-golf&kfs79=150
Posted
Old Timer


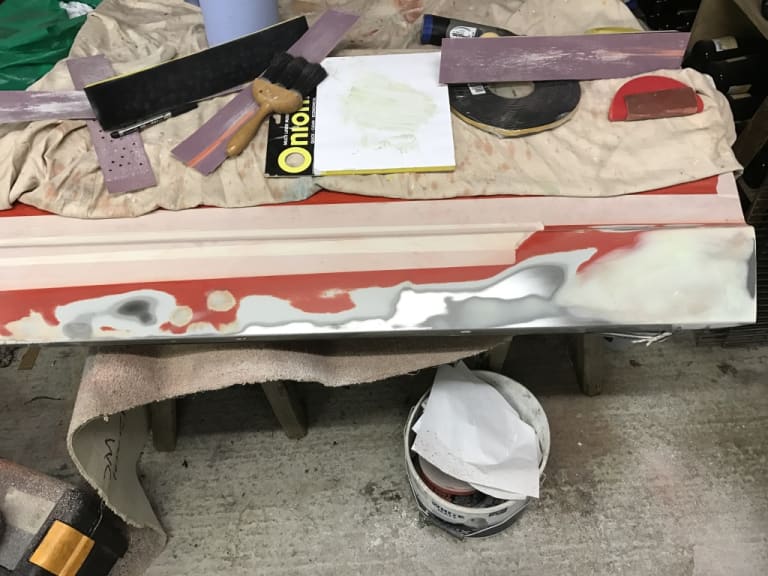
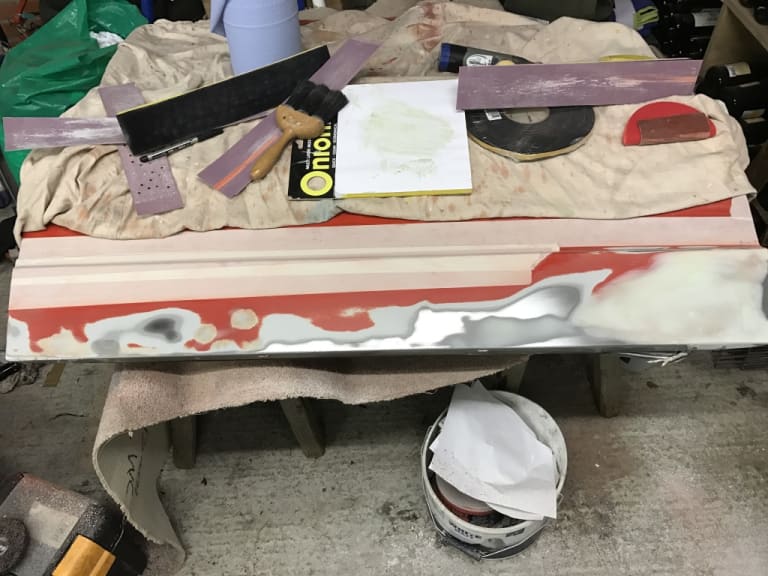
Then it was time for some rattle can paint!
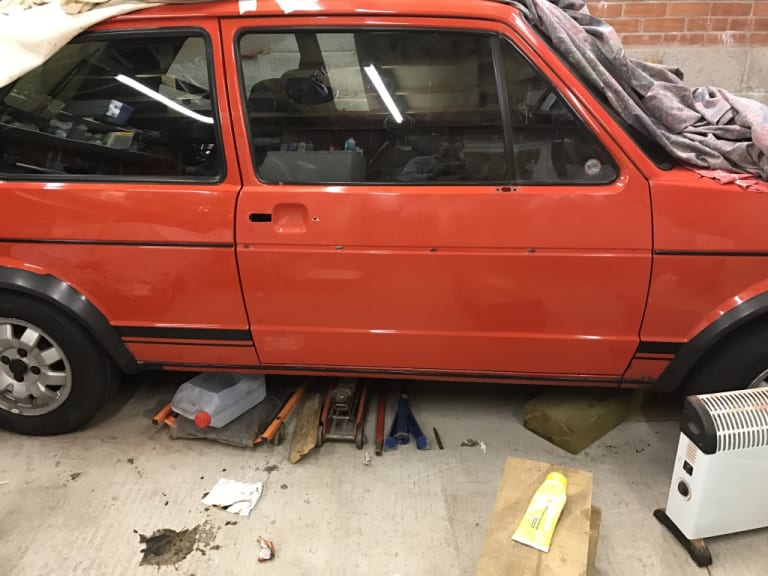
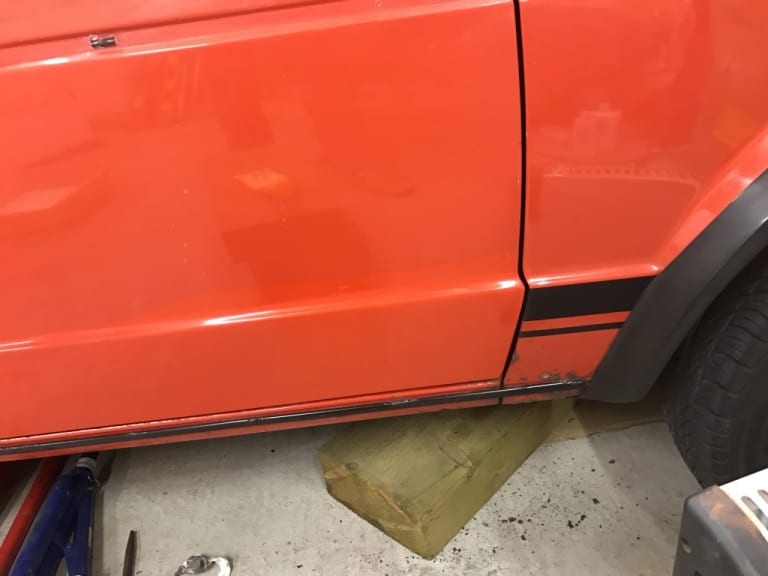

Mars red 1.8 GTI tintop now MOT'd and on the road!
http://vwgolfmk1.org.uk/forum/index.php?page=topicview&id=projects%2Fyour-mk1-golfs_2%2Fwent-to-look-at-a-golf&kfs79=150
http://vwgolfmk1.org.uk/forum/index.php?page=topicview&id=projects%2Fyour-mk1-golfs_2%2Fwent-to-look-at-a-golf&kfs79=150
Posted
Old Timer


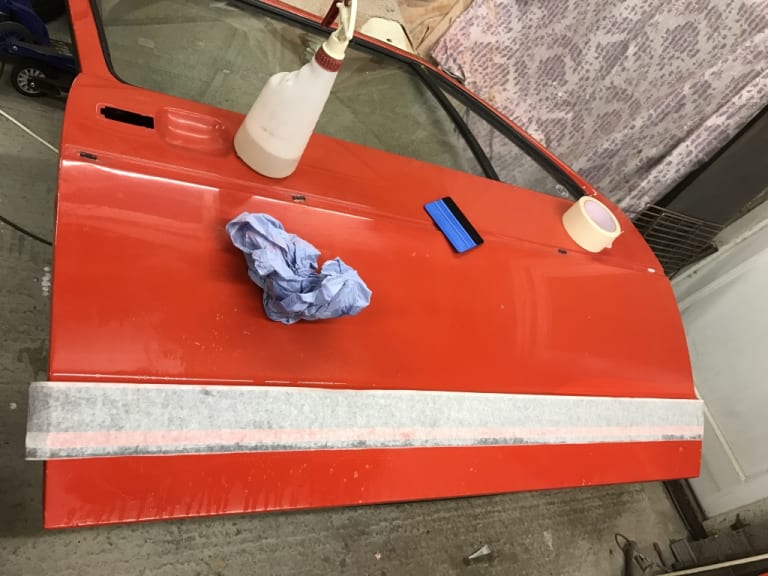
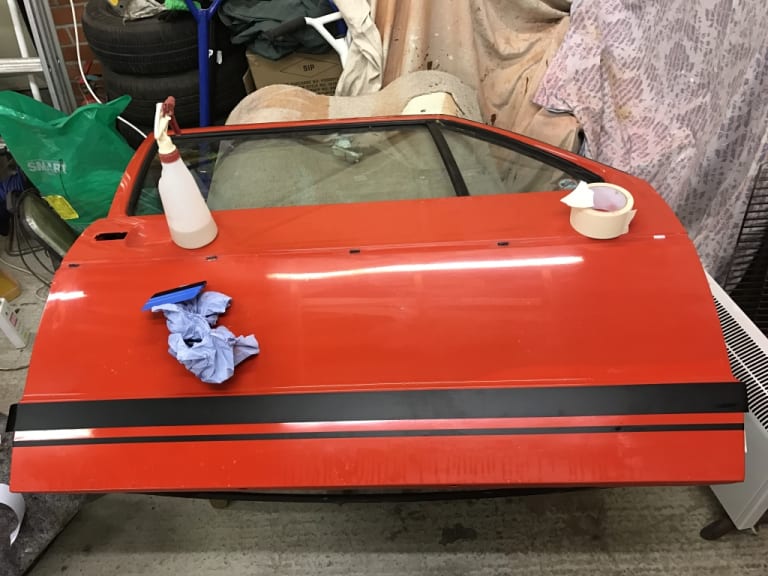

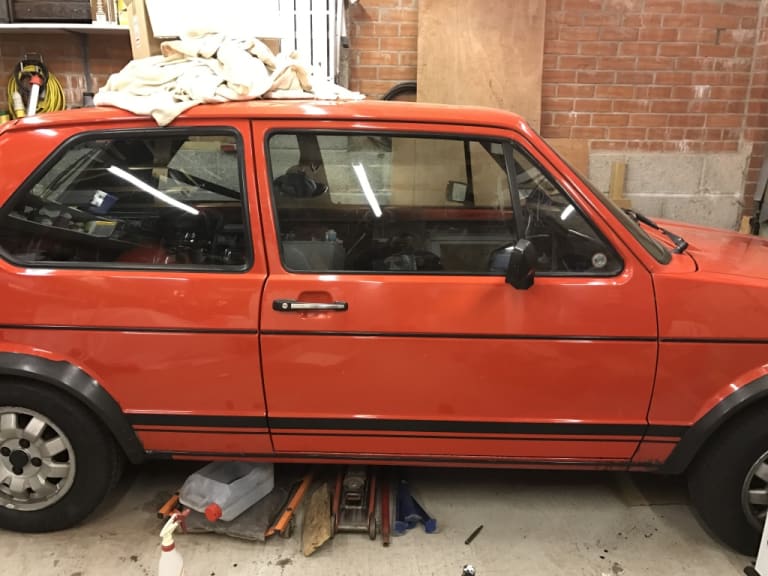
And then the passenger door!
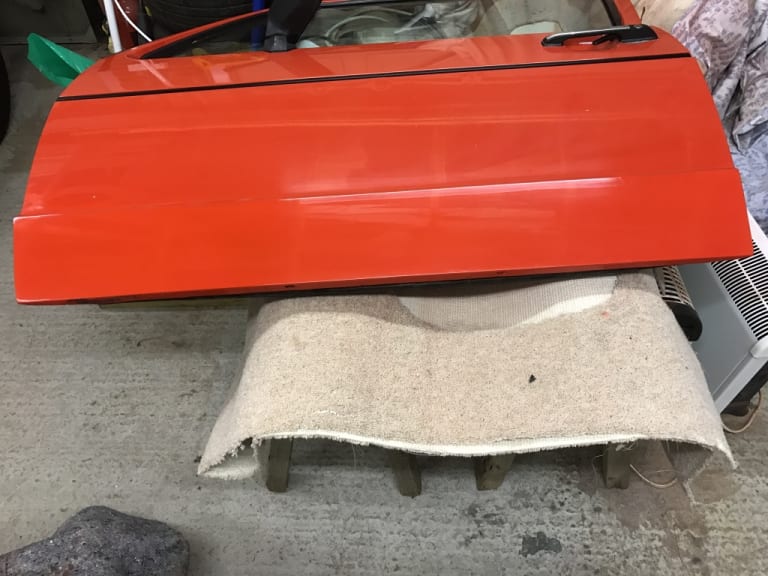
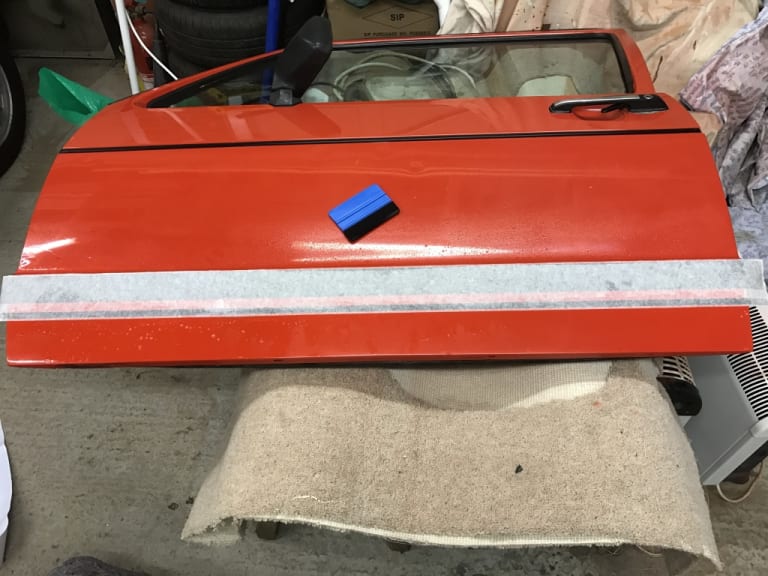
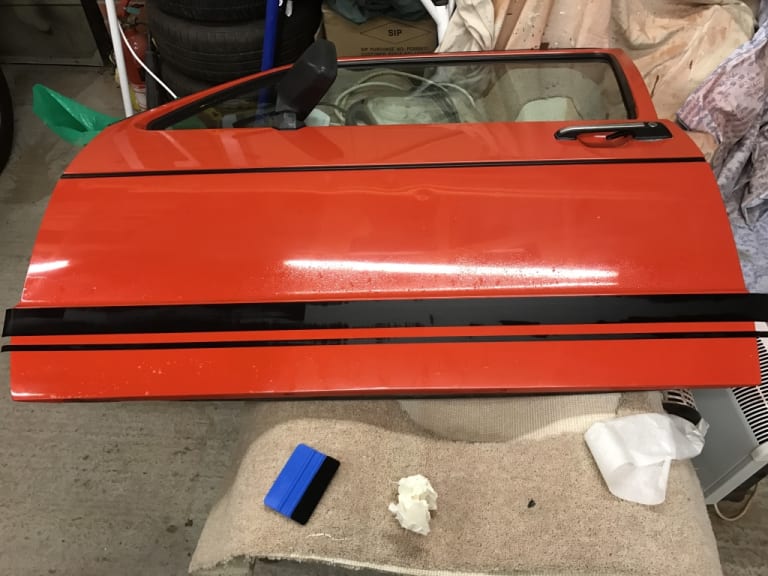
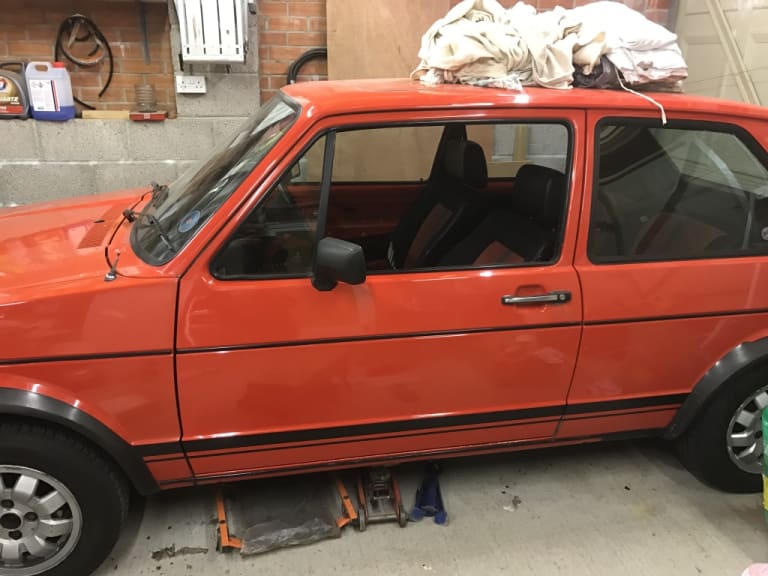
Mars red 1.8 GTI tintop now MOT'd and on the road!
http://vwgolfmk1.org.uk/forum/index.php?page=topicview&id=projects%2Fyour-mk1-golfs_2%2Fwent-to-look-at-a-golf&kfs79=150
http://vwgolfmk1.org.uk/forum/index.php?page=topicview&id=projects%2Fyour-mk1-golfs_2%2Fwent-to-look-at-a-golf&kfs79=150
Posted
Old Timer


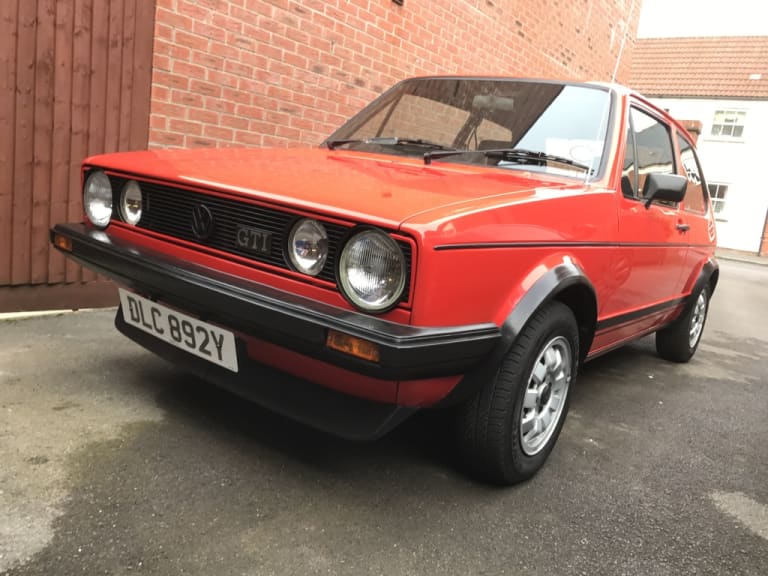
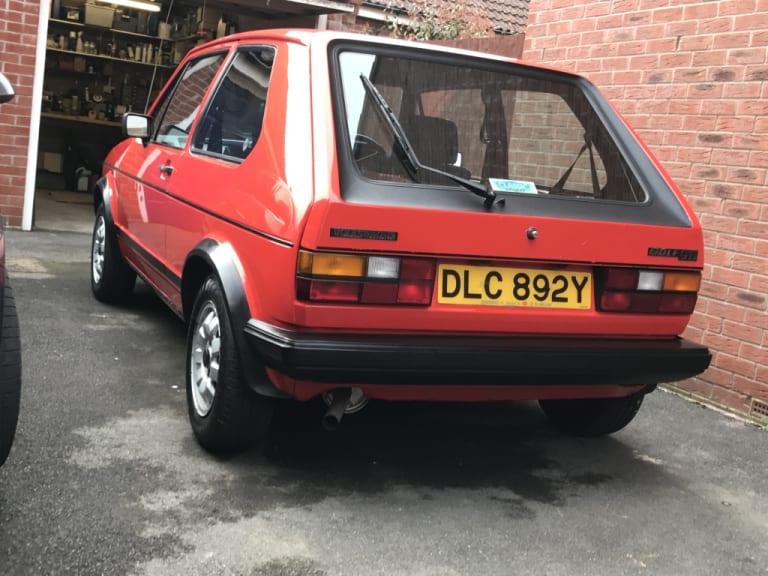
Mars red 1.8 GTI tintop now MOT'd and on the road!
http://vwgolfmk1.org.uk/forum/index.php?page=topicview&id=projects%2Fyour-mk1-golfs_2%2Fwent-to-look-at-a-golf&kfs79=150
http://vwgolfmk1.org.uk/forum/index.php?page=topicview&id=projects%2Fyour-mk1-golfs_2%2Fwent-to-look-at-a-golf&kfs79=150
Posted
Local Hero


Saulty's 1983 Tintop 1.8GTI
Ratlle can paint match looks good too - not easy on red.
Happy days

Sent from my iPhone using Tapatalk
Andy
LINCOLNSHIRE REGION - https://www.facebook.com/groups/467122313360002/
1983 MK1 Golf GTI Campaign Model - Under (looooong) resto!
1962 Rover P4 80
2002 BMW 745i
2008 BMW Z4 2.5Si
LINCOLNSHIRE REGION - https://www.facebook.com/groups/467122313360002/
1983 MK1 Golf GTI Campaign Model - Under (looooong) resto!
1962 Rover P4 80
2002 BMW 745i
2008 BMW Z4 2.5Si
0 guests and 0 members have just viewed this: None.


