


SAMGLF's Mk1 Golf GTI Karman Cabriolet Progress - Recaro Sport (But not for me!)

Posted

Settled In

KPCabrio said
clutch cable isn't it? attached to the gear box.
Oh yes, possibly………that would make sense as he did say it had a new clutch cable. Good shout………I'm not exactly mechanically minded to be honest and this project is a huge learning curve for me!
But gotta start somewhere

Posted
Settled In

Yeah me too. Got mine in January and the job list is getting longer. - new clutch cable is one of them� cf_emoticons__BangHead:It's gonna be a long work in progress…….
cf_emoticons__BangHead:It's gonna be a long work in progress…….
Posted
Settled In
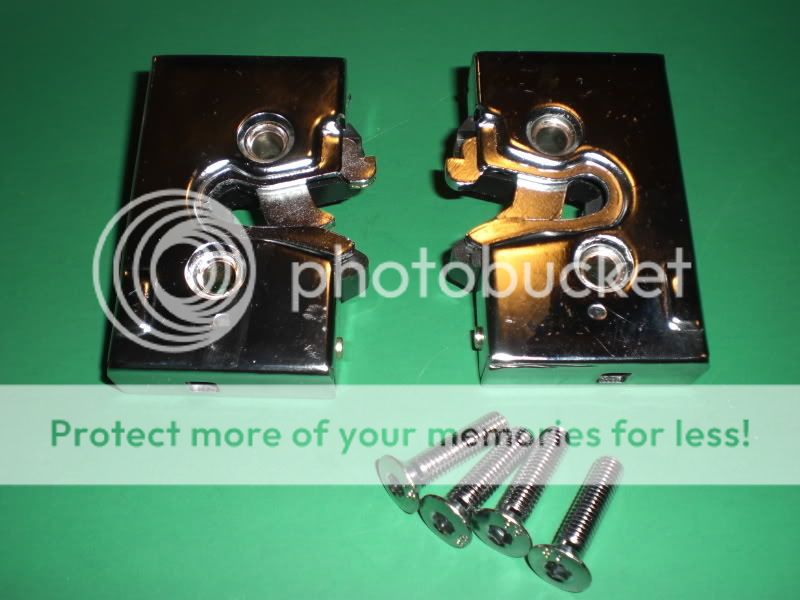
Does anyone know if these door latches will fit a MK1 Golf GTI Cabriolet?

Posted
Settled In
It is the clutch cable. 
Posted
Old Timer

Did it start after charging the battery then??
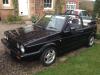
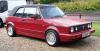
1983 White cabriolet GTi
Posted
Settled In
Maniac said
Did it start after charging the battery then??
It did
and seems to be ok now…….though I've been too worried to use the electric roof when out and about in fear that it might drain the battery and I'd get stuck out again.
Posted
Settled In
So……. I'm going to be replacing the gasket seals on my cabby roof today (hopefully)!
I'll share pics of the gaskets I bought direct from VW later on, for those who've asked and I'll let you know how I get on with them. I bought four in the end, since leaking appears to be only in front quaters, which set me back �19 FYI.
I'll share pics of the gaskets I bought direct from VW later on, for those who've asked and I'll let you know how I get on with them. I bought four in the end, since leaking appears to be only in front quaters, which set me back �19 FYI.
Posted
Settled In
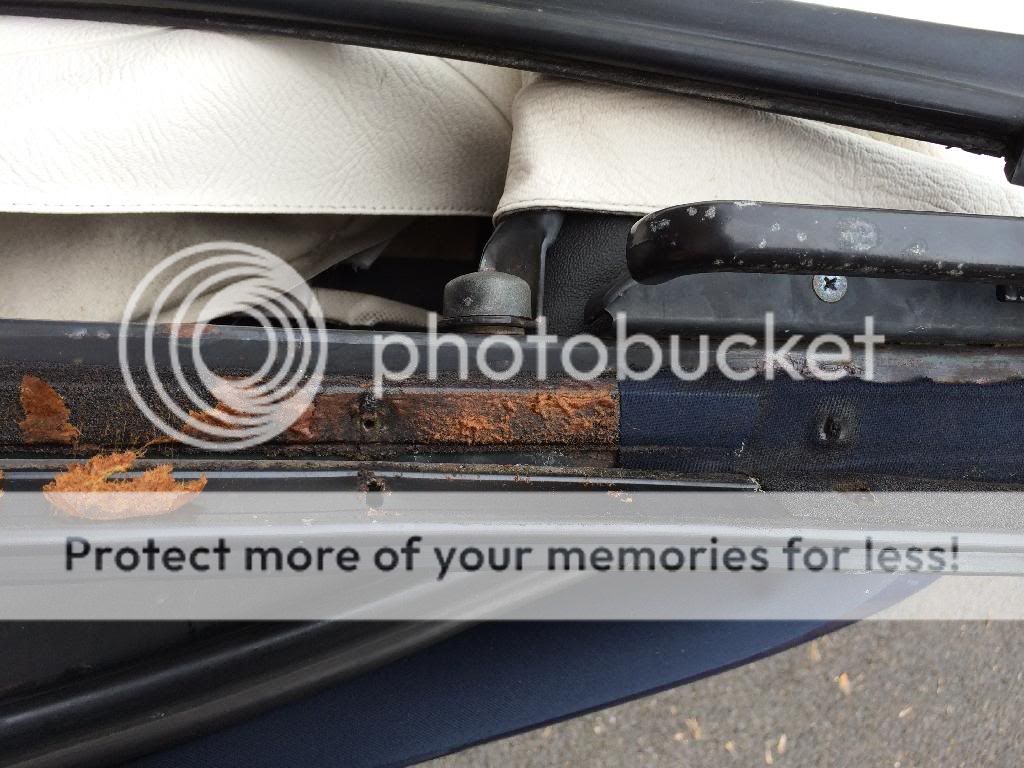
Sooo…..today the tools came out for the first time, with first job on the list - sorting out the gasket seals on the roof to try and reduce/eliminate the leaks through the handles!
For those who wanted to see the gaskets I purchased from VW, see pic below and I also showed a few of the other essential items I used.


The first task was to remove the screw at the header end and then slowly pull back the rubber seal. Once pulled back, there was a selection of screws holding the bracket in place, with the gasket beneath.

Once the remaining screws were removed, a rather sticky mess was revealed, in obvious need of replacement.

The brackets, once removed, were given a really good clean to remove all of the old sticky residue - note before and after shot below. I used Auto Glym Intensive Tar Remover to clean off the dirt and adhesive and it worked an absolute dream!


With both the removed rails clean, as well as the roof frame, the replacement gaskets were stuck into place and ready to be fixed back to the frame.

Now ready to be fitted, as the first screw started so go in, some silicone sealant was placed around the screw and in the area behind, ready for the rubber seal to butt up into and hopefully close any small gaps. Putting the remaining screws in, all but one at the head end, the rubber seal was ready to go back.
I found the rubber seal a bit tricky to put back at first, but after applying a bit silicone lubricant along the rail and instead of trying to slide the entire thing along the rail, I positioned the seal in place and started to push in from one end, working my way along the rail. As with the start, before putting the final screw on to fix the rubber seal in place, some silicone sealant was put beneath the fixing positon to close any small gaps as the the end of the rubber seal was pushed into place.
I only found time to replace the front seals today, but will probably do the middle set as well in the next day or so.
For those who wanted to see the gaskets I purchased from VW, see pic below and I also showed a few of the other essential items I used.


The first task was to remove the screw at the header end and then slowly pull back the rubber seal. Once pulled back, there was a selection of screws holding the bracket in place, with the gasket beneath.

Once the remaining screws were removed, a rather sticky mess was revealed, in obvious need of replacement.


The brackets, once removed, were given a really good clean to remove all of the old sticky residue - note before and after shot below. I used Auto Glym Intensive Tar Remover to clean off the dirt and adhesive and it worked an absolute dream!


With both the removed rails clean, as well as the roof frame, the replacement gaskets were stuck into place and ready to be fixed back to the frame.

Now ready to be fitted, as the first screw started so go in, some silicone sealant was placed around the screw and in the area behind, ready for the rubber seal to butt up into and hopefully close any small gaps. Putting the remaining screws in, all but one at the head end, the rubber seal was ready to go back.
I found the rubber seal a bit tricky to put back at first, but after applying a bit silicone lubricant along the rail and instead of trying to slide the entire thing along the rail, I positioned the seal in place and started to push in from one end, working my way along the rail. As with the start, before putting the final screw on to fix the rubber seal in place, some silicone sealant was put beneath the fixing positon to close any small gaps as the the end of the rubber seal was pushed into place.
I only found time to replace the front seals today, but will probably do the middle set as well in the next day or so.
Posted

Local Hero


Nice work Sam  Hopefully you'll be staying dry soon
Hopefully you'll be staying dry soon
Andy
LINCOLNSHIRE REGION -�https://www.facebook.com/groups/467122313360002/
1983 MK1 Golf GTI Campaign Model - Under (looooong) resto!
1962 Rover P4 80
2002 BMW 745i
2008 BMW Z4 2.5Si
LINCOLNSHIRE REGION -�https://www.facebook.com/groups/467122313360002/
1983 MK1 Golf GTI Campaign Model - Under (looooong) resto!
1962 Rover P4 80
2002 BMW 745i
2008 BMW Z4 2.5Si
Posted
Settled In
good work on the seals bud, i need to change mine but i think i would use stainless screw instead
any chance you still have the part numbers for the seals?
any chance you still have the part numbers for the seals?
Old dubs never die, they just get lower
Posted

Settled In
great looking car m8, mine is same colour, helios blue. i had same leaking problem too, i bought a 5m length or neoprene rubber on ebay for �2.50 no more leaks
Posted
Settled In
dik-van-dub said
good work on the seals bud, i need to change mine but i think i would use stainless screw instead
any chance you still have the part numbers for the seals?
Yeah I did try and get some stainless ones first, but I couldn't seem to find any in the right size. Halfords were out of the sizes I needed. Maybe I'll keep an eye out for some…..
The part number is 155/871/431
Posted
Settled In
So……the car lasted two days from a full battery charge and it's struggling to start again 
Hasn't gone completely flat yet, but sounds almost there so I've had to put it on charge again tonight. Question is, do we think the battery is knackered and needs replacing, or alternator had it!?
Hasn't gone completely flat yet, but sounds almost there so I've had to put it on charge again tonight. Question is, do we think the battery is knackered and needs replacing, or alternator had it!?
Posted
Settled In
have you taken a voltmeter to battery with the car running
it should read around 13v if the alternator is working
it should read around 13v if the alternator is working
Old dubs never die, they just get lower
Posted
Settled In
dik-van-dub said
have you taken a voltmeter to battery with the car running
it should read around 13v if the alternator is working
Haven't got one
Is it worth getting one du reckon?
Posted
Local Hero
Defo buy one Sam - even a cheapish one is worth every penny. You only realise when you've got one. I'm no electrics expert but just knowing where you've got 12V and where you haven't, for example when installing a stereo, is a great bonus!
Andy
LINCOLNSHIRE REGION -�https://www.facebook.com/groups/467122313360002/
1983 MK1 Golf GTI Campaign Model - Under (looooong) resto!
1962 Rover P4 80
2002 BMW 745i
2008 BMW Z4 2.5Si
LINCOLNSHIRE REGION -�https://www.facebook.com/groups/467122313360002/
1983 MK1 Golf GTI Campaign Model - Under (looooong) resto!
1962 Rover P4 80
2002 BMW 745i
2008 BMW Z4 2.5Si
Posted
Settled In
Hairyarse said
Defo buy one Sam - even a cheapish one is worth every penny. You only realise when you've got one. I'm no electrics expert but just knowing where you've got 12V and where you haven't, for example when installing a stereo, is a great bonus!
Ok, I'll pick one up tomorrow then if I can. Will grab one from Halfrauds.
I've been reading online this evening as well that aftermarket immobilisers can be to blame for battery drain? I've got one of those, so wonder if it's that. Plus it does look like there's some pretty shoddy wiring under the bonnet but I've no idea what I'm really looking at :/
Bit of a laearning curve….
Posted
Local Hero
A steep one with electrics, well for me anyway, it's the one aspect of the car that still gives me the jitters!! Lead-loading for the first time, no problem - anything electrical, grrrr 

Andy
LINCOLNSHIRE REGION -�https://www.facebook.com/groups/467122313360002/
1983 MK1 Golf GTI Campaign Model - Under (looooong) resto!
1962 Rover P4 80
2002 BMW 745i
2008 BMW Z4 2.5Si
LINCOLNSHIRE REGION -�https://www.facebook.com/groups/467122313360002/
1983 MK1 Golf GTI Campaign Model - Under (looooong) resto!
1962 Rover P4 80
2002 BMW 745i
2008 BMW Z4 2.5Si
Posted
Old Timer
I'm quite sure it will be your alternator mate, that's typical behavior for when it's on the way out, but hasn't quite got bad enough to trigger the battery light yet. Essentially what's happening is it's kicking out some current still, but not enough to run the car and charge your battery so the car is slowly using the battery up to keep its self running. Eventually it gets to the stage where there's no power left.
Definitely get yourself a cheap multimeter, they are dead handy bits of kit to own.
Definitely get yourself a cheap multimeter, they are dead handy bits of kit to own.
1983 White cabriolet GTi
Posted
Settled In
Ok, so I'd be looking at this part then for my 1991 Cabriolet wouldn't I, if it turns out to be the alternator?
http://www.vwheritage.com/vw_spares_Alternator-90Amp-Mk2-Golf-T25-T4-diesel-068903017PX_act_shop.product_pID_170218.htm
Looks like there are two different amp rate parts…..but guessing one is better than the other?
Is fitting one a difficult job? Bearing in mind I'm a bit of an amateur when it comes to mechanics lol
0 guests and 0 members have just viewed this: None.