


Project Juliet

Posted
#1392790
(In Topic #182924)
Newbie

Restoration/Custom Build of a '83 Mk1 Golf GTI
I've always craved owning a VW since I was a kid in the early eighties. I lived in Germany (RAF brat) and was lucky enough to be exposed to the GTI experience at an early age and it left a lasting impression, even though I never got to drive one! Well, just under four years ago I finally got to realise my childhood wish (cliche alert but I apologise to no one) and bought a '1983 Mk1 Golf GTI in Alpine White.
Shortly after returning to work in the New Year of 2010. I received the news I was to be made redundant, awful situation but it had a silver lining… When I left work I received a tidy payout, so I paid off most of my debts but still had to find myself a new job and quickly. This meant working away from home and would need a car to commute back and forth to Derby to see my kids. That’s when the mid-life crisis really kicked in; I was in the enviable position of having some money in the bank and needed transport. Mmmmm…
I started to think the usual list of crappy and/or practical cars but fell into a dilemma when I saw an on-line advert for a MK1 Golf GTI. I had a look and was surprised to find I could afford to get a tidy example and being my age (36 at the time) the classic insurance was an absolute steal. The temptation was too great to resist and I started trawling classifieds in my price range.
In the meanwhile, I moved to Leamington Spa in the February and got my dream job working on racing games. Of course this meant I was surrounded by petrol heads for most of my working day and their passion started to rub off on me so I started to go and have a look at a few Golfs in the flesh. After a couple of months of searching I found her (I know… but she had a 'J' on her plate so she got called Juliet). The advert had been posted a couple of days before I saw it so I phoned the owner, pronto, got him to stall another buyer and took a day off work. I found myself sitting on a train to Newcastle the next morning, on my way to meet a total stranger about a car I had never driven!
When I finally saw her she met all my expectations, there was a little bubbling in front of the rear, passenger side wheel arch but nothing too serious (I thought), so I went for a test drive. She was so much fun, even at the speed limit and smelled like my granddads car. There was no turning back; I had to have her and paid the man his money. I arrived back in Leamington late that evening, after a six hour road trip without a single hiccup. Not bad for a 27 yr old car!
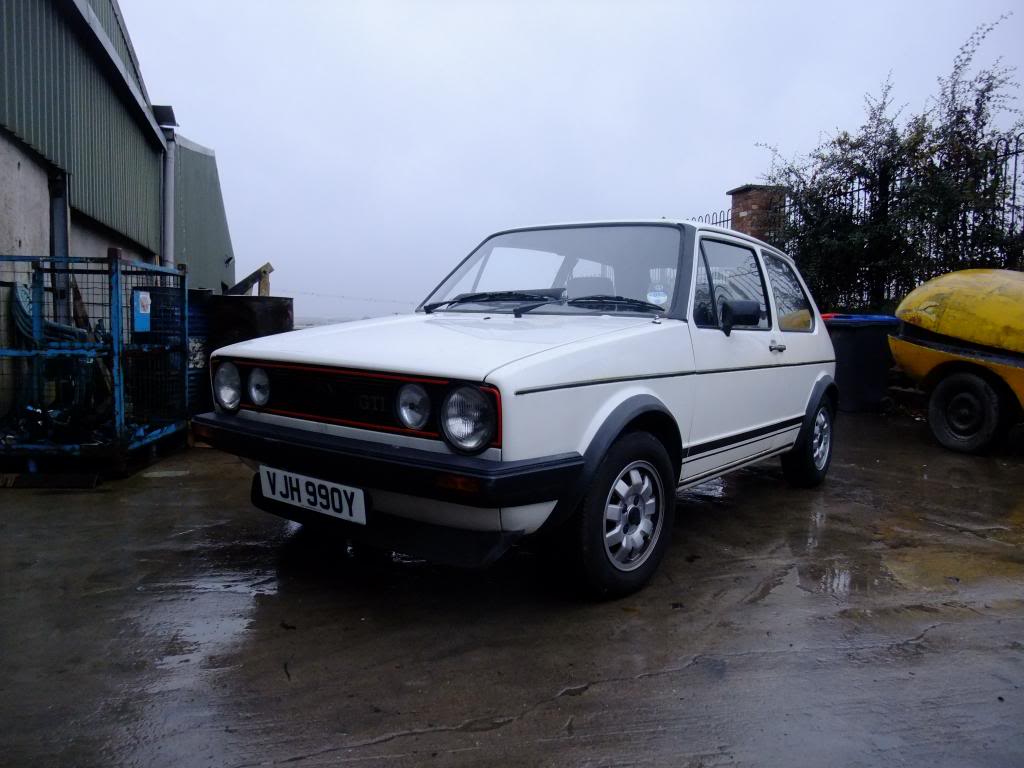
Anyway, back to the point’… Here are some of the pictures I took of the car for the insurance company.
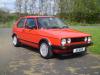
Project Juliet:April 2010
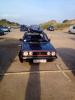
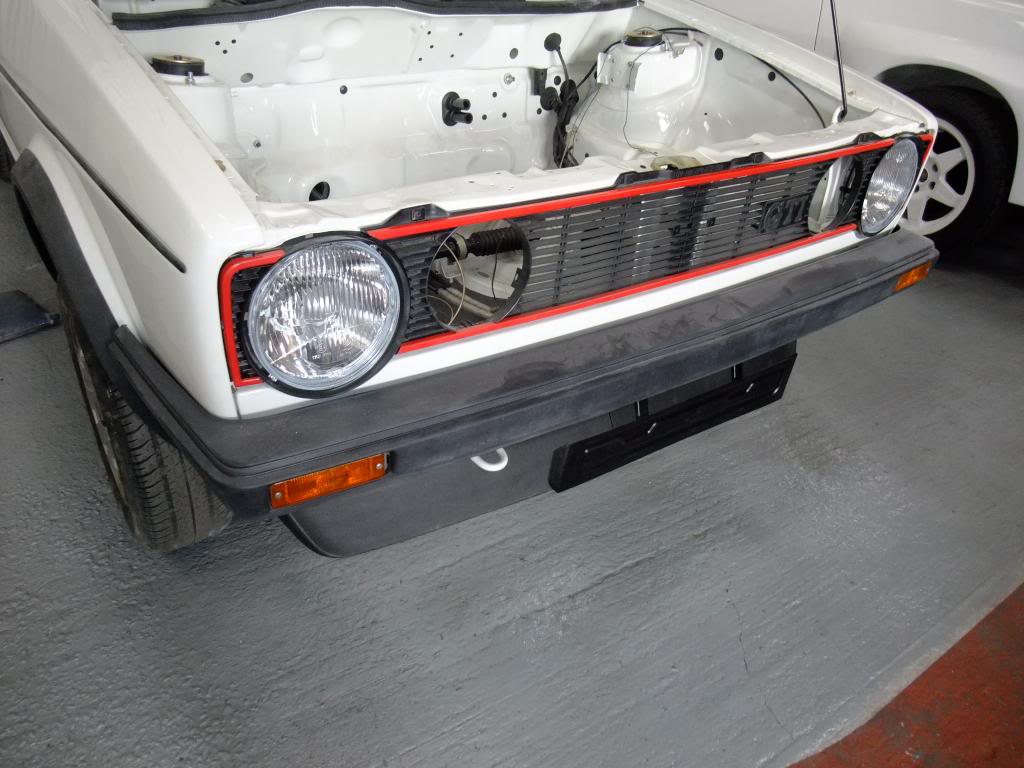
Front Quarter
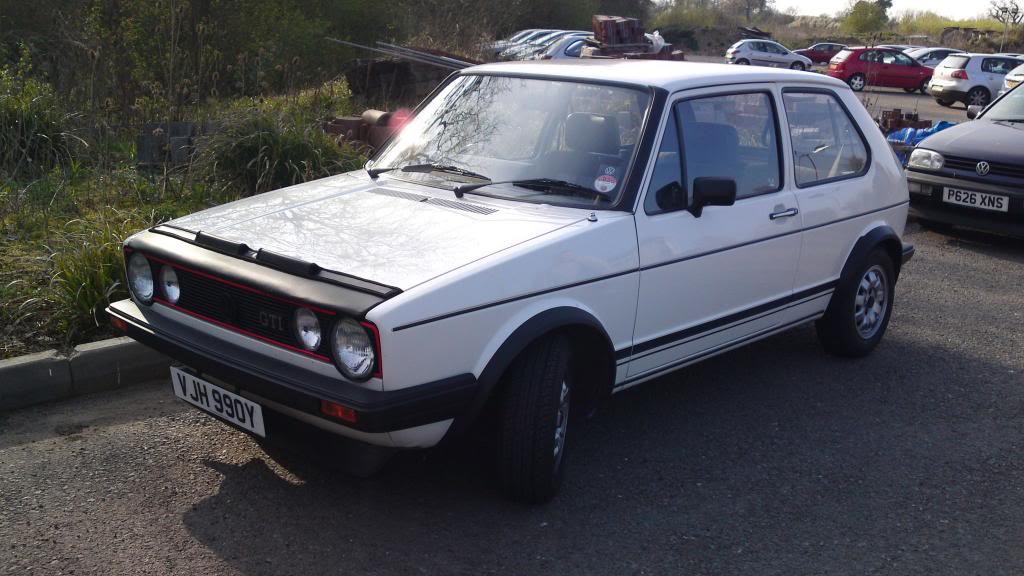
The bonnet bra has now been confined to the cupboard for corrosive reasons.
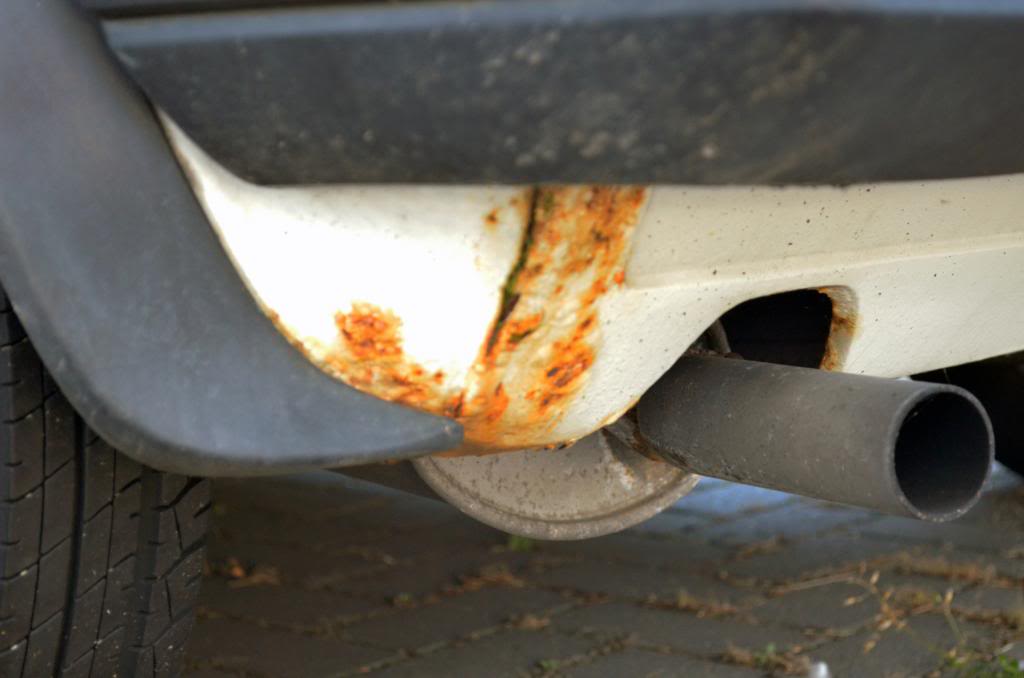
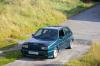
Rear Quarter

New stainless steel exhaust and everything
Interior
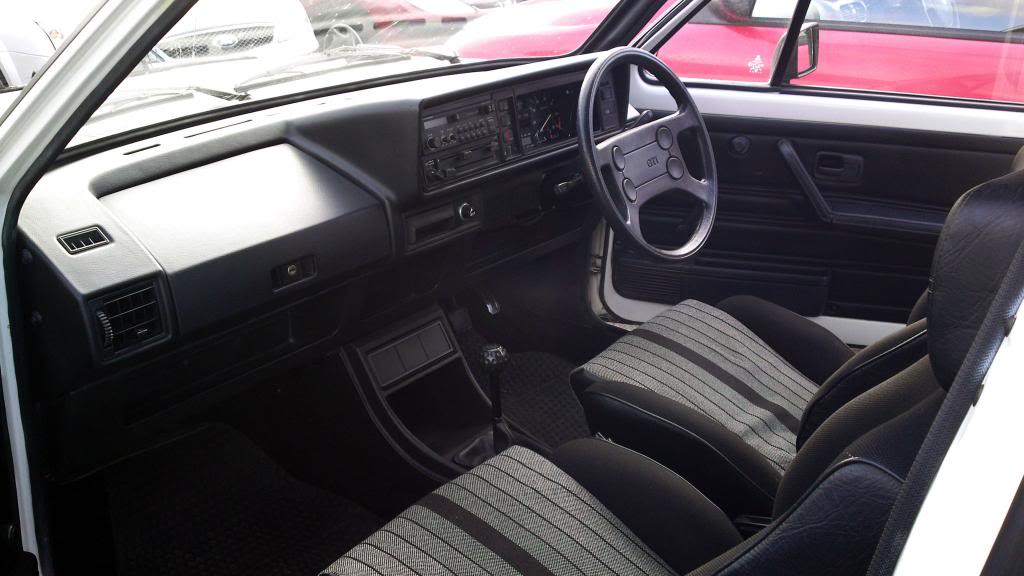
Spotless…
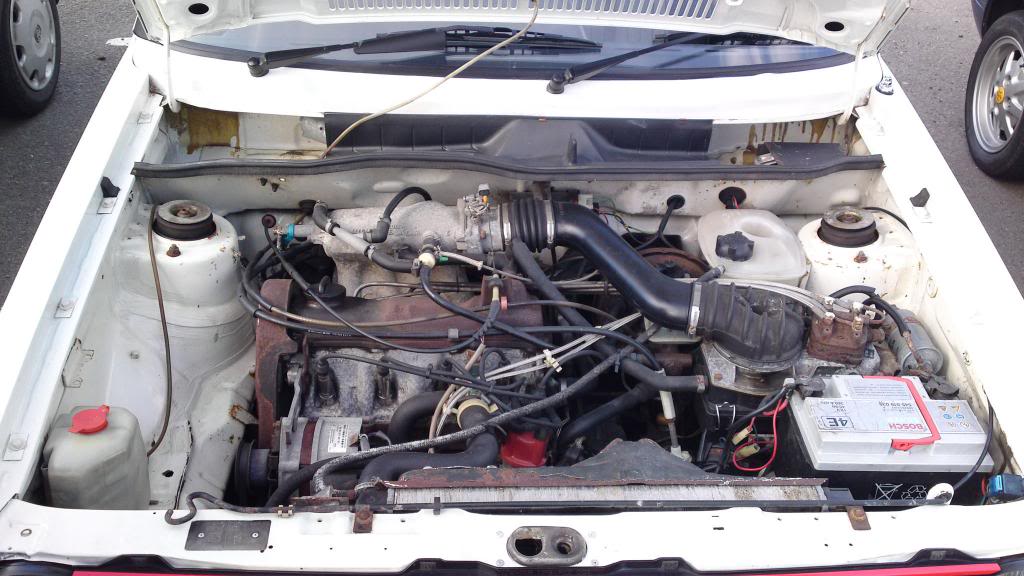
Engine Bay
There's more to come but I thought I'd do this in bite sized chunks to make sure I don't hit the image limit and bore anyone to death…
 Last edit: by Jujenkai
Posted
Newbie
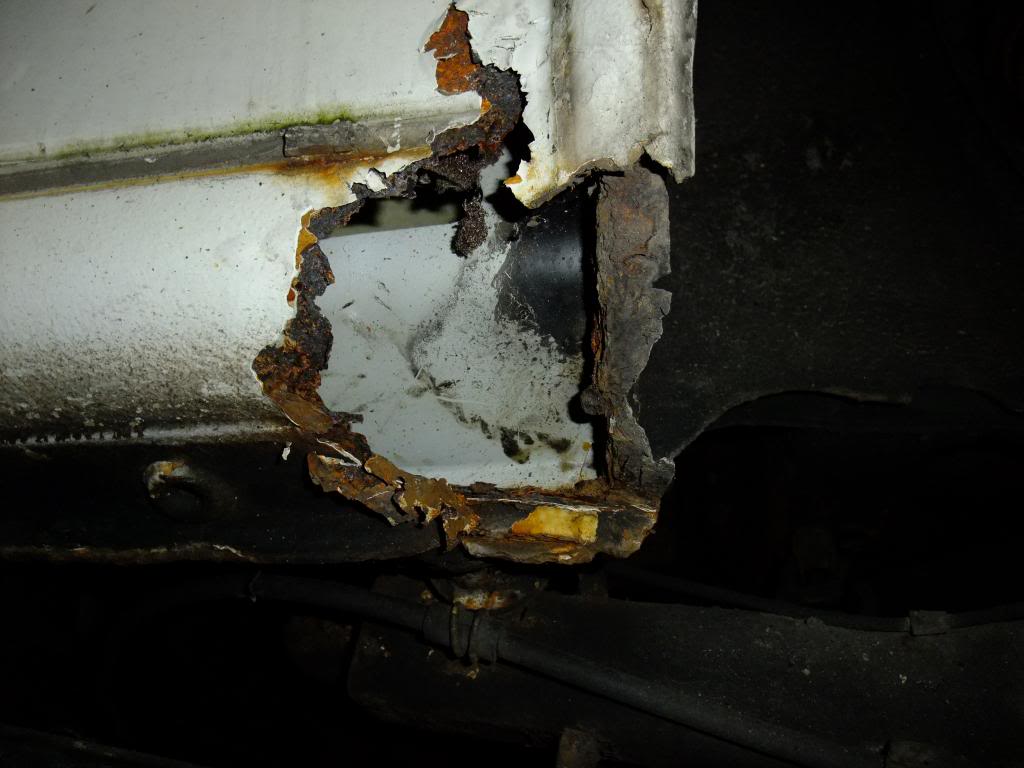
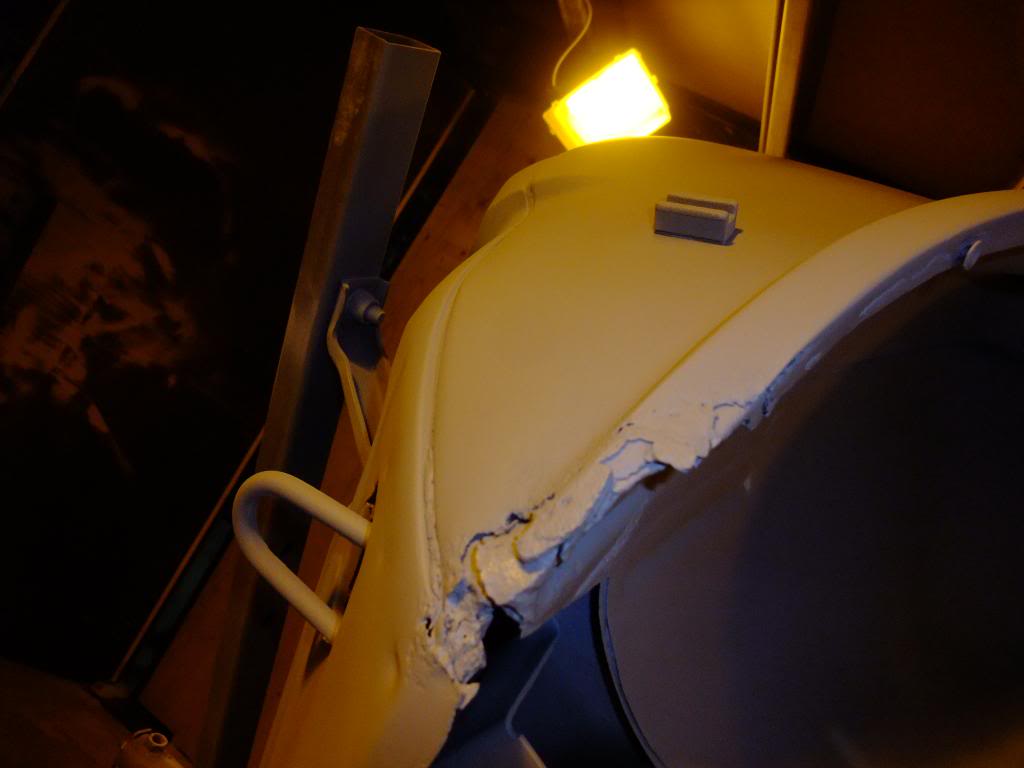
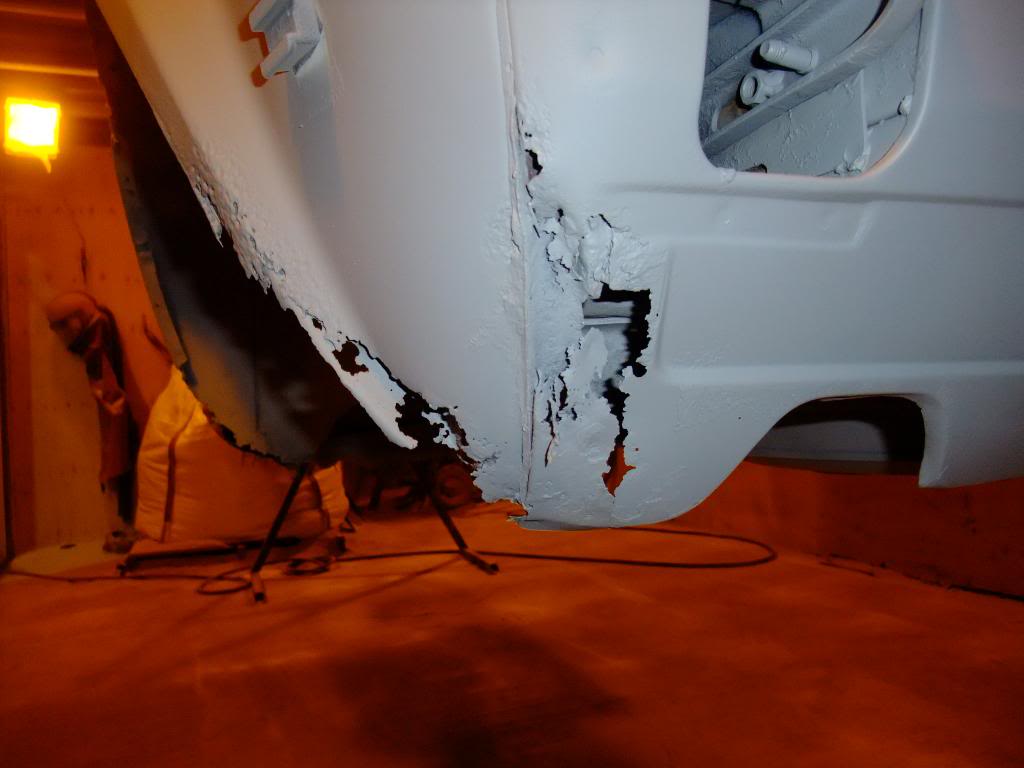
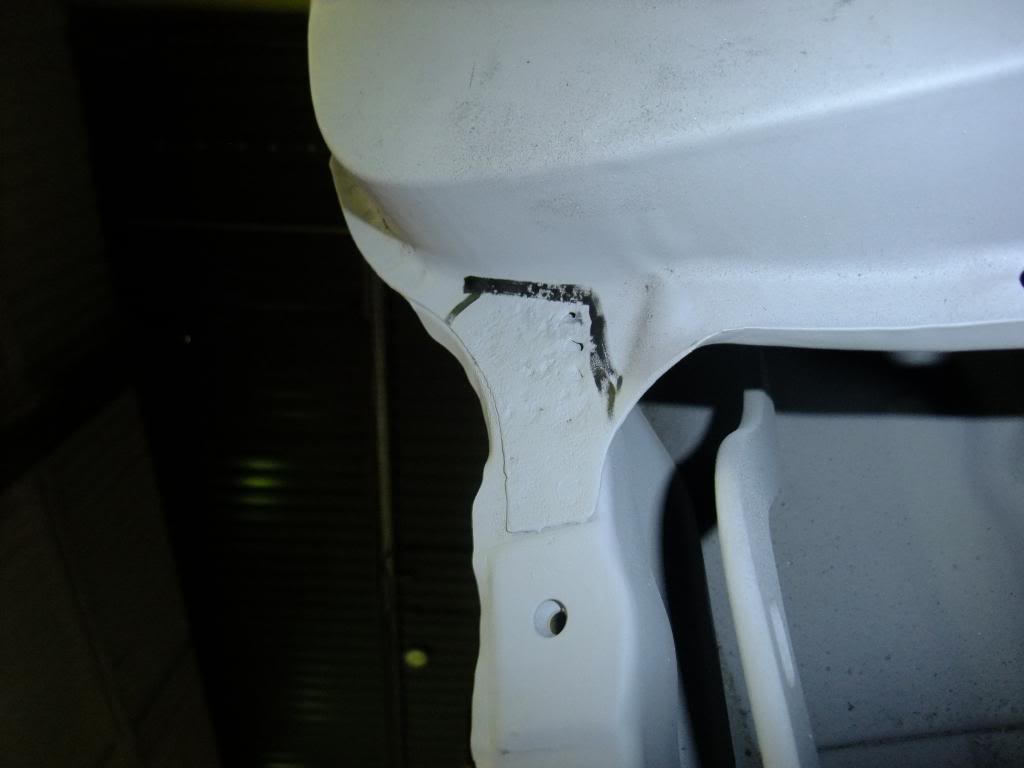
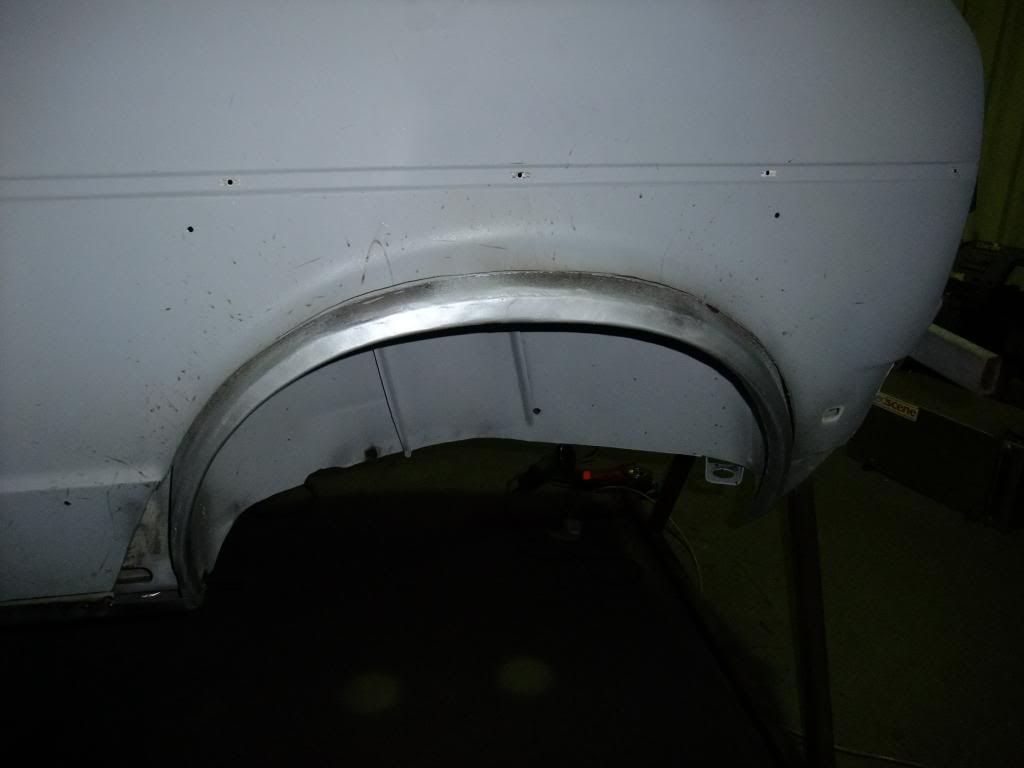
However, the body work was now visibly rusting in the usual areas; the windscreen sill was leaking along the bottom seal (and draining any water into the fuse box), base of the wheel well, bottom of the passenger door and of course, the rear arches. The adjacent sections were in pretty bad shape, causing the rear valance to 'separate' from the rear quarter on the passenger side. Plus what were the arch spats hiding?
Rear Passenger Side Arch
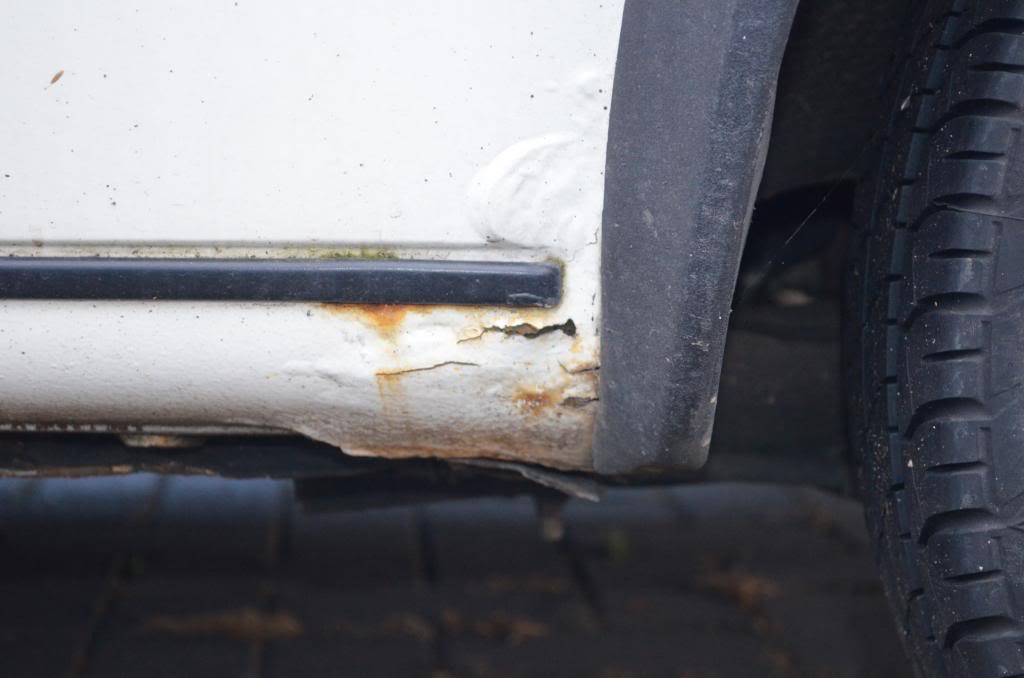
The thing was I had to drive her everyday, knowing the corrosion was only going to get worse and I had no alternative transport. Watching the car slowly deteriorate was killing me but I had no savings to finance the repairs. I kept saying to myself, 'I'll put a bit away every month' thinking I would get the bodywork sorted out in stages. Did that happen? No! Life just kept throwing stuff at me, literally…
On my first day back to work in 2012 some oncoming traffic chucked a stone at my windscreen, Happy New Year! once I had recovered from the noise of the impact I realised the screen had cracked, on the driver's side at head height. It was the final straw, I couldn't afford a new screen at the time plus my OCD wouldn't allow me to replace it without repairing the rust in the sill. So I took stock and SORN'd her the very next day. I removed the battery, got her under cover and started to sort out my finances. There was no way I was going to let my car just rot away.
After what seemed a life time (8 months to be exact) which included getting my divorce through, I got some news. The ex-wife was looking to buy my share of my house in Derby. After some careful deliberation (or was it reckless abandonment?) I said yes, agreed a price and started the legal process. I had no intention of buying a new house with the money so there was only one thing left to do with it.
 I started dreaming of what I could do with Juliet and it came down to this; I didn't want to spend most of my time worrying about the state of my car and get on with enjoying the driving experience.
I love the agility of my Golf when driving the B roads between my home and work, it is where I feel I get the most out of my car so I wanted to make her the best she could be when weaving between hedgerows. Saying that, I was always aware if I did future proof this car I would need to restore her sensitively, she may not be mine forever and considered the possibility that someone else may have different ideas for her. So I decided it was to be a mixture of restoration and custom build:
- Bare metal respray, original colour, and refurb'd trim.
- Upgraded suspension, brakes, clutch.
- Refurb'd engine and gearbox.
- Refit the original interior as I love the original design and fittings.
Meanwhile, I had started a search for someone to take on the job, share my vision and contribute to the build on every level. I know this may wind some people up but please don't judge me, I may own a classic but I'm a self confessed office monkey, I'm not a mechanic or fabricator and I live in a flat!�
 � Anyway, in late September my research led me to a family owned company near Hinckley who have a history of restoring a variety of classic, fast road and rally cars but no real experience with VW's. So I got in touch and they invited me down to the workshop to see their handy work in the flesh before I made a decision to go ahead. For all of my limited experience you know when something feels right so I sat down with one of the brothers and outlined the vision for my car. He got what I wanted to do straight away and started feeding me ideas of how I could approach the rebuild, after an hour of exploring the options and how much it may cost I booked her in and luckily they had a gap in November.
On Monday 26th of November a flatbed turned up at my flat and my car was winched onto the back ready for delivery to the shop. Project Juliet was a go…
Delivery
Outside the shop ready to be man handled.
Stripdown
First things first, the car was stripped and the damage was assessed:
Panels
Interior

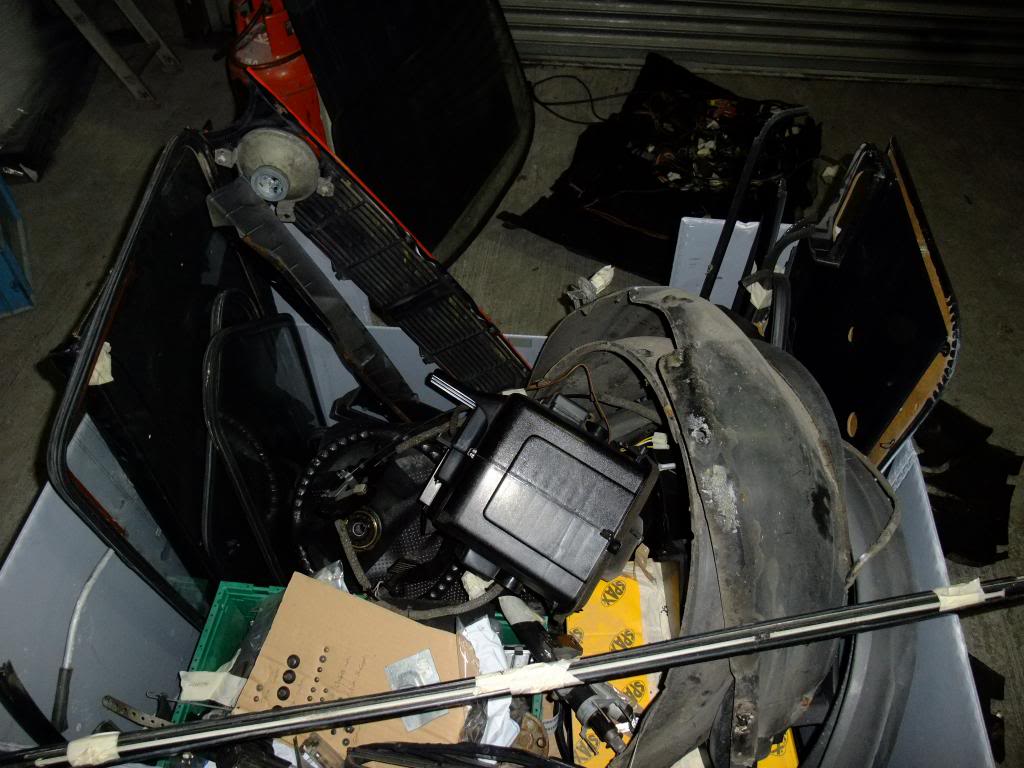
Engine Bay
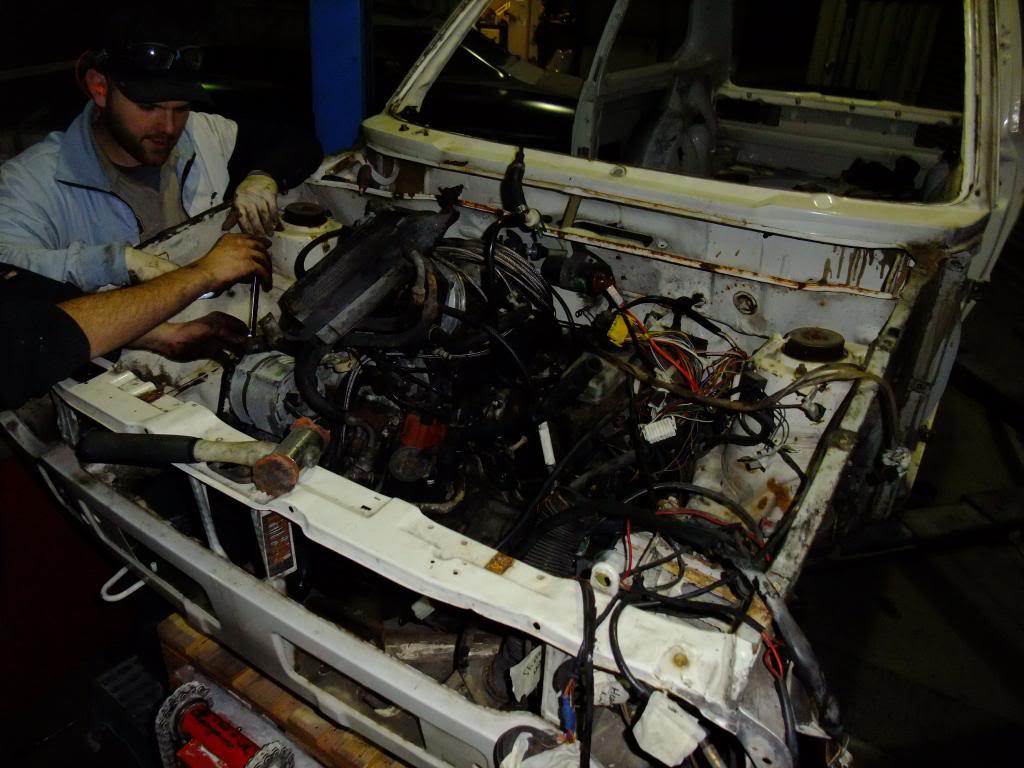
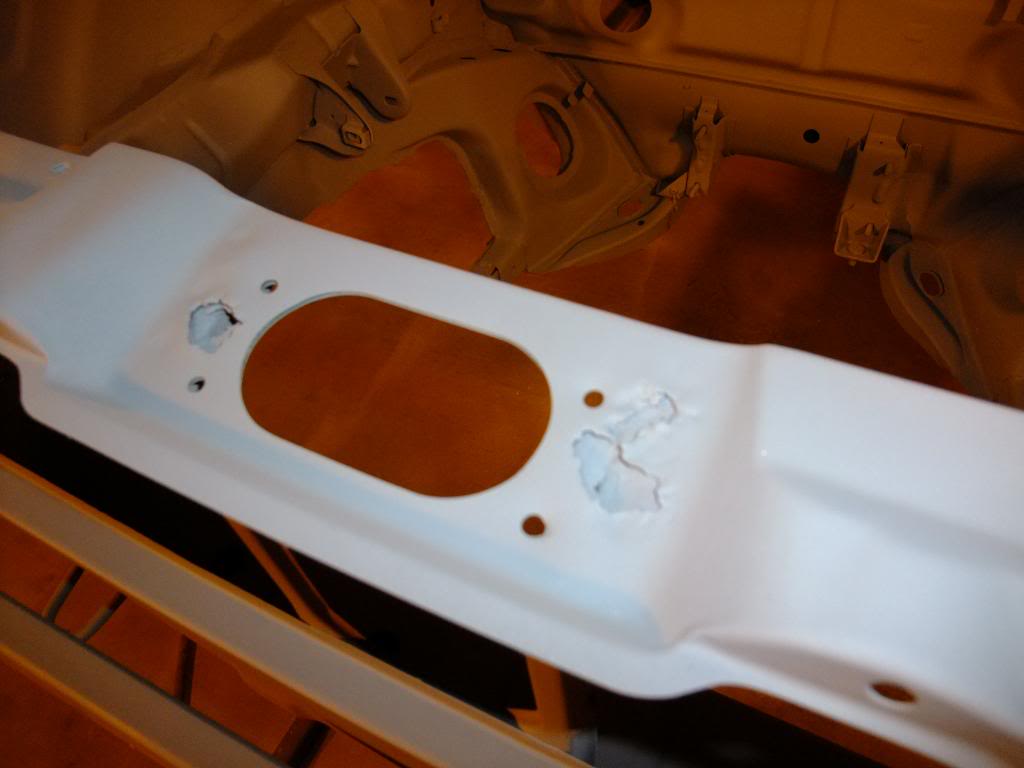
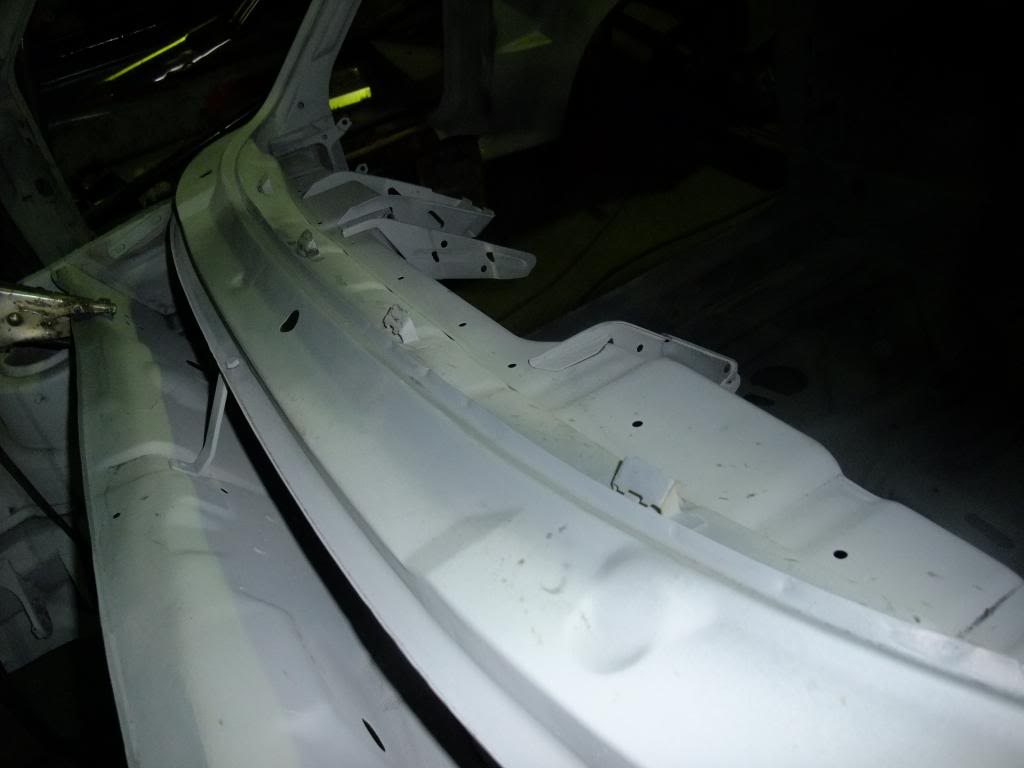
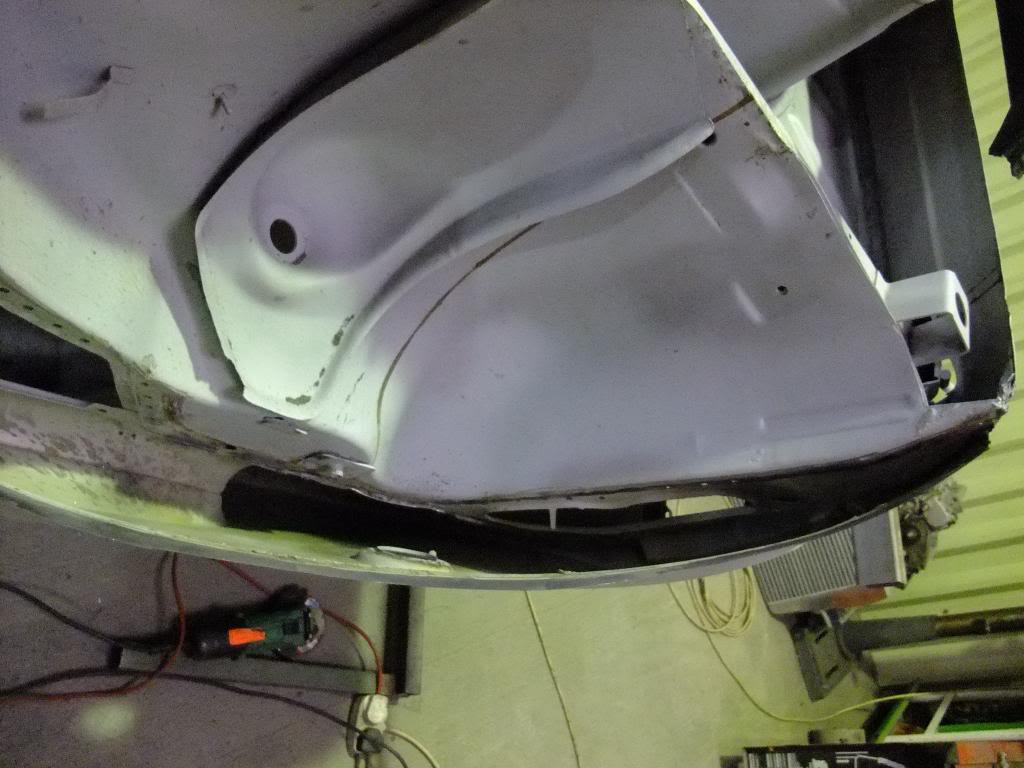
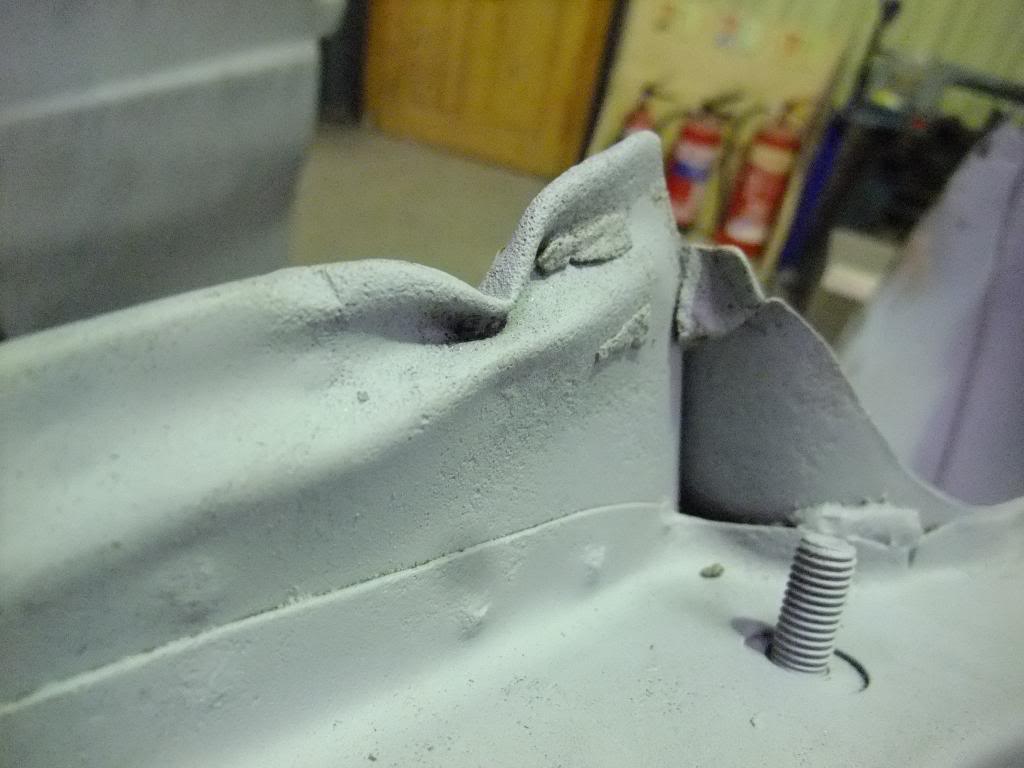
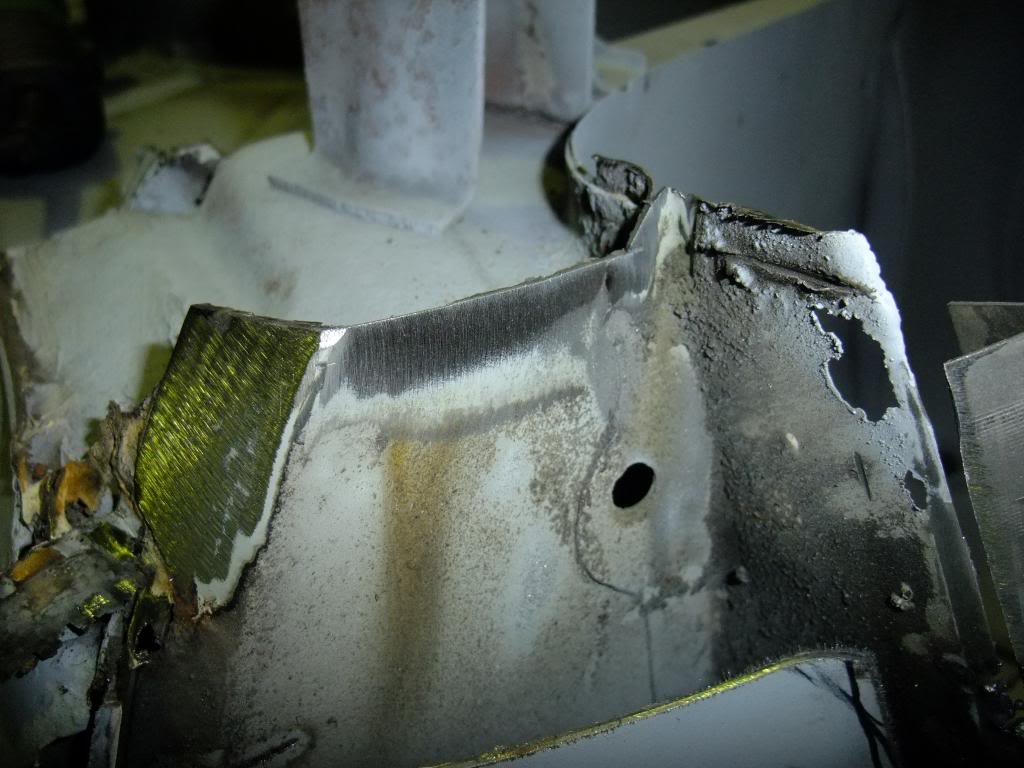
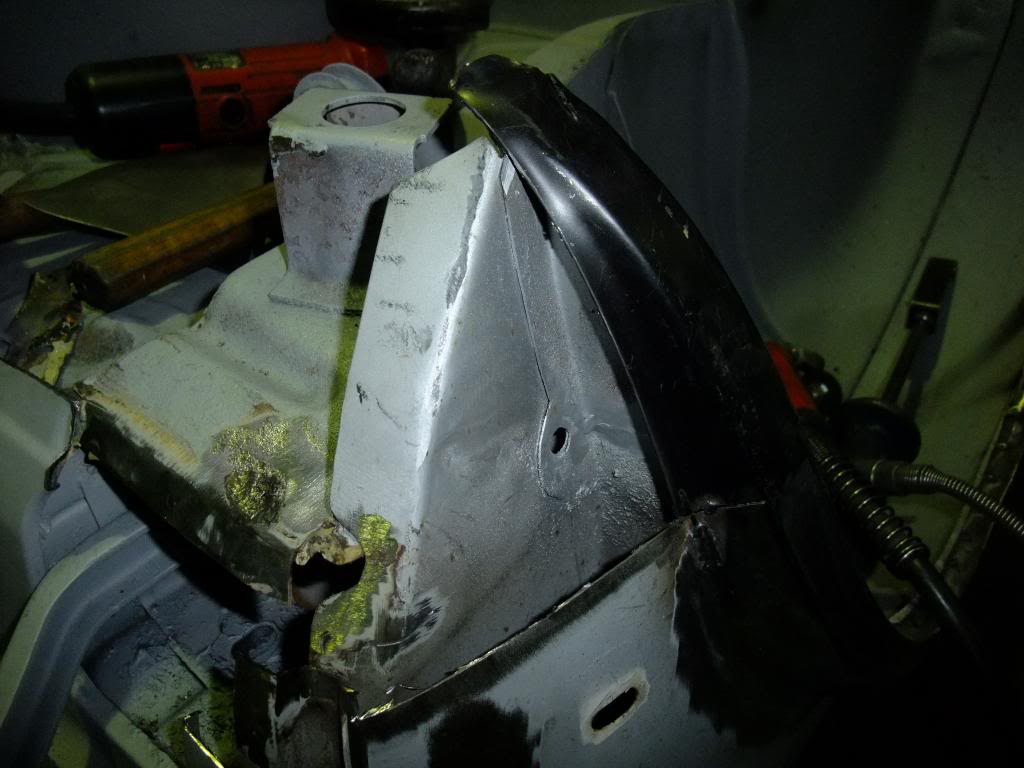
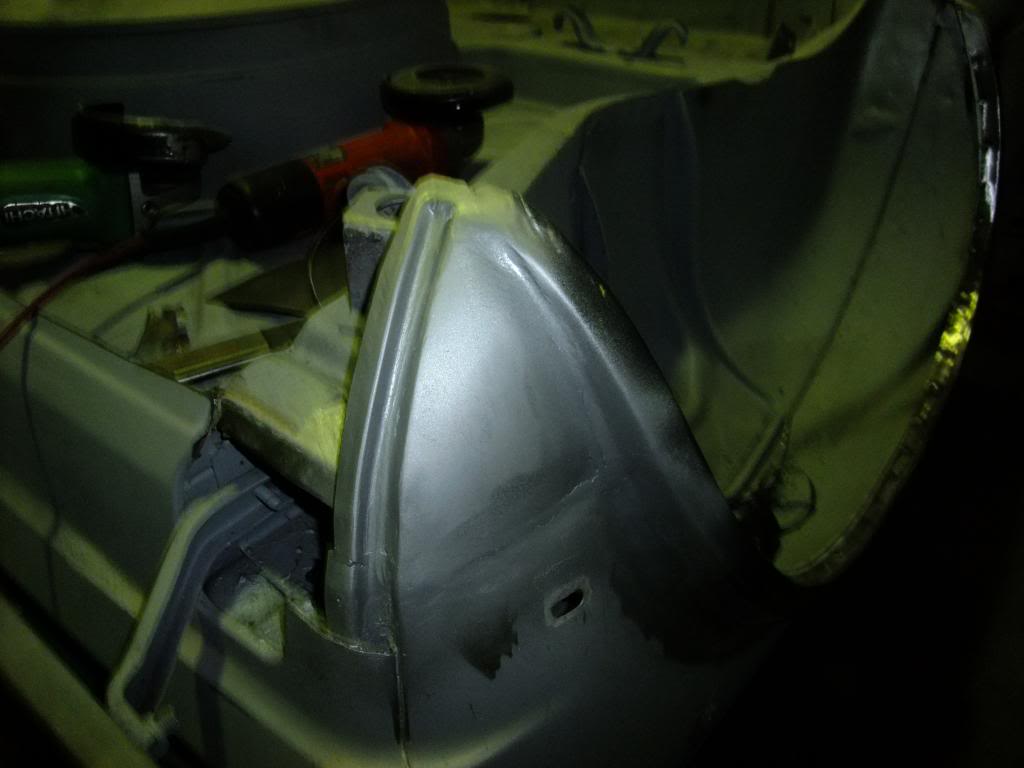
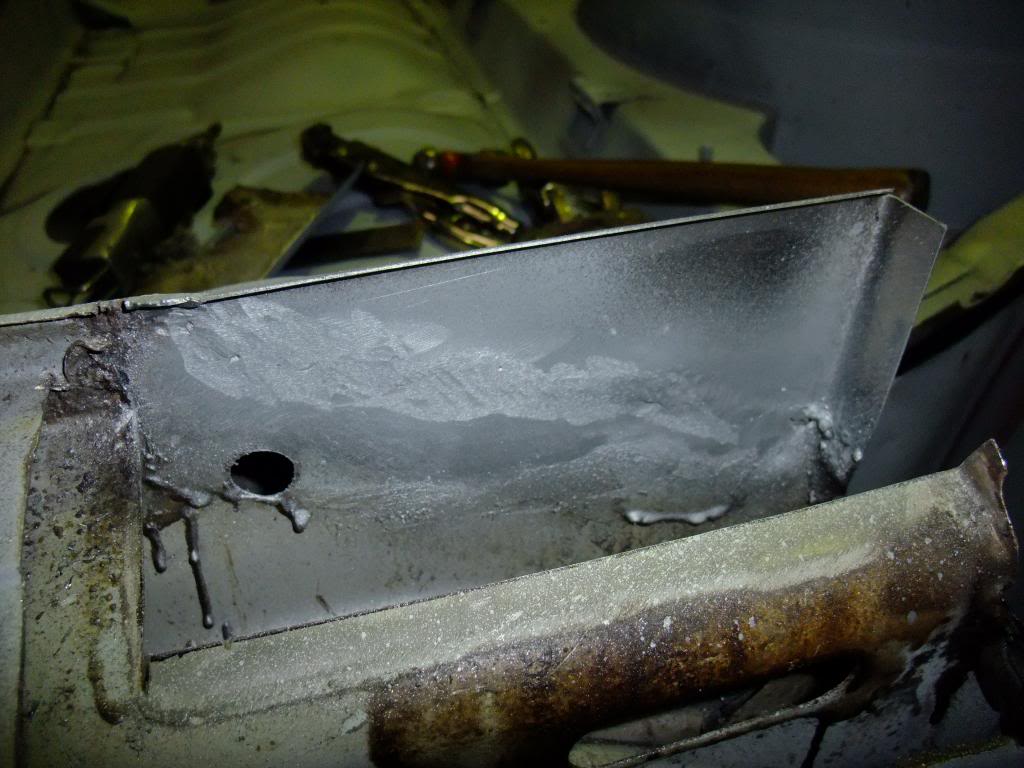
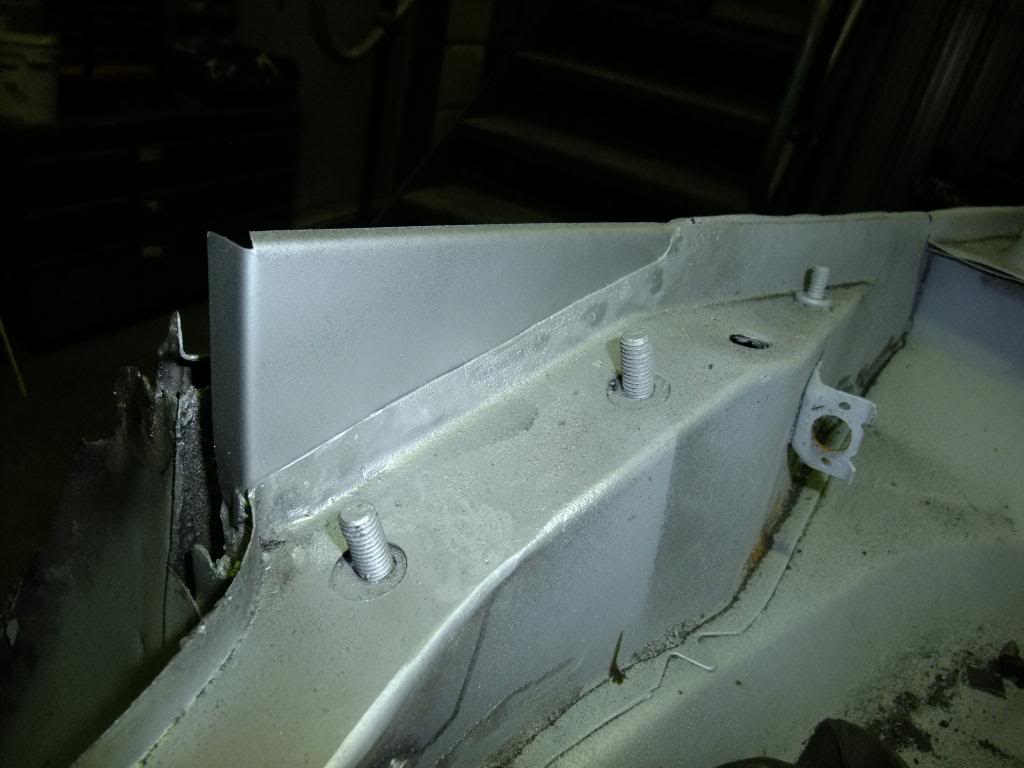
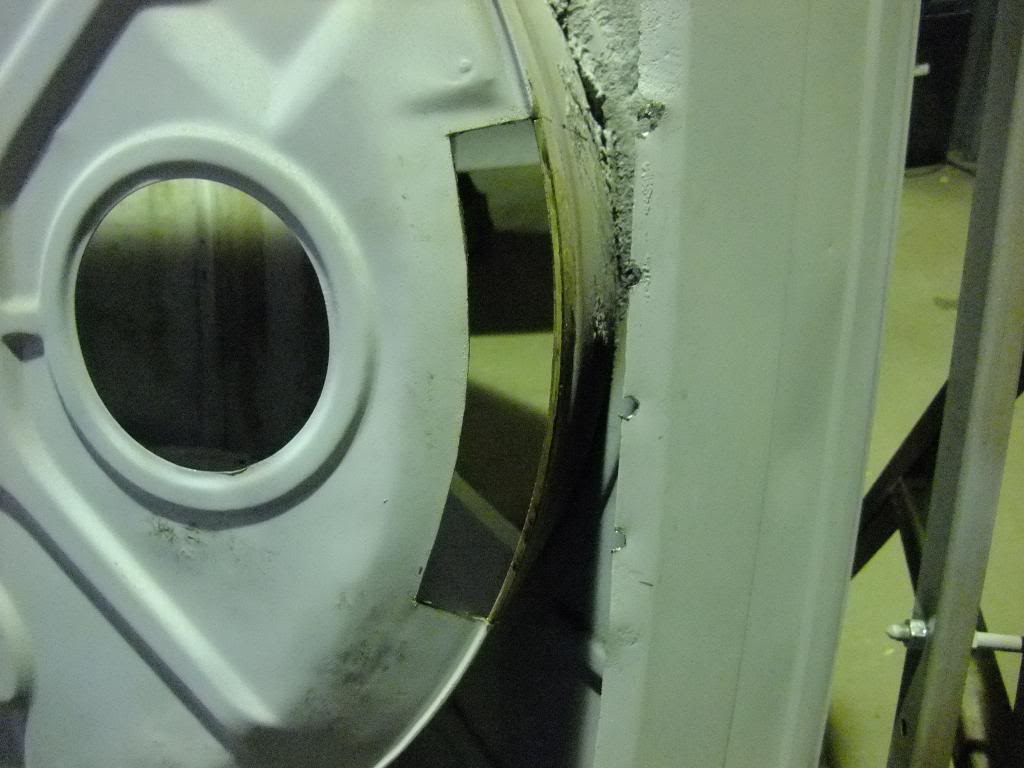
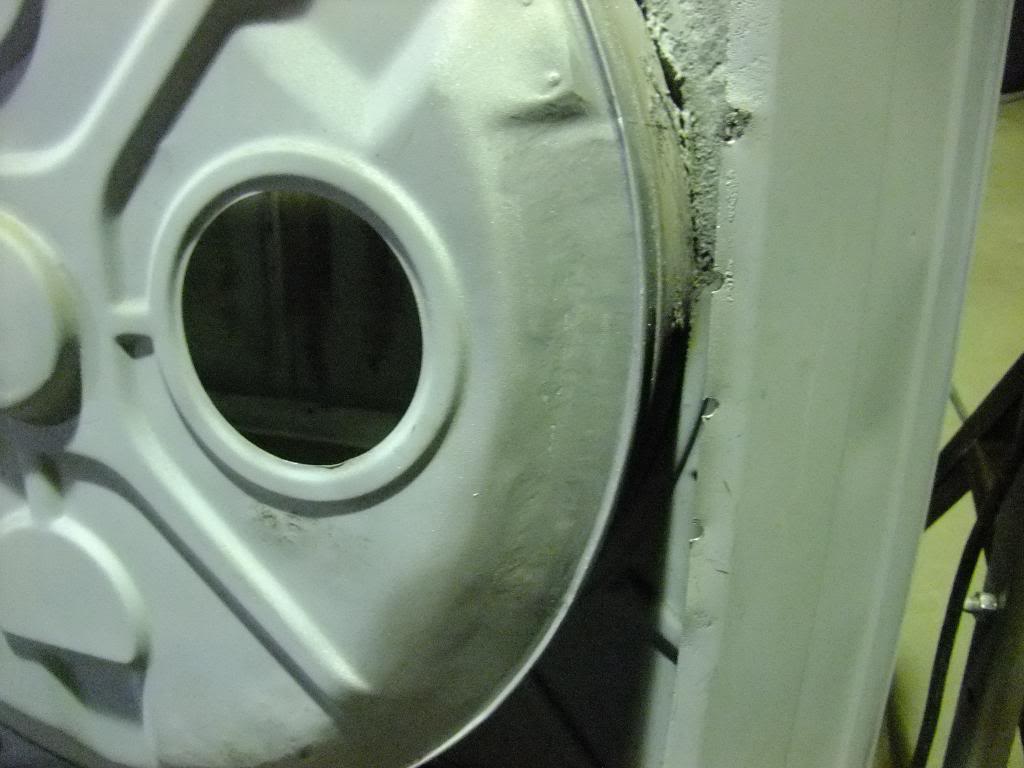
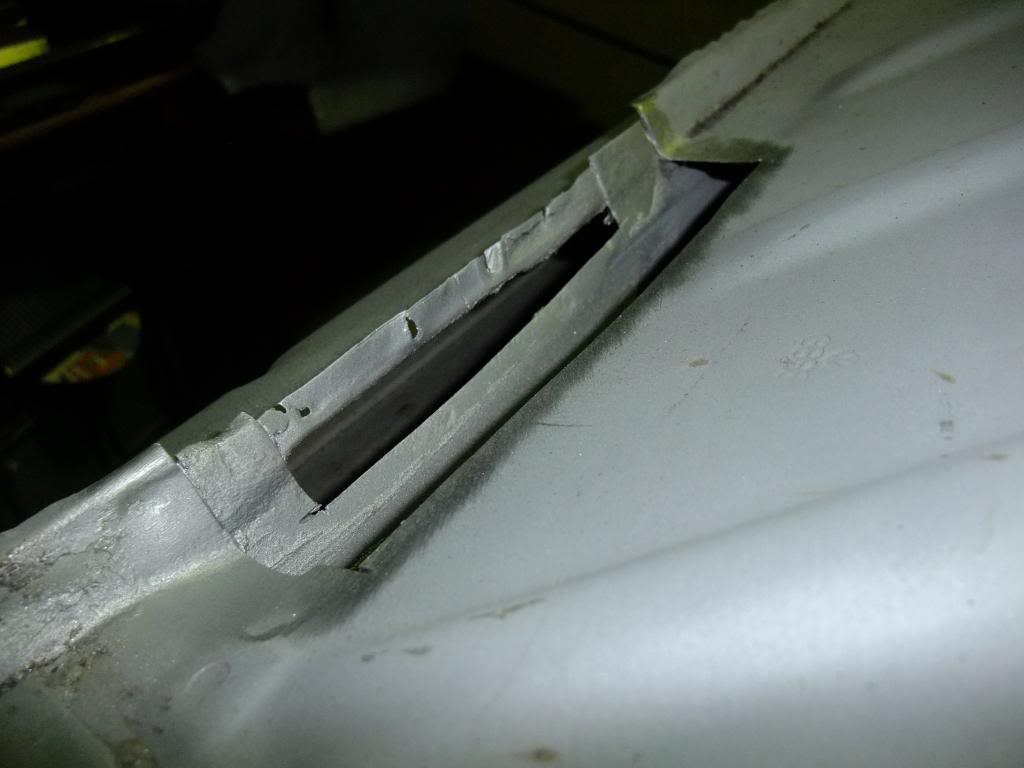
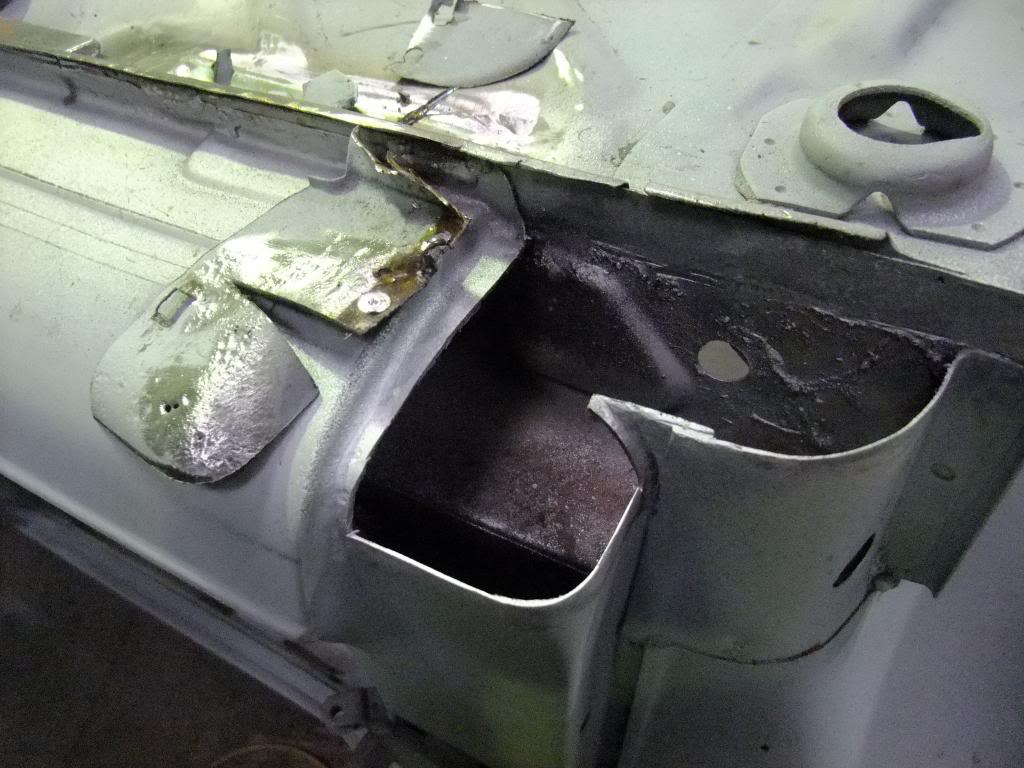
Scuttle and Upper Bulkhead
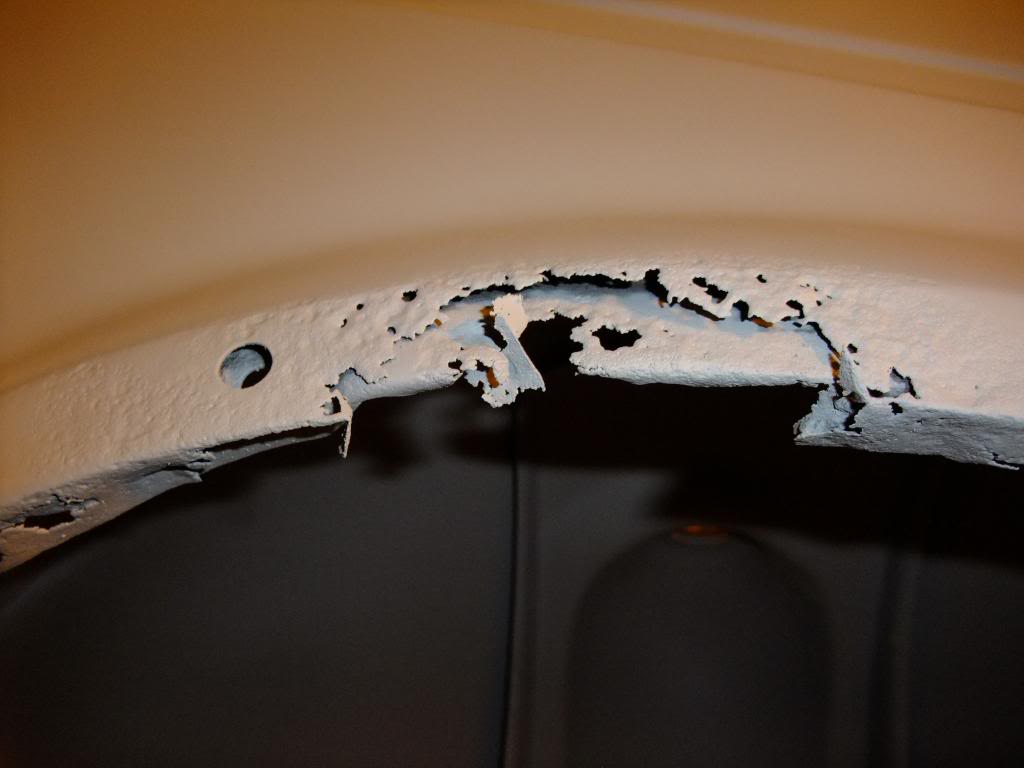
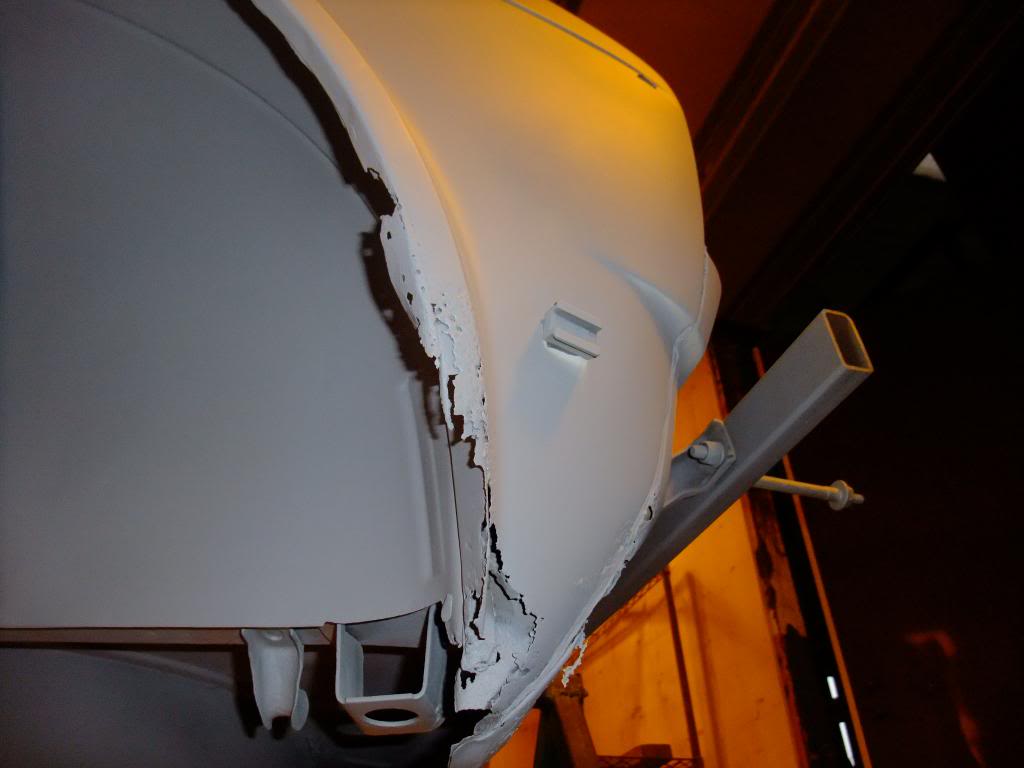
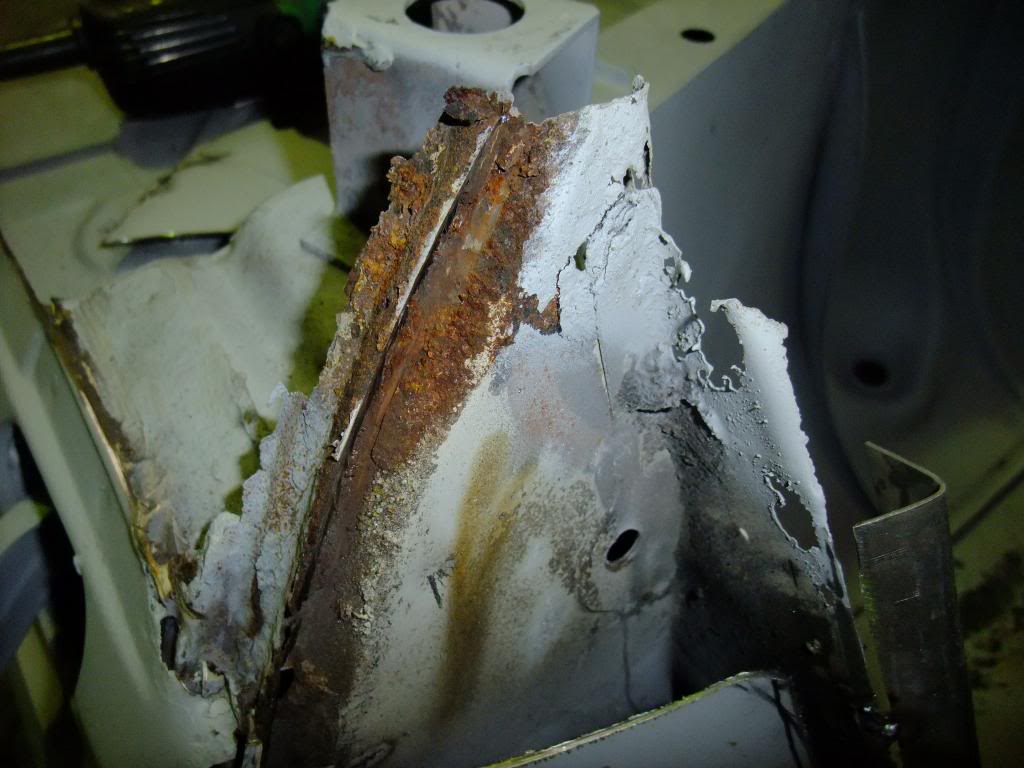
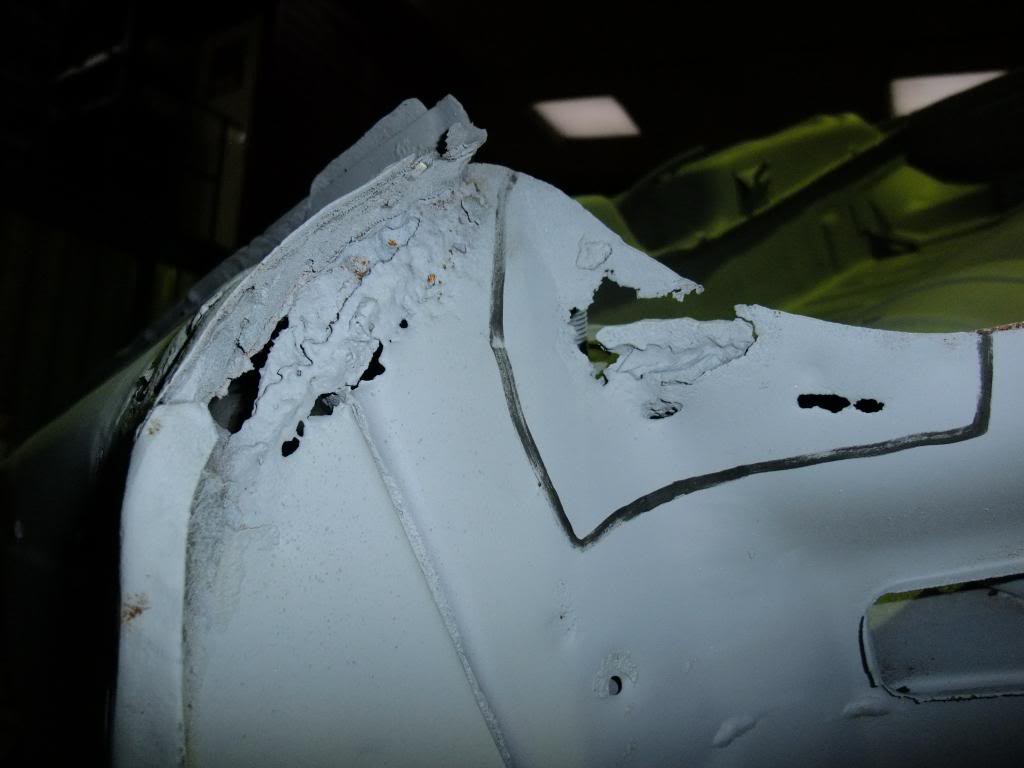
Rear Passenger Side Arch
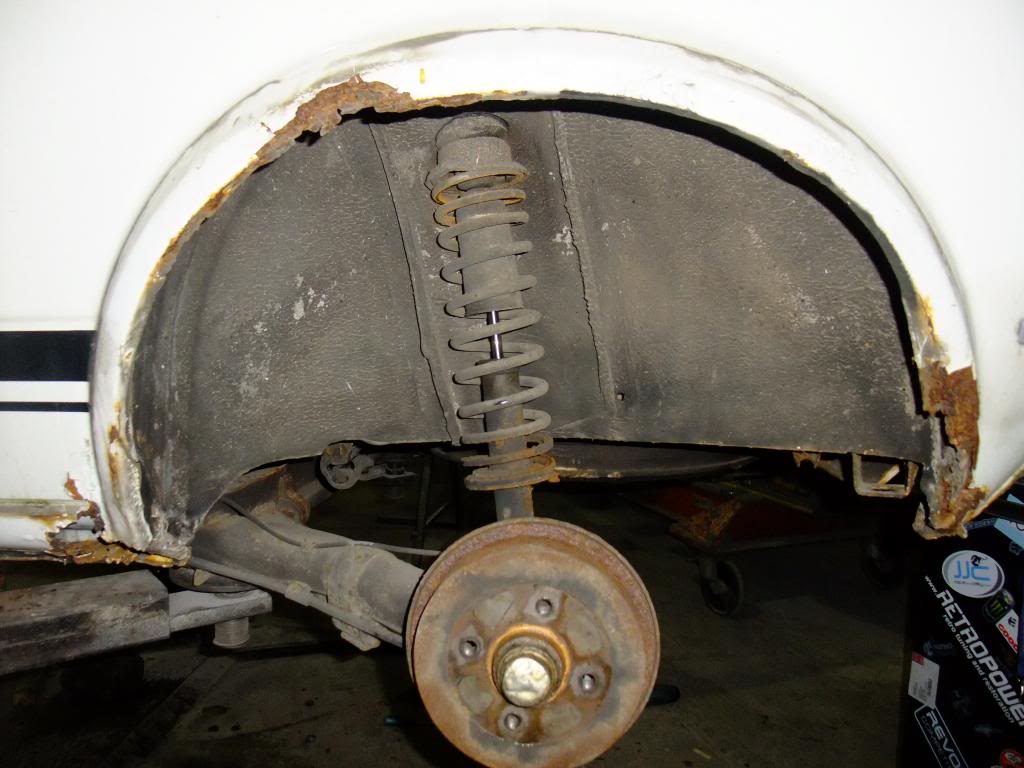
So that's what those spats were hiding… Worse than expected but not too bad.
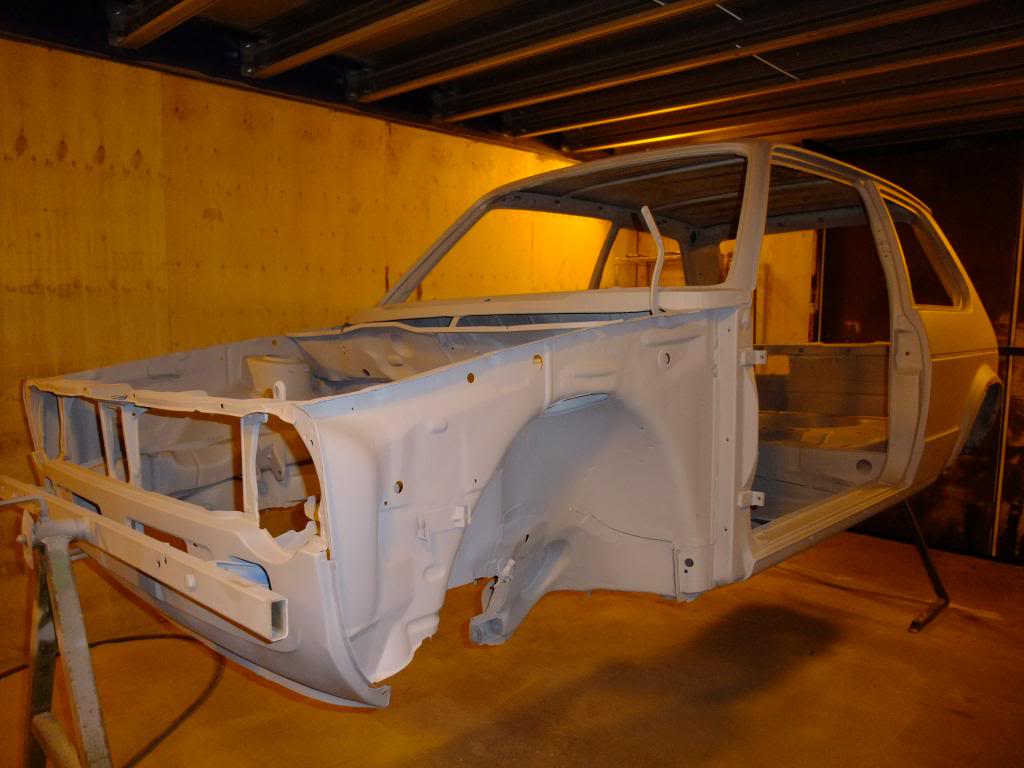
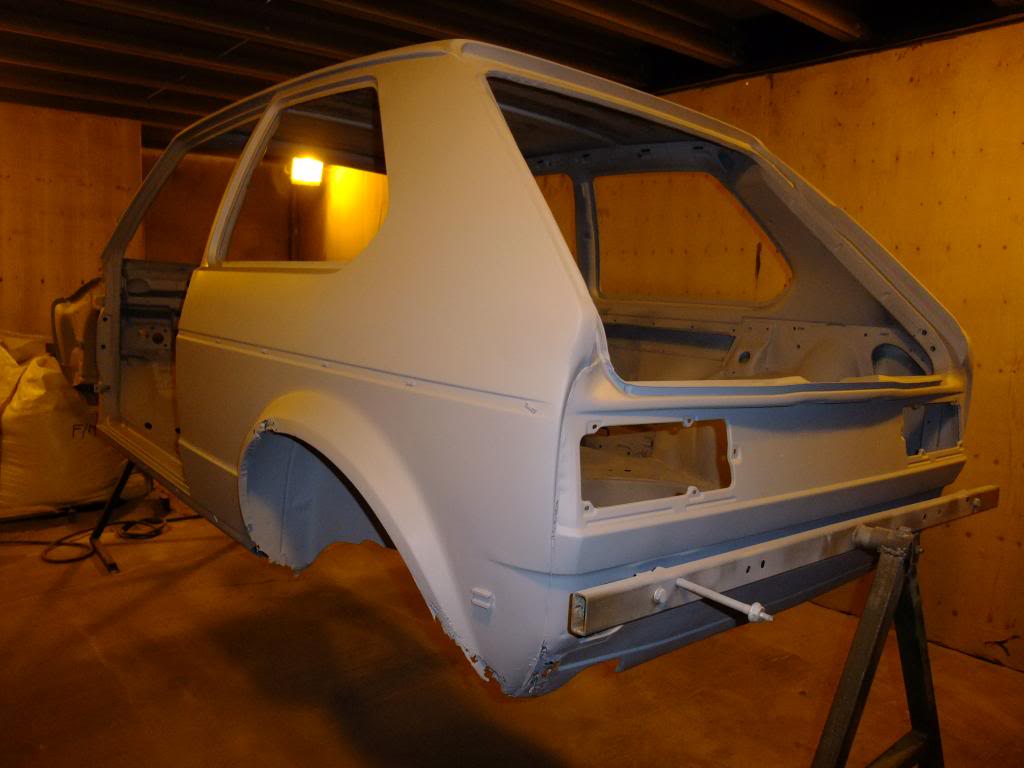
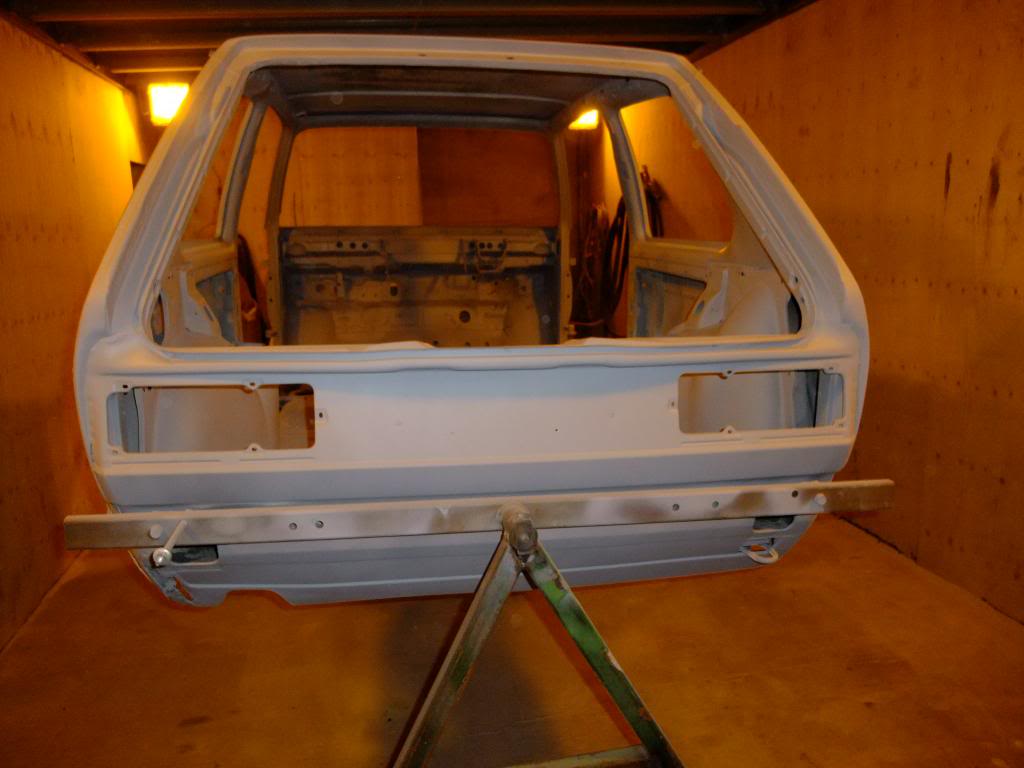
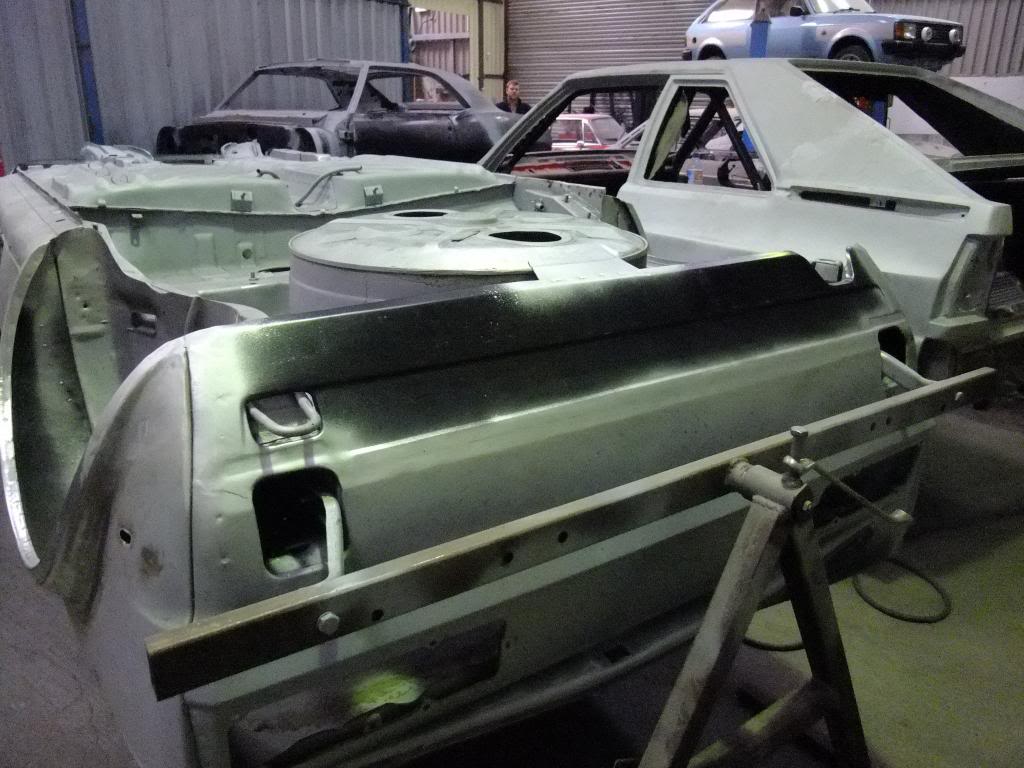
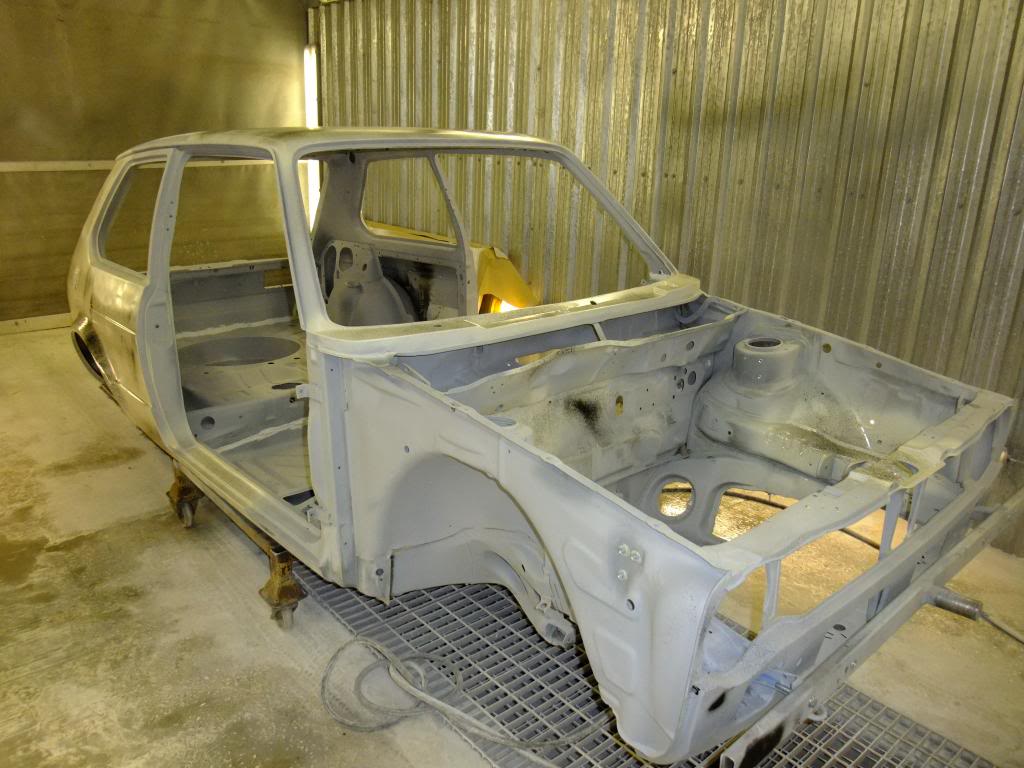
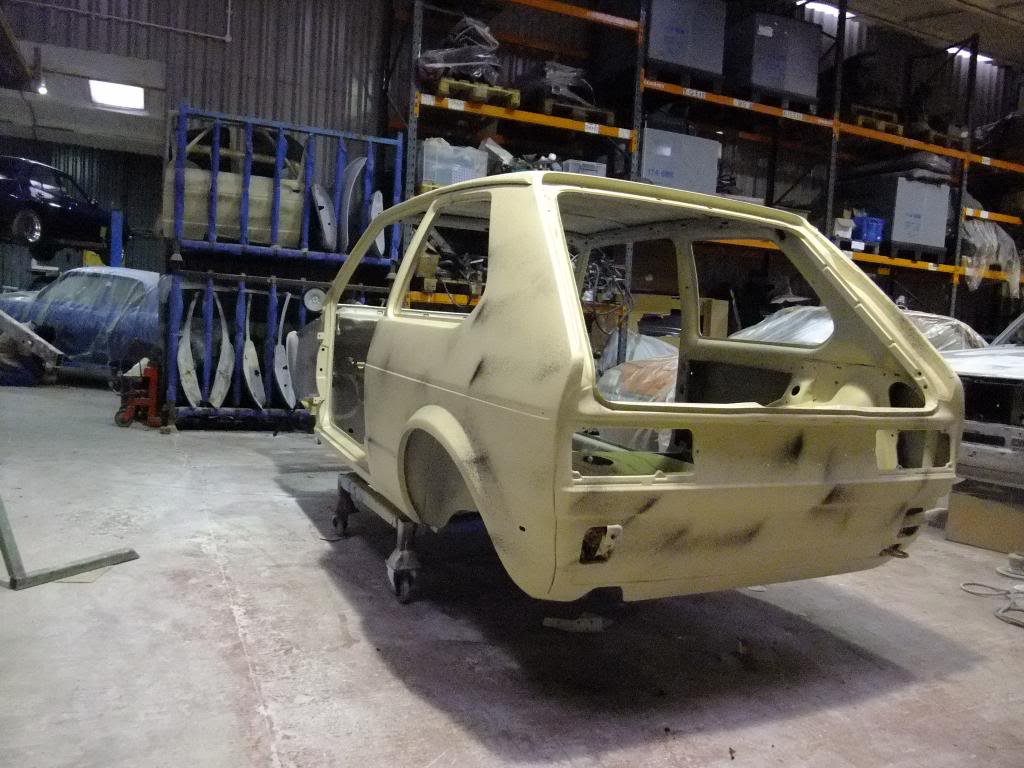
Body Shell

Ready for media blasting…
Last edit: by Jujenkai
Posted
Newbie
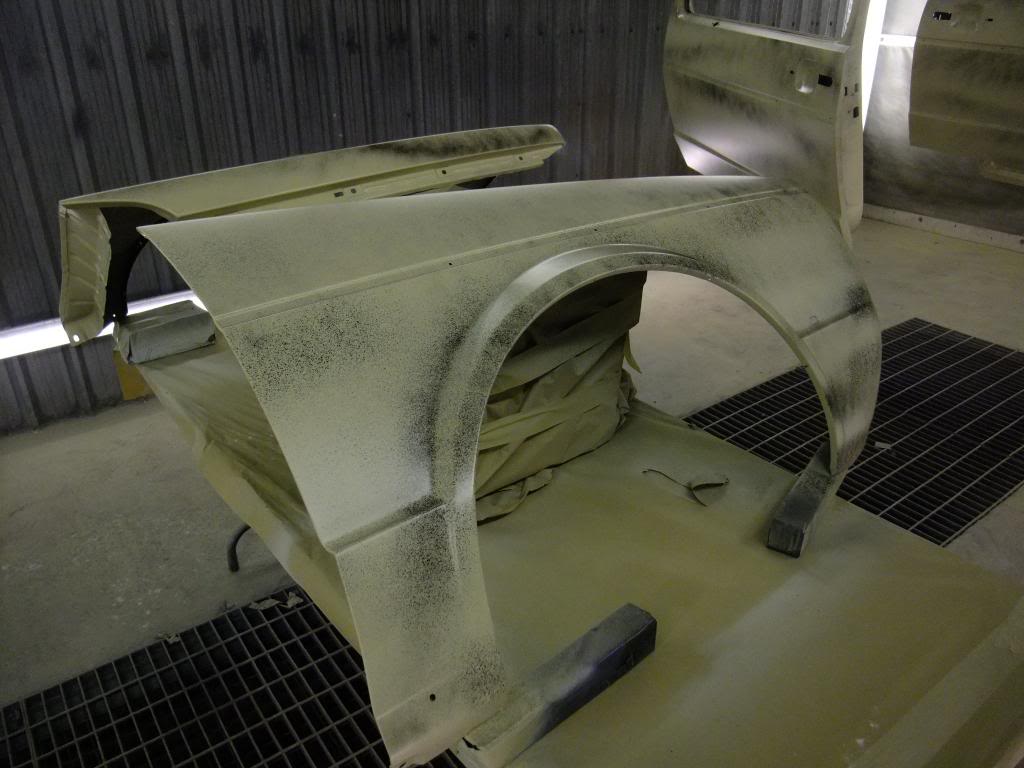
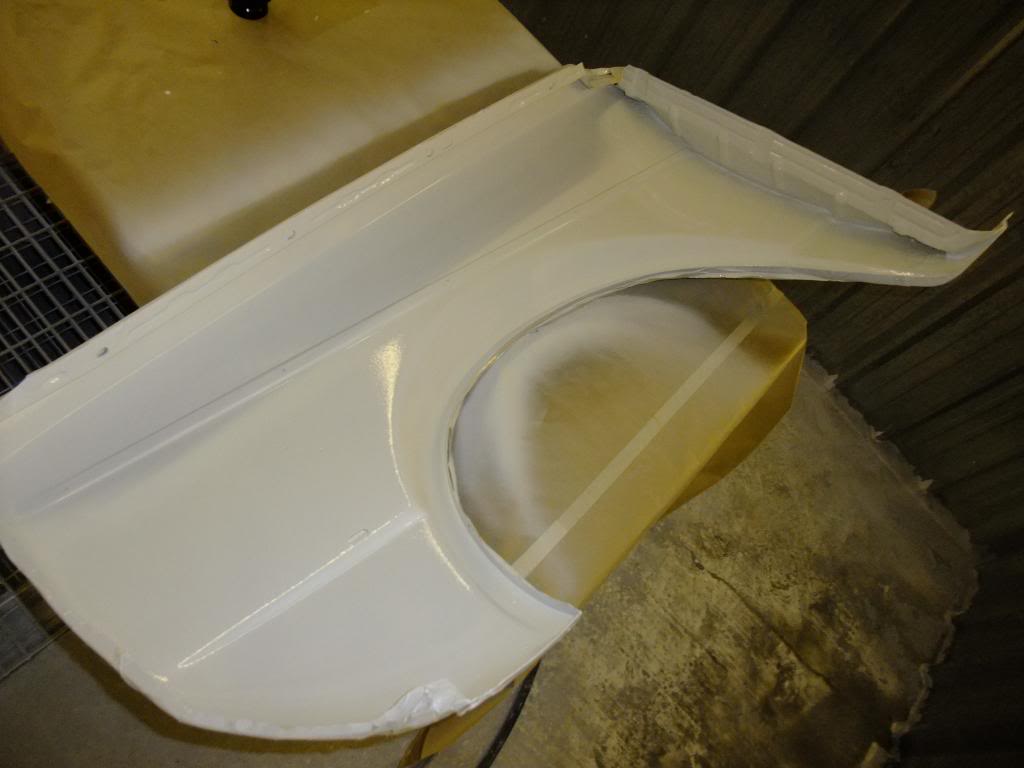
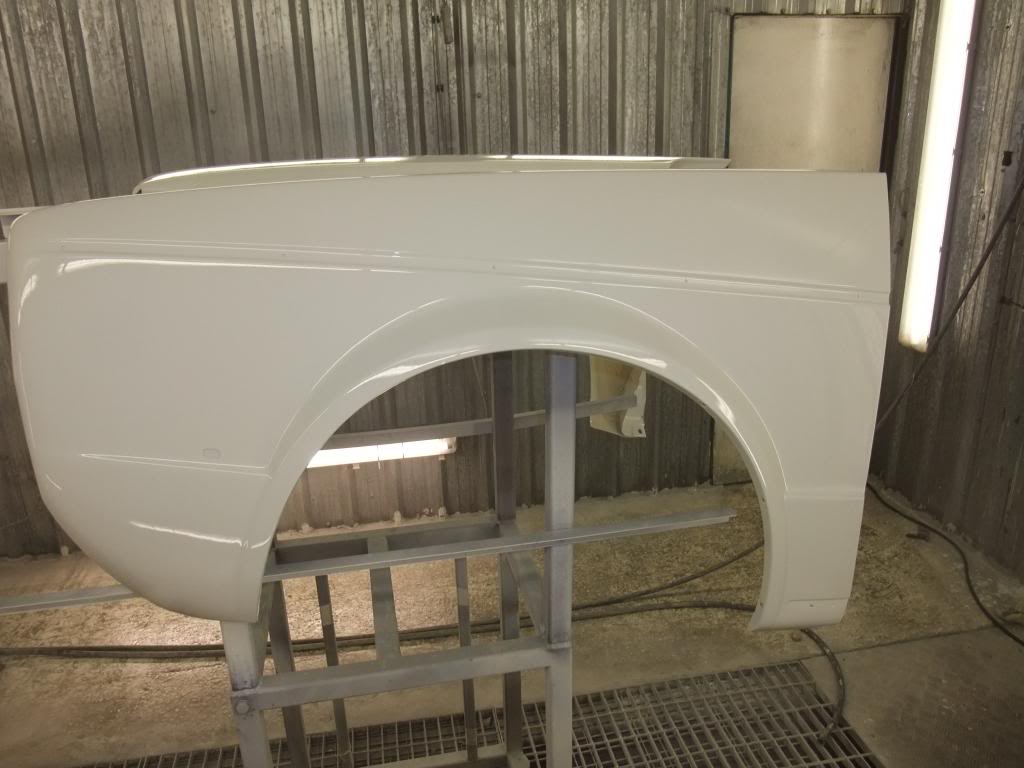
Panels
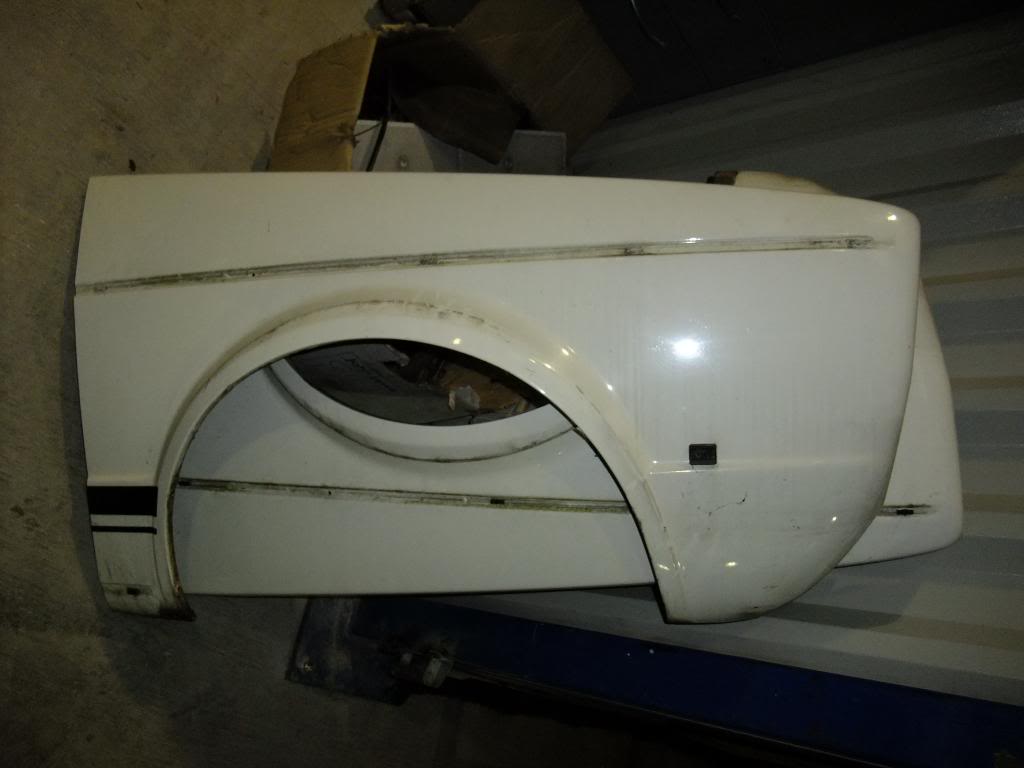
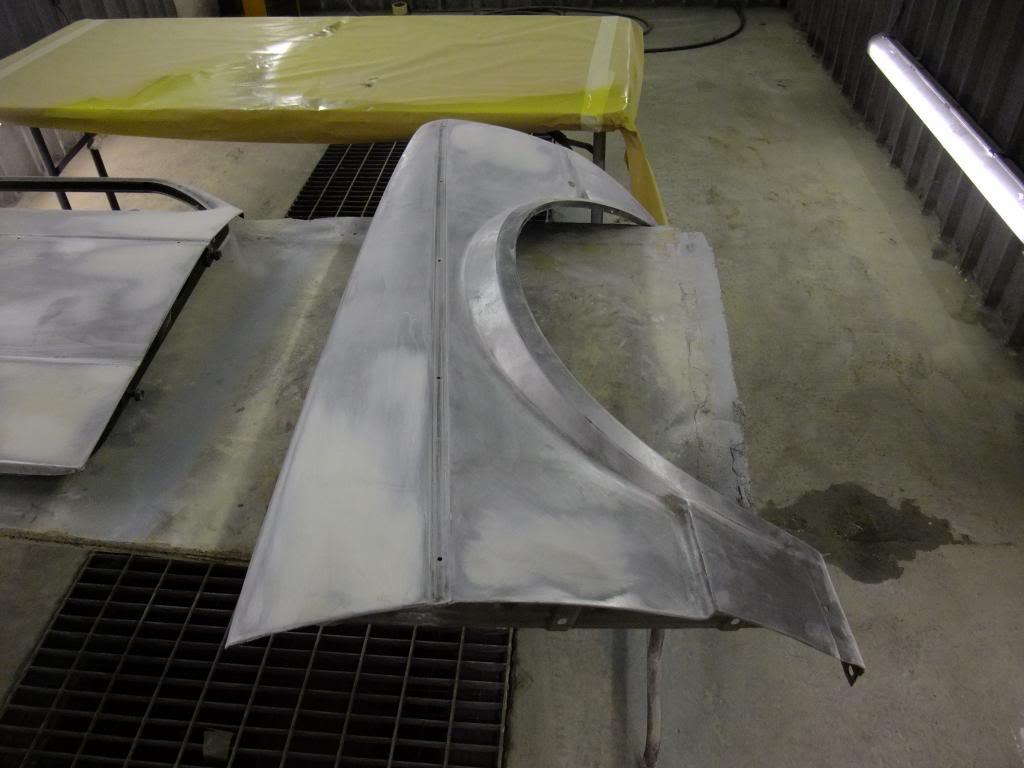
Wings
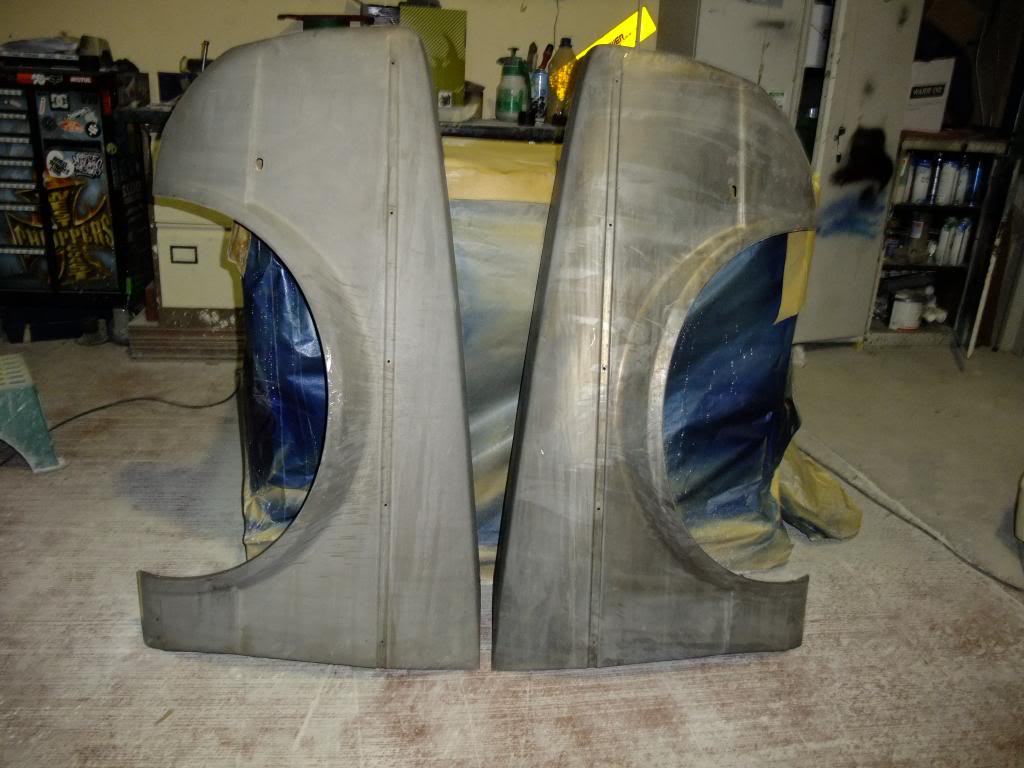
Like new!
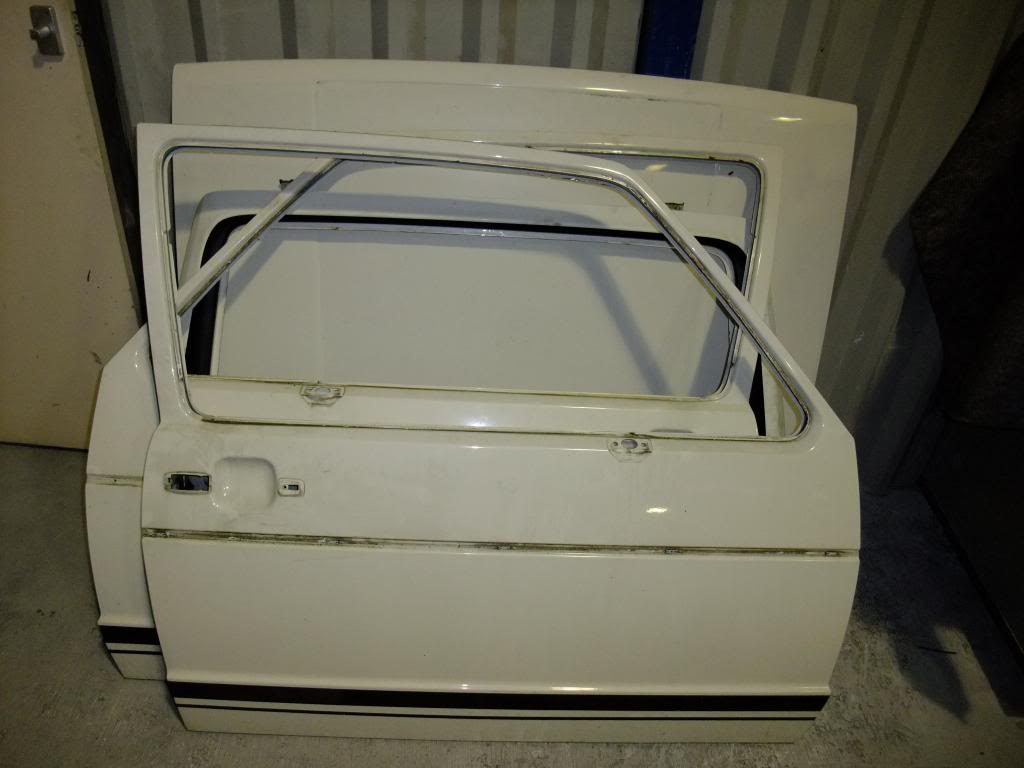
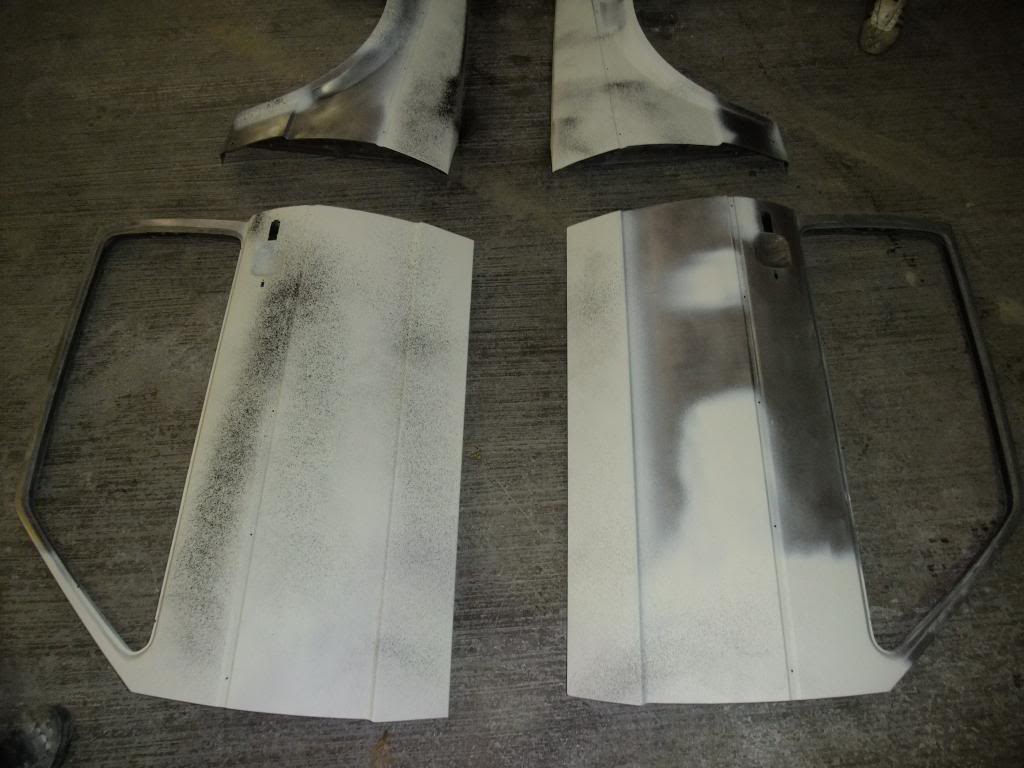
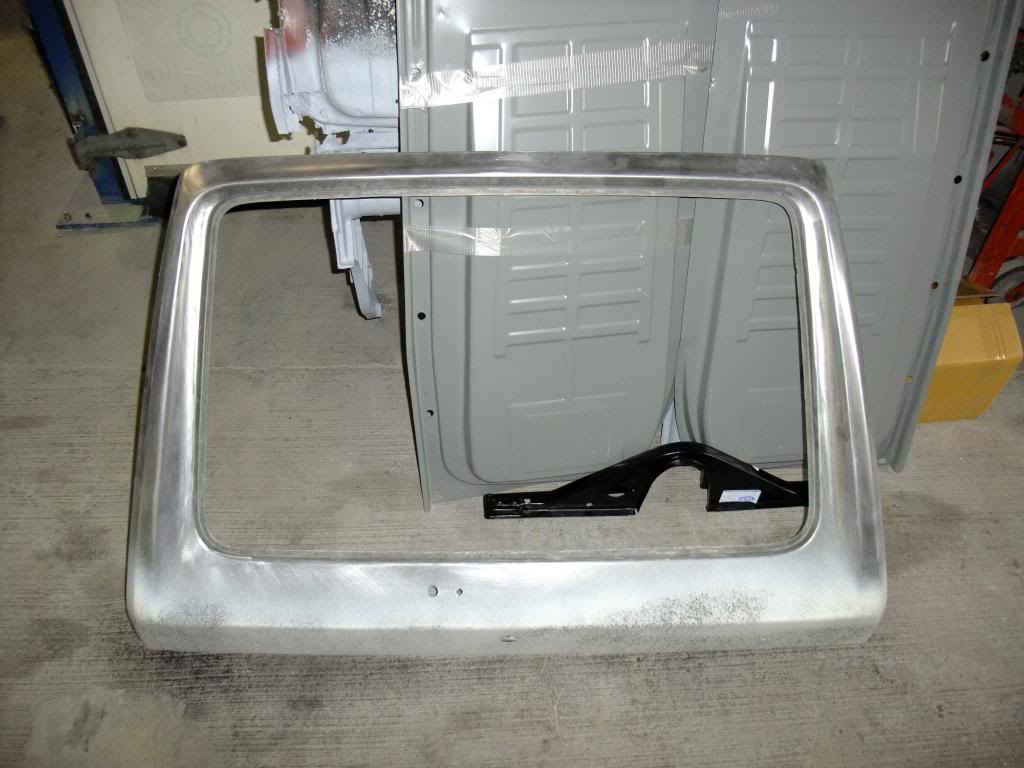
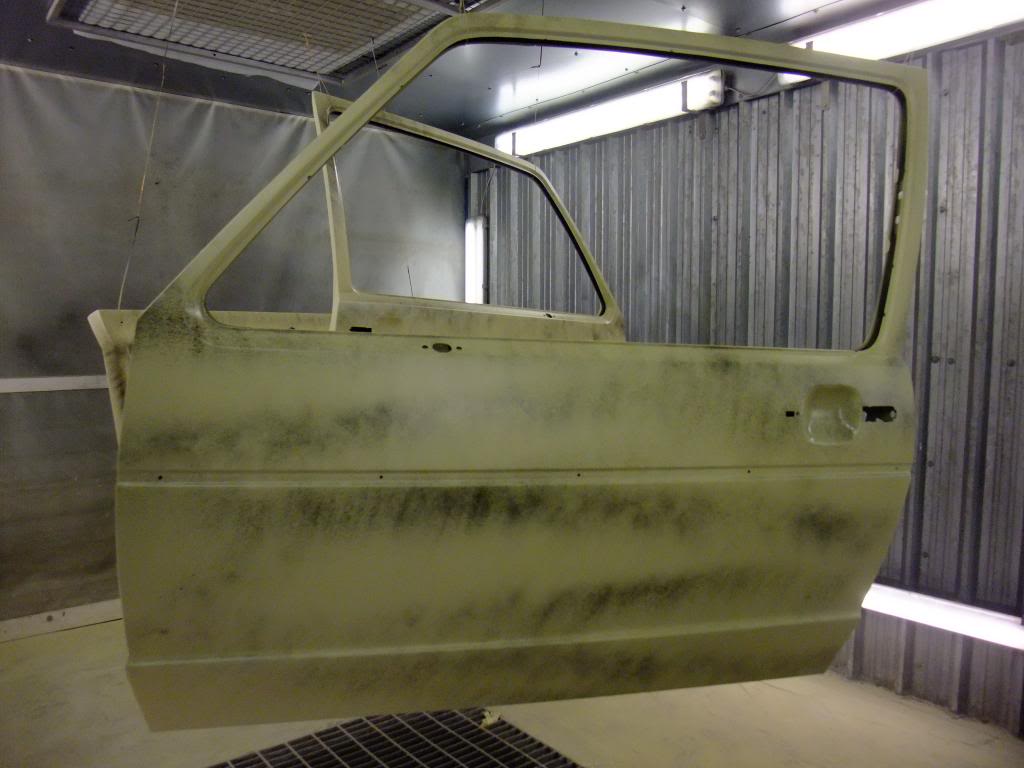
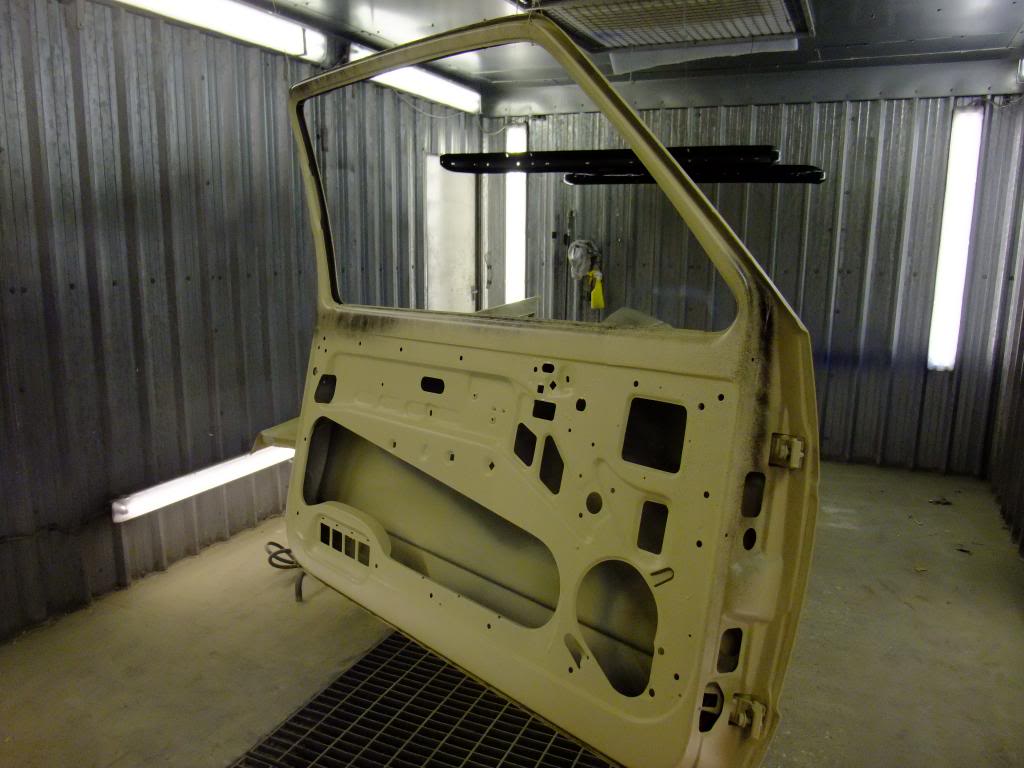
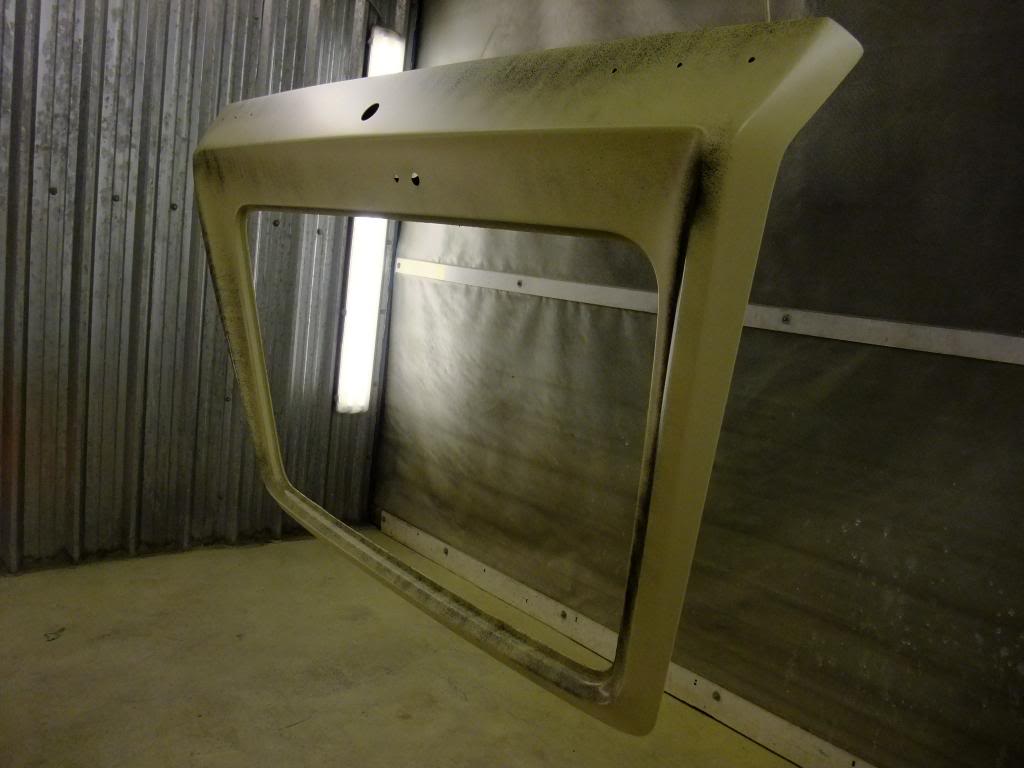
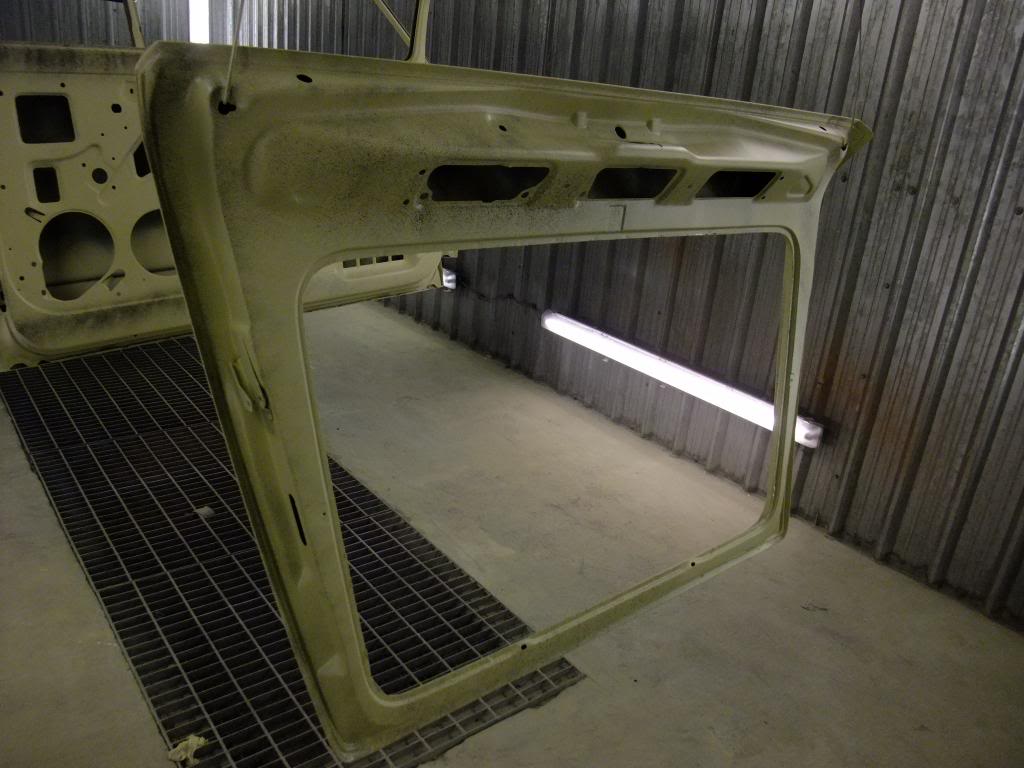
Hatch and Driver Door

Can't fault the VW paint quality, they're so clean for 30 yr old bits of steel.
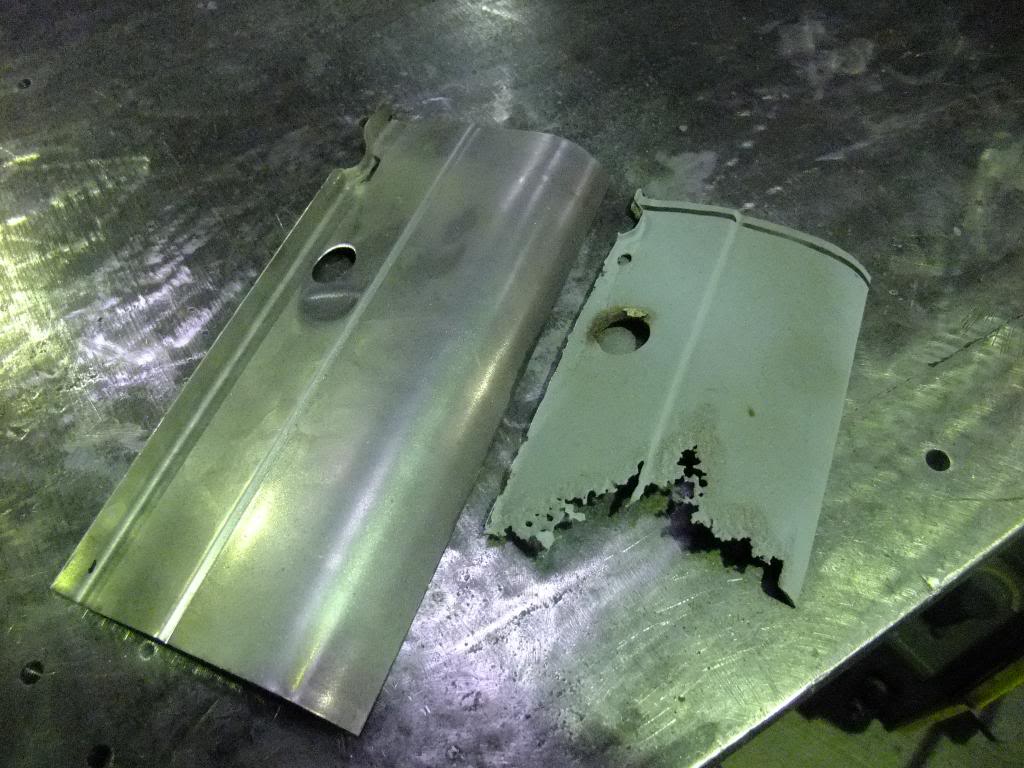
Passenger Door (and Repair)
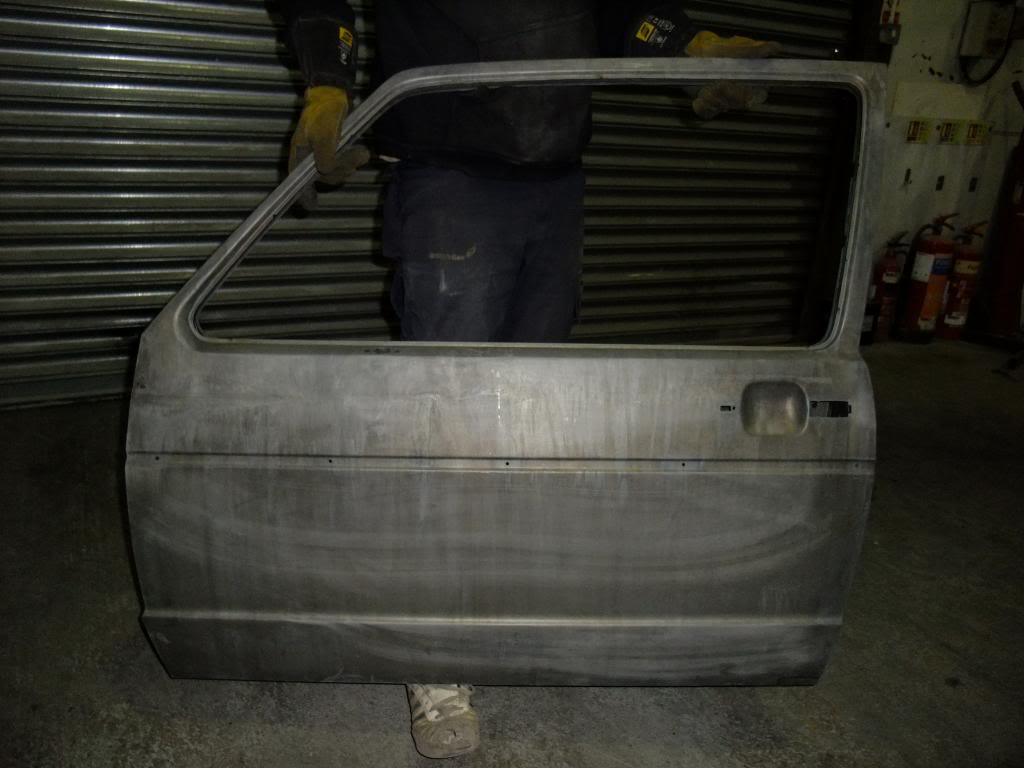
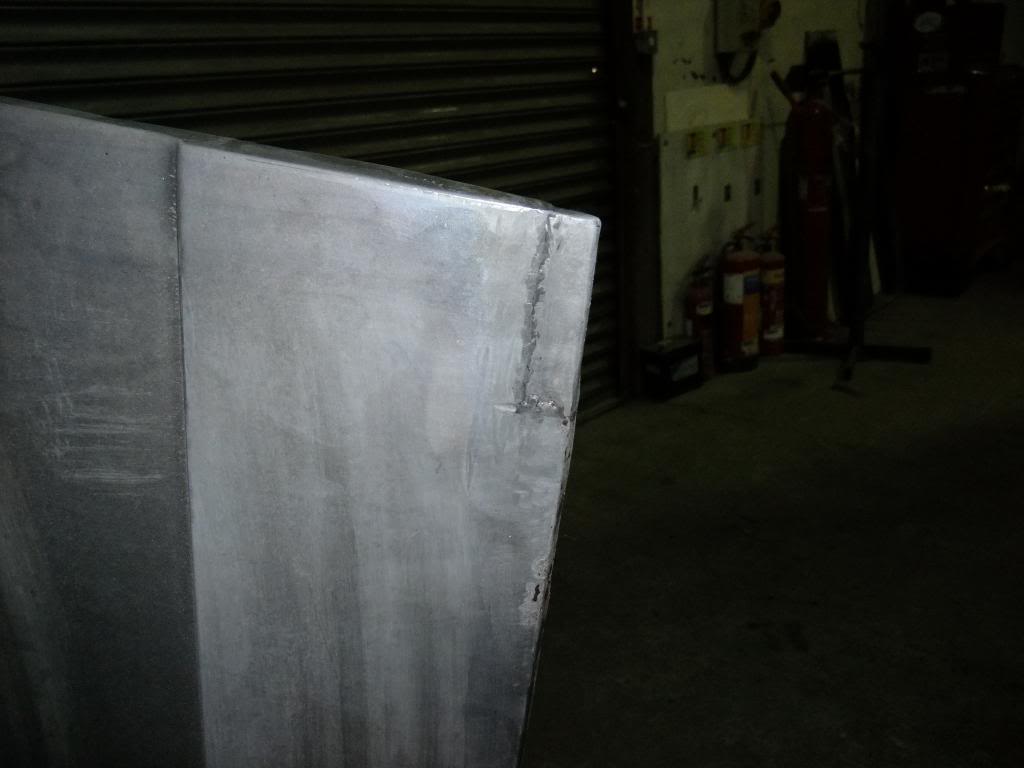
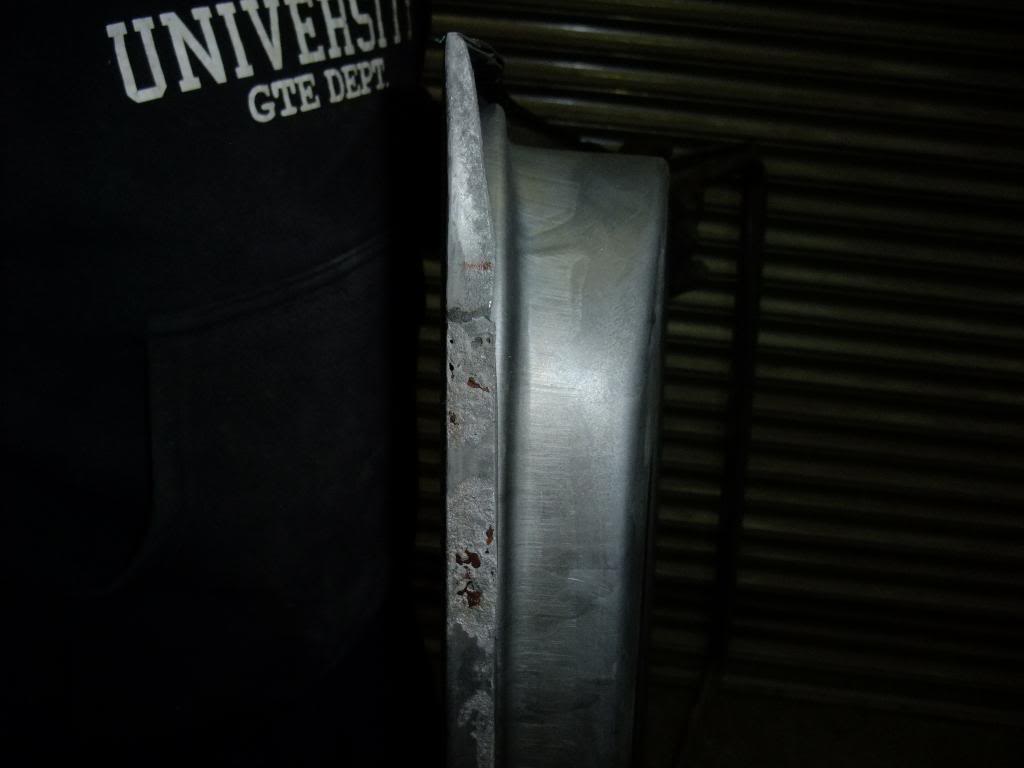
The only repair found on the metalwork. I was starting to get nervous, this was going too well…
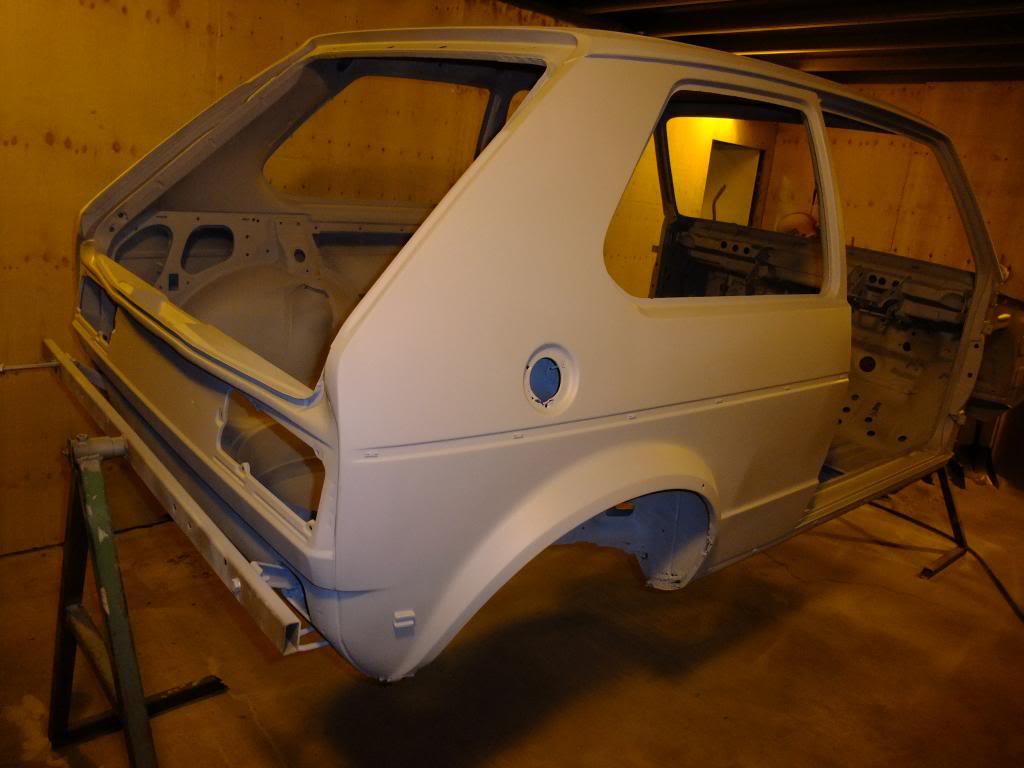
Body Shell
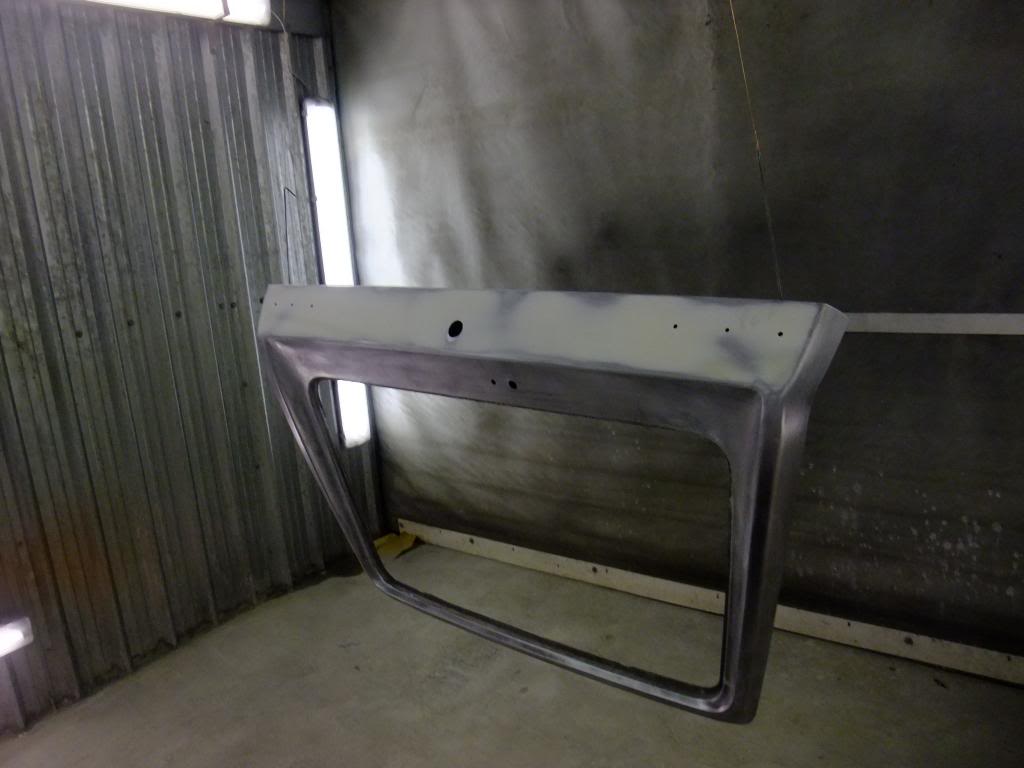
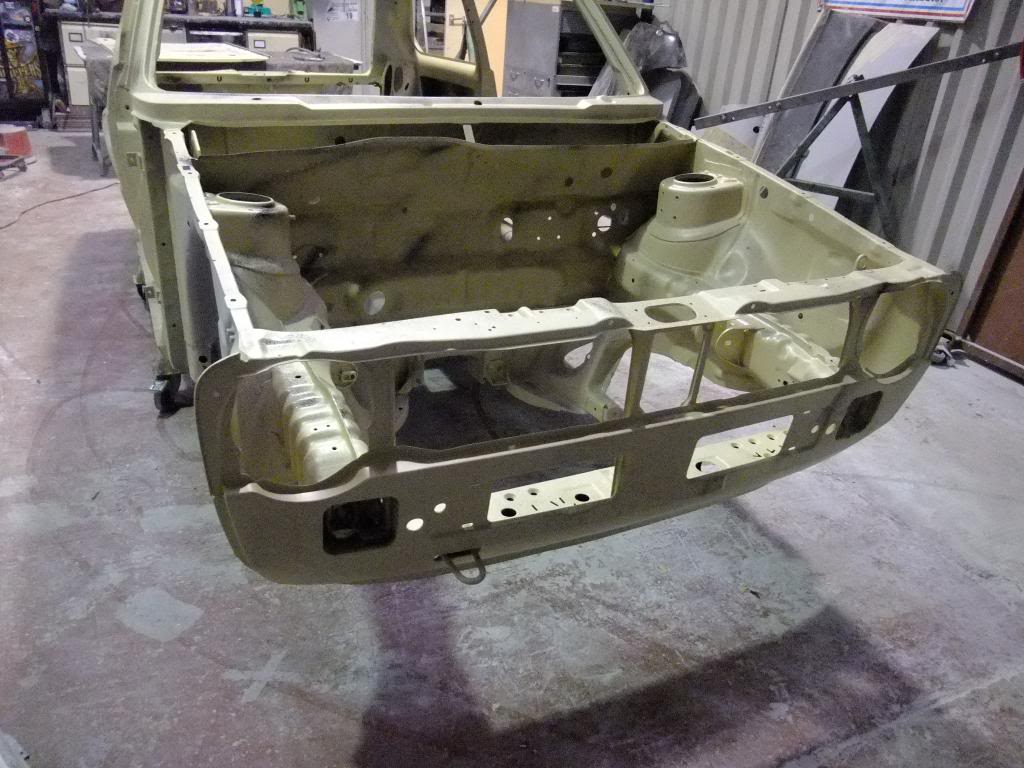
I'll start at the front and work towards the rear. Just to say the bare metal was zinc phosphate primed to prevent any areas of rust from progressing any further.
Front Panel

Nice and clean, just a couple of small patches on the bonnet lock plate…
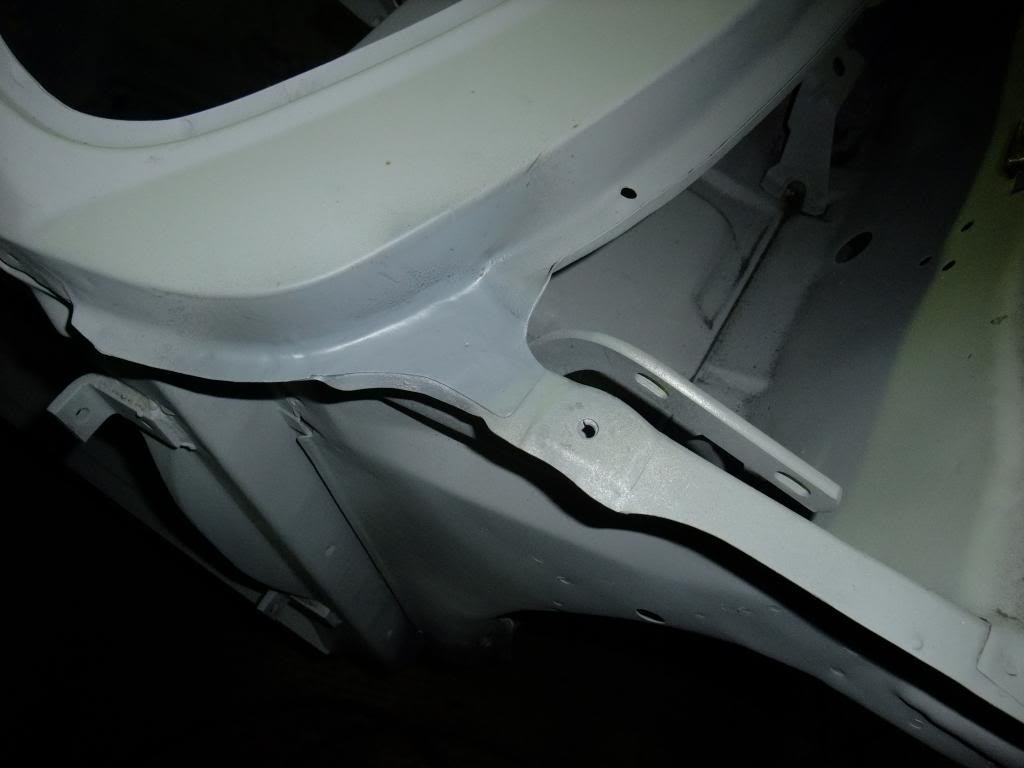
Front Inner Wings and Fire Wall
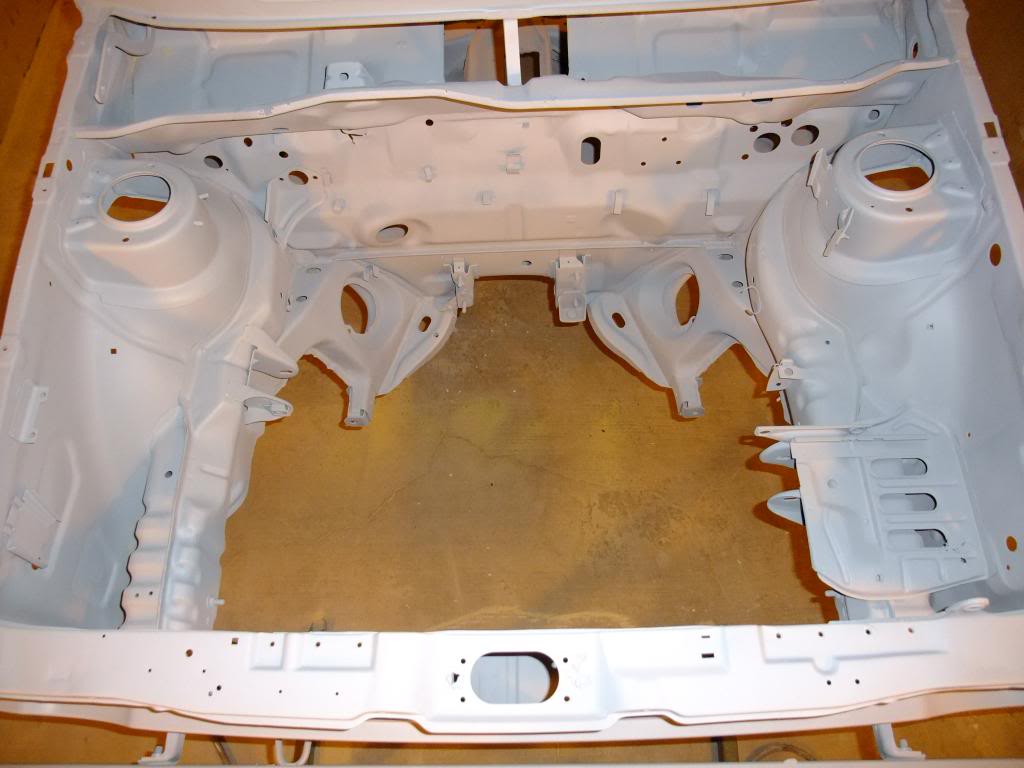
All good…
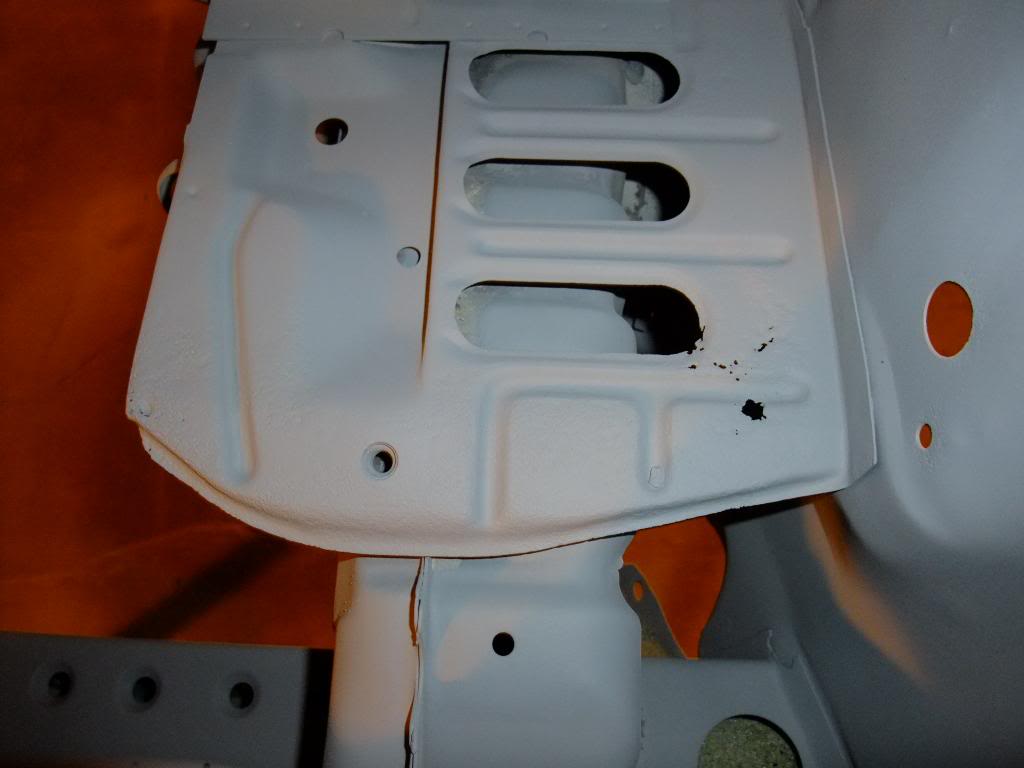
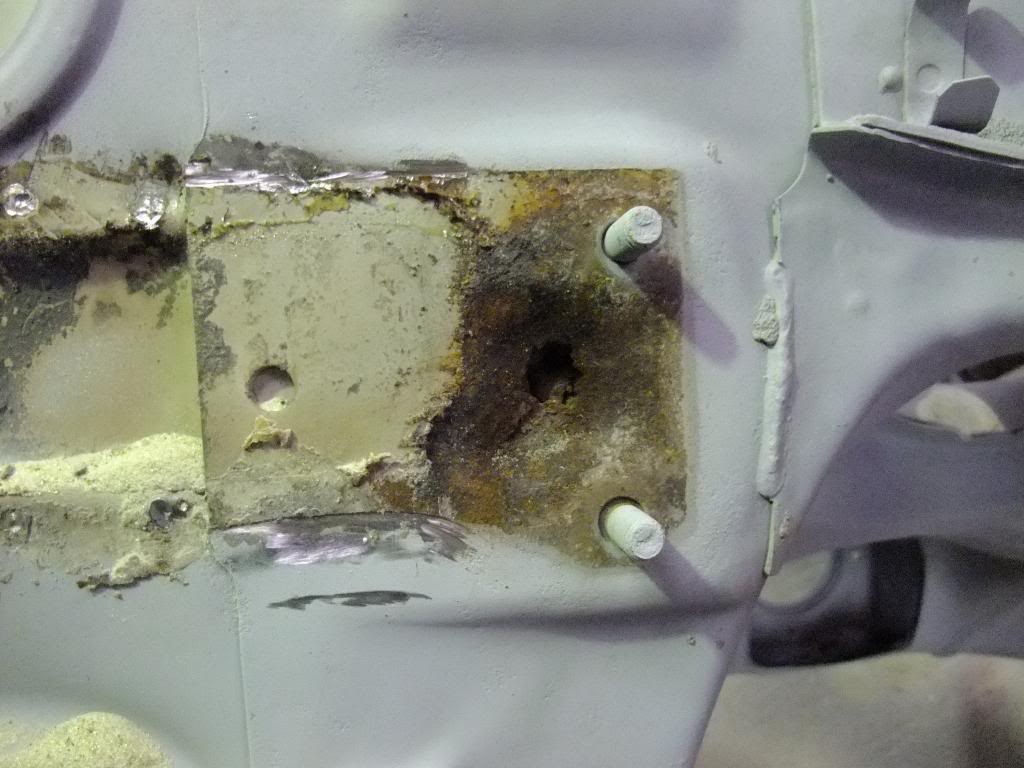
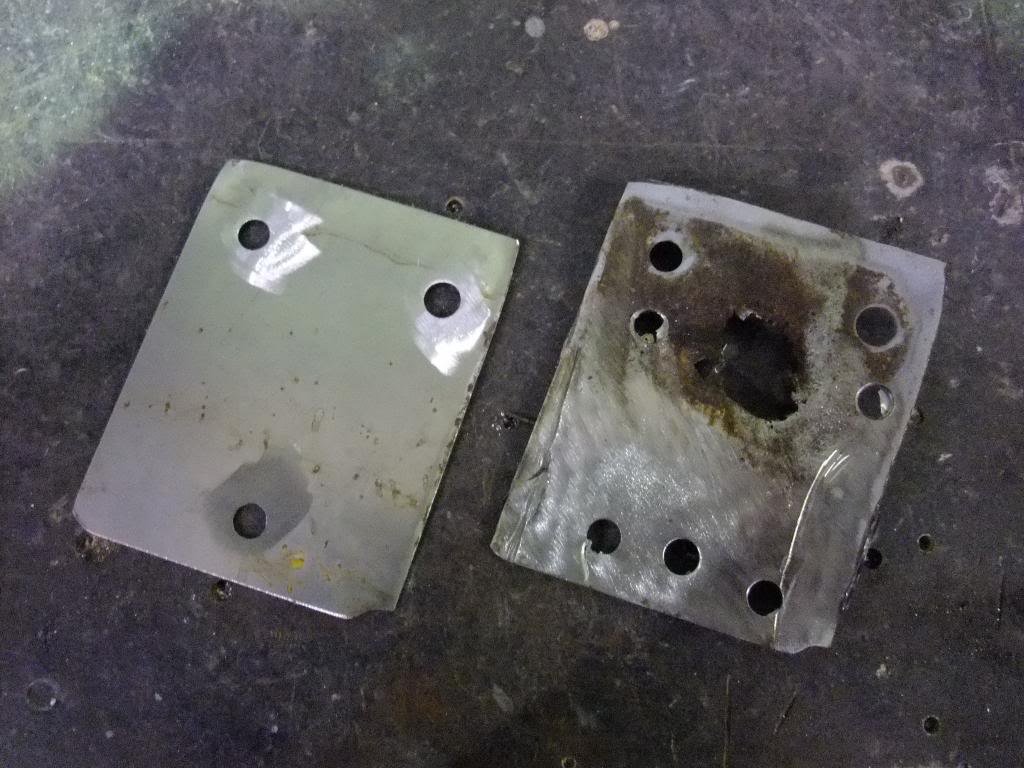
Except for the battery plate.
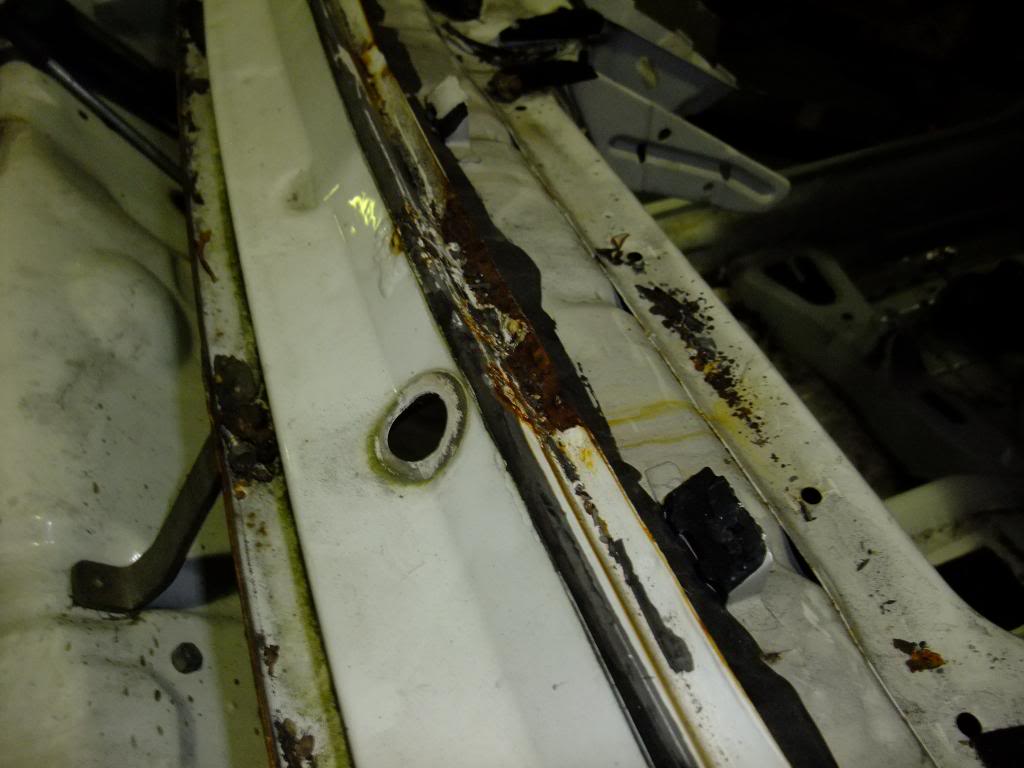
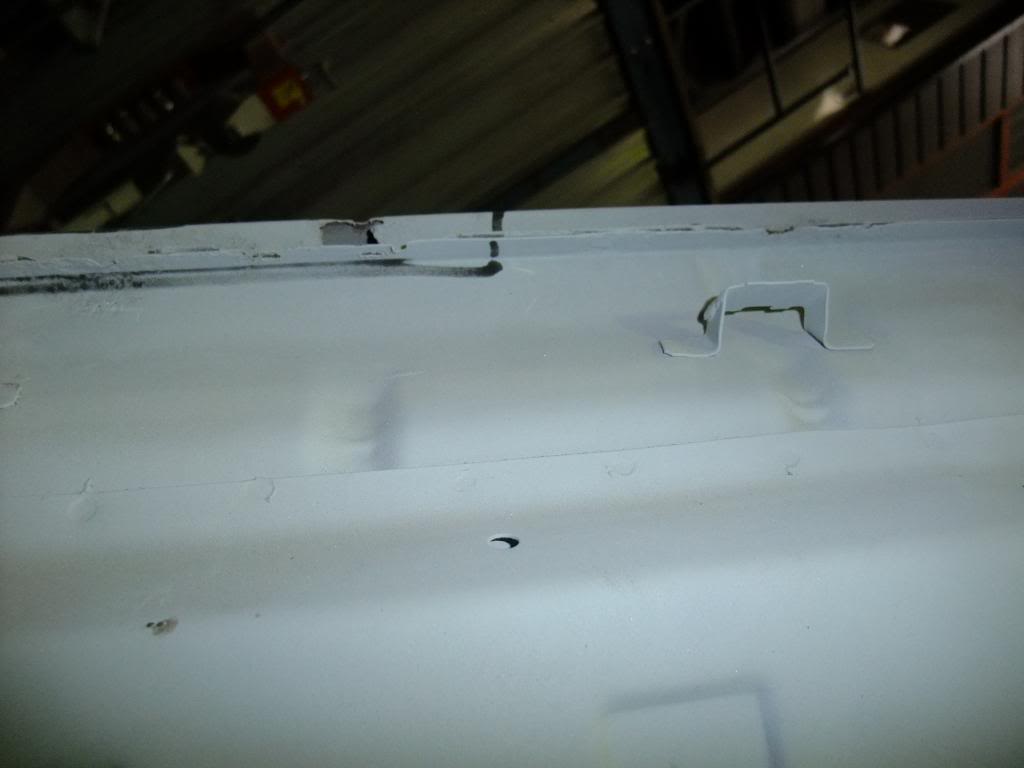
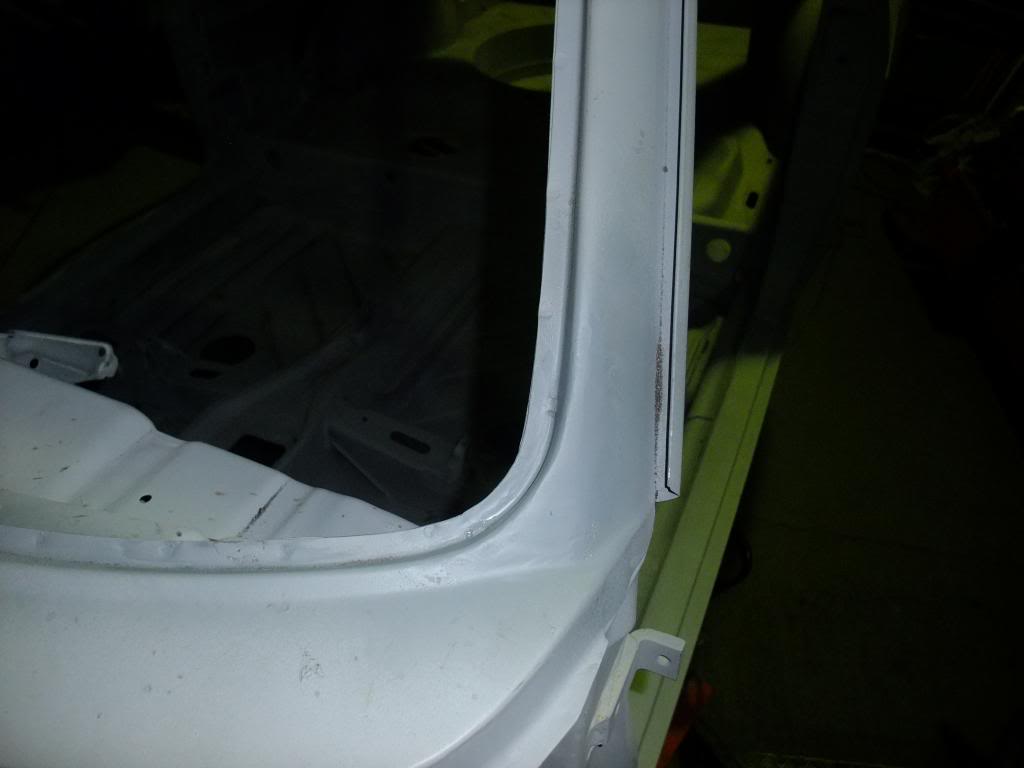
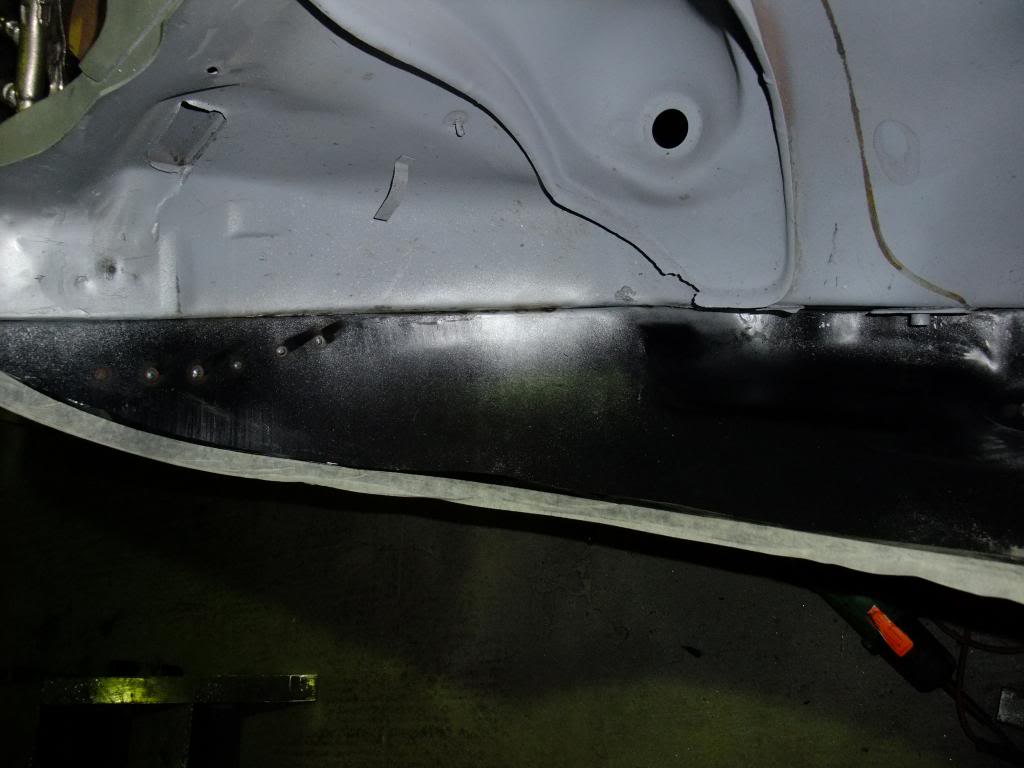
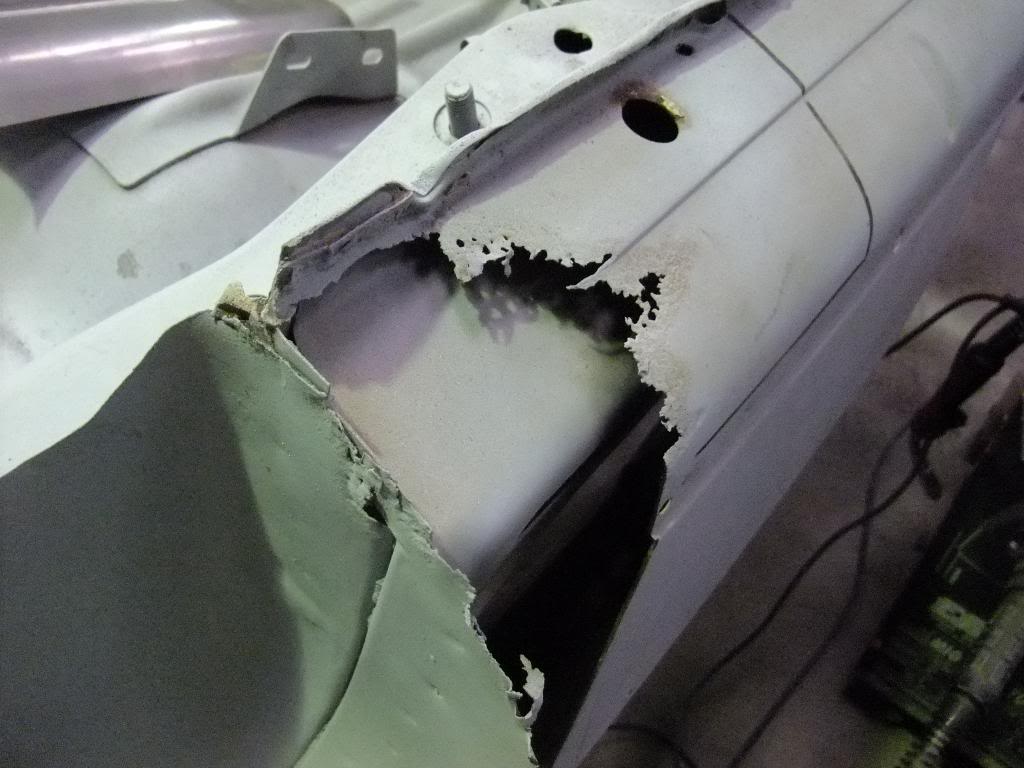
Windscreen Sill
The reason my fuse box got wet when it rained.
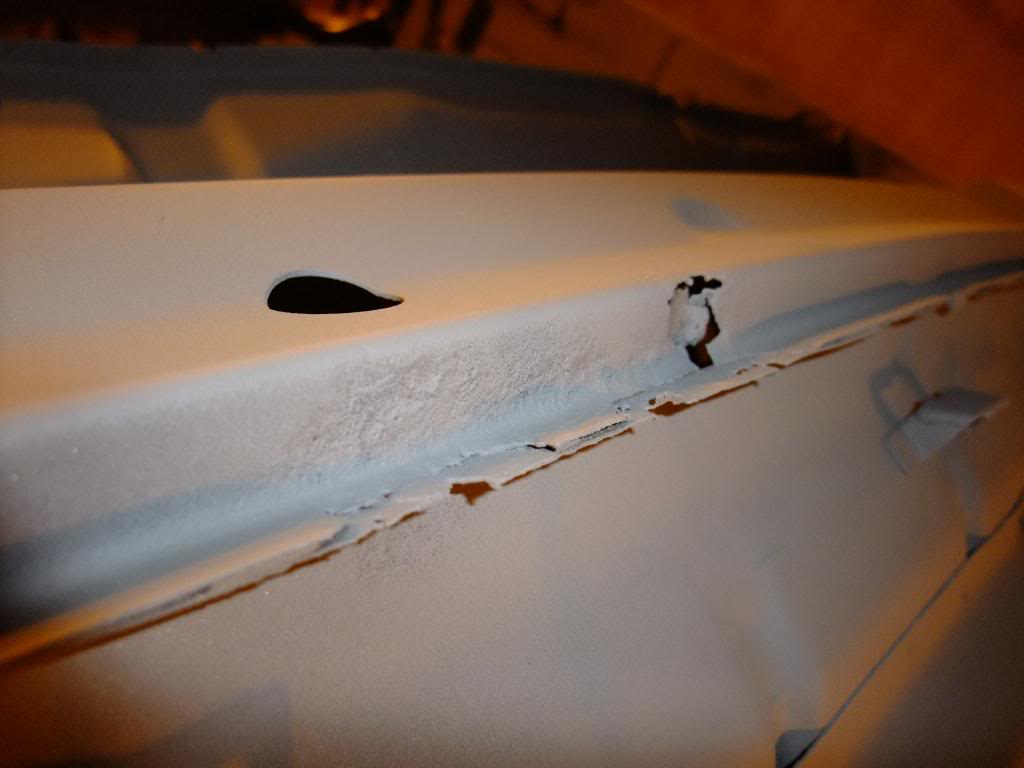
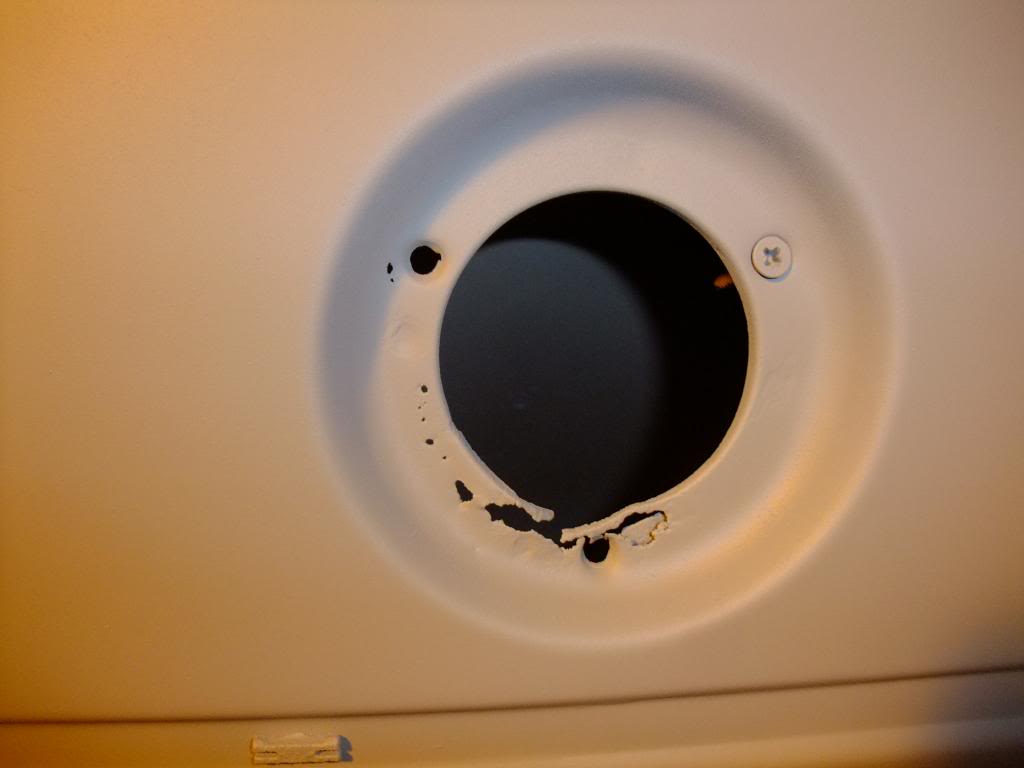
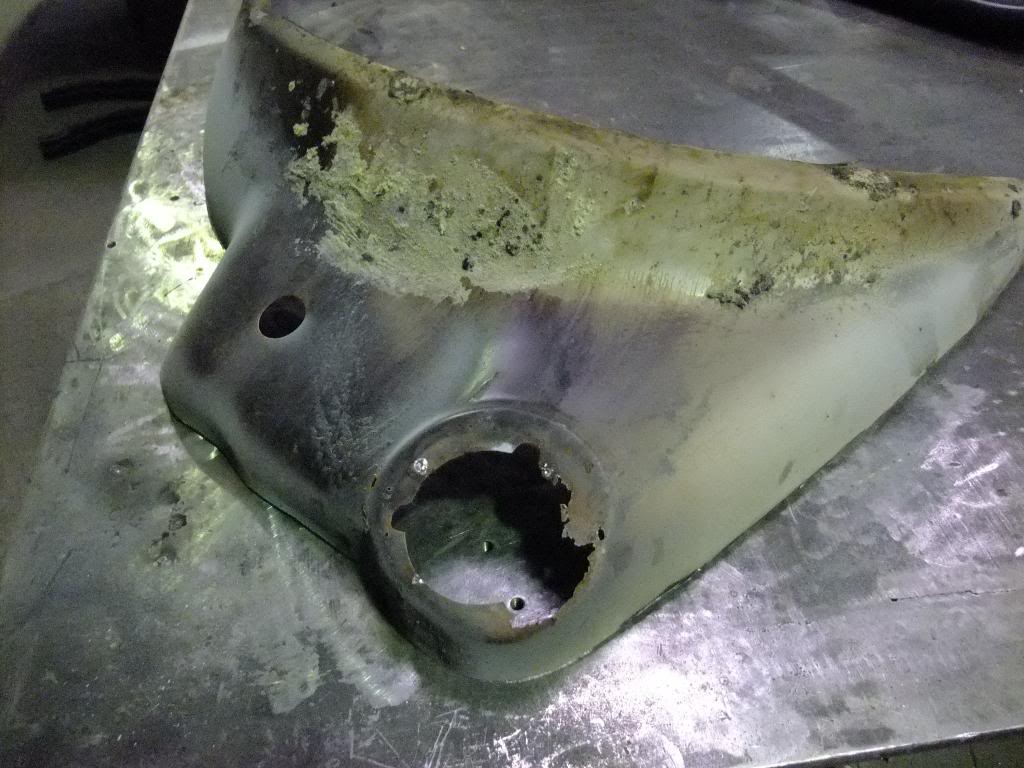
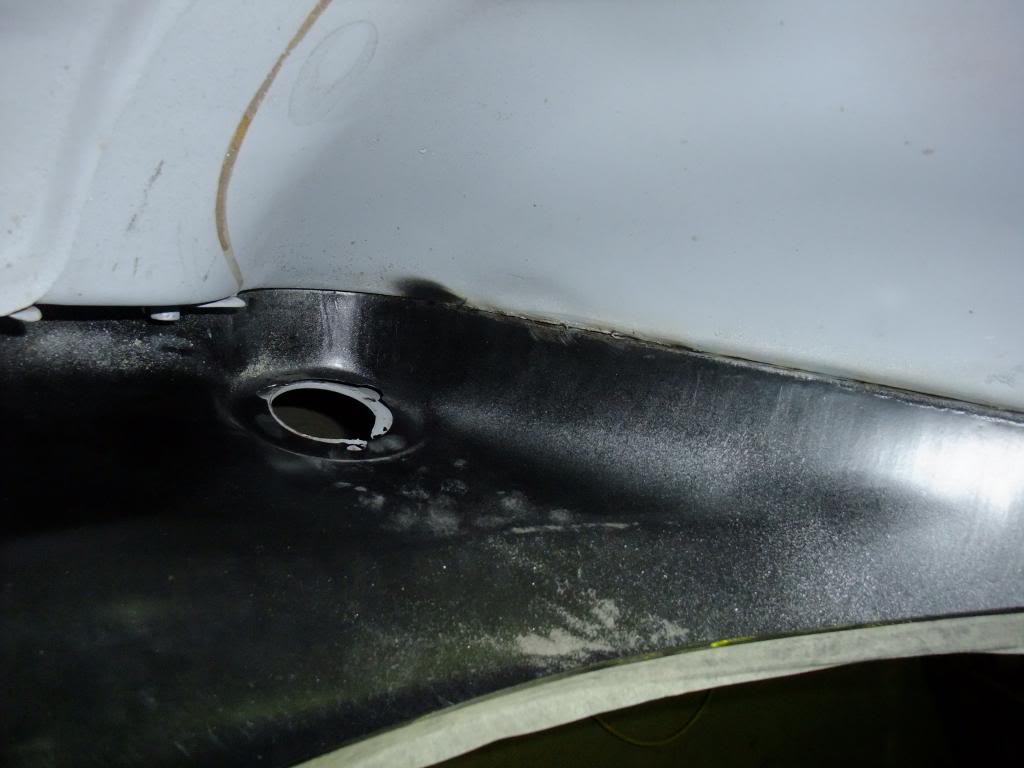
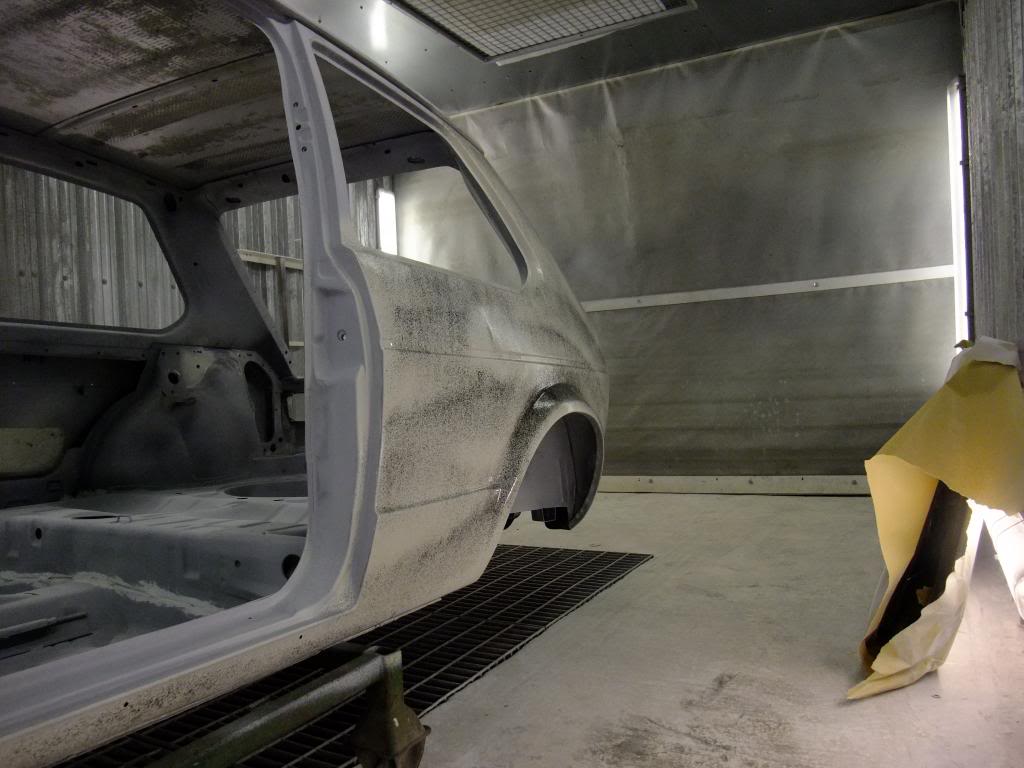
Right Rear Quarter
Not too bad but the rust around the fuel filler would still require a repair.
And of course there was the wheel arch…
Right Rear Wheel Arch
Not as bad as the left side but still shocking considering I could only see a bit of bubbling on the surface.
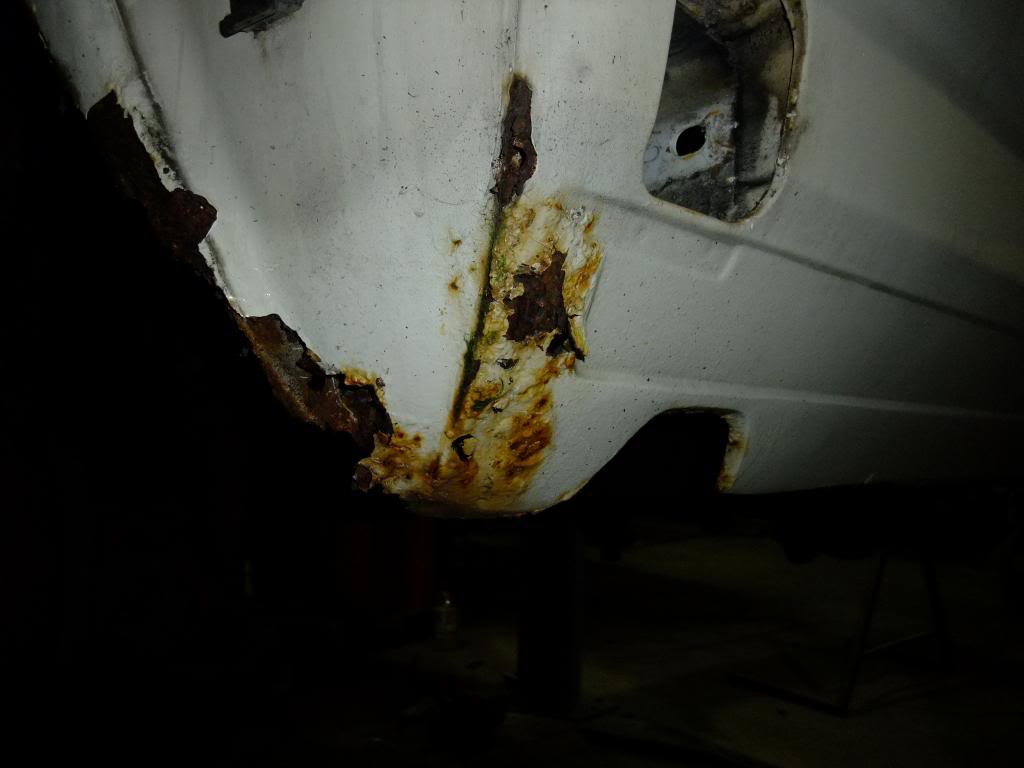
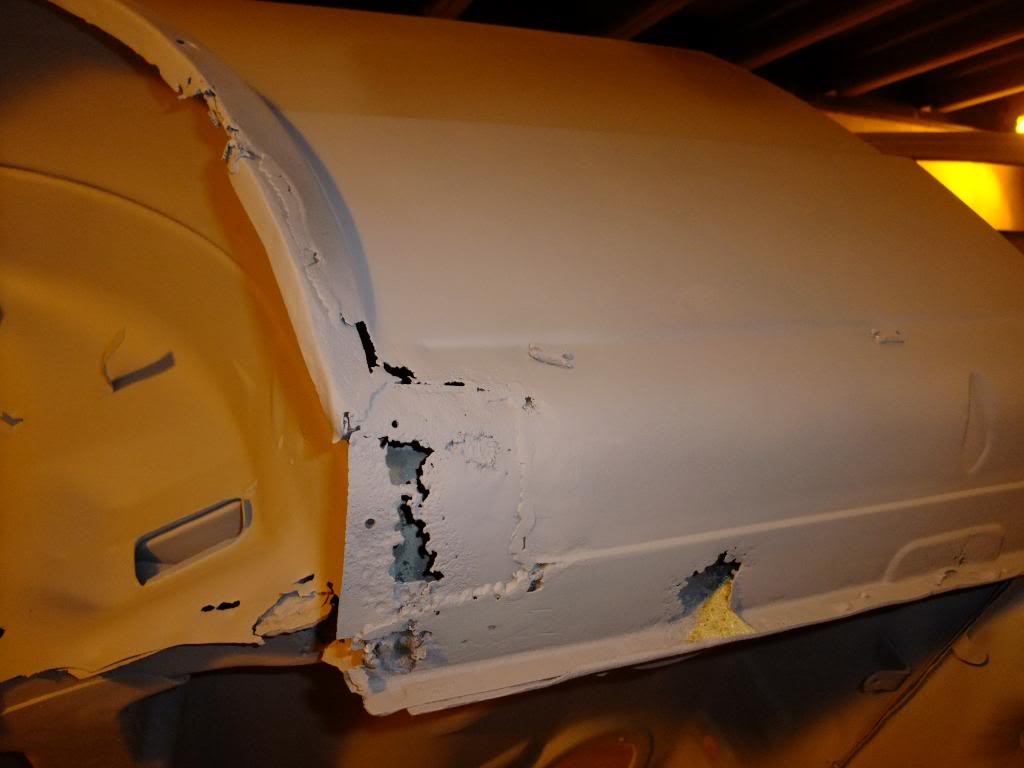
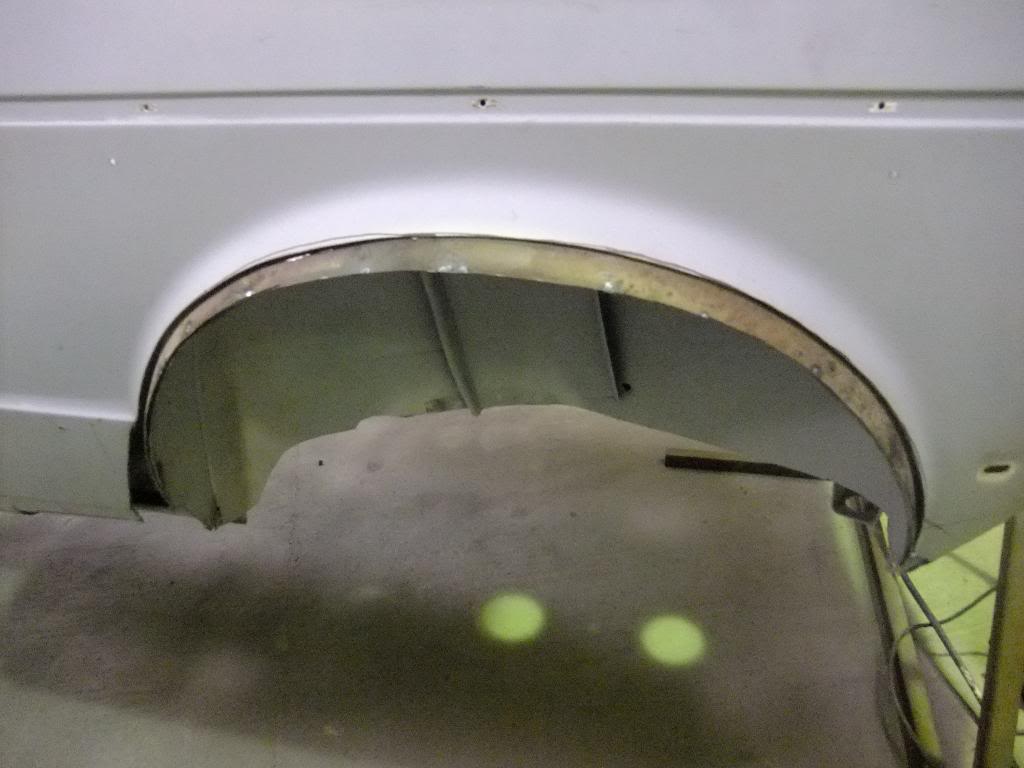
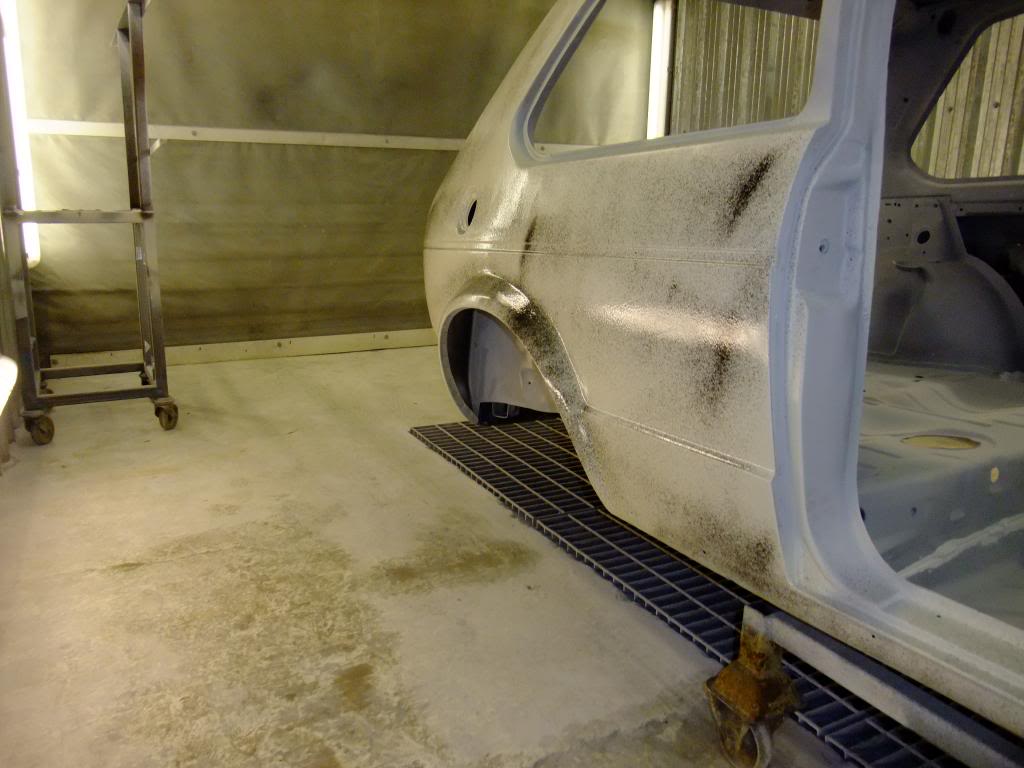
Left Rear Quarter
Wait for it…
Left Rear Wheel Arch
This was the worst of the damage found. Glad I caught it in time, the inner sill wasn't affected.
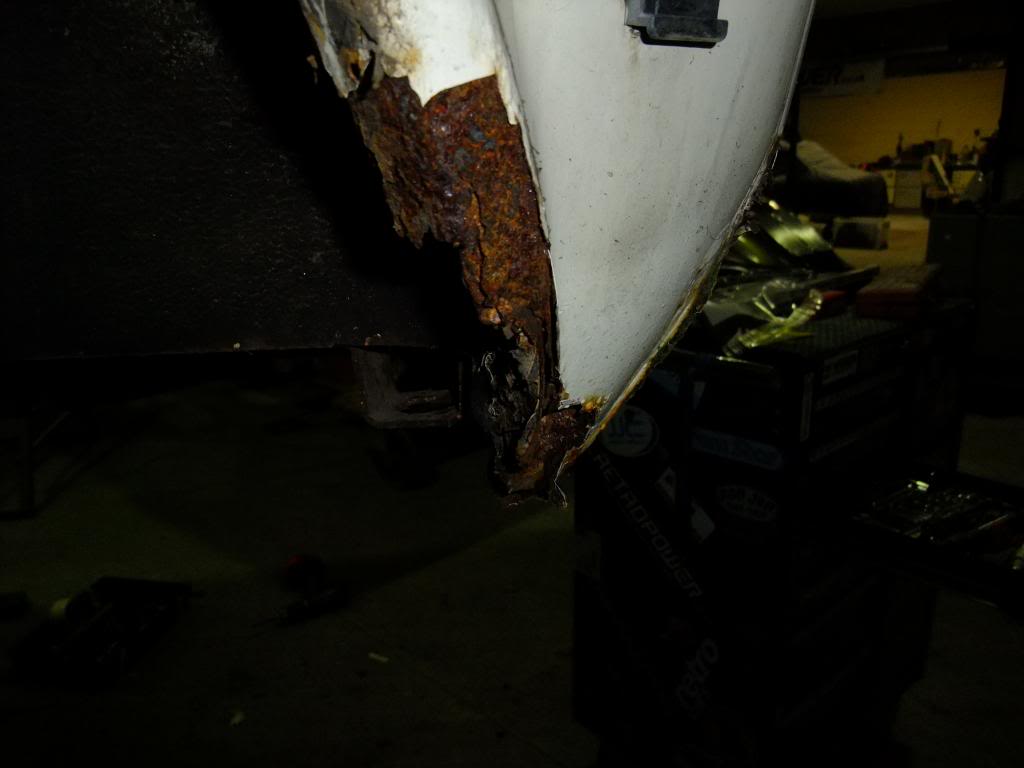
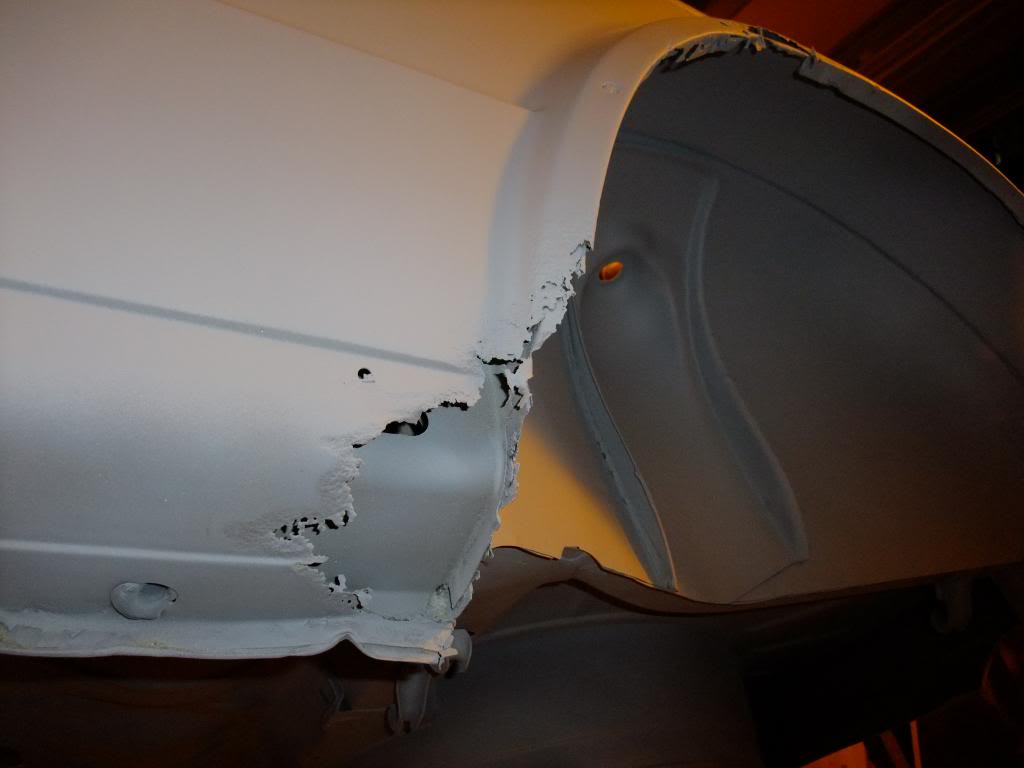
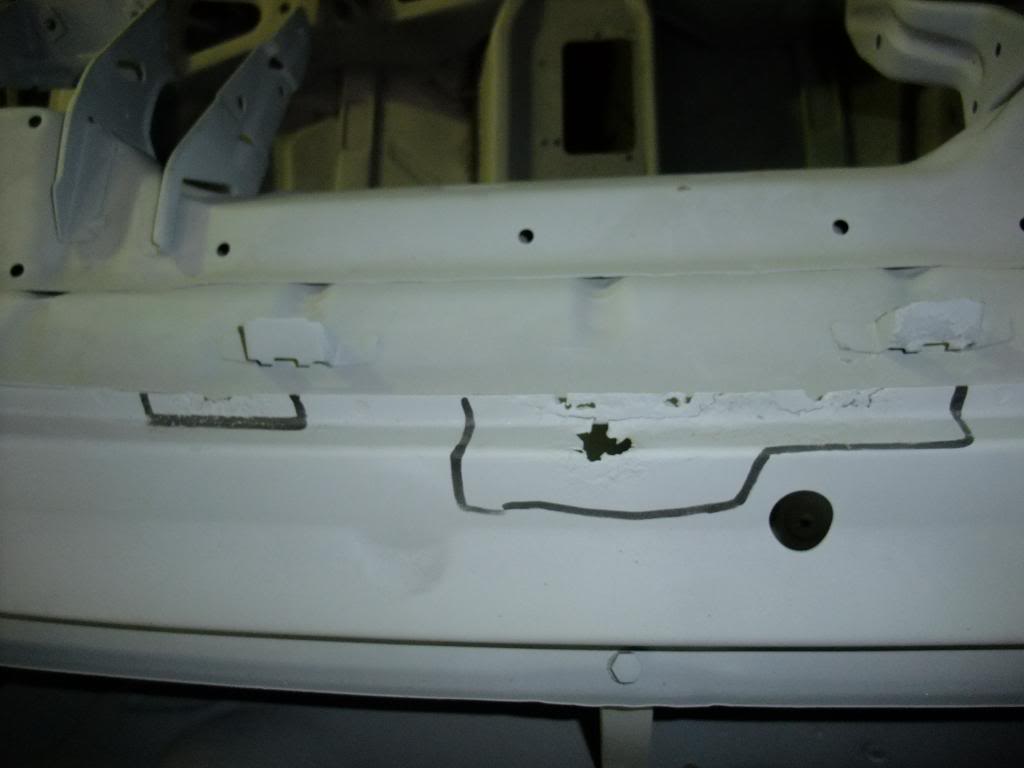
Rear Panel
Tidy except for where the valance meets the left arch.
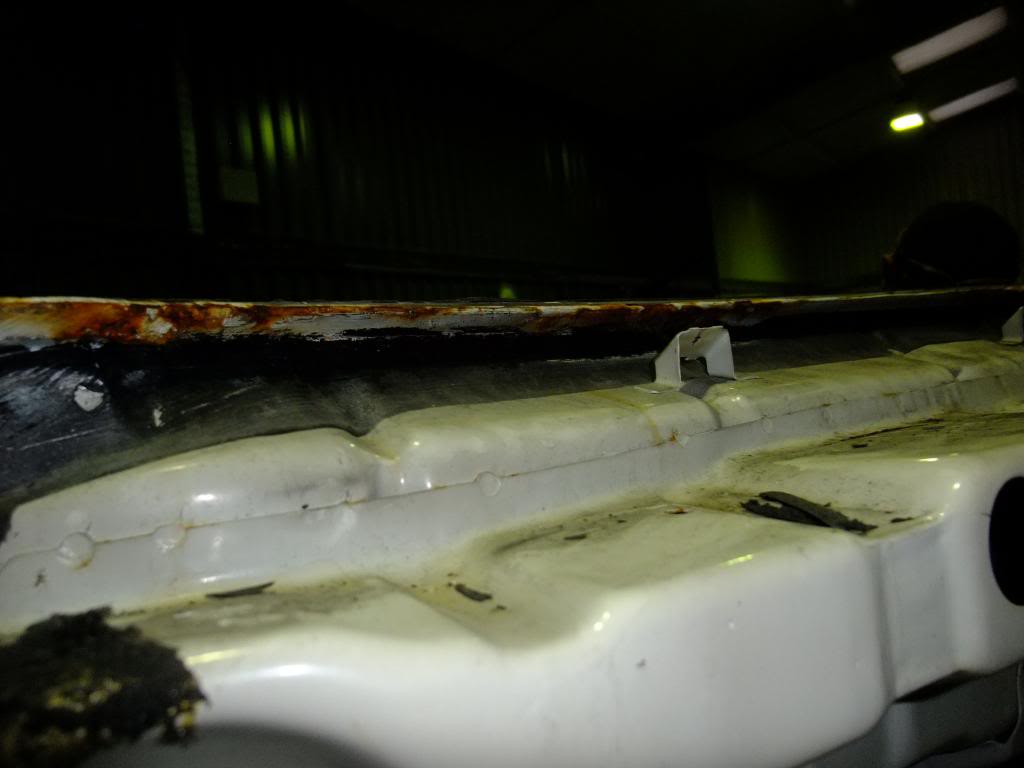
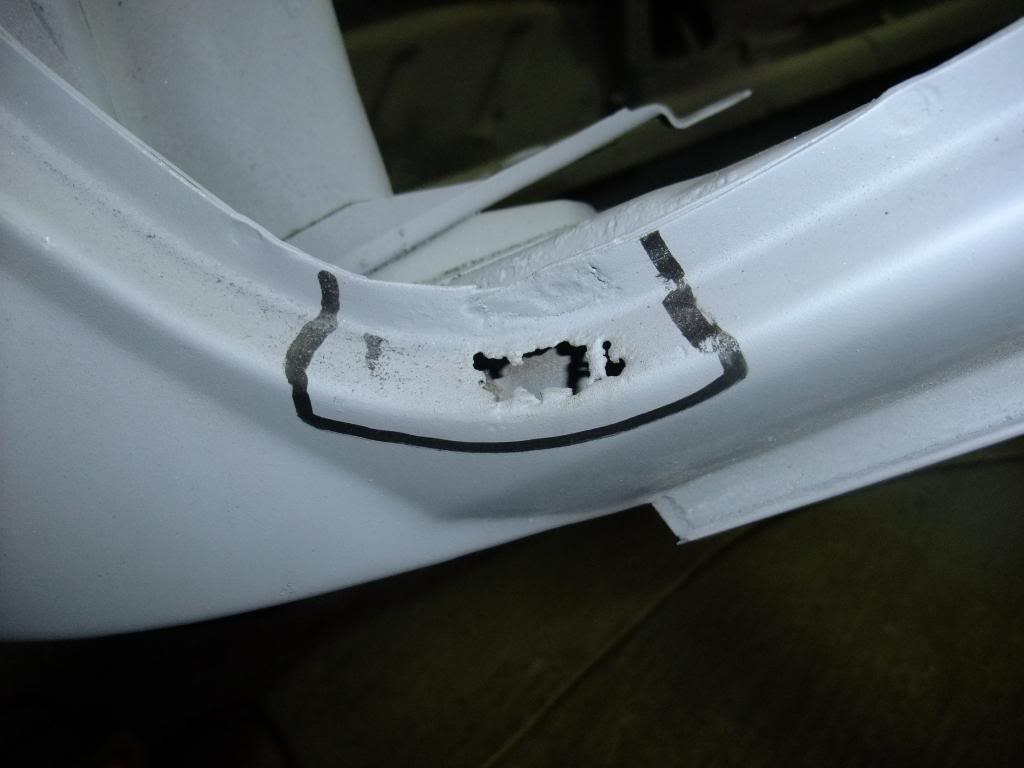
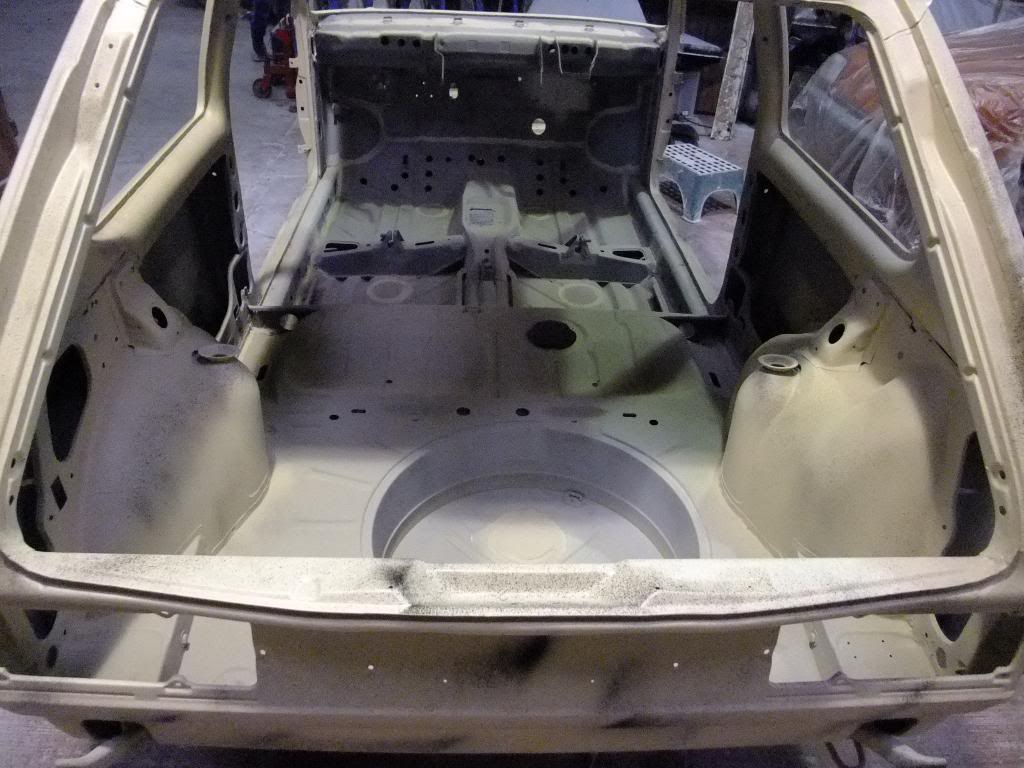
 Wheel Well
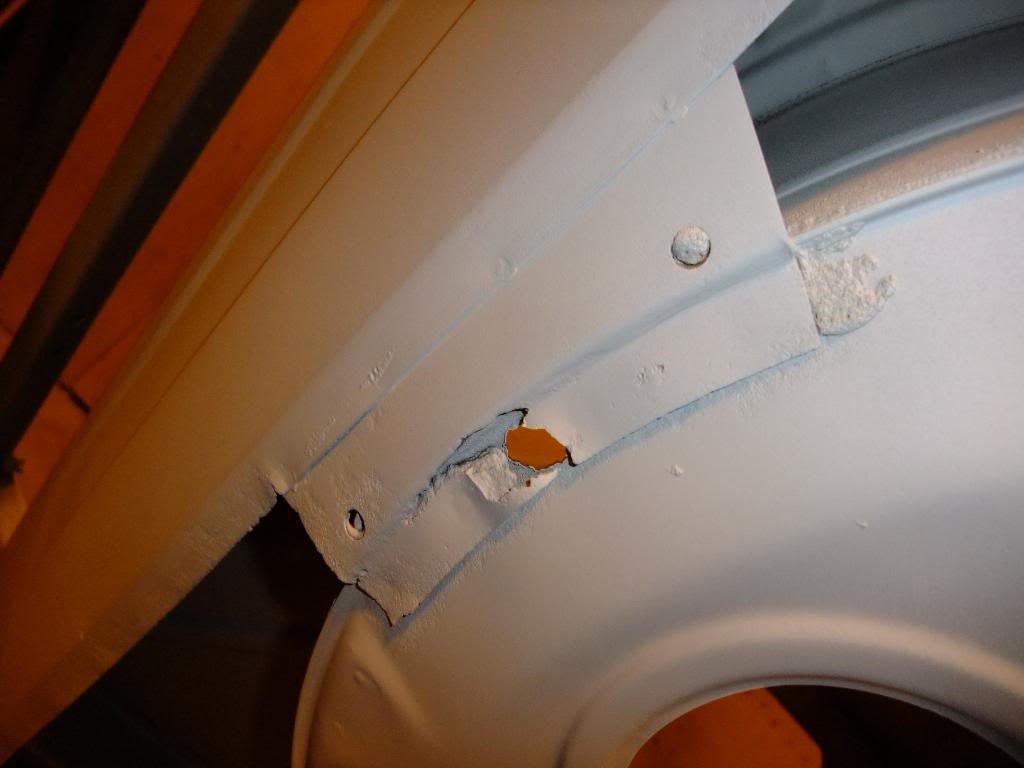
Apparently in the usual place, under the bracket next to the rear valance where the water collects in the gap.
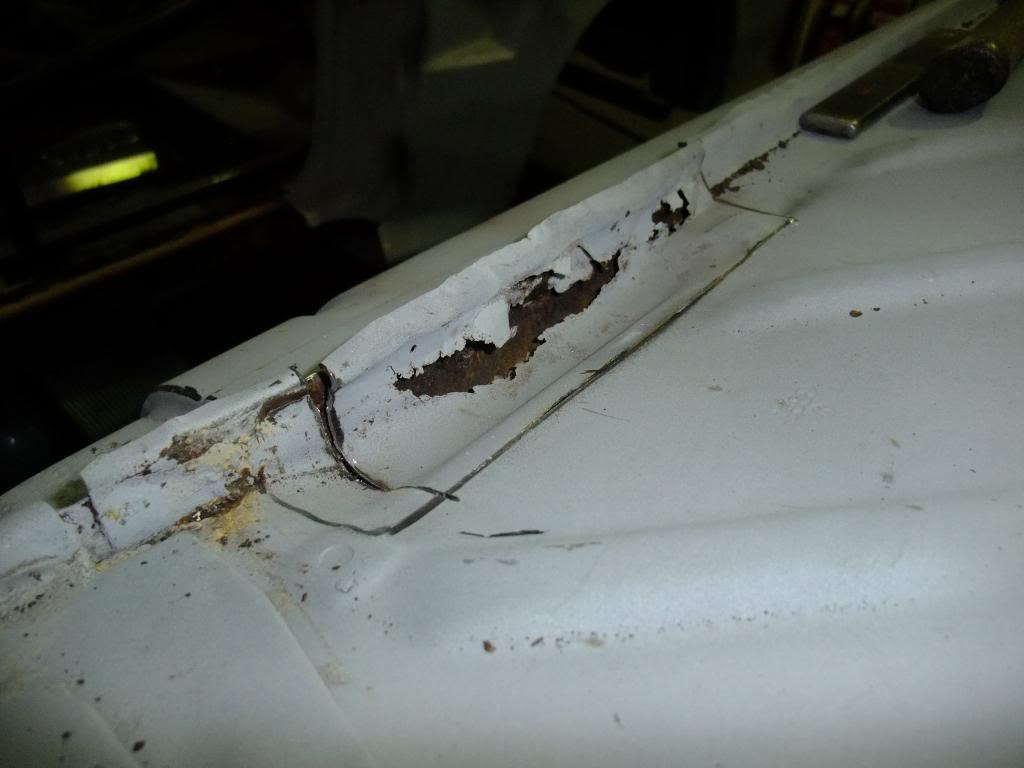
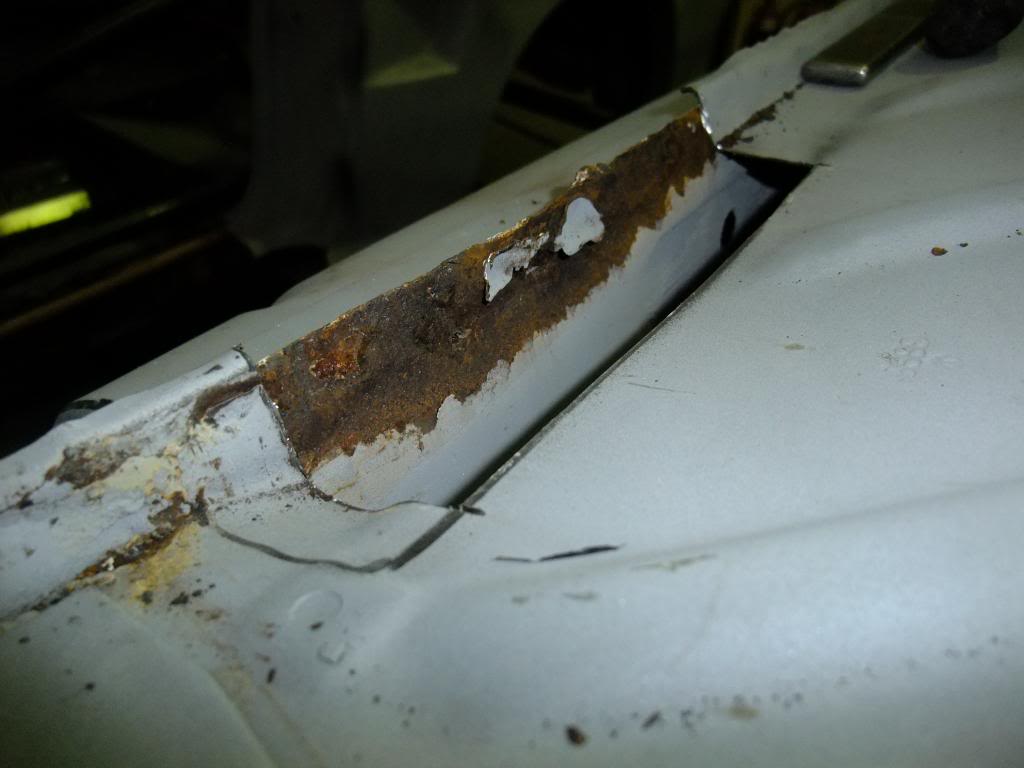
Floor Pan
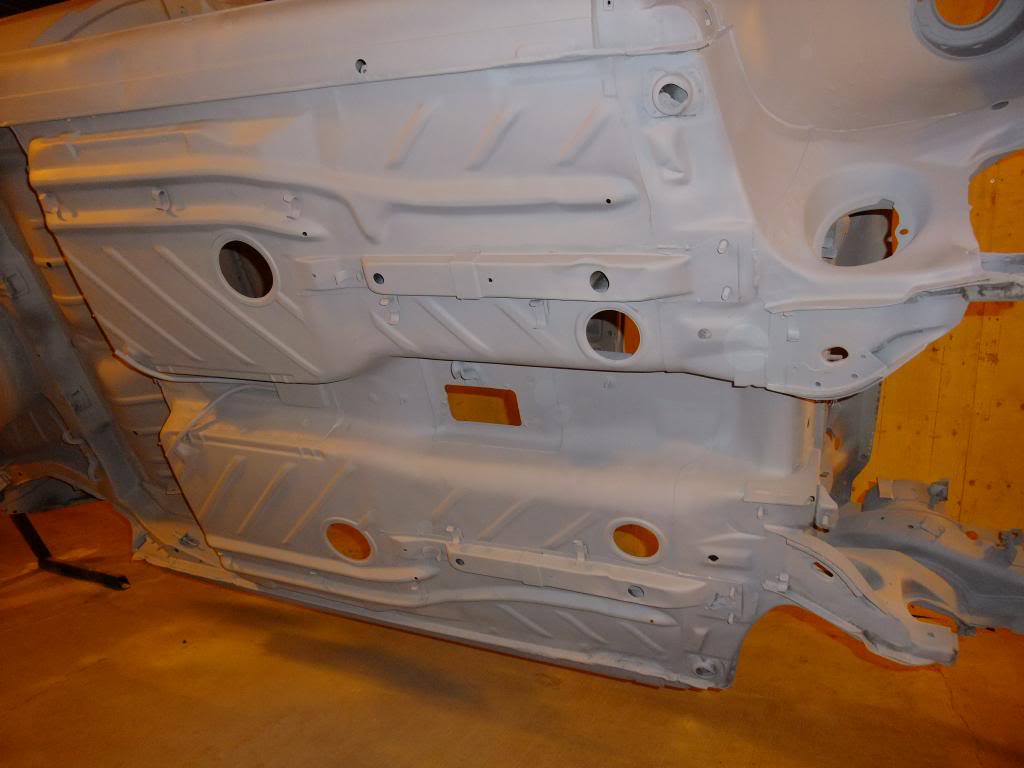
Excuse my ignorance, I don't know what to call it but one of the 'ribs' reinforcing the floor pan was rusting on the fixing plate.
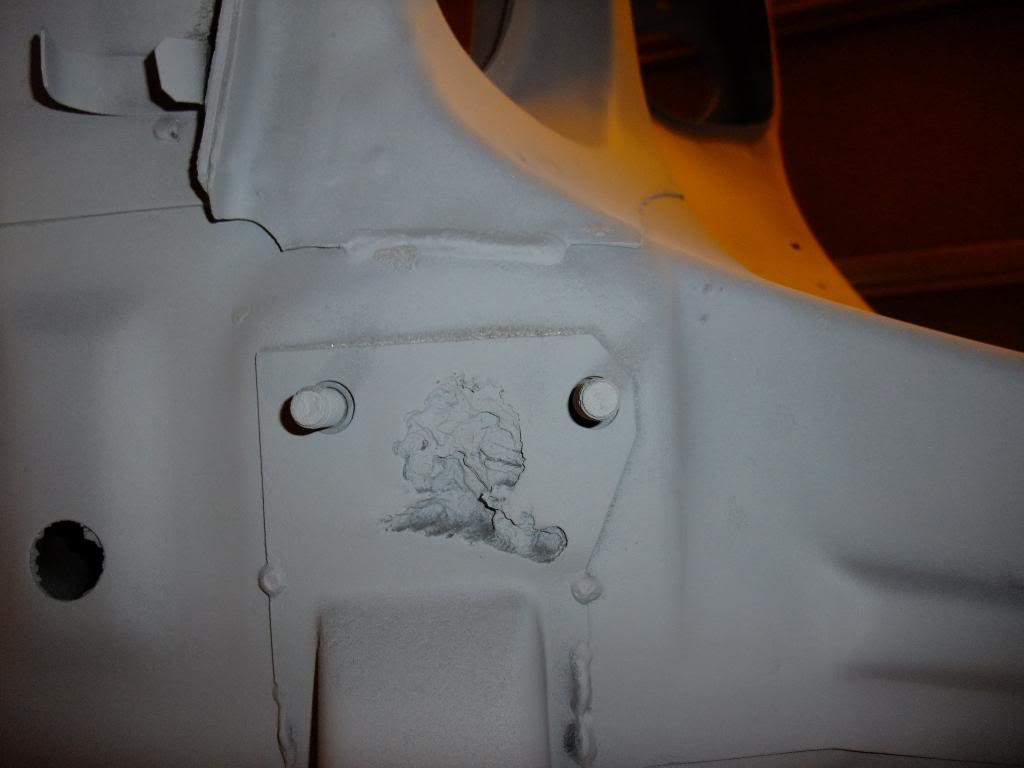
It had also been bent (presumably from a misplaced jack) so would require replacing.
In all, I was very pleased that the blasting hadn't revealed any bodged repairs or hidden surprises and it justified the timing of the restoration (all be it more by luck than judgement
).Anyway, eyes have gone square so I'll be back soon to show off the metal work.
Thanks for reading…
Posted
Local Hero


Golf GTI Campaign 1983 Mars Red, Ford S-Max 2015, Audi TT 180 quattro 2003, Fiat 500C 2013, Golf GTE MK7.5

�
�
Posted

Settling In

Posted

Old Timer


RichardHall said
Hurry up - want to know more! Dying to see how it turns out….
Same here too…..

"Mk1 Golf Gti...all things to all men"
Posted

Moderator
 Looking forward to the rest of the story!!

Posted
Settled In

really looking forward to further updates
Posted

Local Hero


Glad the bonnet bra has been banished too

Andy
LINCOLNSHIRE REGION -�https://www.facebook.com/groups/467122313360002/
1983 MK1 Golf GTI Campaign Model - Under (looooong) resto!
1962 Rover P4 80
2002 BMW 745i
2008 BMW Z4 2.5Si
LINCOLNSHIRE REGION -�https://www.facebook.com/groups/467122313360002/
1983 MK1 Golf GTI Campaign Model - Under (looooong) resto!
1962 Rover P4 80
2002 BMW 745i
2008 BMW Z4 2.5Si
Posted

Moderator
Posted
Newbie
Once the stripdown and blasting were complete (end of November 2012) the panel beater started to repair all the damaged areas. Most of the small or complex sections were fabricatied from scratch only the rear wheel arches, rear valance and fuel filler were repaired with preformed panels.
Body Shell
Front Panel
The bonnet lock plate was cut out, measured up and a new piece welded back in place…
Sorted, 'scuse the blurry image…
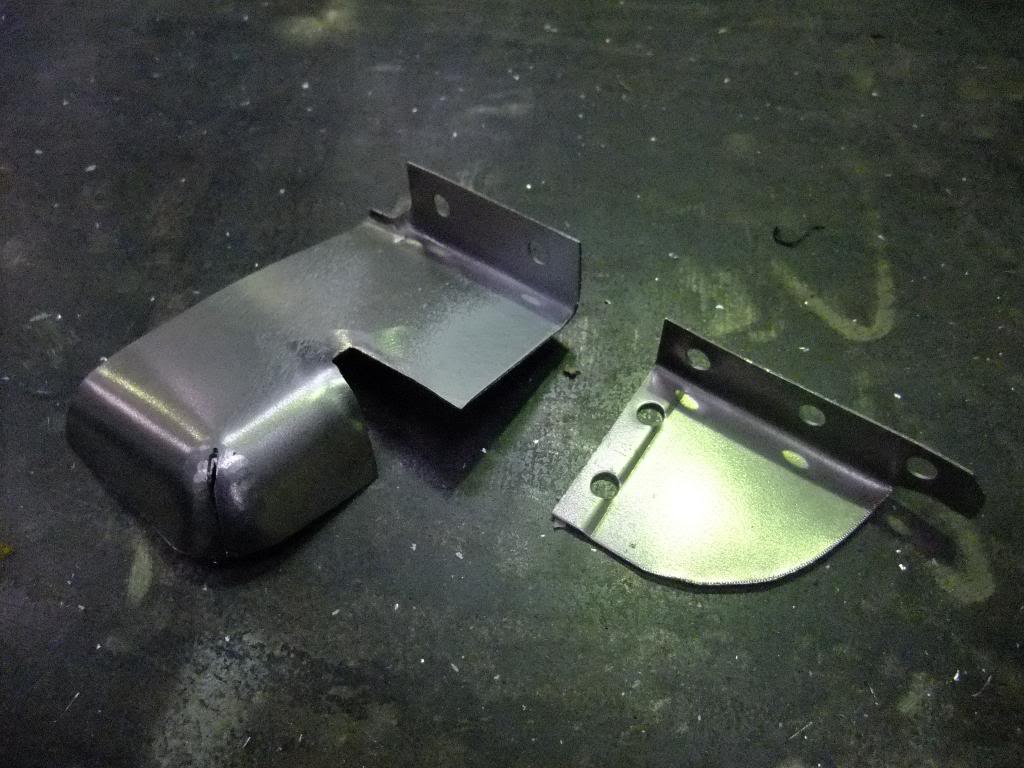
Battery Plate
This was removed as we decided to put the battery in the boot to help with weight distribution.
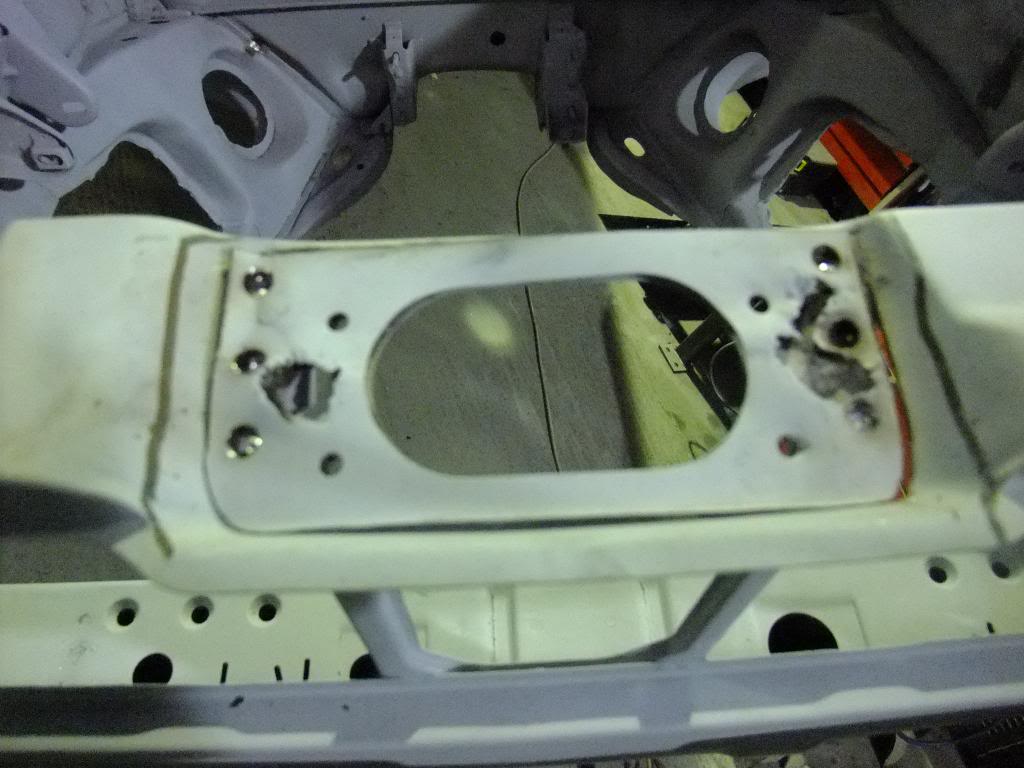
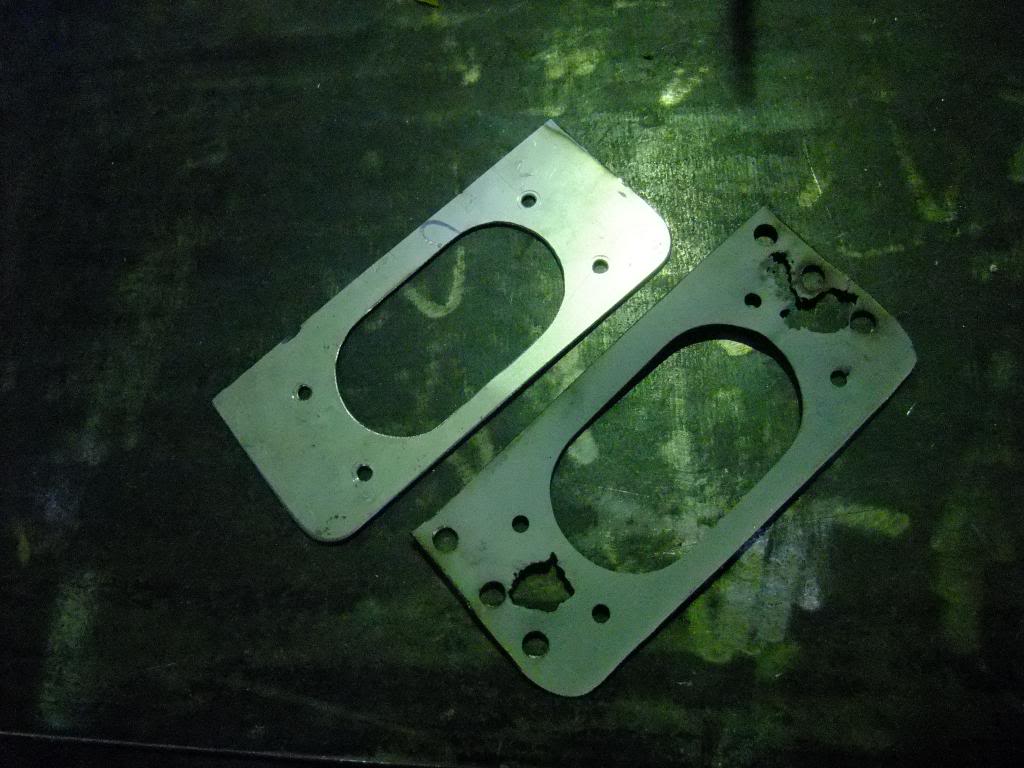
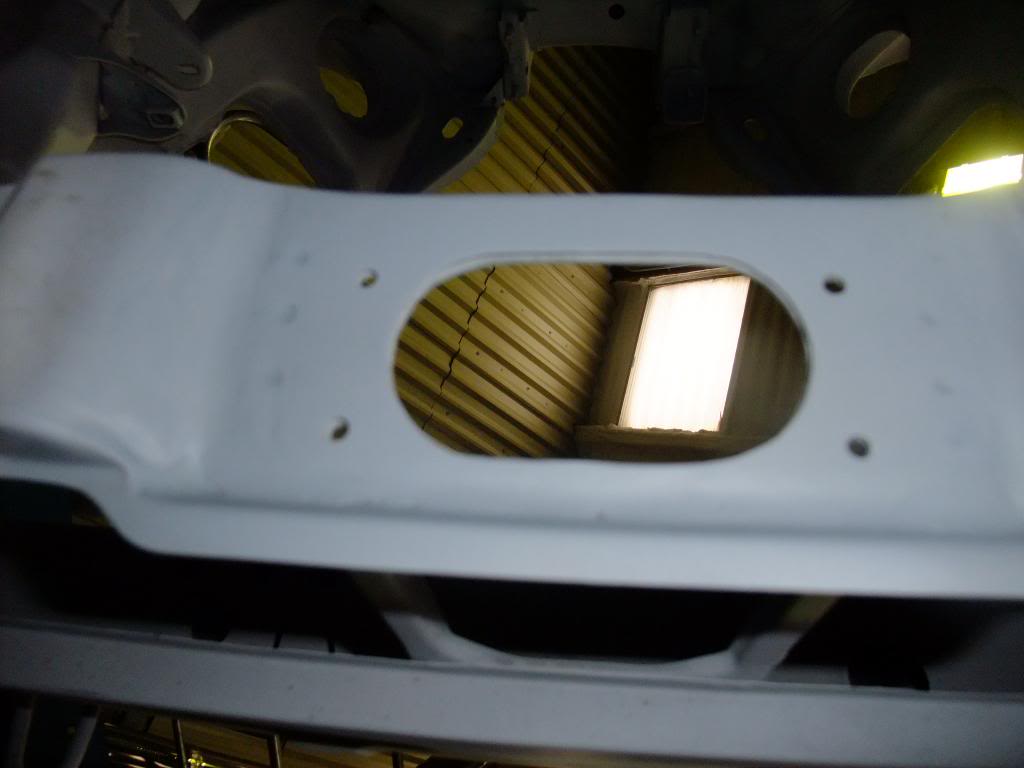
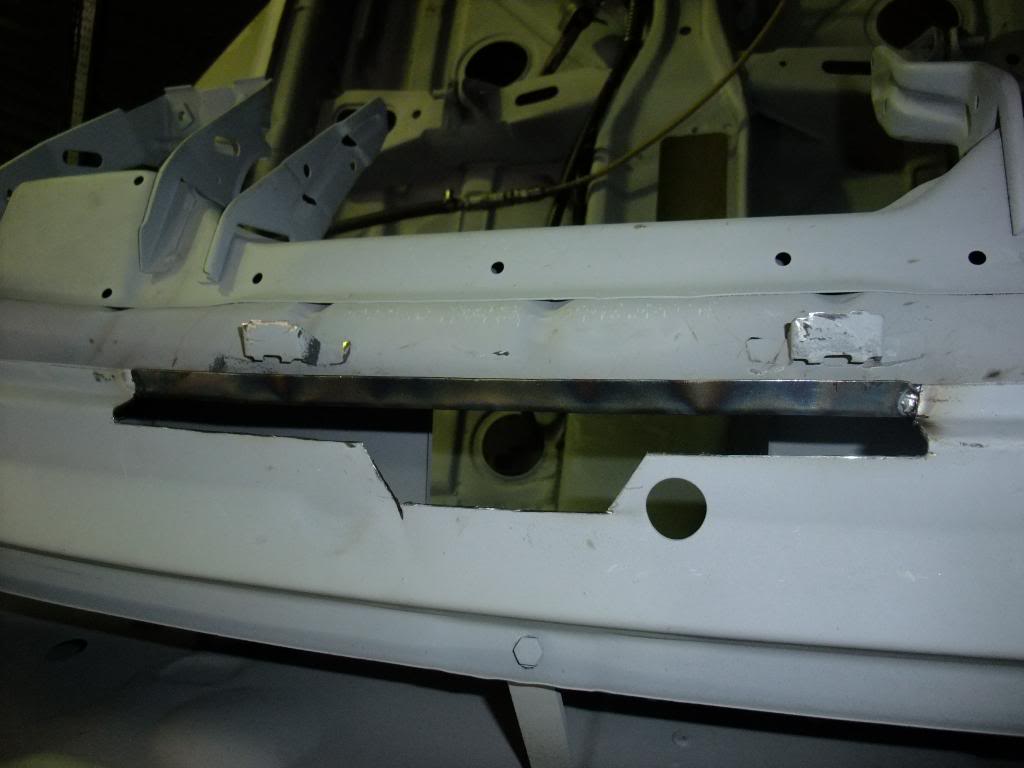
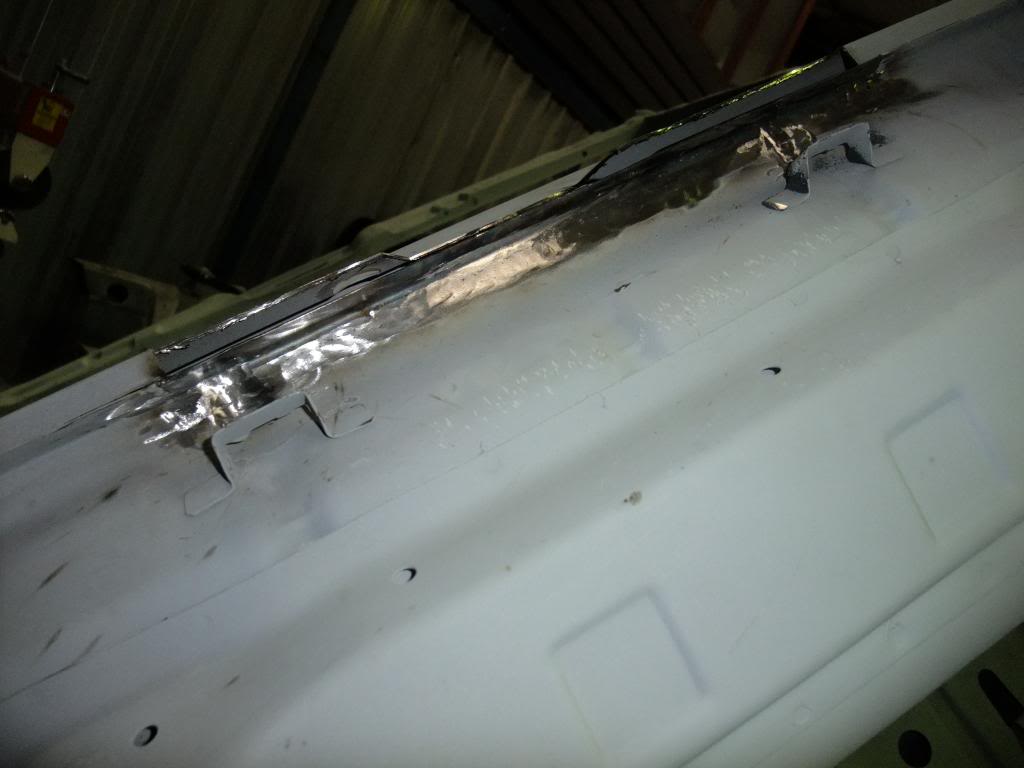
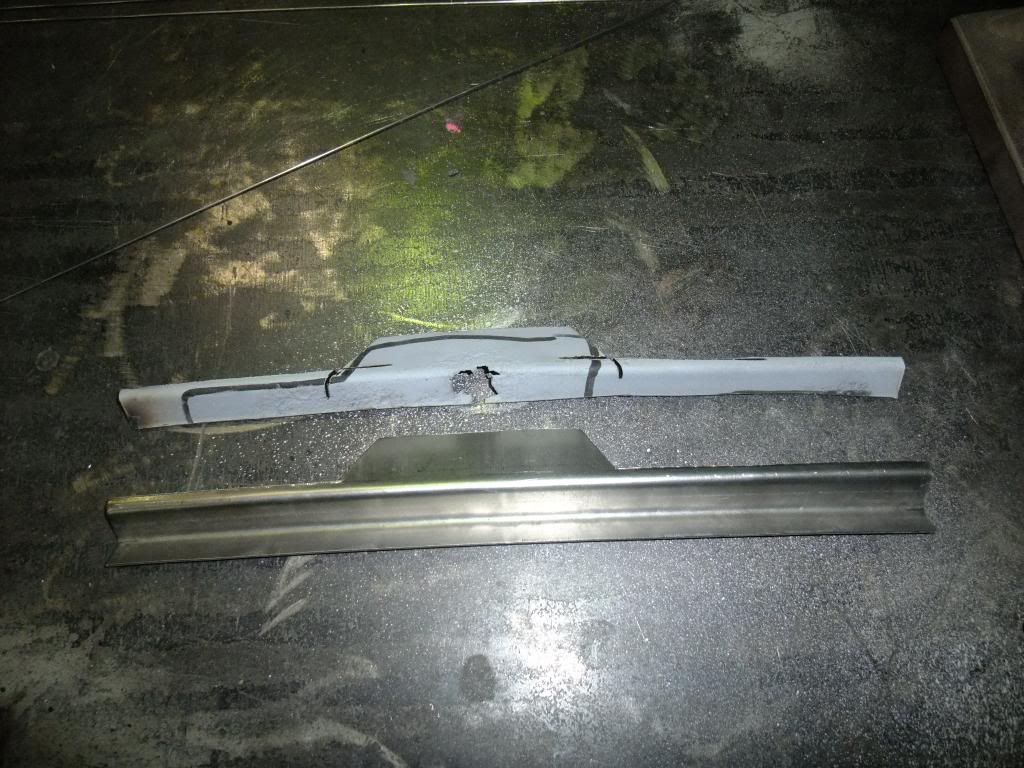
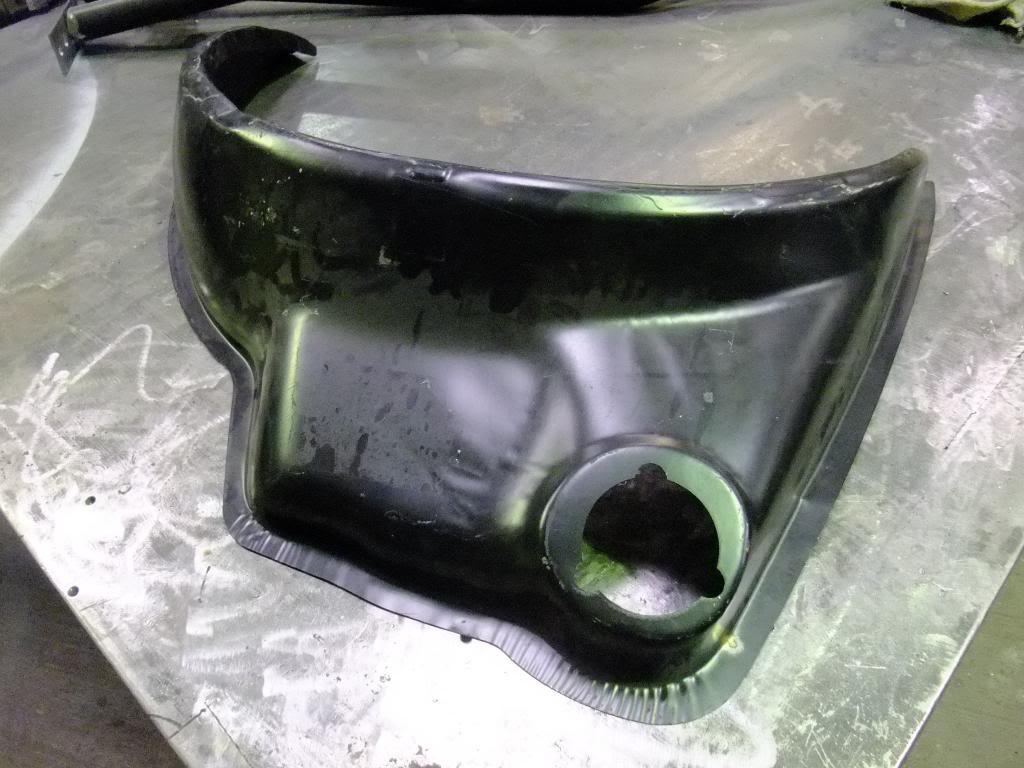
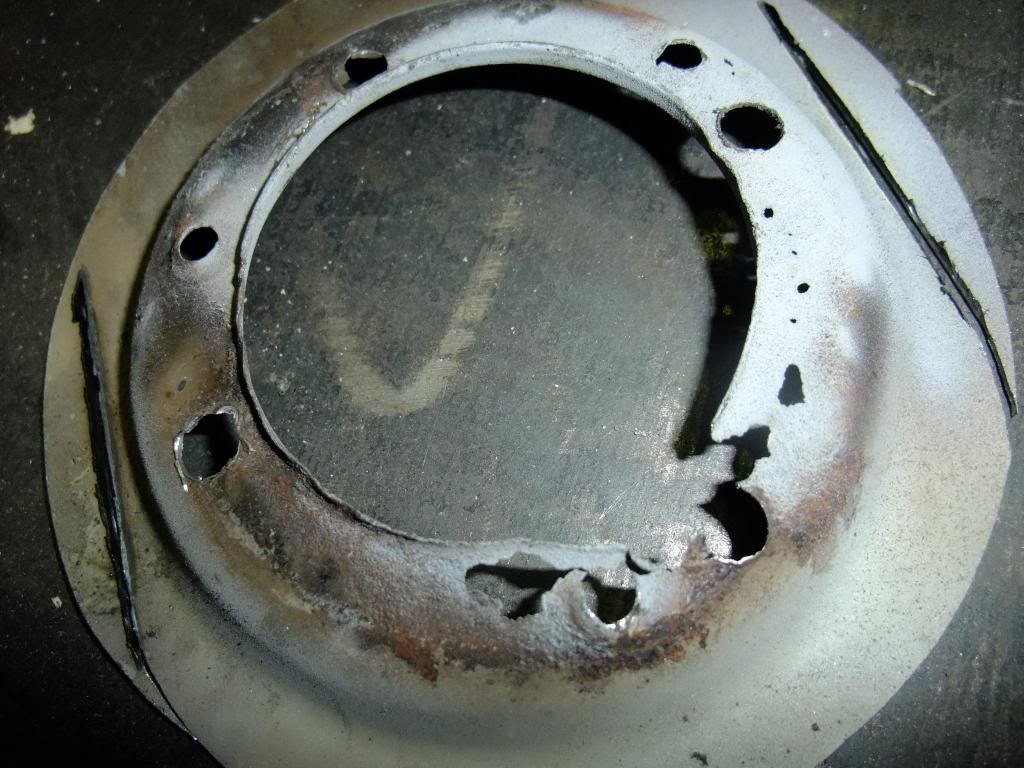
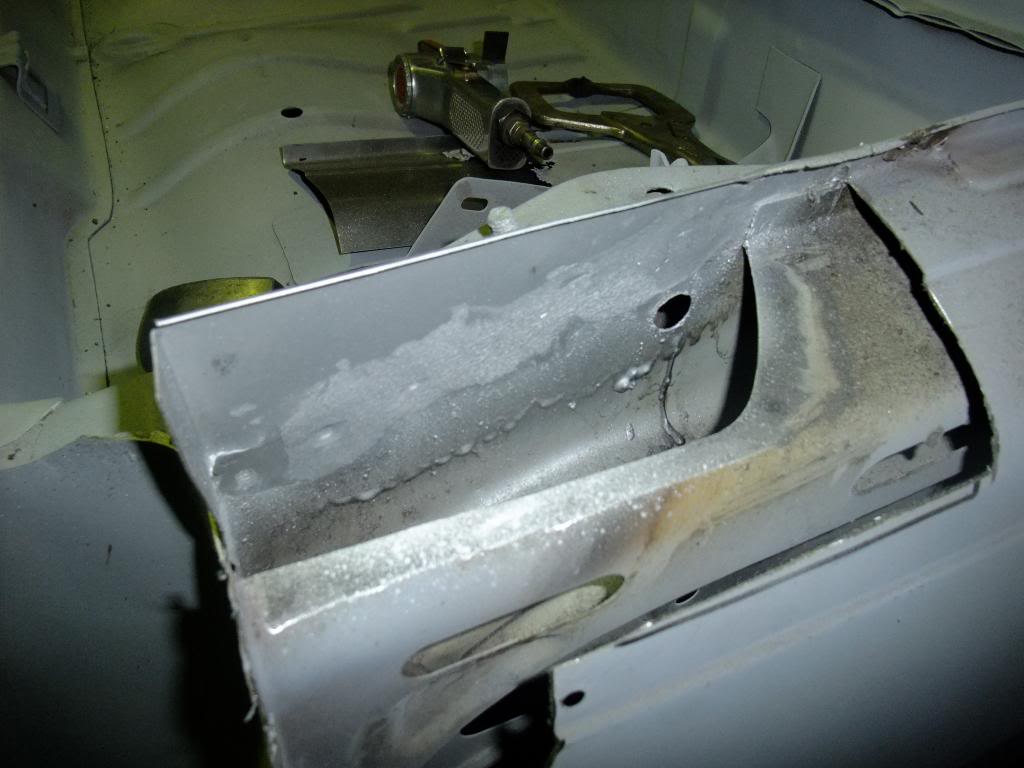
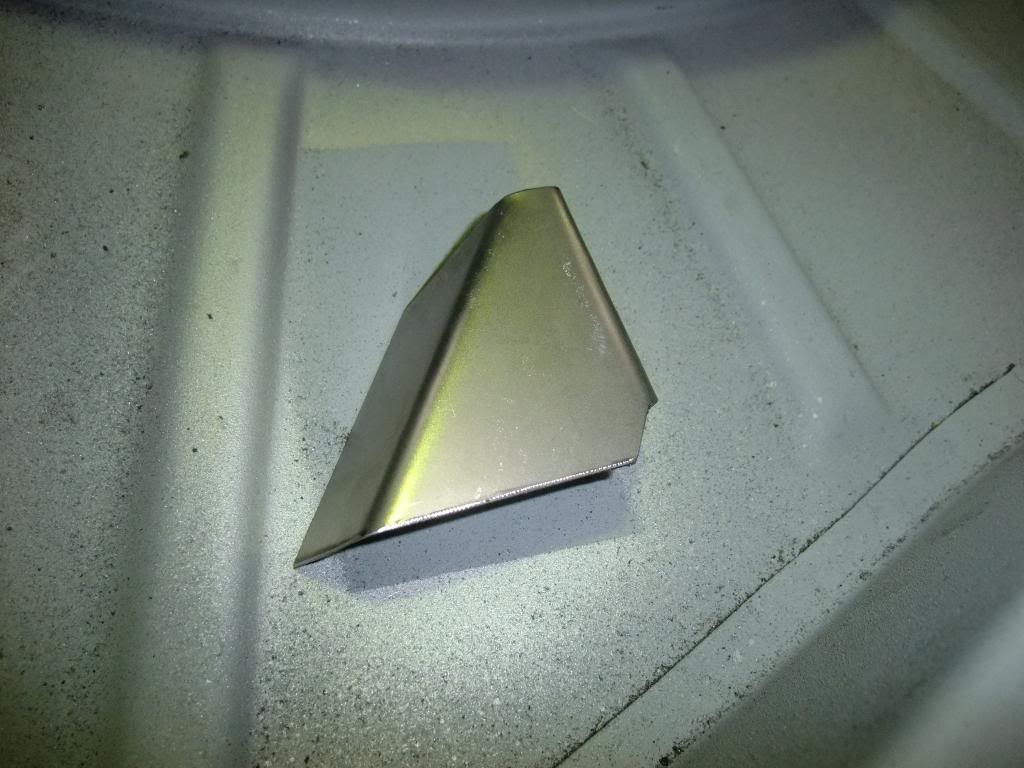
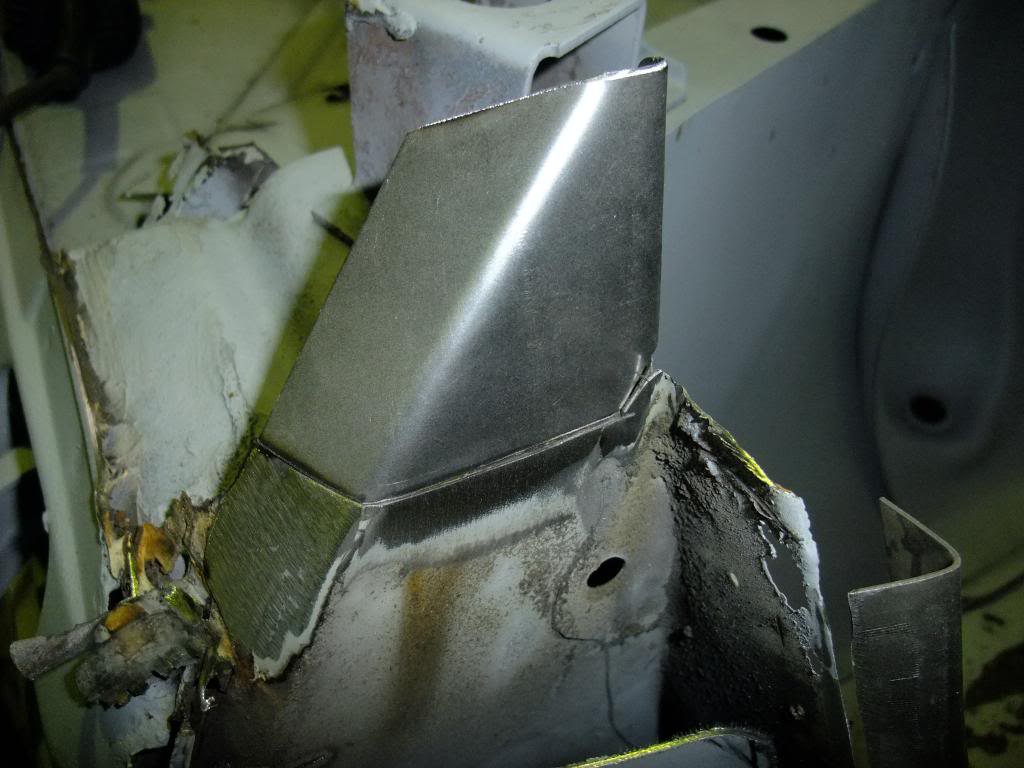
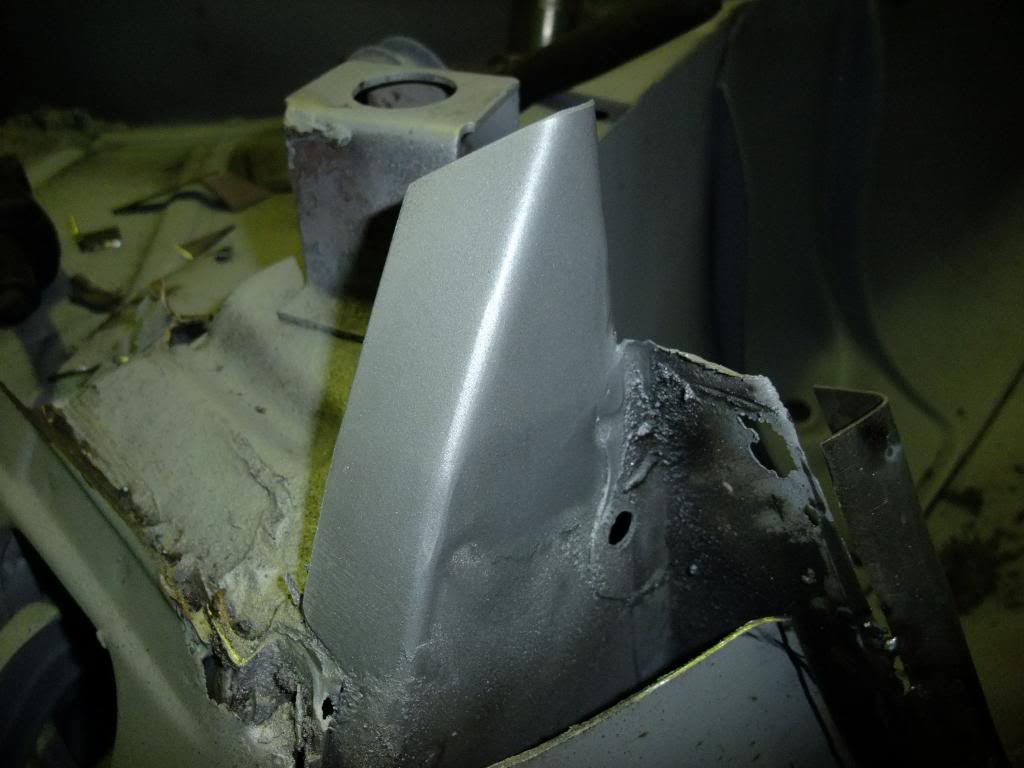
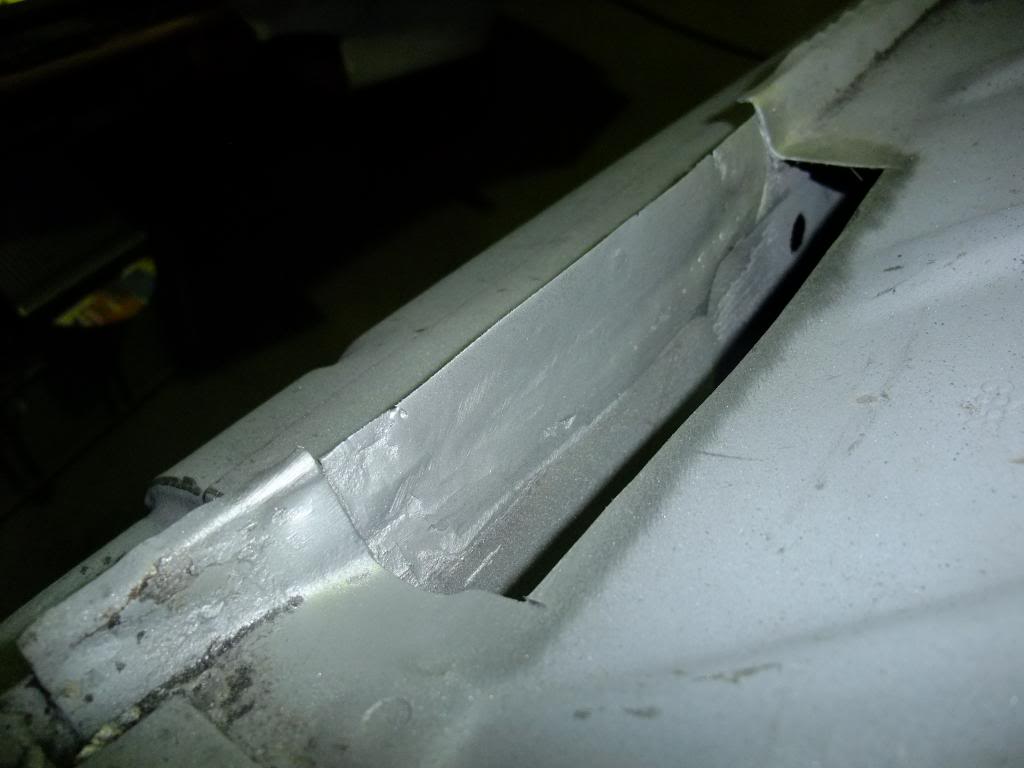
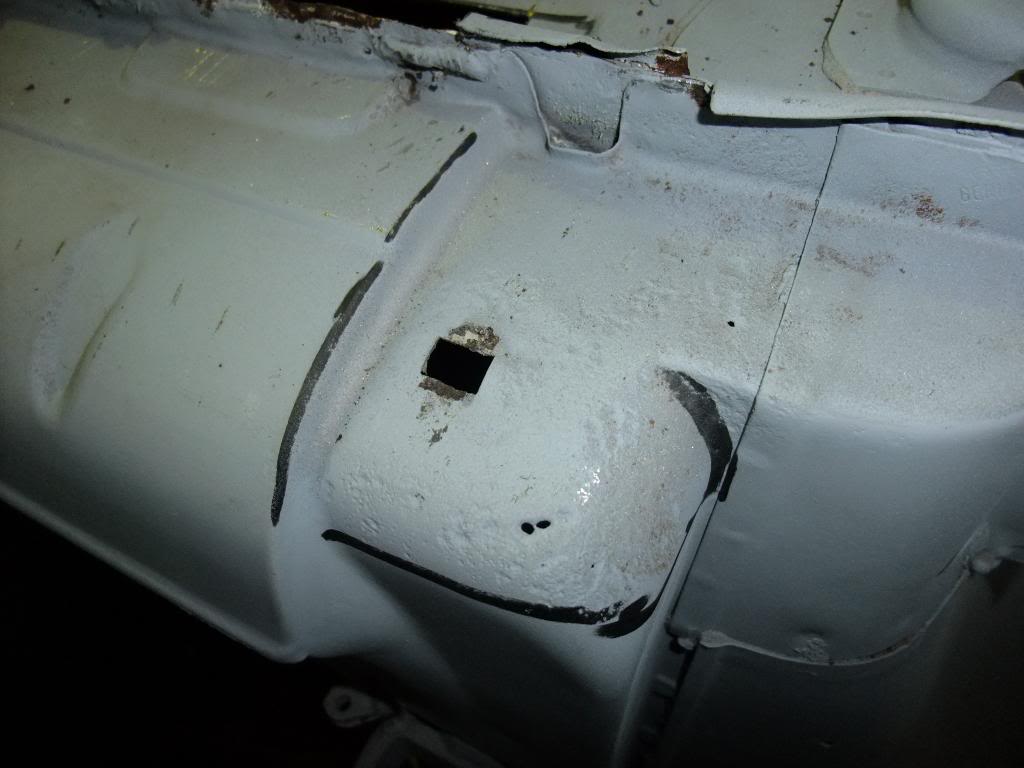
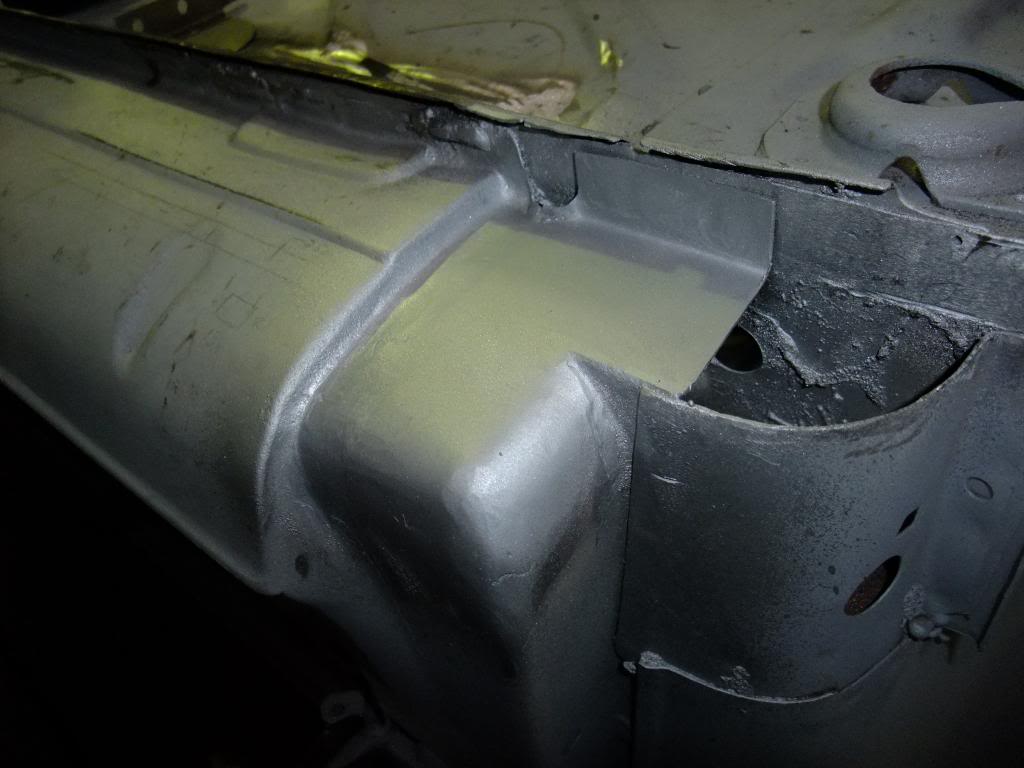
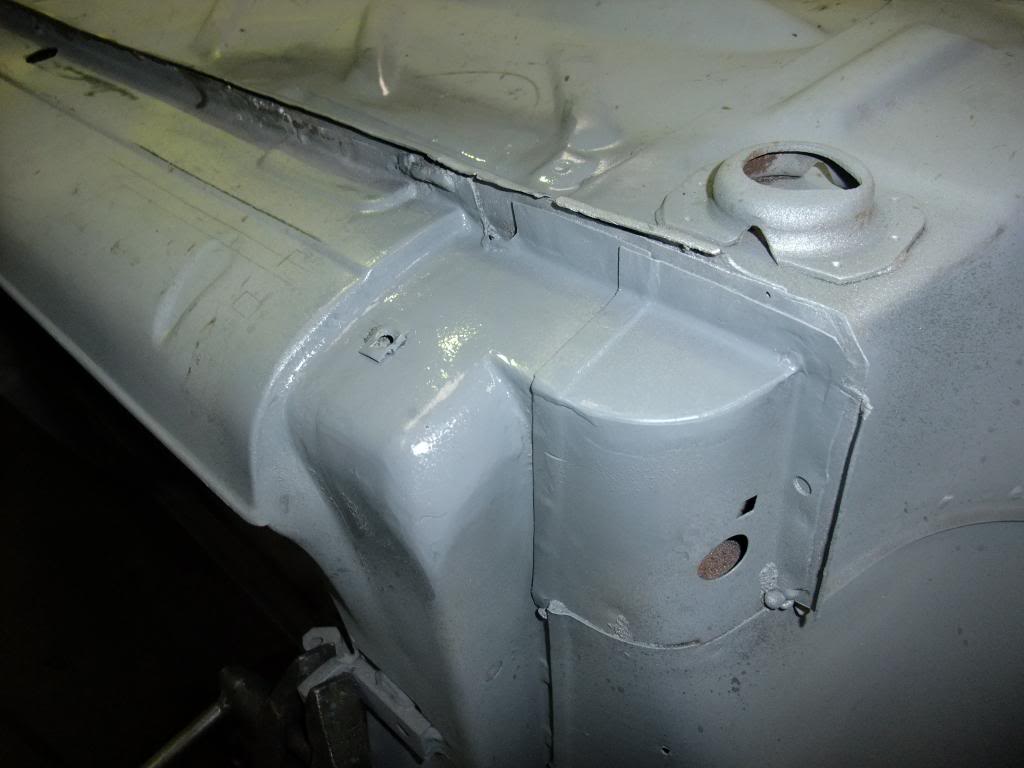
Scuttle Tray
After removing the cover we discovered the middle section had a few holes in it. So it was replaced…

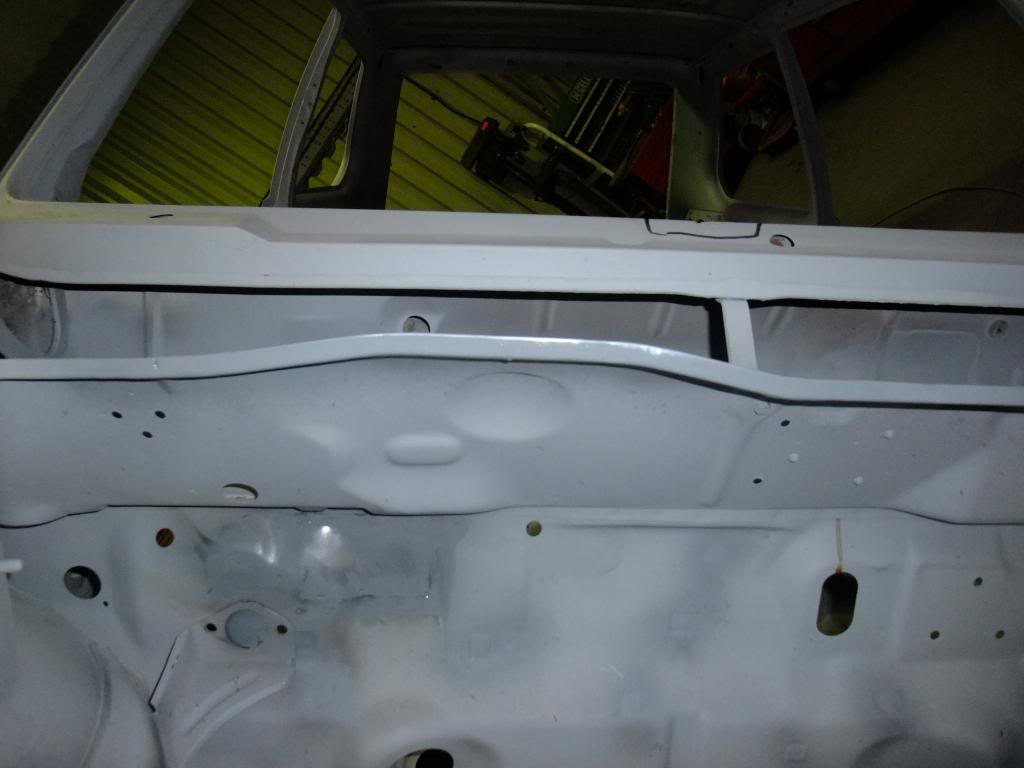
All done.
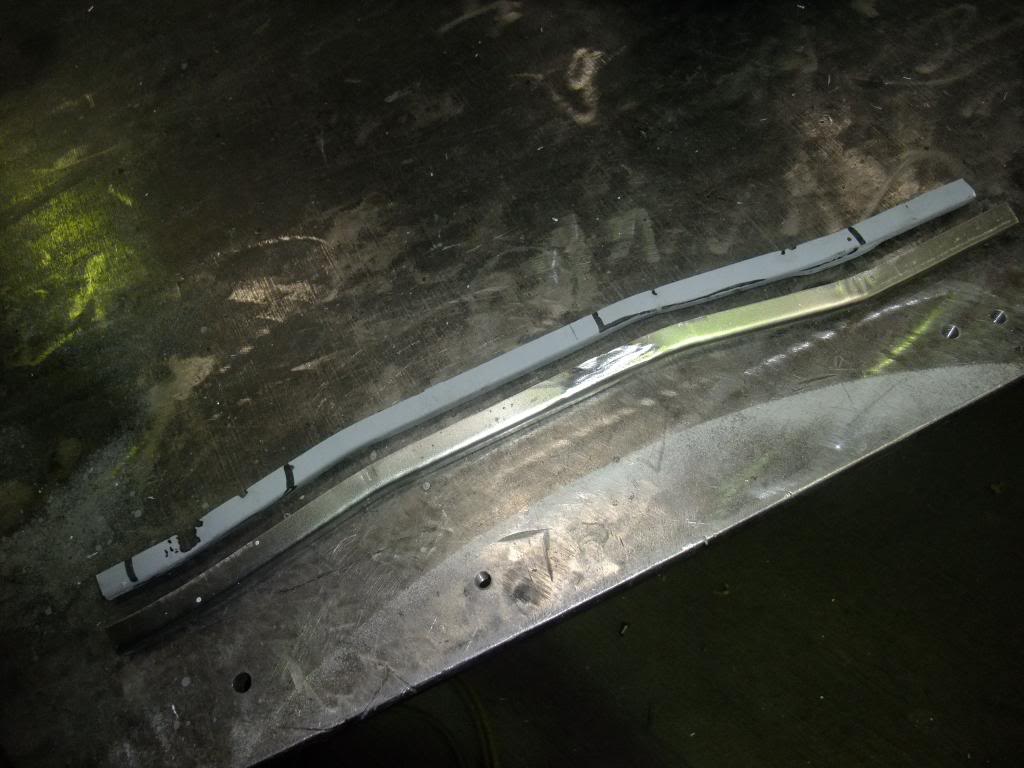
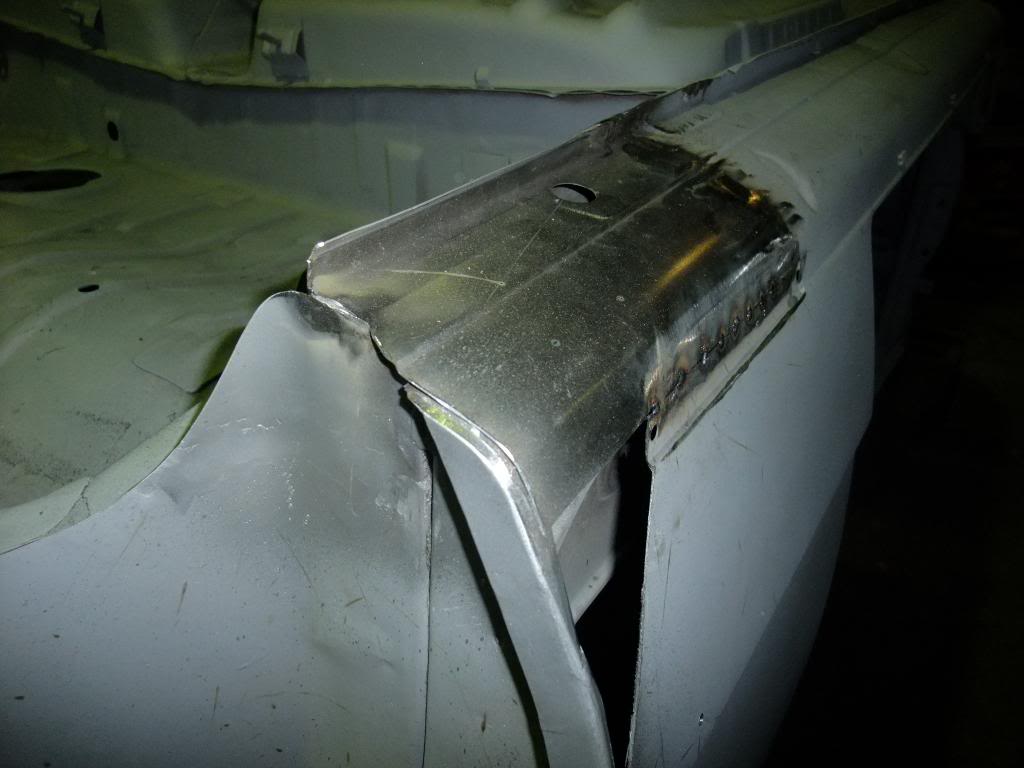
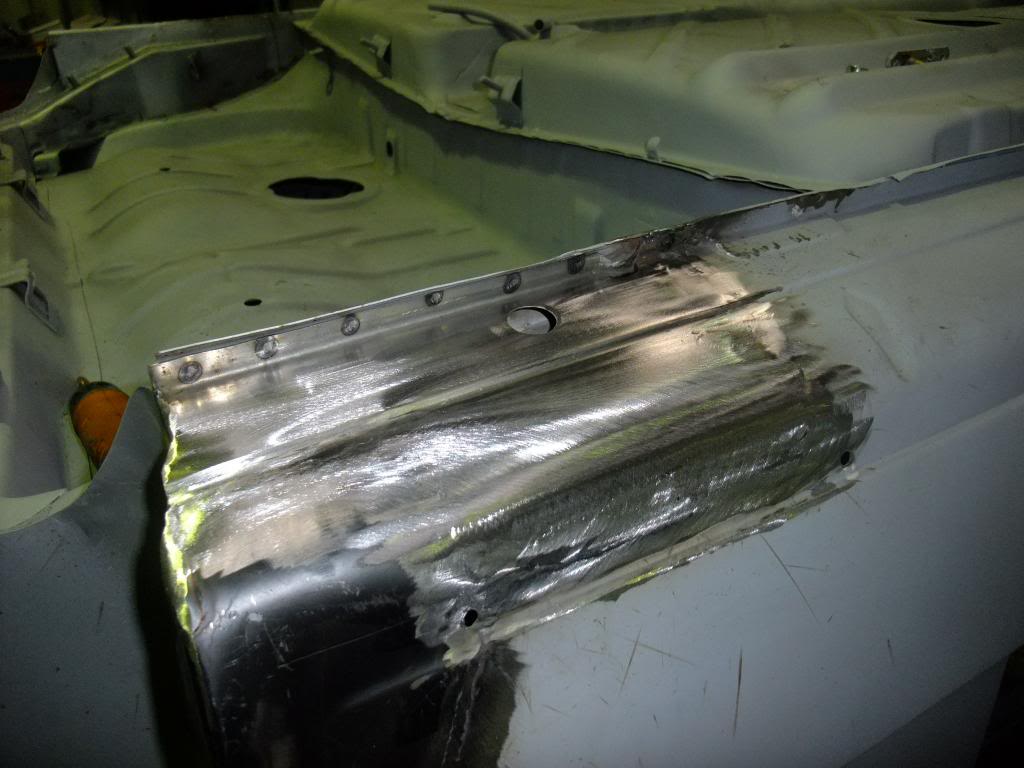
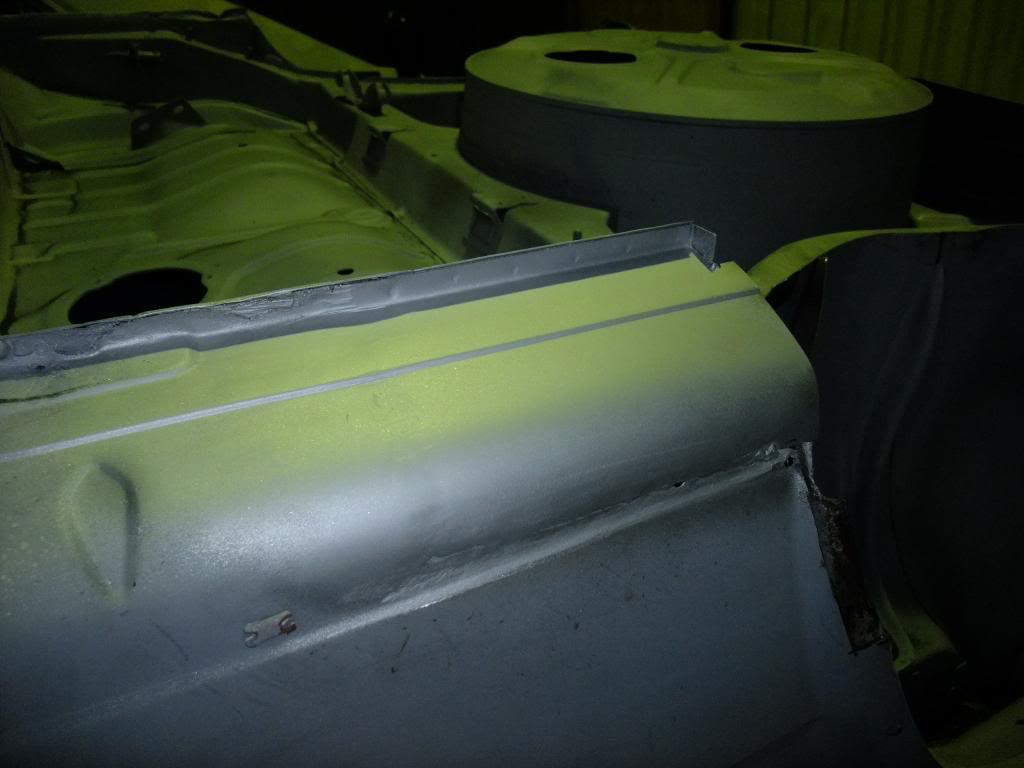
Windscreen Sill
Having a leaky seal ment the section had a few areas of corrosion to address.
Cut section…
Replacement…
Welded and primed…
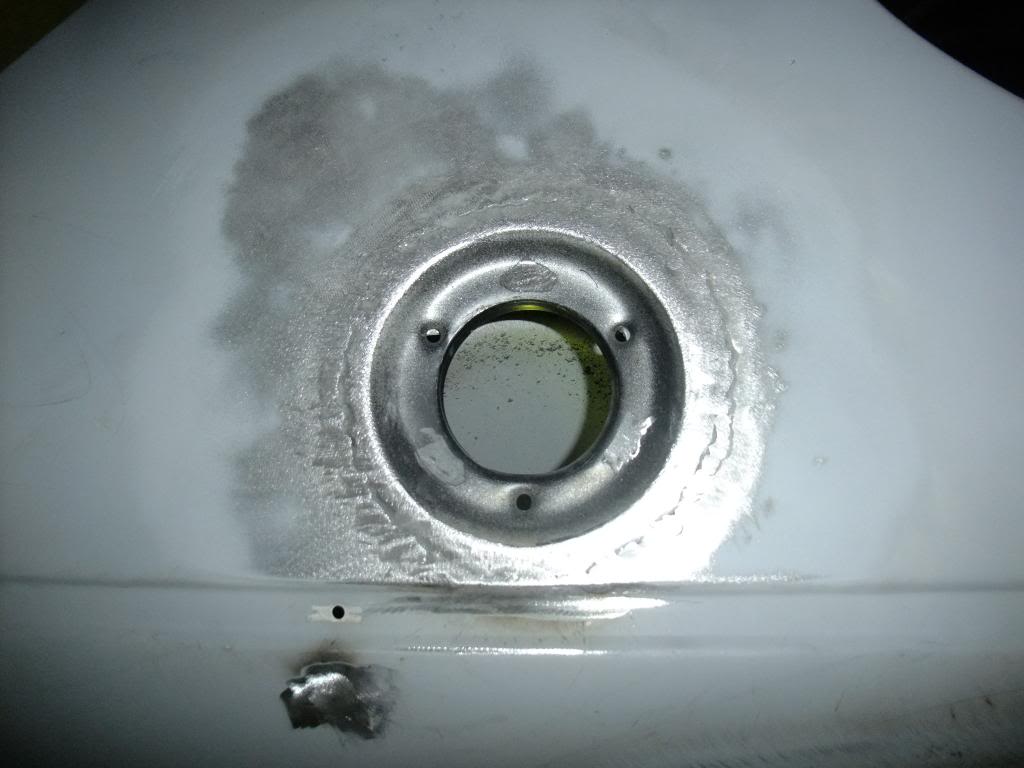
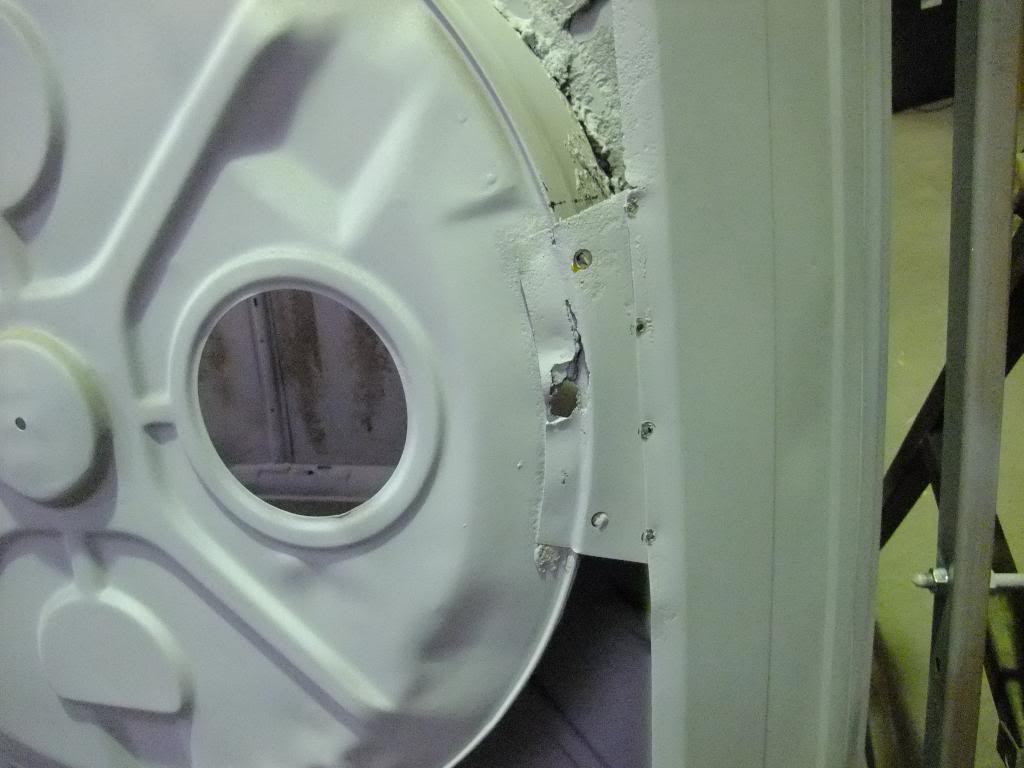
Fuel Filler
The inner panel was not in good shape so…
New panel ready to go.
In place…
And of course the corrosion affected the outer panel as well.
Huge number of images for this instalment so I've split it into three parts. This is the end of part 1, part 2 below…
Posted
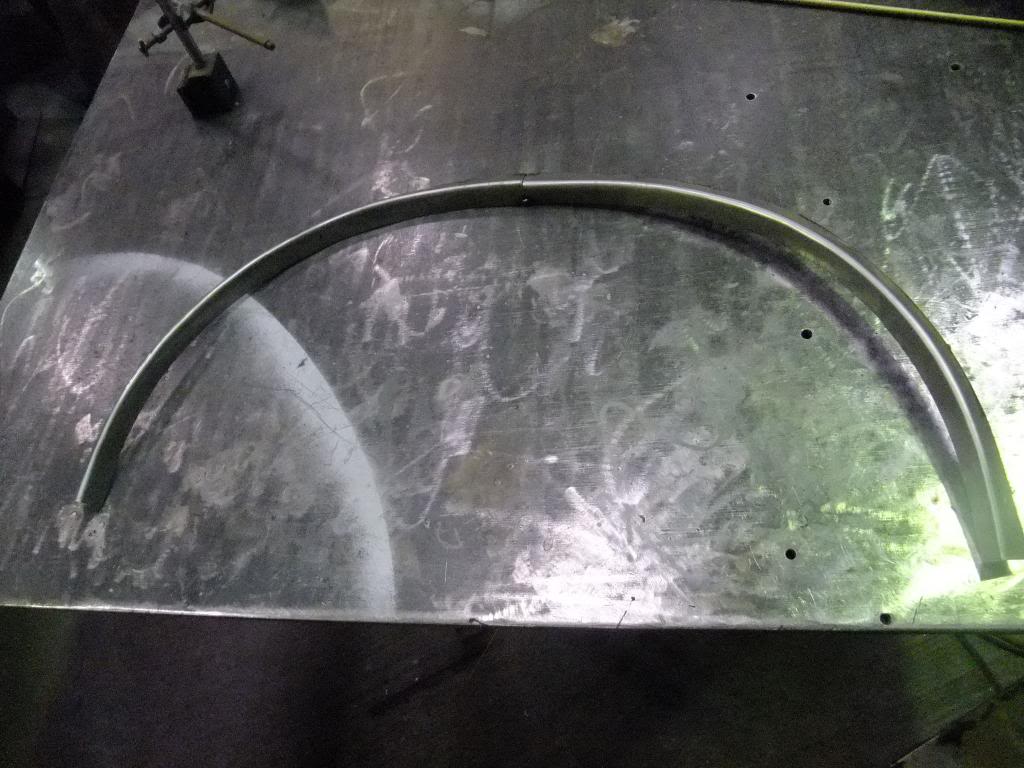
Newbie
Start at the front…
Nice new shiny arch.
Onto the rear corner, inner panel…
Outer panel…

Right Rear Wheel Arch
Start at the front…

Corrosion removed…

Inner sill repaired…
Outer Sill Repaired…
Rear Valance
Wheel Well
New bracket and repair…


Rust removed and ready for welding.
This is the end of part 2, part 3 below…
Posted
Newbie
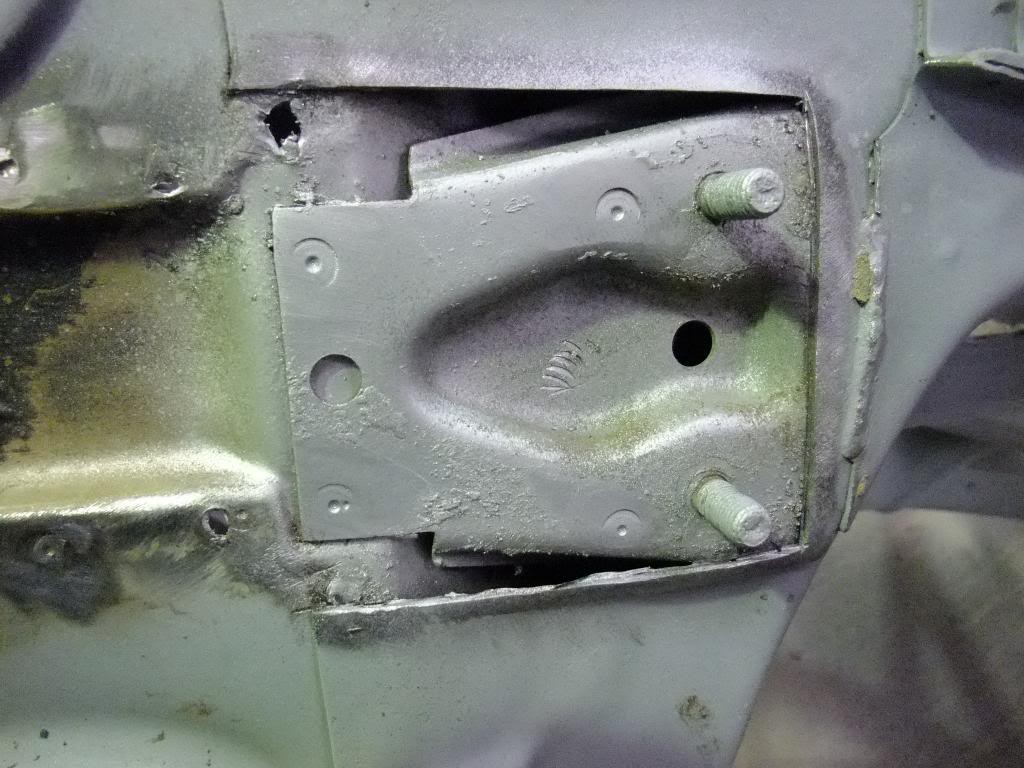
Chassis Rail
Quite a big hole on the fixing plate which had gone through to the floor pan underneath and a reasonable dent on the front half.


Floor pan…
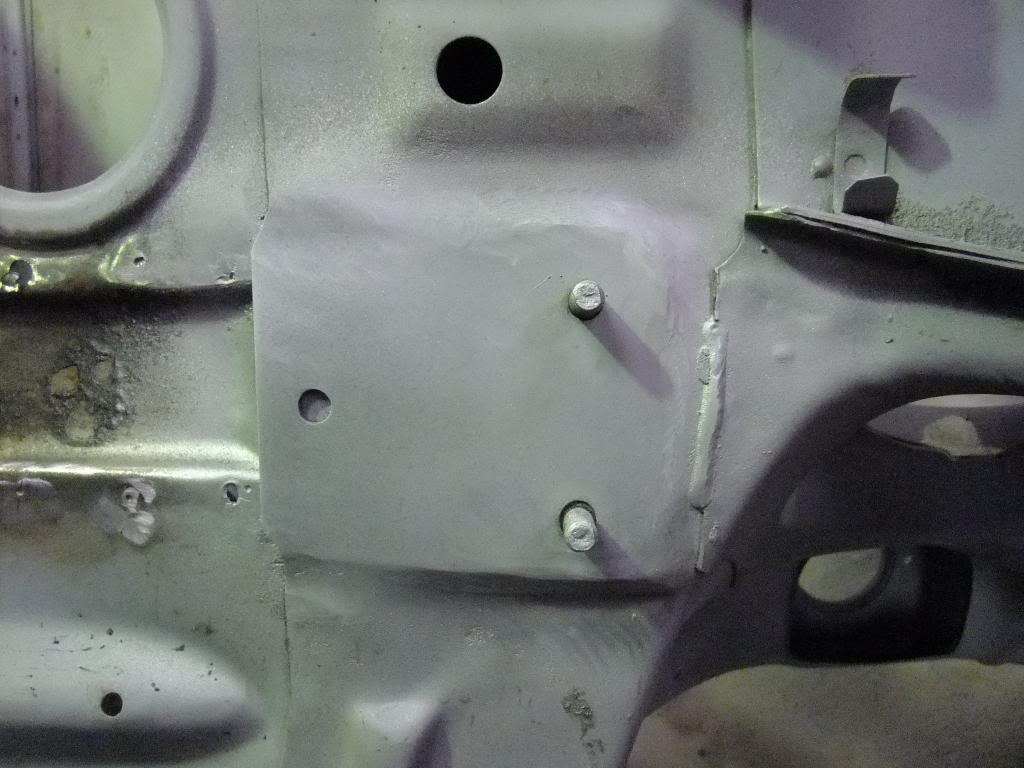
Fixing plate and rail…


Floor Pan/Sill
Some damage and corrosion to the folded join between the floor pan and outer sill, situated just behind the front right arch.
Damage removed and primed…
Repaired…
Floor Pan
Adjacent to the damage described above was an area of rust which looked to be slowly working it's way through the floor pan.
Rear section in place…
Front section in place…
In all, this work was complete by mid December, taking just over two weeks. As you would expect I was chuffed to bits as my car was now rust free and I could stop stressing about any potential delays to getting the body shell painted and fully protected again.
Looking at the pictures after all this time, I'm still amazed how precise a skilled labourer can be, with just a lick of primer my untrained eye has trouble spotting the repaired areas.
As usual, thanks for reading…
Posted
Old Timer
1985 Cabriolet GL
Posted
Moderator
Keep the updates coming
Posted
Settled In
Posted
Local Hero
Damn fine work though chap, both fabbing and welding look first-rate. Filler neck is good, I did mine twice and still couldn't avoid distortion in the rear 1/4 panel
Andy
LINCOLNSHIRE REGION -�https://www.facebook.com/groups/467122313360002/
1983 MK1 Golf GTI Campaign Model - Under (looooong) resto!
1962 Rover P4 80
2002 BMW 745i
2008 BMW Z4 2.5Si
LINCOLNSHIRE REGION -�https://www.facebook.com/groups/467122313360002/
1983 MK1 Golf GTI Campaign Model - Under (looooong) resto!
1962 Rover P4 80
2002 BMW 745i
2008 BMW Z4 2.5Si
Posted
Newbie
Surface Preparation
First things first, the panels were sprayed with a coat of filler to create a constistent surface to which a 'guide coat' is applied. The surfaces are then block sanded to identify any surface or inconsistencies.
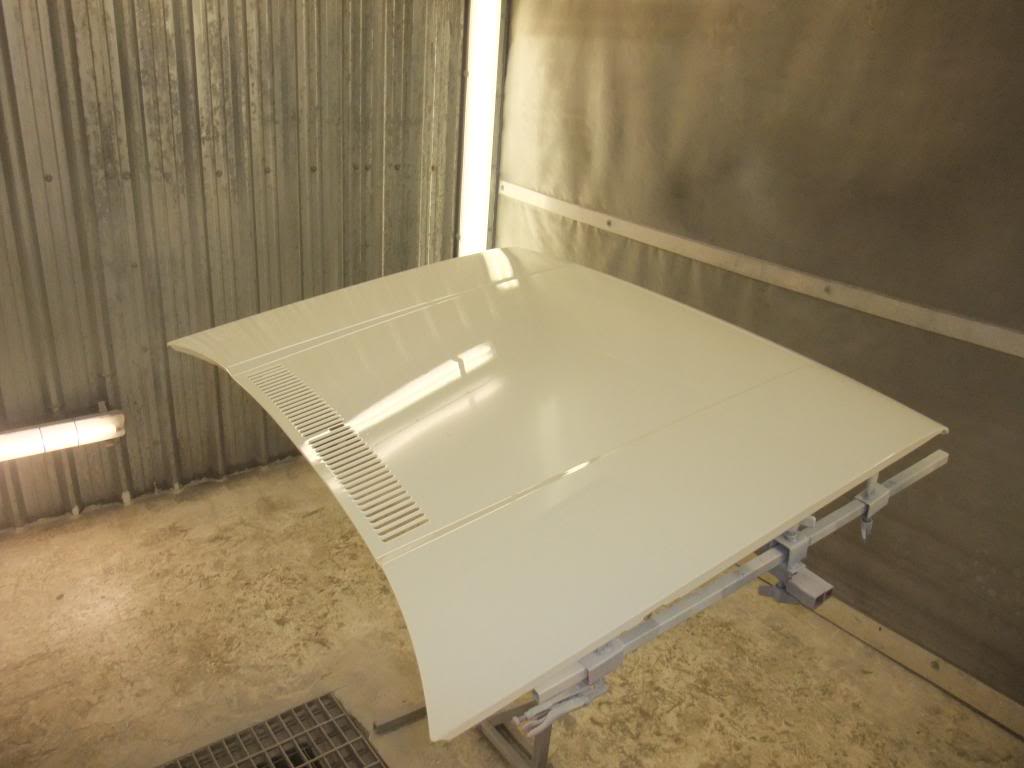
Panels
As you may have noticed from previous posts, the bonnet wasn't acid stripped with the other panels. As there was no corrosion and the paintwork was still in good condition the body-shop wanted to ensure the sealer between the panel and frame was kept intact.


Plus initial guide coat…

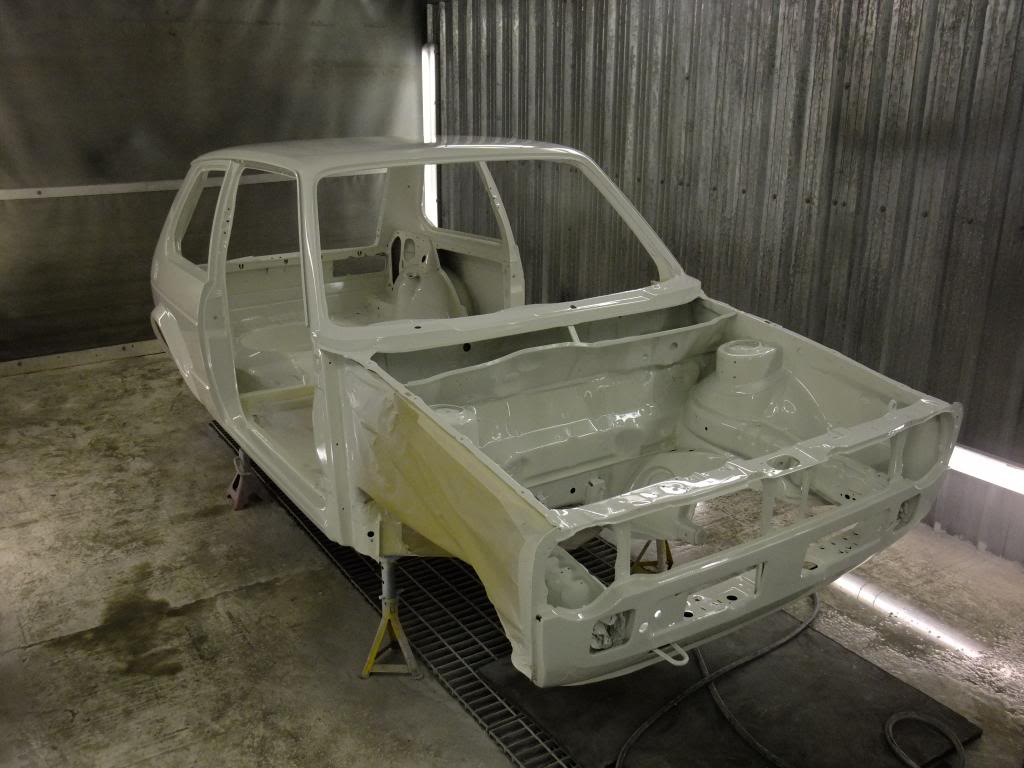
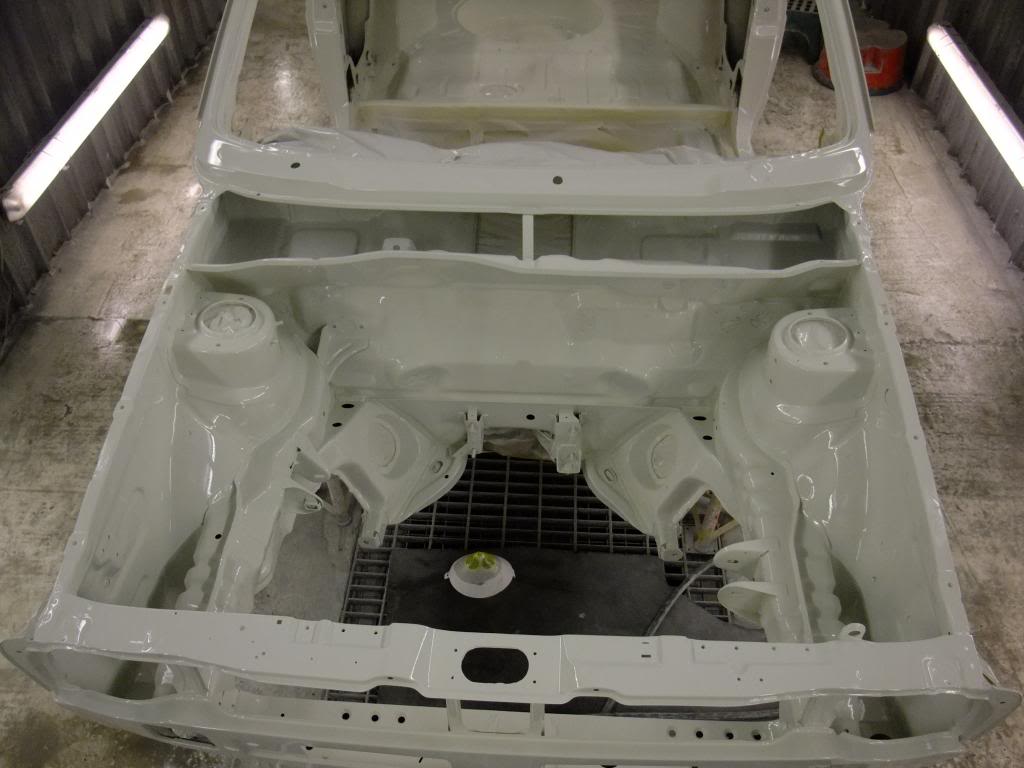
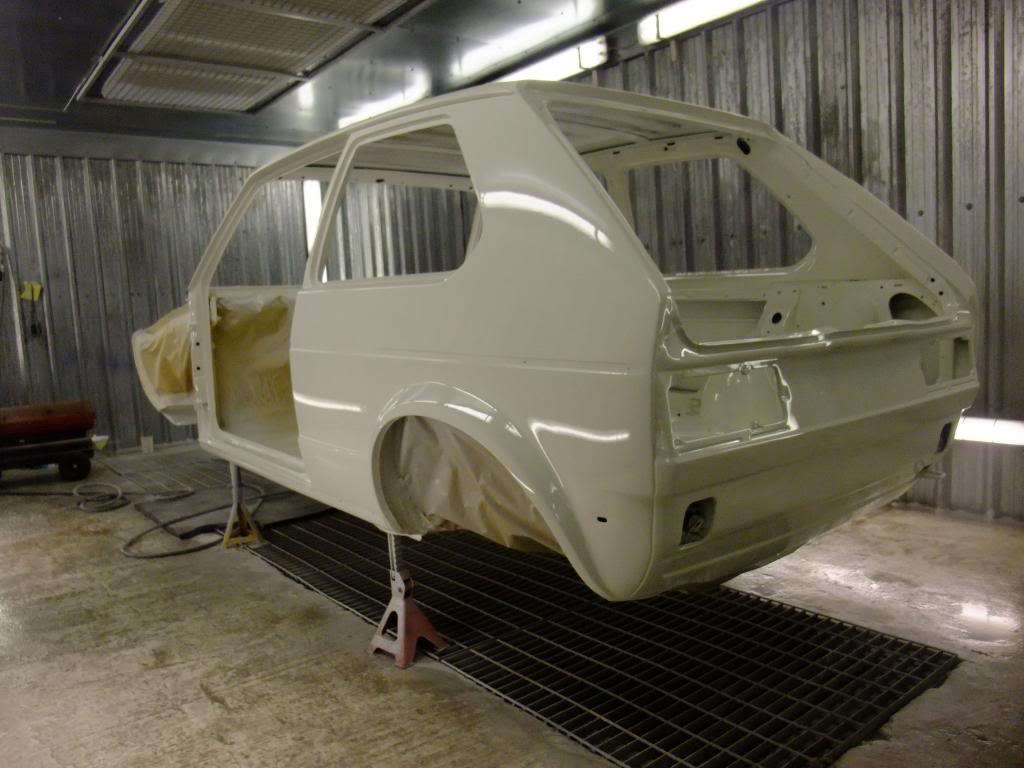
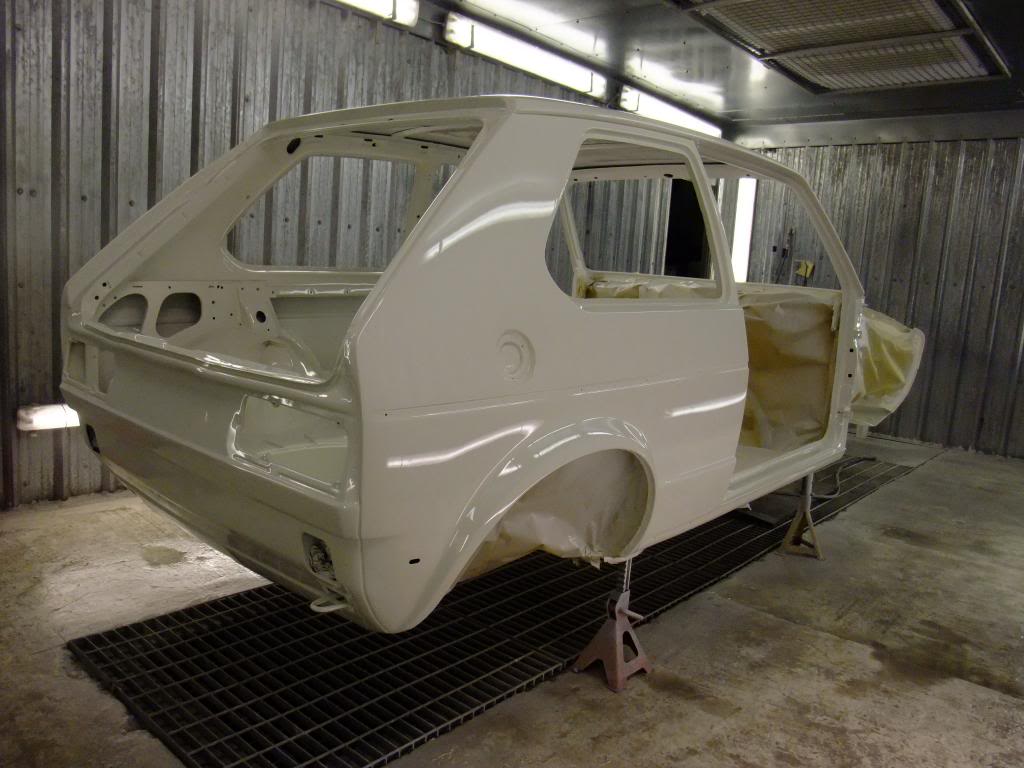
Body Shell

Primer Coat
A beige 2K primer was then applied to every square inch of exposed surface. Again, a guide coat was applied to all the surfaces to help identify any surface inconsistencies.
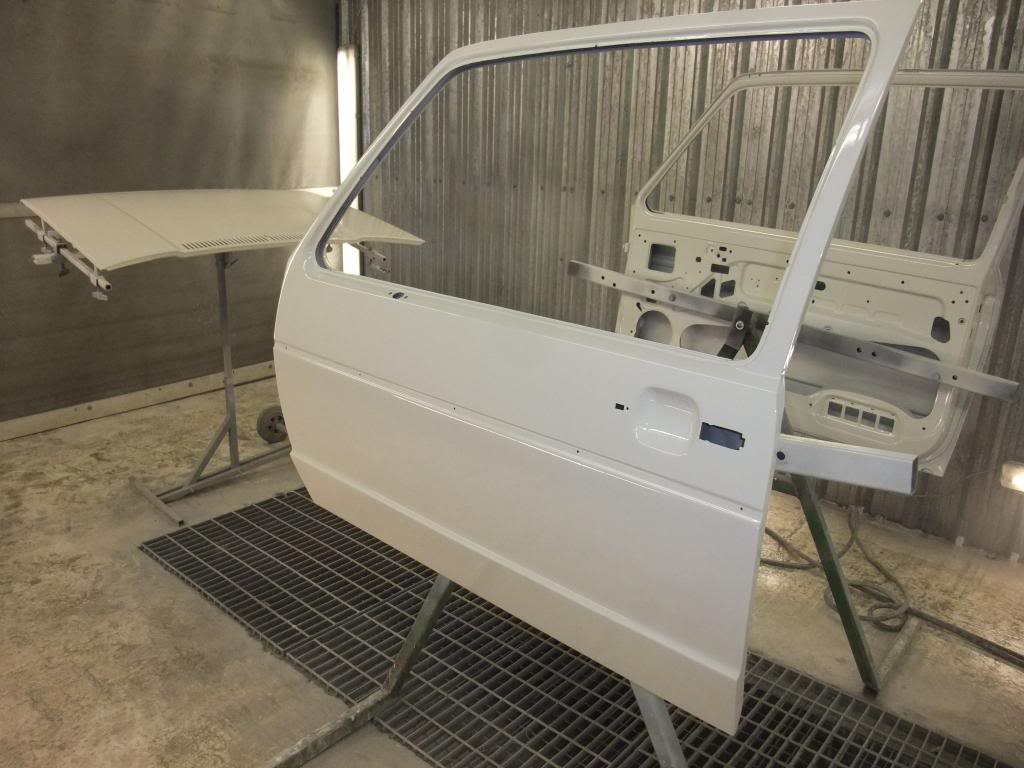
Panels
Body Shell
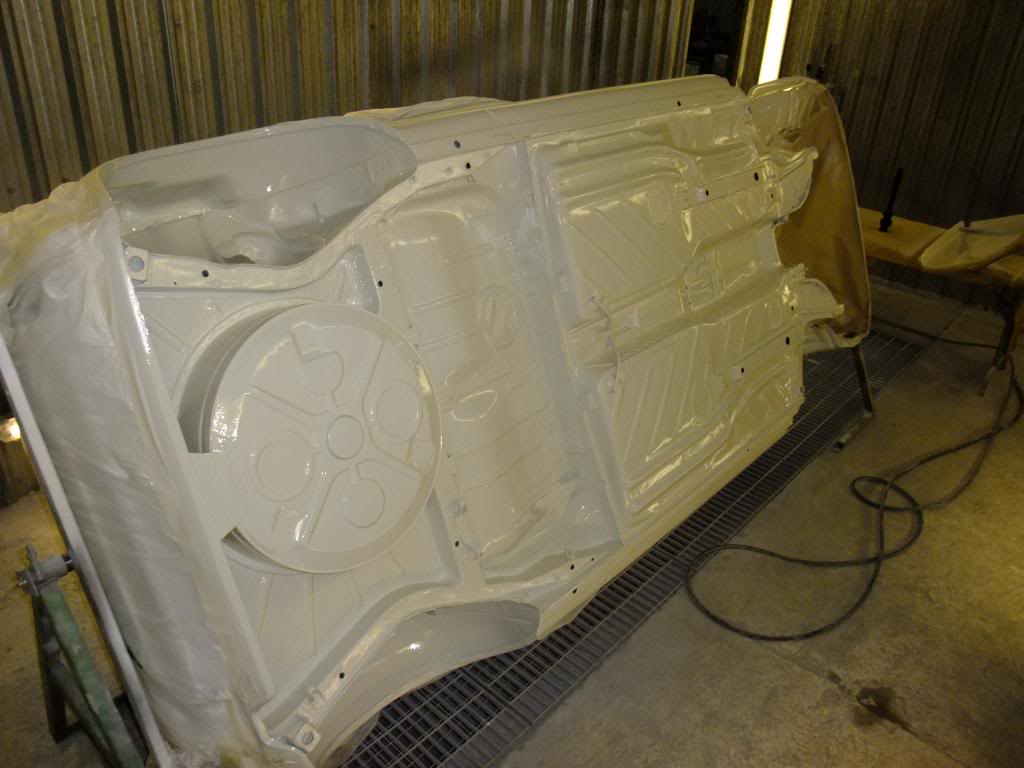
Underside Coat
The floor pan, inner wings and the inside of the outer wings were given a coat of 'specially mixed' bed liner to match the body colour. The aim being to provide a good protective coat for the exposed surfaces of the vehicle without comprimising the 'show car' appearance.
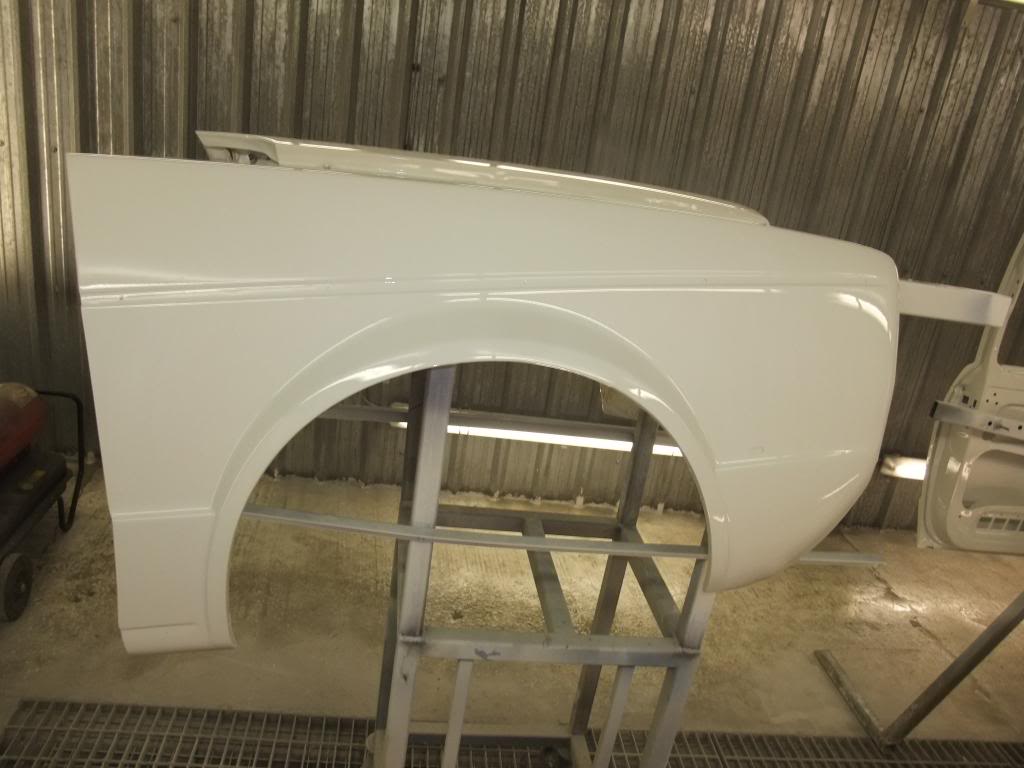
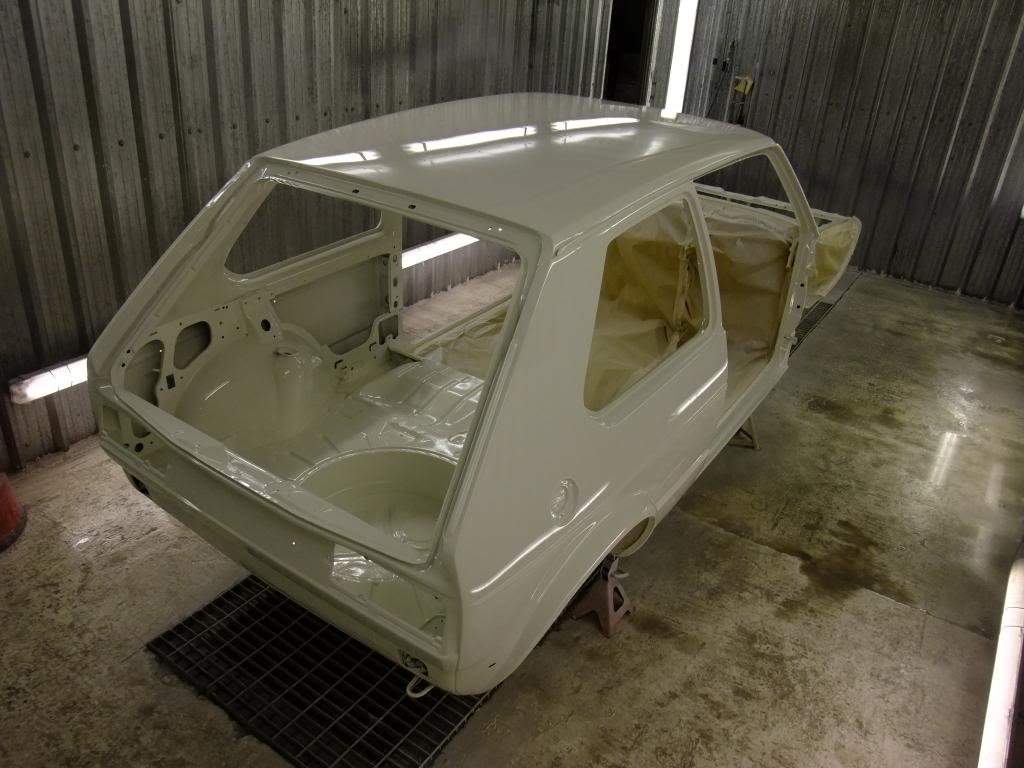
Laquered Base Coat
The base coats were applied iteratively and laquered with a grip coat and two final coats to give that extra depth to the finish.
Panels
Body Shell
And here's the final look, body shell with all the panels all lined up.
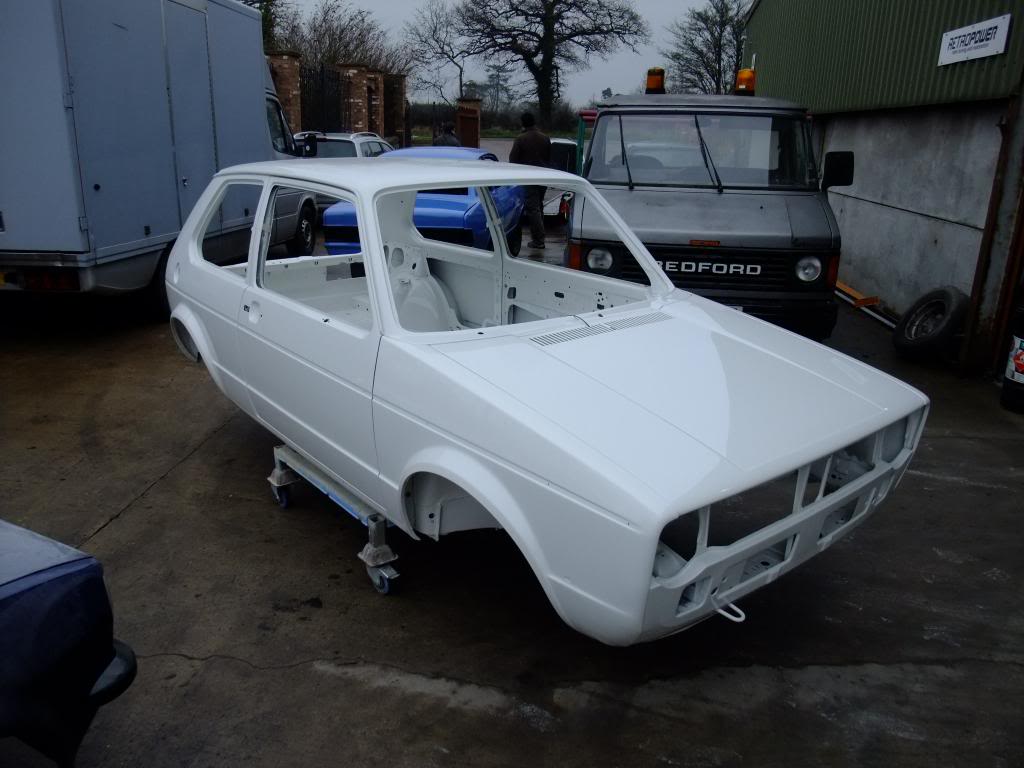
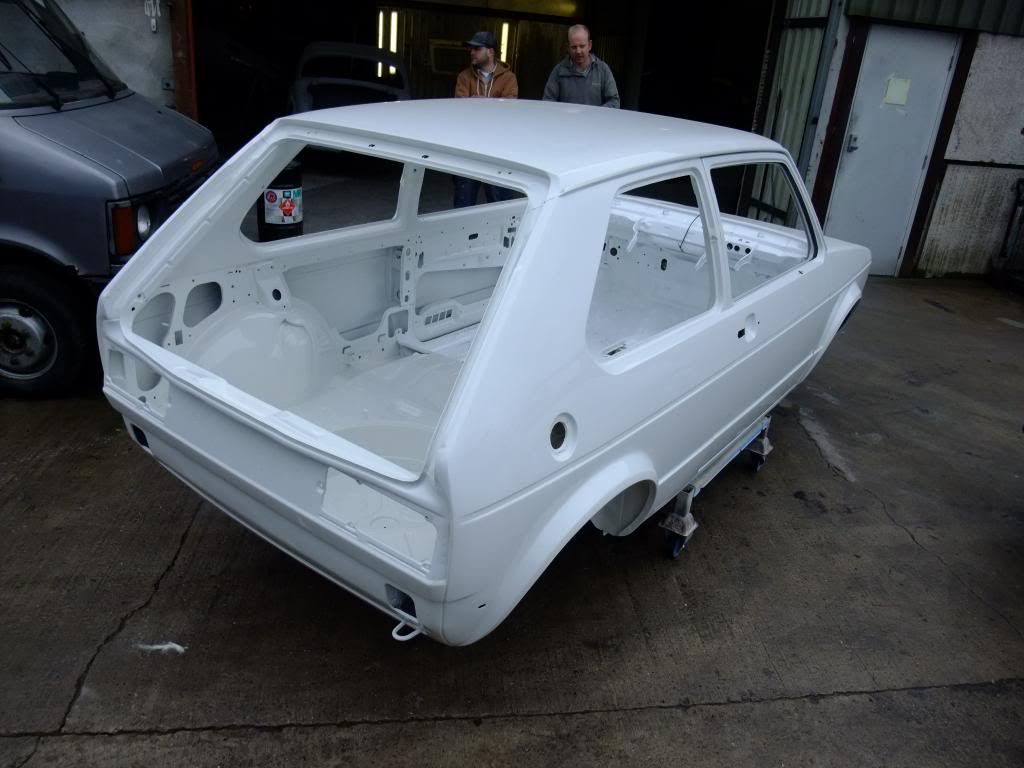

What can I say, it's just like she stepped out of a factory… Actually, even better than that, considering the materials and techniques used are bang upto date and the surface preparation was anal to say the least. So happy with the results…
Posted
Newbie
Decisions, Decisions…
Engine Rebuild
With my lack of engineering background I had some vague ideas of how to achieve the response (throttle bodies) I wanted from the engine but no clue what impact that would have on the whole build. After talking through some alternatives with the engineer we plumped to keep the engine 8v and increase it's capacity slightly to 2.0l, which meant I could keep the original head and replace the lower end with minimal fuss.
He also presented a whole spectrum of options when considering how far I could go with the rebuild, ranging from the simple to the ridiculous and everything in between. At one end of the scale; a straight forward rebuild with new standard parts and throttle bodies which would deliver about 140 bhp, alternatively a fully tuned engine with forged internals, larger ports/valves, upgraded cam, forged crank (lightened and knife-edged) and engine management system (Omex 600) to deliver the potential 210 bhp to the wheels without them bursting into flames.
With the mechanical injection system gone, I would be effectively doubling the power of the original engine and reducing the weight over the front axle. Was I mental? This wasn't my initial intention but the thought of it raised the hairs on the back of my neck every time I looked at the specs. This was a big decision to make as it would push my limits financially and I didn't know whether it would suit the car. After a couple of weeks of umm-ing and argh-ing I jumped in with both feet and got the workshop to source a 2.0l block, then went to the bank to borrow some money.
Running Gear
In the meanwhile, I had to revise the specs for the running gear to cope with the revised engine output. So I sat down with the guys from the workshop again, to say we were excited would be an understatement…
Transmission
- O2J Gearbox. Low mileage, stripped and rebuilt.
- O2J Hydraulic clutch conversion. Stronger and removes the need for any cheese wire in the engine bay.
- G60 flywheel, lightened.
- VW Polo GTI 6n2 cable shifter.
- Gripper LSD. Recommended as one of the most progressive diffs on the market I hope it will counteract the potential for huge torque steer.
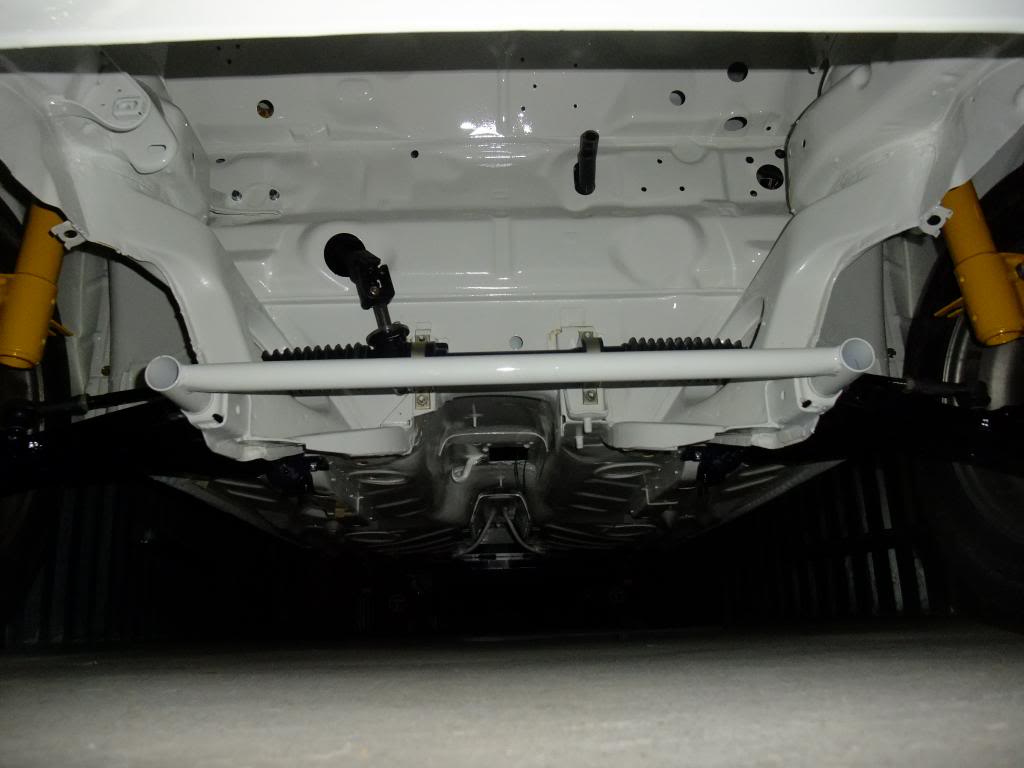
Steering
- New MkI rack gaiters.
- New MkI rod ends.
- Quaife quick rack kit.
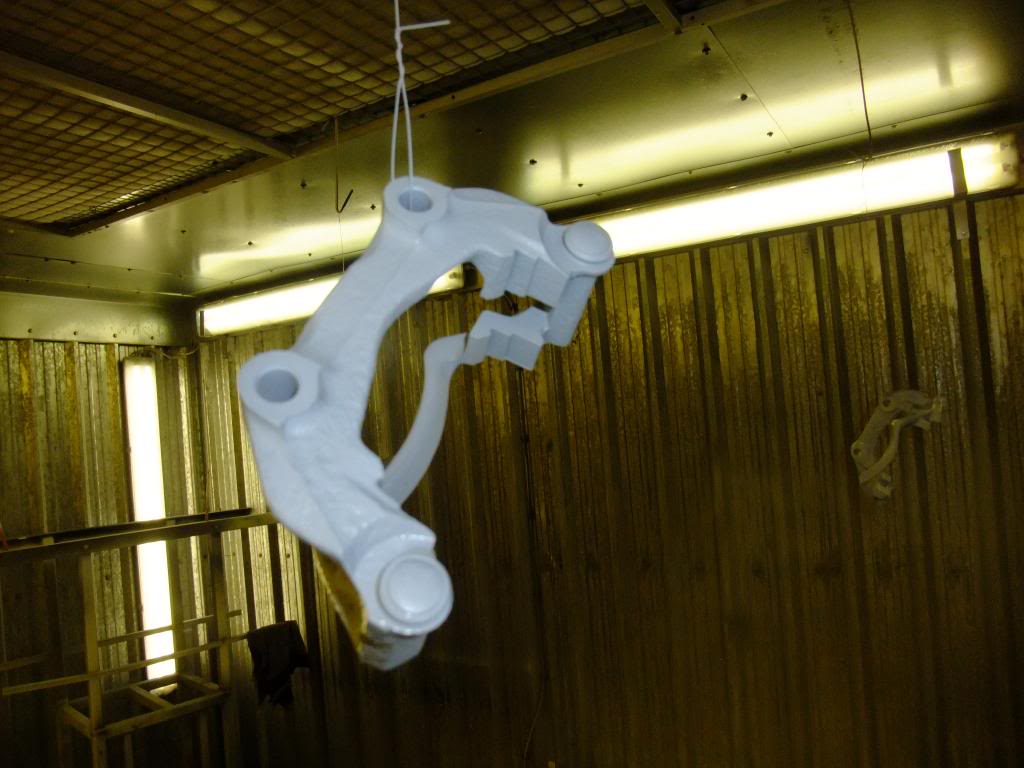
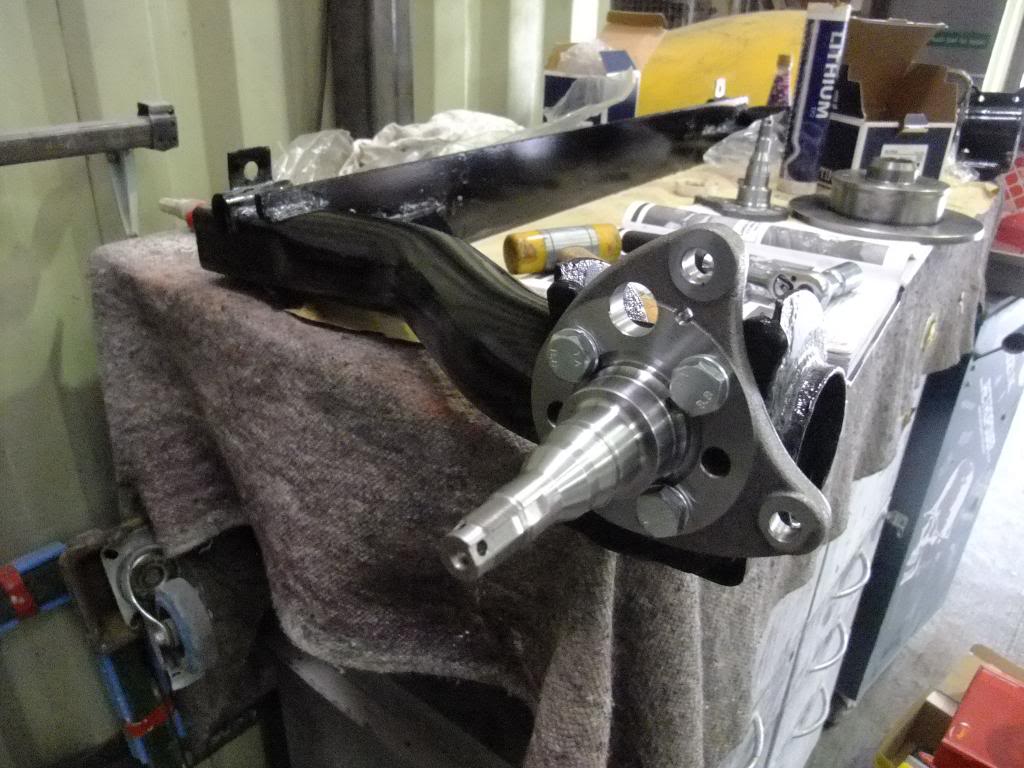
Suspension
- Refurb'd front wishbones. Seam welded to reduce flex.
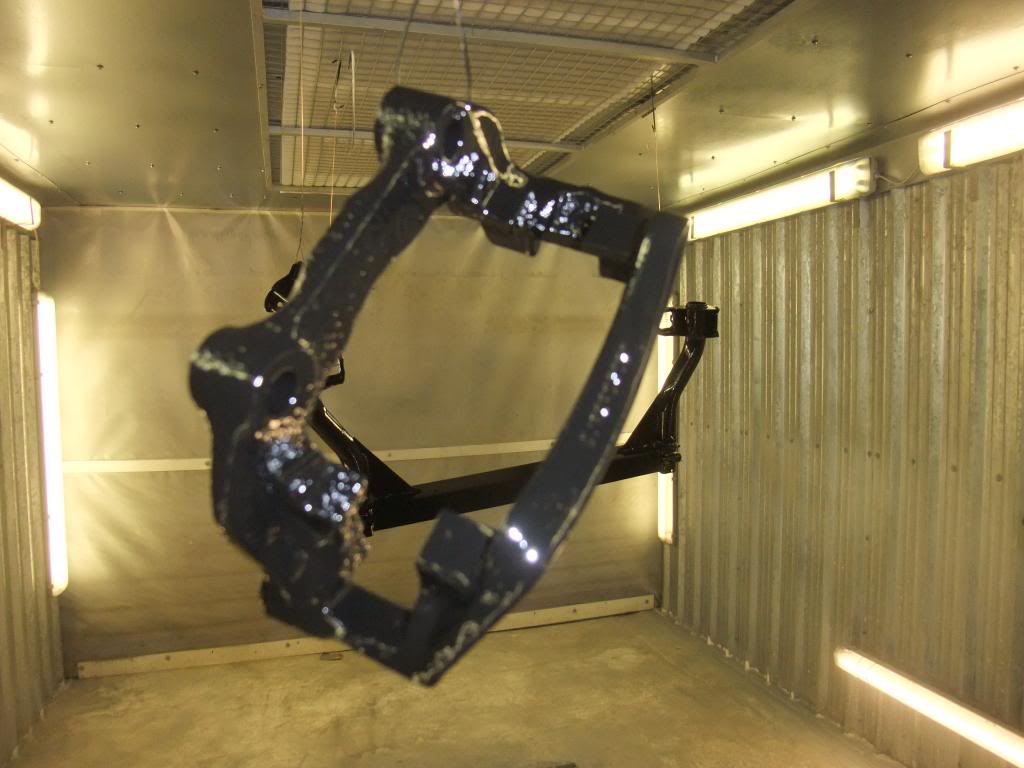
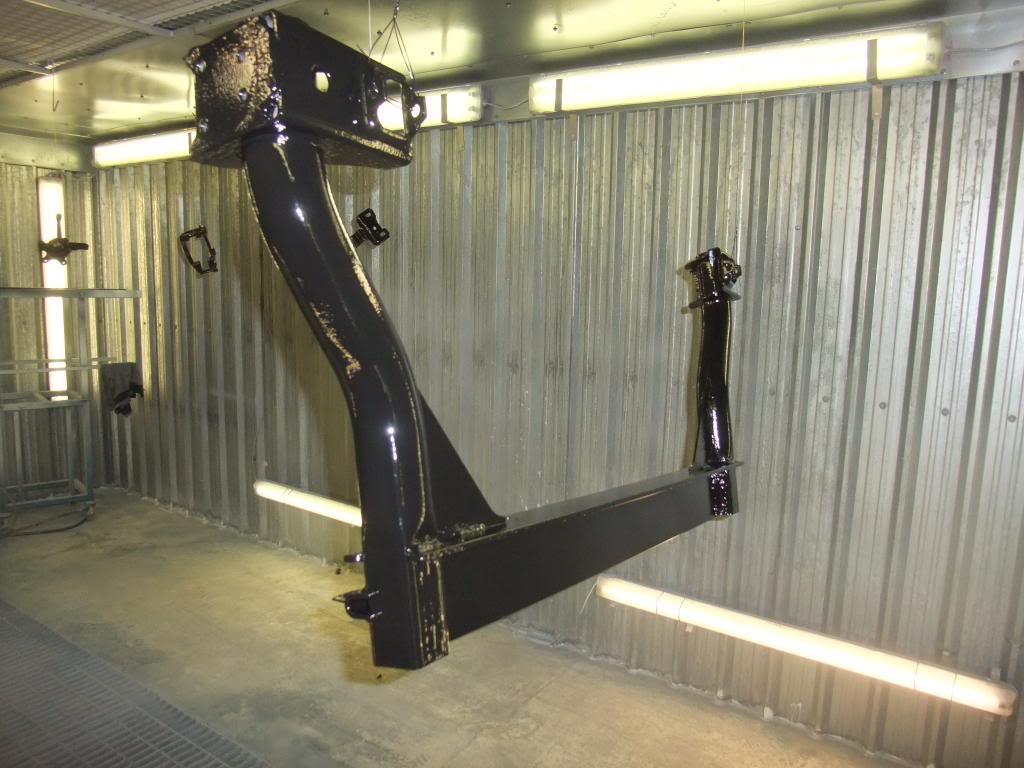
- Refurb'd rear beam.
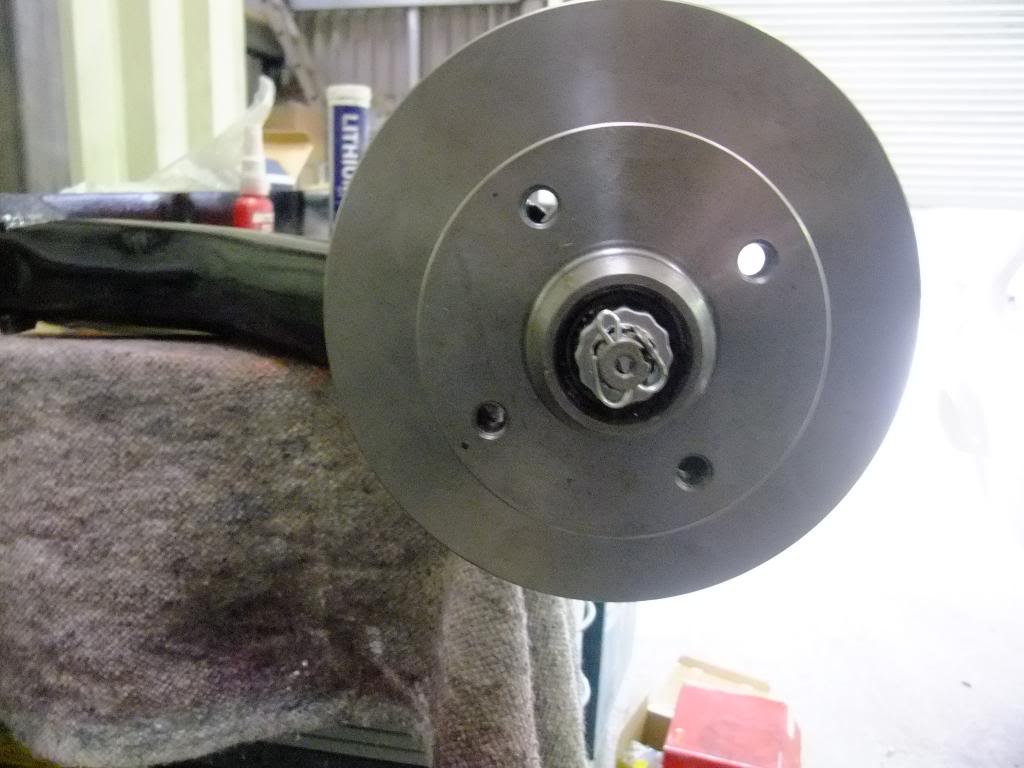
- Refurb'd MkI front hubs.
- New MkI front bearing kit.
- New MkII rear bearing kit.
- Bilstein B12 kit.
- Eibach lowering springs (-30mm).
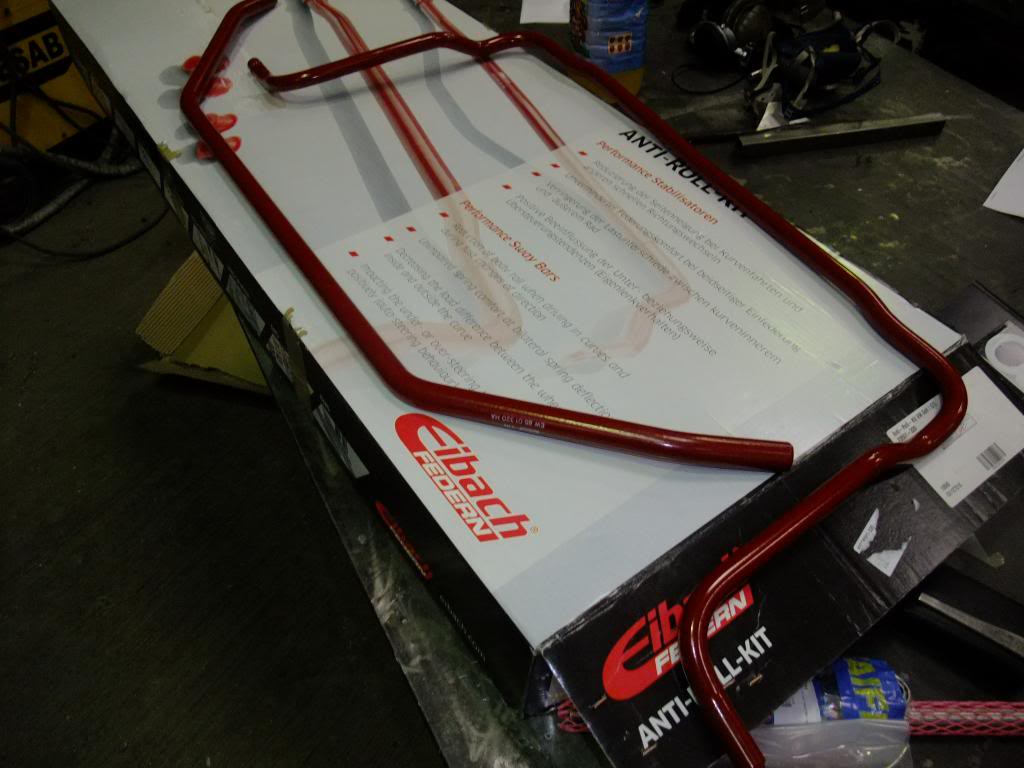
- Eibach front/rear anti-roll bars.
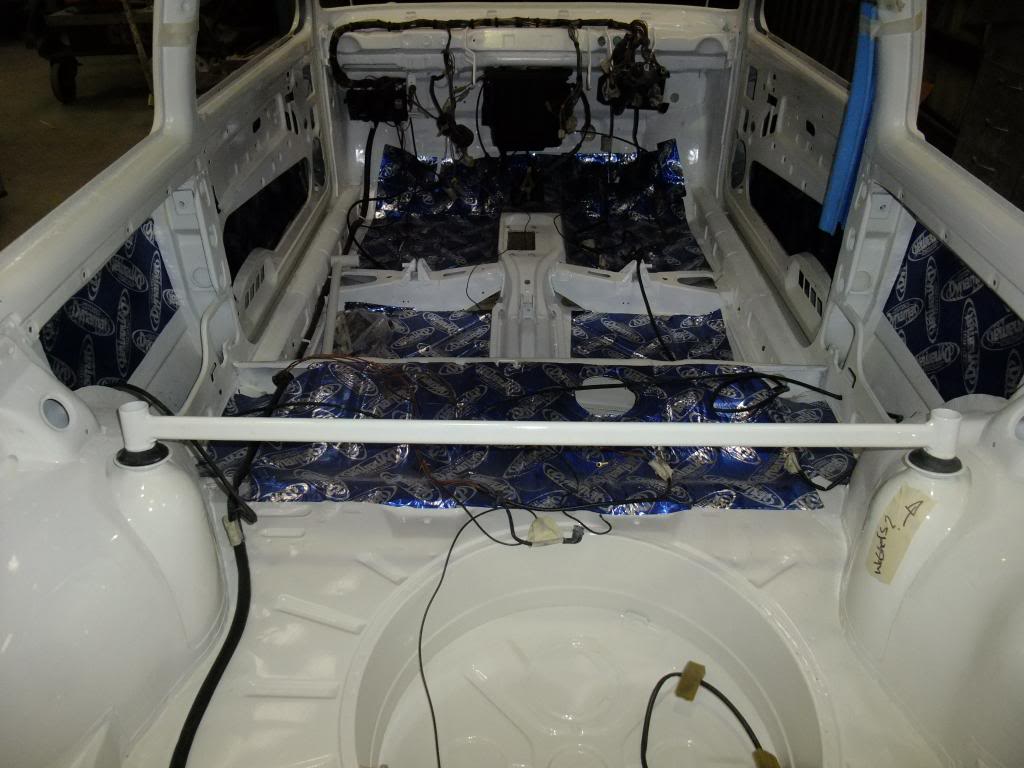
- OMP upper/lower front and upper rear strut braces.
- Superpro polybush full kit.
Brakes
- New MkII disc stub axles.
- New G60 front discs (280mm) and calipers.
- New MkII rear discs (239mm) and calipers.
- Custom brake bias box (Wilwood master cylinders).
Wheels and Tyres
- 15 x 7'' wheels to cope with the extra power and larger brake discs.
- 195/50 R15 tyres to maintain the original rolling radius.
Assembly (Part 1)
As January progressed the engine went off to be re-engineered and the guys at the workshop got down to ordering parts and putting my car back together again. I started to source the hard to find parts and extras that I wanted for the cabin, a strangely absorbing task (geek alert).
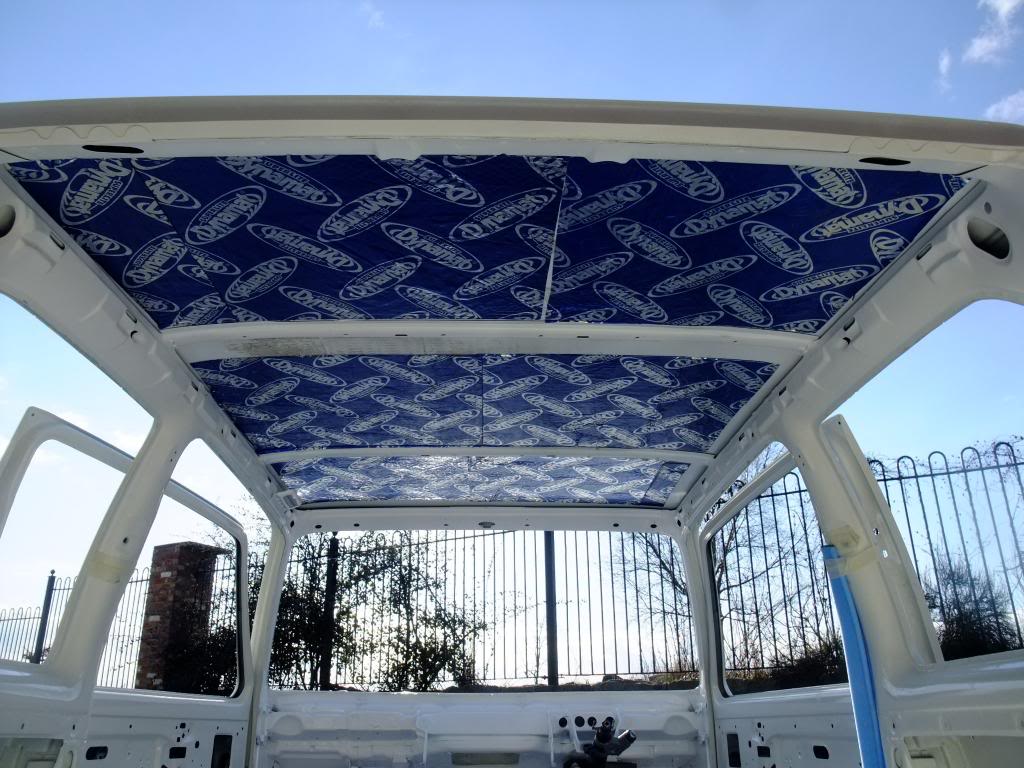
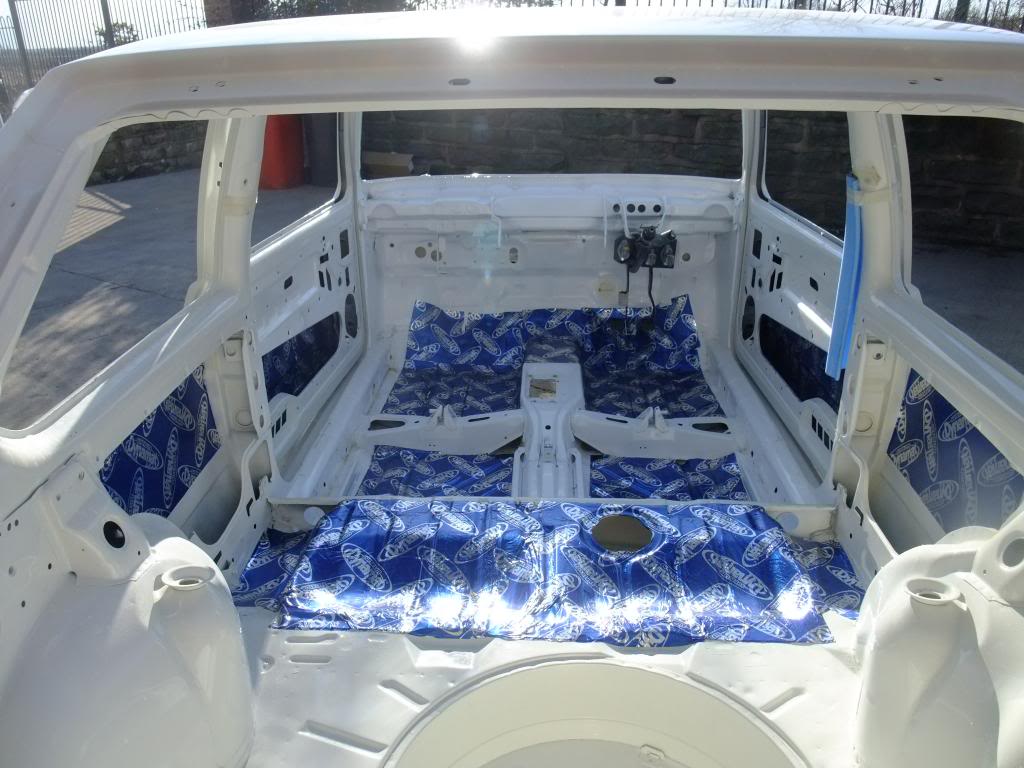
Sound Deadening
The assembly started with lining the body shell with Dynamat to reduce road and engine noise in the cabin.
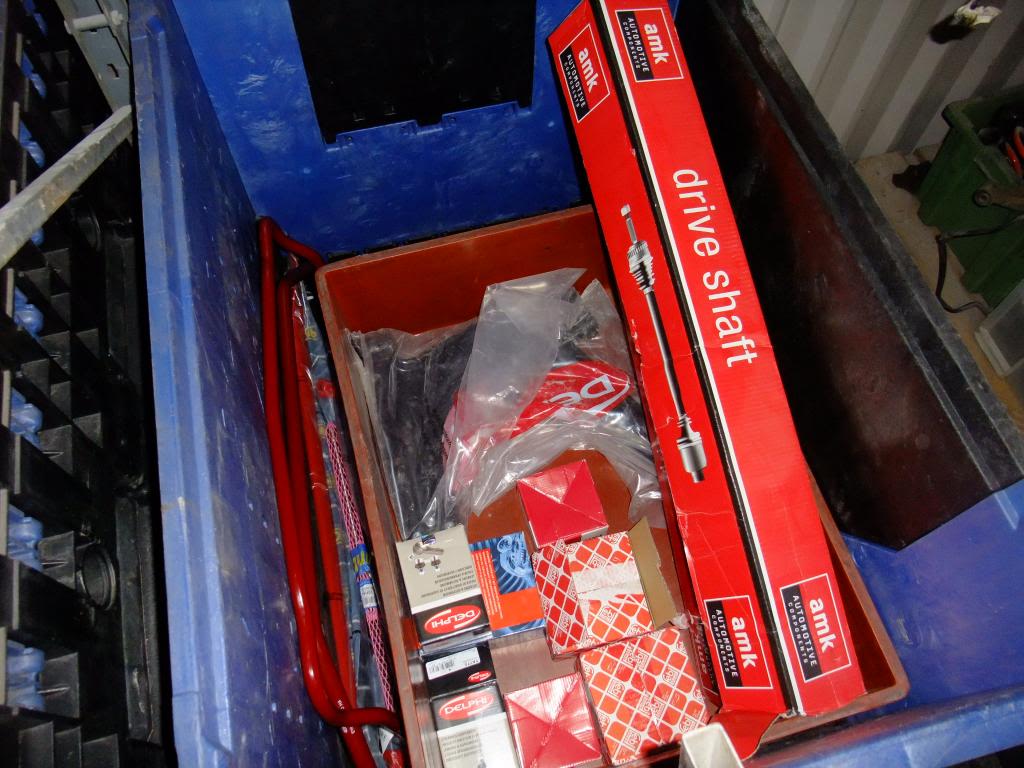
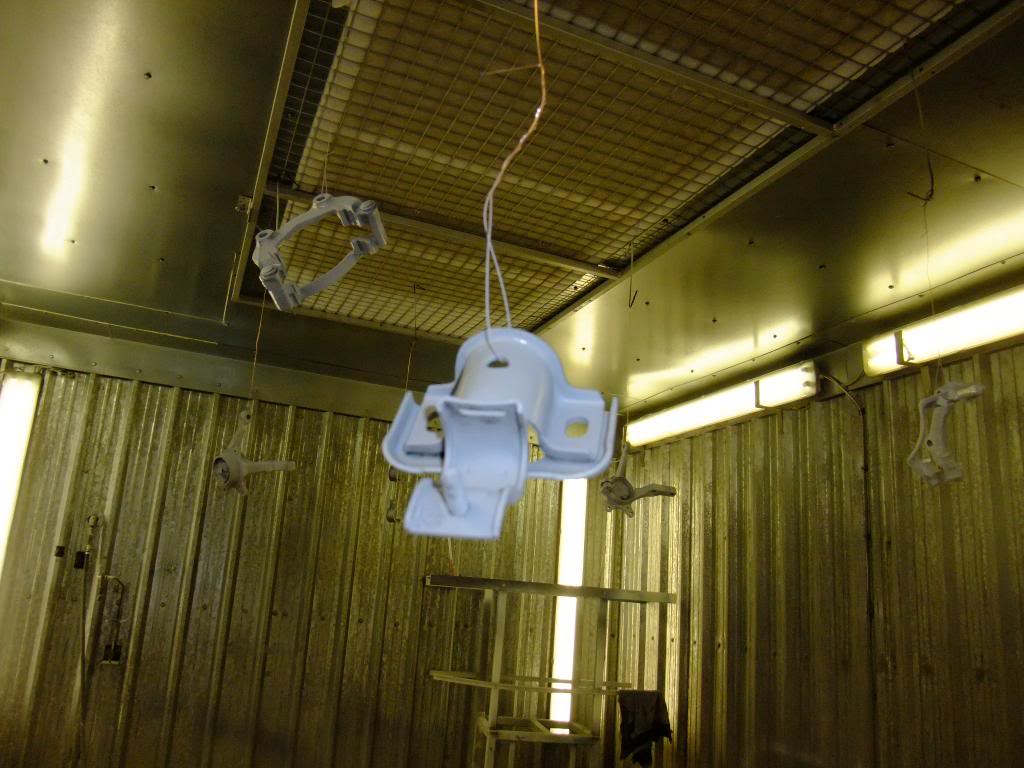
Shiny Bits
The parts had started to arrive at the workshop. I just love opening presents…
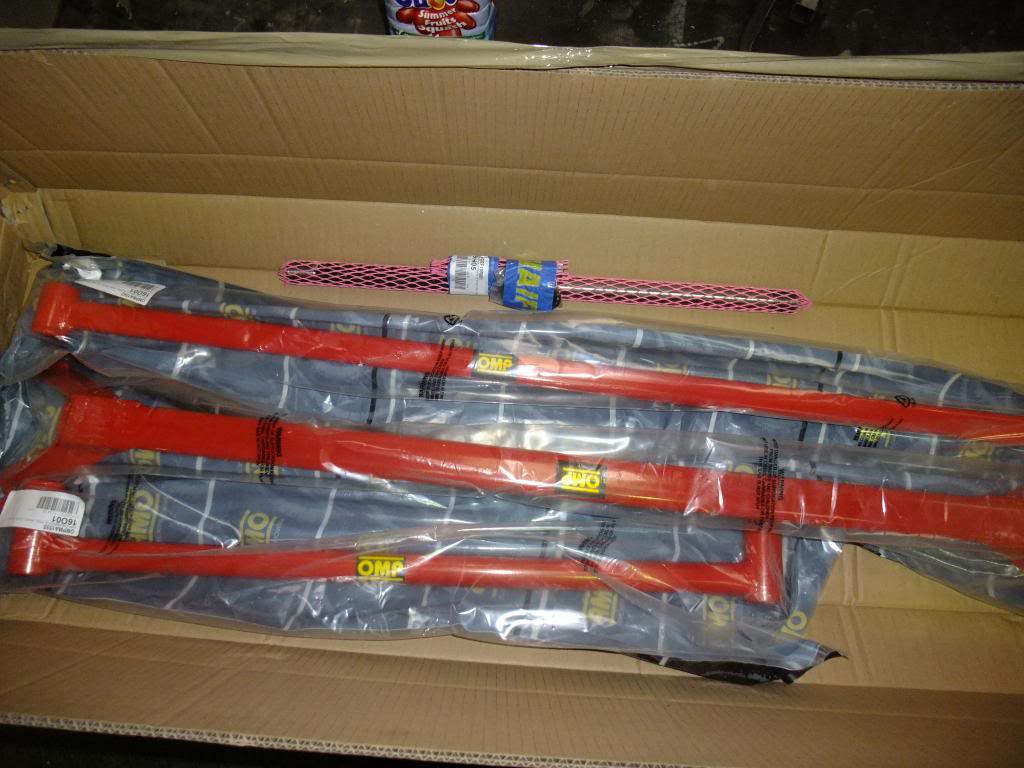
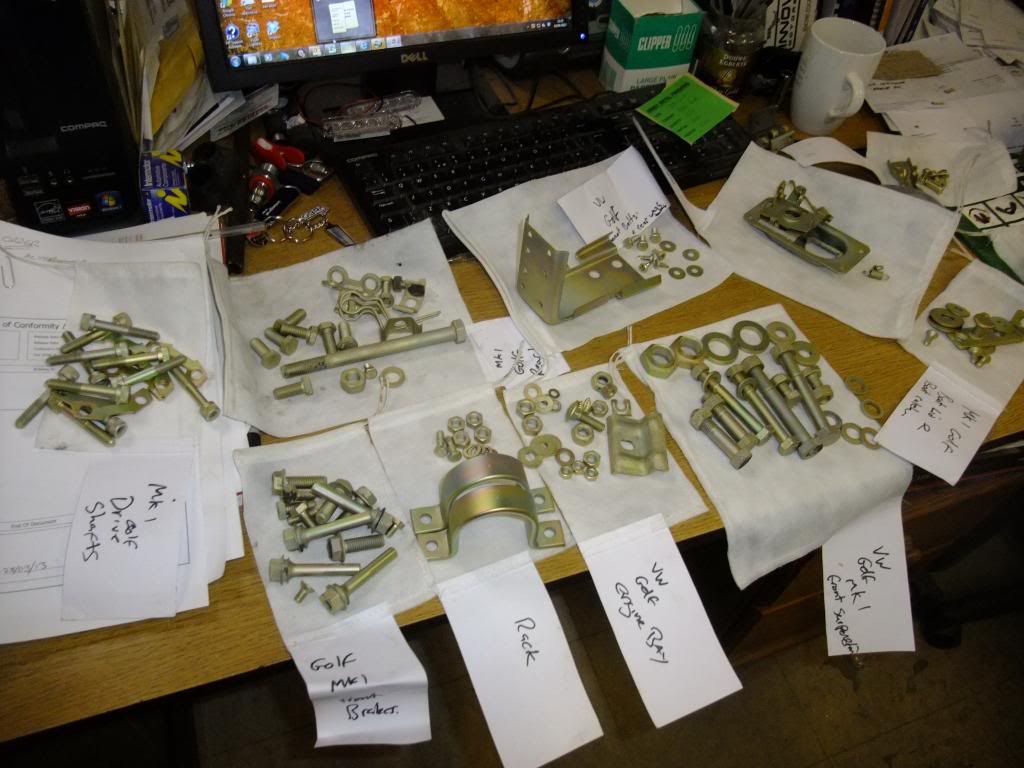
All the brackets and bolts went off for zinc plating and came back looking better than new.
Steering

Nice rack…
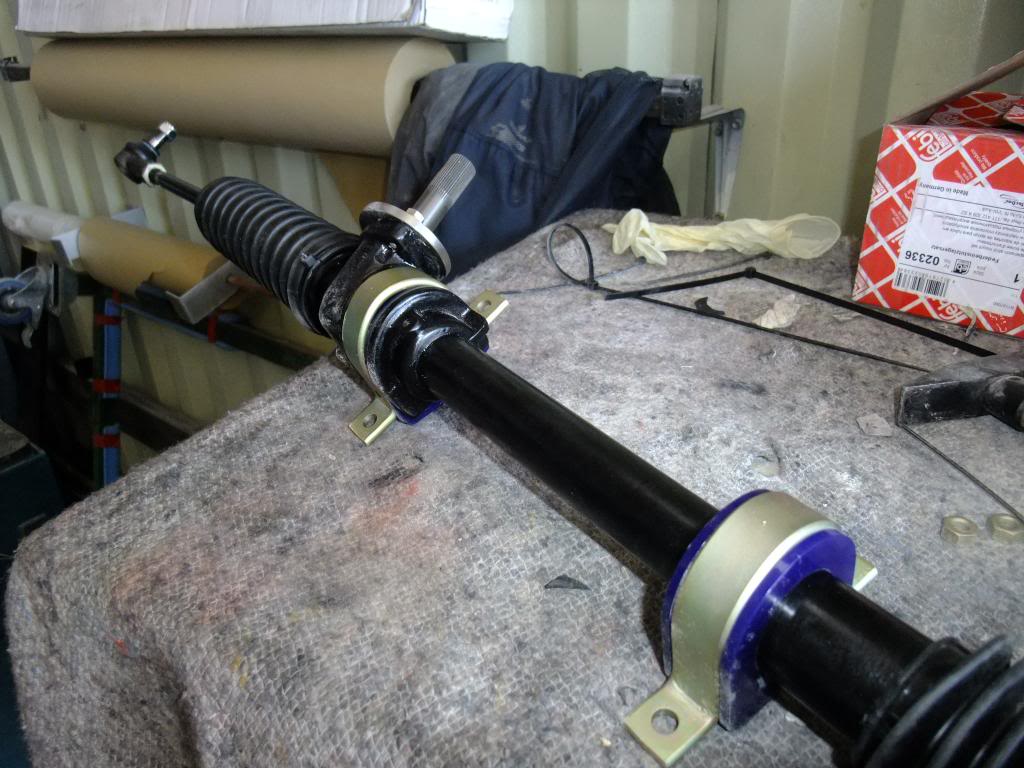
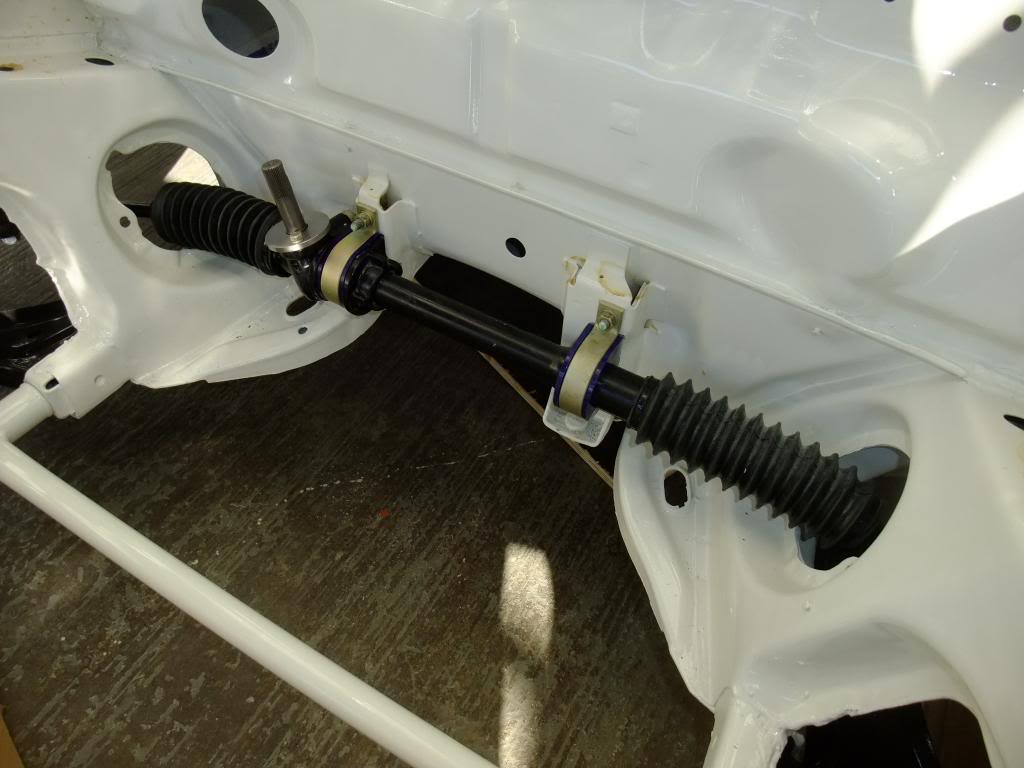
Fitted, including the new Quaife quick rack kit.
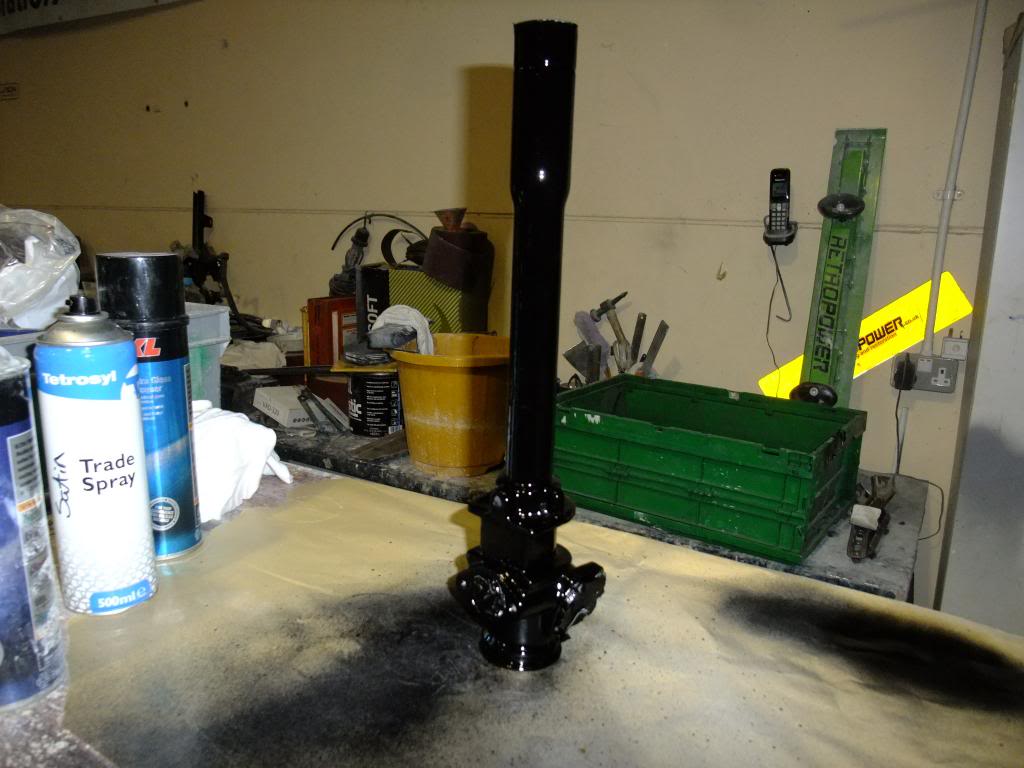
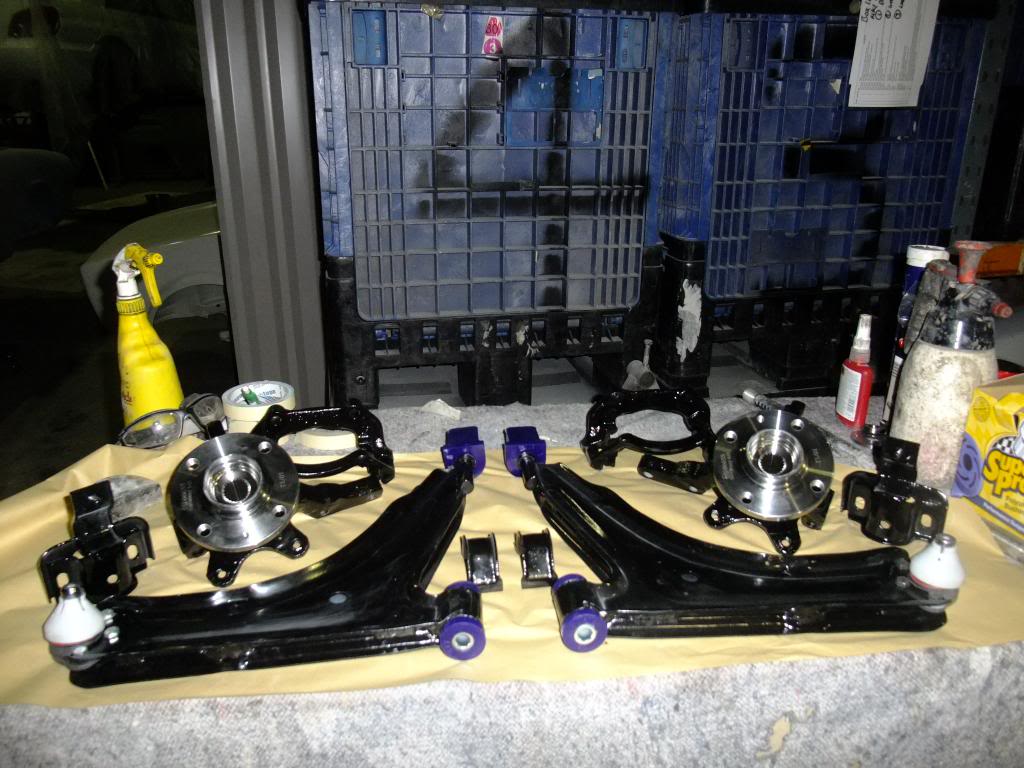
Suspension
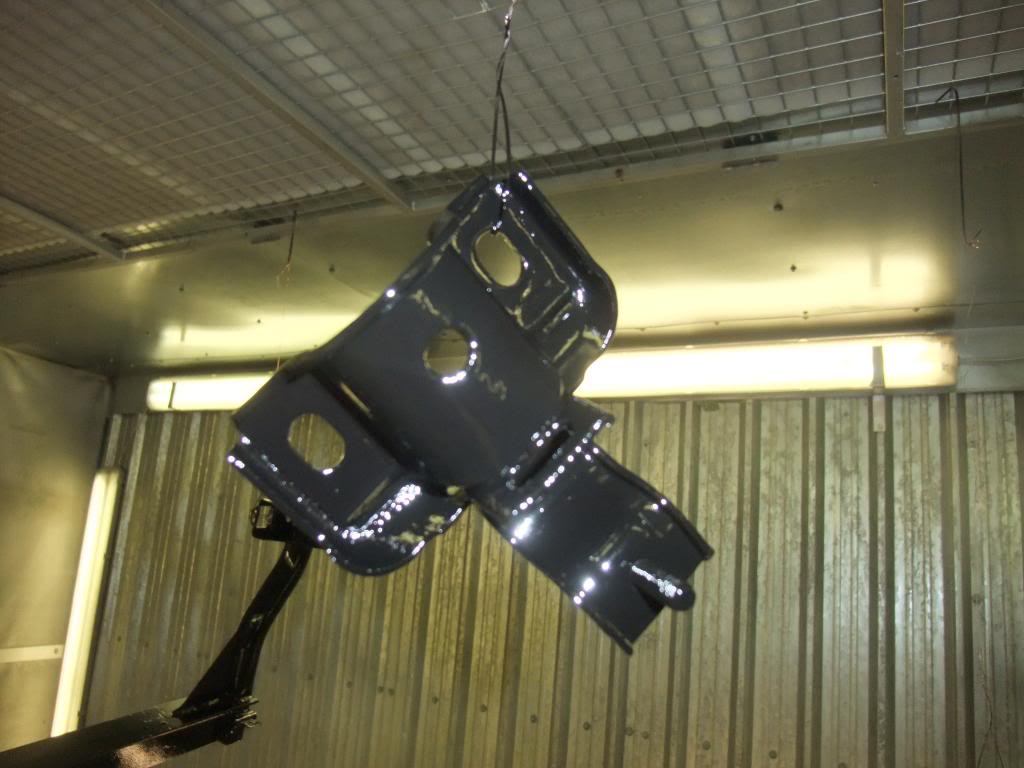

Original, MKI/MKII components looking like new.
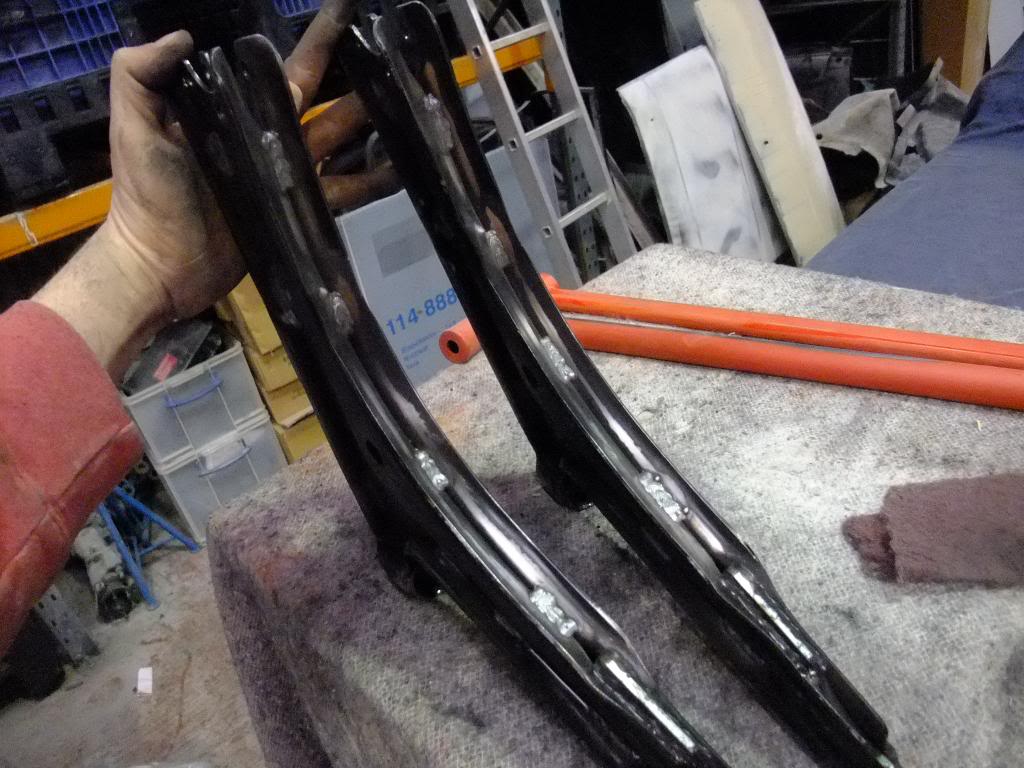
Seam welded front wishbones, phwoa…
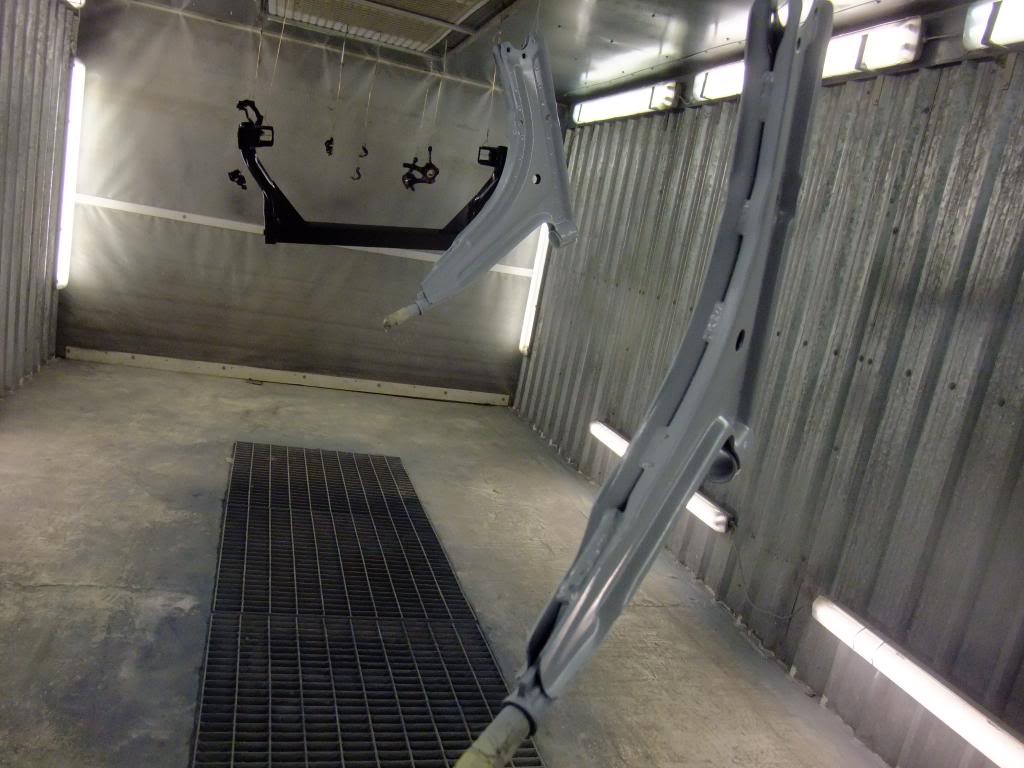
Primed…
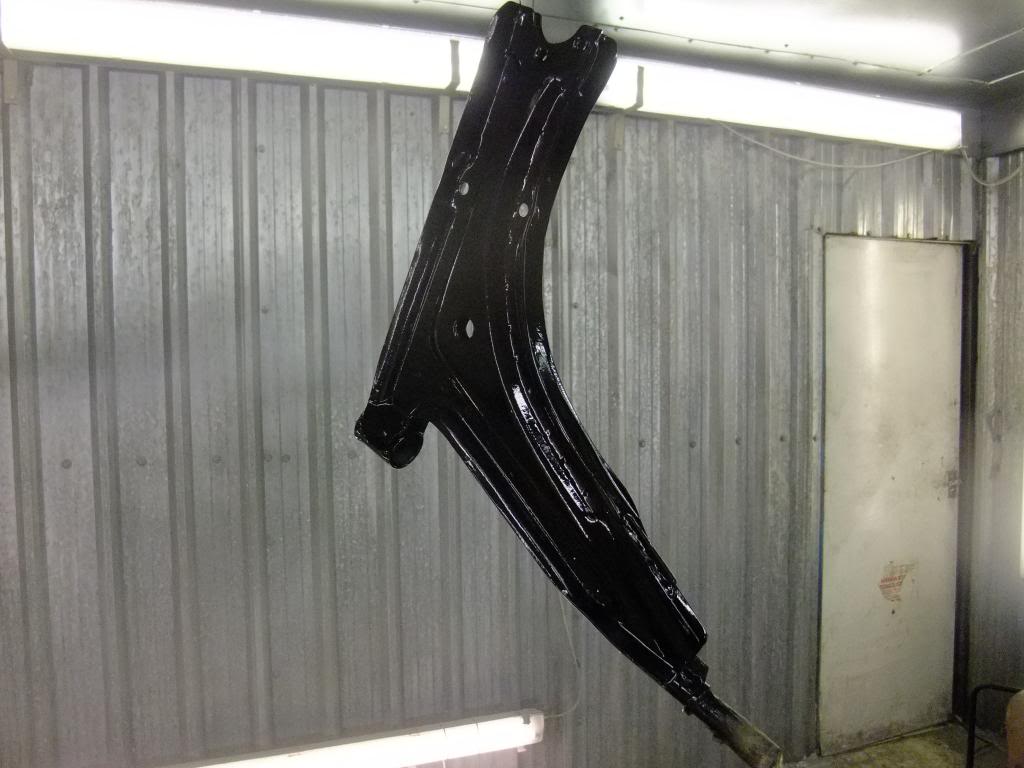
And ready to go.
Bottom mounts colour matched to Bilstein dampers.
Once all the refub'd components had dried they were lined up ready for assembly.
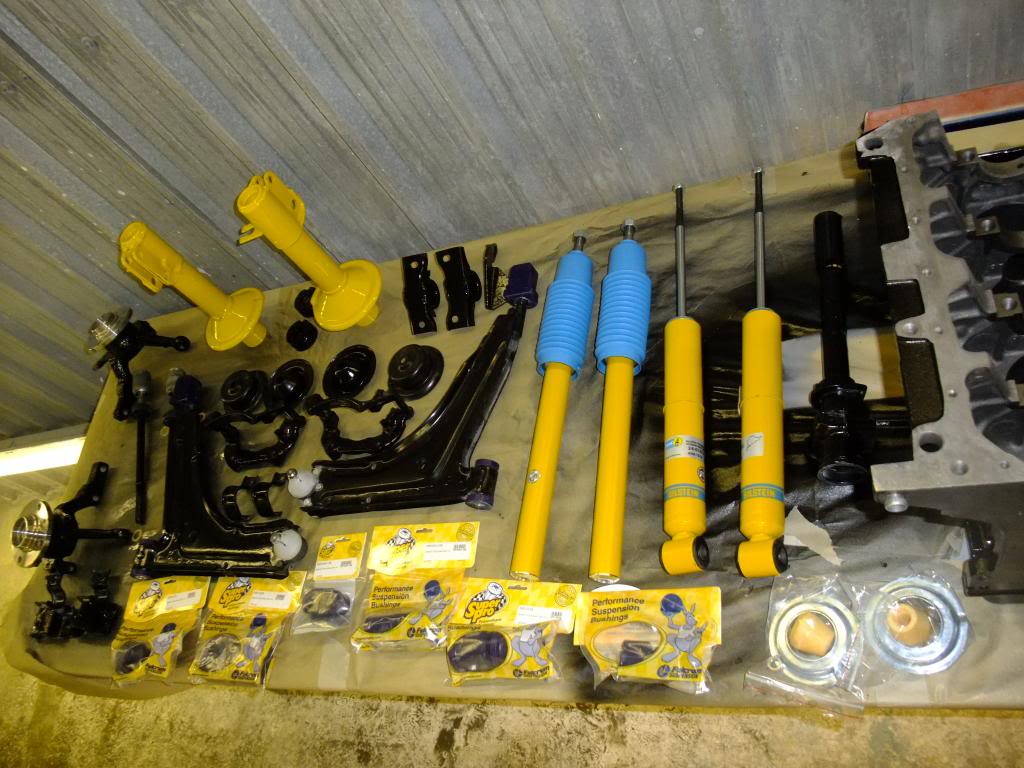
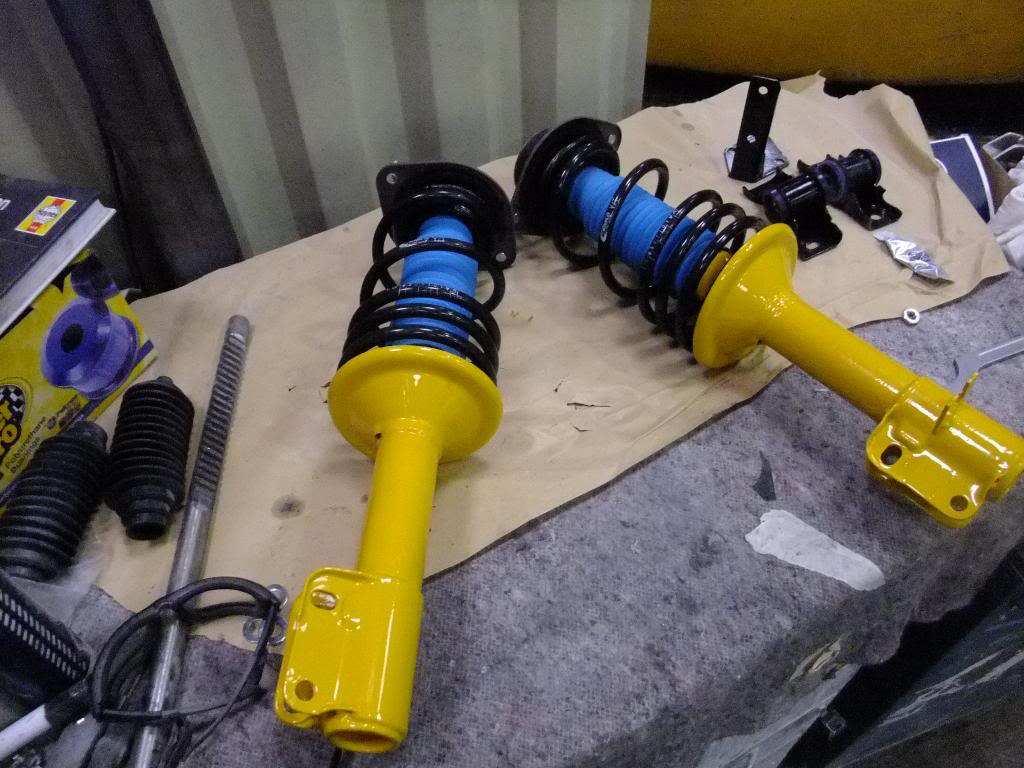
Front dampers complete with lowering springs (-30mm).

And fitted…
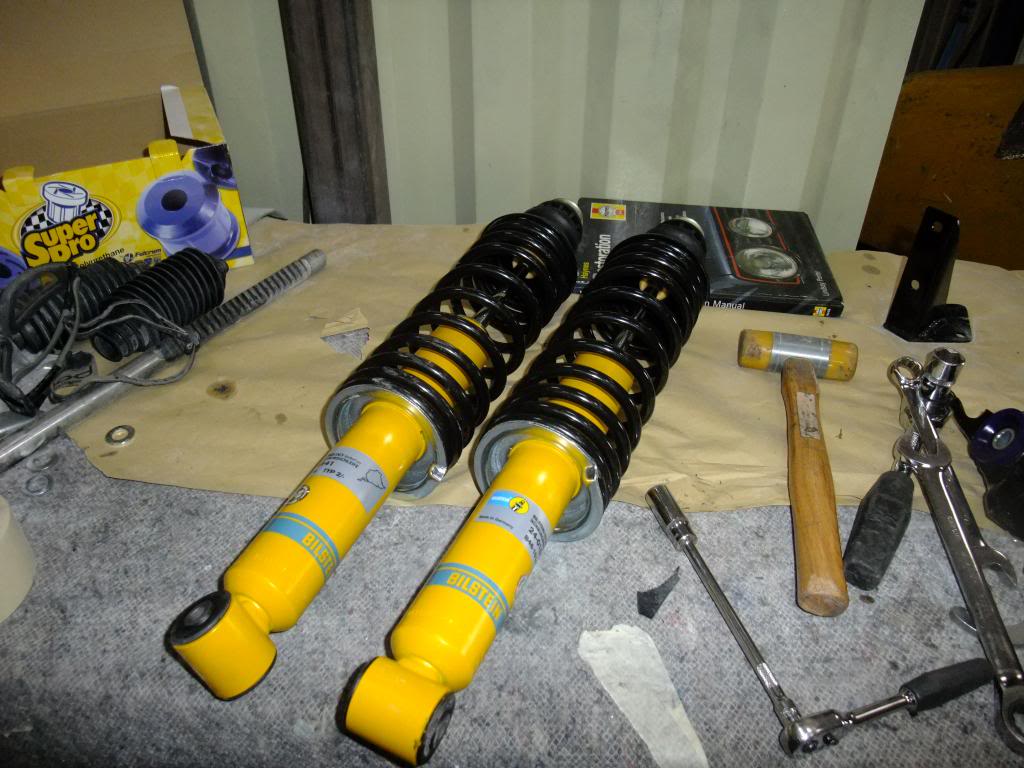
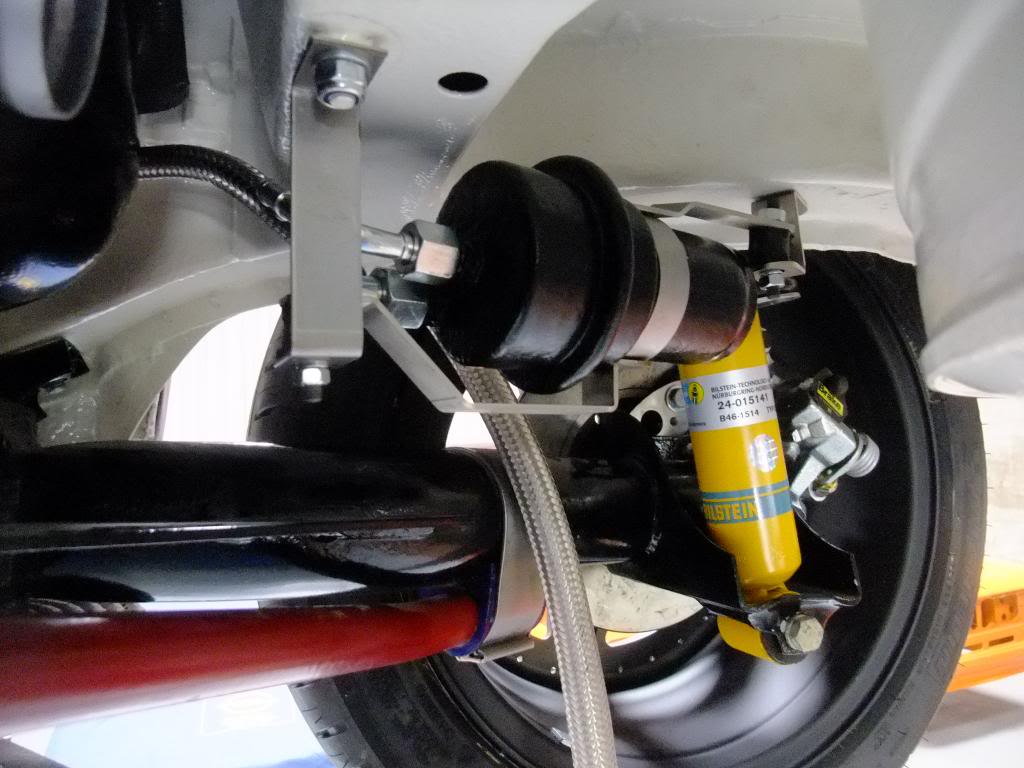
Rear dampers complete with lowering springs (-30mm).
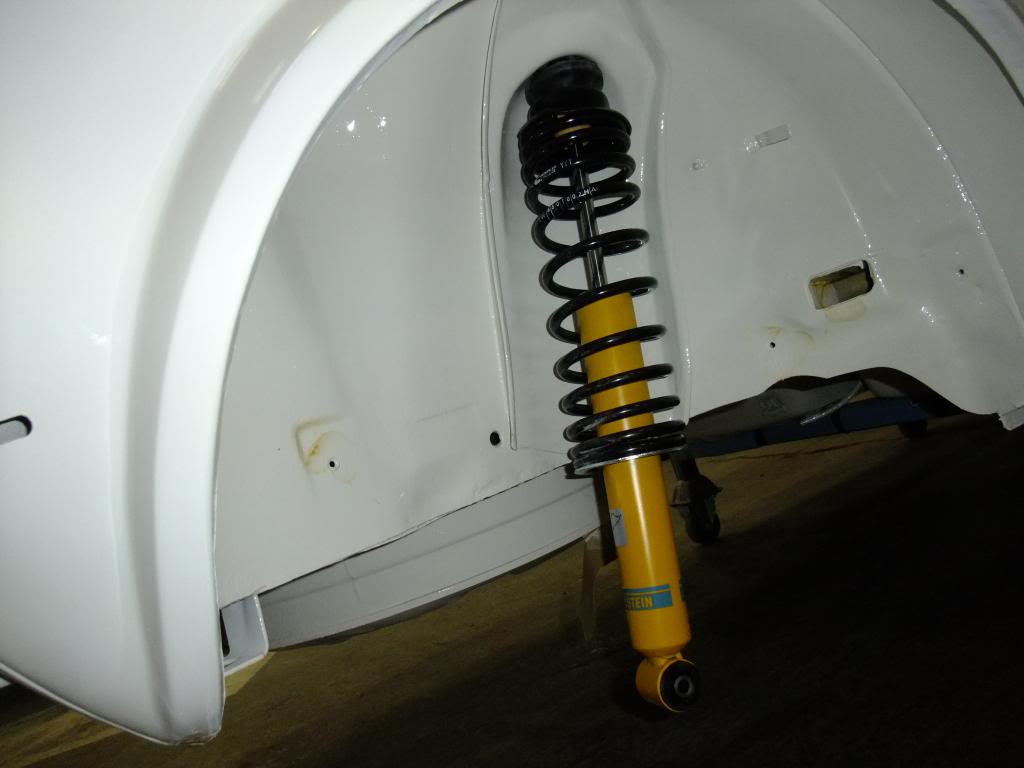
Ready for the rear beam…
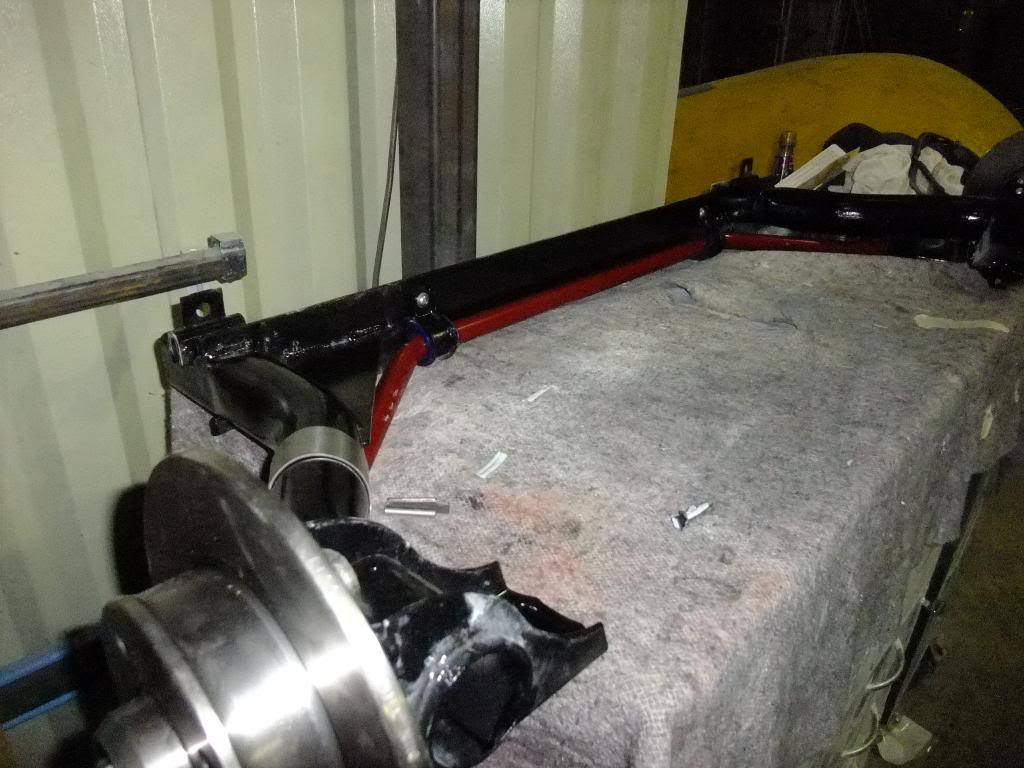
ARB fitted…
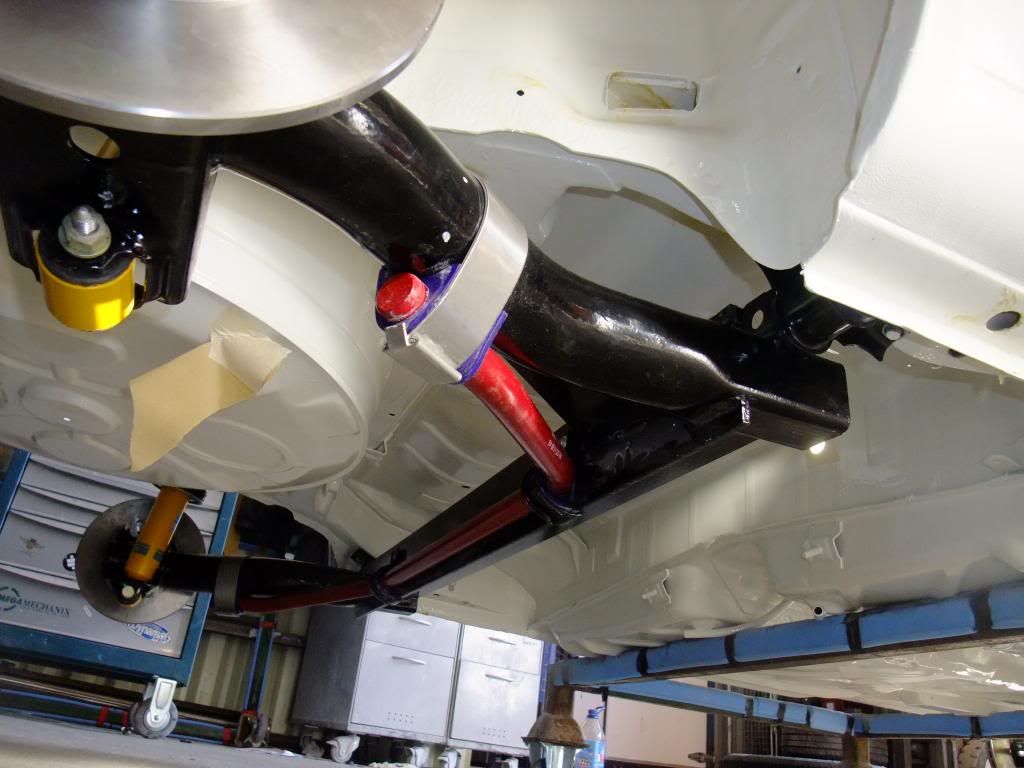
Mounted to the chassis, love the dash of red.
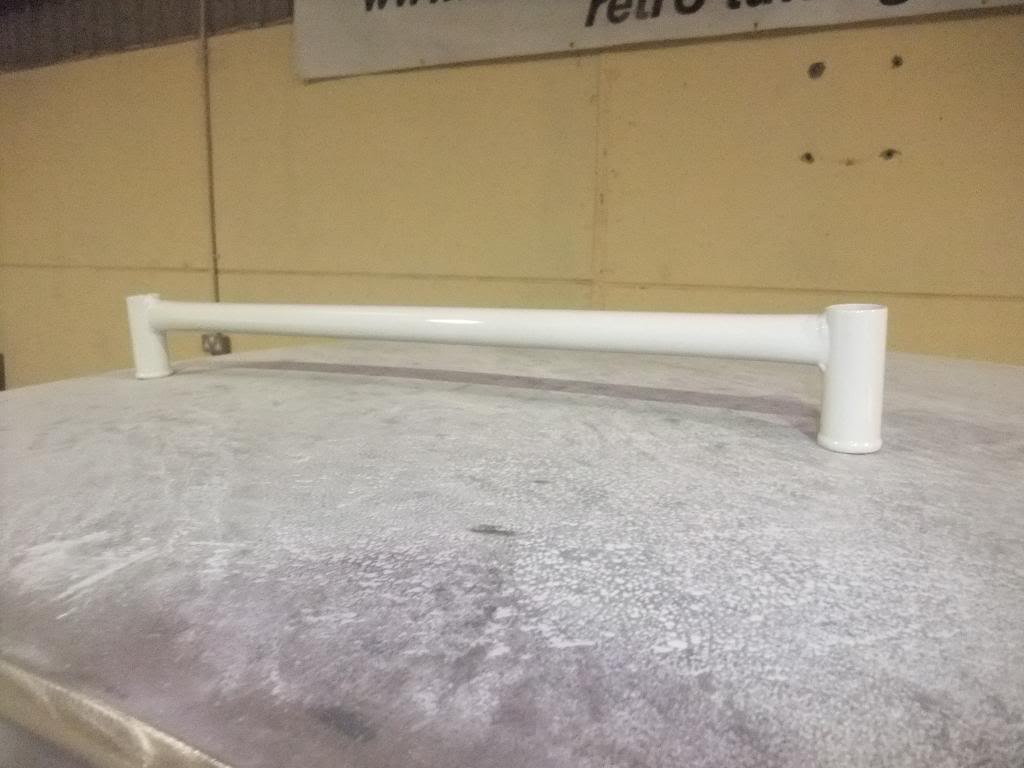
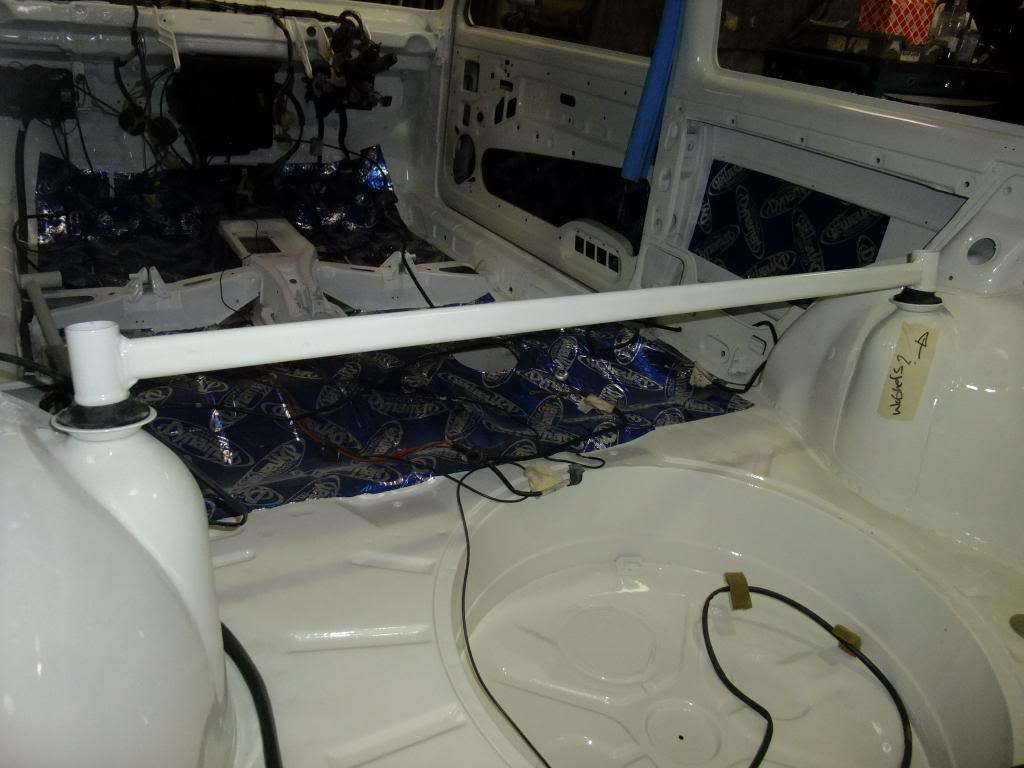
Body coloured strut braces to blend in with the rest of the paintwork.
As usual, I'll continue the assembly in a separate post so I can show all the images. Part two to follow…
Posted
Newbie
Through January and into February the build kept going at some pace…
Electrics
An all new wiring loom was installed and modified to accommodate the new engine, management system (Omex 600) and ICE.
Transmission
Whilst the chassis was being worked on the O2J gear box arrived, was stripped and rebuilt from scratch.
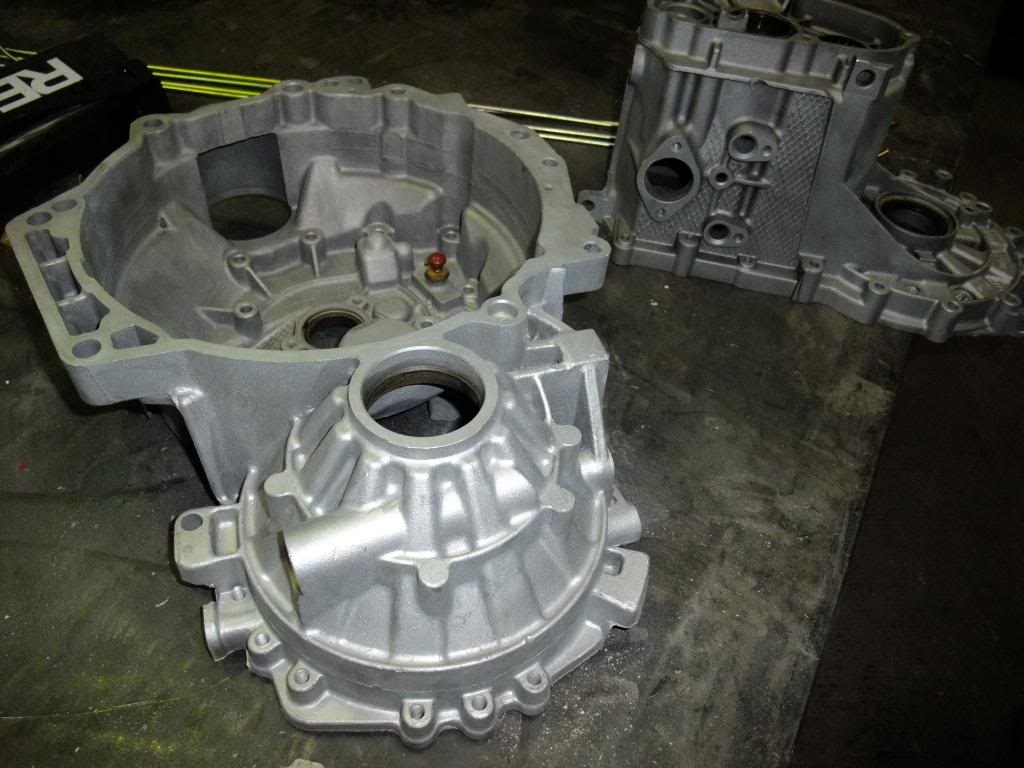
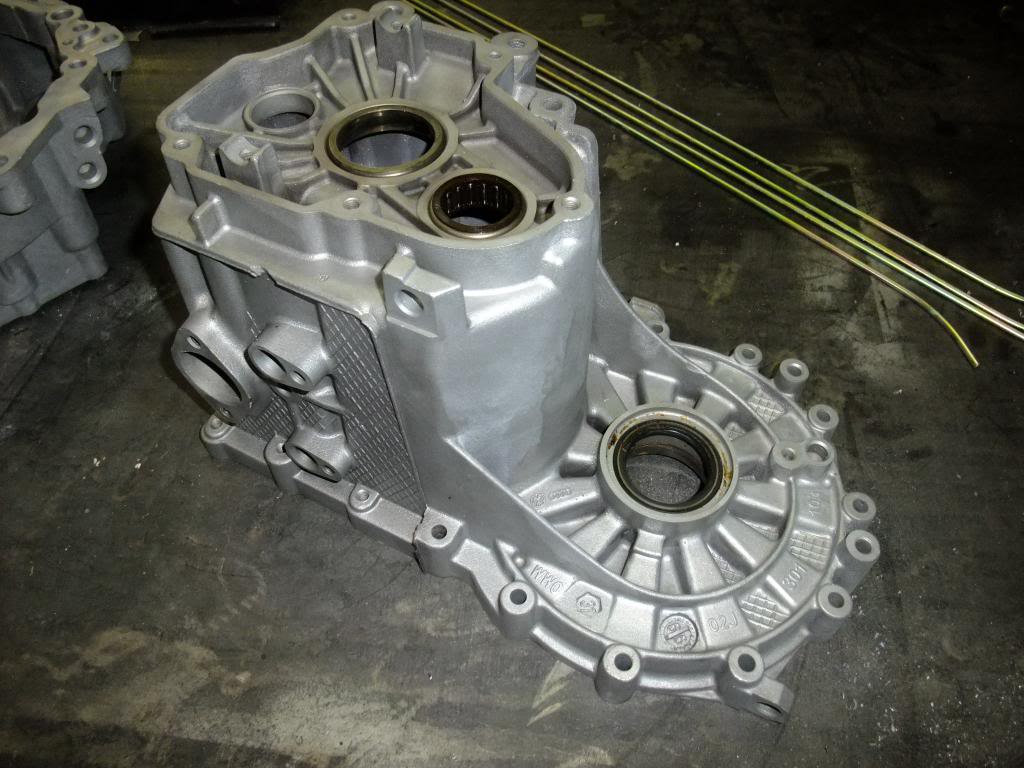
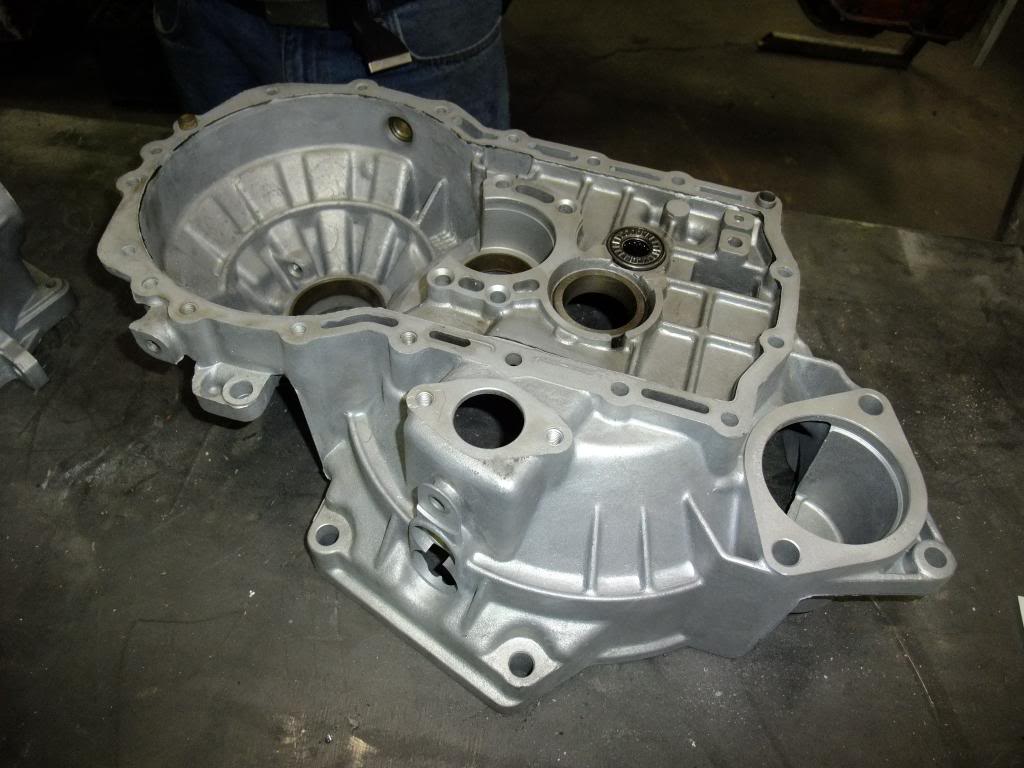
New bearings fitted.
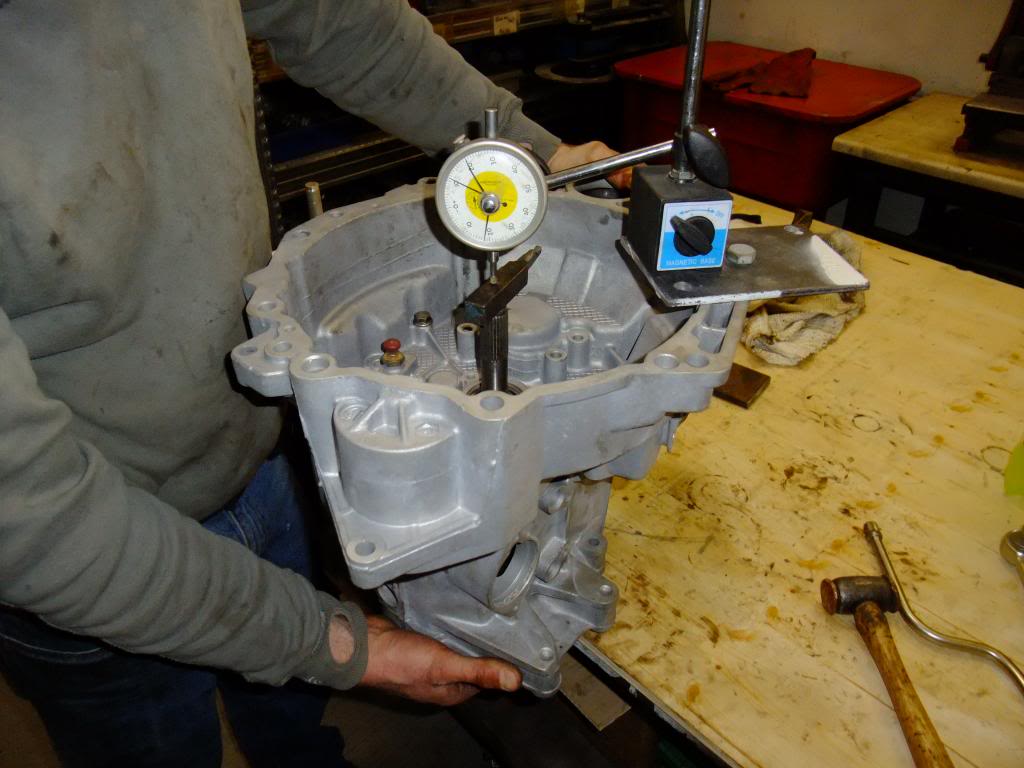
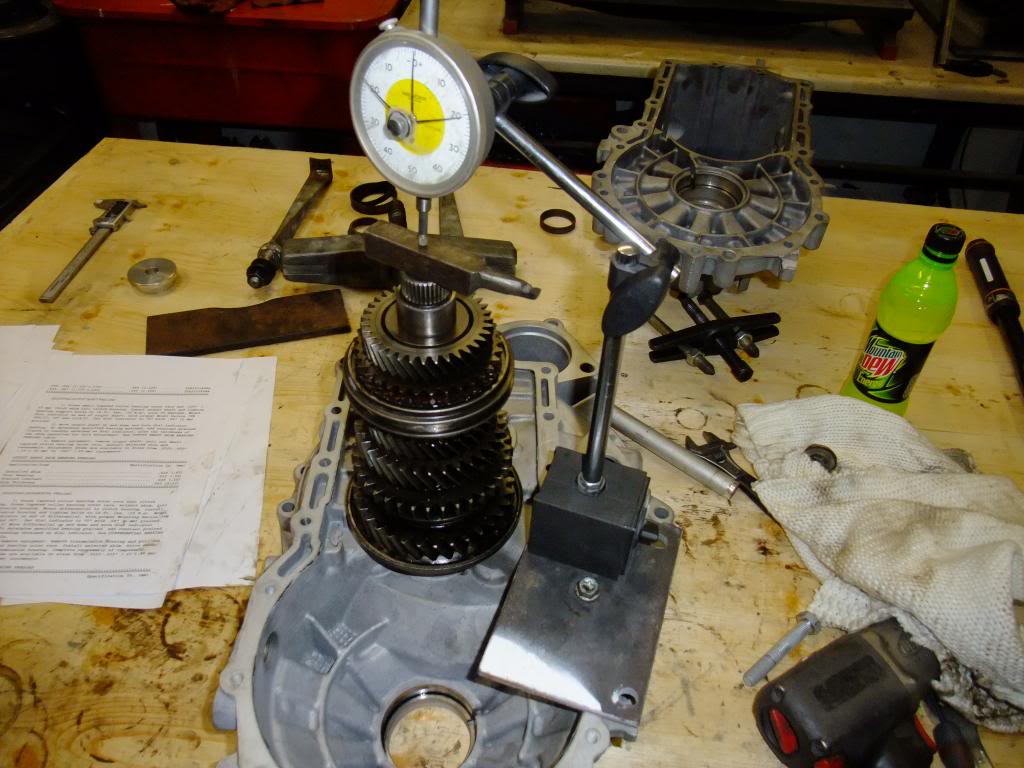
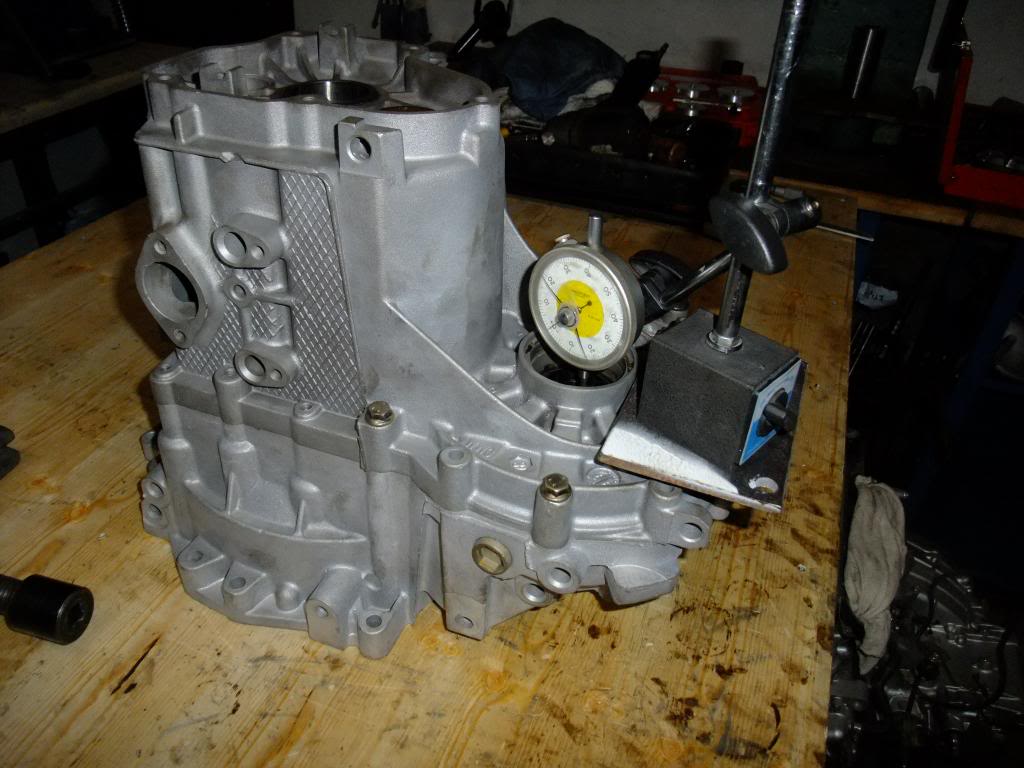
The resident engineer sets the end float for the gearbox shims (two were replaced and one was in perfect working order).
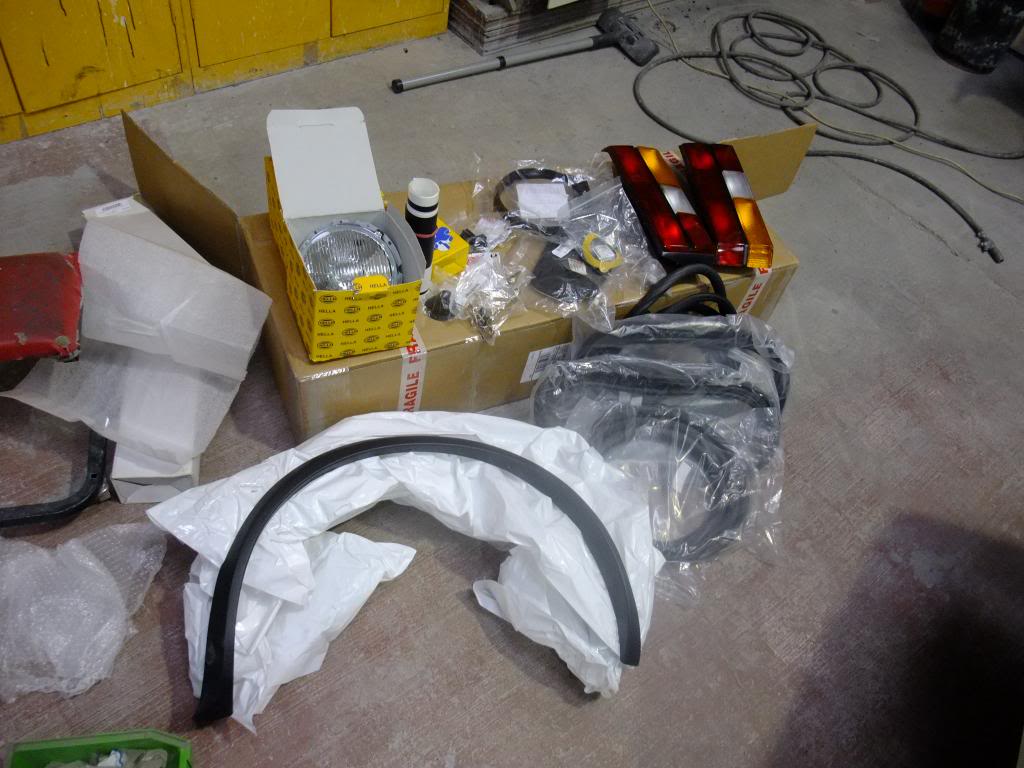
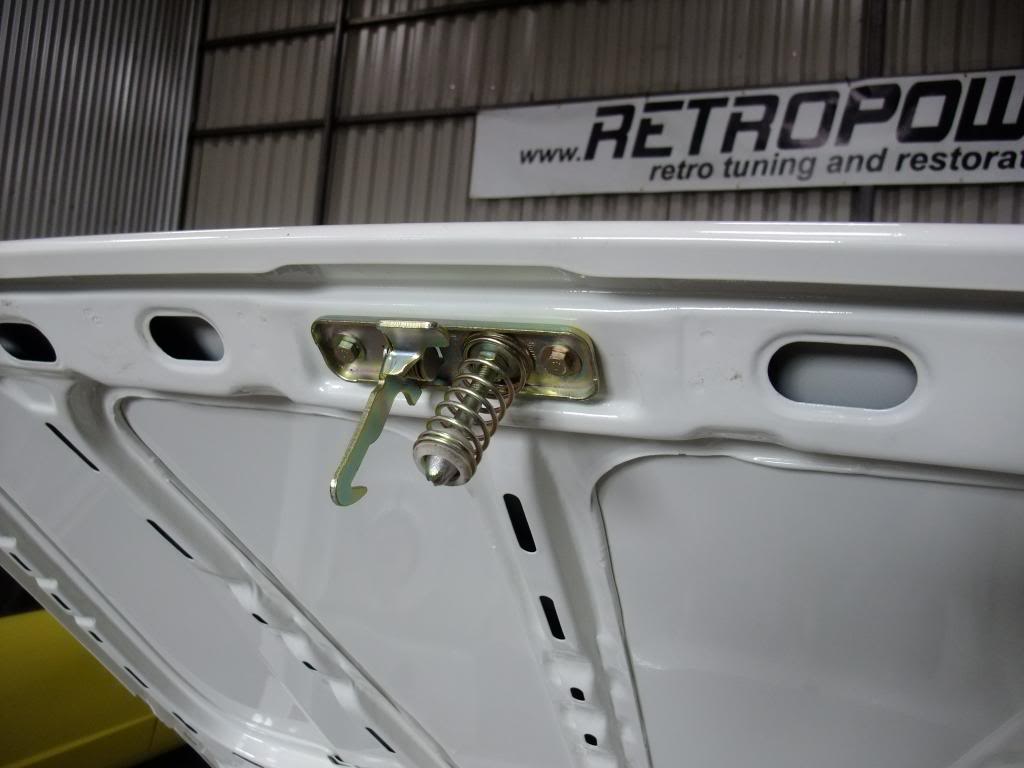
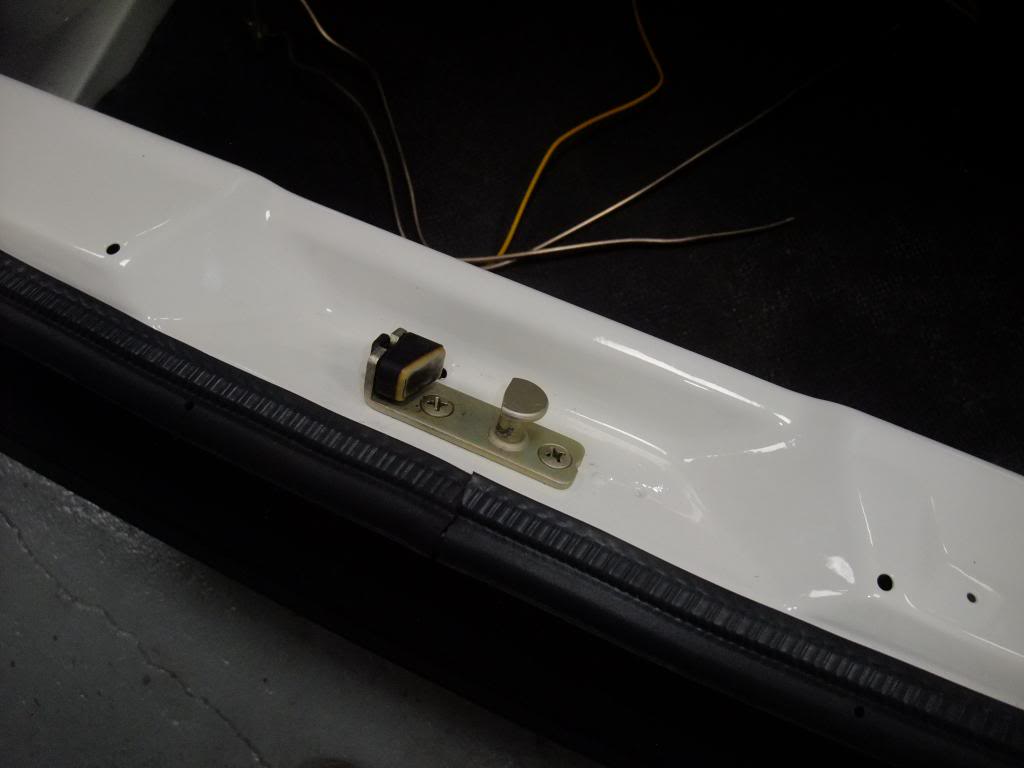
Exterior and Interior Trim/Fittings
Unfortunately, I don't have many photos of the exterior fittings being installed but here's what I have got…
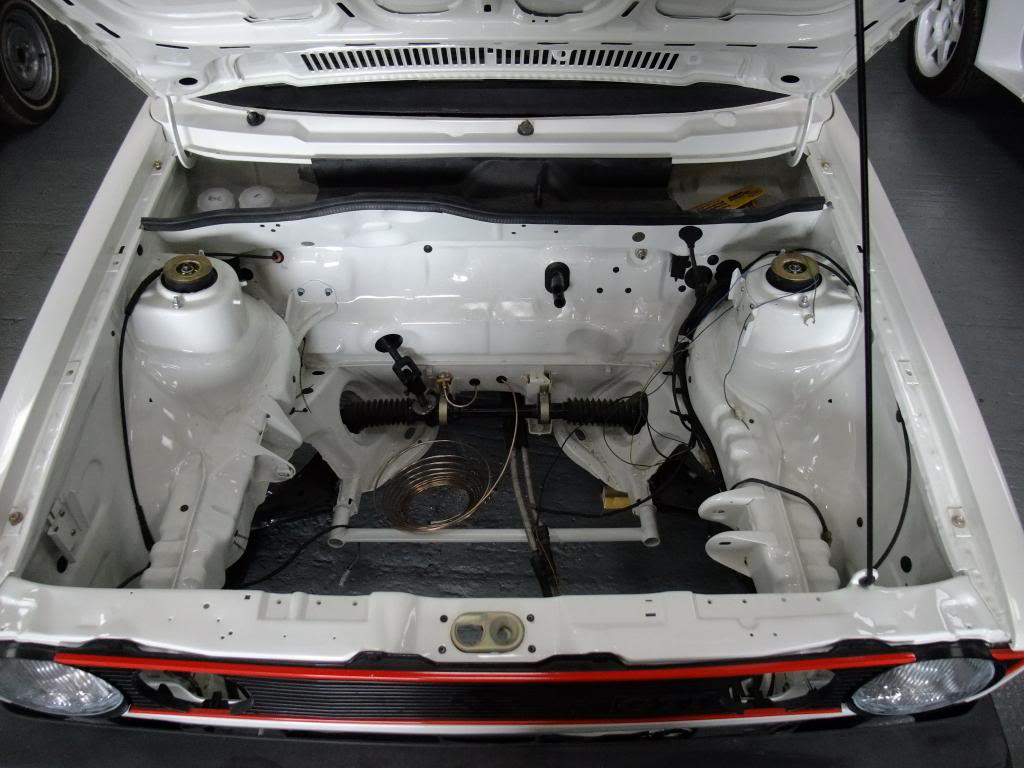
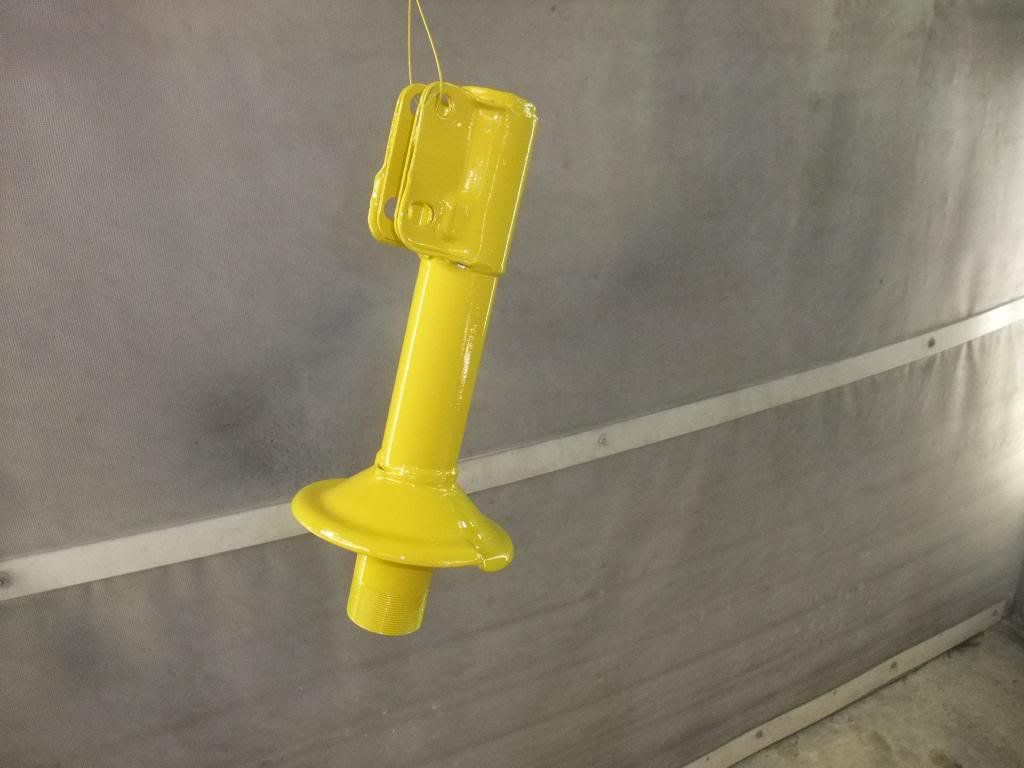
Fuel System

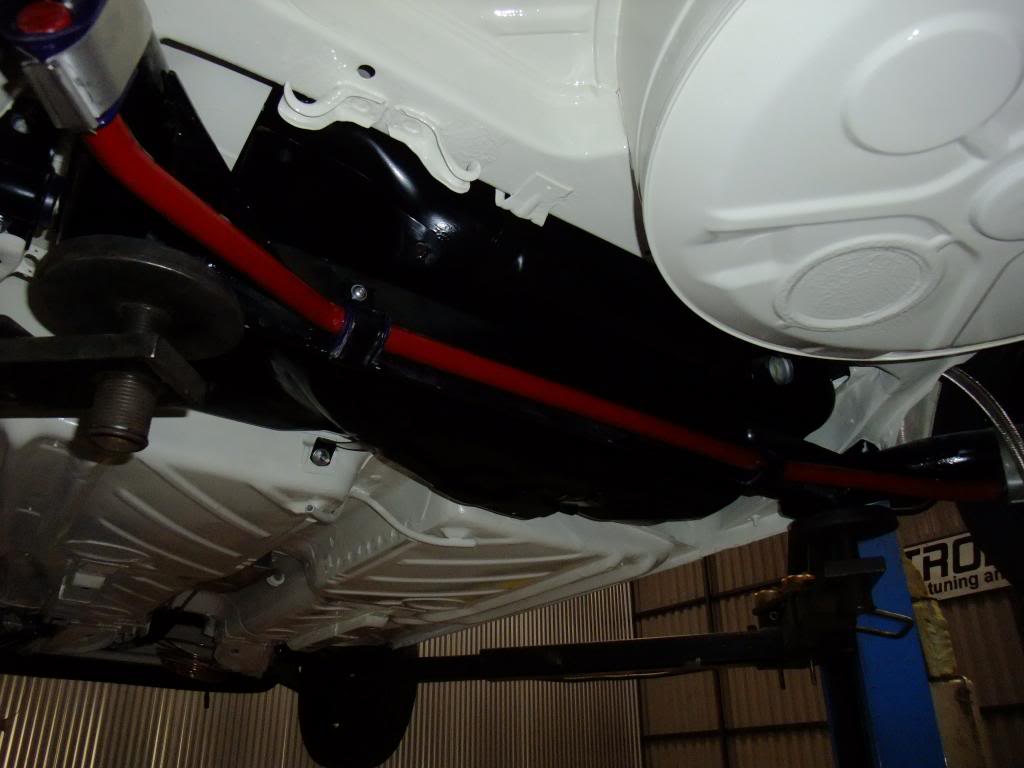
New fuel tank in place.


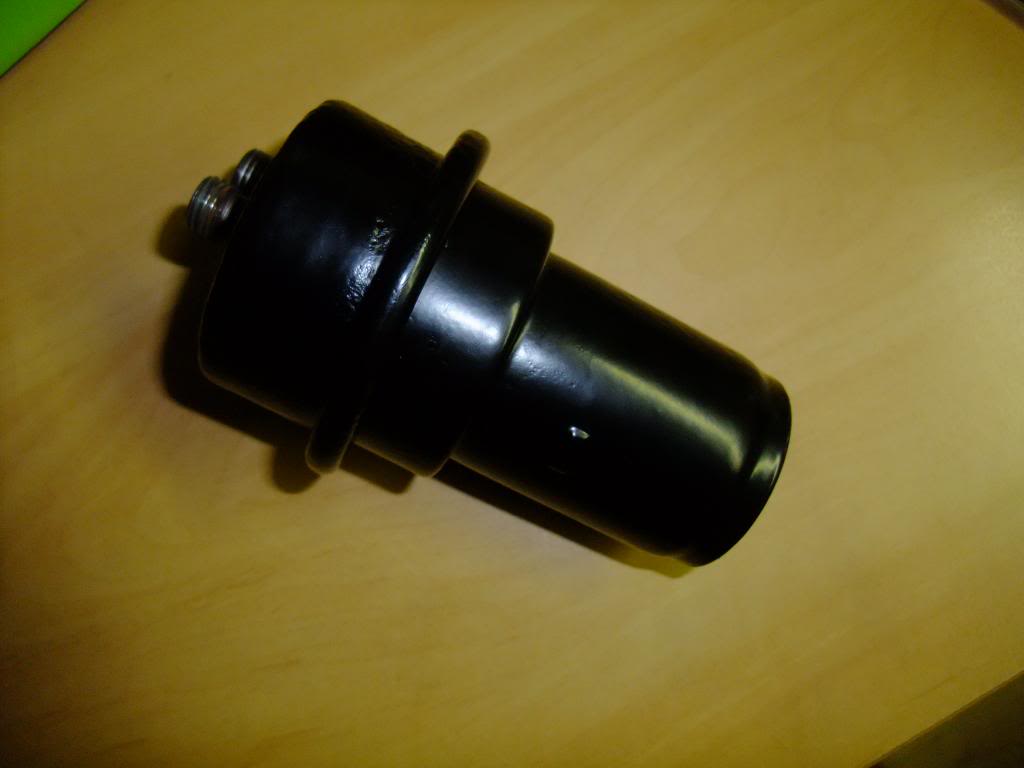
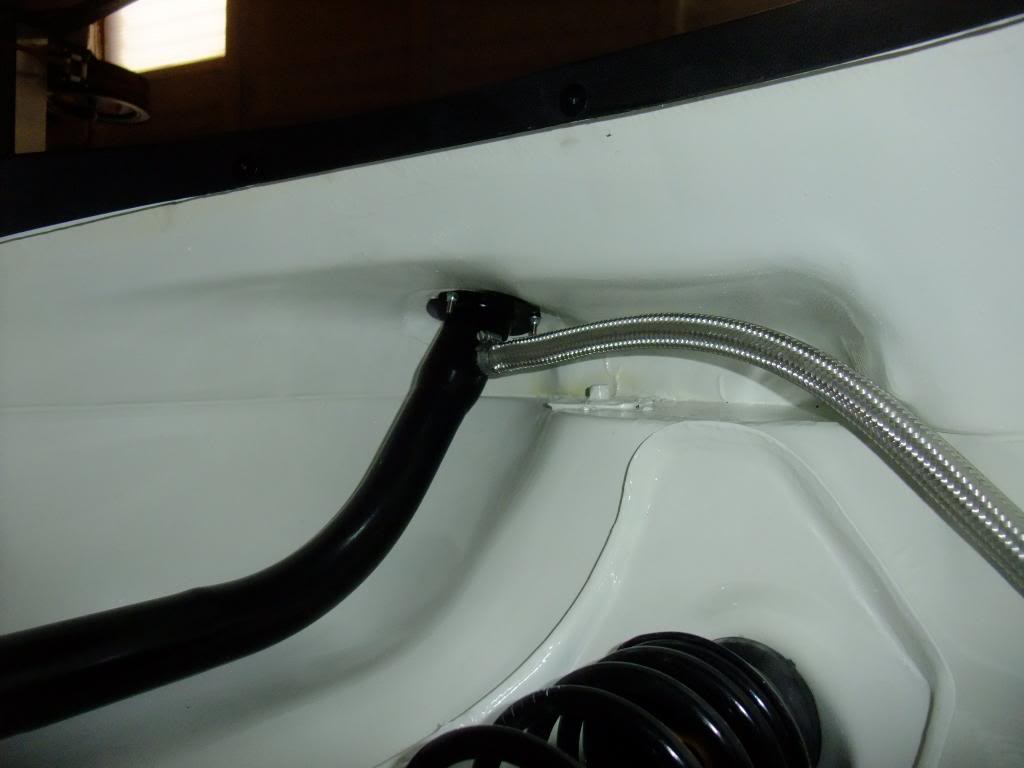
Fitted the refurb'd swirl pot with a new stainless steel bracket and connected with a braided hose.

The finishing touch…
Brakes
The up-rated calipers arrived and were fitted without any fuss, thank you V.A.G. for your interchangeable design.

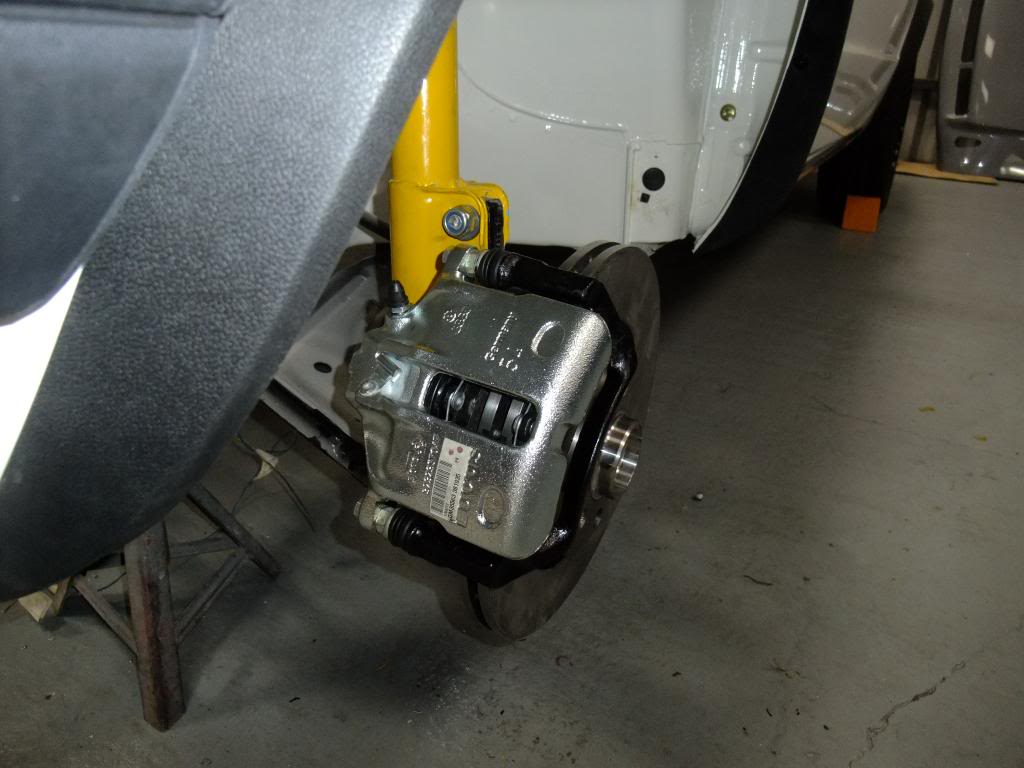
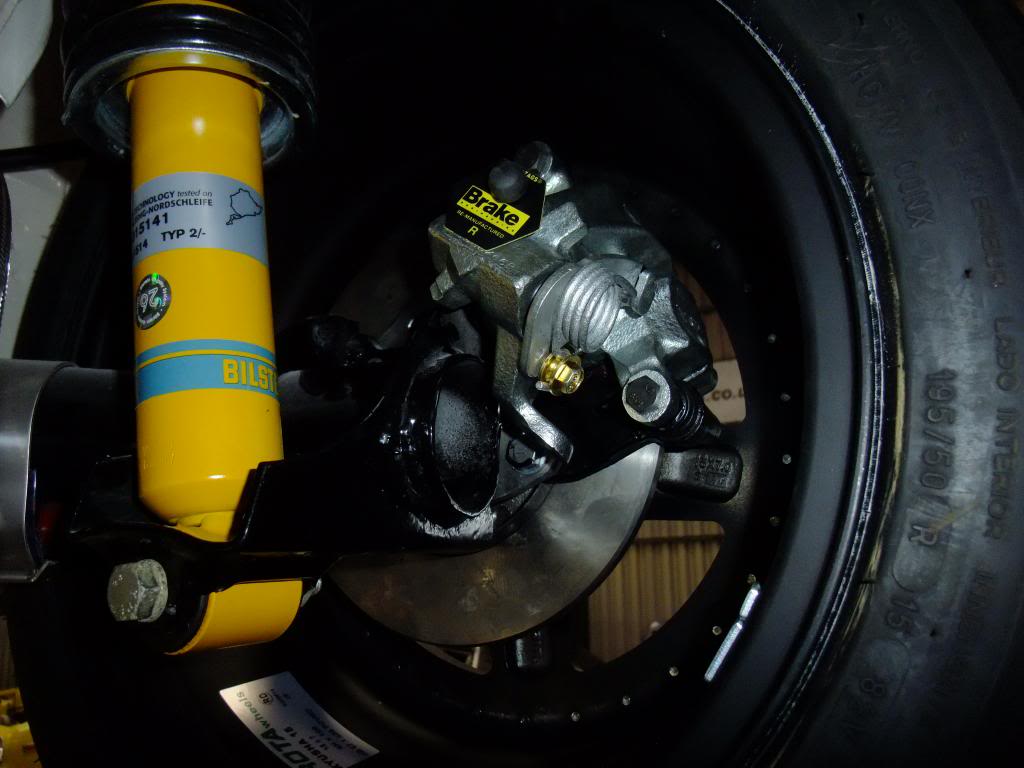
I had also finally made a decision about the wheels, as you can see from the images above, albeit from a distance…
Wheels and Tyres
With the larger discs on the front and rear I had to look at going to 15 x 7'' wheels and 195/50 R15 tyres if I was going to keep my rolling radius.
The larger wheels proved a bit of an issue stylistically as I wanted to keep the car looking as stock as possible on the outside and I didn't want to go down the usual BBS route. I started to search for something period and European, I found plenty of options in thirteens (the Ronal Kleeblatt and Spiess RS2 were my favourites) but nothing that really stood out in fifteens. So I resorted to looking at custom and JDM wheels (RS Velgen, Image Wheels, HTN, Watanabe, SSR), unfortunately they were all out of my price range so I kept on searching, Photoshopping everything I came into contact with onto my Golf.
Then I found some nice understated, 'race' inspired alternatives by Work (Meister CR01) and started to price them up, still too expensive but in my search I found that Rota did some copies, in black and +38 offset, exactly the same as the original Tarantulas. Plus they were within my price range but would they suit the car?

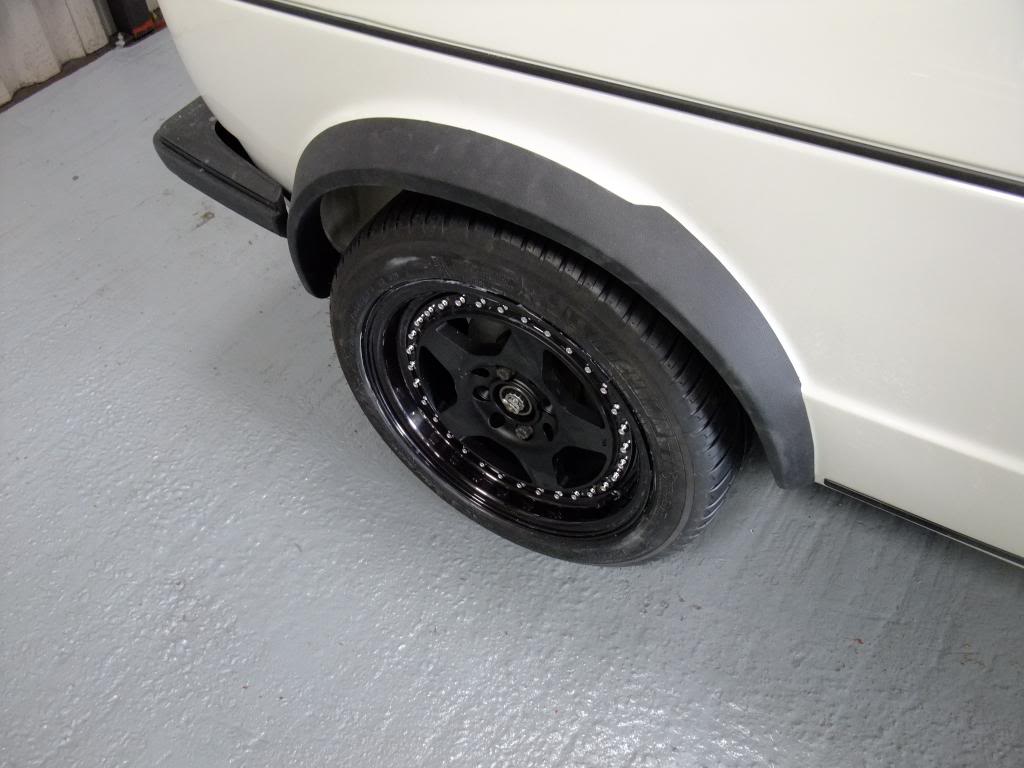
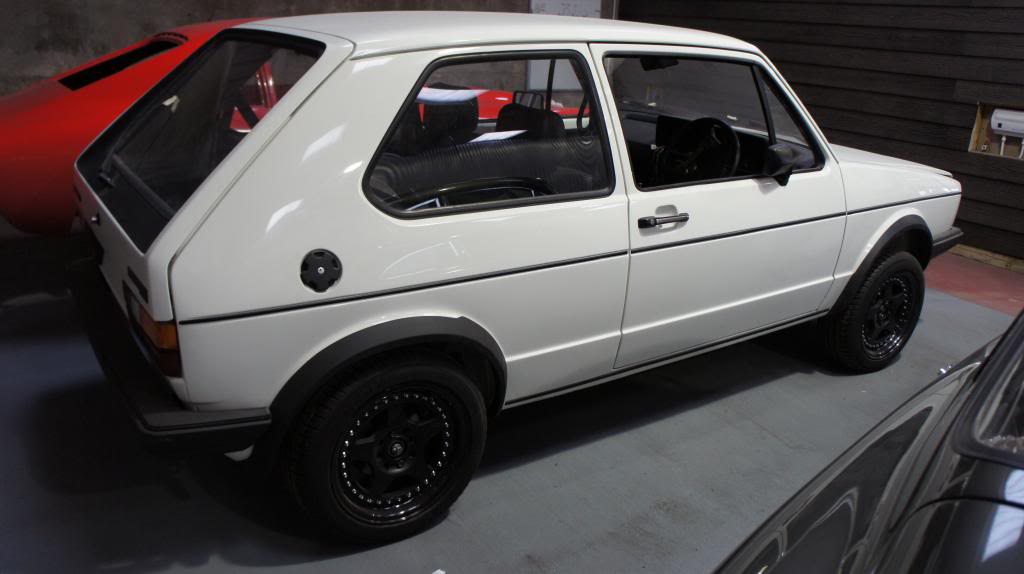

I was very pleased with the result, a little of left field when it comes to the usual VW scene but the colour and inner bolts visually reduce the size of the rim. Combined with the Michelin Pilots I achieved what I set out to do, keep a performance stance with a an 'over engineered' flavour.
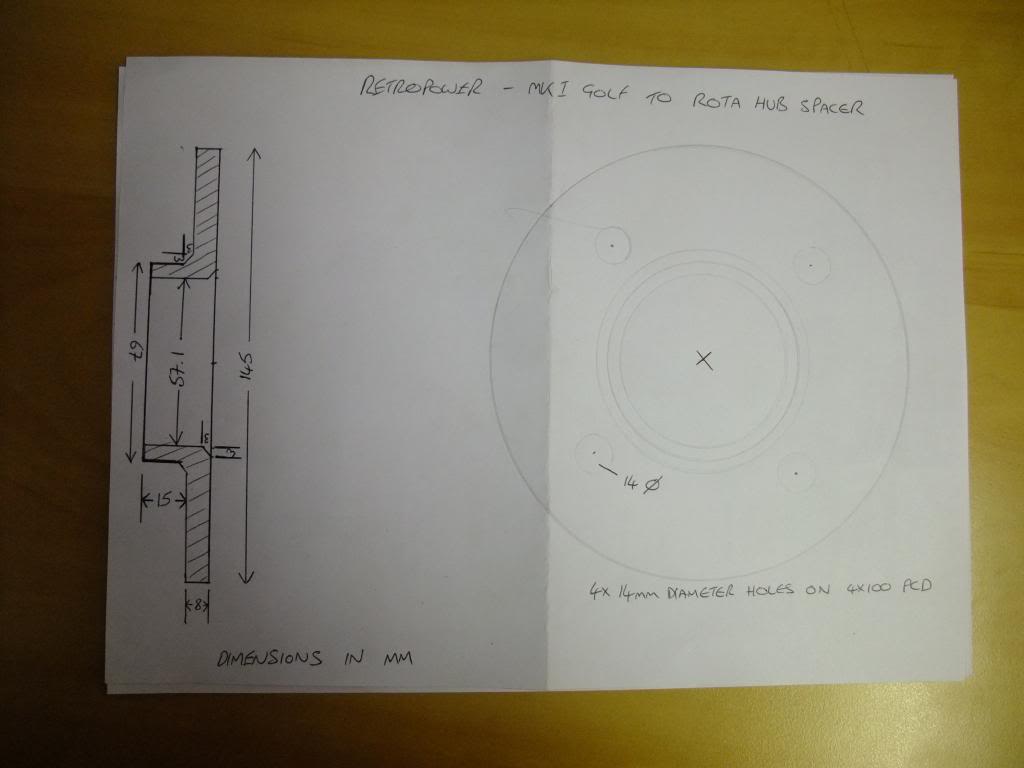
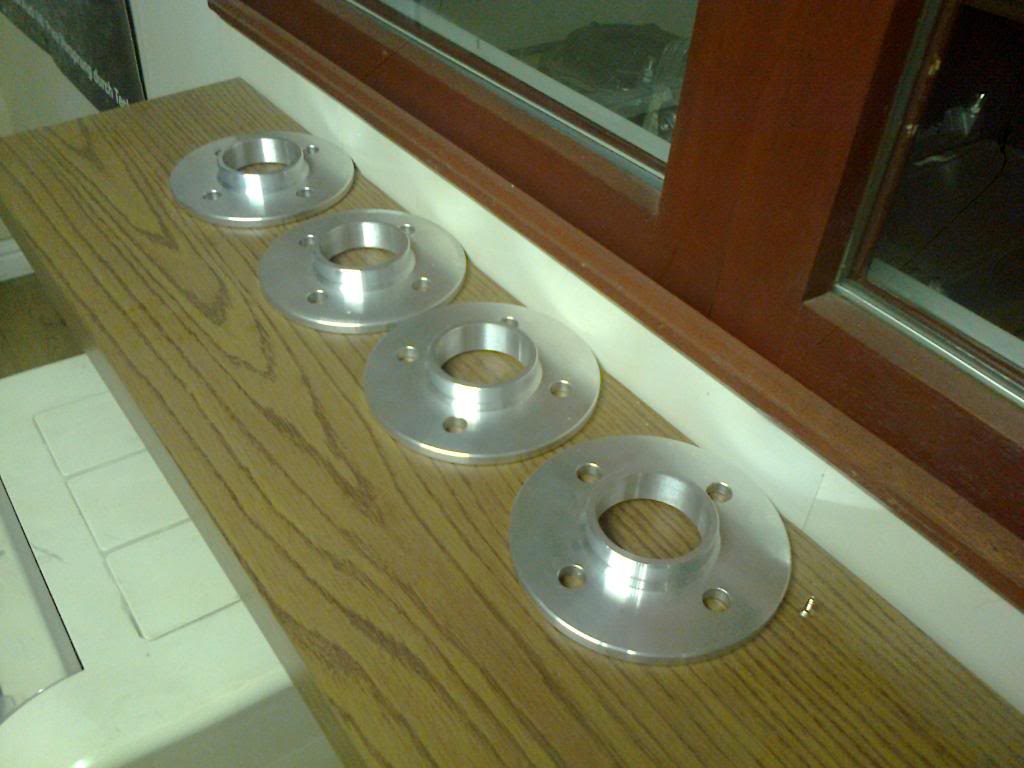
The only issue the workshop had fitting them was with the centre bore plus the rim wasn't flush with the outside of the wheel arch so they commissioned some custom spacers to fix both issues with one solution.
 .
.
Current Status
Due to personal reasons I run out of funds at the end of last summer so she's standing idle at the workshop at the moment and it's driving me nuts. I'm working hard to purchase the outstanding parts with the� aim to get her back on the road for summer, whether that is achievable remains to be seen.
Oh yeah, I forgot to mention that the engine arrived back at the workshop with the Jenvey throttle bodies…

Here is that picture of the Jenvey throttle bodies I promised
: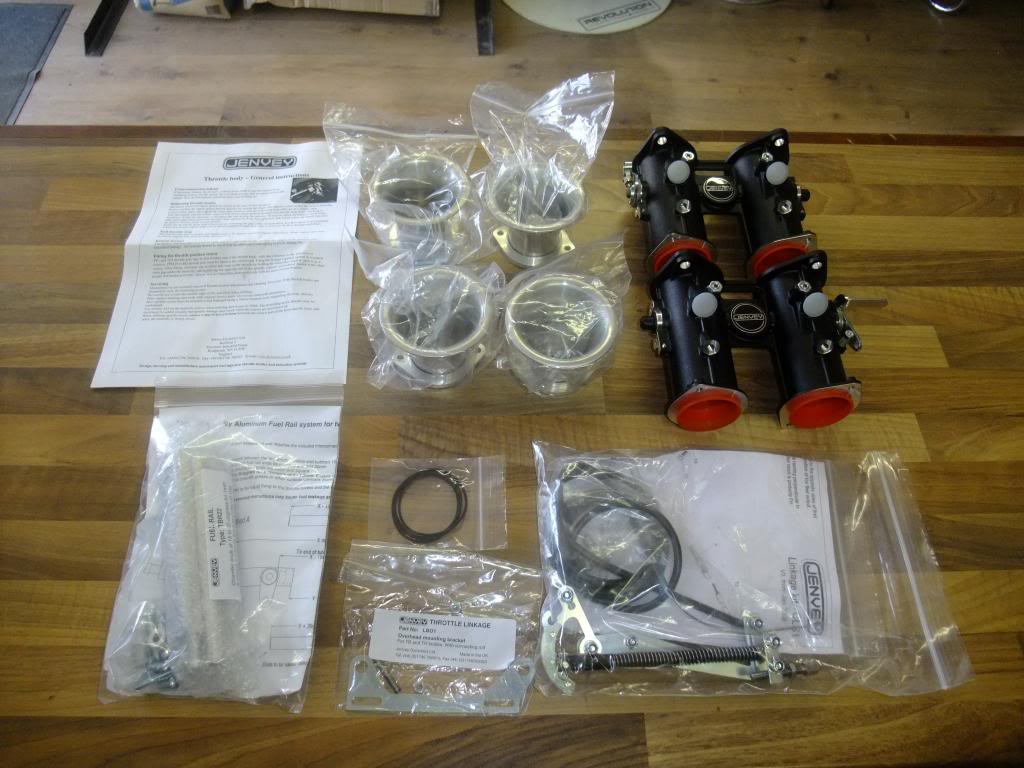
All the major elements are in now ready to drop in I will add more pictures of the engine rebuild when they arrive, along with the final specs. The piece of paper sellotaped to the top has the measurements for the custom 4>2>1 manifold and exhaust system written on it ready to go, boy that is going to sound awesome when I finally get to fire her up.
I've got my financial situation sorted again. So the guys at the workshop have officially been given the green light, with the aim to get the car finished by the August bank holiday weekend so I can hopefully show it off at the Retro Rides Gathering.
I will keep posting any more completed work as it happens over the next few months so watch this page.
Thanks very much for reading. Please feel free to add your comments below…
0 guests and 0 members have just viewed this: None.