


VR6 Campaign

Posted
Old Timer

Posted
Settled In


Sticker Pig
Posted
Settled In
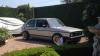
New and old:
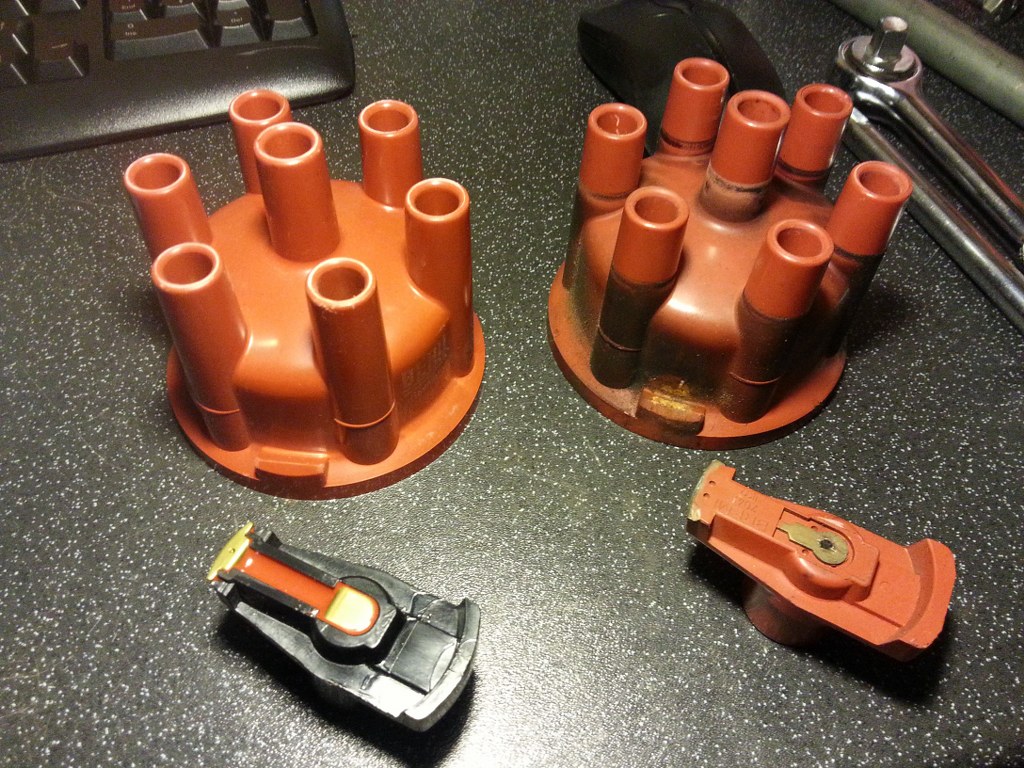
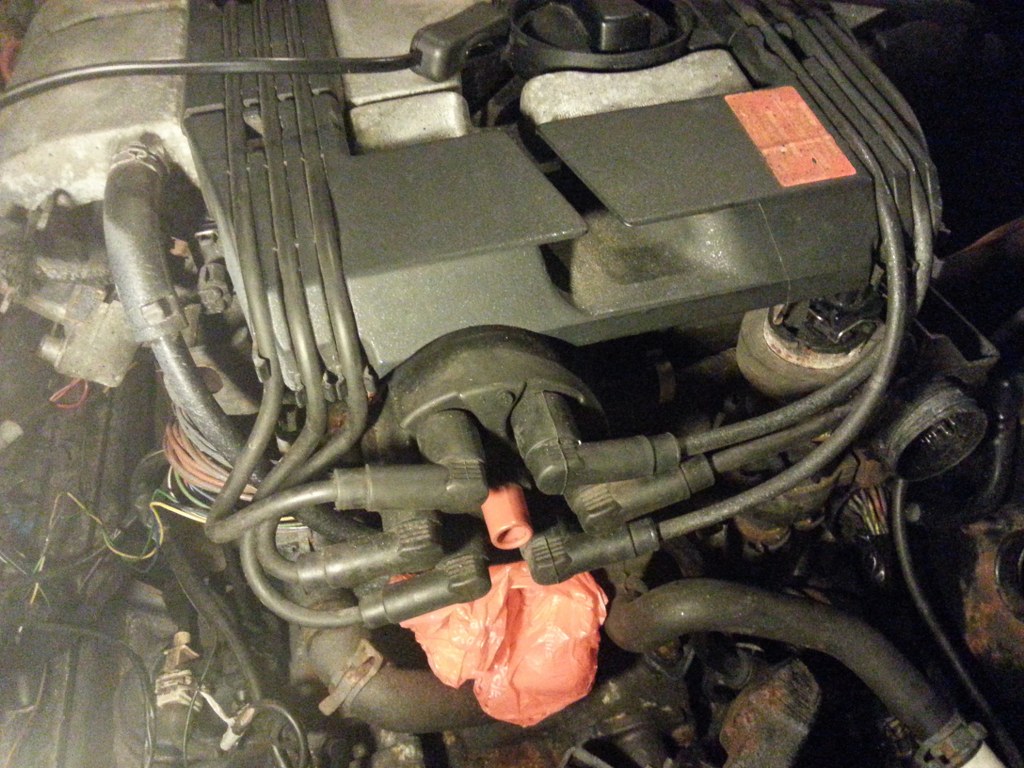
I then started getting the old plugs out. What a fiddly job!! I bought the special tool a while ago so once i got the hang of it it wasn't too bad, but the plugs that came out ooked like this
 I guess it was running too rich. The Lambda isn't wired in so hopefully that might be some of the cause, the engine apparently had an erratic idle before i got it so once it's all setup i'll get it VAGcom'd and see whether there any sensor issues etc.
Cylinder numbers 2 - 4 - 6
Posted

Settling In

Posted

Local Hero


sinnysinsin said
This should be some great fun when finished, I bet she sounds orgasmic!
Hell yes! I used to have a MK3 VR6 and rarely turned the stereo on as just wanted to listen the engine. Lovely!

Andy
LINCOLNSHIRE REGION -�https://www.facebook.com/groups/467122313360002/
1983 MK1 Golf GTI Campaign Model - Under (looooong) resto!
1962 Rover P4 80
2002 BMW 745i
2008 BMW Z4 2.5Si
LINCOLNSHIRE REGION -�https://www.facebook.com/groups/467122313360002/
1983 MK1 Golf GTI Campaign Model - Under (looooong) resto!
1962 Rover P4 80
2002 BMW 745i
2008 BMW Z4 2.5Si
Posted
Settled In
Hairyarse said
Hell yes! I used to have a MK3 VR6 and rarely turned the stereo on as just wanted to listen the engine. Lovely!
I used to have a Mk3 VR6 which i've regretted selling ever since! The sound was so nice and so i started looking for one after i sold the last Mk1 project and came across this project which seemed to combine both a MK1 and a VR6

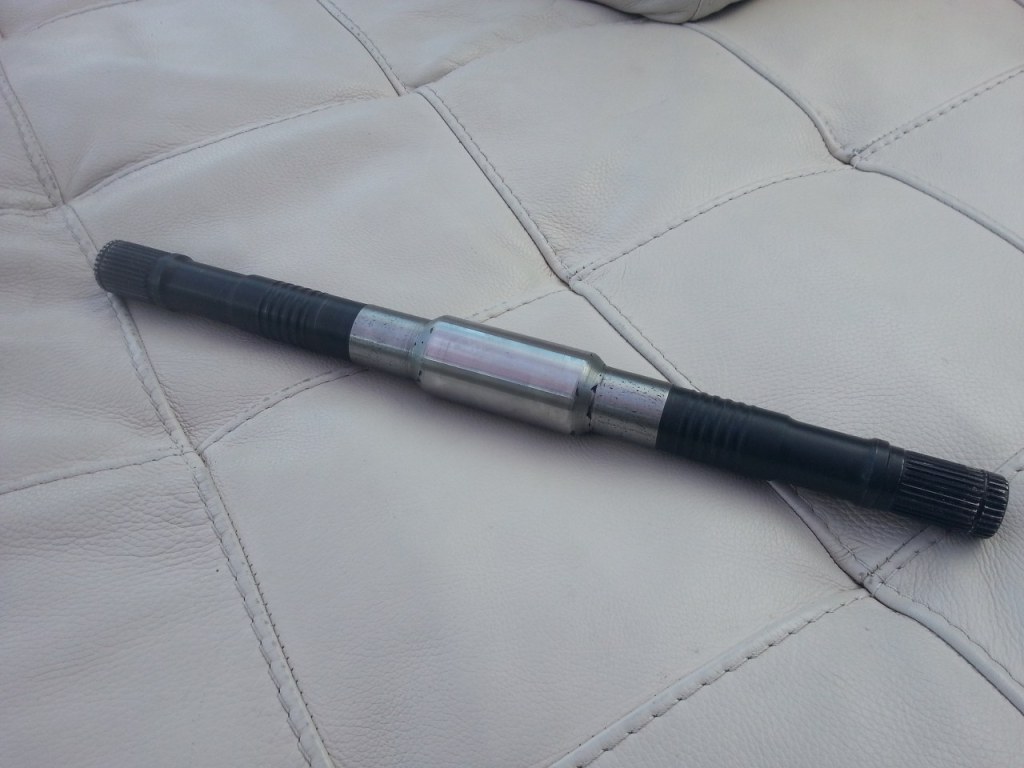
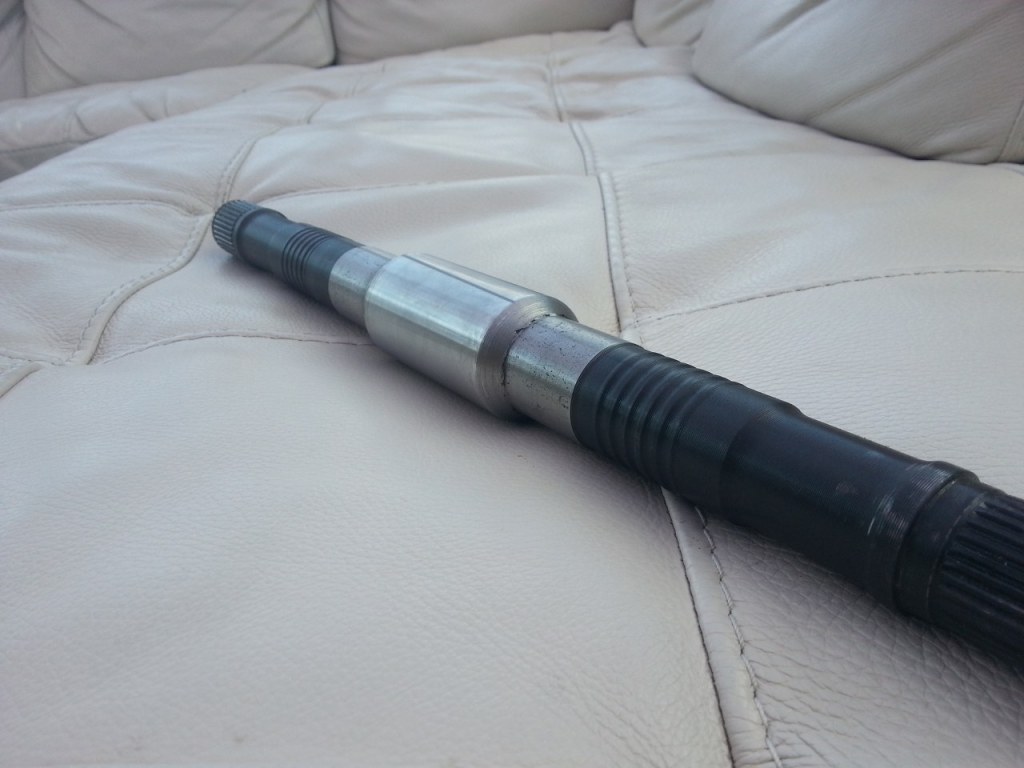
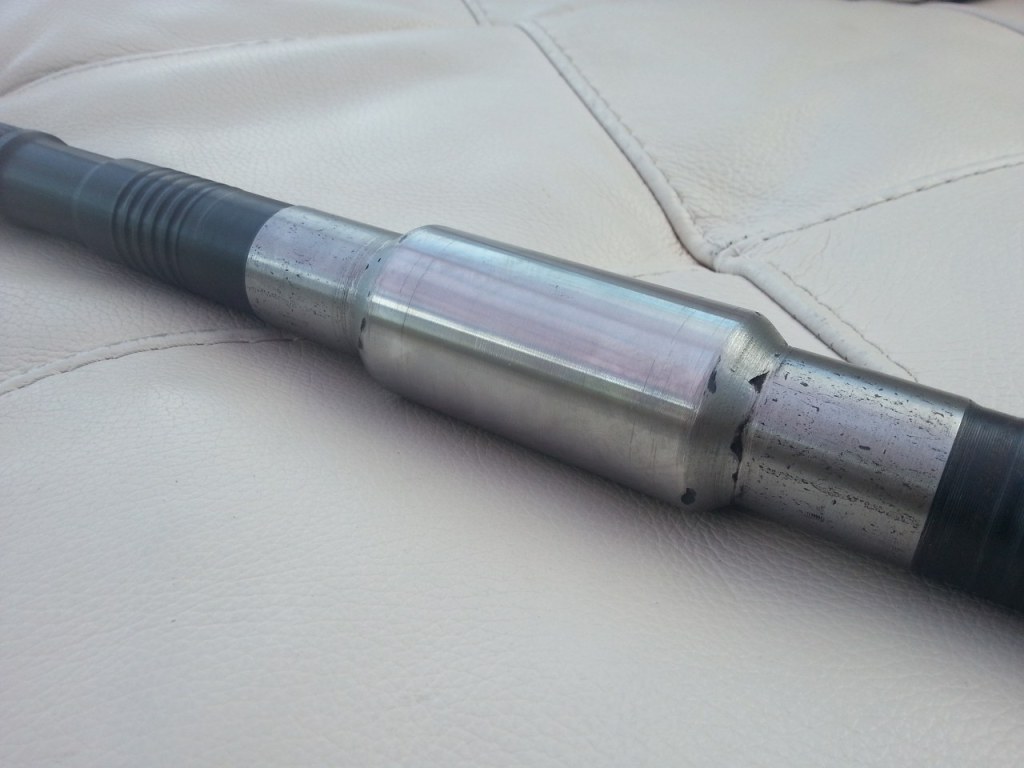
Took the nearside driveshaft to a local engineering company this morning to get it shortened so will hopefully get it back soonish and then try and finally sort out the front running gear once and for all.
Stumbled upon a new problem on Saturday. The offside wishbone 19mm bolt that screws into the body just spins. It seems the captive nut or whatever secures it is no longer! But it gets better
because the oil sump on the VR6 sits nearer the bolt and so when trying to take it out (easy as it freely spins) the head end hits the sump not allowing me to take it out completely 
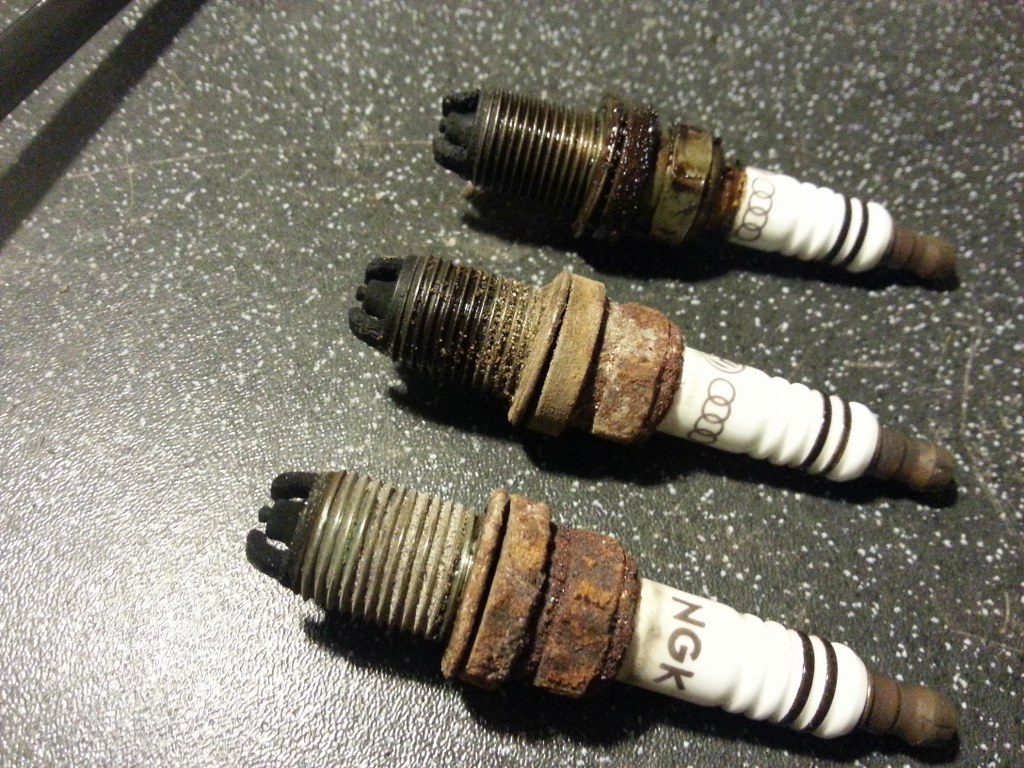
I guess i'm going to have to unbolt the engine and jack it up slightly on one side to remove the bolt and see if i can see why it won't tighten, any ideas how it secures? Is there a captive nut inside the arm here:
(Photo of my old MK1 engine bay)
Posted

Old Timer
I have always heard that you need to take care with this bolt, and do not over tighten
 Great work by the way on sorting this mk1 out!
 Last edit: by redpetemk1
Posted
Settled In

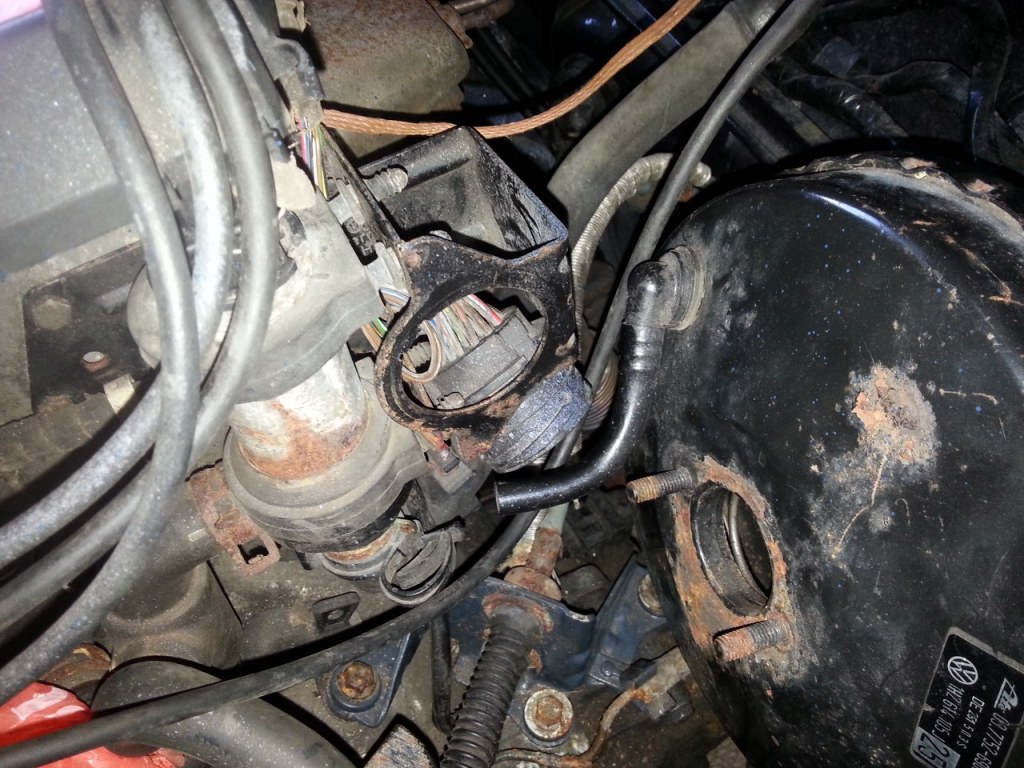
I then managed to get an hour on the car this afternoon between the little one's sleep and tried to sort the main wiring loom connector out. Unfortunately where the engine is mounted means that this main connector will foul against the brake master cylinder and reservoir so i had to get a bit creative! I unbolted the bracket that holds it and cut the lower bracket that the secondary water pump mounts to, then threaded the connector so that it now is orientated downwards instead of how it originally sat facing the passenger side.
Before on the far right of the picture:
But it will now sits pointing downwards, still need to finish it off and re-strengthen the bracket i cut and make sure it is secured safely:
Posted

Moderator


Posted
Old Timer
Speeding is like masturbation, everyone does it ,but it's not something you should record and put on the internet!!�
Posted
Settled In
collo16v said
Good work fella keep it going !!
Cheers.
Waiting on the custom driveshaft to come back so that i can get it installed and then i can get the front running gear all bolted in properly, try and sort out the wishbone bolt mentioned a couple of posts back. I can then drive it up onto the car ramps i have bought (hopefully, with no brakes
) and start checking everything underneath. I know the exhaust is rattling like crazy and seen cable ties so that'll need sorting!
Posted
Settled In

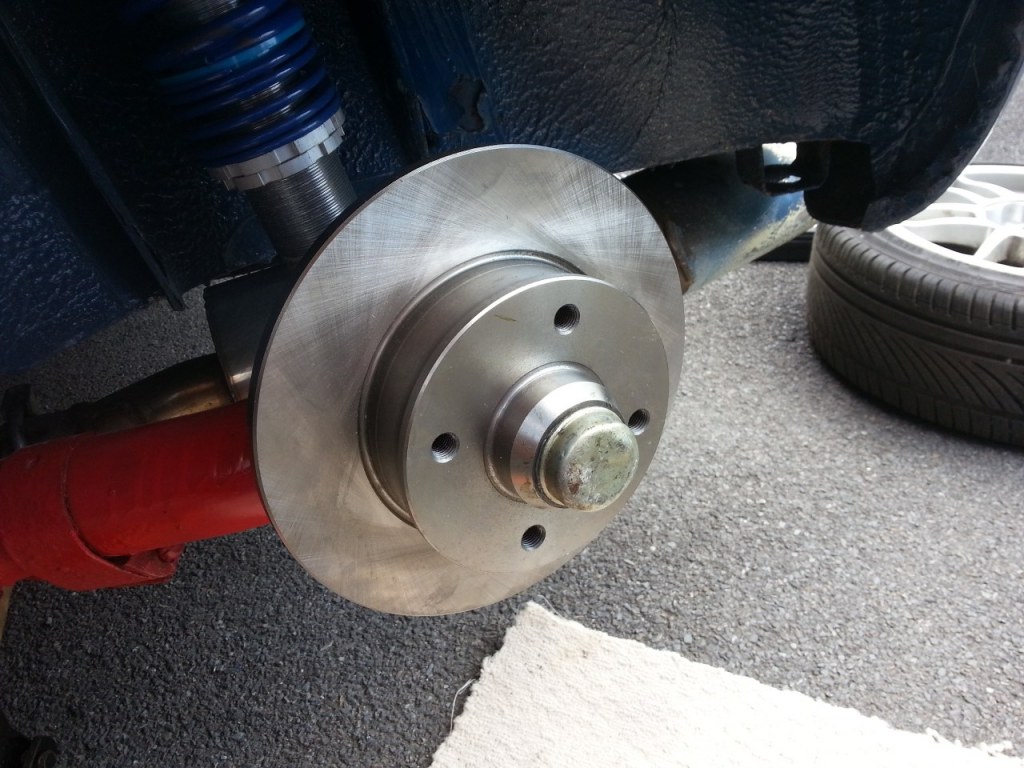
Went and got some Mk2 discs, pads and bearing kits for both sides.
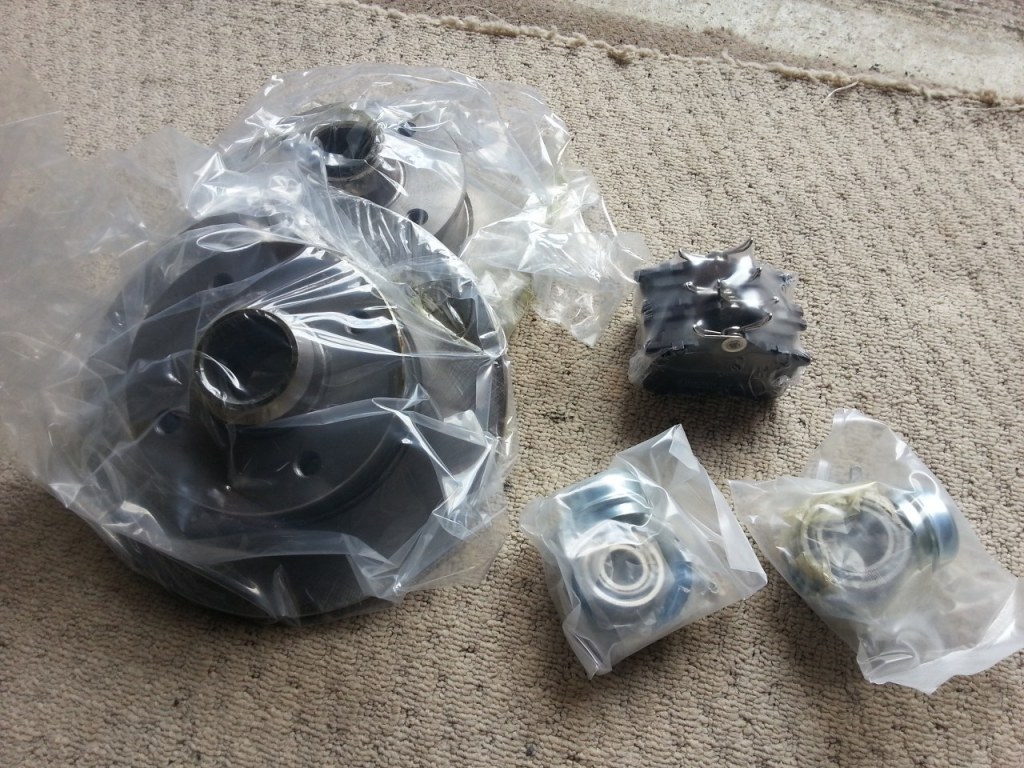
Then went about changing a set of rear discs for the 1st time!! Had fun getting the bearings into the new discs but used the old bearing outer as a drift for the inner bearing and 30mm socket for the outer one, and it went quite well to be honest.
Few pictures of the job done. I'll have to go down the scrappy next weekend for some Mk4 calipers. I did try putting the Mk3 caliper on that came with the car, but the piston was not fully compressed and so wouldn't fit over the discs and pads.
As it started
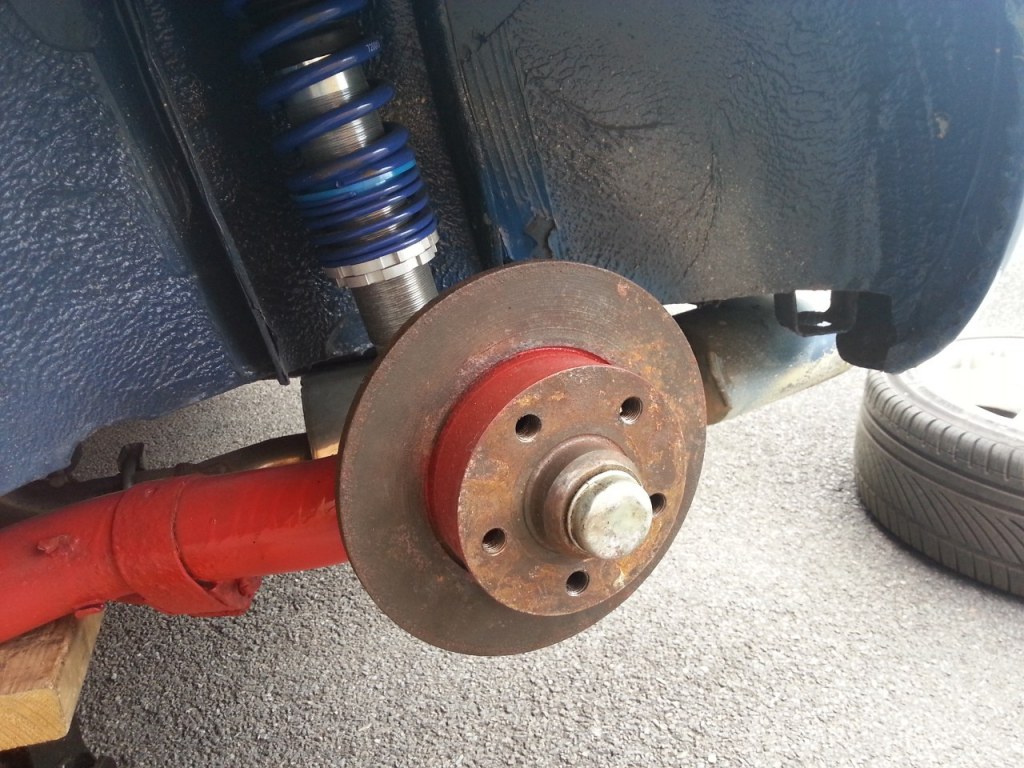
Disc and bearing removed

New disc on and finished for the time being,
Posted

Settled In
'84 MK1 Golf - View topic: Humble Beginnings........... - VW Golf Mk1 Owners Club '99 MK4 Golf
Posted
Moderator
 .
.
Posted
Settled In
Spidermonkey84 said
Just read this from the beginning, cracking work mate, it's going to be so worth it when she's back on the road!�
Thanks I hope so!�
smudger1980 said
Got the MK2 stuff on the rear of my MK1 mate. Those bearings are fun to get in aren't they
I was quite worried about doing it initially, but once I came across a thread on Clubgti about using the 30mm socket and the old bearing as a drift it didn't go too badly.�
In other news I got a phone call today to say the custom driveshaft is ready so I'm picking it up on Thursday. Not sure if I've got a brand new custom made one or the one I have them has been shortened, find out on Thursday I guess lol. �Now I've got to learn how to remove the Cv joints from my spare shaft and put them on the new custom one!�
Posted
Moderator

Posted
Old Timer

Posted
Settled In
JonP said
you know you have to wind the piston in and not just push it.
Yeah I read that after trying the vice. Going to try and get some Mk4 calipers as I have some banjo conversion hoses. If not I'll get a tool to try and get the piston in on the mk3 ones.�
Posted
Settled In
Hopefully get the CV joints attached to it at the weekend and then fitted to the car to see how it all fits together
Posted
Settled In
Tonight i have had a go at taking the inner CV joint off the original 100mm passenger side driveshaft, what a horrible messy job. Pictures, more for reference so i know how and which way the bits are orientated when they go back together!
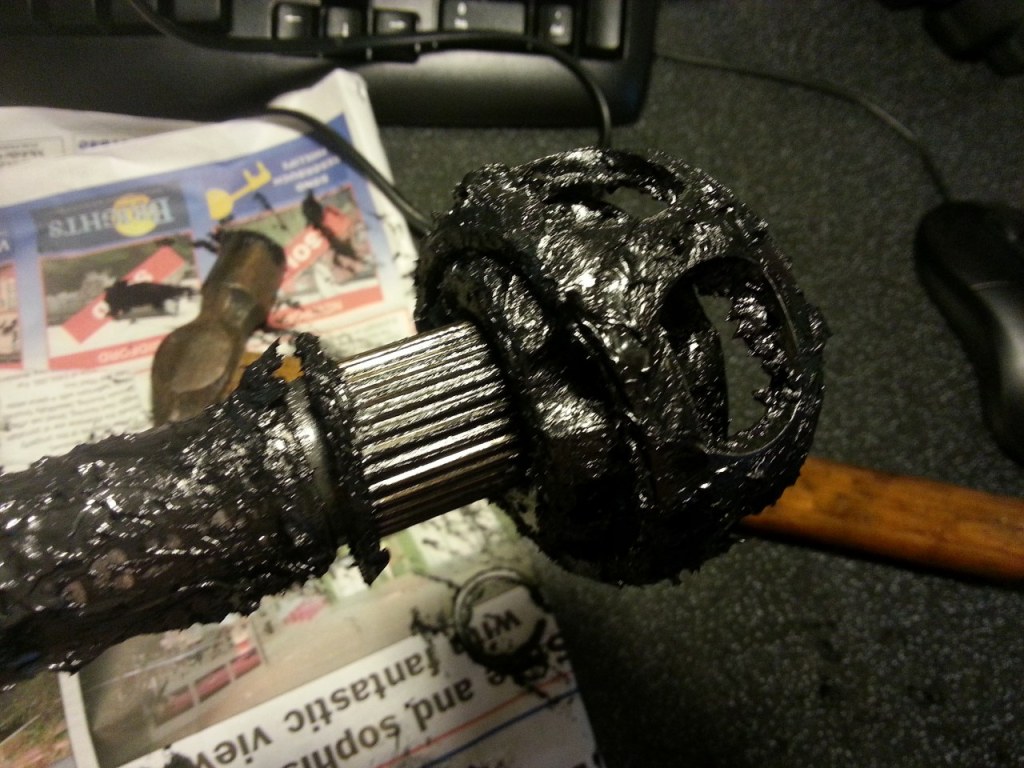
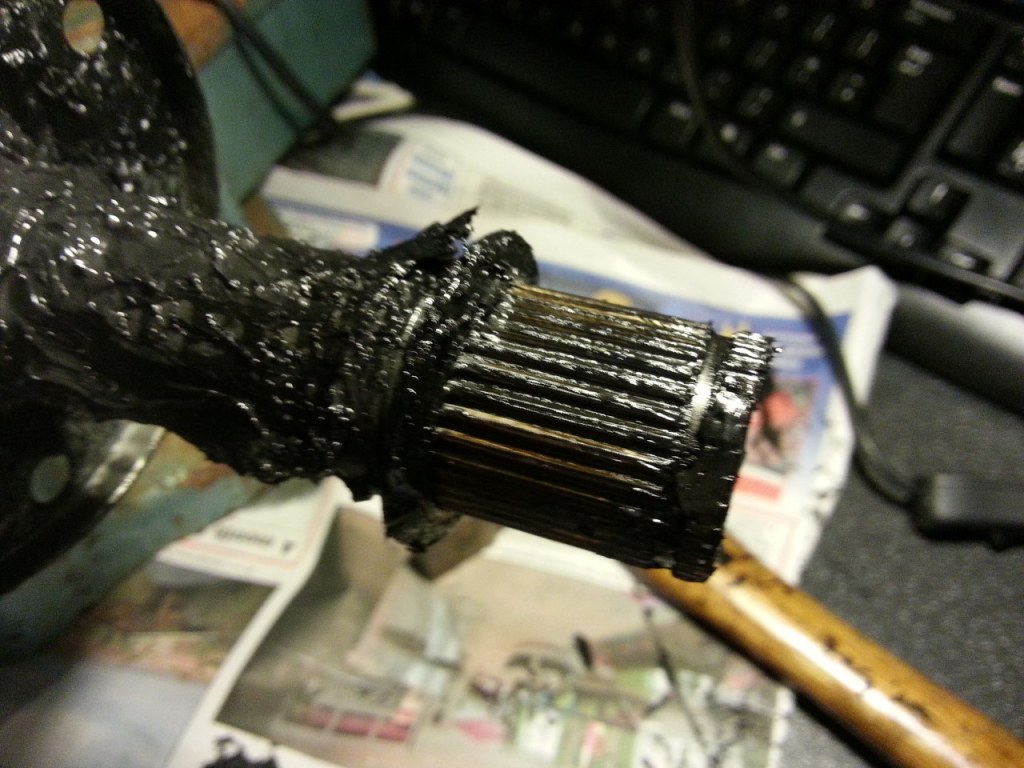

Before cleaning

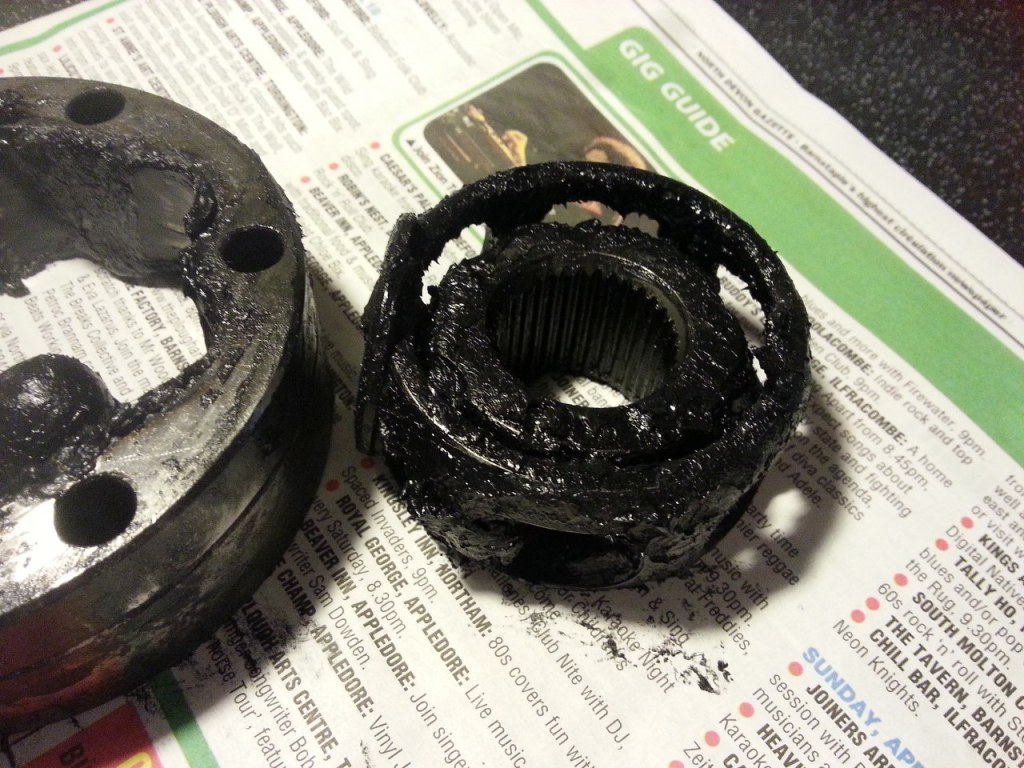
Especially hard when you don't have the correct tools, but i eventually got the circlip off the end and managed to then get the CV joint off the shaft very easily with a few small taps of the hammer. I've cleaned it all up and it doesn't look too bad, no real marks within the joint to worry about (i think) so i'll get some CV joint grease from GSF tomorrow and then rebuild it but on the new shortened shaft.
A lot of newspaper, Gunk, plastic gloves and time later!!


0 guests and 0 members have just viewed this: None.