


84 Driver resto, KR turned AEB conversion

Posted
Settled In

84 Driver resto, KR turned AEB conversion

Well an update took a little longer than I expected.. :-(
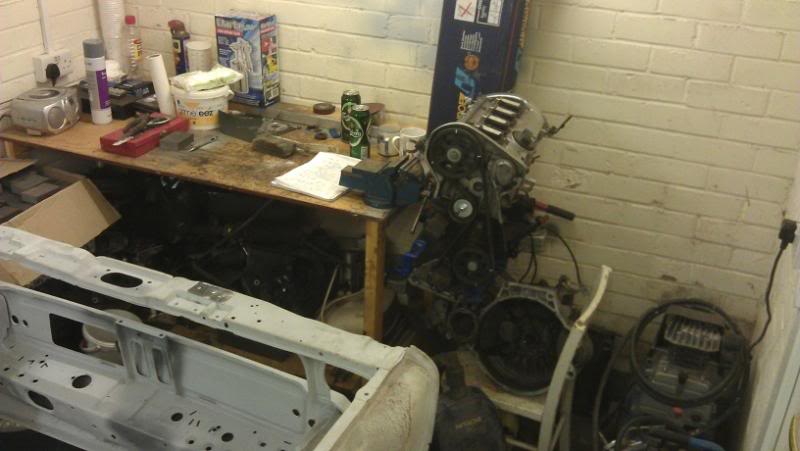
But i'v finally been out today :-) Made a start pulling the engine out. And as before got it hoisted up only to realise the crane hit the sealing .. Had to re-mount the engine and try again.. Same thing.. hahaha but this time it was an easier option to drop the shell a bit.. All the p1ssing around was a pain but at least it gave me some practice getting the engine in and out for when I have some paint on..

Here's a little thing I wish I did from the start… lol
I also emptied the inside from being used as storage space and touched up any scratched bit's with a tinned primer..
Ended the day with cleaning the garage a bit ready for some sand and spray sessions coming soon I hope..
\/\/ The beast to be…!!! (loads of pics) \/\/
http://www.vwgolfmk1.org.uk/modules.php?name=Forums&file=viewtopic&t=95838&highlight=
SSC ELECTRICAL
(loads of pics) \/\/http://www.vwgolfmk1.org.uk/modules.php?name=Forums&file=viewtopic&t=95838&highlight=
SSC ELECTRICAL
Posted
Settled In
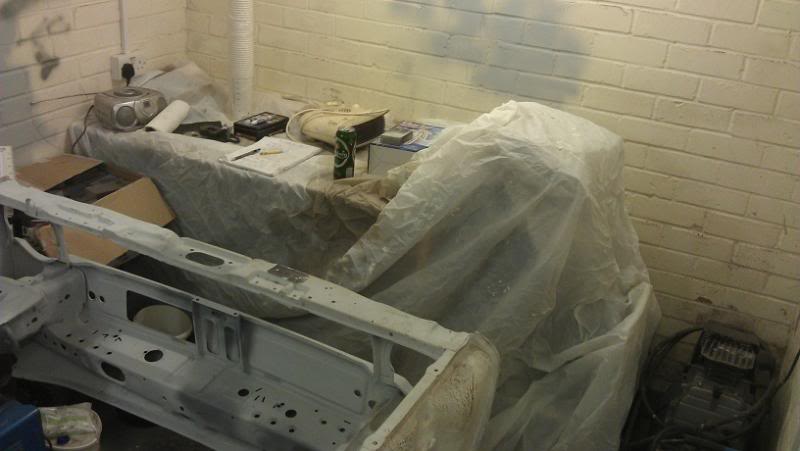
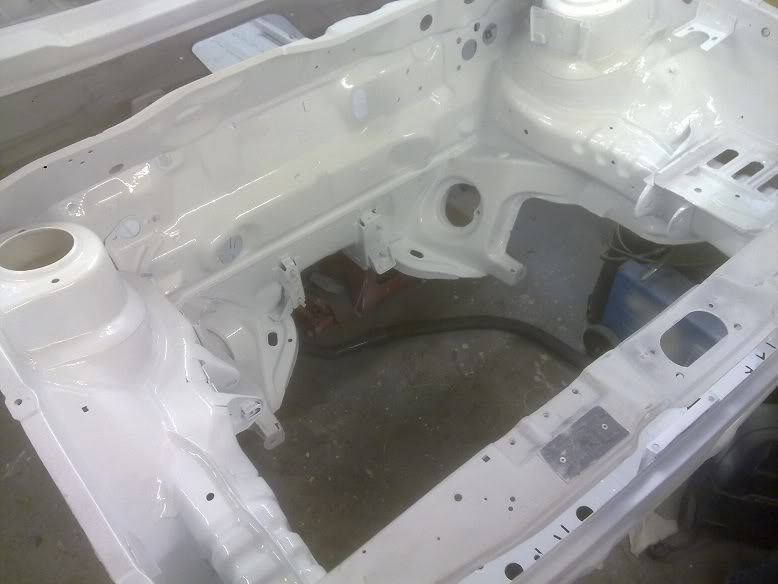
I'v flattened down the primer for where i want to paint, floor and engine bay.
Should i mask off areas for shell color.?? I got half way round and thought not to so pulled the tape off.. lol under the belief the tapped edge would be a pain to get rid of.?
\/\/ The beast to be…!!! (loads of pics) \/\/
http://www.vwgolfmk1.org.uk/modules.php?name=Forums&file=viewtopic&t=95838&highlight=
SSC ELECTRICAL
(loads of pics) \/\/http://www.vwgolfmk1.org.uk/modules.php?name=Forums&file=viewtopic&t=95838&highlight=
SSC ELECTRICAL
Posted
Settled In

Posted
Settled In
Cheer's bud
Might try and squeeze a session in later after work..??
\/\/ The beast to be…!!! (loads of pics) \/\/
http://www.vwgolfmk1.org.uk/modules.php?name=Forums&file=viewtopic&t=95838&highlight=
SSC ELECTRICAL
(loads of pics) \/\/http://www.vwgolfmk1.org.uk/modules.php?name=Forums&file=viewtopic&t=95838&highlight=
SSC ELECTRICAL
Posted
Settled In
Posted
Settled In
I rushed home from work then to pick up some hardener who told me to mix it 3-2-1..?? So went home to proceed.. I cracked the door's, dusted out, left to settle, mixed the paint and started to get to work, barely playing around with the gun first. The gun was pulsing abit.? I made sure everything was tight (as previous fault, lol) bit better.. So i started, but before long i started to notice run's…
 I played with the gun abit and cautiously started the engine bay..still ended up with run's.. Did suss out in the end to spray in quick burst.. Bout right.. lol
 I stood back despairingly only to see the two inner rear aches i'd missed.. hahaha
There's quit a few of these..!!
Not too happy but it's gave me a few thing's to consider for the second coat..
Double check 3-2-1- mix
Ater fan to get in crack's
GET GUN WORKING PROPERLY FIRST
Suss out how to get rid of run's.? lol
Hope i'v learnt before the shell get's it
Or yea.. just to top it off when i was cleaning the gun, one of the nut's bounced off only to disappear forever… after a search even more annoyed had a smoke, walked back in the garage and it was bang where i was stood… hahaha, Made me laugh
\/\/ The beast to be…!!! (loads of pics) \/\/
http://www.vwgolfmk1.org.uk/modules.php?name=Forums&file=viewtopic&t=95838&highlight=
SSC ELECTRICAL
(loads of pics) \/\/http://www.vwgolfmk1.org.uk/modules.php?name=Forums&file=viewtopic&t=95838&highlight=
SSC ELECTRICAL
Posted
Settled In
You also want to be spraying at about 2-2.5 Bar of pressure And remember, your first coat will probably not cover any repairs so don't try and make it!Hope this is of some help!
Posted
Settled In
Yea i'll have a few sessions trying to flat out the drips.. I'm using a 2k solid white. I was planning on giving it a few really light coats but that never panned out..
I'm using the same gun as for the primer.. i had a quick look last night to see what the different screws adjusted.. bit late by that point tho, haha..
Let's hope i can redeem myself on the second coat
\/\/ The beast to be…!!! (loads of pics) \/\/
http://www.vwgolfmk1.org.uk/modules.php?name=Forums&file=viewtopic&t=95838&highlight=
SSC ELECTRICAL
(loads of pics) \/\/http://www.vwgolfmk1.org.uk/modules.php?name=Forums&file=viewtopic&t=95838&highlight=
SSC ELECTRICAL
Posted
Settled In
Another thing that could help is to use an extra fast hardener and buy some Rocket accelerator additive (only a couple of drops) to help the paint cure faster. I'm saying this as I am guessing to are spraying with no heat?
Posted
Settled In
I had a little blow heater on for about an hour or so before i started, but thinking afterwards thats no time to heat the metal which is the idea i guess.?
I'm hopping to start round two over the weekend
But for now here's just a little update..I'v been out in the week sanding down the run's.. After the first one i noticed it sanding areas around that i din't want.. so started carefully chopping the nipple off with a stanley blade to help..
As the paint went on alot thicker than i wanted i noticed the dread orange peal.! in some place's i'd sanded..(well one really but there must be more waiting
) After i'd blended the run's out i give it all another sand down.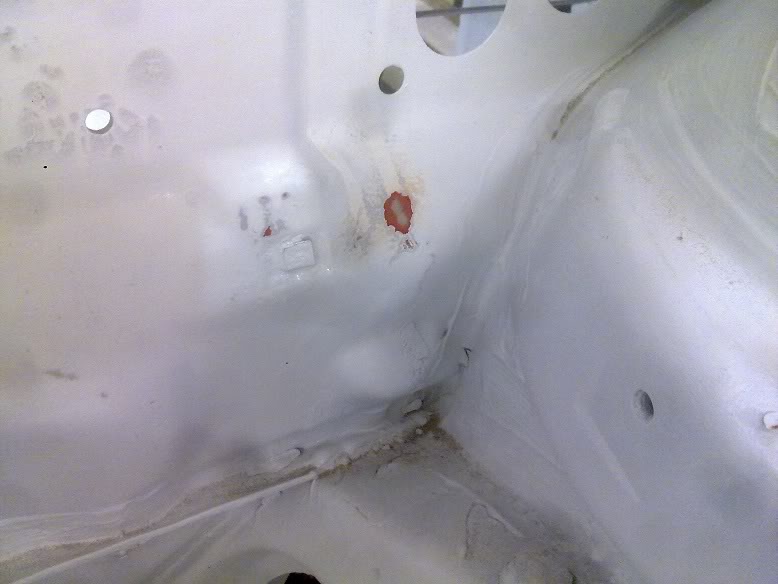
Quite annoyed with the thought of it all flaking off i felt like blasting it all off and starting again..!! But that's a hell of alot of backwards steps and at the end of the day she's gona get abused on the track and prob end up on her roof at some point, lol so it's jst another step in the learning curve..
Round two comming soon..
\/\/ The beast to be…!!! (loads of pics) \/\/
http://www.vwgolfmk1.org.uk/modules.php?name=Forums&file=viewtopic&t=95838&highlight=
SSC ELECTRICAL
(loads of pics) \/\/http://www.vwgolfmk1.org.uk/modules.php?name=Forums&file=viewtopic&t=95838&highlight=
SSC ELECTRICAL
Posted
Old Timer


Mk1 Golf Gti Abf conversion Project
Mk2 Golf Gti 16v
Mini Cooper S R53 (Daily)
Posted
Settled In
I really feel like i'm getting somewhere now paints going on Had a quick look at your project, looking exceptional i must say As promised round two update but first a little story of my weekend. friday work, saturday morning paint car, saturday night go for a quite couple.! with my sis and a few, sunday morning get in 3.30ish (a complete mess, lol) 5.30 go to a big sea fishing match. Where i was about as much use as a chunk of driftwood, Needless to say we never caught any thing.! sunday night curled up in bed typing this up, lol
Ok back to golf..
So as i was a little peed off at my attempt i called in a little bit of guidance off my uncle. I did all the work he fed me info(and some sanding) Big thanx
So we had a good look round (he said he was impressed how far it had come, which is always good to hear
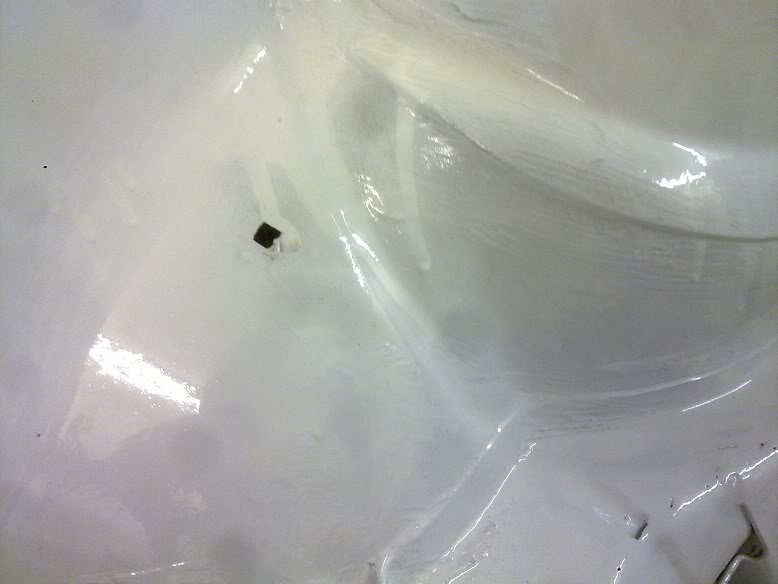
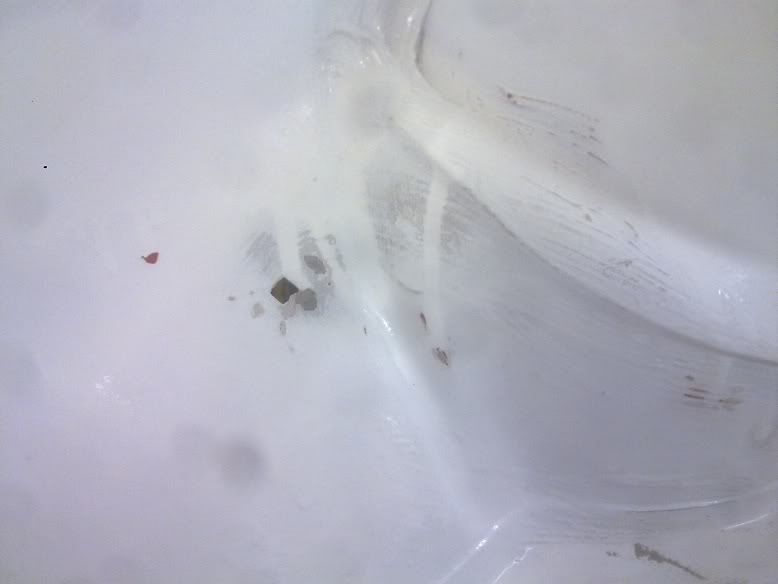
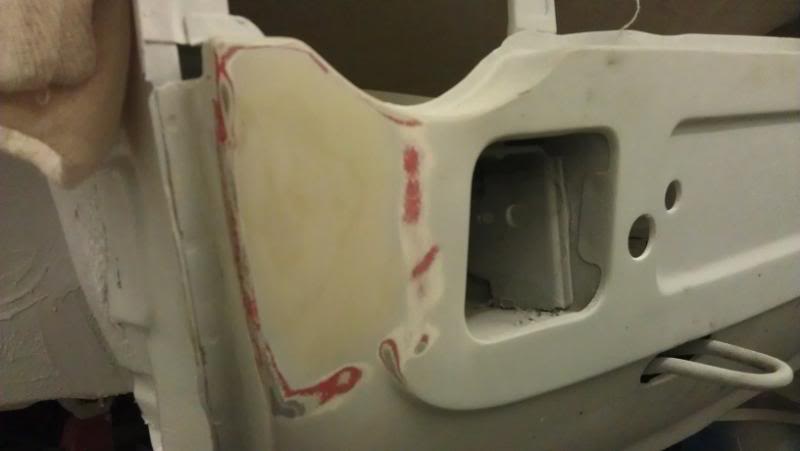
) Gave it abit more of a sand here and there but when i was airing it down i came across this patch..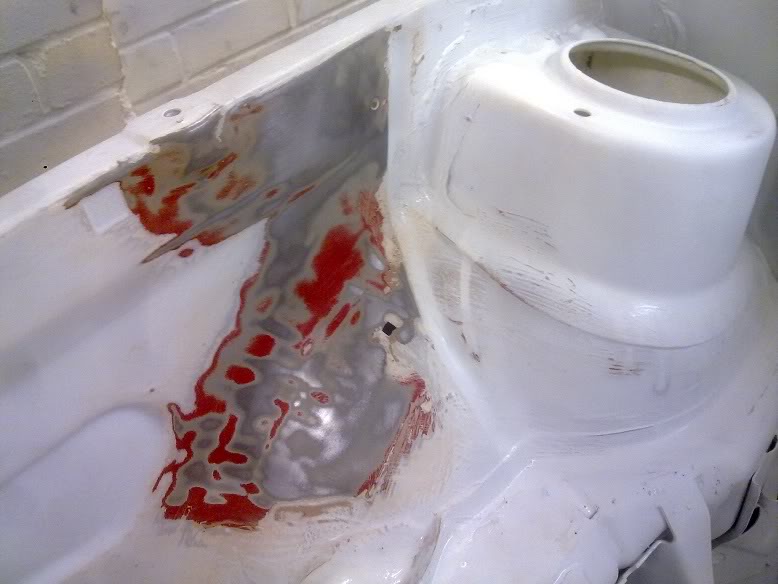
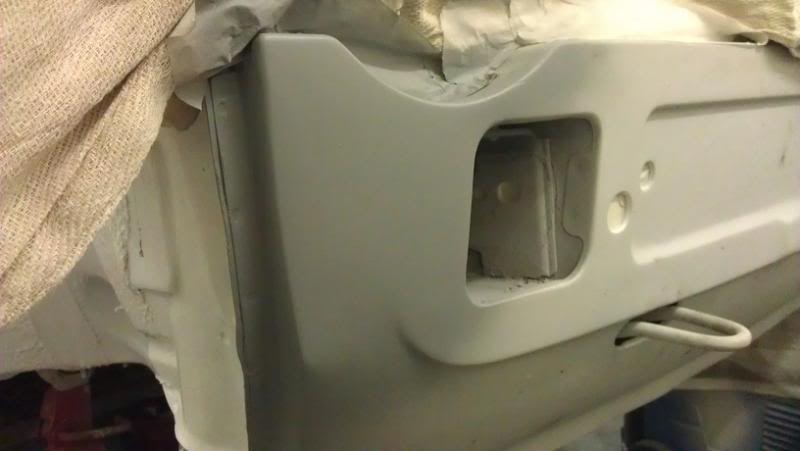
Ouch.!! took it back to solid stuff and sanded it in 2 hour process mind. When it was ready i tin primed any through to color patches.
We chatted about the gun which is a 1.4 nozzel (bit of an all-rounder?) He did have a moan about the state i'd left it in. So had to give that a good scrub, lol.
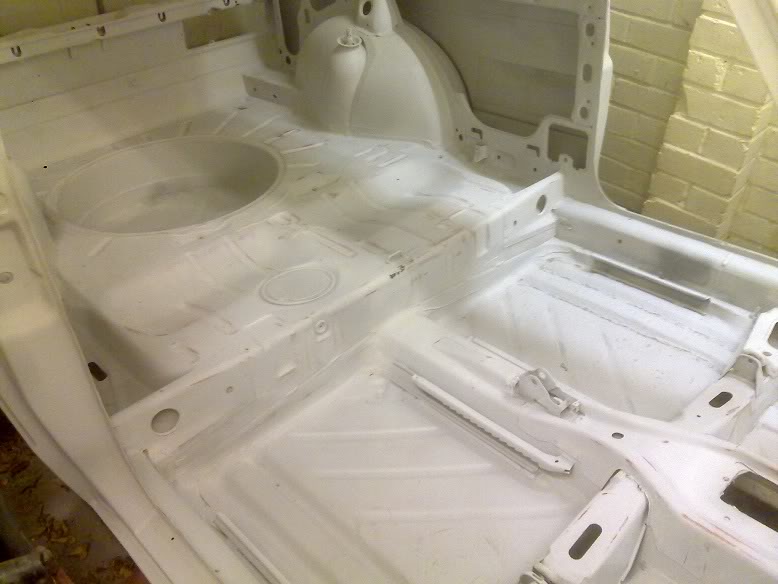
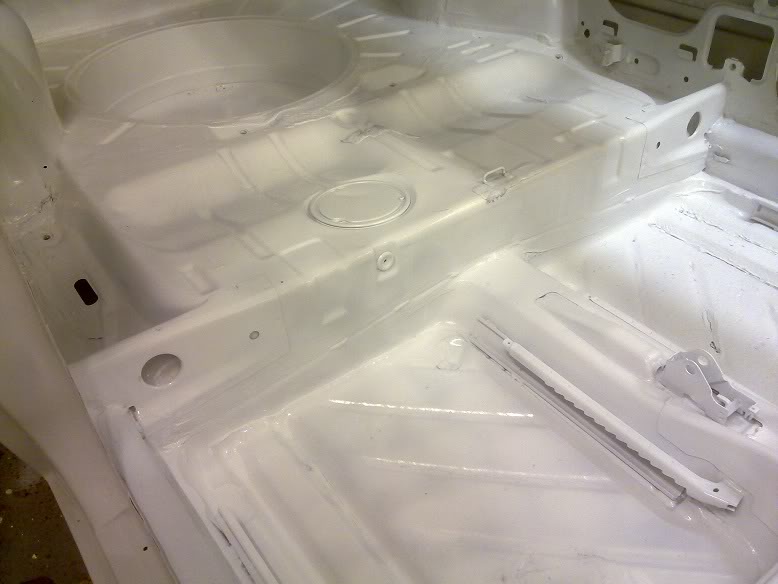
I mixed the paint 3,2,0.5 and give it a filter into the gun. To be fair he set the gun up but talked me trough what he was doing(small fan to get in tight bits first) Then i got to work in the bay, it was really helpful to have a spotter for bits i'v missed.. Bay first coated then did the rear inner arches.
Mixed more paint and while the first coat was still tacky, set the gun to a wider fan and gave it a glossy finish..


On the rear arch one it looks patchy but that's the camera lens. I'v been out and double checked, lol, Got to admit it was a right pig getting in there, so there is a couple of runs i know of.. but no biggie.
I'm really happy with the outcome
but now i'm left to my own devices for the roof and floor.. Another thing we chatted about was i was hoping to get every thing fitted after the white but he pointed out that i really want to color my slam panel and front panel first.. Which means i need to decide a color asap..???
\/\/ The beast to be…!!! (loads of pics) \/\/
http://www.vwgolfmk1.org.uk/modules.php?name=Forums&file=viewtopic&t=95838&highlight=
SSC ELECTRICAL
(loads of pics) \/\/http://www.vwgolfmk1.org.uk/modules.php?name=Forums&file=viewtopic&t=95838&highlight=
SSC ELECTRICAL
Posted
Settled In
Posted
Settled In
Got to admit i was a little impressed with myself, lol, really appreciated all the help hope i can keep it going for the roof etc. Nearly whittled it down to a choice of two colors… Blue to keep in key with business colors(I can put my mag signs on to sell myself, lol) and i noticed the white's got a hint of blue but all my ancillaries look's like there gona be blue, i.e suspenssion, bushes, engine, pipes and leads, seat belts. Will that be too much blue.? Or a solid gun-metal grey (well a silver that looks metalicy and making it abit darker.? paint dudes idea, lol)
p.s. Reading this do you have to scroll right to see my pic's in full.?
\/\/ The beast to be…!!! (loads of pics) \/\/
http://www.vwgolfmk1.org.uk/modules.php?name=Forums&file=viewtopic&t=95838&highlight=
SSC ELECTRICAL
(loads of pics) \/\/http://www.vwgolfmk1.org.uk/modules.php?name=Forums&file=viewtopic&t=95838&highlight=
SSC ELECTRICAL
Posted
Settled In
Just remember for when you do any of the outside panels, don't try and get a super flat finish because you have to allow for the paint to flow out a bit! It's better to put it on a little bit dryer then you would want and flat and polish it afterward. As for colour choices, what sort of blue/gun metal grey were you thinking of? Maybe you could find and post up a few pics of cars with the colours your interested in. Also, what are the colours for your business? have you pics of a work van you could post up?
As for having to scroll right, for me its fine, I don't have to
Keep it up dude, and I hope I have been of some help!
Posted
Settled In
Even people who don't know it, as i like to search for info on what i want to know. Makes me feel like i'm putting some effort in, lol, plus there's been alot of other bit's i've picked up on the way I could post pics up of colors and although second opinions are very mind resting, i feel this is something i have to do on my own..?? lol
Ok so as my weekend was very chaotic i din't get chance to do owt.. :-( So wrapped up early today to get on it.. (You gota have some perks, lol)
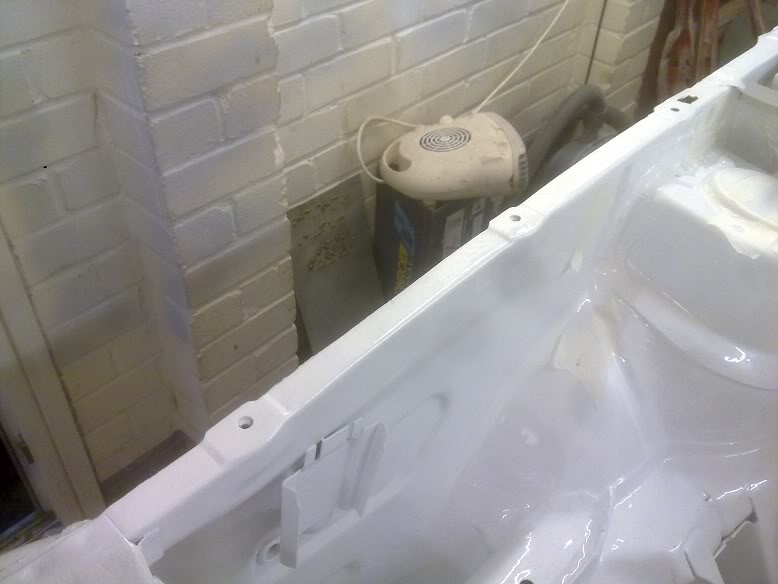
First thing was to mask bit's off..
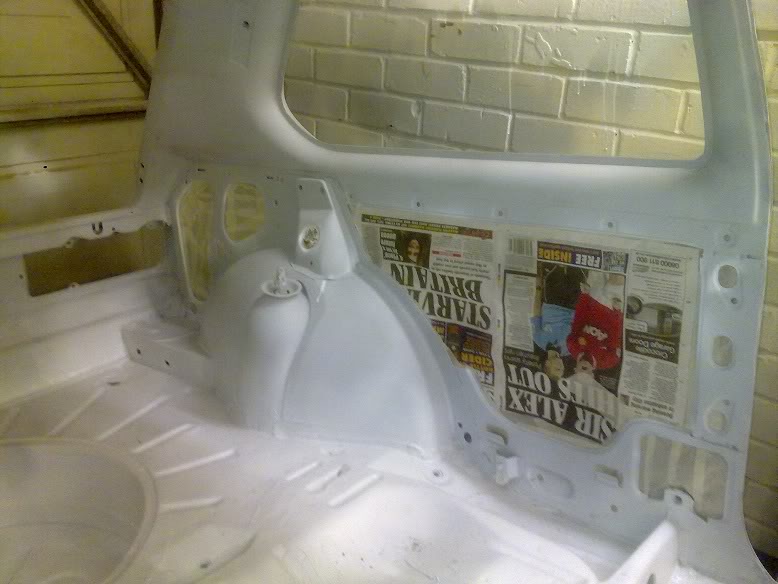
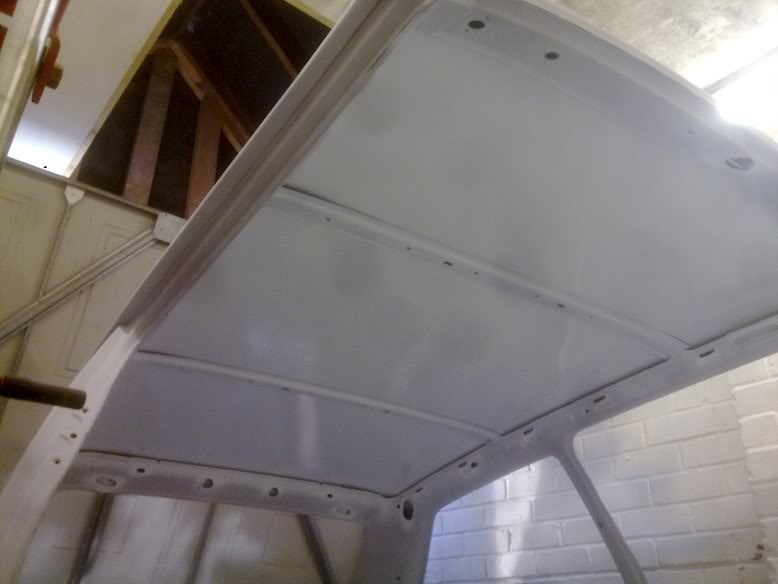
Then i gave the roof a flatten which revealed a few patches of where the head lining was stuck on (bad prep i thought but as it's the roof only gona notice it if upside down and i think that will be the least of my worrys at that point, lol)
I bought a big tin of gun wash so i din't have to keep cleaning out with thinners. So filled the cup and had a play with the adjustment's on the gun. Feeling happy i got mixing, i also bought some strainers so i din't have to keep chopping mams tights up, lol.
Soon sussed out i missed my spotter when the roof looked like tiger stripes. But at least i felt quite comfortable doing it. And am quite happy with the out come after 2 coats..
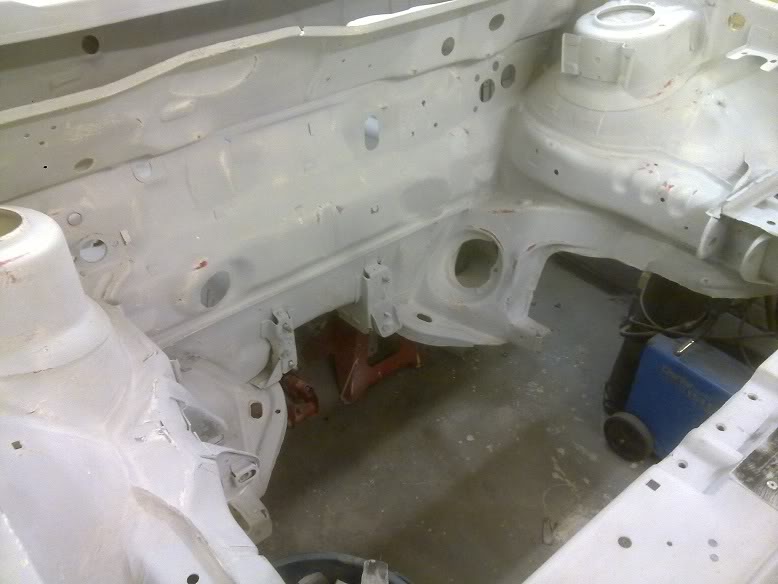
I also went over the hamerite on the front inner arches.

And i noticed i'd missed the top edges of the engine bay so carefully tartted them up tring not to get any in the bay.
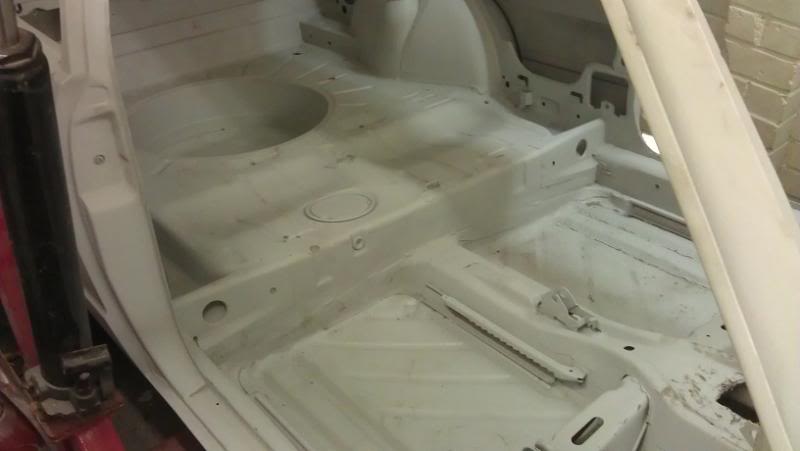
Now i'v just got to suss out how to attack the floor.?
\/\/ The beast to be…!!! (loads of pics) \/\/
http://www.vwgolfmk1.org.uk/modules.php?name=Forums&file=viewtopic&t=95838&highlight=
SSC ELECTRICAL
(loads of pics) \/\/http://www.vwgolfmk1.org.uk/modules.php?name=Forums&file=viewtopic&t=95838&highlight=
SSC ELECTRICAL
Posted
Settled In
Posted
Settled In
The inner arches are masked off because there staying white un like the body which i'm pretty confident now is gona be blue.! Looks good in my head.?? lol
\/\/ The beast to be…!!! (loads of pics) \/\/
http://www.vwgolfmk1.org.uk/modules.php?name=Forums&file=viewtopic&t=95838&highlight=
SSC ELECTRICAL
(loads of pics) \/\/http://www.vwgolfmk1.org.uk/modules.php?name=Forums&file=viewtopic&t=95838&highlight=
SSC ELECTRICAL
Posted
Settled In
Posted
Settled In
mk
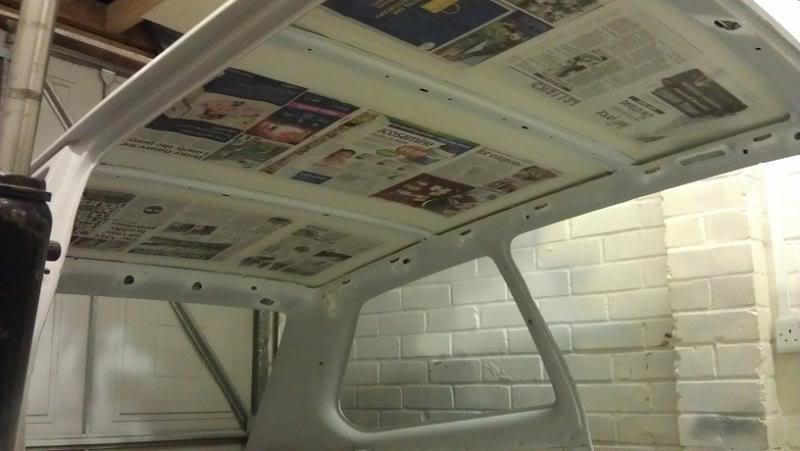
So the first thing i got on with was to mask off the ceiling panels and all the little holes around top. Yes.. they have bit's of paper and card inside, lol
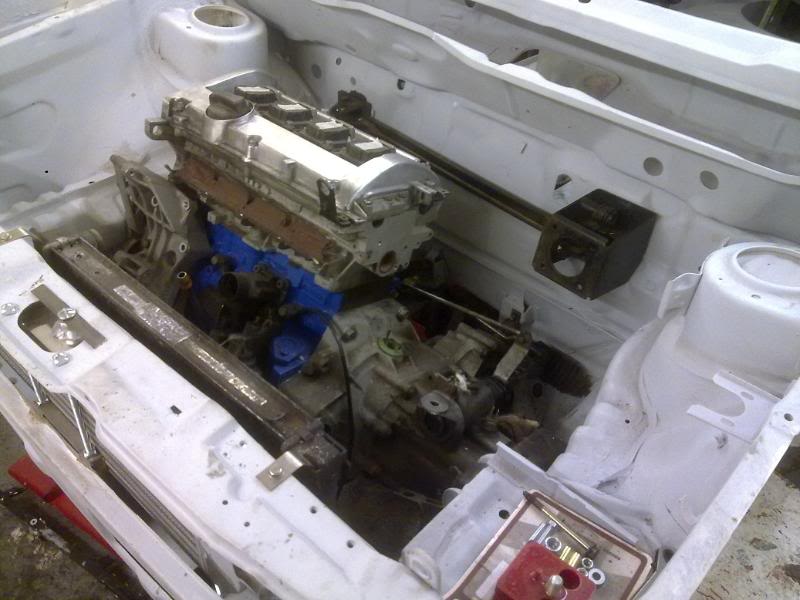
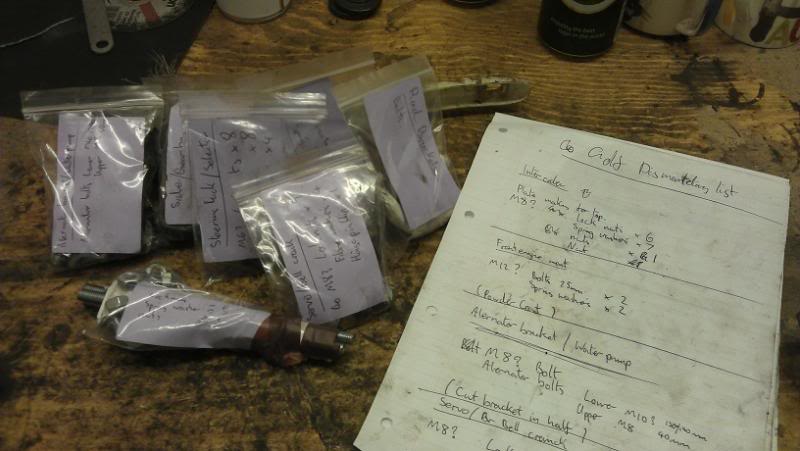
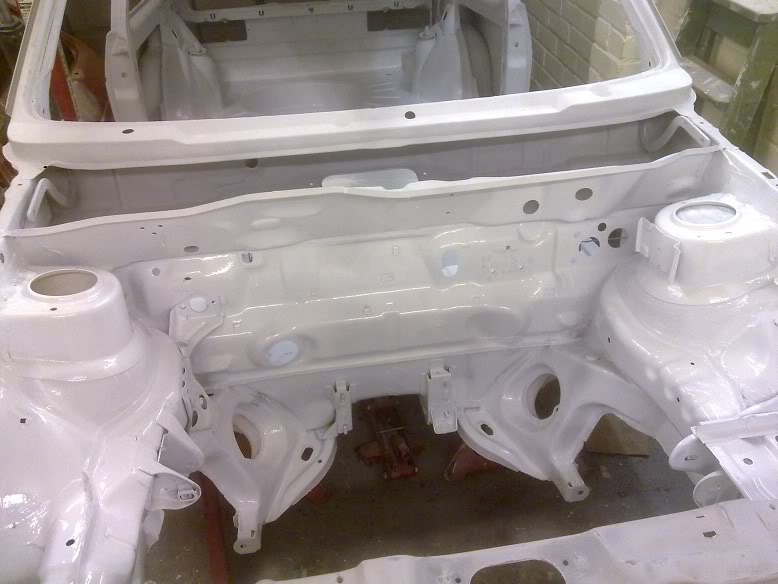
Remember where the engine slipped putting it in place for trile fit..?? I sorted that.
Felt second nature now, lol..
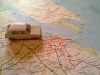
This arrived the other day
Which has changed plans a little.. for the best of corse Got carried away with the wire wool and took the stamp off, lol as long as it does it's job 
Got the floor left to do in white then hopefully abit of color in there over crimbo
\/\/ The beast to be…!!! (loads of pics) \/\/
http://www.vwgolfmk1.org.uk/modules.php?name=Forums&file=viewtopic&t=95838&highlight=
SSC ELECTRICAL
(loads of pics) \/\/http://www.vwgolfmk1.org.uk/modules.php?name=Forums&file=viewtopic&t=95838&highlight=
SSC ELECTRICAL
0 guests and 0 members have just viewed this: None.