


84 Driver resto, KR turned AEB conversion

Posted
#1093201
(In Topic #130791)
Settled In

84 Driver resto, KR turned AEB conversion
My Mk1 Diary
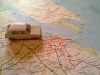
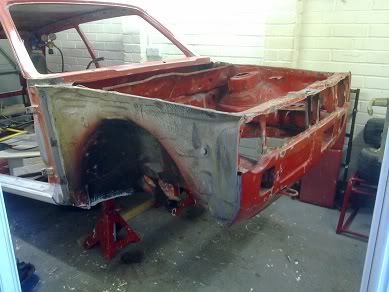
I spotted the car peering through the fence of a scrappy in Tetney, Grimsby.
She had four flat tyres a bit of a dint on the tailgate and the usual body rust of a 20 year old car.
I rang the number on the fence and arranged a meet with whoever was on the other end, some haggling and a few hit's with the hammer and she was free.
I was now the proud owner of a Volkswagen 1984 Mk1 Golf.!!
She was only a baby at 1.3 and the engine never run, but I had all the dreams of a track thirsty teenager.
I got her home and with all the enthusiasm of a little boy with little to no knowledge of mechanics, started to do what seems to come natural to me in life… Dismantling !!
First on the list was the interior, door cards, seats, carpets, dashboard, roof lining, etc. Then started to remove the engine and all the ancillary.
And there she stood for one and half years.. I had many people offer me money for her but those dreams of mine were still alive and I was never gona let her go.
We started to get complaints about are garden making the area look unsightly, and it want until we got a letter off environmental agency I decided to do something.
We did have a garage but it had a load of junk in it, so I made a start on clearing it out. I painted it all white with a grey floor, as am a sparky I fitted some electrics and to make life a little easier because the garage door never worked properly I fitted a side door.
So now I had a good place to work in (a little tight but… am not complaining) and a kick start of motivation I set about doing some more… dismantling.! Glass, door's, bonnet, wing's, tailgate, sunroof, fuel tank, back swing arm, wheels, suspension, etc.
And then there she stood for another year, tut-tut..!!
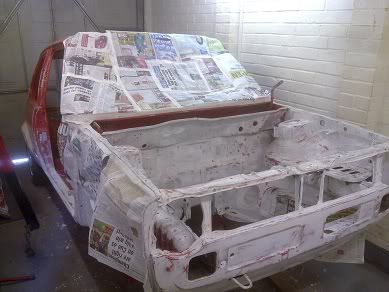
I then decided enough's enough, I might not know what I'm doing right now but I'm sure I will do at the end and she aint getting any better without trying. So I made a start sanding the shell and trying to put a plan together.
I found a rust hole on the floor so seens as this will be covered up by sound proof or something this is where I'll learn to weld, I had practised on a couple of bit's lying around, but not a lot. Chasing holes in not so sound metal is how that started but before long I'd sussed it.
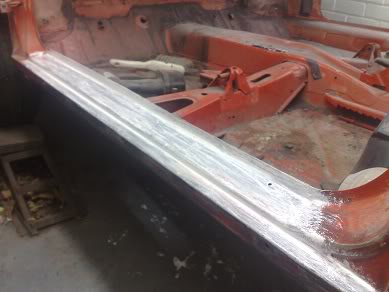
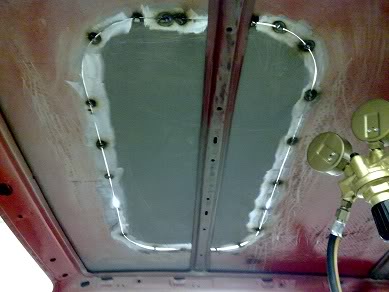
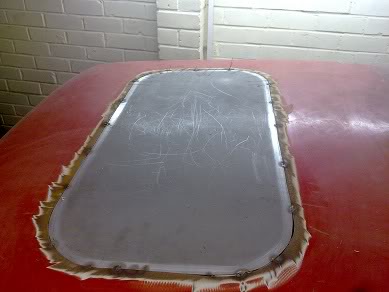
Because I was gona turn her into a track car I'd decided to weld the sun roof up and insert the missing support bar to add a bit more rigidity, with all good intentions I went about cutting out the shape for a butt joint, and that's how it still stands.. just a shape.
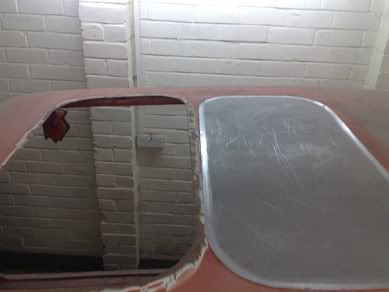
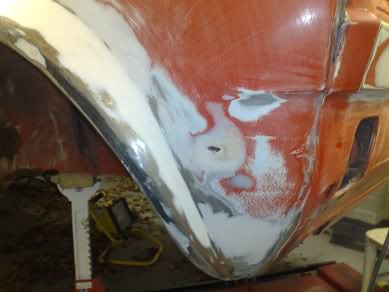
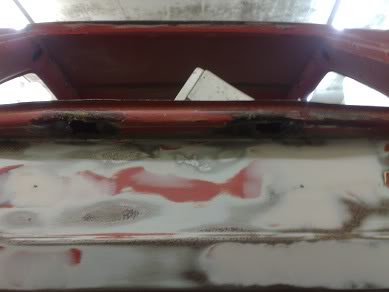
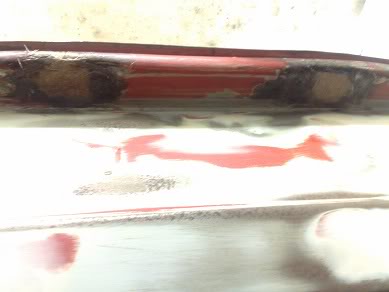
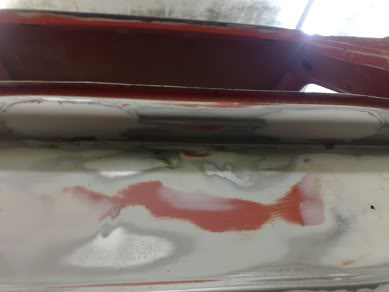
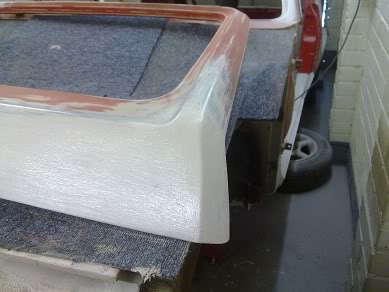
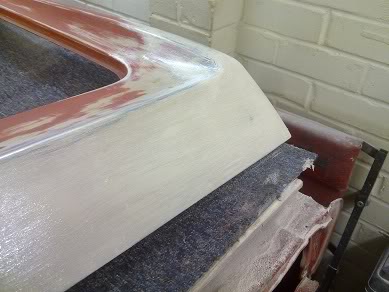
The back panel had a bit of damage from the tailgate dent so I set about learning to filler and sand and more sand.
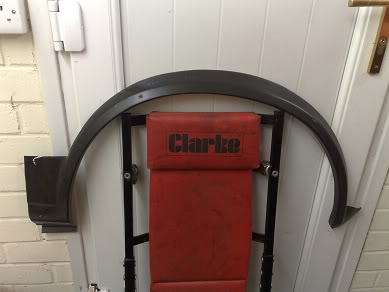
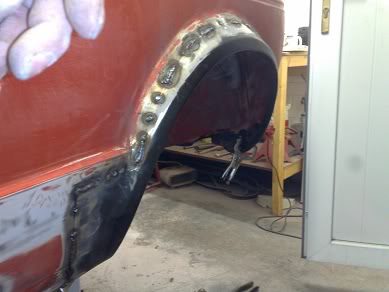
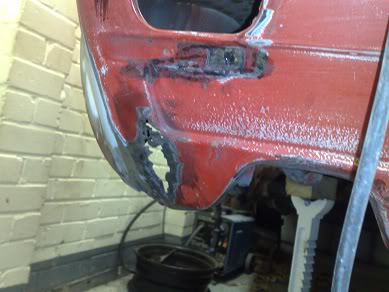
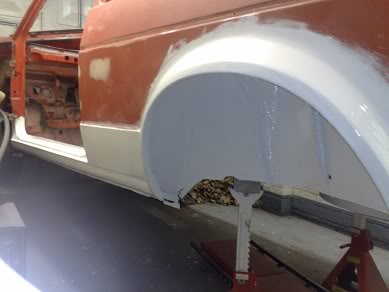
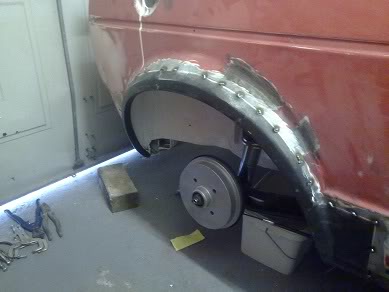
With my new two skills I'd learnt I started on my next chapter. The rear arches were that badly corroded I'd decided to weld on new ones. I chopped away the excess of the new repair panel but there was still some fettling to do to make it fit snug. Got it welded into position with a bit of twisting going on at the back as part of the learning curve. Flap disked the excess weld off and started filling/sanding did that for about a week all in all, not too bad job for a first timer.
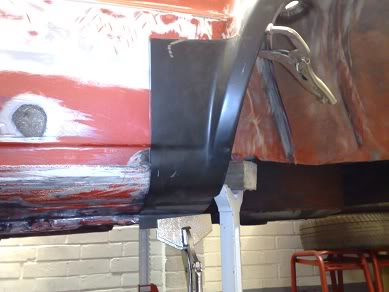


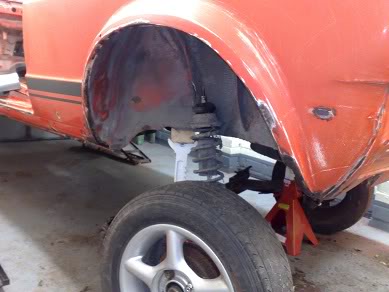
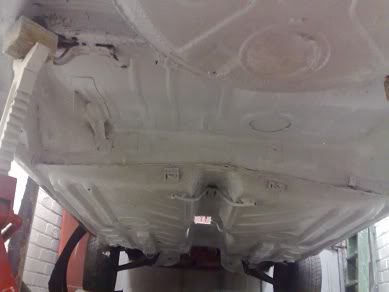
Had the car up on some stands so had a couple of foot of clearance, had all the break and fuel lines out the way plus got rid of all the little brackets with the intention of running them on the inside. Started wire brushing the underneath of all the loose bit's. Getting it prepared ready for under sealing…….
AND that's were she's STOOD for nearly another two years…. will this project ever see the light of day…????
A couple of weeks have gone by now, not a lot happened sourced a big box of tack cloths and a fibreglass kit which is to fill a hole on the back valence. But tonight 21/1/2011 me and my friend have made a Wager..!!! He's got his own place and in the middle of renovation and the deal is by Thursday the 21st of July, Car/House completion…. if my mate wins I have to fund a garden BBQ party..!! If I win he fund's tickets to Bug Jam 25.!!
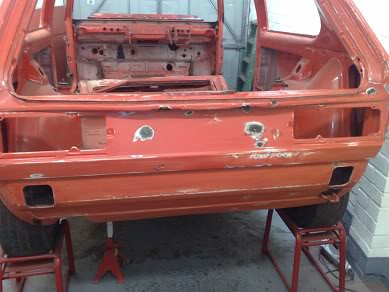
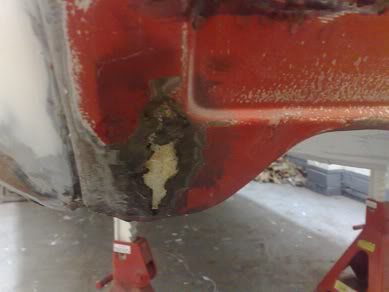
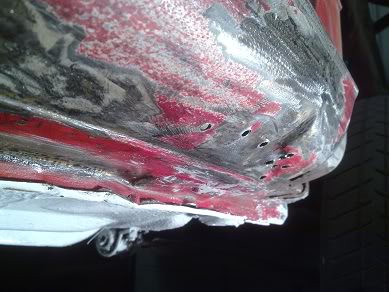
Was out last night, fibre glassed the rust hole up on the valence and the two the rear number plate light holes ready to go over with filler, would of preferred to weld metal bits in but cos of the rust I din't really want to cause more work with such a dead line. After I patched up the hole's I set about white smooth hammeriting the underneath was quite a bigger job than I thought, second coat should be a bit easier.
\/\/ The beast to be…!!!  (loads of pics) \/\/
http://www.vwgolfmk1.org.uk/modules.php?name=Forums&file=viewtopic&t=95838&highlight=
SSC ELECTRICAL
(loads of pics) \/\/http://www.vwgolfmk1.org.uk/modules.php?name=Forums&file=viewtopic&t=95838&highlight=
SSC ELECTRICAL
Posted

Local Hero


Good work so far mate
Andy
LINCOLNSHIRE REGION -�https://www.facebook.com/groups/467122313360002/
1983 MK1 Golf GTI Campaign Model - Under (looooong) resto!
1962 Rover P4 80
2002 BMW 745i
2008 BMW Z4 2.5Si
LINCOLNSHIRE REGION -�https://www.facebook.com/groups/467122313360002/
1983 MK1 Golf GTI Campaign Model - Under (looooong) resto!
1962 Rover P4 80
2002 BMW 745i
2008 BMW Z4 2.5Si
Posted
Settled In
Been battling a bit of the dreaded man flu last couple of days, so not done as much as I'd of liked but still put in an effort.
Body filled and sanded the fibre glass patches in only two skims this time, must be getting better, lol.
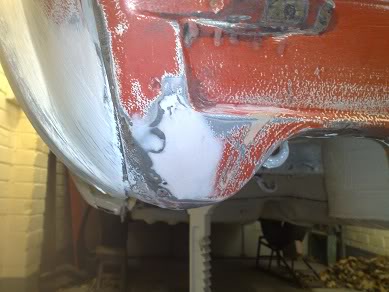
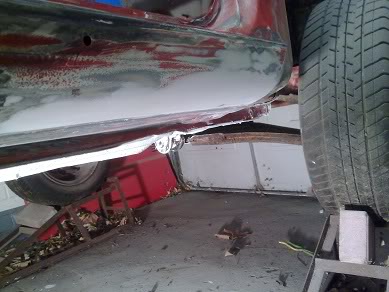
Then I set about getting two cotes of hammerite on the passenger sill, inner rear arch and the rear panel after I'd sanded off all the surface rust.

\/\/ The beast to be…!!! (loads of pics) \/\/
http://www.vwgolfmk1.org.uk/modules.php?name=Forums&file=viewtopic&t=95838&highlight=
SSC ELECTRICAL
(loads of pics) \/\/http://www.vwgolfmk1.org.uk/modules.php?name=Forums&file=viewtopic&t=95838&highlight=
SSC ELECTRICAL
Posted
Settled In
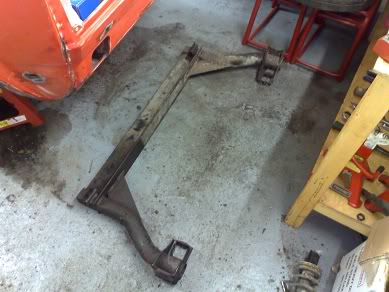
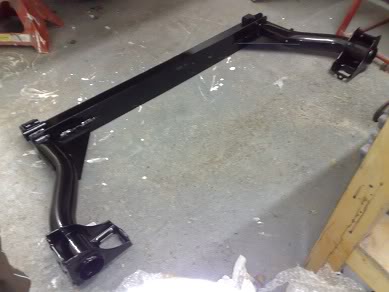
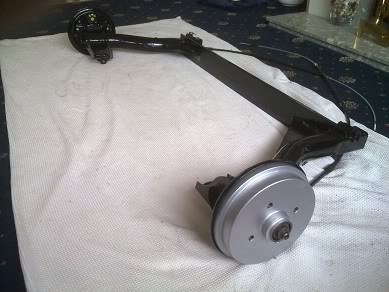
Been and had the trailing arm sand blasted and powder coated. I was planning on buying thing's new but a quick search of parts required to build the trialling arm back up, made me think twice..!! (plus some parts was gona be a pain to find).

Whilst I was dismantling I tried to save as much as poss. So I salvaged the Stub axle's, backplates and side mounting's.
I started stripping the backplates of shoes, cylinders, springs etc and separating the stub's. The side mountings still had the bushes and bolts in.. I squirted WD on, left for a bit then junior hacksawed the rubber lip off one end then they tapped out…
 . Then I went and got the salvaged parts sand blasted and powder coated.
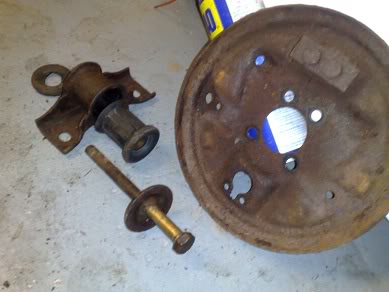

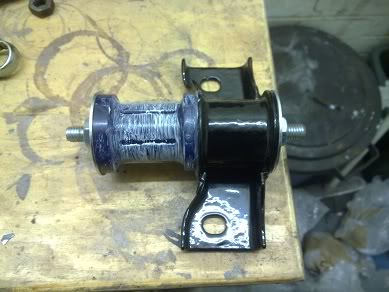
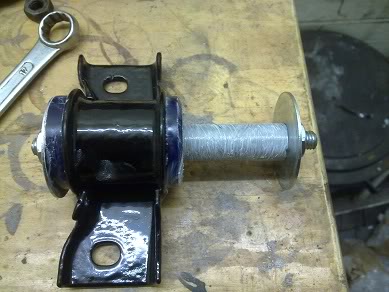
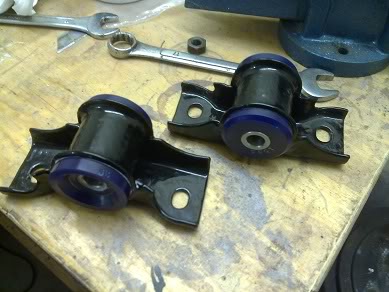
The time has come to buy the first new parts for my baby.. Rear side mount BUSHES..!!
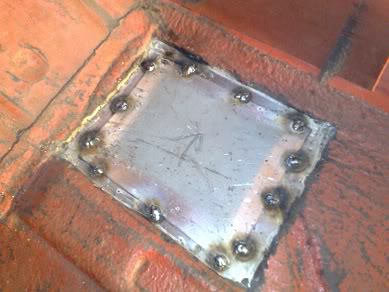
While I was waiting for the parts to be delivered I set about fixing the shared off chassis stub for side mount. (which I was dreading). Got given some helpful advice. (Thanx Hairyarse and jellybelly). My final plan was to drill the old stud out with a 20mm2 hole saw, grind down a big washer and use a M10 bolt then fiddle into position through the access point.
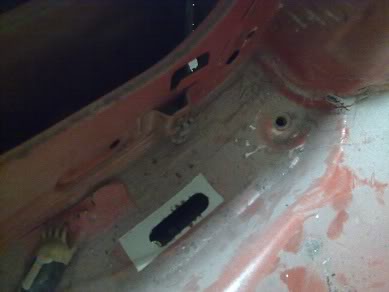
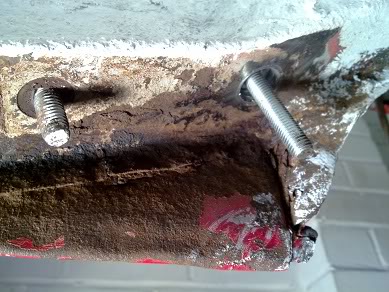
By this point my bushes had arrived, some more sound advice on which bushes to go for and fitting (thanx abfmk1) Using big washers and thread bar I squeezed the bushes into place then the metal tube. Went a lot easier than an anticipated.
\/\/ The beast to be…!!! (loads of pics) \/\/
http://www.vwgolfmk1.org.uk/modules.php?name=Forums&file=viewtopic&t=95838&highlight=
SSC ELECTRICAL
(loads of pics) \/\/http://www.vwgolfmk1.org.uk/modules.php?name=Forums&file=viewtopic&t=95838&highlight=
SSC ELECTRICAL
Posted
Settled In
Another hole dealt with..
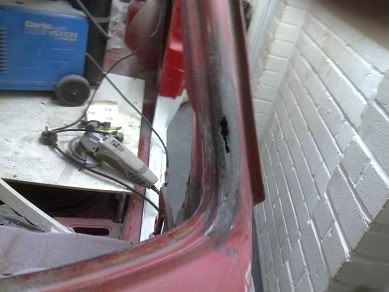
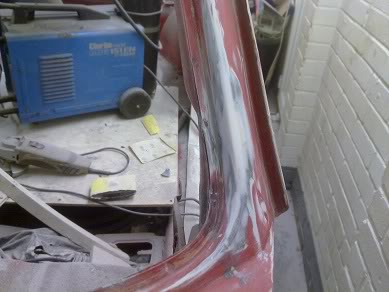
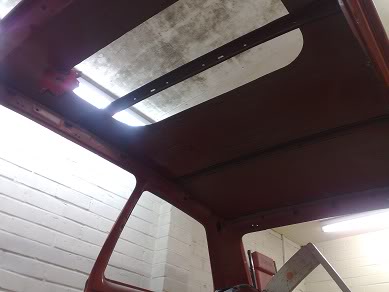
Bit's still not here… Gonna have to start that sunroof.. Every time I arc'ed up the welder it birds nest at the feed wheel. Bought new neck spring, problem sorted. I fitted the roof strut temporally to help get the curve. No more escapes left.. so made a start, bit of warping at the end but eh.! I want expecting perfection.
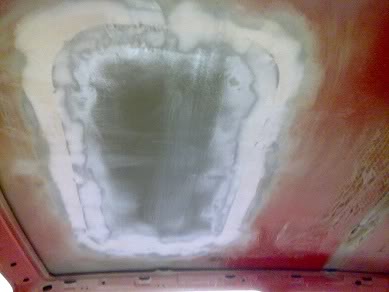
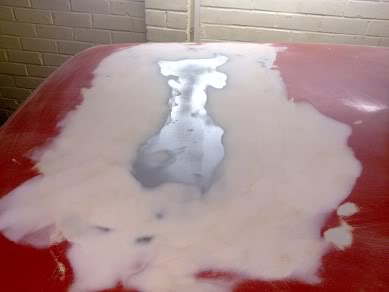
For some reason I fillered before I ground the welds down.. the heat made it bubble and bent the metal some more, I wasn't finished fillering so no prob there jst a lesson learnt.

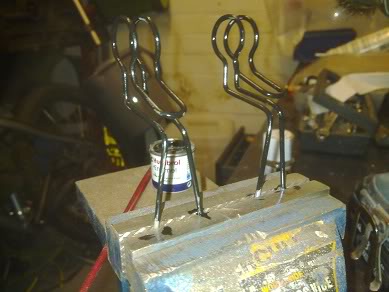
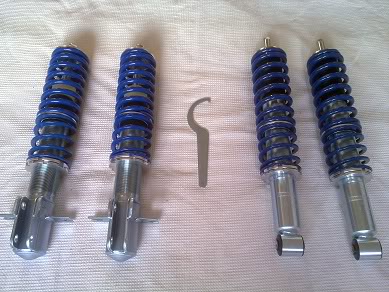
Finally my parts had come.. I realised there was a few parts I'd chucked.. push rods, wedges etc. Vw fixed us up and I got suspension top rubber rings and replaced all the nut's while I was there.
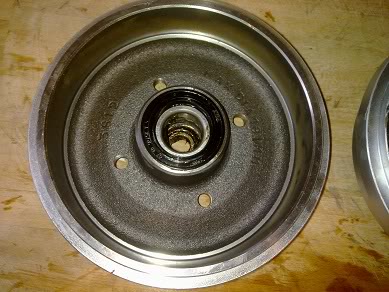
Got a good diagram off Vw of the hub and armed with haynes battled the shoes and springs. :starwars: Well.. first move was to trap my fingers by the hinged piece.
Then got the first shoe/spring set fitted to the backplate… and realised id fitted them to the wrong one. By now id sussed it tho. Then I bolted them to the trailing arm with stub axels.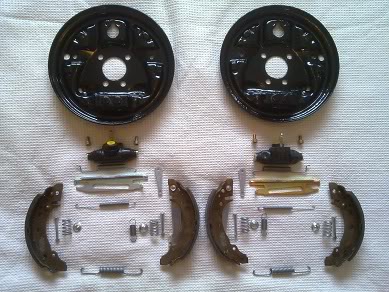
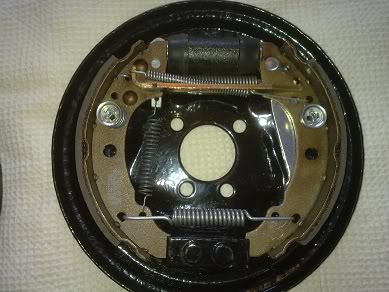
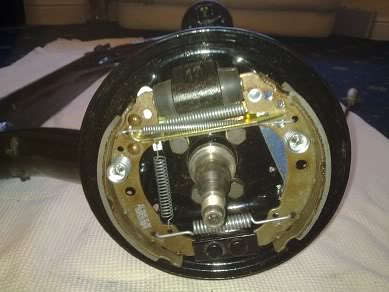
Sprayed my hubs and painted handbrake brackets during the battle..
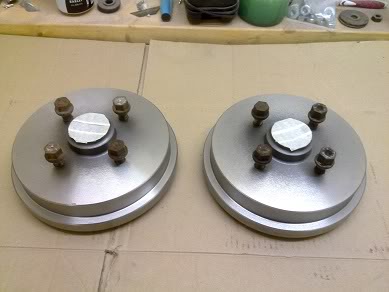
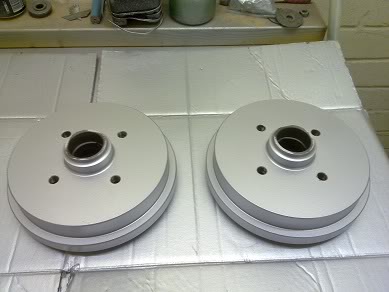
Now I started on fitting the bearings. I had the bearings in loob in the freezer to shrink over night, the next I put the hubs in the oven to hope make life easier…
But the paint went soft again which left finger prints. So had to spray again. Once dried bolted them to the axle.
\/\/ The beast to be…!!! (loads of pics) \/\/
http://www.vwgolfmk1.org.uk/modules.php?name=Forums&file=viewtopic&t=95838&highlight=
SSC ELECTRICAL
(loads of pics) \/\/http://www.vwgolfmk1.org.uk/modules.php?name=Forums&file=viewtopic&t=95838&highlight=
SSC ELECTRICAL
Posted
Local Hero
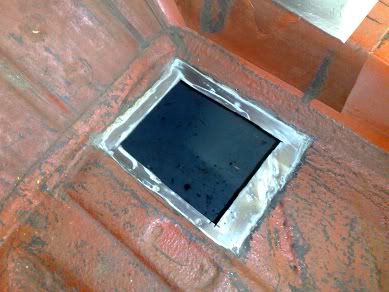
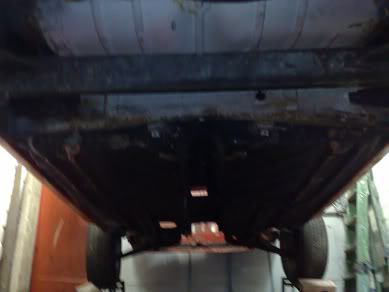
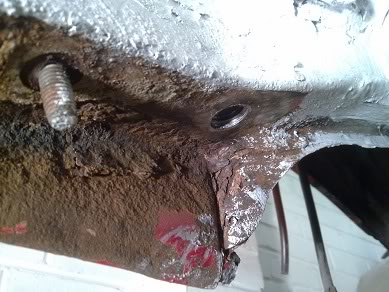
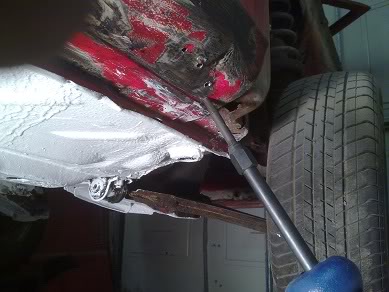
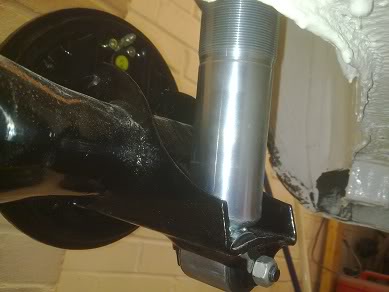
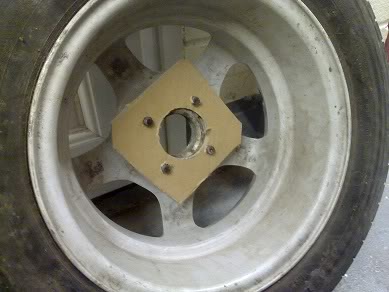
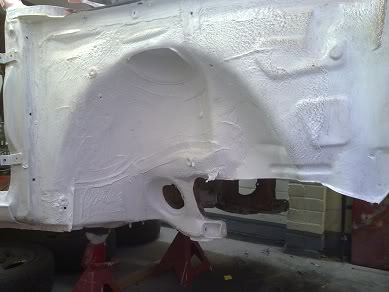
And you have a picture of the elusive access hole:

I have been after a picture of this for ages to see if it is worth me uncovering mine to replace a sheared bolt. :mrgreen:
What was covering the hole, or did you make that hole yourself?
My Build Thread
All My Build Photos - https://www.flickr.com/photos/pix-al/albums/72157622794406840
My other hobby - www.pix-al.co.uk
All My Build Photos - https://www.flickr.com/photos/pix-al/albums/72157622794406840
My other hobby - www.pix-al.co.uk
Posted
Settling In

nice work by the way shaun
Posted
Settled In
Yea.. thats right, jst have a tap about with a screw driver easy enough to find
, drilling out and getting the bolt in another story i went through a hand full of HSS bits and 3x hole saw's(slower speed is better).. Please be aware that the access hole so informed is only on 3 door shell's.Thanx Shaun
\/\/ The beast to be…!!! (loads of pics) \/\/
http://www.vwgolfmk1.org.uk/modules.php?name=Forums&file=viewtopic&t=95838&highlight=
SSC ELECTRICAL
(loads of pics) \/\/http://www.vwgolfmk1.org.uk/modules.php?name=Forums&file=viewtopic&t=95838&highlight=
SSC ELECTRICAL
Posted
Settled In
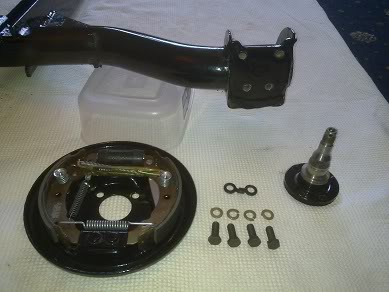
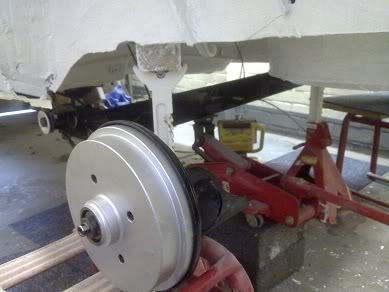
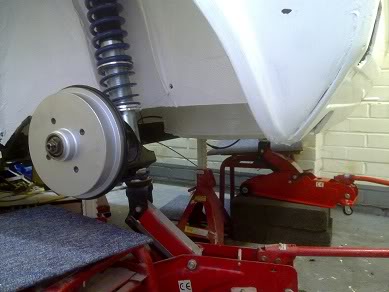
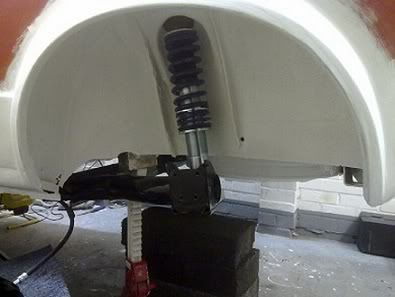
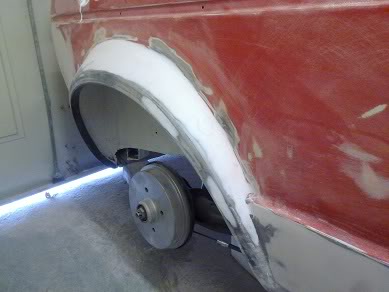
So giddy with excitement I bolted my side mount's(with new pivot bolts,
) offered the trailing arm into position and bolting it to the chassis before mounting the suspension leg and fixing the top mount.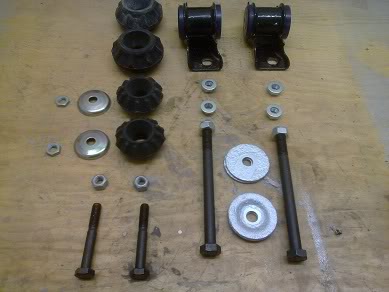


I'd not wound the c-spanner nut up enough and the backplate was in the way so took them off briefly..
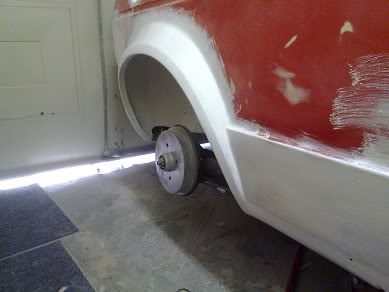
That issue resolved I tightened everything up and put the wheels on, I dint want the crap on the back or the wheel to mess my new hubs so I made cardboard washer's
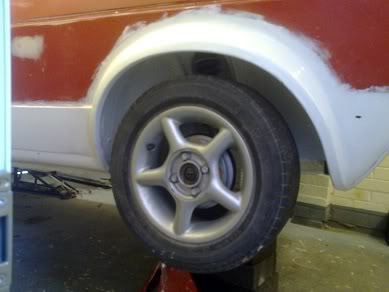
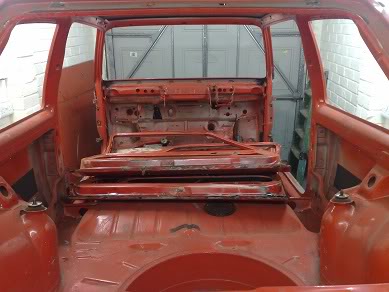
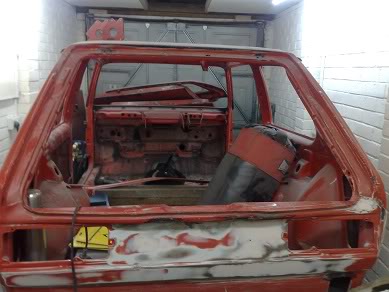
Bit of a faff getting her down but finally got her on the ground.. first time in a while
Then took her outside.. while I gave the garage a good sweep and put her in the other way..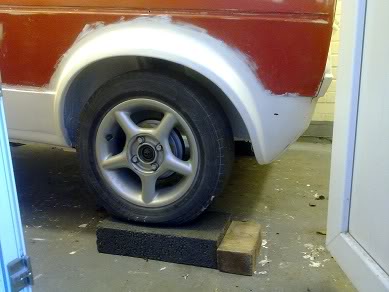
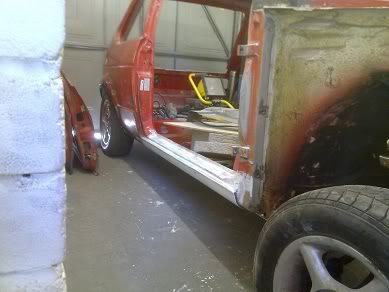
I then jacked up the front and took off the wheels in preparation for the next chapter…
\/\/ The beast to be…!!! (loads of pics) \/\/
http://www.vwgolfmk1.org.uk/modules.php?name=Forums&file=viewtopic&t=95838&highlight=
SSC ELECTRICAL
(loads of pics) \/\/http://www.vwgolfmk1.org.uk/modules.php?name=Forums&file=viewtopic&t=95838&highlight=
SSC ELECTRICAL
Posted
Settled In
Posted
Local Hero
foxy
p.s its hard work reading this as i have to scroll left and right al the time lol im just lazy
foxy
Posted
Settled In
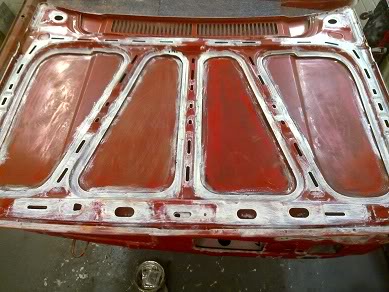
Now she's turned round i'm using the bonet as work area to sort the doors etc. So getting stuck into them for a few day's.
If it's easier for people to read i'll keep the txt small.? I'm always zooming in and out to fit txt on a screen 10ft away, (Ctrl+Scrawl or +and -)
Thanx Shaun
\/\/ The beast to be…!!! (loads of pics) \/\/
http://www.vwgolfmk1.org.uk/modules.php?name=Forums&file=viewtopic&t=95838&highlight=
SSC ELECTRICAL
(loads of pics) \/\/http://www.vwgolfmk1.org.uk/modules.php?name=Forums&file=viewtopic&t=95838&highlight=
SSC ELECTRICAL
Posted
Settled In
Got the bulk done in a couple of coats of filler but the sill part and panel above took abit more time to get good.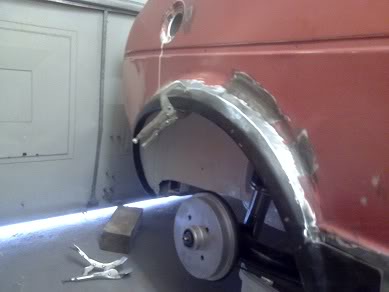
Had a few dents on the sill I sorted but never took any pic's.
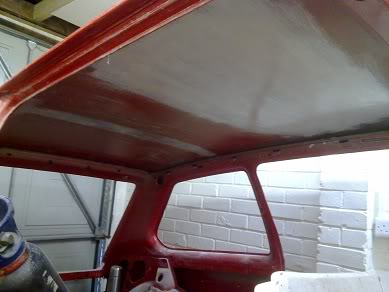
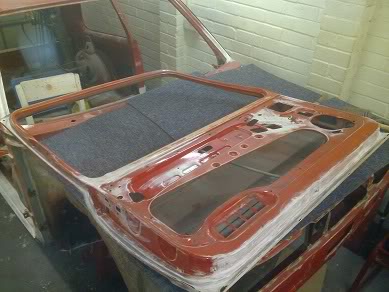
I'd welded the sun roof up so I could add the front roof brace and because some yobs had jumped on the roof the rear one was bent. I sourced a pair a while ago, I prepped these and the roof and stuck into position with some "tiger seal"and put a tack on either end.

I cleaned and painted the drivers front arch at this point.
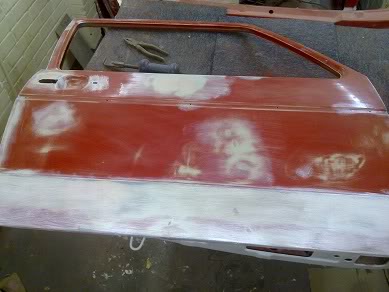
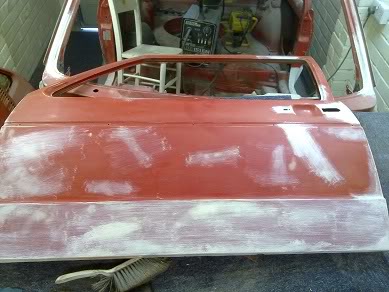
Now I can use the bonnet area as a work bench. I made a start prepping one of the doors.
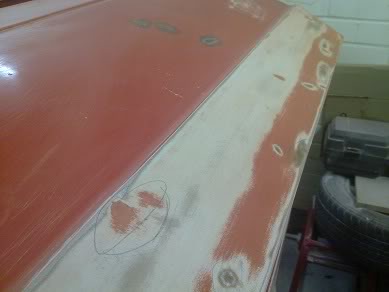
Then I moved onto the tailgate which was badly damaged, drivers side. I pulled it out some more(the big holes are from previous repair) And reconstructed a new corner which feels/looks pretty close.. see what the lines are like when fitted. While I was working on this I decided to get rid of the badge holes, which turned out to be nearly as much a pain as the other side.
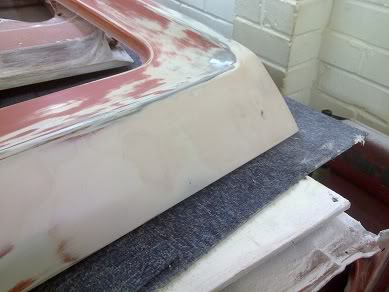
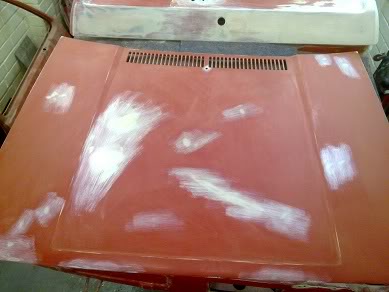
Now it was the bonnets turn which was abit swayey(yobs again I suppose) tried to straighten best as poss then a few marks I tried to make disappear.. hopefully it wont look too bad.
And last but not least the other door. By this point i'd leant to put the filler in front of the blower… made it easy to work with and go off in 5 min's or so.
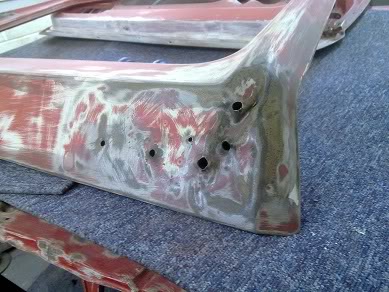
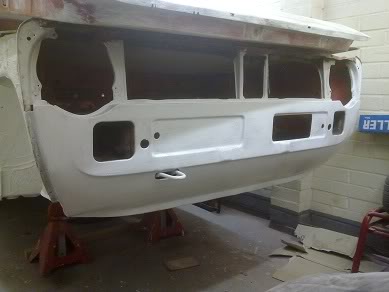
Hopefully the last of the filler-sand-filler-sand-filler-sand…. the front valence.!
Want in too bad shape the bottom corners where pretty much gone and on the left hand side was a big dent, See what it looks like when I get wings on.
\/\/ The beast to be…!!! (loads of pics) \/\/
http://www.vwgolfmk1.org.uk/modules.php?name=Forums&file=viewtopic&t=95838&highlight=
SSC ELECTRICAL
(loads of pics) \/\/http://www.vwgolfmk1.org.uk/modules.php?name=Forums&file=viewtopic&t=95838&highlight=
SSC ELECTRICAL
Posted
Local Hero
My Build Thread
All My Build Photos - https://www.flickr.com/photos/pix-al/albums/72157622794406840
My other hobby - www.pix-al.co.uk
All My Build Photos - https://www.flickr.com/photos/pix-al/albums/72157622794406840
My other hobby - www.pix-al.co.uk
Posted
Settled In
\/\/ The beast to be…!!! (loads of pics) \/\/
http://www.vwgolfmk1.org.uk/modules.php?name=Forums&file=viewtopic&t=95838&highlight=
SSC ELECTRICAL
(loads of pics) \/\/http://www.vwgolfmk1.org.uk/modules.php?name=Forums&file=viewtopic&t=95838&highlight=
SSC ELECTRICAL
Posted
Settled In
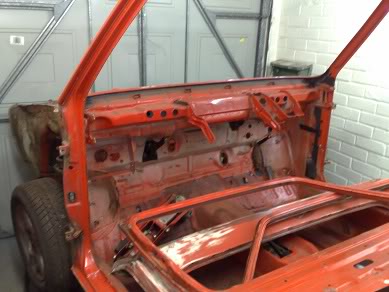
Since then i'v mainly been on a fact finding mission, now I know what engine i'm using..
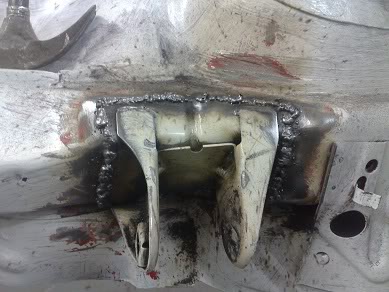
I did however move my engine mount..
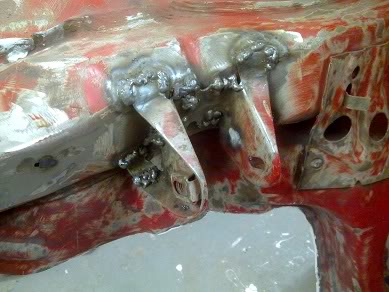
Not at all happy with it… so I decided to try again with a proper jobby(crazyquiffs) with chassis behind so I could weld it over as a plate..

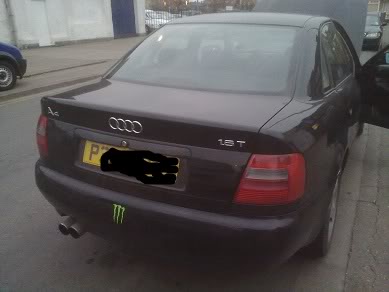
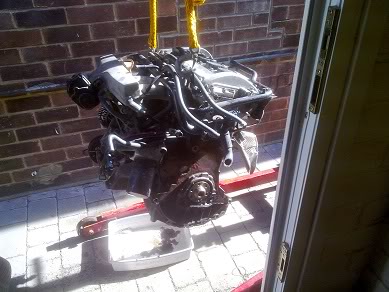
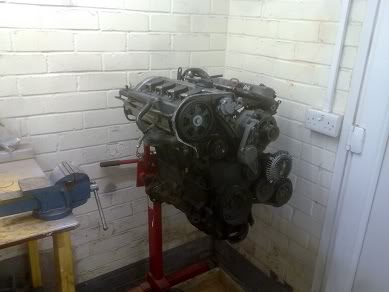
I'v spent the last couple of days removing the engine out the A4..
With only a bullet point list from Haynes of thing's I had no knowledge of, I started to unbolt and unclip everything in view.. I bought a tipex pen to mark everything up but it never even got used..
Everything done I stated the wresting match out the house with the crane followed by round 2 getting the engine out…
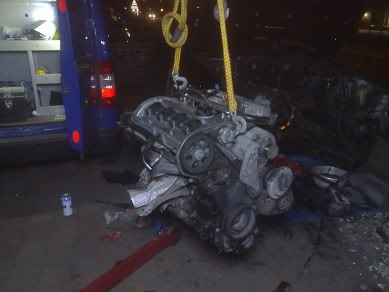
Manoeuvring into the garage was abit of a game as well.
\/\/ The beast to be…!!! (loads of pics) \/\/
http://www.vwgolfmk1.org.uk/modules.php?name=Forums&file=viewtopic&t=95838&highlight=
SSC ELECTRICAL
(loads of pics) \/\/http://www.vwgolfmk1.org.uk/modules.php?name=Forums&file=viewtopic&t=95838&highlight=
SSC ELECTRICAL
Posted

Settled In
Good times!
Al
1979 S1 MK1 Golf L FOR SALE! http://www.vwgolfmk1.org.uk/modules.php?name=Forums&file=viewtopic&t=101471
1970 VW Beetle 1600 Twin 34 ICT\'s - Betty
1973 Marathon Beetle - The Moll\'s
1970 VW Beetle 1600 Twin 34 ICT\'s - Betty
1973 Marathon Beetle - The Moll\'s
Posted

Settling In
Posted
Settled In
84 Driver resto, KR turned AEB conversion
I'v been on the blower to a few breakers trying to sauce parts and scouring fleabay also been in touch with crazyquifs which amounted to hell of a lot more than expected but a lot of those part's I need never the less…
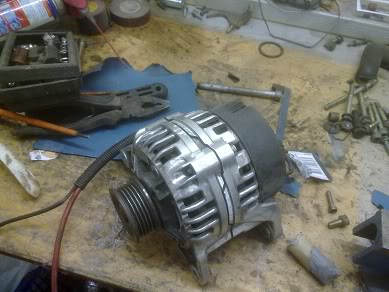
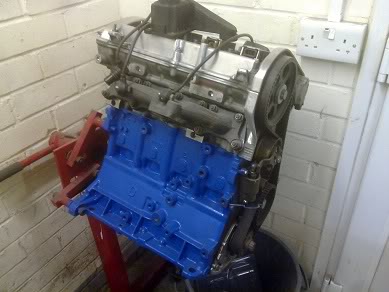
So to keep me occupied I made a start polishing cam cover and alternator.

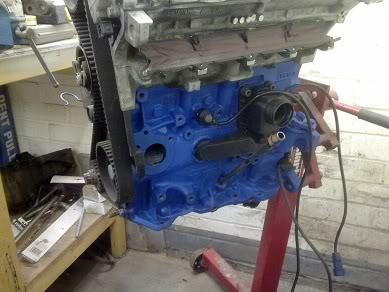
Then painted the bottom block blue.
And sanded the shell down ready for primer, which is my next task..

\/\/ The beast to be…!!! (loads of pics) \/\/
http://www.vwgolfmk1.org.uk/modules.php?name=Forums&file=viewtopic&t=95838&highlight=
SSC ELECTRICAL
(loads of pics) \/\/http://www.vwgolfmk1.org.uk/modules.php?name=Forums&file=viewtopic&t=95838&highlight=
SSC ELECTRICAL
Posted
Settled In
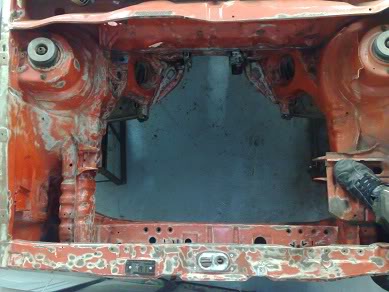
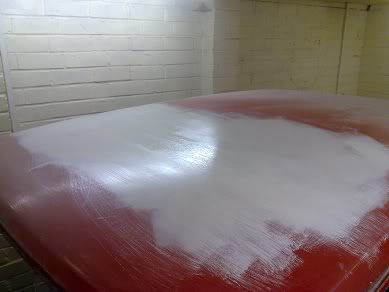
Been out 2day to learn how to spray..
I thought it wud be a good idea to suss it out in the engine bay.?
(thanx for tips 89clipper and Stupidstu)
I washed the bay down with thinners then masked surrounding area off, while drying. set the gun up which I could only get a 3-4 inch fan(guessing the paint was a bit thick for nozzle) but this turned out to be a good thing because it never over sprayed that much and I din't get as much excess on areas when getting the tight gaps..

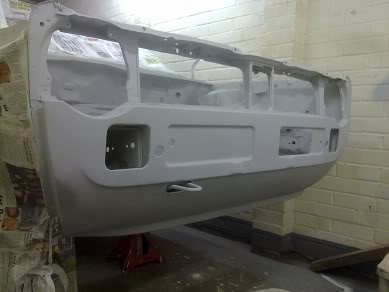
It safe to say i'm buzzing with the out come..
Hopefully get the rest of the shell done 2moz..
Which i wish I did in the same occasion because cleaning the gun was a bit boring, haha. Suppose it gives me time to reflect on what i'v learnt, lol..
\/\/ The beast to be…!!! (loads of pics) \/\/
http://www.vwgolfmk1.org.uk/modules.php?name=Forums&file=viewtopic&t=95838&highlight=
SSC ELECTRICAL
(loads of pics) \/\/http://www.vwgolfmk1.org.uk/modules.php?name=Forums&file=viewtopic&t=95838&highlight=
SSC ELECTRICAL
0 guests and 0 members have just viewed this: None.