


My Formel E Project..A45 MKJ

Posted
Settled In


My Formel E Project..A45 MKJ
So with a dry day for a change, a trip to B&Q for some polythene and double-sided tape, i got busy making some new membranes. You could see on the bottom of the old ones where the seal had been breached and the water had snuck through.

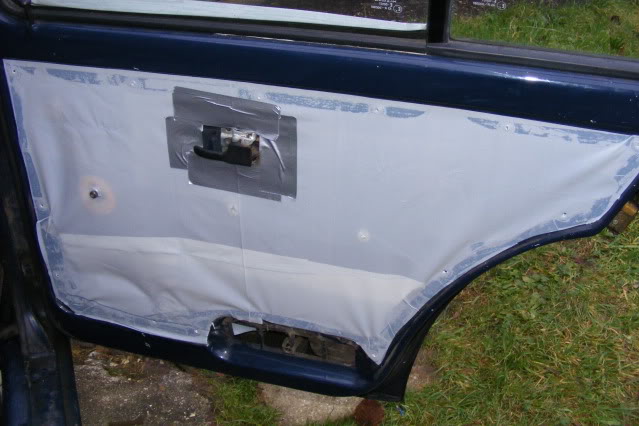
I havent tested it yet.. but think it's going to be ok- added extra on the inside to make a run off to the bottom of the door.
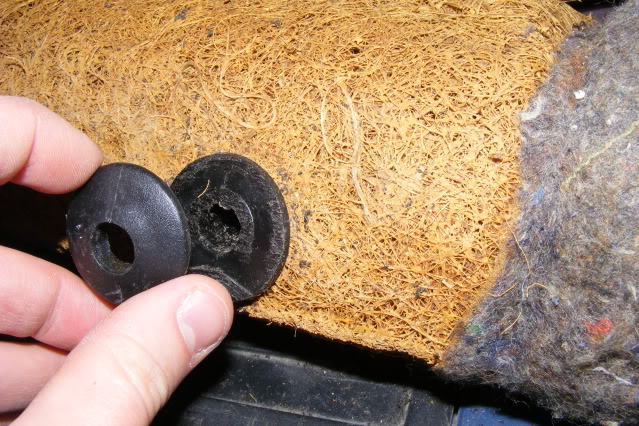
Spent an hour indoors this afternoon with my new craft knife (you can only buy pink ones FFS!!! ) and some gasket material i picked up on Ebay making a new gasket to go beneath the heatsheild and onto the inlet manifold.

I managed to get the old one off in one bit, so armed with a marker pen, i drew round it and got to work with my camp cutter.

Et voila.. looks pretty good, cut the centre hole with the knife and used a drill on the 4 outer holes.
Will try and get it fitted up tomorrow.

Posted
Settled In
at first i thought it was mine, same colour, 5 door, although your bay looks much fuller than mine

your daily runner, or you have another more modern car for that?
Posted
Settled In
I'm quite a fan of small engine cars.. although with a recent itch to go track daying i think i could succumbe to a Mk1/Mk2 Gti quite easily if it wasn't for the rape they call Tax, and petrol costs!
Posted
Settled In
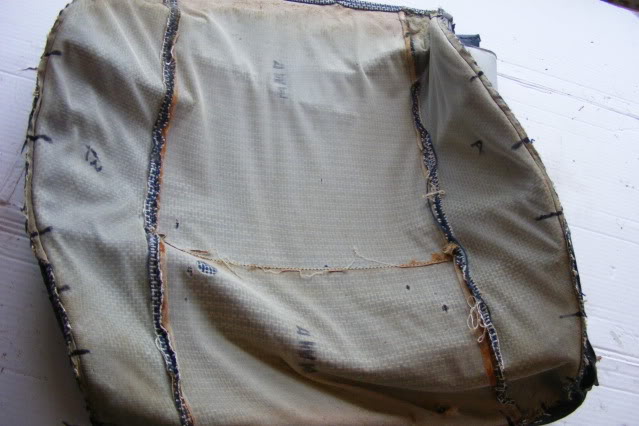
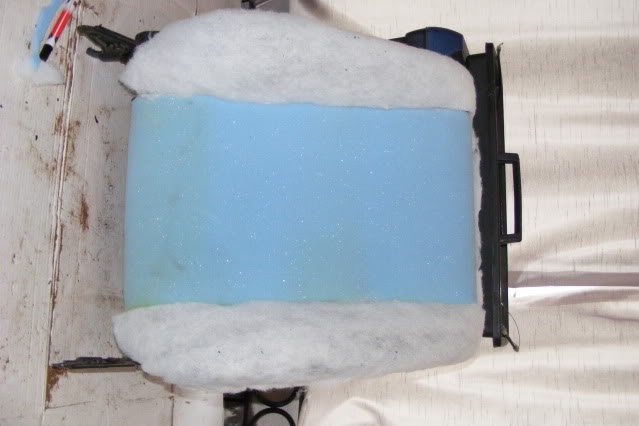
Yesterday saw the first steps in getting the seats recovered.
Having got the seats out the car, and turned my dining room table into a workbench, i started stripping the seats down to get the old covers off them.

Withe the seats apart, you can the get to the bits holding the covers on a lot easier - sorry, i do this on auto pilot now, so havent taken snaps.
This leave you with 2 rather worn seat covers, and our first continuity error! lol!

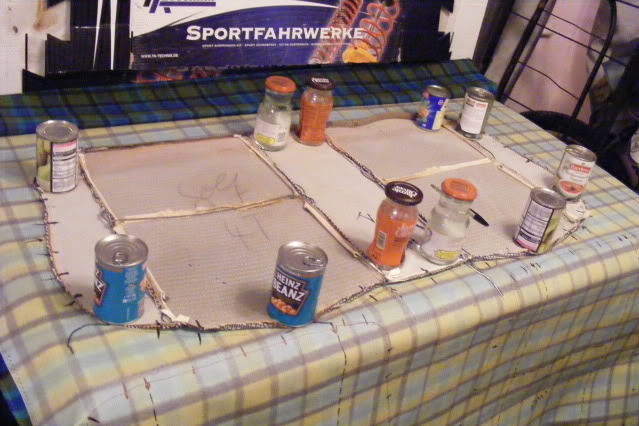
With both covers off i needed to start "check marking" so when i take the covers apart and copy the pattern onto the plaid material, i can then put them all back together in the right place!

Because i'm only going to change the patterned material over and keep the vinyl - mainly as the door cards are in good nick, and they match the vinyl - also, it will save me a few quid which is good!
Rolling the new material out on the "bench" i lay both the patterns for the bases out - fortunatley being able to see the pattern through the backing, so i could get them lined up - fingers crossed both seats will look the same, with the chequers in the same place, and the pattern following up the back rest.

You need something heavy to hold the pattern in place, to keep it flat, enter some cans out the cupboard!
With the pattern drawn, i got this..note the check marks which have been transfered to the new material. This material will be foam backed before it is sewn into the seat cover, and as the pattern is the continueous across the cover i didnt need to make seperate panels which has made it a tad easier.


Just the back rests and the back seat to do now!! Then will take them up to see my dad at the end of the month for a whiz on his sewing machine, and hey presto!
Thanks for reading.
Andy
Posted
Settling In

Did you say your keeping the headrests off? I always think it looks better with out.
Posted
Settled In
Looking forward to it.. should look pretty cool, and be different for sure!
Posted
Settled In
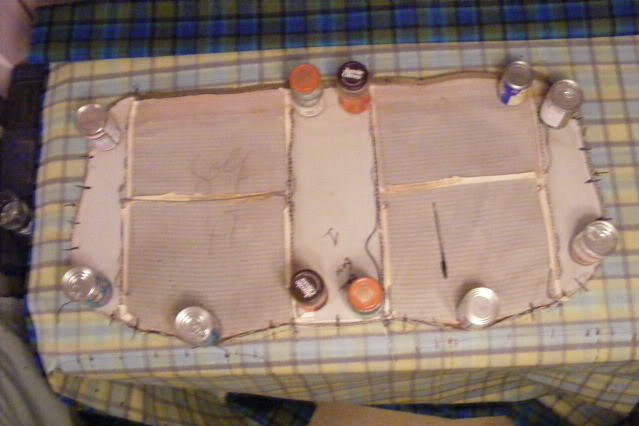
I raided the cupboards for weights again - and some old sauce jars filled with water.
I knew i had just enough material..just!

Managed to roll it all out, its 3 yards long.. heres what i have! (this is only the faces of the seats, so you would need more for a complete retrim)


Will get pictures up of the finished seats as soon as possible!
Thanks for reading. Andy
Posted
Settled In
So this is how it looks - the cover still needs taking back off for the foam to be padded out slightly, but i'm pretty chuffed with it, and think it'll look even better in the car. Let me know your thoughts!

Andy
Posted

Settling In
Mk1 Golf 1983 1.5 GX
Posted
Settled In

These had to be trimmed down - they do unclip, but i wanted the option to reused head rests in the future, although they wont secure with the spring clip anymore.
The hair on the seats were a bit worn and not as supportive as once could of been.. some foam soon sorted that though.

The bolster on this one was alright, so just a bit of wadding to pack out the new covers.
The top got an extra skim of foam to smooth it out.

And you've seen the seat with a cover on - although both fronts are now done and in the car, i'll hold these pics back till the rear is done too.. needless to say i'm pretty pleased with how it looks!
Posted

Old Timer


Fortunately my seat material is pretty good, however I have lost the backing foam / scrim. Which I intend to replace.
It had deteriorated and disappeared completely when putting them in the washing machine, very clean though and almost mint!
I have already aquired new front seat bases and backs from Germany some time ago. I also have a second set of seats with the same material for spares.
I will unpick, replace the foam and re-stitch, unless you can suggest a better method.
A few questions, what sort of sewing machine is required for this work. i.e. domestic or heavy duty?
What sort of thread is used for stitching.
Thanks in advance.
Posted
Settled In
Sewing machines - well the ideal is a "walking foot" industrial machine- i'm lucky as my dad as a few for work, so just get him to do it. You could potentially do it with a home machine, but its probably a bit trickier. Thread - pass, not sure to be honest, sorry!
DuncsMk1
- thanks for the kind words! Andy
Posted
Local Hero

Malcom - Have you seen my build thread? I did my covers myself, all with a regular sewing machine, pinched off my Mam!
Link in my Signature…
My Build Thread
All My Build Photos - https://www.flickr.com/photos/pix-al/albums/72157622794406840
My other hobby - www.pix-al.co.uk
All My Build Photos - https://www.flickr.com/photos/pix-al/albums/72157622794406840
My other hobby - www.pix-al.co.uk
Posted
Settled In
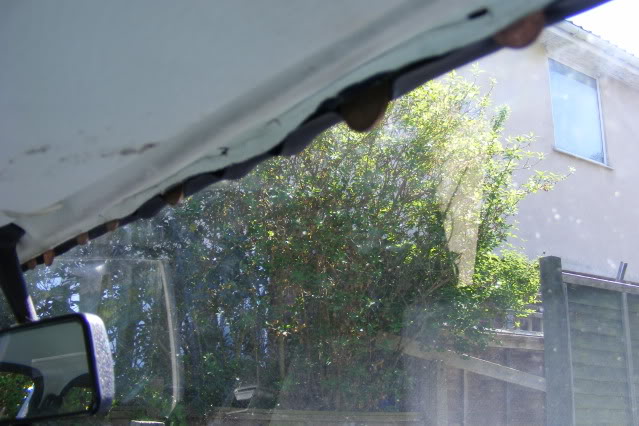

The screen came out nice and easy, prizing the rubber up with a taped up screwdriver and poking some loose change under the rubber, 50 p later and it pushes out..bingo!

The frame was great, no rust holes in sight, and only a couple of small scabs.. phew!


After polishing the windsreen frame up, and feeling all "autoglass" i set to work fitting the new one.
Apart from the rubber looking a bit different, i thought it would go smoothly. Turns out you cant fit a new screen on your own. So i waited till the evening and my good lady helped.. i ended up on the scuttle pushing it-and it was almost in - but not. We called it a night, and it stayed almost in for 2 days, i even drove it locally like it.
Then my mate came and gave me a hand Monday, he's a whizz at stuff like this, and with a dab of waxoil round the aperture we were ready to go!
It was all going so well….
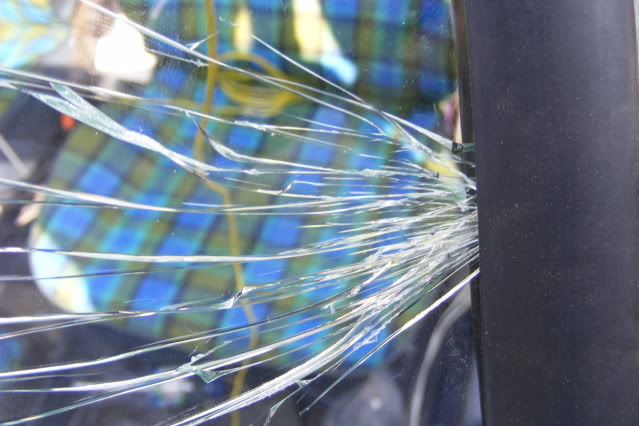


Arse! we got so close, but an over zealous push can only be responsible for this, whether it would of worked with the old rubber i'm unsure - in fact i'll never know! GGGRRRRR!
And with that we slipped the old screen back in like a glove!
The good news, you might be able to spy through the crack, is that my car now sports its full westy style interior..pics will follow!
Thanks for reading.
As for the sucess of fixing the water ingress, never have i found myself wishing for a downpour over a bank holiday weekend before!
Andy
Posted
Old Timer
The interior looks awesome btw! Shame about the windscreen but good job you work in the right place. Glad to see there is no bad rust on it and hope its solved your problem!!
Can't wait to see this again at the next meet!
Rich
Posted
Settled In
Posted
Settled In
Best of luck with it and keep the updates coming, it motivates us all to get out and do something to ours!
My New Year's resolutions are: 1. Stop making lists. B. Be more consistent. 7. Learn to count.
Posted
Settled In
http://www.vwgolfmk1.o…viewtopic&p=680161#680161
Heres the last of the pictures


Then when this sells i can continue with this little peach.

Thanks for all your kind comments so far.. hopefully i will have another Mk1 soon, got a hankering for a GTi but got a Wedding to pay for

Andy
Posted
Settled In
Till the next time
Andy
0 guests and 0 members have just viewed this: None.