


Project BBQ aka Up the middle Finger! - Jins '83

Posted
#1075882
(In Topic #128769)
Settled In


Project BBQ aka Up the middle Finger! - Jins '83

Posted MAY 26 2010
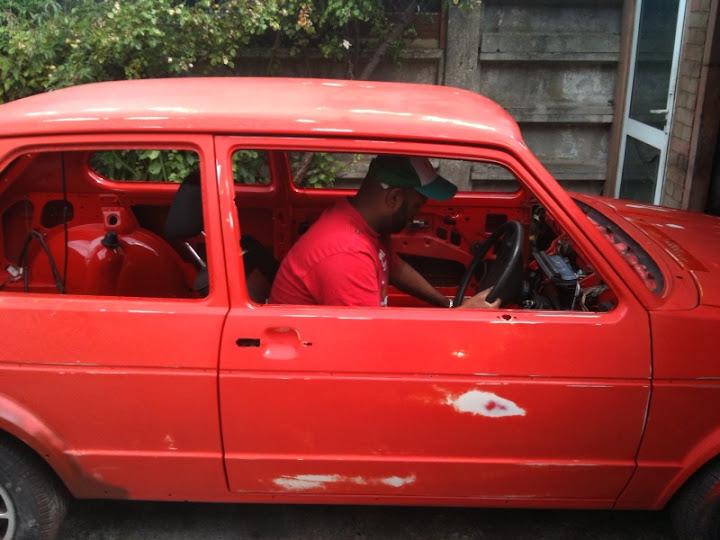
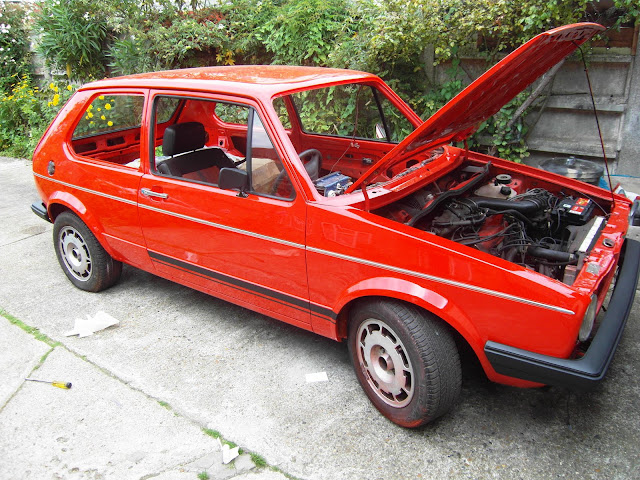
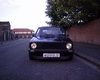
Thought i'd start documenting this as started to piece my old Mk1 up - Shes a 1800 8V '83 Golf GTI.
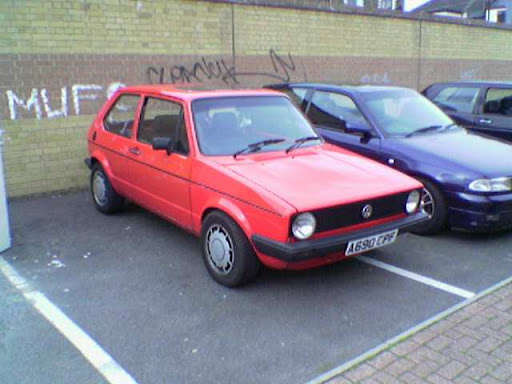
This was taken years ago, prob around 2002ish. Gonna have to bare with me on this as havent sorted any pics out on this yet and when i orig started the project, it was when you had to go get films developed so most pics lying around in boxes somewhere.
In 2003/4…Although fully road worthy, i decided i wanted to strip and lighten the motor so began the striping process and literally gutted the whole cars interior to just loom and steering column and began sanding down to bare metal. The exterior was stripped of everything inc windows and i was left with a shell.
Unfortunately it kinda stayed like this for a while, bought a corrado and then i ran out of funds and patience to get it sorted. Whilst i kept changing my daily driver + spunking money there, this kinda just got left behind. Got around to put the windows back quite a while later and started her up every now and gain to ensure still ticking - always started first time and just needed, but its been under shelter since really.
This was my first GTI and never wanted rid, so just kept it (even thought about trailering to my wedding-lol). She started my mk1 fetish and even doh everyone thought of her as a skip, threatened to use as a bbq - i knew one day i'd get round to sorting it. Well….the middle fingers certainly up this summer as shes coming back to play.
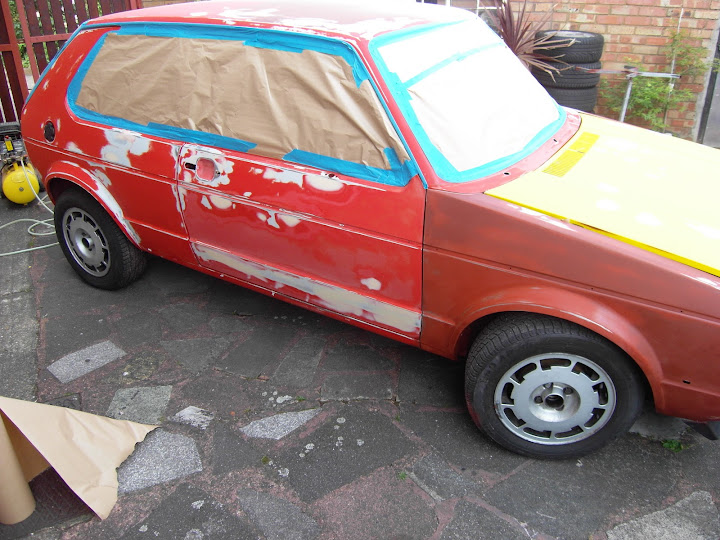
Time to get body work sorted and prep'd for a overdue respray!
Now its been off the road for years and the only panels that show deterioration is the wings, sodding pattern parts - but luckily i had some genuine ones spare. Needed a bit of stripping, small bit of welding and filler to get pucka st8, but my old mans a propa G with bodywork and got em looking nice. Chucked the patterns off and stuck em on and first thing you nottice is how well the gaps line up! FIRST TICK BOX COMPLETE
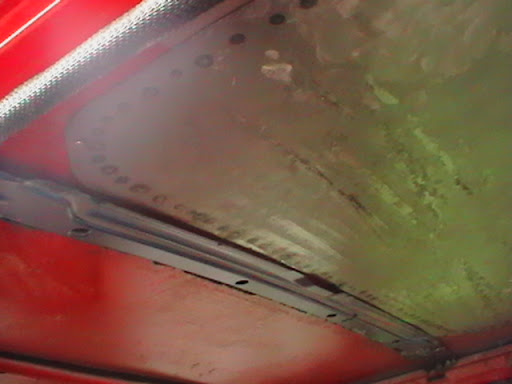
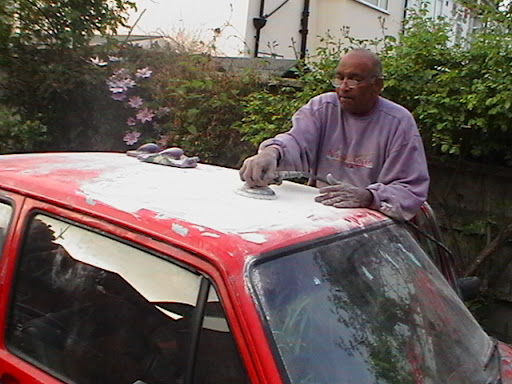
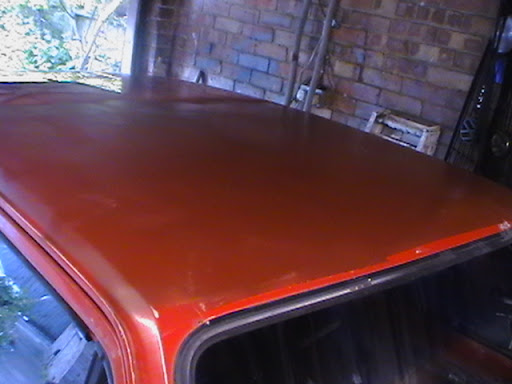
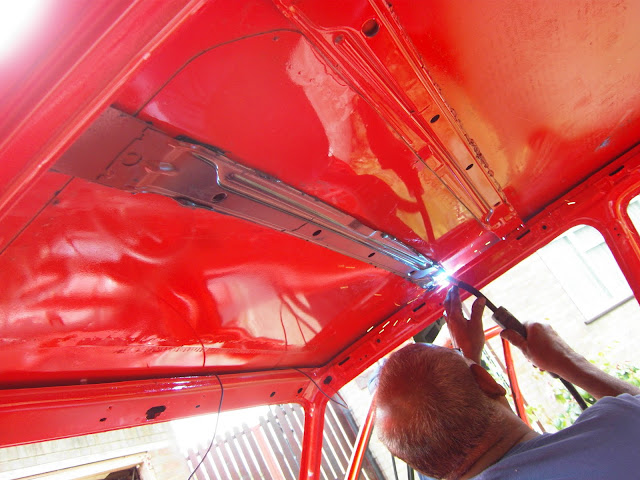
Next jobs the sunroof - somewhere along its life, an after-market one was put in and well, like most tin top owners…dont need/want one! Have taken the sunroof frame/glass out and i'm left with a nice big hole. First thing to do was make it structurally sound so a roof support beam or whatever the official name is has been removed from a mk2 and with a bit of moddin, will go across under the roof skin. You wont see this and could allow it, but putting one in as the orig would have been removed for the sunroof hole. Next is plating the roof, so bought a 2mm aluminium sheet and cut a template, leaving a cuppa cm all round. Theres a few diff ways to do this, but my old man suggested best to plate it from underneath so thats the route i'm taking - It will be tac welded from underneath and then from the top around existing hole.
Kinda where we are at the moment and i know useless thread without pics, but will get round to sticking some up soon. Bird keeps nicking the camera so thinks pics gonna be patchy on progress.
Still in two minds about this one, but think its gonna be a restoration project rather then a modding one so prob not evry1s cuppa tea.
Old Wing
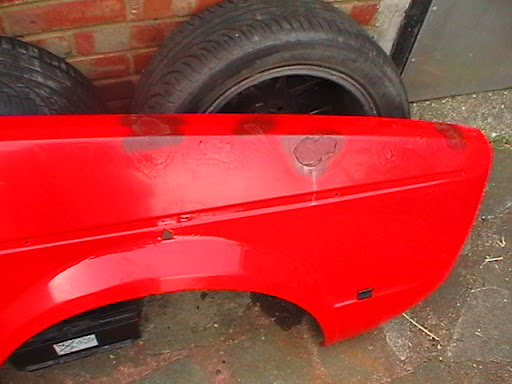
Replacement

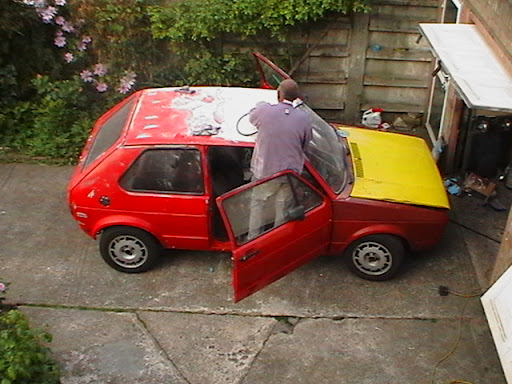
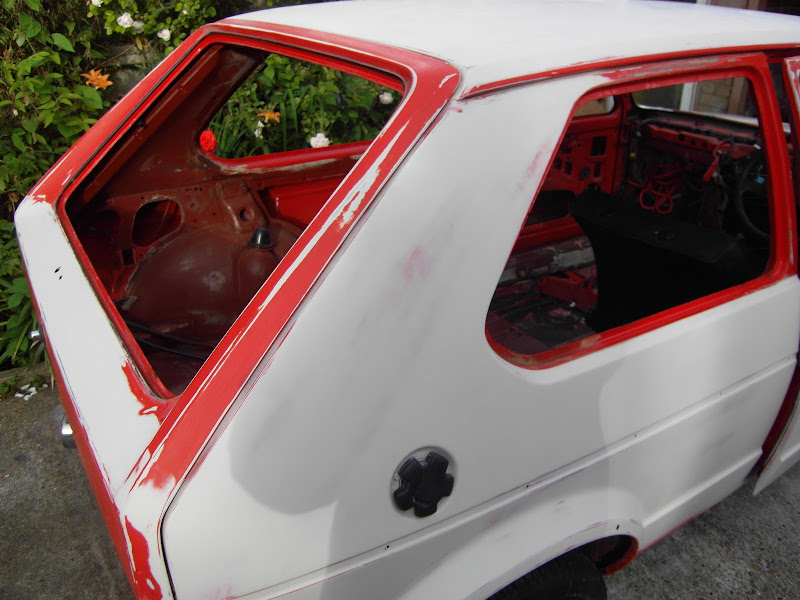
Sunroof Out
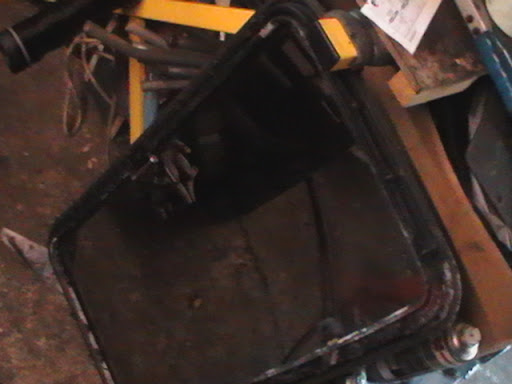
Plate tacked in from inside and new support courtesy of a donar mk2


Filled and smoothed top

Pops sanding
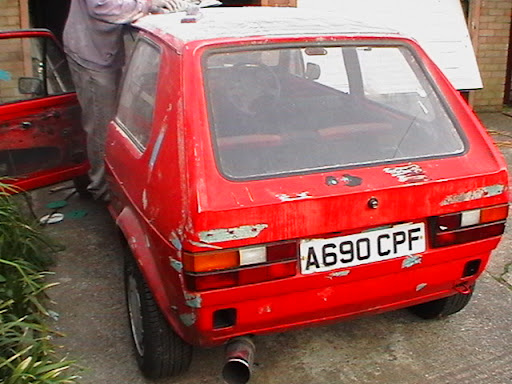
Quick wash and this is what were left with
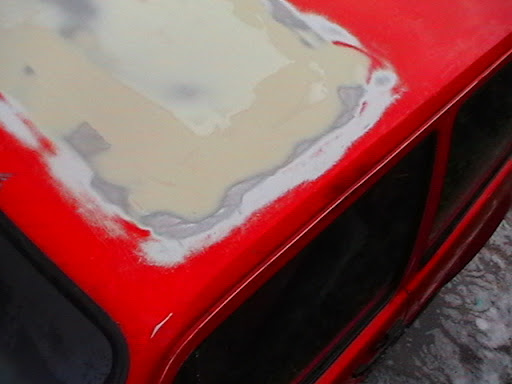


Might get another support whacked in just to strengthen up the roof a touch more too, buts its pretty solid as is. Will whack on a second layer of filler 2mrw & touch more sanding just to ensure the roof lines pucka st8, but looking like another bit checked off the list…eventually gonna smack some old skool vinyl over the roof anyways which will keep it feelin retro!
Posted 27 May 2010
Right, its another CHECK BOX as the roofs complete. One more skim of body filler and more sanding, then a quick coat of red oxide

Will get a touch of proxy resin and some more finer sanding later, when the rest of the motors gettin prep'd
I'm gona whack the seats out which is a 2min job and then need to do a bit of sanding on the visible panels which dont get covered by any of the interior trim. Only light sand needed, but touch of surface rust in places as orig sanding started 6years ago and didnt throw any paint on to protect it.
Posted 01 June 2010
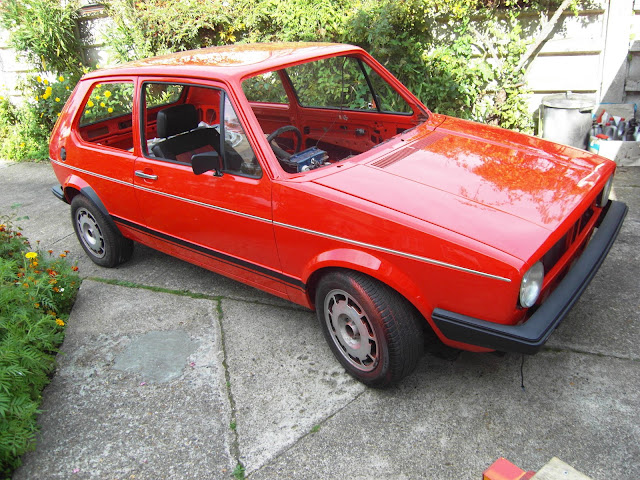
Lazy weekend on the motor really, but picked these up for her.
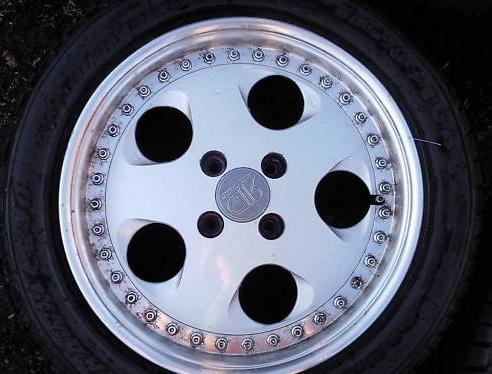
Bit different, but keeps to the look i want. Wish i knew more, but cant find any web info - there 15", 2piece 36 bolts, 4x100 & Japanese made - need to get a tyre off to measure width too but guessing there around the 7" mark. Markings underneth say LOVELARK (text) 'AMP or AMF' (Logo) 'JAPAN' (text).
Trial fitted on my other mk1 and OK (might need a spacer if i uprate the brakes). Will get em refurbed a lil later and should come up a treat (prob colour code or black the centres/polished lip)
Cuppa pics:

Posted 03 June 2010
Sanding of the bodys underway now. Slow progress really, but prep work always is.
Roofs looking so pucka now:

Prob be the box of sandpapaer once this is done!

Fuck u parking dent!

Randoms:


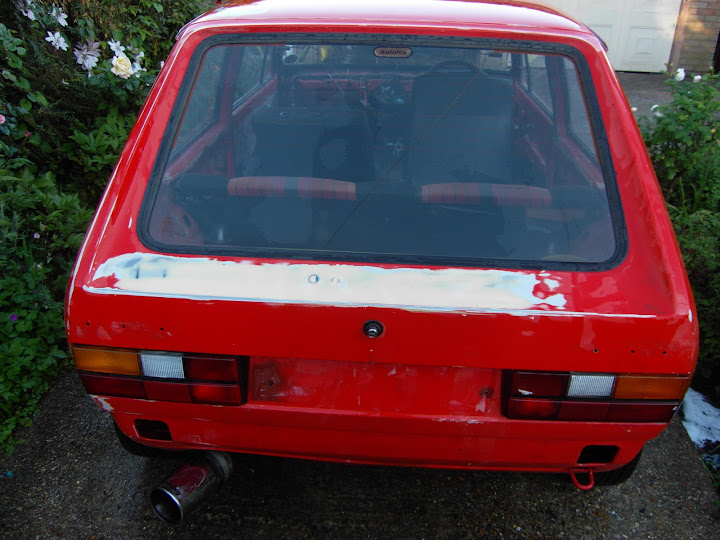
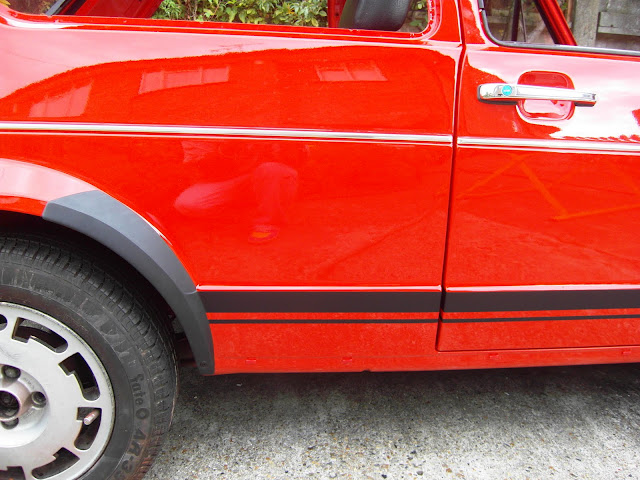
Quick wash and detrimmed a bit more


This bean can exhaust come on my cab orig…(good old max power 90's)…but think i'll get a stainy one once motors done

Might not look like much now (well its all dismantled now) but once sprayed up again, the roof rack should look preety pucka:

Posted 05 June 2010
Shed loads of sanding/filling been going on but….dinks/creases/inperfections slowly all coming out
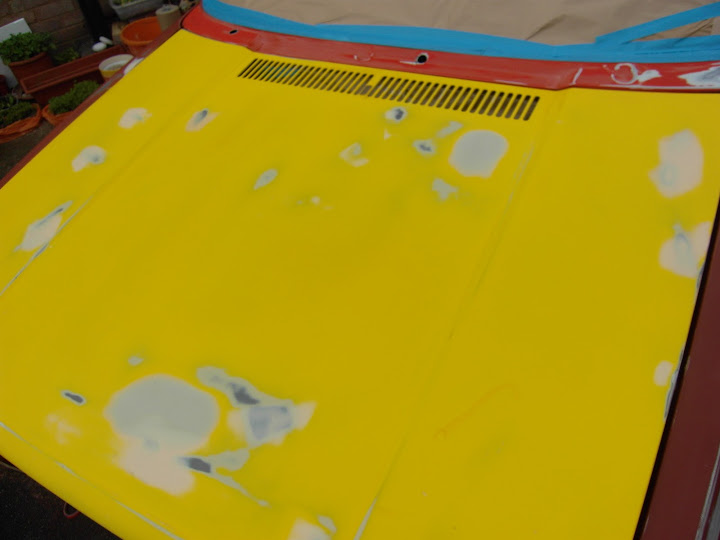
Now time for first coat of primer. This is all pre-prep so is gona get sanded but aim is get at least 2 coats done and smoothed before it hits the bodyshop.
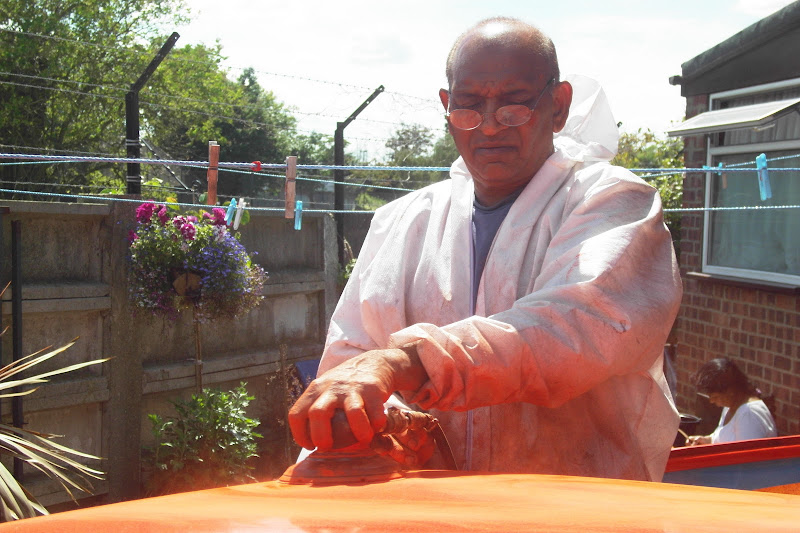
Old man showing me how its done, before i gots my go:
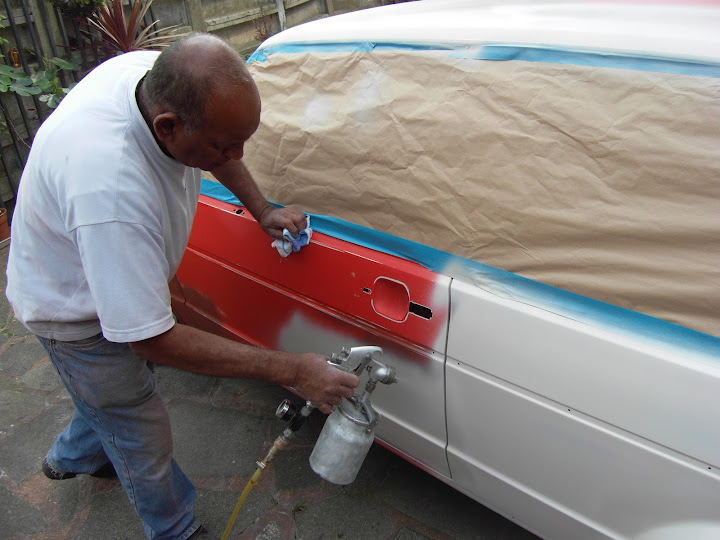
LOL - apparently i waste too much paint so he took it back off me for the otherside

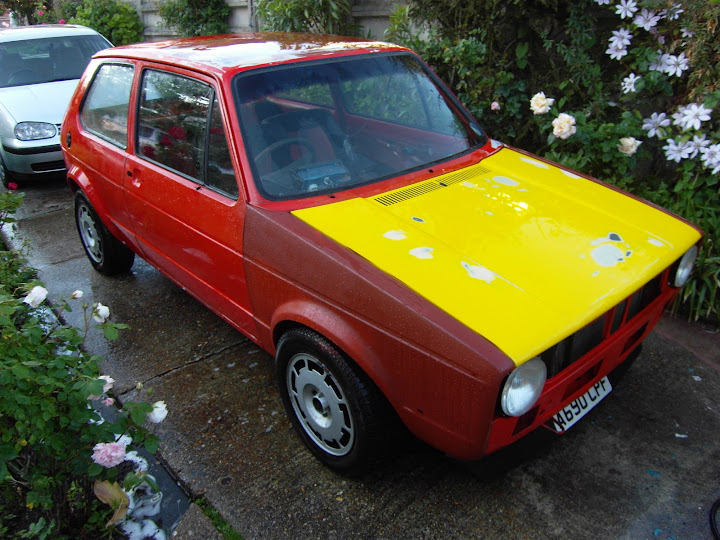
Always wanted to try the matt look:

Went on well really…few specs here and there, but dont matter as its only the first coat. Next steps windows all out and finishing the ext, before the inside gets the some TLC.
Posted 24 June 2010
Its been a cuppa weeks and loosing patience with this prep stage. Its looking like i've gone few steps back really but its slowly moving forward
Original aim for Inters in well out the window, hoping stay on track for ED38. Hopefully there will be some stock minters at GTI INT for some much needed inspiration!
Stripped all the windows out and started more flippin sanding :

Stripping the doors/boot/bonnet outs a minor….then the hours it takes to clean em up and remove stickers/gluey bits/gunk and general grime's a propa pisstake!

Touch of rust found under windscreen (prob why had a damp carpet after washing….always thought it was the door seals)

Cleaned and cut out offending area, plated/filled/primed

Interior needs some TLC, so touch more sanding and anti rust spray going on:


My dads still on it too, which keeps me in check to troop on with this….(he doesn't take any pics which is why u never see me in any)

Getting there (well kinda, this shit will need wet and dry before any paint goes on, but no undercoat rqd, as most of this when sparyed wont ever be seen anyways)(makes u think y the fook i'm doing it….me too)


Air conditioning is over-rated, its allot cooler if u just chuck the windows and doors off (Jokes…my neighbours think i'm building a rally car) :

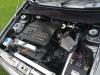
Mighty 8V….175K and still pulling hard. Probably do a stock rebuild and tidy bay a touch, but that's mileage down the pipeline:

Posted 30 June 2010
Been a productive week really, but been slack on posting picys. This is kinda where we was on Thurs/Fri of last week….first ups the inside.
Sandings finally sorted to a reasonable standard, so paints coming to play. First real bit of colour that's goin back on:

Technically this was prob all it needed (just the sides) as its gona all be covered but after it dried - was in two minds and then only gona do it one time so fuck it….more paint and convinced me old man to order another litre. So we ended up here:


So insides sorted, shunts sprayed and that left the doors and boot (inners):

Come Saturday, bits were dry so hung the doors/boot and bonnet back on. I had to do a few bits to the cabrio, so not much more done and Sunday was inters. Jokes drive on both way up & down and overdue long drive for the cabrio, but saw loads of pucka mk1s and managed to pick up some new door and boot seals (�100) + nice lil batch of stickers (Favs the Thundercats logo)
Best thing about summers gota be the long days. Means work on the car can stretch to 9ish without a prob…..so Monday got kinda bizzy:
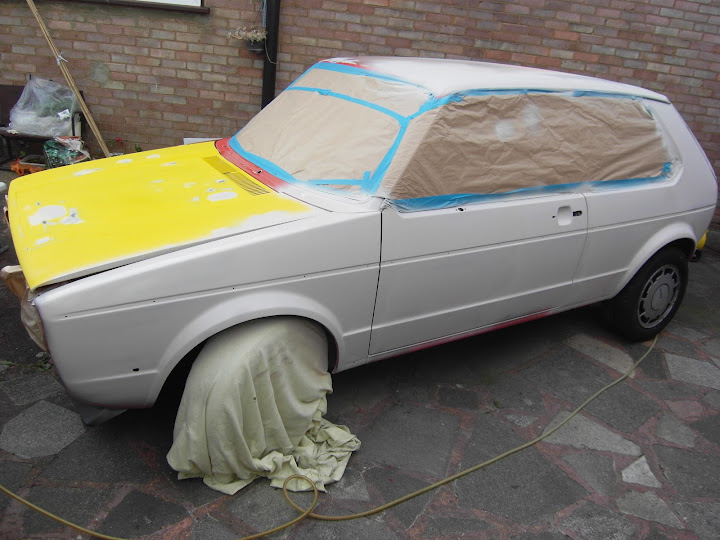
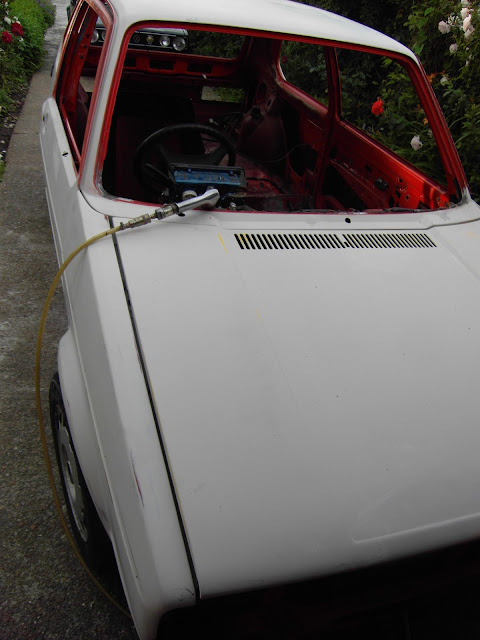
Outsides had another sand, lil wash and been masked up ready for a touch more paint:


It hasn't been one colour for over 10 years but guess what..


As nice as it is, gona give this a cuppa days to dry and soak some sun, before its getting its final rubdown. Some of u might think this is a waste of paint, but the more layers the better really….gona hopefully give a nice platform for the top coat. Enuff paint for 2 more coats and coz this is oil based paint, no lacquer needed.
Well thats where we are, hopefully the next shots will be in the paint shop. Wont be this weekend though as got other plans (cant get outa it…its first wedding ani ) but soon come….
Posted 14 July 2010
The cars had its final rubdown now (will stick a couple of pics up l8r) so it's all about getting a free slot with the body shop - I'm kinda hoping some point this weekend so i can stick about while they do it…..sure the sprayers polski, so just wanna ensure hes 75% sober before he starts the job (i'll give him a bottle of myself when he's done)
Drawn a little list of the bits I still need and its fooking expensive, but think I'll bite the bullet and just order em or will stall the build.
Just off the top of my head, here's the current shopping list (There is shed loads more):
Interior
� New Carpet - Sourced (Out of eBay Sale)
� New Door Cards Sourced (Out of eBay Sale)
� New Head Lining Sourced (Out of eBay Sale)
Exterior
� Front Bumper Sourced Euro Car Parts
� Rear Bumper Sourced Euro Car Parts
� Wing Mirrors Sourced Ebay
� New Grill On Special Order (Euro Car Parts)
� Chin Spoiler Sourced Ebay
� Arch Spats Sourced Big Boys Toys
� Side Trims Upper and Lower Kinda Sourced Big Boys Toys -On Order
� New Window Rubbers Sourced Ebay
� Chrome Handles
� Decals Rear Sourced VW Stickers.com
� Decals Side Sourced VW Stickers.com
Wheels
� Need a refurb - Who's silly cheap to do em?
� Need 2 x 175/50/15 tyres
Suspension
� In two minds, but have fresh AP Racing coilys I bought for my other one
� New Mounts Front/Rear
Brakes
� Need a 280mmm Calliper adaptor
� Discs/Pads
Zorst and Manifold
� EMP when funds allow
OMG, this is a fucking long list + it's not even a precise one ! Not even started on the engine!
Posted 17 July 2010
Eventful day today, but we'll get to that in a sec!
Earlier this week….Preety much the final rubdown and whoopy fucking doo

Gota say my old mans got bare patience…(prob why i never got kicked out my house)

Hmmm, my enthusiasm and me old mans kinda don't compare

So back to this morning…was up and about kinda early and was jammin watching a kung fu flick and me old man come in and says me cars booked in for 1 o'clock…..seeing as it had allready gone 10, and i still had to nip into Sainsburys to hand me notice in (long story…but been off since Nov…they been hassleing me to come back…so i thought fook em), but priorities first, pulled the motor out the garage…
Car needed its last few tweeks so touch more rubbing, old man spotted a small rust spot in the inner rear arch, so he had to work his magic.
Did my quitting and come back to finish up. Come 1' o'clock and were still at me house….old mans getting a cuppa calls from the bodyshop so its time to pack up and make moves.

Certainly been a while (bout 5years)… http://picasaweb.google.com/lh/photo/jJvPSDvpGg-v7pK_lBbuHg?feat=directlink
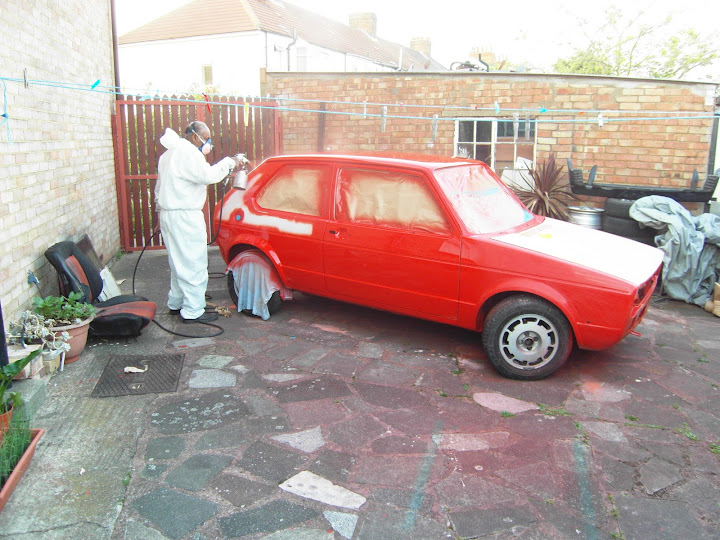
So works still not done for the day….we start getting car ready for paint


You can just about see my m8 Kin there with a watering can….hes watering the floor so we dont get any dust movement

Car getting degreased…


And this dudes Mr Paint (and hes perfectly sober all you polish sterotypists)

Last look i gets as they close the doors. Think my dads got a VIP pass or summin coz he gets access all areas
http://lh3.ggpht.com/_qRqkm5x6EEU/TEH12fusXiI/AAAAAAAACCc/h6DNFpvtx5E/s800/SDC12450.JPG
Sneaky peaky

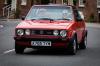
Bout a hour later and some cake and baking…..we gets this


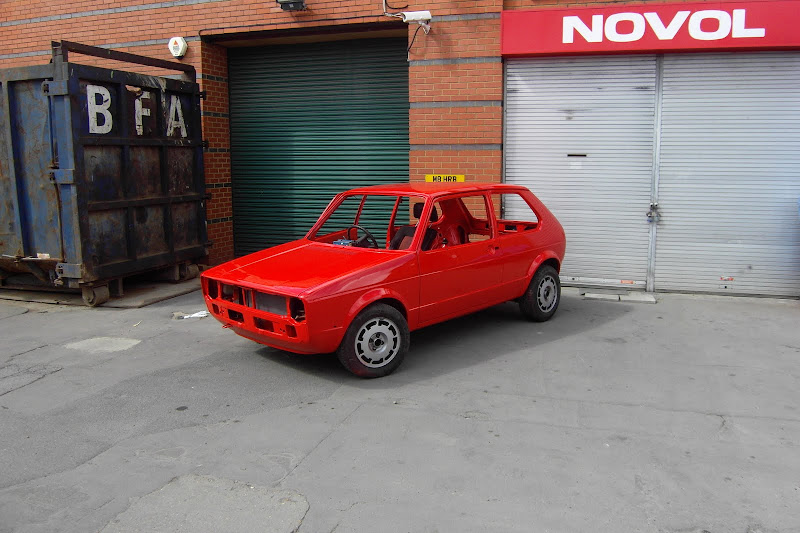


Gota say i'm inpressed and the paints pingin hard…maybey a touch too much as i can see a few imperfections in the body i couldn't see before (few lil creases in the bonnet, cuppa minute dinks in the bootlid, but i'm kinda fussy) Overall…considering shes born in 1983 and this has been a propa man in the shed 'built not bought' jobby…..i'm fucking over the moon with how shes come out!
Posted 18 July 2010
All about piecing it back together now - I could use all the old bits and have this on road ASAP, but i'm gonna be sourcing new bits, which will def slow build down…but should make it look allot minter in the long run. Priority now is getting new window seals and the headlining fitted so rear windows can go back in. Also keeping the rear tailgate OEM, so the black trim sticker needs to go on before the rear screen can go back in…stickers on route and if i cant find seals for a reasonable price in the next cuppa days, i'll pay the unreasonable �35 price tag for each window
Been years since I seen bits like the dashboard (and everything on it)…so hopefully its still all together (just gota find it all, which should be fun)
Home Again…


Posted 20 July 2010
…..Struck a deal with a fella and off down to Oxford later…..sourced brand new carpets/doorcards and headlining!!!
The wing mirrors are on order and the bumpers arrived yesterday….hopefully weather will hold out and I'll have another productive weekend ahead!
Posted 07 September 2010
Its been a while since getting the motor from the booth and progress been a lil slow, but were gettin there…
Front door trims back on, small bumpers


New goodies…


One more for luck
Flag mirrors and go fast stripes
rear sticker, screen, new rubbers…still gota fit the chrome window trim

chrome side strips(cough cough andy bbt…whens the bottom1s comming?) non gti rear spats, chromey handles
(tbh not keen on these, there the plastic chrome look thingy and might flip em for oem ones until some porker ones come my way)

Non gti spoiler

Went to get my rims furb'd but didnt happen as price bumped up silly tyres never been off and it turns out me rims are three piece and not two as i thought booosted

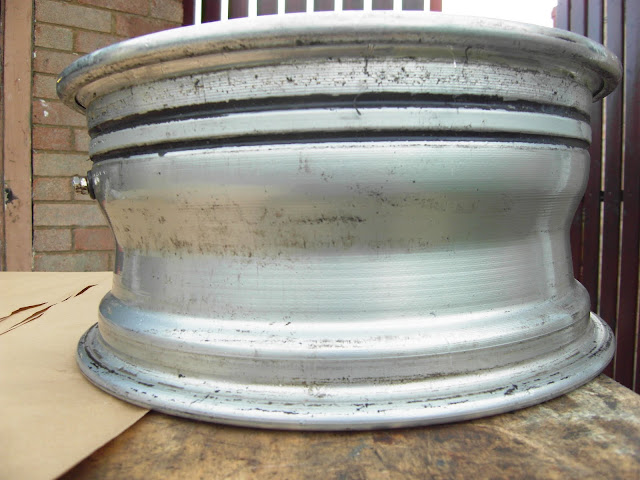
Plan is slam her…..have rims colour coded on face /polished lipys and stretchy tyre ….if poss wouldna mind some dish so on hunt for some new lips (shame there 36 bolt so bbs 1s wont fit )
Not the best update really but ordering and waiting for stuffs longing things…still i got a new pressy on route, 27 years later and this pups gonna get power steering…..well fingers crossed she does….should be fun lil conversion
TBC
Mk1'83 G60
Mk1'82 2.0L 8v
Mk1'93 GTI Sportline
Mk1'82 2.0L 8v
Mk1'93 GTI Sportline
Posted

COTM Team

chris

Chris

Posted

Settled In
Mk1GTi
Rallye Golf
Mk5 GTi
Mk7 GTD
Rallye Golf
Mk5 GTi
Mk7 GTD
Posted
Old Timer


Mk1 Golf Gti Abf conversion Project
Mk2 Golf Gti 16v
Mini Cooper S R53 (Daily)
Posted
Twitter Manager

Posted
Local Hero


SOUTHWEST Regional Host. Bristol Meet - 1st Friday of the month - Toby Carvery Bradely Stoke Bristol Bristol Region Facebook Group
1.8T CABBY
TINTOP THREAD (SOLD 2016) SPORTLINE THREAD (SOLD 2015) CLIPPER THREAD (SOLD 2012)
1.8T CABBY
TINTOP THREAD (SOLD 2016) SPORTLINE THREAD (SOLD 2015) CLIPPER THREAD (SOLD 2012)
Posted
Settled In

I'd like to get her road worthy by March for Ultimate Dubs (LOL original plan was ED38 of this year) which seems away off, but there's so much to do

Power steering is actually in now and works beautifully, but have a small niggle with the boss kit.

Once that's done, will bung up a guide on how it was done so hopefully someone else can give it ago!
Mk1'83 G60
Mk1'82 2.0L 8v
Mk1'93 GTI Sportline
Mk1'82 2.0L 8v
Mk1'93 GTI Sportline
Posted
Old Timer
Posted
Local Hero
Hats off to your dad. :notworthy:
Diesel Possessed
A97JCE
Feeby
A97JCE
Feeby
Posted
Life Member
Now I know why you needed the grille badge… its the crowning piece!!! :wink:

Posted
Settled In
Project snowballed from there really :mrgreen: Dano said
GOOD effort there Jinsta!
Now I know why you needed the grille badge… its the crowning piece!!! :wink:
Its def nice icing for the cake

Mk1'83 G60
Mk1'82 2.0L 8v
Mk1'93 GTI Sportline
Mk1'82 2.0L 8v
Mk1'93 GTI Sportline
Posted
Local Hero
I want to do the same to mine…..
Can i knock at ur dad's door :mrgreen:
Diesel Possessed
A97JCE
Feeby
A97JCE
Feeby
Posted
Settled In
Mk1'83 G60
Mk1'82 2.0L 8v
Mk1'93 GTI Sportline
Mk1'82 2.0L 8v
Mk1'93 GTI Sportline
Posted
Settled In
…but at �4bills(ish)(+Postage)…couldn't justify the price tag I looked about a bit to see if there were any alternatives and come across a chap selling a mk1 with esp fitted…he did it himself and said it was perfectly doo-able diy, essentially all that was needed was a Corsa B column and control unit…got me thinking it weren't the biggest investment if all went pears up…dash was already off…thought sod it…why not give it ago - touch of lux for the old girl
There's a few ways of doing this and after looking at both columns side by side…a bit of head scratching…the aim was to keep it a bolt in/out jobby! (Thought I'd write this up properly as will prob do the cabrio at some point next year)
To get started I needed:
Corsa B EPS column (Complete, so column, orig ECU module box, Corsa Universal Joint)
Corsa B EPS Controller - The box of tricks that controls it (�39) (EBay Item 170547231795 or equivalent)
Plastic bush
Corsa B Boss Kit
Aftermarket Steering Wheel
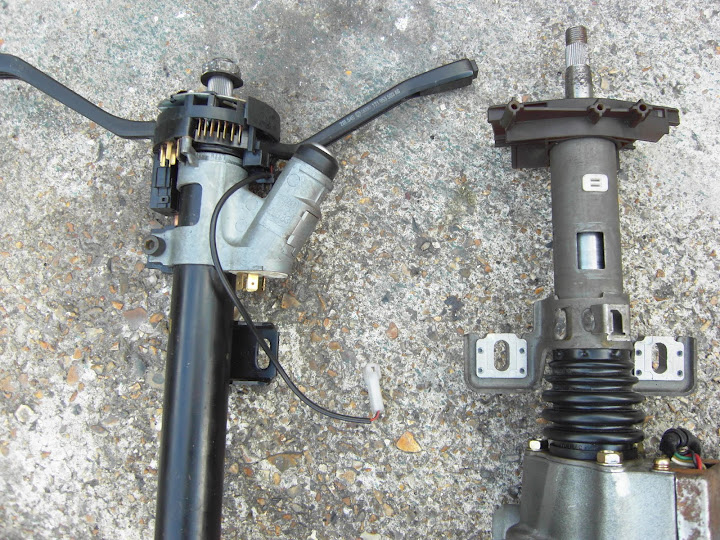
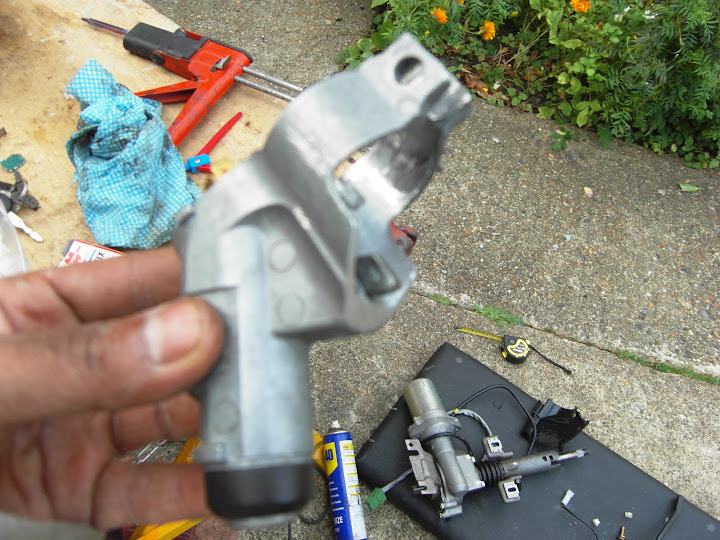
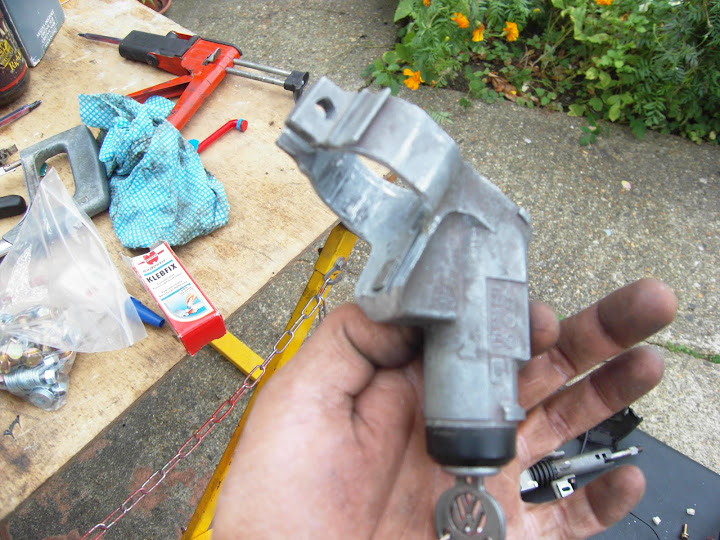
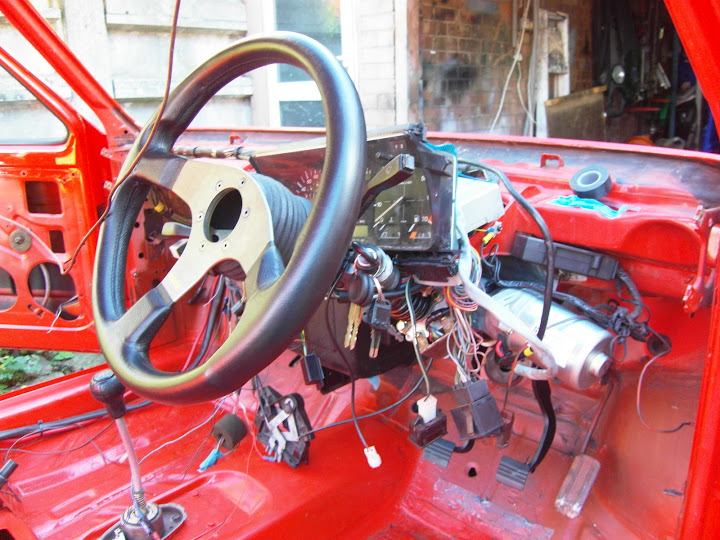
The dash is already off on mine, so the first thing to do was to remove the existing VW column. Most of its simple nut/bolt jobby, but you come across a couple bolts which are just rounded heads. (Never seen these before, but there some sort of torque snap off bolts…Have to chizzle a notch and work bolt out until loose enough for some pliers)
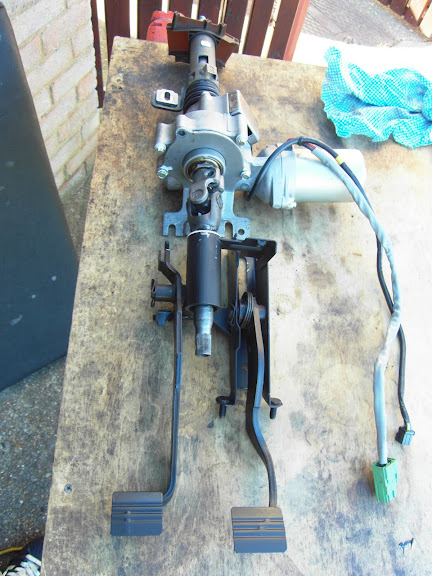
So with the column out….started work on the Corsa B column
- Stripped it back of its stalks and ignition barrel and lined it up with the old column. Said my goodbyes to the stock bits as this is the where the fun starts! (Mutilation begins)
This little bugger is the Corsa B steering universal joint…you might have this still connected to the other side too…mine was split…but wouldn't worry too much…..bout to make the first cut:
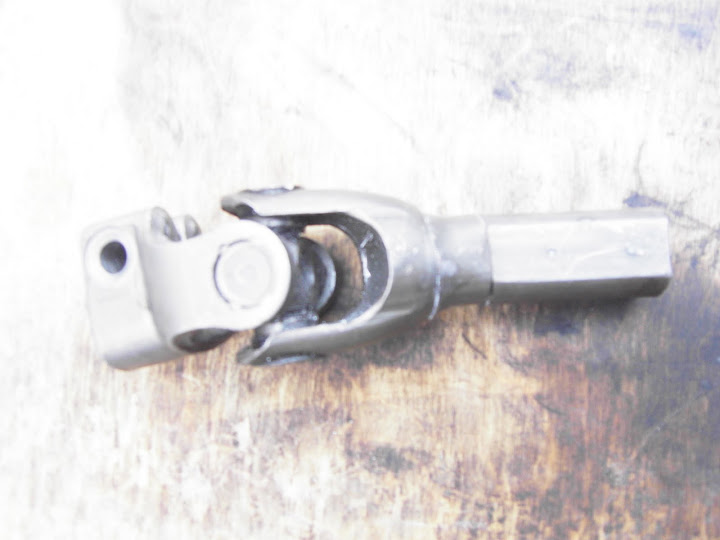
Chopped it back to its neck and left with this:


The next thing that needs chopping is the original VW shaft (It's literally the point of no return)- the length needed is 6.5inchs:


Sand back the end of the shaft, Slide this into your Corsa UJ end, give it one weld tack and then give the shaft a little tap with a hammer so its in perfectly straight….when your happy its square in - tig weld all the way round:


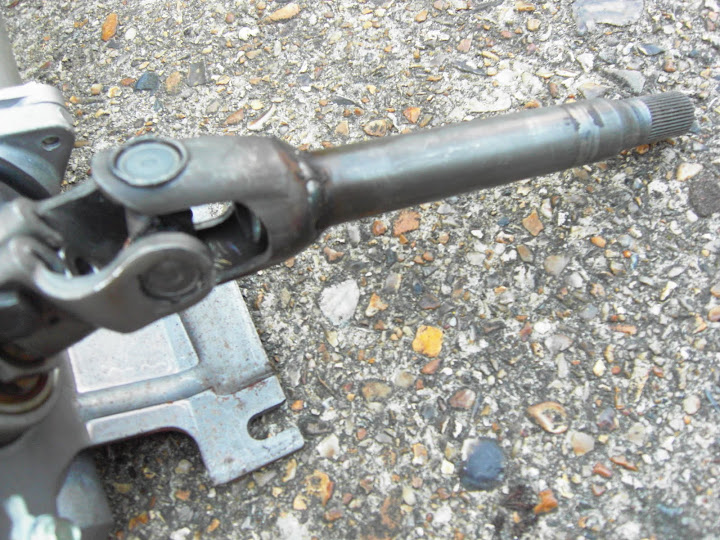
As it's the main weld - have to ensure it's done properly! (I cheated here and got my old man to weld it….done a quality job)…once you're done…your left with this:

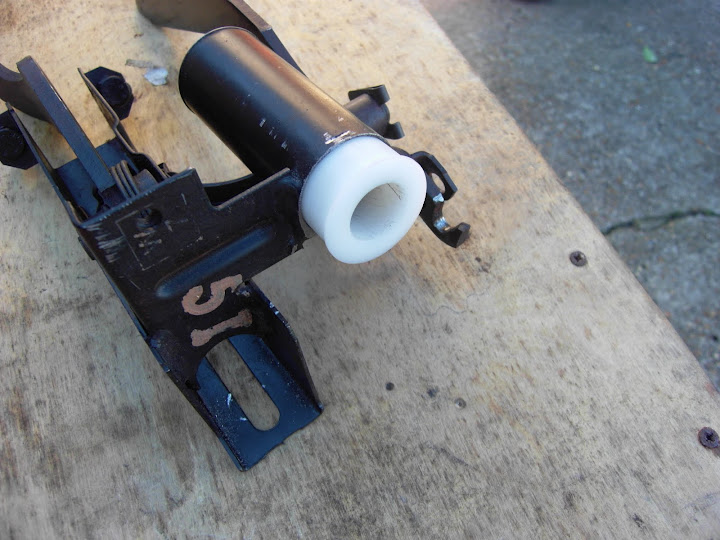
The next thing on the chopping block is the old column - The cut is going to be in line with the plate factory welded on its side…the pic bellow better explains what I mean:

You'll notice the bottom of the original column has a bearing in place to ensure smooth movement of the shaft and keep it central. The top of our newly shortened shaft also needs something……so had this plastic bush made:

Now the above bush was made for us by a local Mechanical Engineer who's a family friend. I have no idea who else does them but there's probably loads of companies/firms who could knock one up - just take the top half of the column you chopped along with shaft so they have the exact measurements to play with.
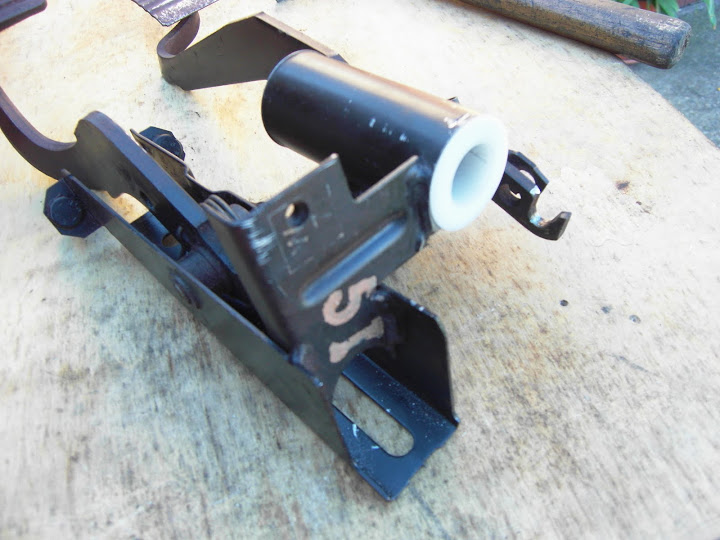
Tap the new bush into place and then slide your newly made shaft in (grease both ends fist). It's starting to resemble a column again…..so time for a cup of tea and a kit kat - luvly jubly!

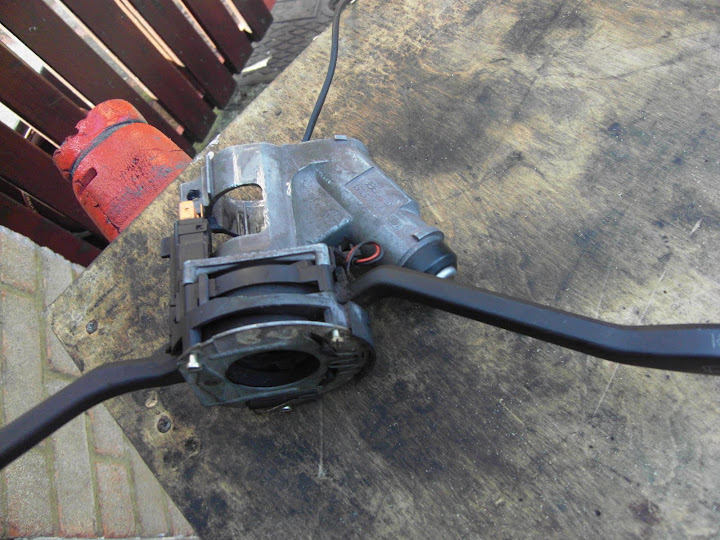
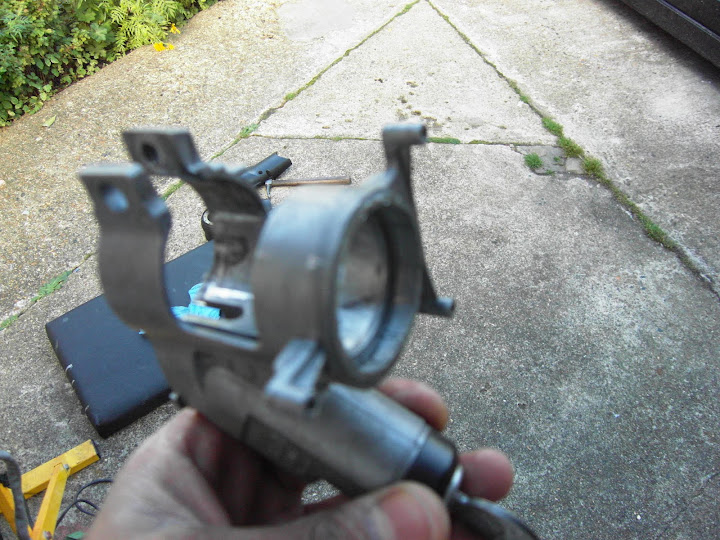
The next thing to do is sort out the stalks and the ignition barrel. The original Corsa B has this funny looking brown casing thing in place (don't know the technical name, but gonna call it the 'corsacap'):

Get some pliers and carefully remove the white clips on either side of the column. Once out, our corsacap will twist out.
The first thing you will notice is has a bearing built in, which keeps the Corsa end of the shaft happy. We want to keep this in place so get your hacksaw/grinder/samurai sword out and start cutting it back.


After some sanding down (I started with super rough, then medium sandpaper to shape it…then a touch of wet and dry to neaten it up) you'll be left with something that looks like this:

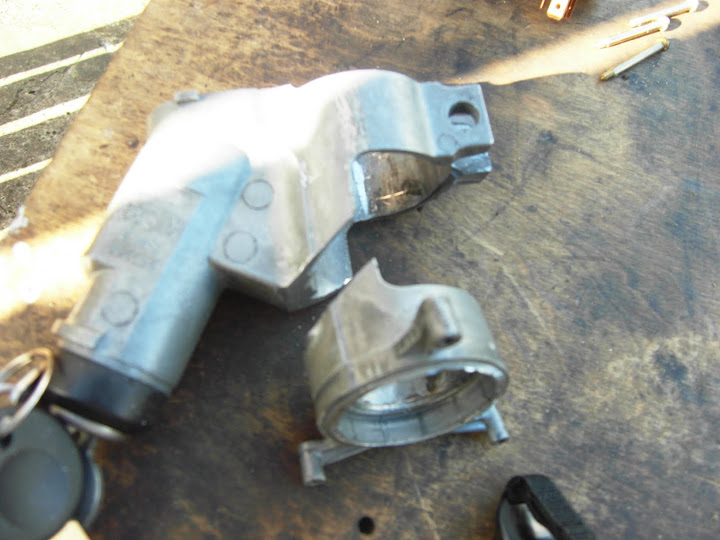
Your original VW stalks/Ignition housing is all one piece, but it's not going to fit over the Corsa column so start off by undoing the three screws on the front. This will separate the ignition housing (Ignore the fact I have removed the bearing…you wont need to do this as no use).

The stalks themselves are two bits, a left and right section and they snap into each other. Carefully pull these apart (notice the little lip in the inside of the third pic):


The ignition housing section needs cutting back so make a quick chop:
The piece you have just cut off originally held the stalks together so cut the three ends off, neatly file and you have just made a custom nut. Before you re-assemble, shave the little lip off the inside of the stalk section (middle of housing) and sand down a little to roughen it up:


Grab your 'corsatop' and roughen the top side of this too. Yep, were gonna bond the two together. If you haven't seen this stuff before its well it's the Veyron of adhesives (But if you can't get this, just look for a good two part urethane adhesive/plastic weld solution - don't use cheap tat…wont work):

Mark where the middle of the stalks is and the middle of the corsatop is and bond together. This stuff dries really quick and no room for error otherwise you'll have lobb sided stalks. It will dry with minutes and to ensure it never comes apart…I've put some small screws on the sides:
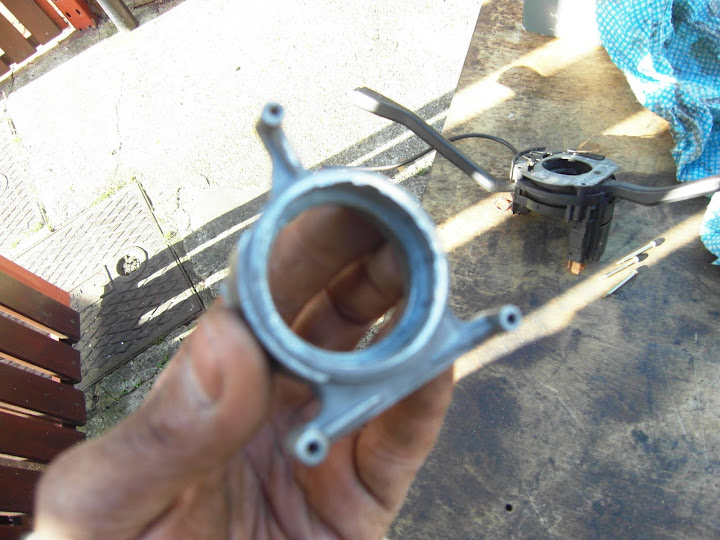
Test fit it back onto the column (it fits spot on whoop whoop!)

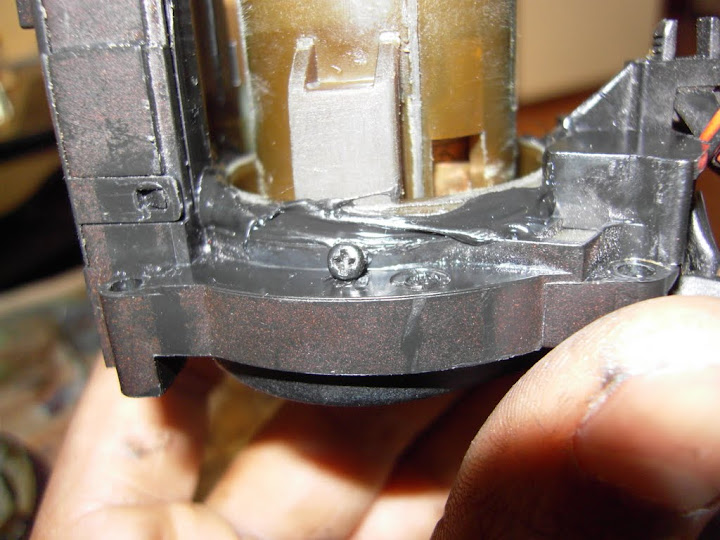
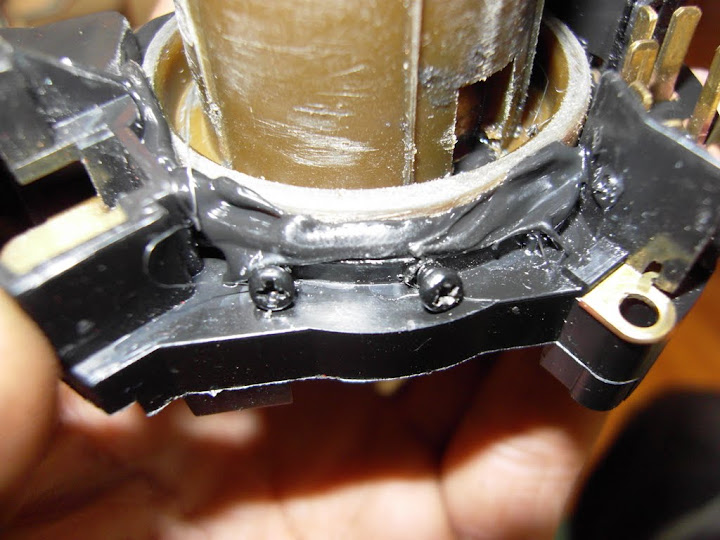
The next thing that needs trimming is the Ignition barrel. Basically it's going to hit the white clips that hold our corsatop in place, so grab the grinder and trim it back. You need to widen the clamp on it with a screwdriver, but it will soon freely slide onto the column - The original 13mm bolts not gona be any good to us…so its being replaced with a 10mm nut and bolt jobby (WARNING! Don't over tighten as the housing won't take the strain and will snap) (Yeah I snapped mine…grr) (The steering lock won't be used so don't worry where that ends up being positioned).

The original VW cover from the original column is gonna be used to keep it looking OEM, so you need to trim the notch off on the underside (basically with both sides, just trim back the underside so smooth)

This piece is your guide to fitting the ignition barrel. There's a little bit on the top section of the cover which slides over the right stalk. Put this in its correct position and then reposition your ignition barrel into its correct place (It will line up with the top cover too) before tightening into place.
Nearly home free now, so quick cuppa tea and then its back to the inside of the car.
The lower section of the rack (Orig Mk1) will bolt back into its original fixings. The original mk1 column end can be fitted as per normal and were left with this:

If you look up you'll see this little bracket, which needs to be chopped out:
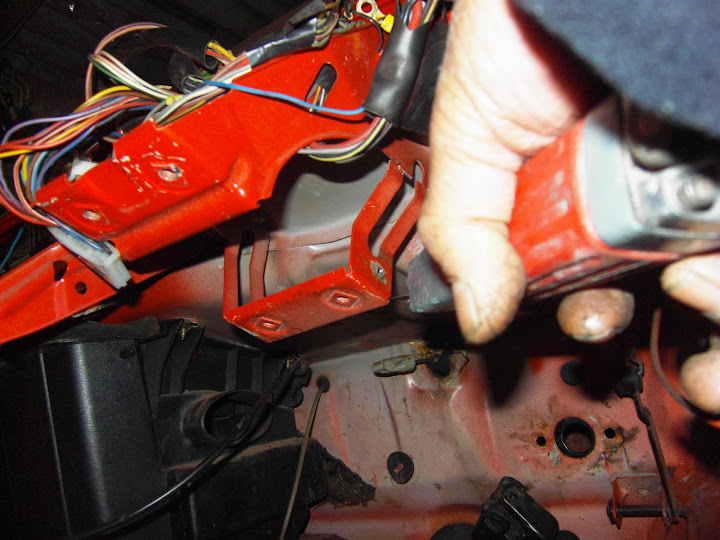

Bolt the Corsa UJ back onto its original position. A plate then needs to be bolted directly to the existing upper fixing points using 13mm bolts (needs to be solid so use 2mm thick steel).
Get a mate to hold the rack up while you mark your new holes, drill them in and then pop in two 13mm bolts. For added safety these are then tack welded in place (although it's not a must) and use Nyloc Nuts to securely hold the column into place:


As it stands the column is now fully in place, but if you haven't noticed already…our friends at Vauxhall actually have a second fixing point bracket already on the column. You can just see it on this pic, under the uj section:
Were gonna use this as the secondary fixing point so you need a quick bracket.
This is again 2mm steel in a L shape, approx 6.5" long, 1.5" x 1.5" wide. The right hand side needs a cut slightly and hammered out slightly so its fits perfectly (Have a look at the picy a few shots down with in place a little more closely and you'll see the kink)
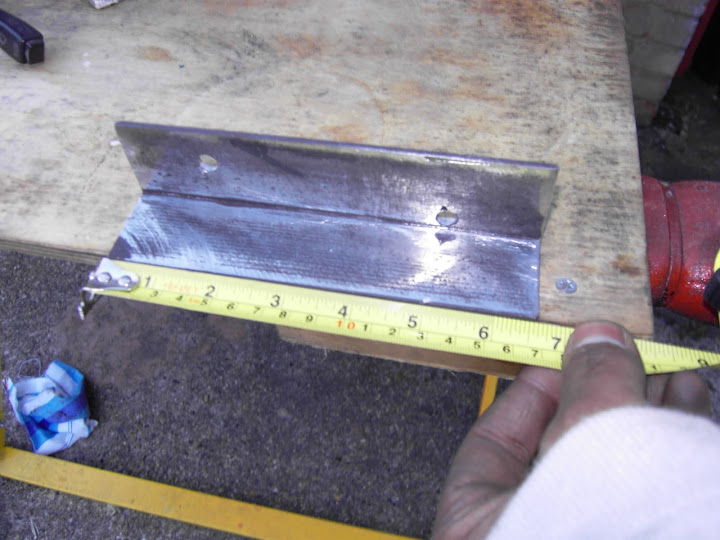
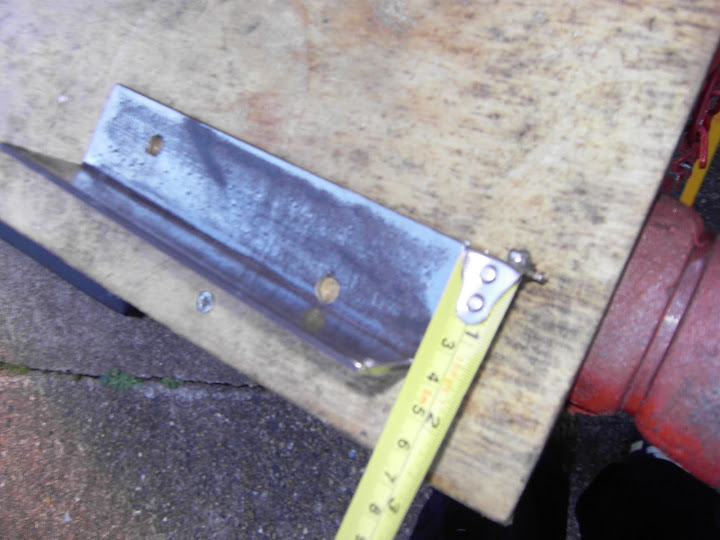
Hold it in approx position and mark it to the two holes on the bracket. Drill these out and mock fit 13mm nuts and bolts. Don't fully tighten as you need a touch of play so you can slide the bracket into its final position before you tac weld it in (one good tack on each side will do and will hold it…there's little point of going all the way round the bracket, but do it if you must - Remember to sand back the bit your welding to)


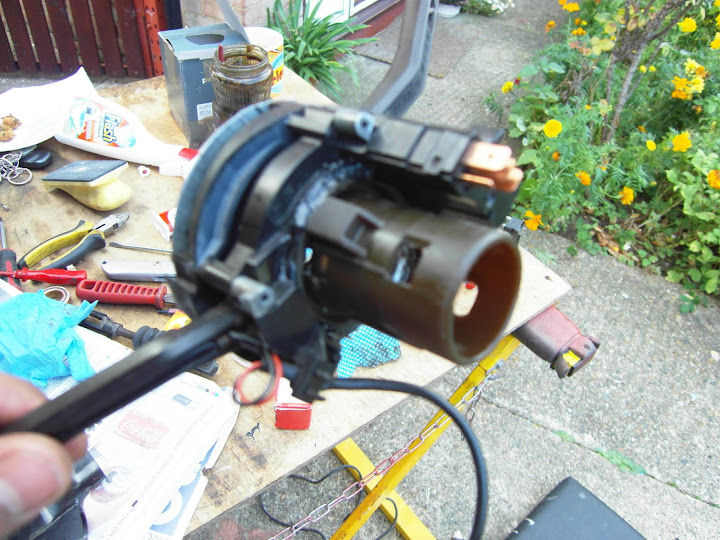
Put the stalks, ignition barrel, upper/lower covers back (covers will not fit perfectly, well one side will…I let the left sit flush and the right side with ignition barrel had a few mm gap - so ran across gap with some black silicone). The original VW electrics for stalks/ignition is per norm and the EPS Controller will be wired in as per the manufactures instructions.

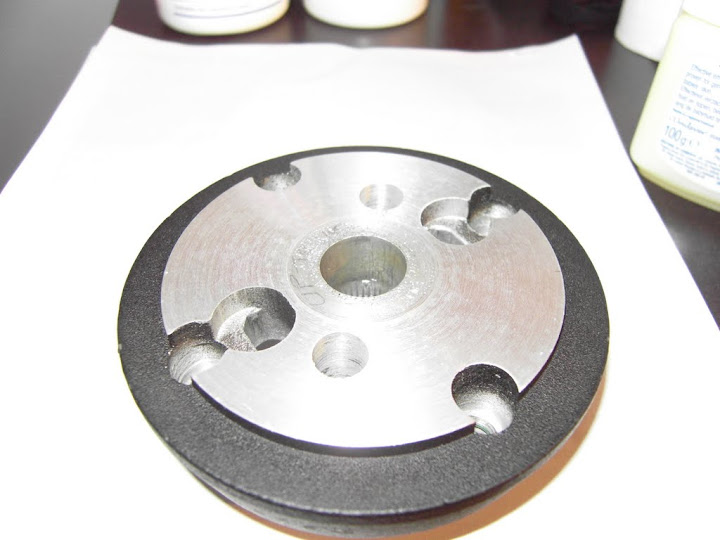
Strap on your Corsa B boss kit. Now I'm not sure if it was just the boss kit I got (NARDI) but it was catching on the stalk and needed some minor adjustment.
Heres what the bottom of the boss looks like:

It can probably be shaved just using a grinder, but I whipped it down to the local machinist and trimmed it down to this:
Put on your Steering wheel
The rack is now complete, Have a cuppa tea and relax - Job done.


Heres a quick video of some on the spot action:
http://picasaweb.google.com/lh/photo/L0CkvgF4AYHkjaQDv3AEMFdiGFJmijOXN-yD0AOqni8?feat=directlink
DISCLAIMER (Copied this bit of the web
)I cannot be held responsible for any injury caused by using any of the information detailed on this thread. If in doubt of your engineering abilities please don't attempt to carry out this conversion.
END
So I'm pleased how its turned out and it works beautifully - Due to the state of my car, I haven't been able able to take her out far, but went for a spin down the road to give it a test and did a few thee point turns with ease so initial runs gone well. Steerings now pucka light…which you get instantly use to, but the real test will be at high speeds!
Before anyone does this, there's a few pros and cons of it too:
Pro - Its power steering baby! Enough said!!
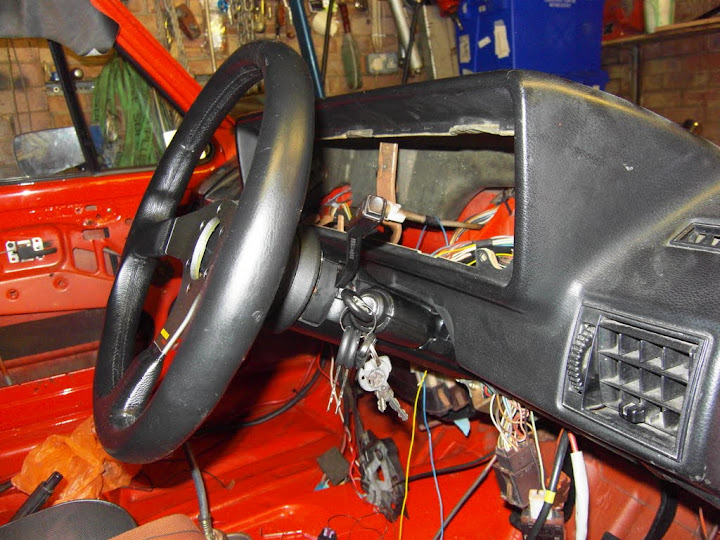
Cons - The actual column once fitted pushes the steering wheel approx 1.5 inches closer to you. (Now this wasn't really a con as I'm fairly tall and me knees always clipped the wheel, but might be a issue for some) (Worst case, this could be corrected by shortening the boss kit…had a look and its quite simple to cut and reweld if you really wanted to) - Boss to dash, How it sits now:

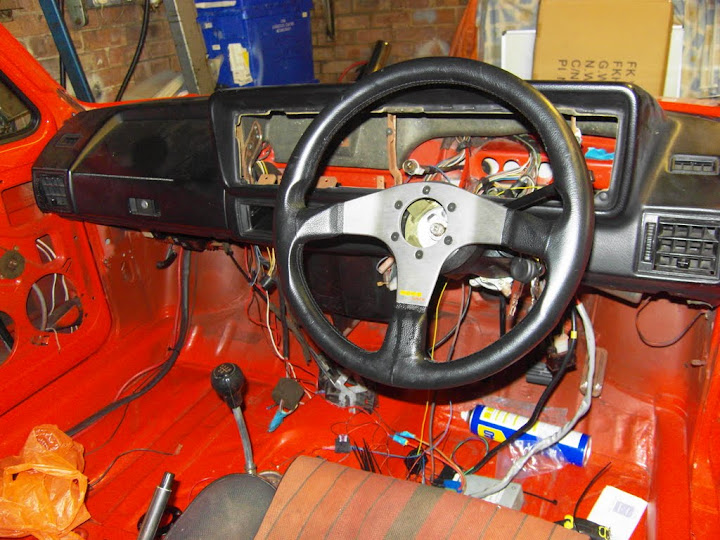
How a stock column with boss sits:

Pro - Doesn't effect the insurance as long as it's securely fitted (or fitted by a professional) (I'll opt for the first option)
Con - OEM wheel can't be used, unless you're sporting OEM Vauxhall…so Momos the word really.
Pro - Not breaking the bank to do the conversion, will prob do my cabby too…soon enough.
Con - You loose the steering lock (To be fair, the VAG one could be snapped easily enough if someone wanted too) (The unit does need power to be activated) - but it's a con nonetheless
Pro - It leaves you in a position where if any of the Corsa gear went wrong….it would be a simple bolt in and out jobby. Also means if you bought a unit from somewhere offering warranty - it will stay valid as everything's in tact!
Con - Biceps will end up shrinking!
Not sure how to stick this up as a guide, but shout out to Mk1 owners club members - JETTA & PNERivage for their helpful info and the following links:
http://www.vwgolfmk1.org.uk/modules.php?name=Forums&file=viewtopic&t=82482&postdays=0&postorder=asc&highlight=power+steering&start=0
http://www.fastgolf.org.uk/modules.php?name=Content&pa=showpage&pid=14
http://vagdrivers.net/forums/index.php?showtopic=20511
Mk1'83 G60
Mk1'82 2.0L 8v
Mk1'93 GTI Sportline
Mk1'82 2.0L 8v
Mk1'93 GTI Sportline
Posted
Local Hero
Diesel Possessed
A97JCE
Feeby
A97JCE
Feeby
Posted
Settled In
allana13 said
What breaks are you fitting dude ?
Still got to get round to doing it, but have the TSR big brake kit on my daily so thought i'd go down a similar route on this one - caliper extension brackets….decent pads and some 280mm disks. Will also fit a Mk2 16v Master Cylinder & Goodridge hoses - Rears will be just given a overhaul and new shoes (say that now) :mrgreen:
Mk1'83 G60
Mk1'82 2.0L 8v
Mk1'93 GTI Sportline
Mk1'82 2.0L 8v
Mk1'93 GTI Sportline
Posted
Local Hero
Diesel Possessed
A97JCE
Feeby
A97JCE
Feeby
Posted
Settled In
Suns been out so thought best crack back on - first up was sorting the headlining…

After fiddling about with it for a bit, decided as it's a onetime glue in jobby to get someone who's done it before. Luckily found a chap local who's a oldskool trimmer so done a fair few in his time. Gotta say better him then me as he was at it for about 5 hours getting it all glued in. Hats off, he done a good job and was pleased with the result:

With that sorted meant I could finally get all the windows back in. Sounds minor, but with new seals and that extra wedge of vinyl….it was a mission. So after a bit of swearing and no joy getting the seal to fit properly, gave the seal a dunking in some boiling water to loosen it up and lubed it up with plenty of window cleaner and after a couple of tries..went in perfect.


Next ups sorting the floor…
Bit of umming and ahhing about whether to sound proof the floor with fancy dynamite stuff or to use flashing tape, ended up using this:
It's about as close to the original VAG one I could find so two packs later….


The original underlay sections that went on top were deteriorated and needed something to cushion the carpet so decided to make some. Went down to Wickes to get some laminate underlay, but it was way to thin, so went to the check the local carpet shop. Quite a few more underlays to choose from really, but after I told him what I was gonna use it for, he said I could help myself to some offcuts he had at the back.
Few measurements and made my four sections.I then made a reverse template and used some carpet glue to stick em back to back and although solid, went round the edge in some gaffa tape


New carpet going in…

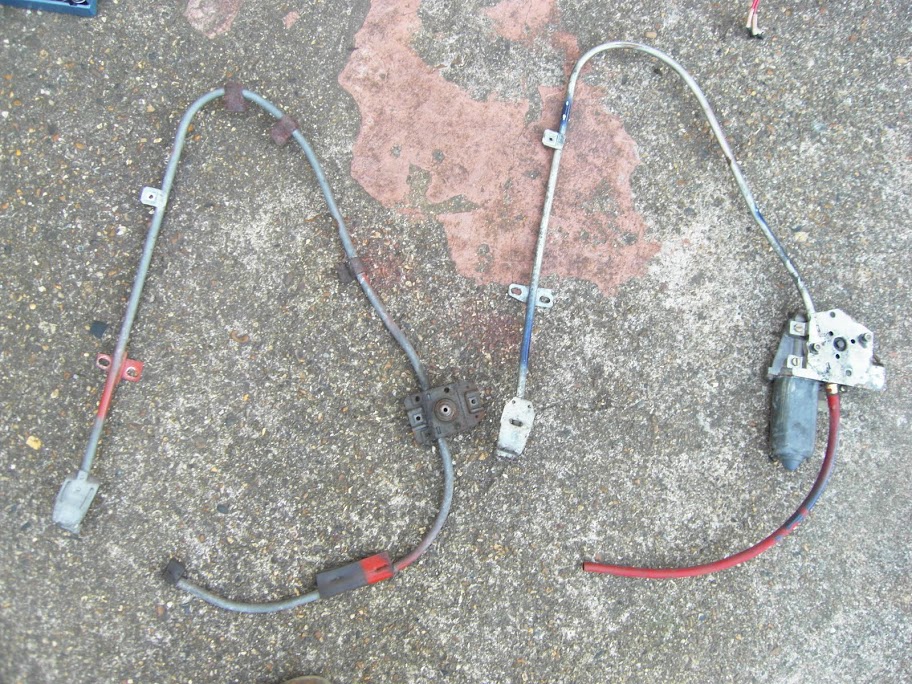
Doorcards are spank so don't have the holes for the window winders in place so thought best keep it that way and swapped the manual winder system for some electric ones:
Whilst i had the space, thought best to sort out some wiring. Sleeved and wrapped the elecy windows and power steering wiring and added a mini fuse box so didn't have to piss about if something went wrong:

Nope not a gain control for the amp - the power steering also has a little volume knob to control its sensitivity so mounted it within good reach

Seats was the next mission! I've had these sitting about for a while, but the subframes were on back order for months and then turned out to be discontinued

Good timing really as Olly was breaking his Mk1 and from the bundle of toys I picked up these seats, sub frames and harnesses….

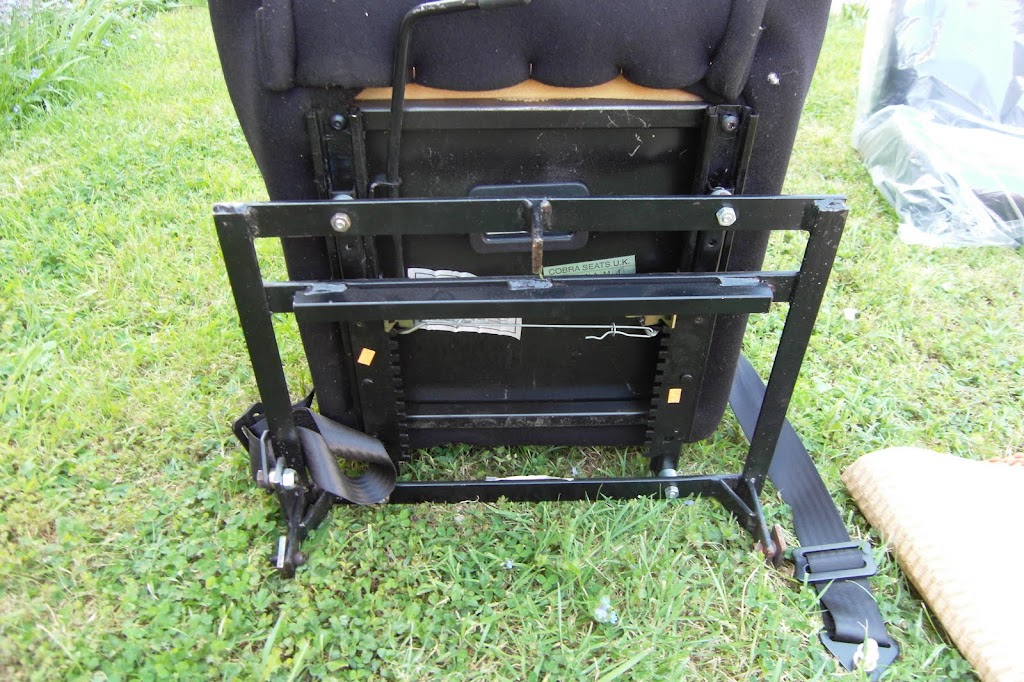
Nice seats really, but what i really wanted was the seat frames. I thought it would a quick two min swap, but like everything else it turned into a bigger job….the actual frames fit the stock rails no probz, but the gliders needed modification to fit the seats. Bit of tubing added to the seat and few new holes, touch of welding and all good, but once in…the actual seat position was a tad high, so had to come back out and figured by removing the original spacer washer, it dropped by � inches - Perfect!


Rear door cards in…

These are the 'Newton' ones and thought i'd try use the original clips to fix it in, but found they push the card too far to the left once on so the inner door trim wasn't fitting over - solutions to use the clips they provide (makes sense really) which are slightly diff to the OEM ones and give you movement to slide the card a little, meant I could butt it up more towards the right and the door trim would then actually fit over - Simples!

The end of the harnesses still need securing to something and I'm currently pondering about a forking out on a front harness bar or somehow converting the ends to take the anchor plates. Not too many peeps doing the harness bars for VWs but come across this lot…
http://cgi.ebay.co.uk/TEGIWA-HARNESS-BAR-MITSUBISHI-EVO-LANCER-ALL-MODELS_W0QQitemZ190514927104QQcmdZViewItem?rvr_id=229367092657&rvr_id=229367092657&cguid=10d3ce5712f0a0aa125387f3ffea7c2f
Look nice, but not too sure about universal stuff really (and never heard of em) - some of the Jap boys use it, so it's a possibility. The best thing would be a proper roll cage with bar, but erm….my budgets def not gonna stretch it so a pipe dream for now L
The last bit for the door arrived too via special delivery (Cheers Rajan):

So swapped off and fitted up the chrome trimmings

Randoms


Still got loads to do really, but tis getting there
Mk1'83 G60
Mk1'82 2.0L 8v
Mk1'93 GTI Sportline
Mk1'82 2.0L 8v
Mk1'93 GTI Sportline
Posted
Twitter Manager
Posted

0 guests and 0 members have just viewed this: None.