


project lead foot - resto underway!!

Posted
Old Timer

project lead foot - resto underway!!
Posted
Settled In

i think my car has all the known rust spots rolled into one car haha.Gazvenn said
I swear we're working on the same car as I'm doing pretty much everything you are at the moment all be it not as quick or well it would seem.
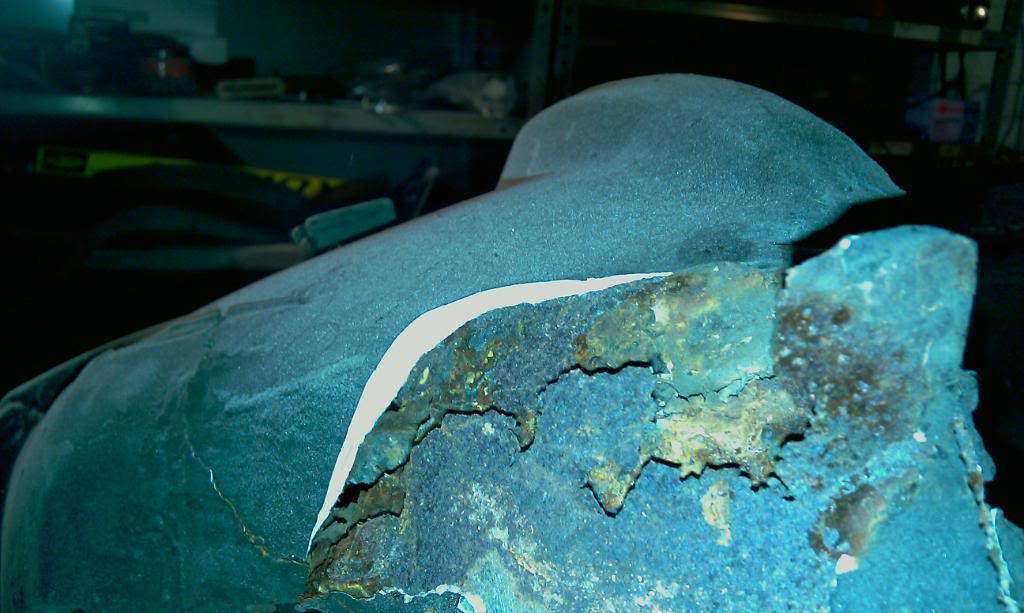
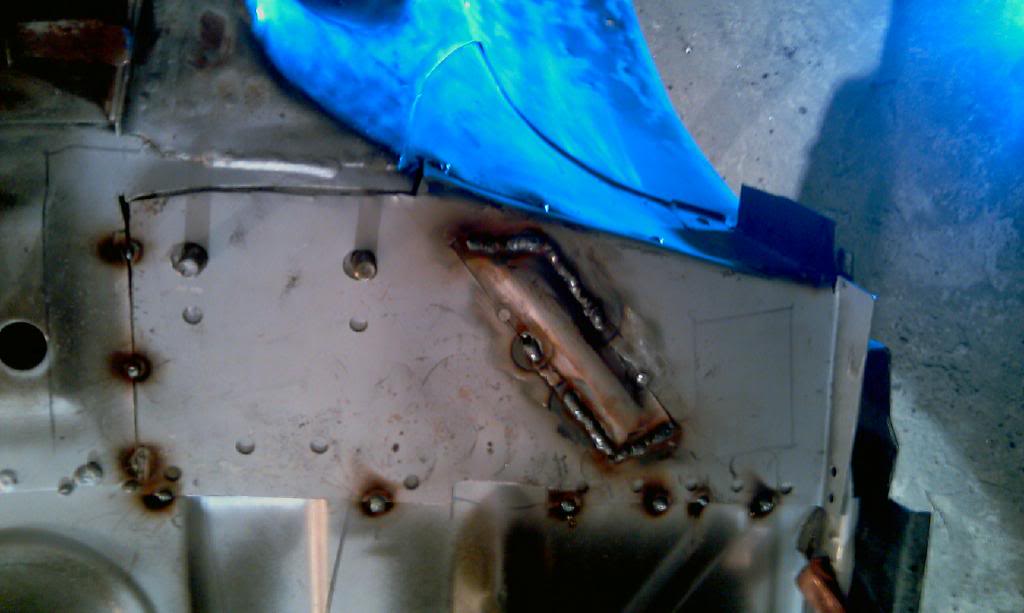
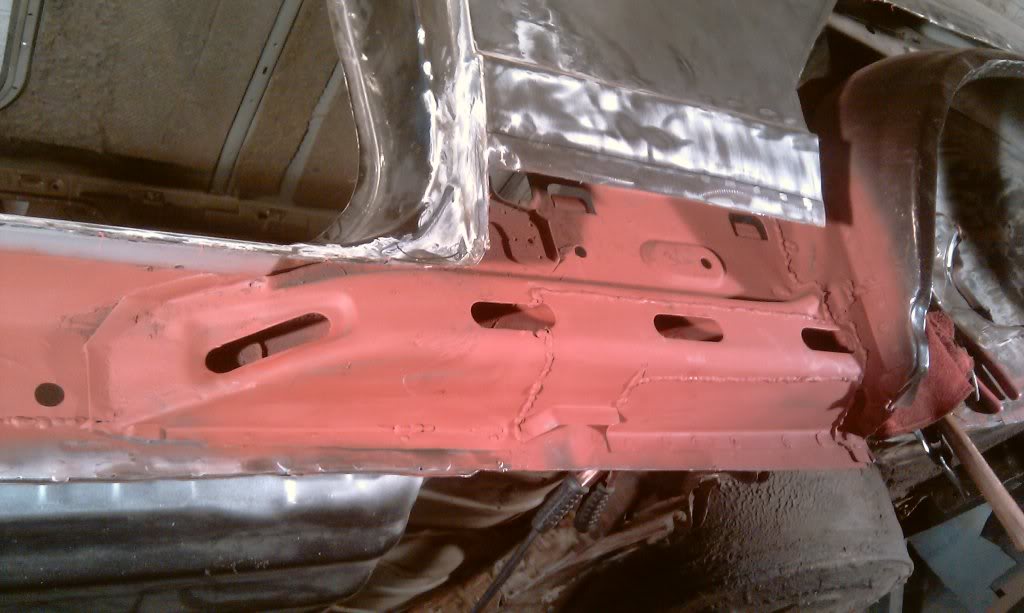
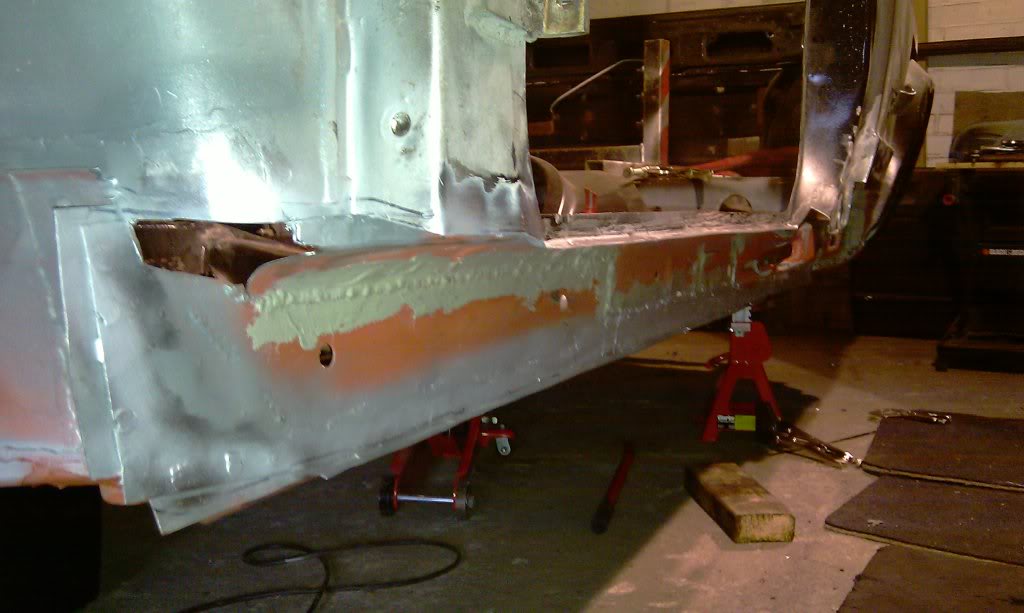
Got a small bit more done over the last few evenings. would av done it sooner but ran out of gas friday night so had to wait till monday to get some more.doh. i put a new bit in the front but found extensive rust at the rear.
this is what i found. lots of filler in the rear arch corners. oh and rust, dont forget the rust….
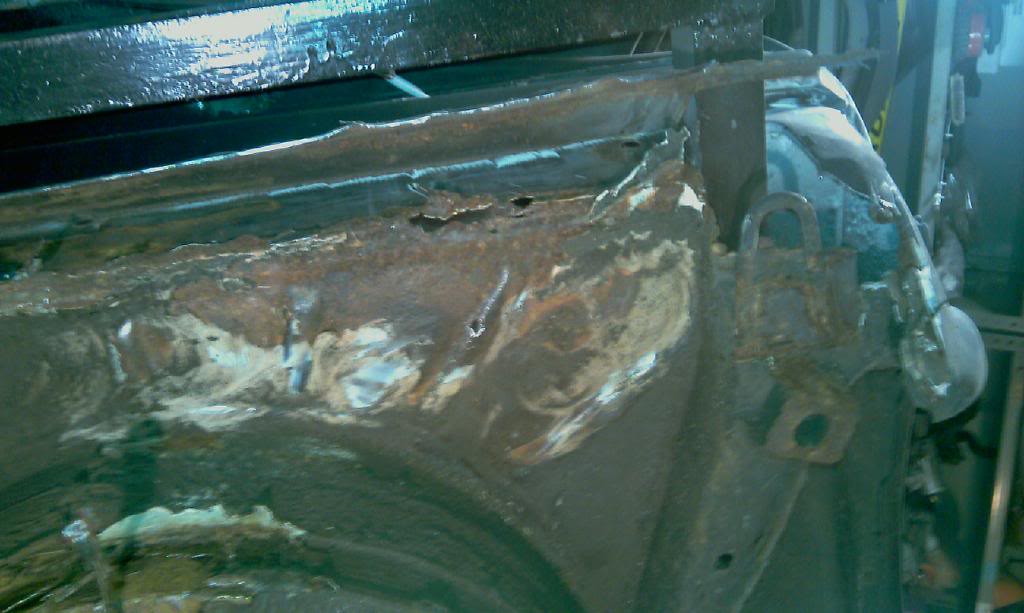
found the rear valnce panel had also been plated over with the original left behind to rot. found some sort of sealent/gunky stuff to seal the two pieces together. dont know why they botherd it ddnt do anything. it had rotted the rear part of the boot floor aswell. i dont think that having a realy bad water leak for so long helped either. the ends of the chassis legs are abit gone aswell.i think its my jig thats actually holding it togethere now hahah.
then i made this, and then ran out of gas.
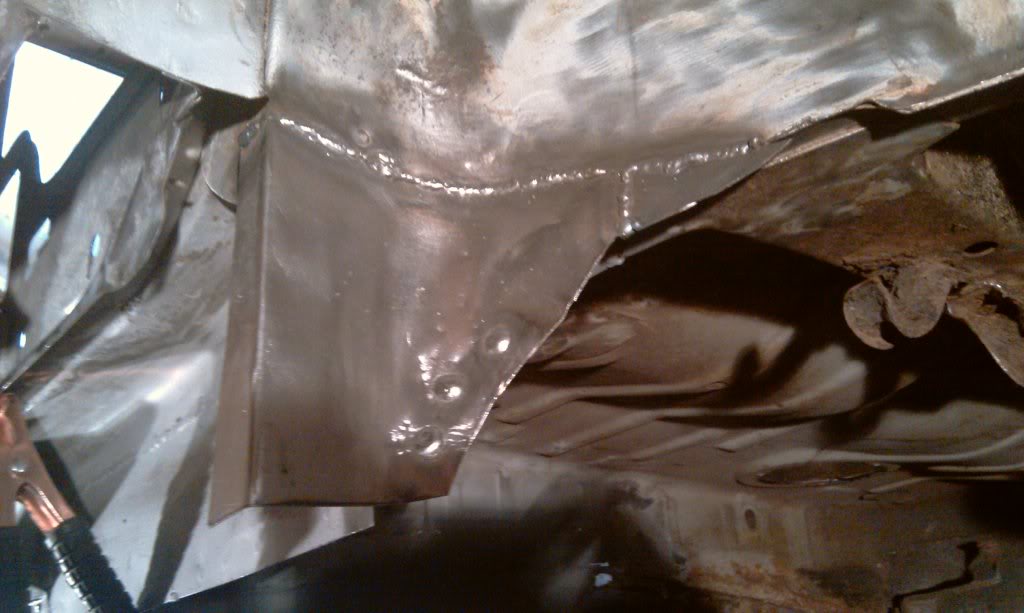
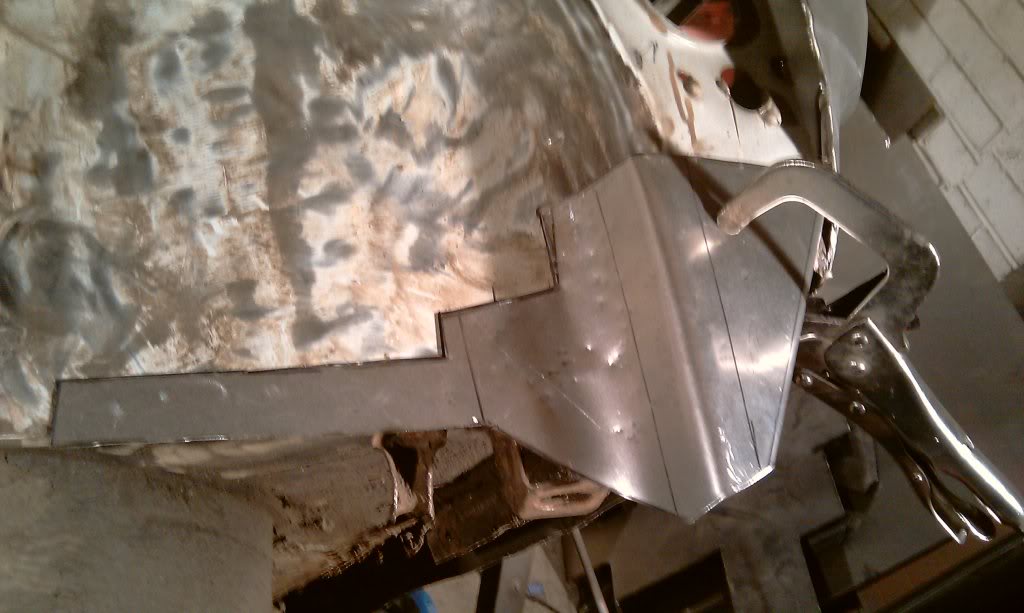
then i got gas and did this. bulkhead/floor/wishbone mount panel tacked in place
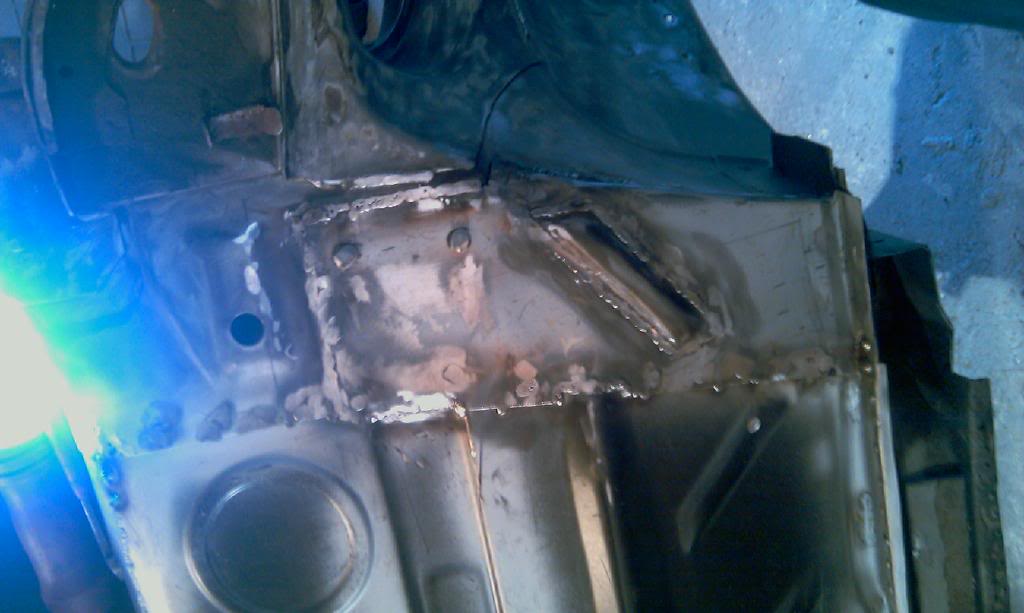
i then welded it in tonight, i did plug welds along the edge that joins to the floor with two heavy duty seam welds where it attaches to the main floor strengthening channels, i butted and seam welded up all other edges apart from 4 plugs on the inner sill side.
welded and ground down
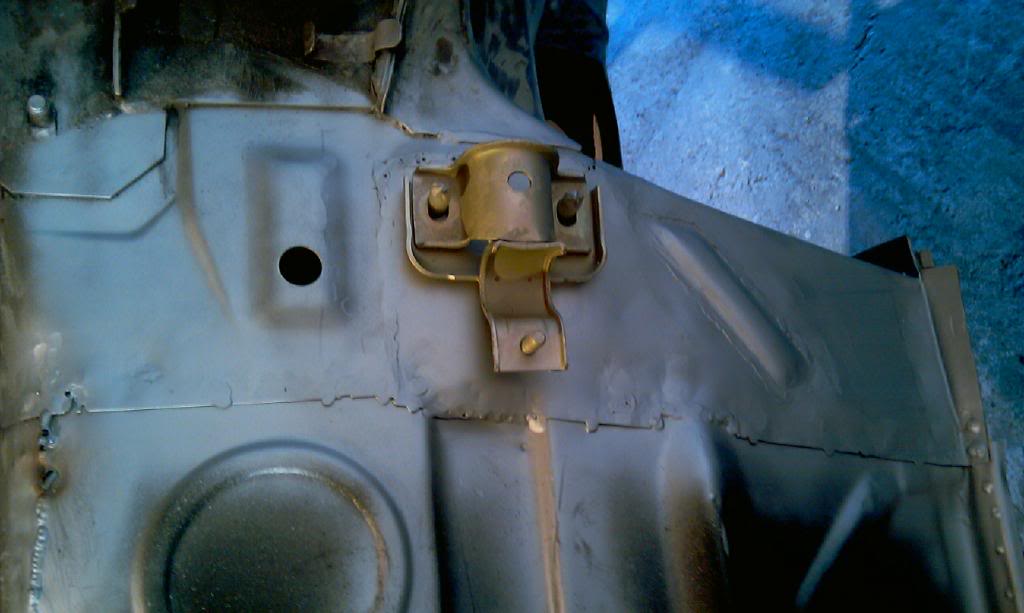
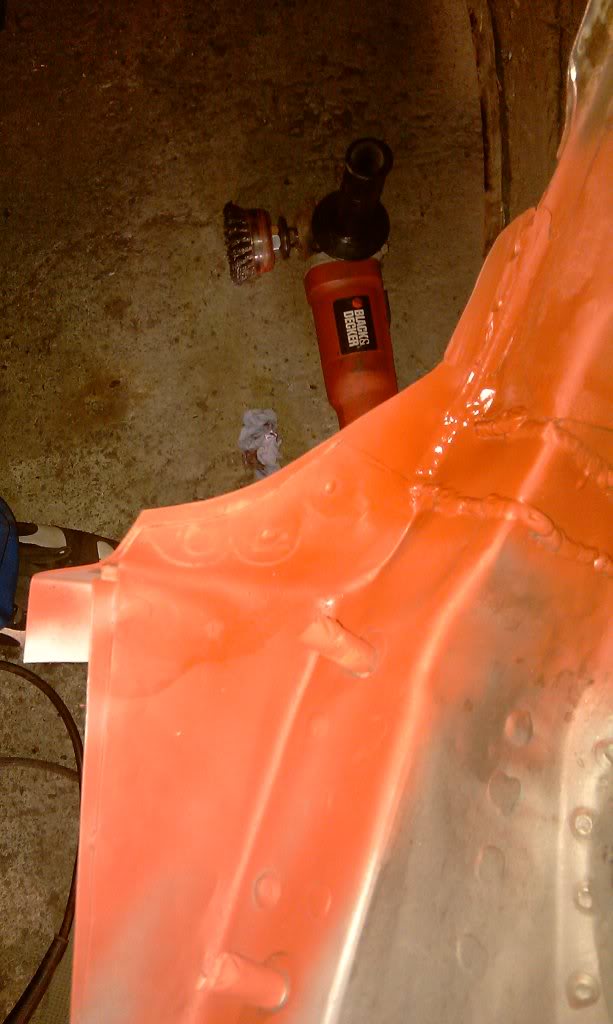
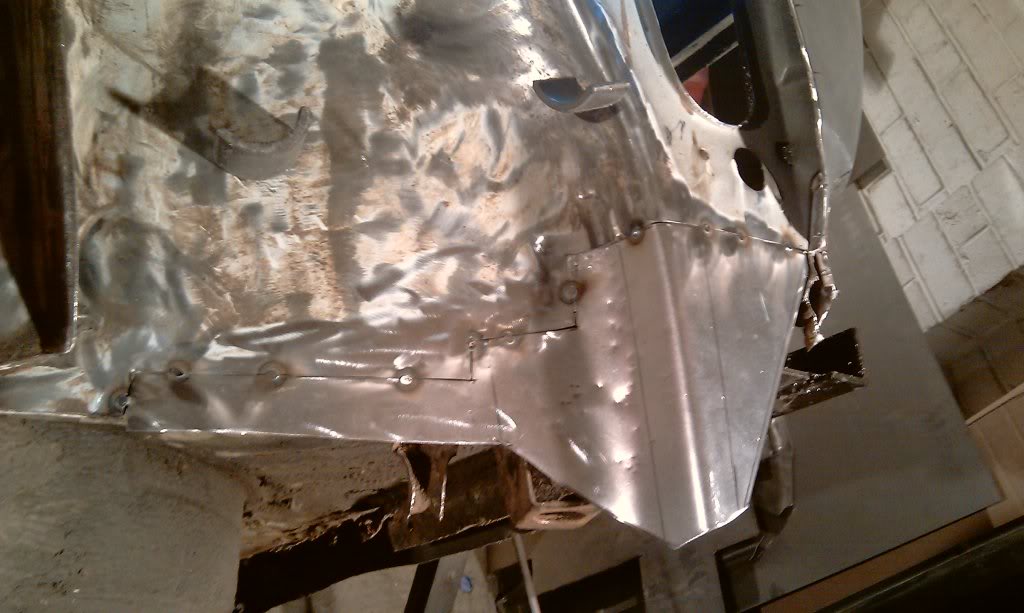
the original had a strengthenin mould bit init next to where the jack point is located. i tried to replicate this but im not that good with a hammer and making panels yet so i cut a piece out of a quater floor pan im not using and welded it in place where the original would have been (give or take). jack point will get put in when it gets back from the blasters.
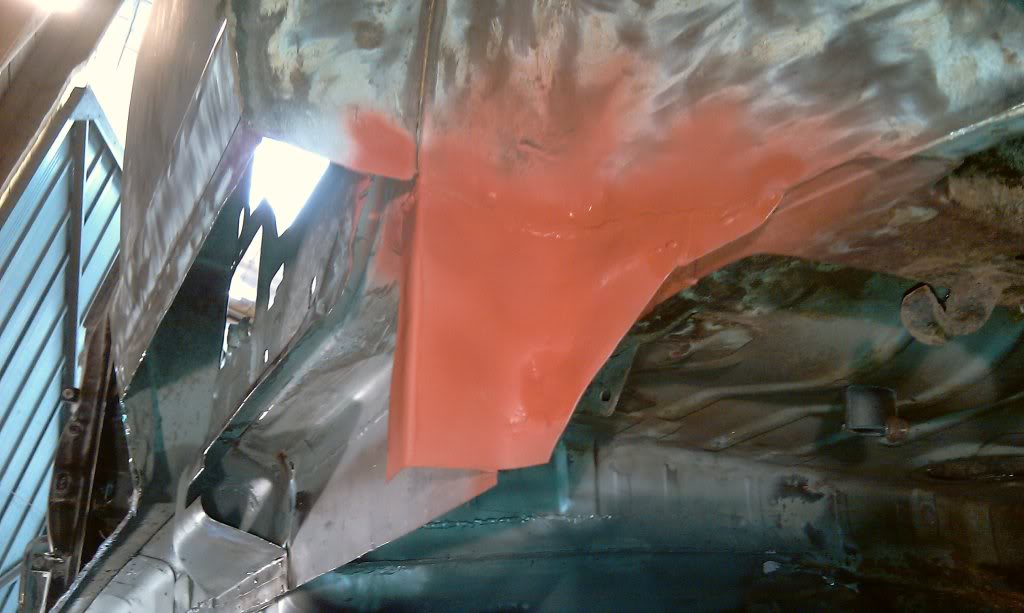
panel in primer and with zinced wishbone mount to see if it still fit and if the antiroll bar would fit.
strength bit
front of panel. very hard to weld verticle then curvin upside down haha. welds ruffly ground down.
more tomoro i hope.
mk1 golf - resto
mk3 polo breadie - daily banger
mk3 polo breadie - daily banger
Posted
Settled In
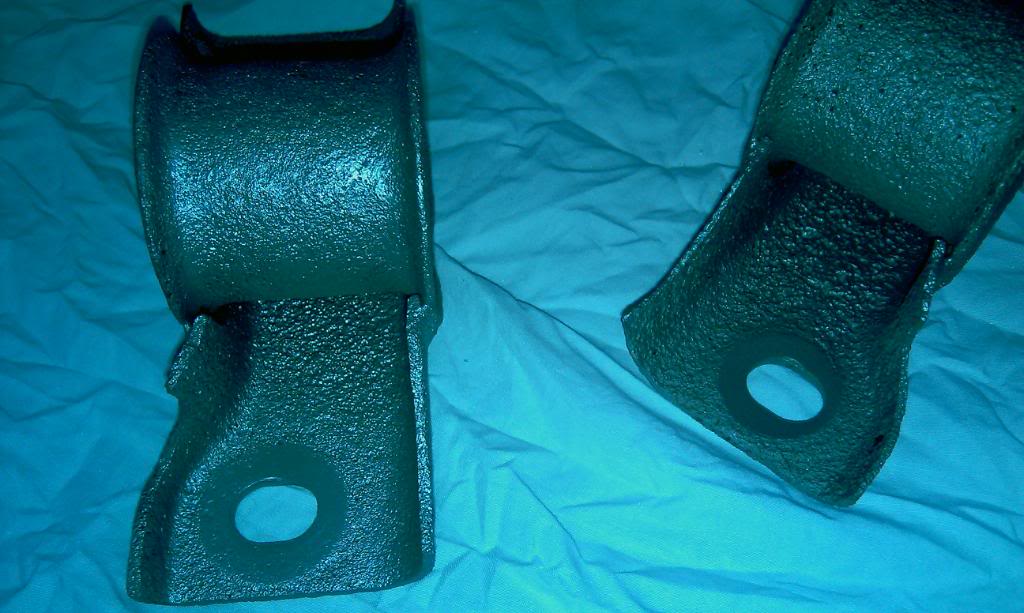
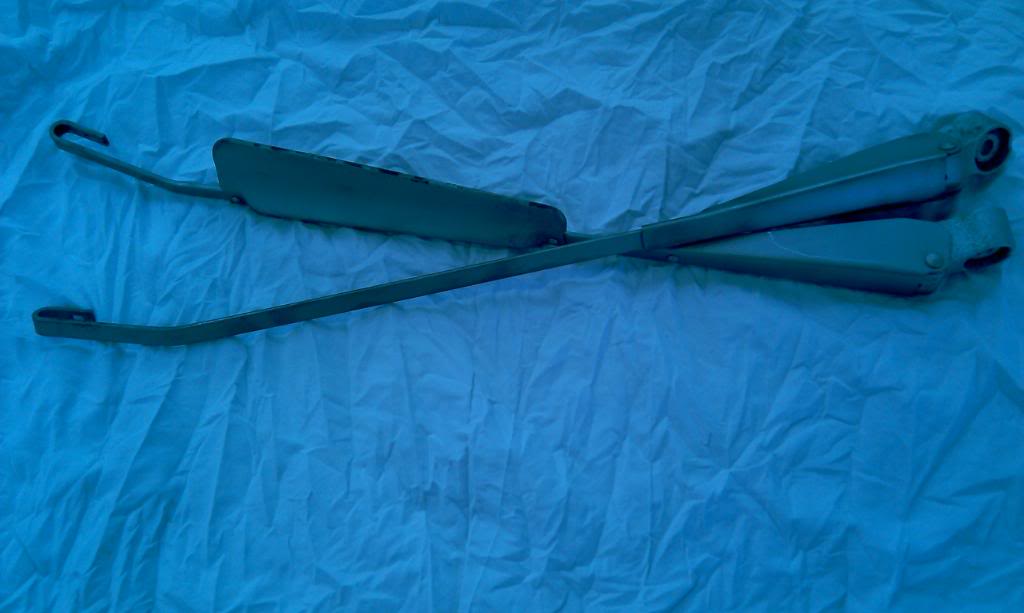
got sum bits back from blasting today.some good some bad. got more parts goin next week which is nice.
wiper mech arms. i love it when i get bits that have writin an parts numbers on em still that i ddnt know were there before.

the gear stick joint bracket thing and wiper mech bit
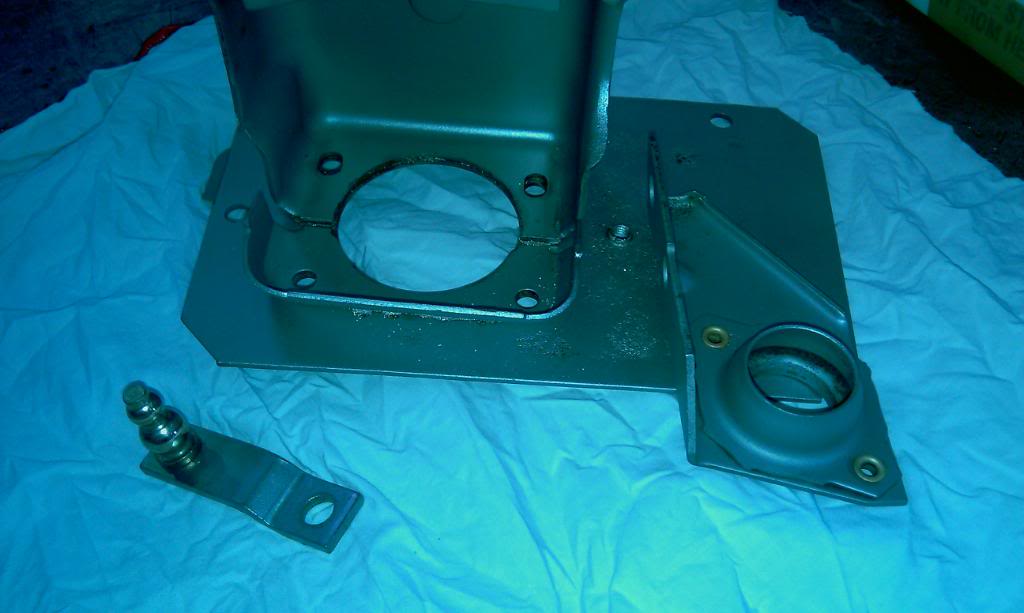
the rear axle mounts.these were a right state before blasting an even worse after. might have to source some new ones as the pittin in the metal is extensive. any one got any up for grabs that arnt rotten?
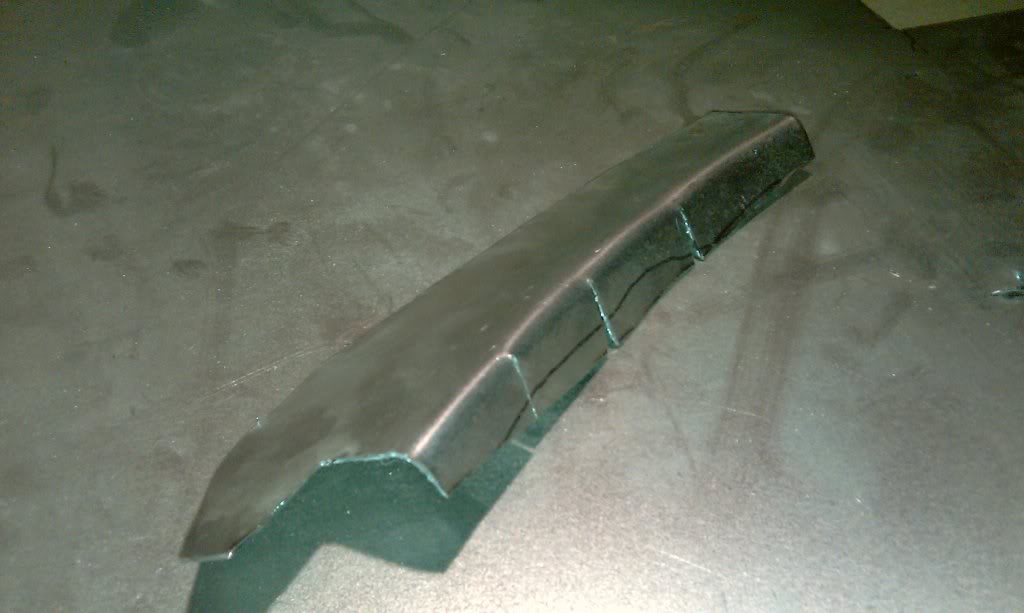
bonnet hinges, steering rack clamps brackets and jack point which will be welded in this weekend i hope. cant throw that bit away lol.

an wiper arms
all parts will be given a quik coat of primer or sumin to stop further rust as they will if left unprotected.
i also welded this in the floor yesterday, still needs grinding down. when i cut it out i found a wax oil worm under the floor that was bout 5 inches long. was curly like a pigs tail hahah.
mk1 golf - resto
mk3 polo breadie - daily banger
mk3 polo breadie - daily banger
Posted
Settled In
colour ha ha.
Posted
Local Hero

That has to be one of the rustiest Mk1's I've seen. Makes what I need to do look like a tiny drop in the ocean!
Keep the updates coming!
AL.
My Build Thread
All My Build Photos - https://www.flickr.com/photos/pix-al/albums/72157622794406840
My other hobby - www.pix-al.co.uk
All My Build Photos - https://www.flickr.com/photos/pix-al/albums/72157622794406840
My other hobby - www.pix-al.co.uk
Posted
Settled In
its not gunna be matt black wen im done.that was a tester paint job to see if i liked it. i do but is too much maintenance being matt.andy-b said
Your doing a great job keep up the good work,all that work could of picked a better
colour ha ha.
instead of goin out in the glourious sunshine that was goin on today i hid in my garage with my golf getting very hot!!
i spent the first part of my day making a repair panel for the inners sill box section then realised i couldent weld it in till the inner arches wer in so i set about fixin the bottom of the inner half of the tub. i bought a outer half and a wheel arch panels of bbt during the week so theyll be goin on soon hopefully.
i started with this hole
then made a template
and then cut and hammerd a piece of metal into this shape. i really need to get a sheet metal folder to get better folds an stuff as id like them nice and neat.
thenh tacked that mofo in..

i then welded her up. did three plugs to the axle mount chassis rail. i also plugged it behind where the inner sill met it.
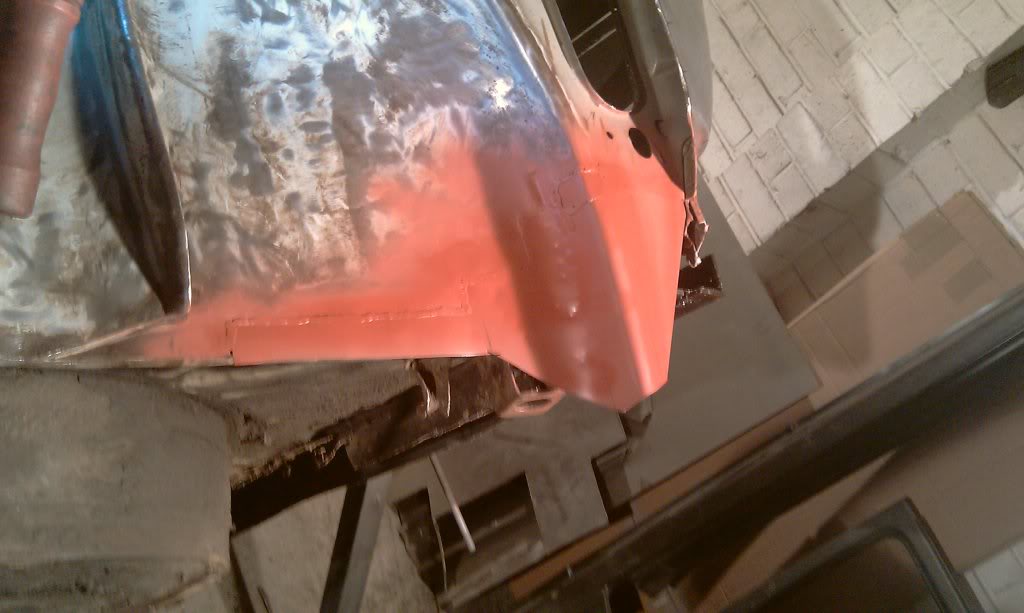
i flipped her over and welded the front jacking point back which i had had sand blasted.

welded up the back side of the repair and sprayed with some new very very red oxide primer. got 4 tins off the bay for cheap. better than halfords rip of rubbish haha.
sprayed this side too. guna try get the arch cut off and remove the tub outer half tomoro. i know that the repair i did today will need to be trimmed to fit the outer sill on but will wait till the outer tub half is in place to see where it needs to be cut too.
enjoy………….
mk1 golf - resto
mk3 polo breadie - daily banger
mk3 polo breadie - daily banger
Posted
Settled In
Keep it up this will be rock solid when you finish, you may struggle for the mk1 meet on the 22nd July.
Posted
Settled In
mk1 golf - resto
mk3 polo breadie - daily banger
mk3 polo breadie - daily banger
Posted
Settled In
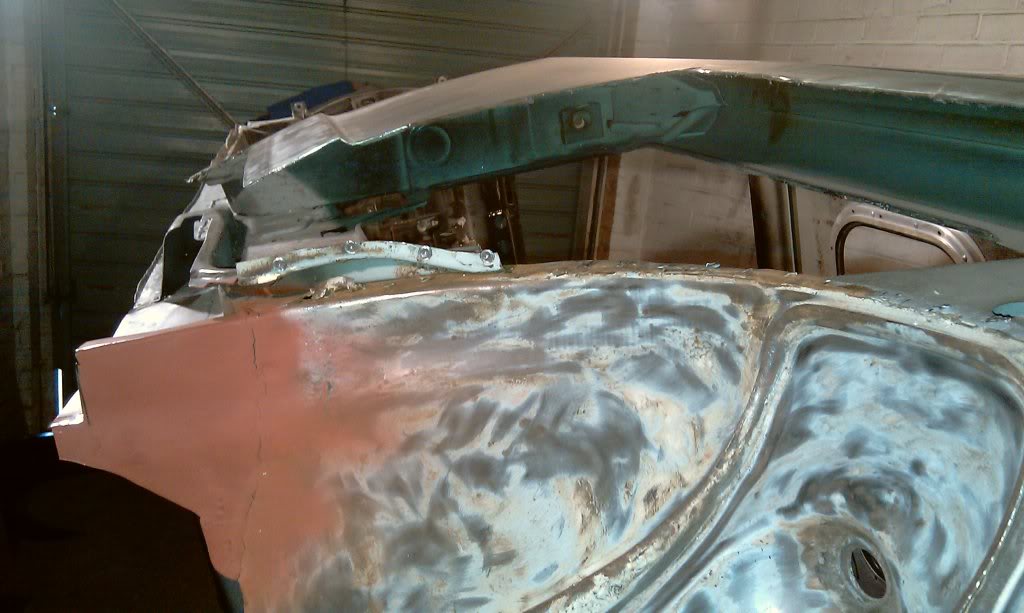
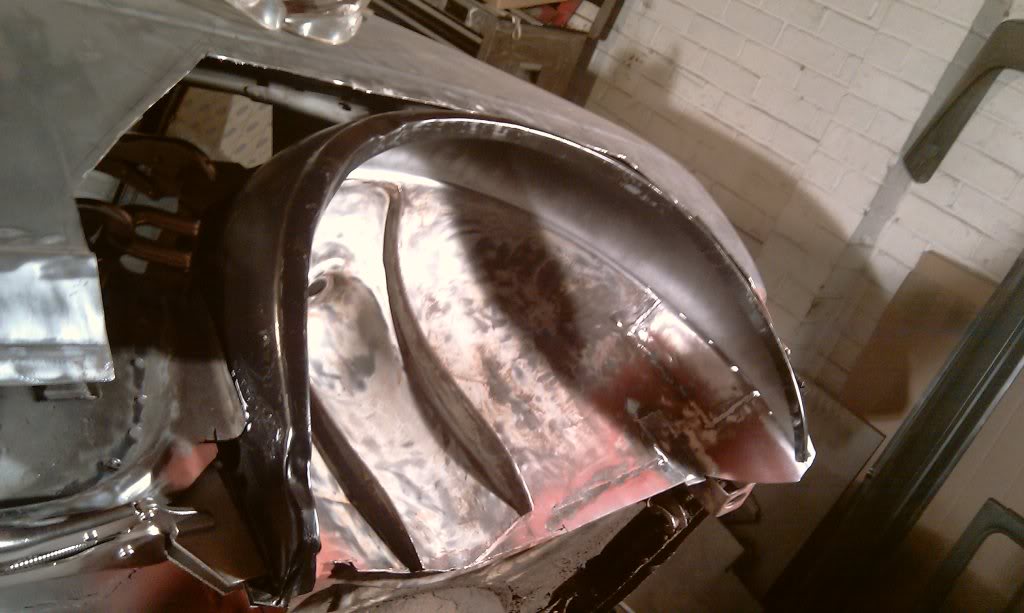
im glad it wasnt sunny today and wernt missing anything as i wanted to crack on with the rear arch area.
i started off this morn by poppon to ma gramps house who had knocked be up a lil custom sumin for the interior but its not fin yet so no piks just yet. busted a groove to my garage and started to chop at the rear arch. cut the rusty bit off so that i could lay the new arch on top and it be in roughley the right place but the inner arch was so rusty and vacant it didnt do much lol.
the offending arch cut off and rusty tub behind
new arch clamped up roughley in postion enough to mark up around it.
this is the piece i did yesterday that i was jus guessing the shape with so it had to be cut down to fit the arch in properly.
with the corner piece trimmed the arch went on ok but was too high to see the top of it so i repostioned my jig so it was perfect working height
i ddnt want to start messing with the swage/trim line of the car asit was straight and i ddnt want it wonkey so i cut that part off the new panel and remarked out its place on the body.
i cut out the arch with a gap below the line i marked out incase of further adjustments needed. remember measure twice cut once haha…
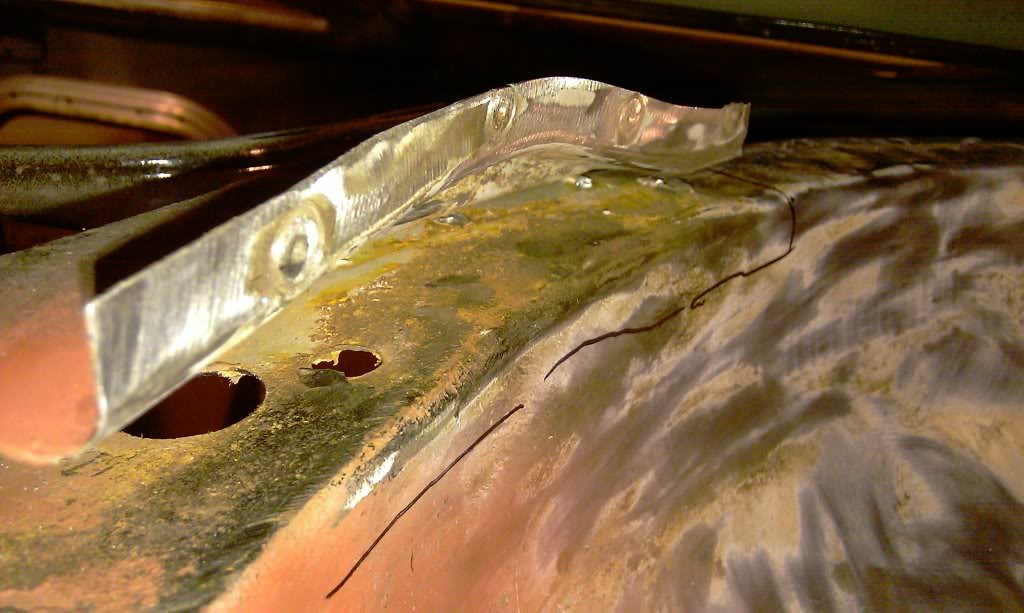
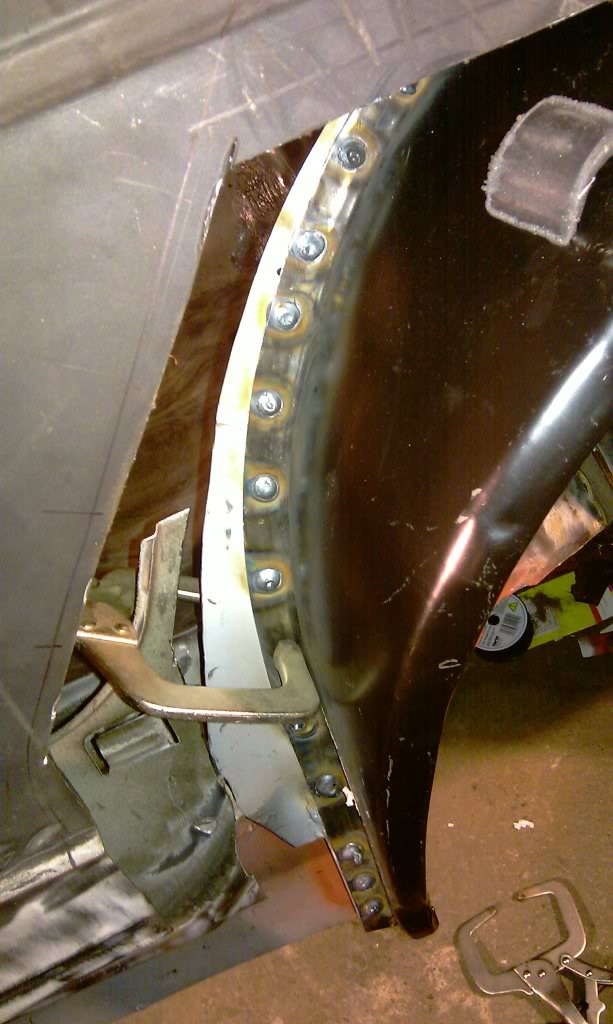
now it was time to remove the rotten tub. therer are 4 spot welds on the front part where the inner sill internal box section mounts toit.

inside where it mounts
drilled out. really need a better drill bit…

i then cut the tub close to the joining line to get acsess to the spot welds. couldent be arsed to drill em all out so i got a chisel in the gaps a broke em of as they were only small welds and came off quite easilly.could have been due to the rot mind you
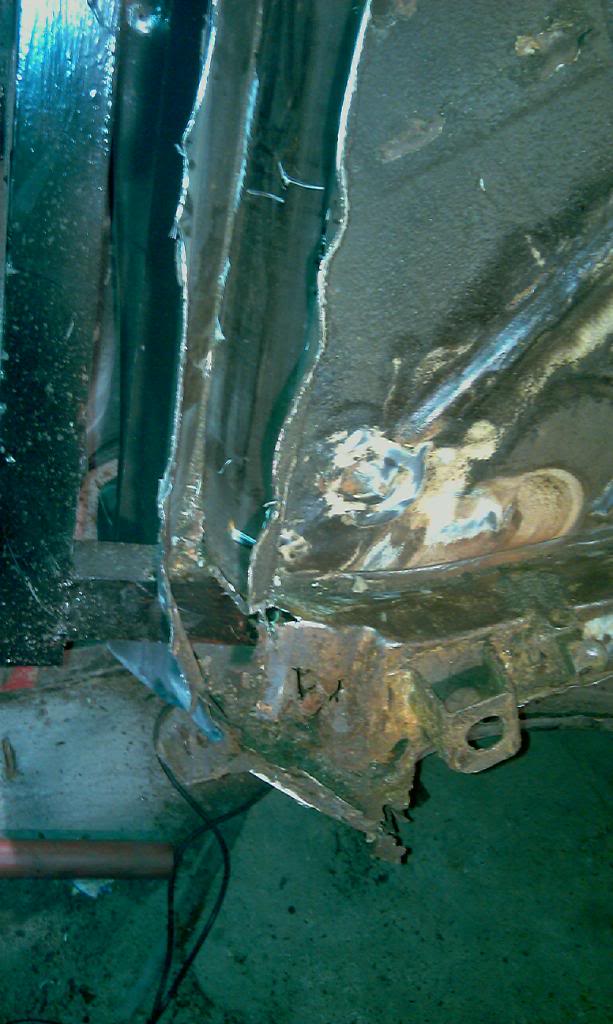
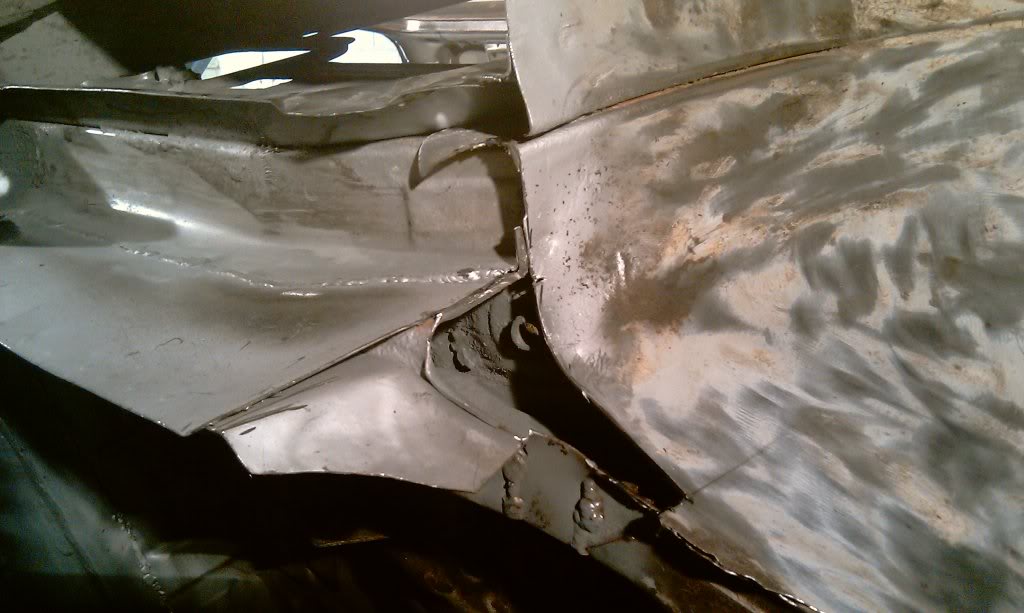
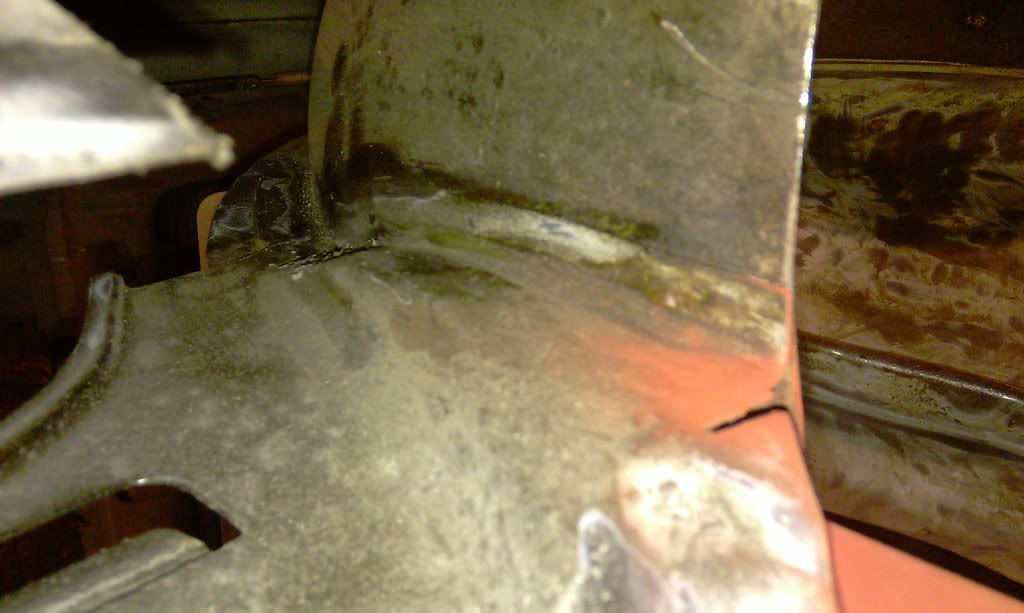
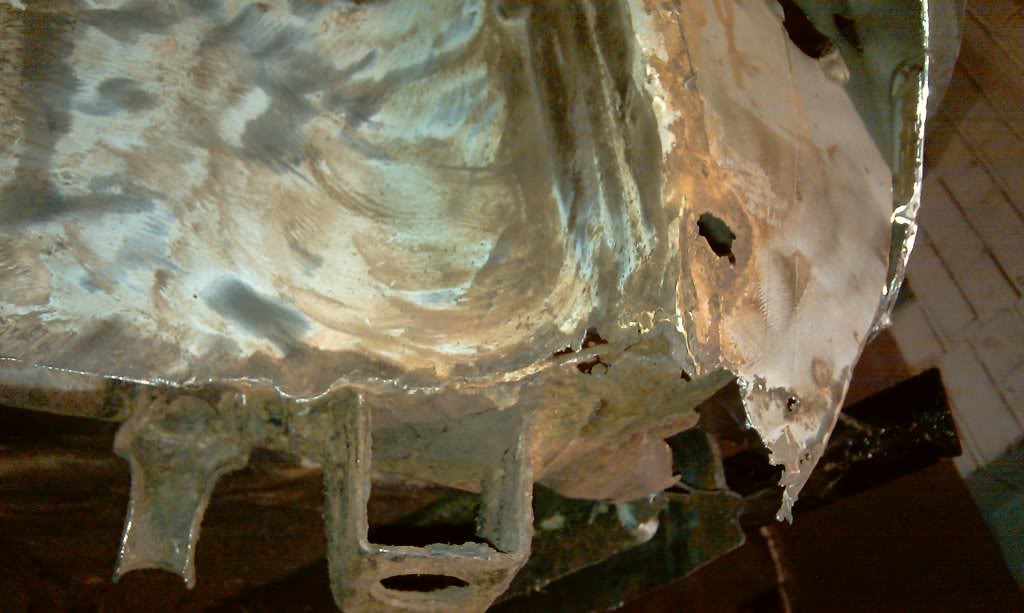
this corner is a right mess!!!! rotten chassis leg an everything!!!!
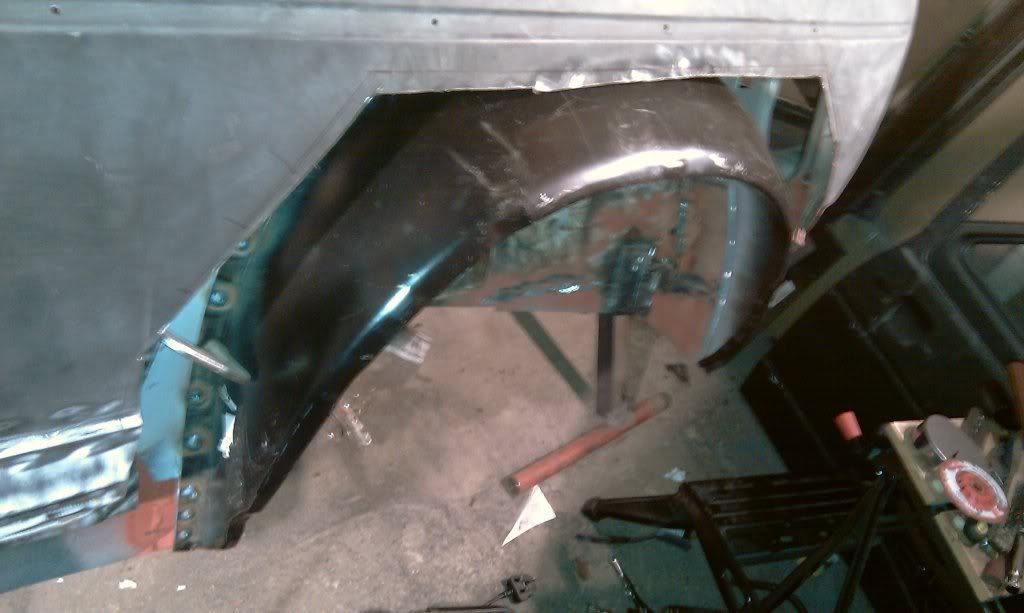
tub in place
put the arch on and positioned it where i want it. wish i cd have just tacked it in place where it was as it was spot on and looked good but still loadsa prep work to so onit before it goes on doh.
i dont know what this corner is suposed to look like really as it was original or solid when i got toit so im jus guessing. if anyone has a good pik of what these rear corners do look like then i would be gratefull if they could post one up! but for now its guna look like this….
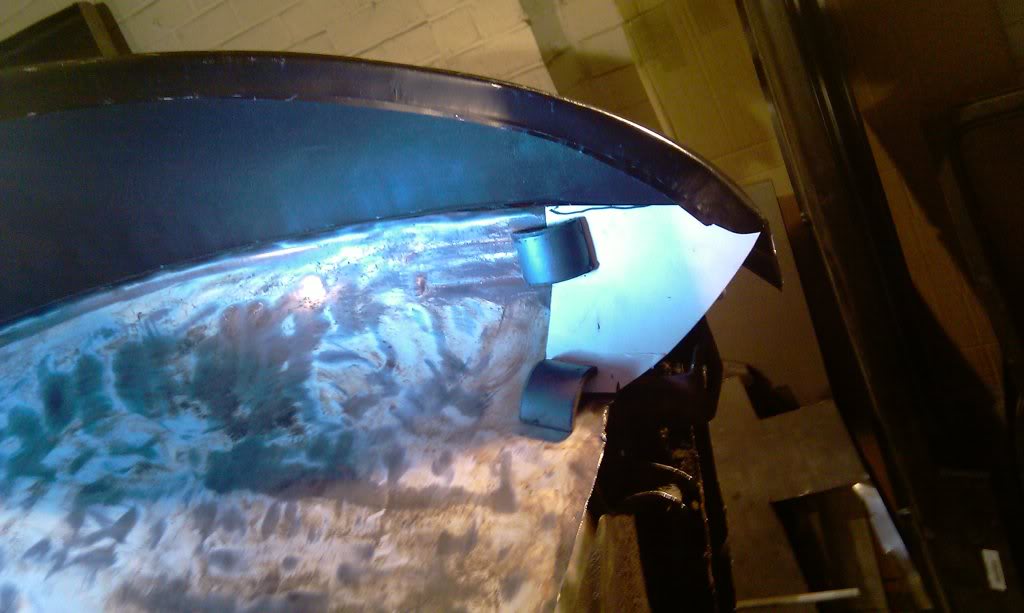
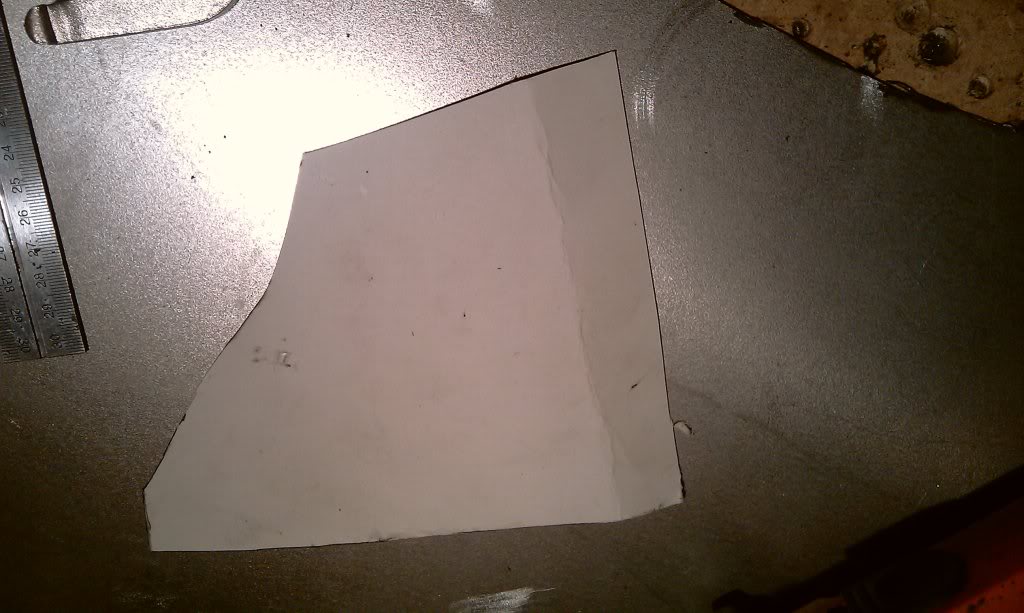
made some random lookin template out of about 4 different pirces of card haha

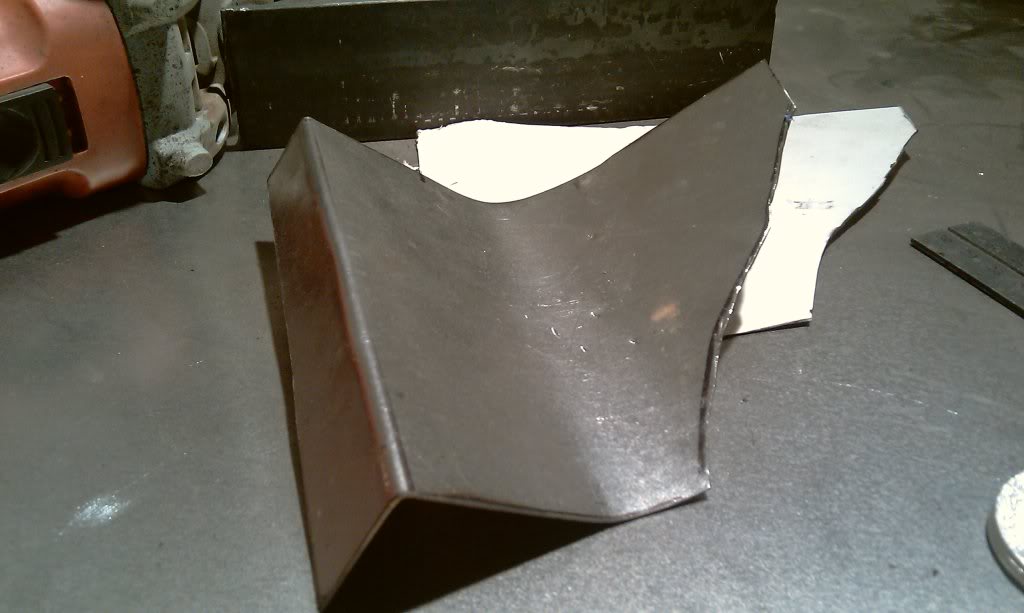
i cut out the template from my sheet of metal and shaped it into this lil beaut
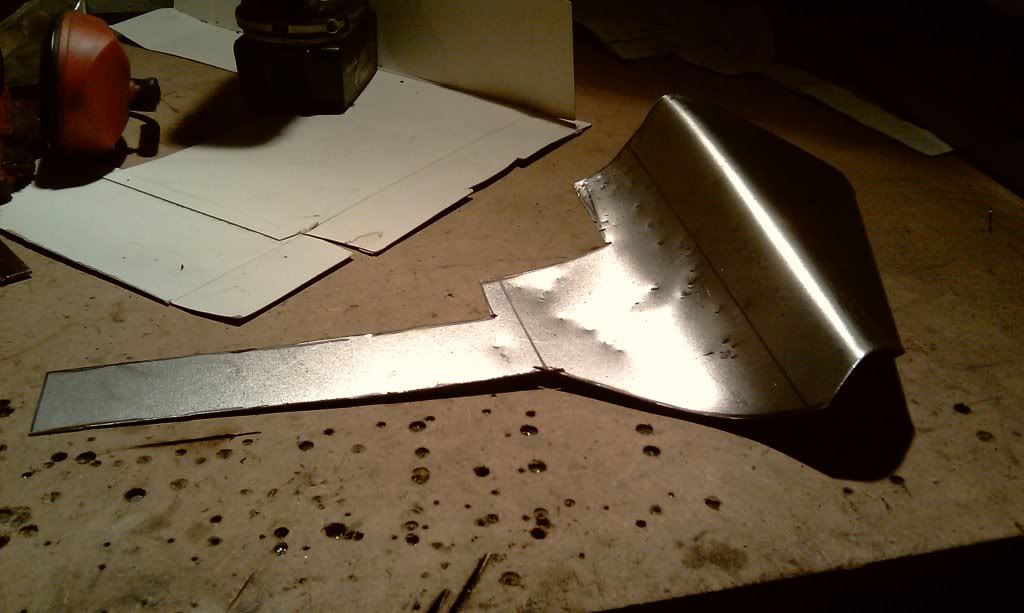
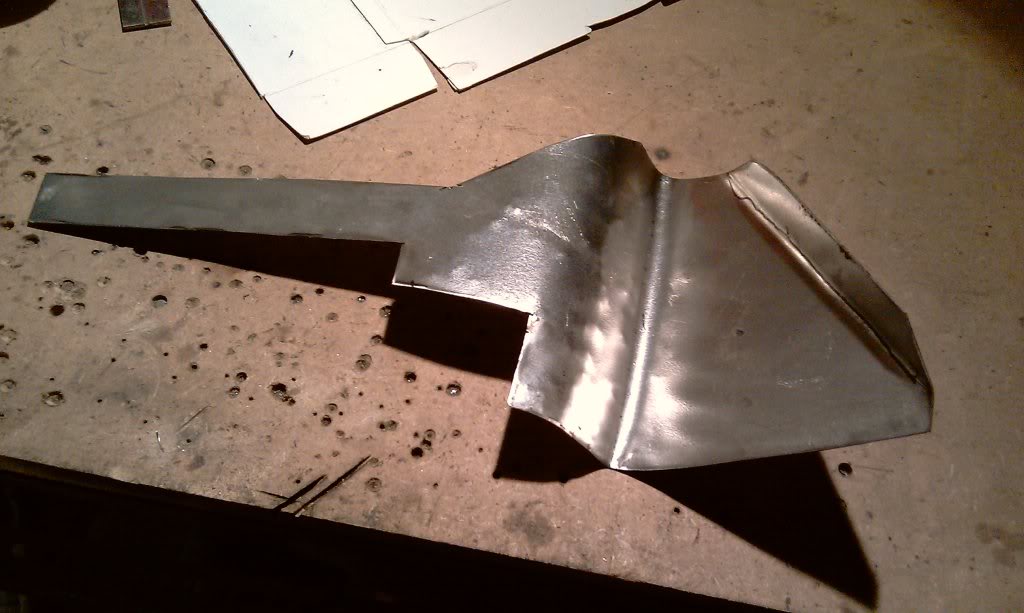
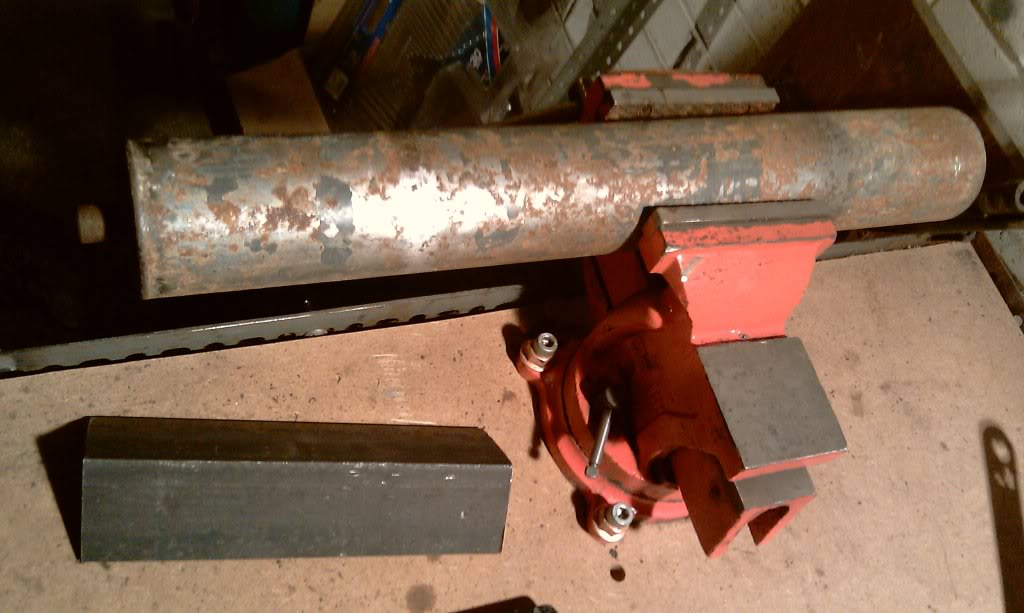
to shape it i put the 90degree bend init by bending it over the edge of my work bench. giggedy. then used this weapon of a piece of metal to put the curve in. for the back angle i clamped it using angle iron in the vice and bent it manually.
alil bit of hammering with it clamped in place and it was sweet. i marked around it and cut out the arch. dam chassis was mingin behind it!!! got some nice thick metal to repair that with tho hehe.
then i ran out of time annoyingly as i was on a proper roll but had enough time to tack the bugger in. required a couple of slight adjustments with the flap wheel and it slotted right in. will weld her up tomoro night i hope. the can get the tub on the either the sill or arch. not sure wich to do first?

score…
mk1 golf - resto
mk3 polo breadie - daily banger
mk3 polo breadie - daily banger
Posted
Settled In
tonight i welded in the repair panel i made yesterday and prepped the inner arch for welding in.
not guna be able to doit till the end of the week now which is annoying.
had troubles weldin the main bend in the panel together so hade to cut it out and put a lil piece in.must have missed a lil bit of pitting in the metal.doh.
panel welded and primerd up.
mk1 golf - resto
mk3 polo breadie - daily banger
mk3 polo breadie - daily banger
Posted
Settled In
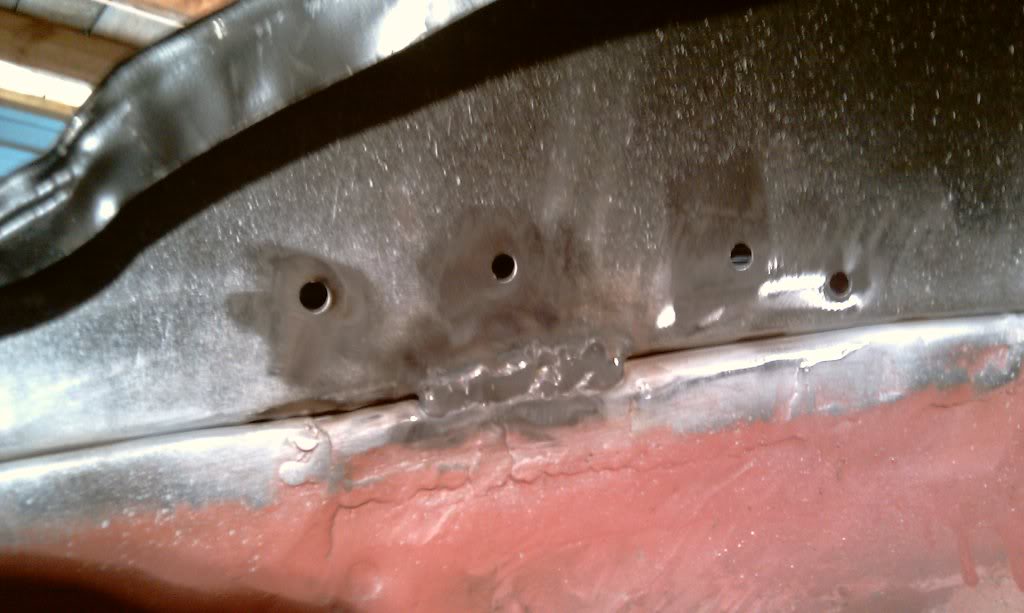
there was this lil bit lurking behind the sill box section. no way was ii guna leave it in there to fester and eventually come through again. especially as its in a place i cant get anti rust paint between the two surfaces!!!
cut and bent this to go in.
cut out then welded in, grinded back and weld through primerd..
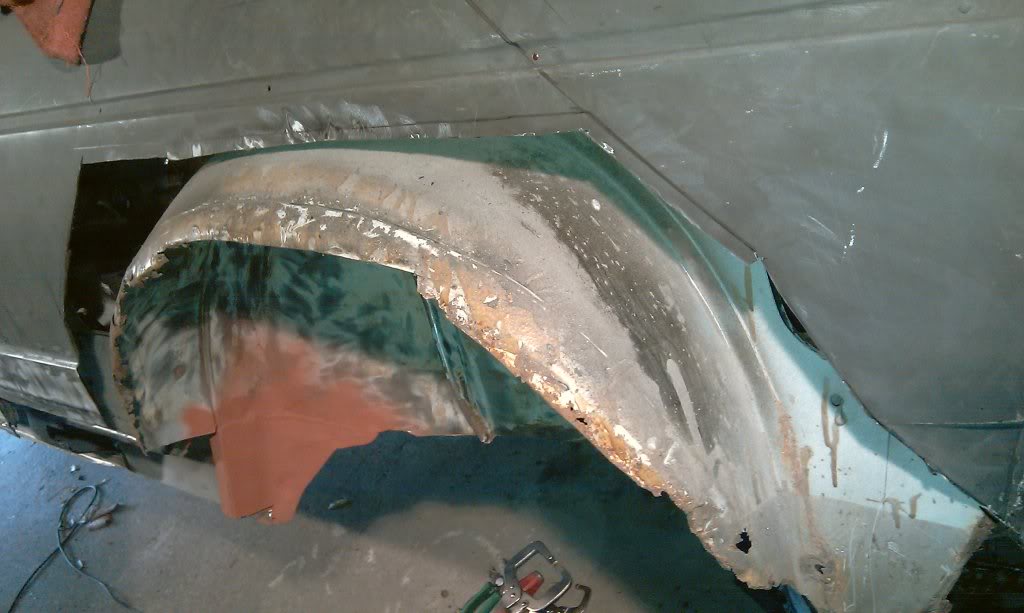
the rear corner with further repair patches put in.
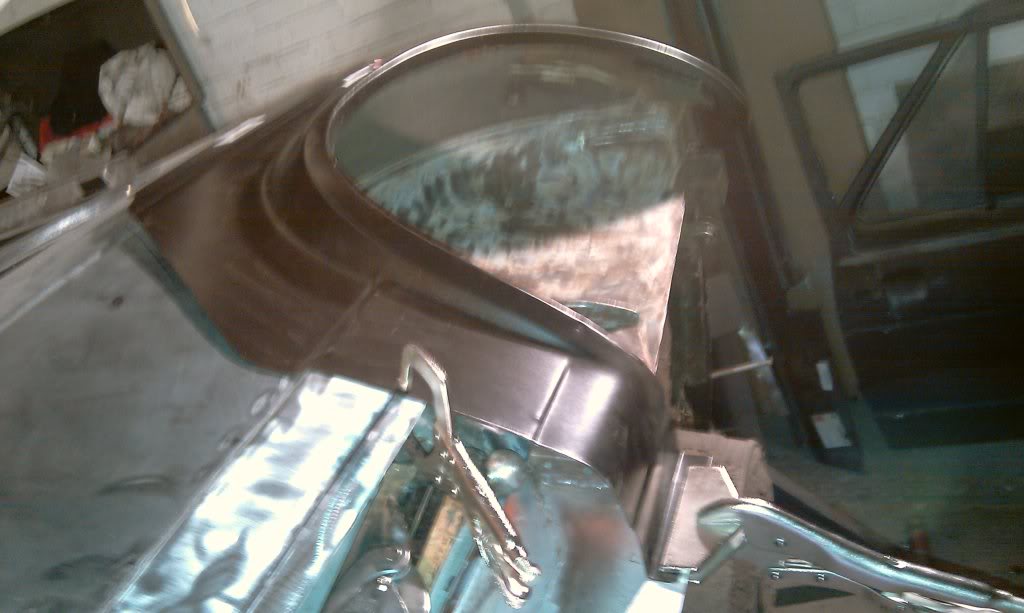
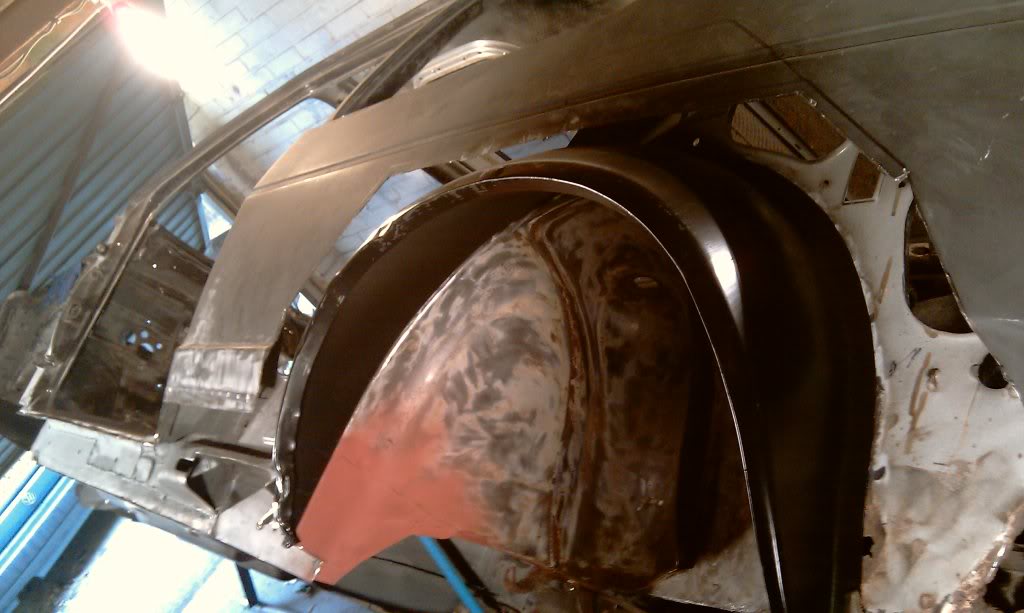
i then put on the outer tub half and lined it up with the wheel arch ontop in place to line it up right.
i then started plug welding it in.only got half done as it was getting late and i needed dinner haha.
will try get the last bit of the tub welded tomoro then i can finally start on the sill.
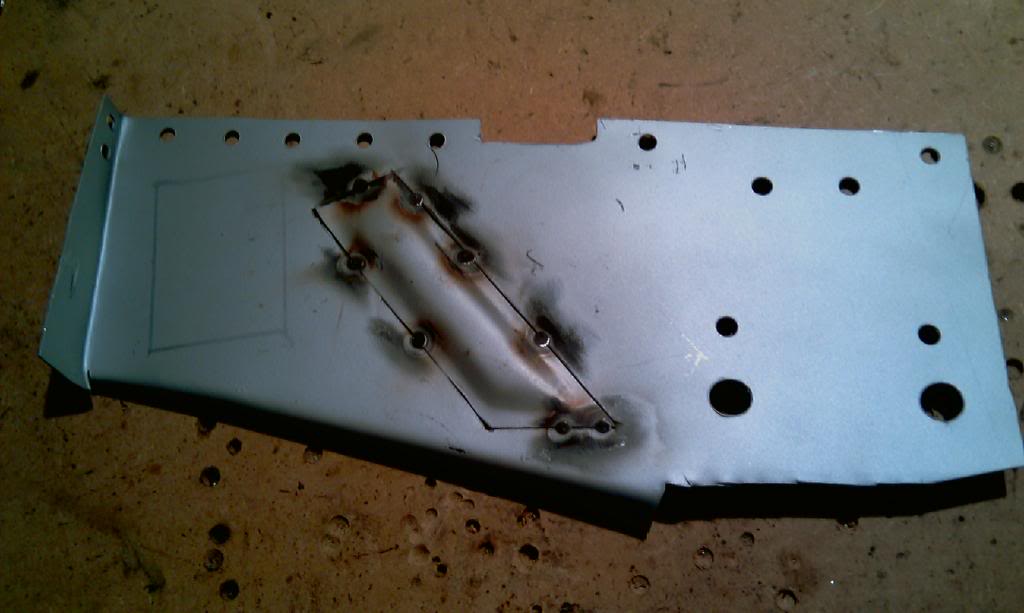
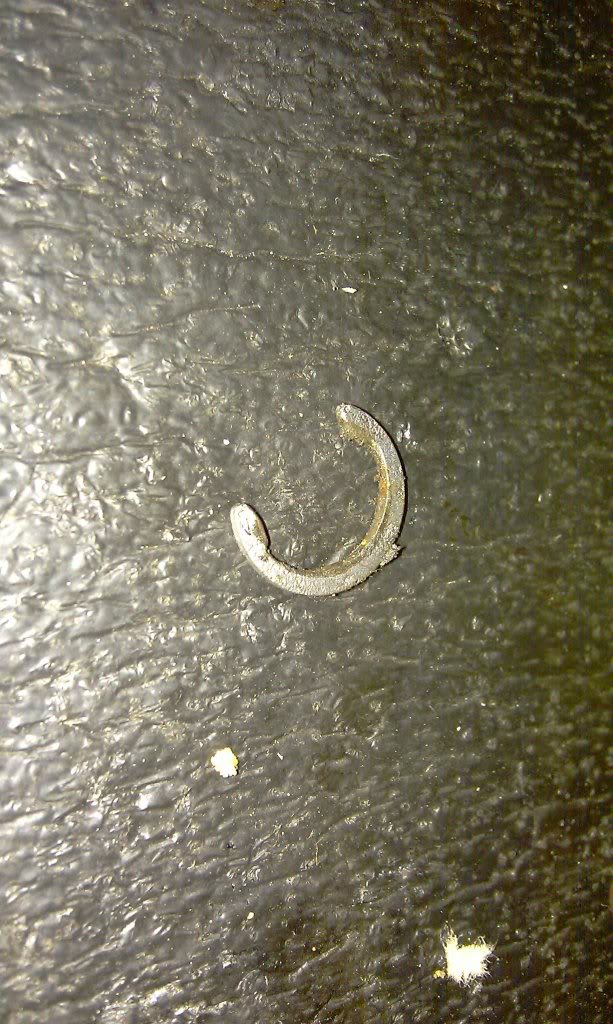
i also got more parts back from blasting, got the rusted seat rail and wiper arm bracket thing done. one of the wiper arms felt abit gritty and not smooth wen turned so i pulled it out and gave it a good clean out and greased it good an proper too find that the lil C clip and the washer was missing when i inspected the other side. how annoying.
dont know if it got blasted off or was jus missing but im on a hunt for new ones now…..
need this c clip lol
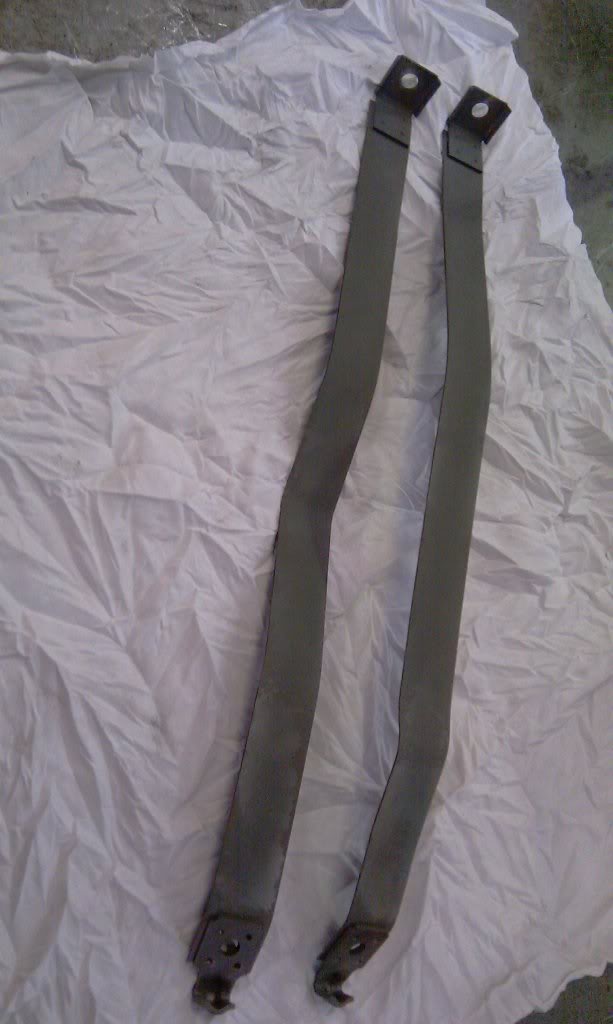
fresh fuel tank straps
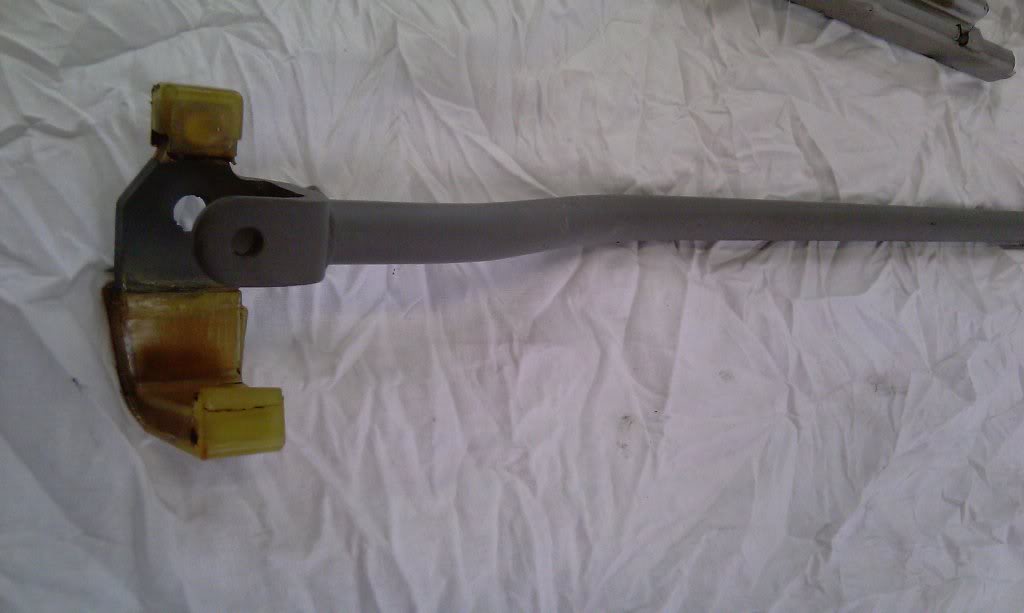
gear stick to linkage rod
safe…
mk1 golf - resto
mk3 polo breadie - daily banger
mk3 polo breadie - daily banger
Posted
Settled In
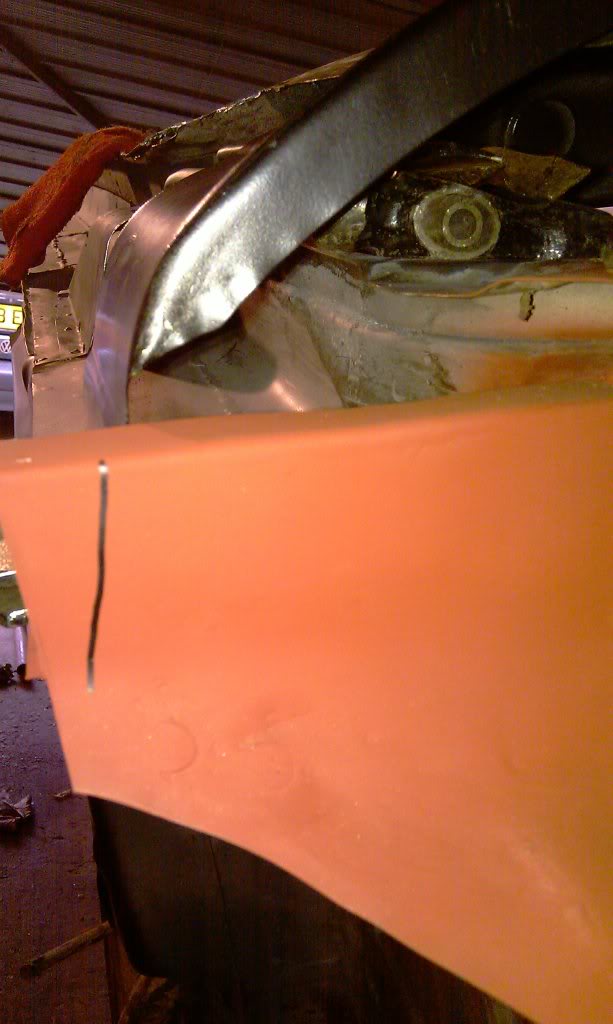
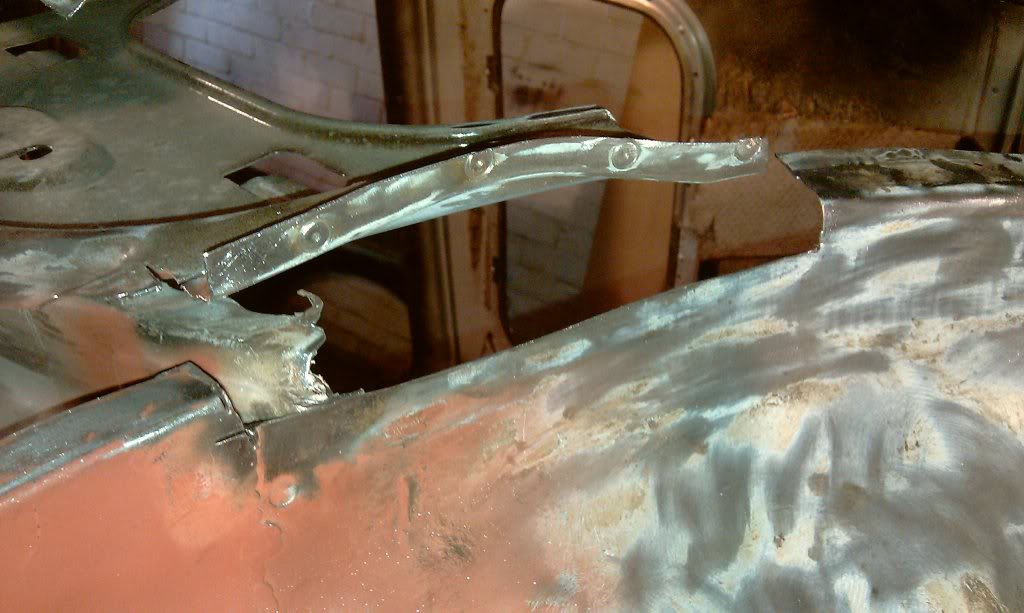
now thats on i can almost start more pressing and interesting matters such as gettin this bit in!!!

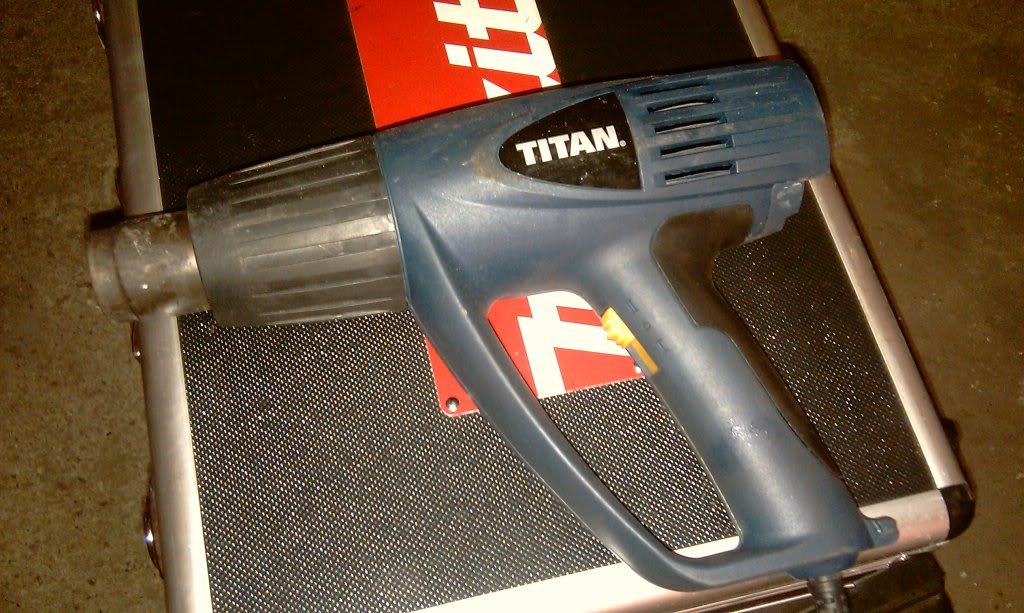
i acquired myself a hot air gun today, stoopid cleaners at work got a new one as this one was "broken". i checked it out and took it apart, turned out the contacts in the switch wer filthy and not actually contacting. 10 mins of investigation and cleanin time and i had myself a working gun hahah. used it tonight to melt sum wax oil off. been havin issues with it melting into my welds as im welding so if i can clear an area im about to weld with it beforehand its a result.
i love tools……even more free tools!
hopefully i can get some work in this weekend.
safe
mk1 golf - resto
mk3 polo breadie - daily banger
mk3 polo breadie - daily banger
Posted
Settled In
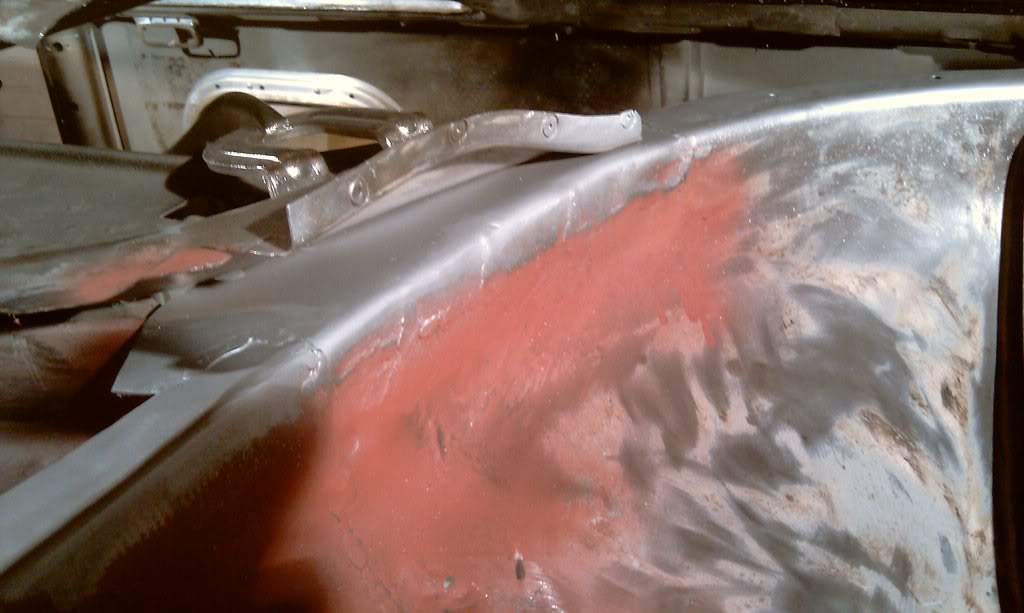
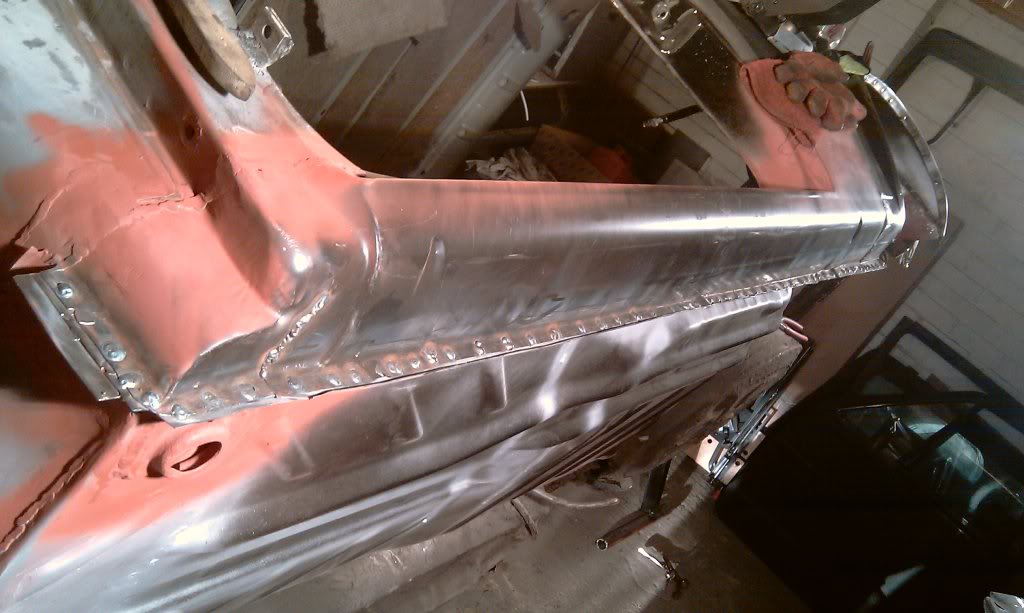
got onit at the weekend and sweated it up in my garage and welded in the box section.
started with this bit that i had to cut out to weld in the tub

and i drilled some holes in the tub to plug weld the piece back on.
tacked the bit in
and then tacked in the bits that i cut out ages ago to do the inner sill repair with a new piece in where the rust used to live. not any more!
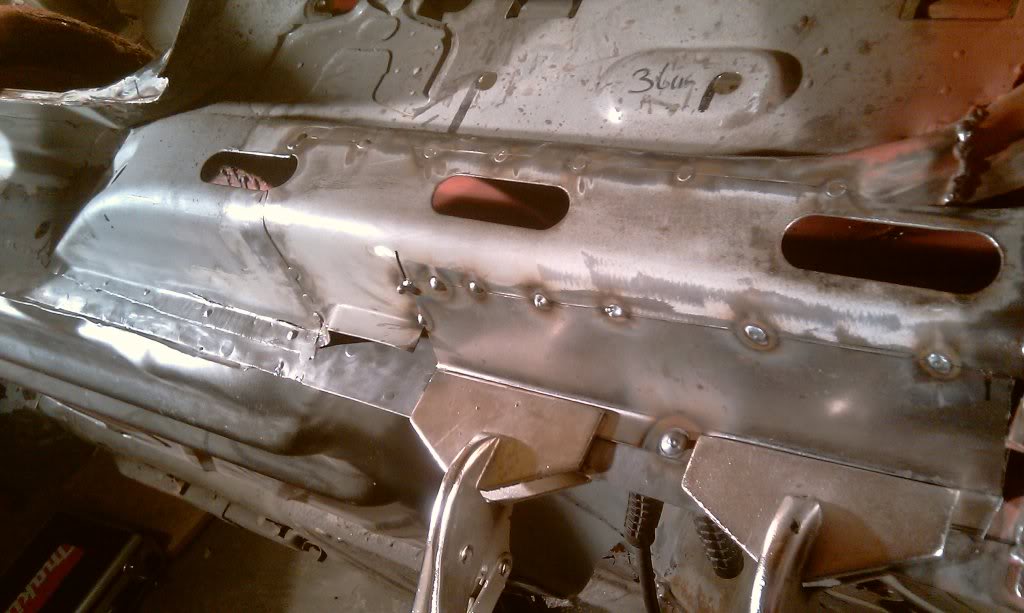
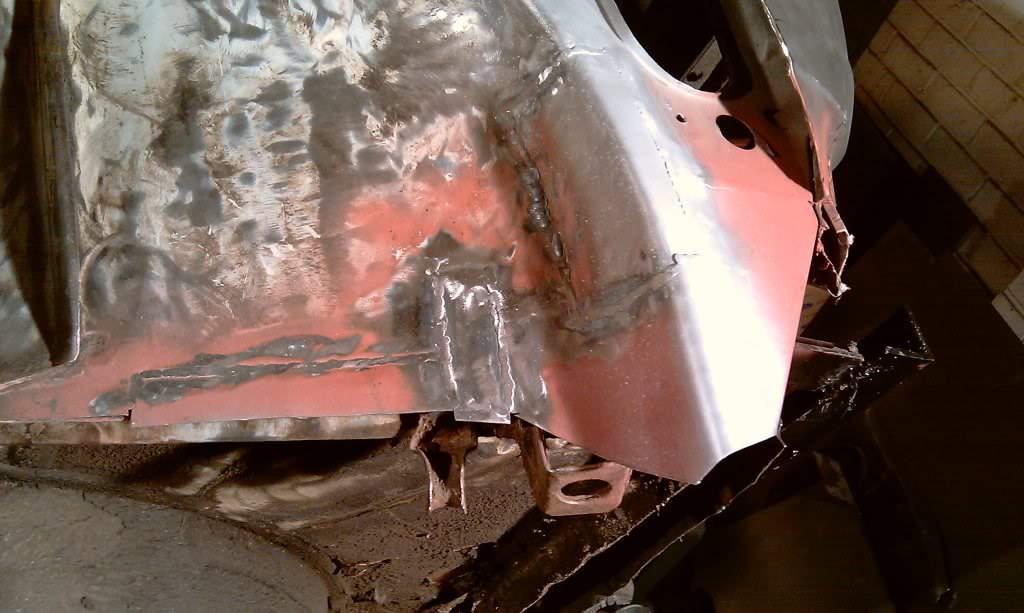
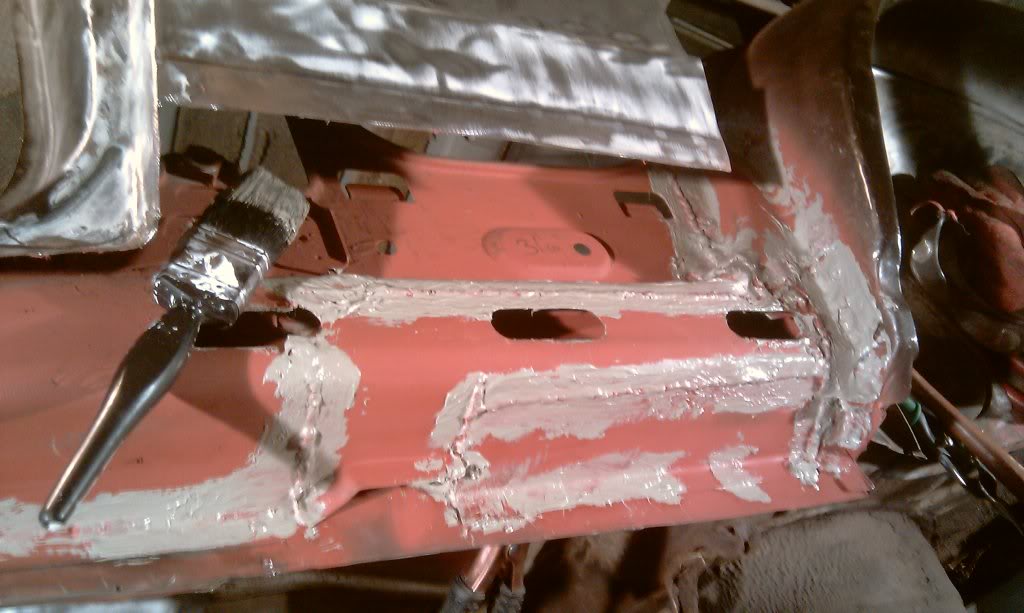
then i welded it all up and sprayed with sum red oxide primer

i then splapped a load of upol seam sealer on to protect it when the sill goes on.
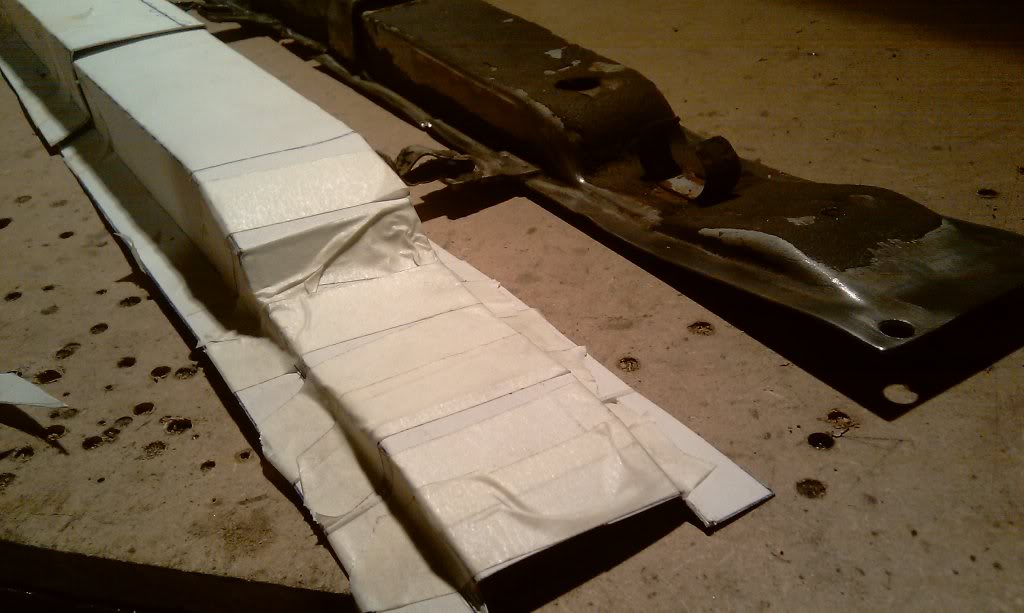
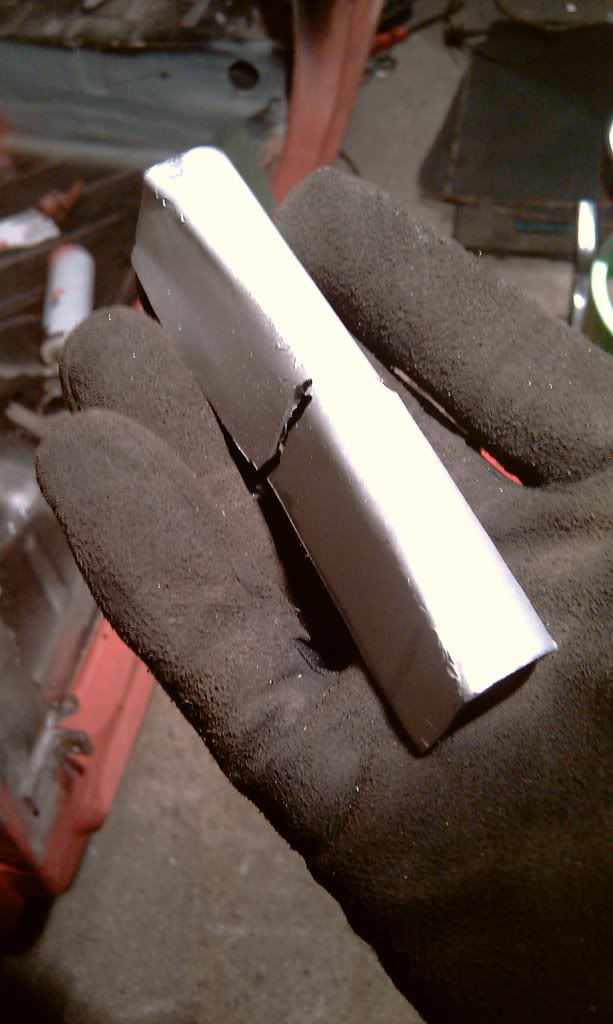
i would like to take the golf off the rotisserie jig thing for welding of the sill to stop twisting of the car and it being welded in weird so i wana put it back on stands but wanted to put it on the chassis rails that run from to wishbone mount along the floor so ive measured up and made some templates to make some new chassis bits out of. need to get on the sheet metal folder to get these bits done, naff hammering em into shape haha.

safe
mk1 golf - resto
mk3 polo breadie - daily banger
mk3 polo breadie - daily banger
Posted
Settled In
unfortunatly and annoyingly today was the first time i got to work on the golf in almost four weeks due to changing jobs and my polo daily broken down twice in 1 month, can you believe it.
dam car i dont want to spend any money on ended up costing me �200 just in parts, lucky im a mechanic so could do all the work myself. im now broke and have had to spend the money that was suposed to be gettting me to the agm next week so thats pissed me off also.
note to self - dont buy gsf alternators. they suck….especially when there brand new.
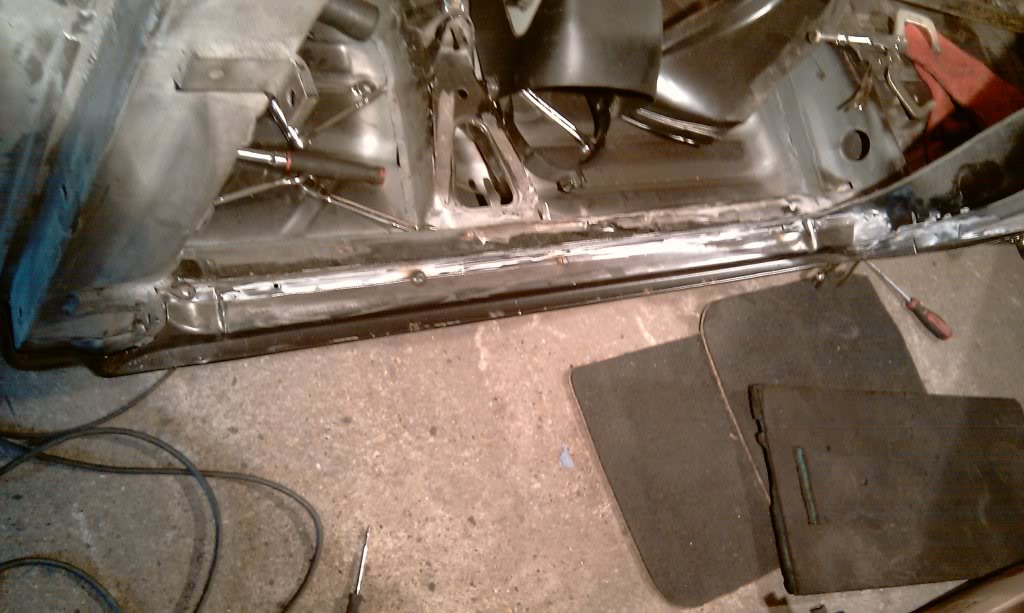
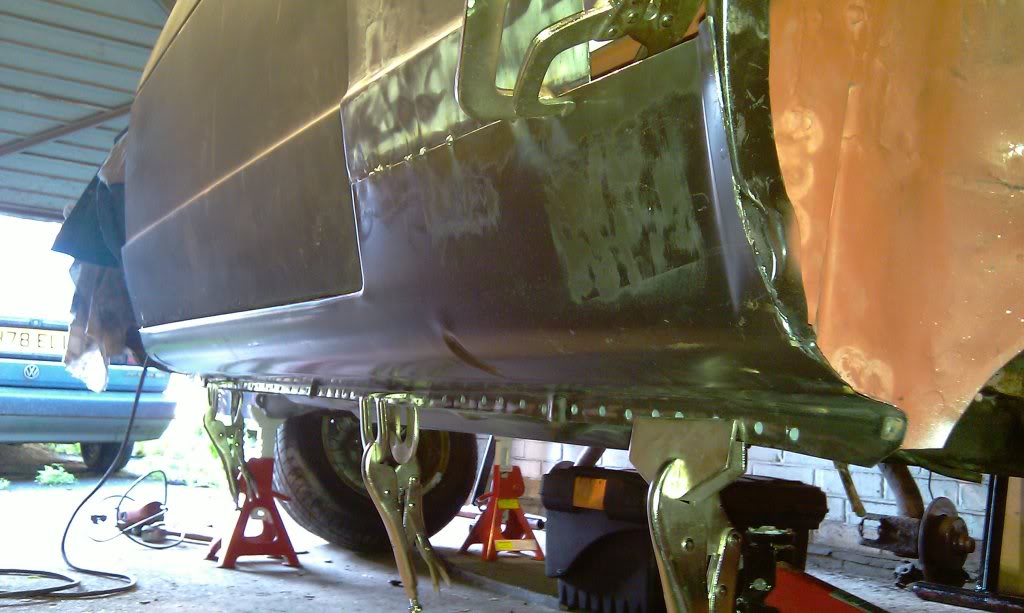
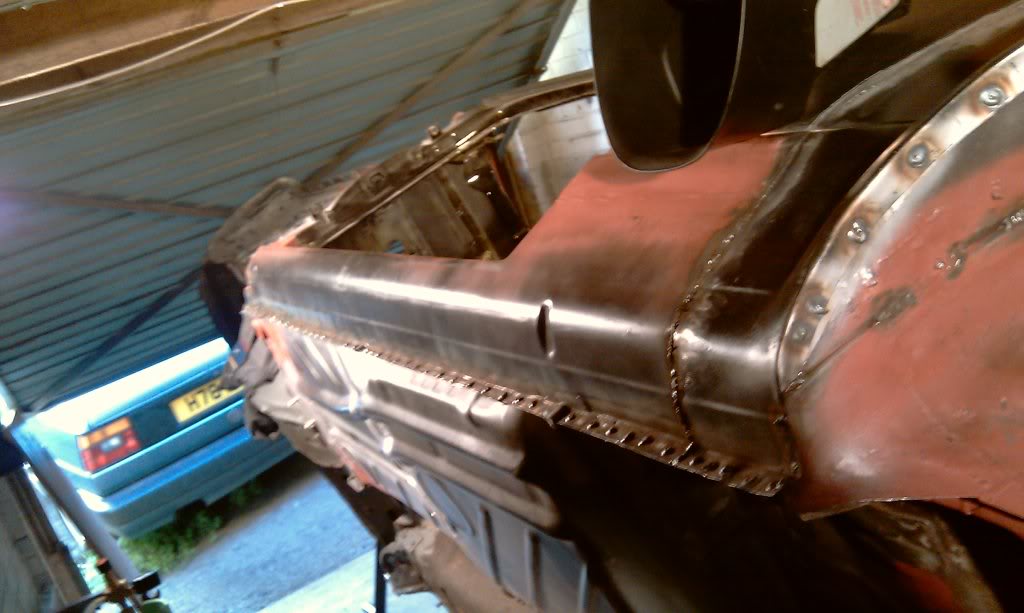
anyway i smashed out another bit today which is pleasent. got the n/s sill on. spent ages prepping to get iot right, all the cleanin off that black stuff they put on the panels and cutting to get it to fit right. got there in the end though.
decided to take the car off my jig for this part as i ddnt want any twisting in the body when i welded it on so i put it back on axle stands. i also hung the door on to get the sill positioned right.
as my garage is narrow getting the doors on and off is a right paint so instead of tryin to get the bbolts in i cut sum longer bolts heads off and wound the studs into the door an then put nuts on them. was much easier.
i put the sill in place and clamped the bottom in place. i did a couple of tack welds to hold the top in place so i could mark around it for cutting. i then ground the tacks off and cut the sill to where i needed it.
tacked in
without sill

after ages of adjustin and trimming it was time to weld that badboy in. i started with sum spot/tack welds to hold it in place

i then clamped the bottom into place and re hung the door to make sure everything lined up before the real welding commenced
i then set about butt welding the top part of the sill in doin some plug welds from underneath to keep it all together.
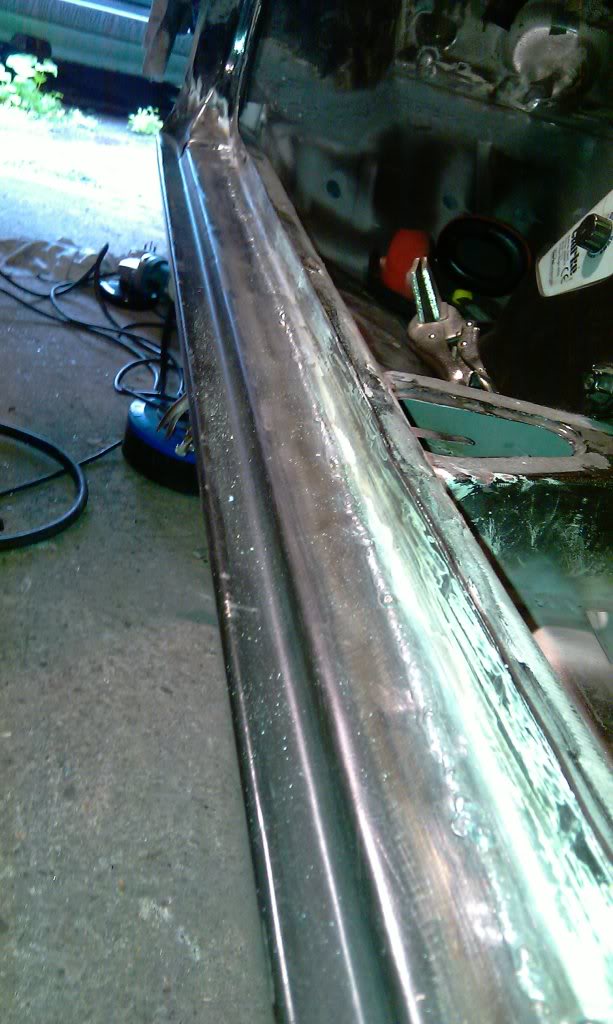
the step part is all welded in now but i havent done the rear panel completely or all the plugs from underneath yet. more tomoro.

mk1 golf - resto
mk3 polo breadie - daily banger
mk3 polo breadie - daily banger
Posted
Settled In
Posted
Settled In
never welded before starting this resto. getting the hang of it lol.Dubwanabe said
its a good job your handy with a welder keep the updates comming
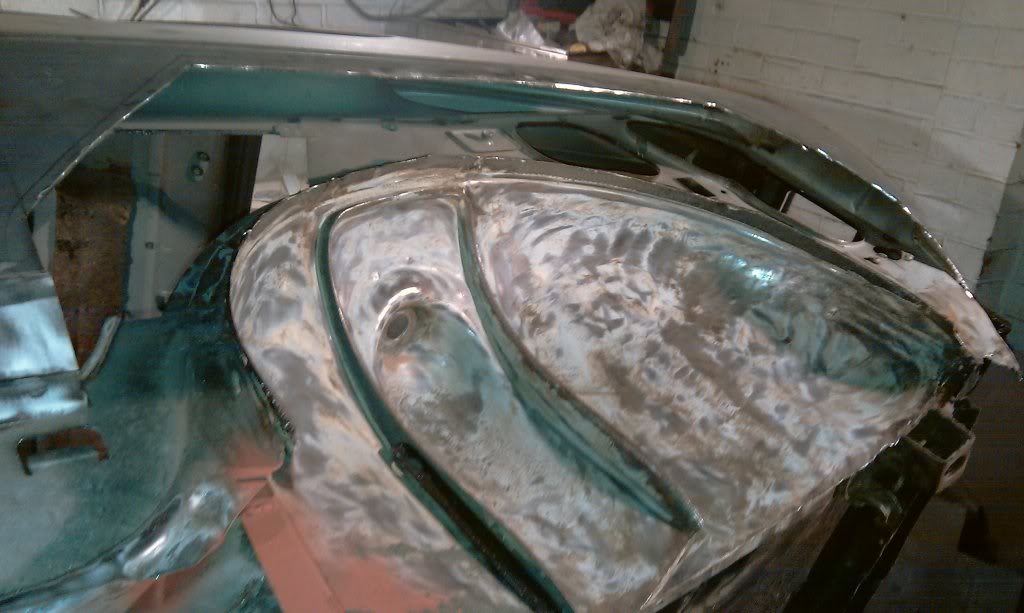
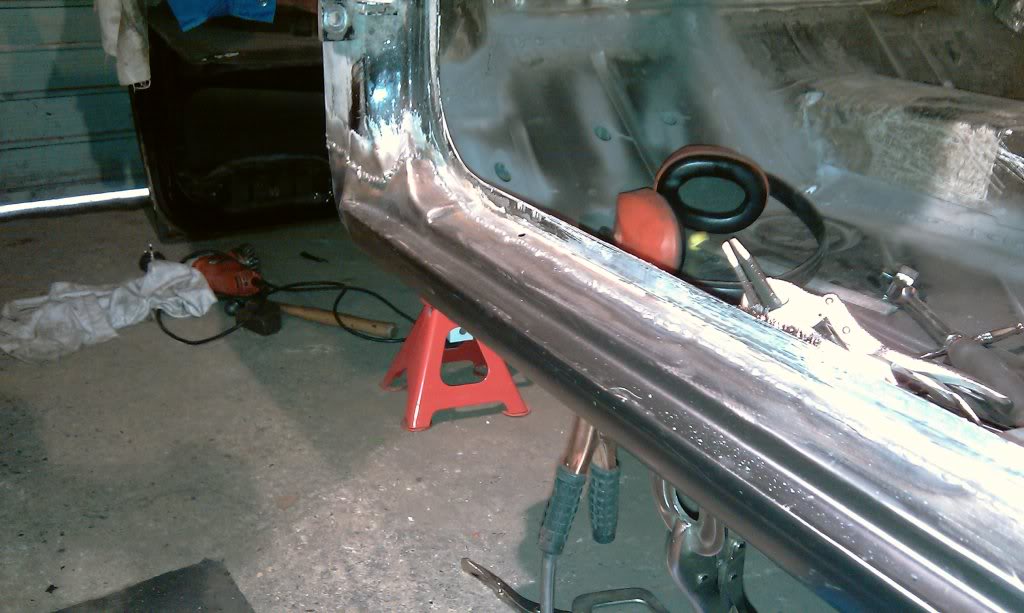
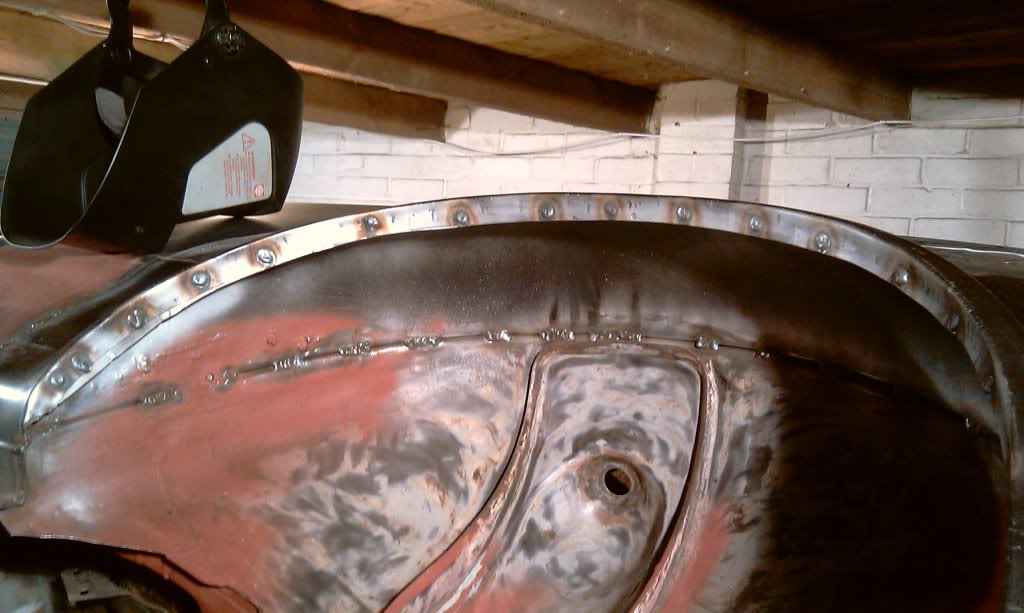
today i ground back the step as much as i could with the flap wheel but sum weird angles on the front an rear parts so need to properly smooth them off still as flappy wouldent reah.
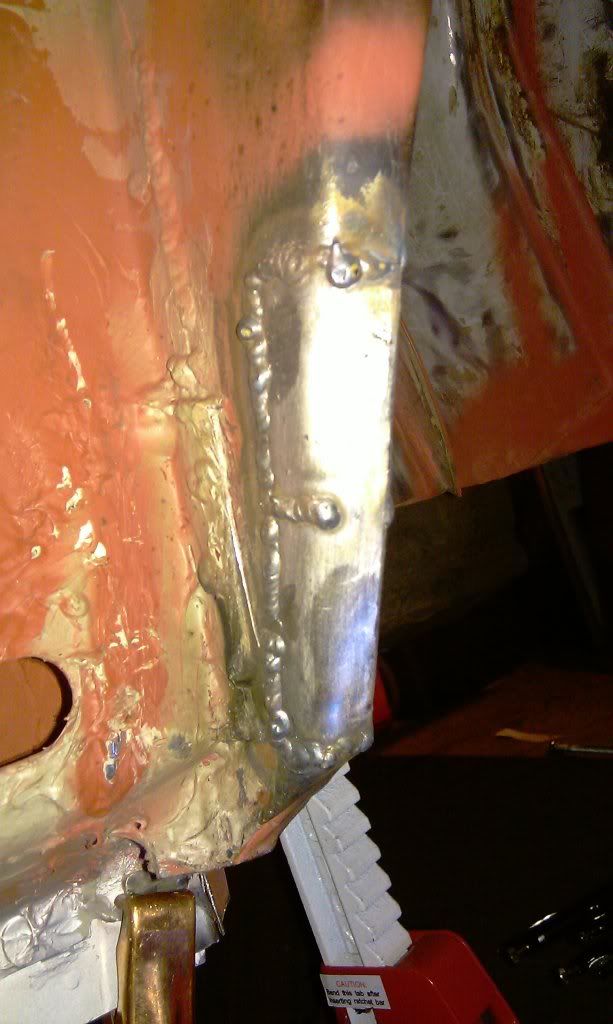
i welded the rear panel between door and arch today also. first bit of welding on a visible body panel today. got a lil bit of distortion but im guna spend a while with a the hammer an dolly to try get it out. light skim of filler willl be needed though.
now know to weld even smaller amount at a time when i put the arch on next to minimise distortion.
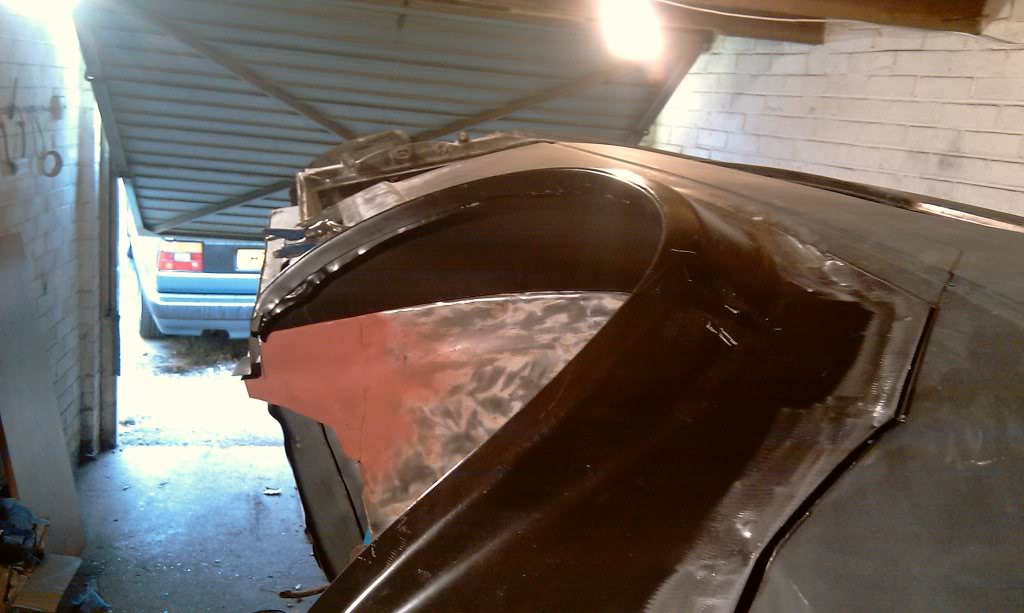
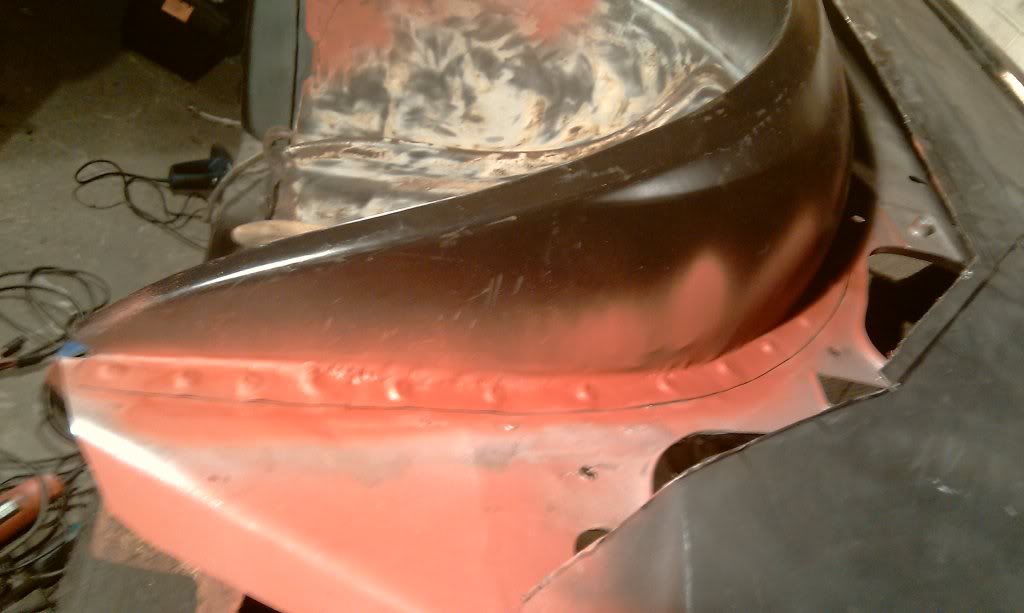
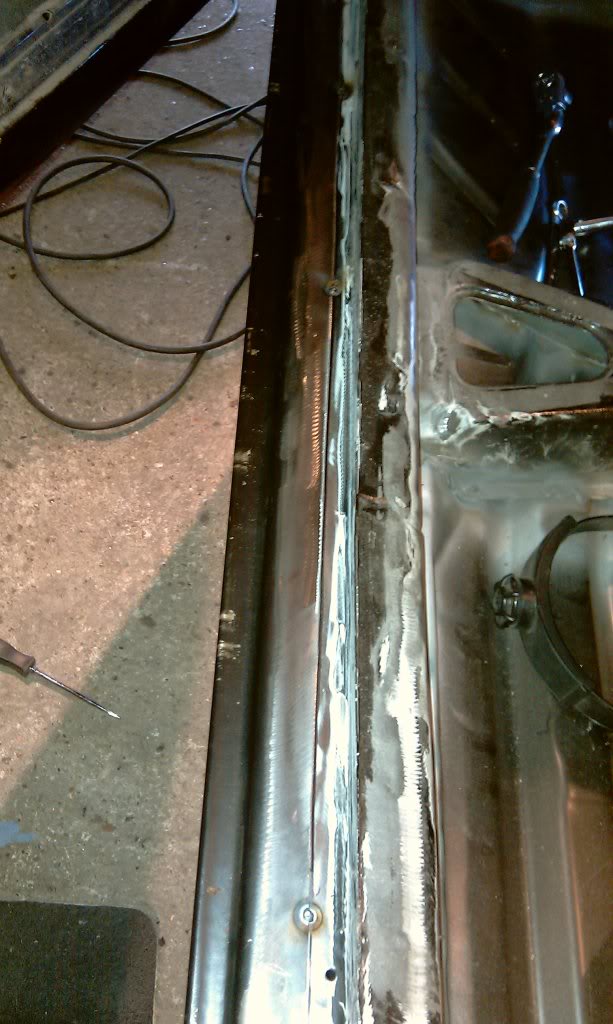
rear 1/4 panel welded and ground down. i use my edge setter tool on the original panel side so the new panel would sit abit flusher. worked ok too. got perfect penetration through it too which is nice to know. its good when u can see behind your weld to make sure it went through properly.
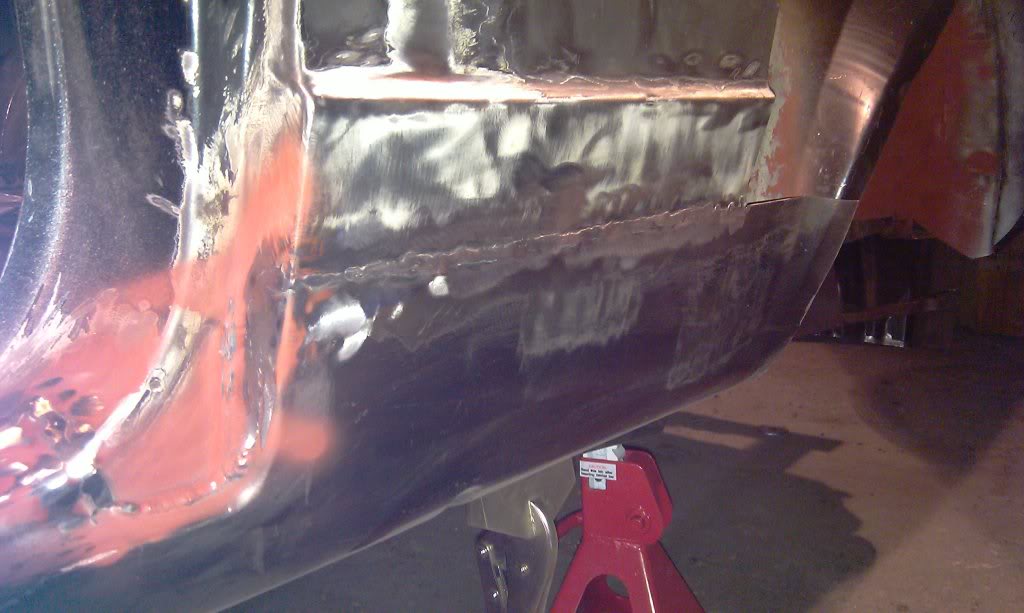
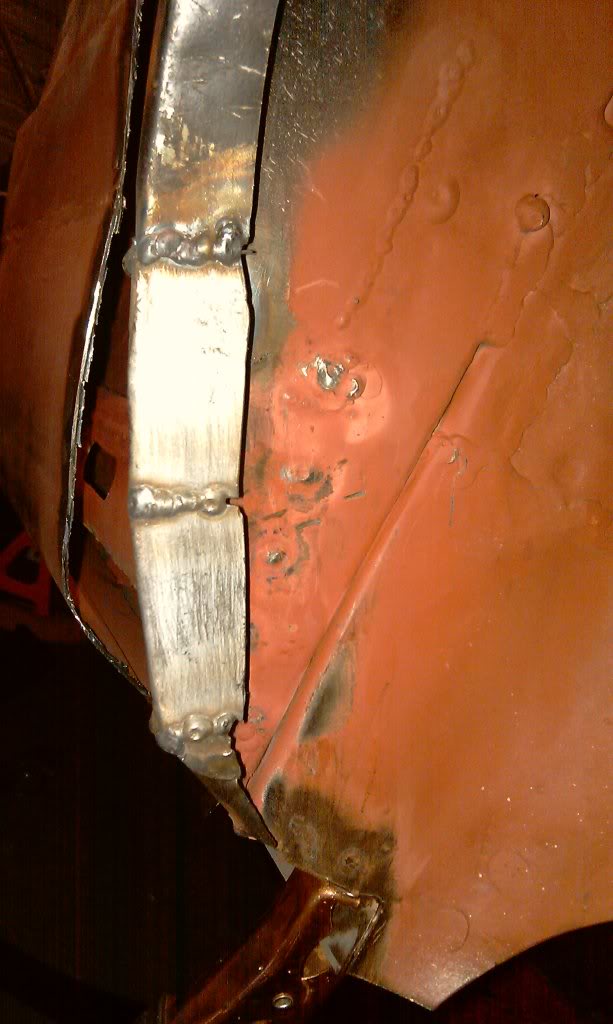
as it is at the moment, still grindin to do but almost there. sprayed up in oxide primer.


enjoy………
mk1 golf - resto
mk3 polo breadie - daily banger
mk3 polo breadie - daily banger
Posted
Settled In
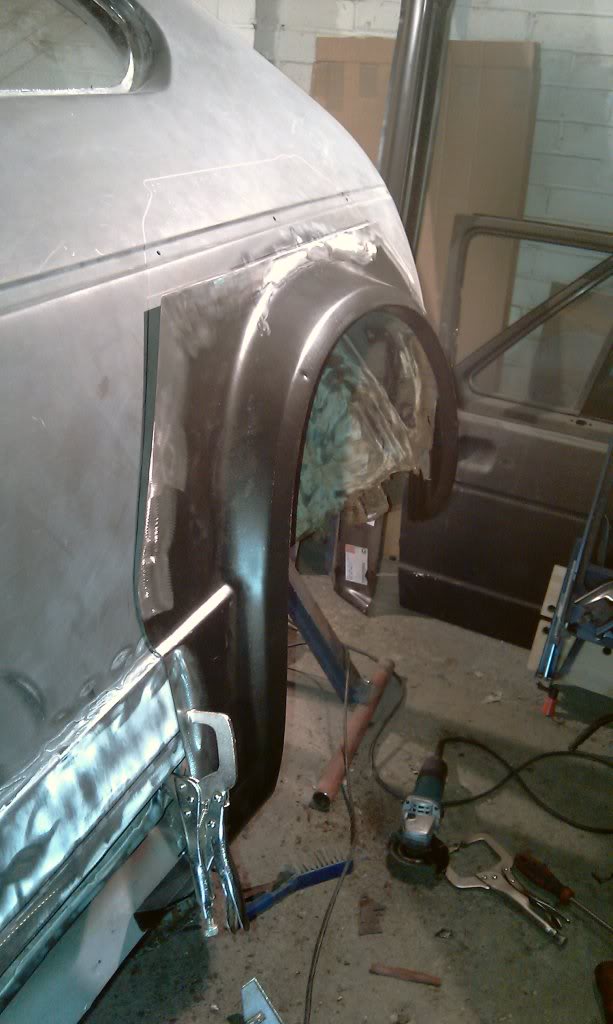
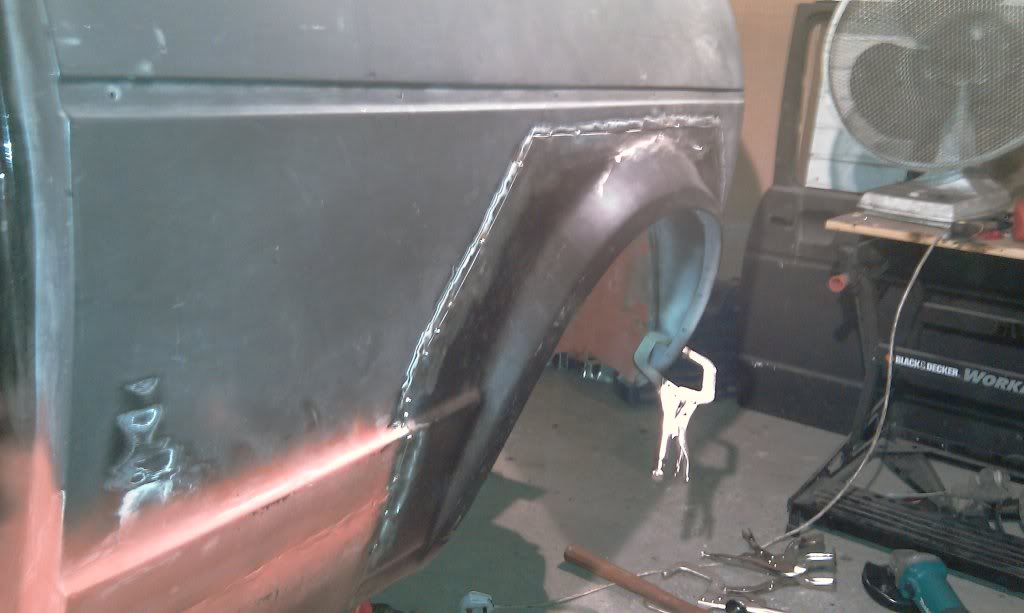
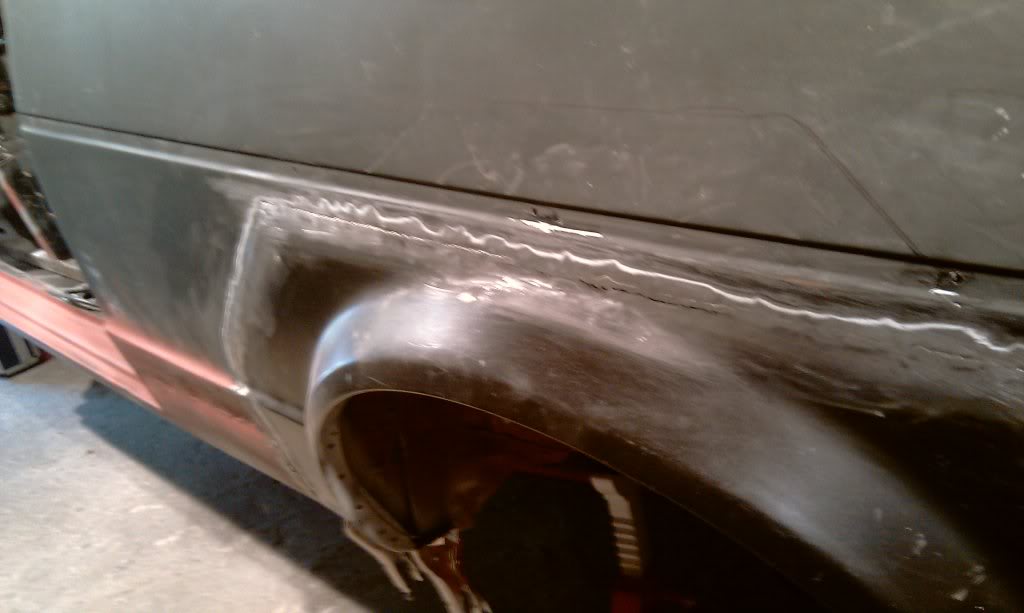
todays task was to get the rear arch on. was an annoying job to say the least. the inner arch that i had put onit had sum mash up bit at the bottom which didnt make any sense to why it was there, just meant that the outer arch had nothin to weld onto.
note the dent bit at the bottom.

i then fabd up a lil bit to go inits place and then welded it in,
with the inner arch all sorted i set about gettin the outer arch on. this took a while to get lined up right an had tacked it place once and cut it out again as i wasnt happy with the linin up of it but its where i want it now. its all tacked in jus needs to be completely welded in now.guna be loooong todo.
mk1 golf - resto
mk3 polo breadie - daily banger
mk3 polo breadie - daily banger
Posted

Old Timer

bob
Posted
Settled In
thanks bob. i think the key word for this project is PERSERVERANCE……Swallowtail_uk said
wow, thats alot of welding man…….keep it up, taking shape now..hats off to you.
bob
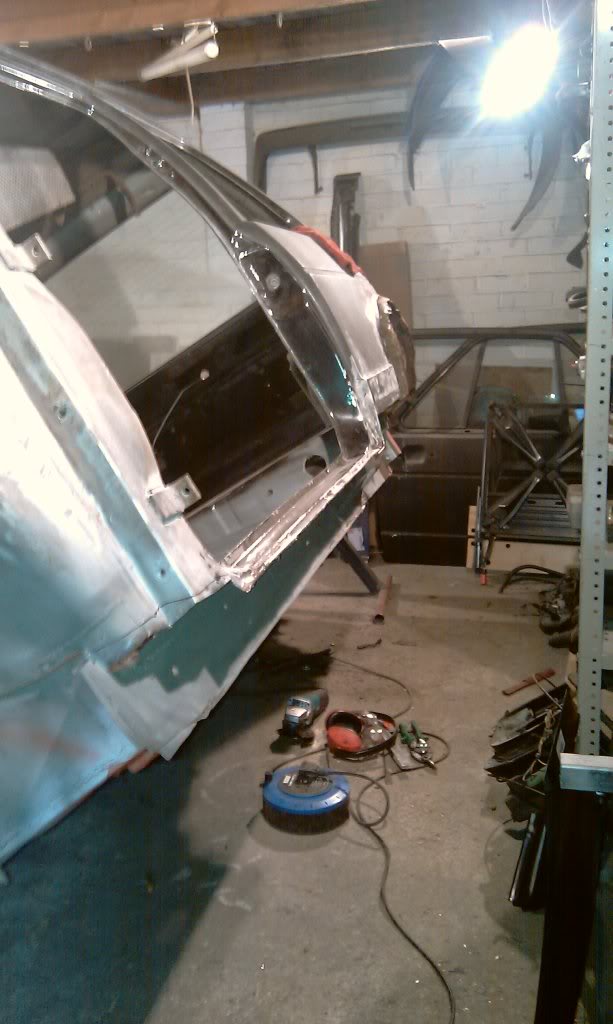
almost 1 side done
only 3 more to go??
mk1 golf - resto
mk3 polo breadie - daily banger
mk3 polo breadie - daily banger
Posted
Settled In
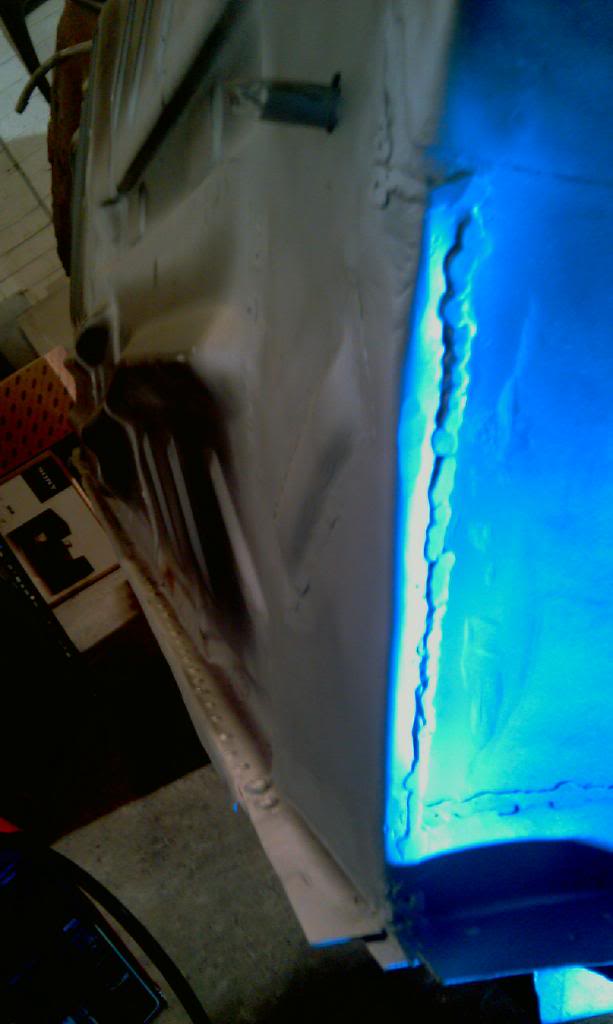
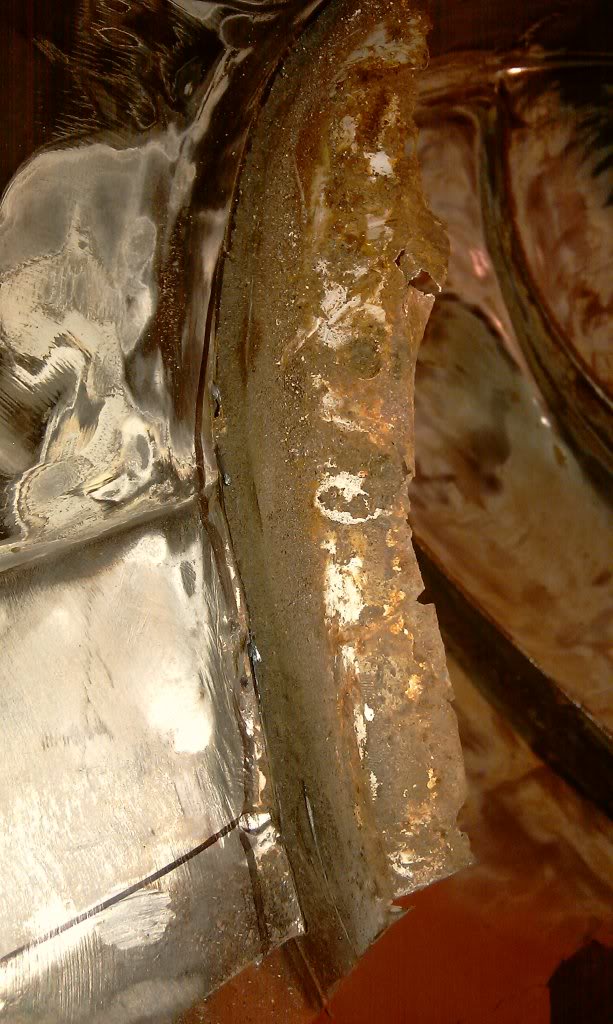
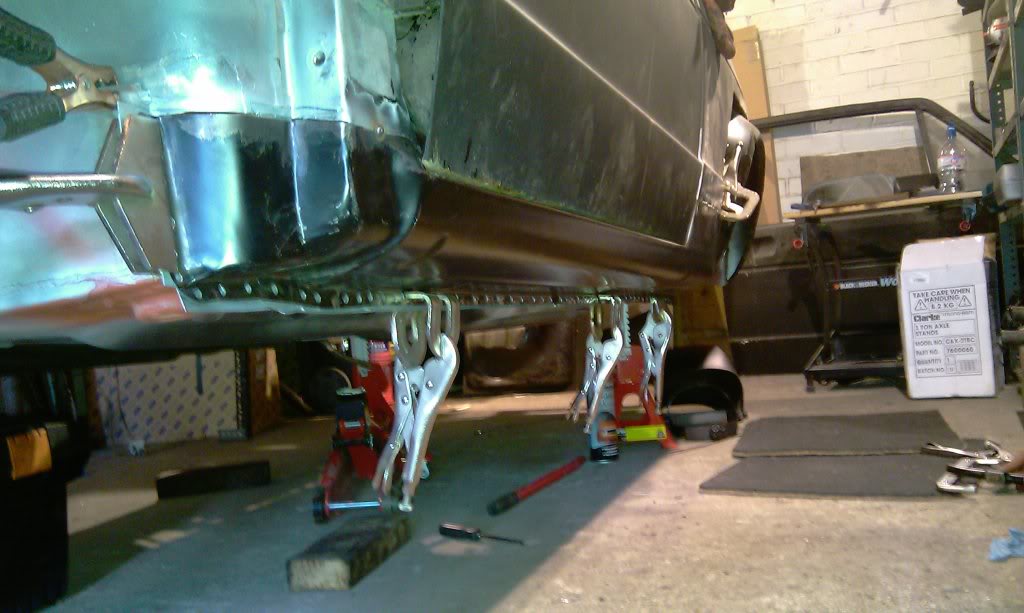
this week ive been very slowly welding the rear arch in half centimeter by half centimeter lol. took a while but very minimal distortion in the panel. still a bit more sandin to do onit but will need a skim of filler fo show…..
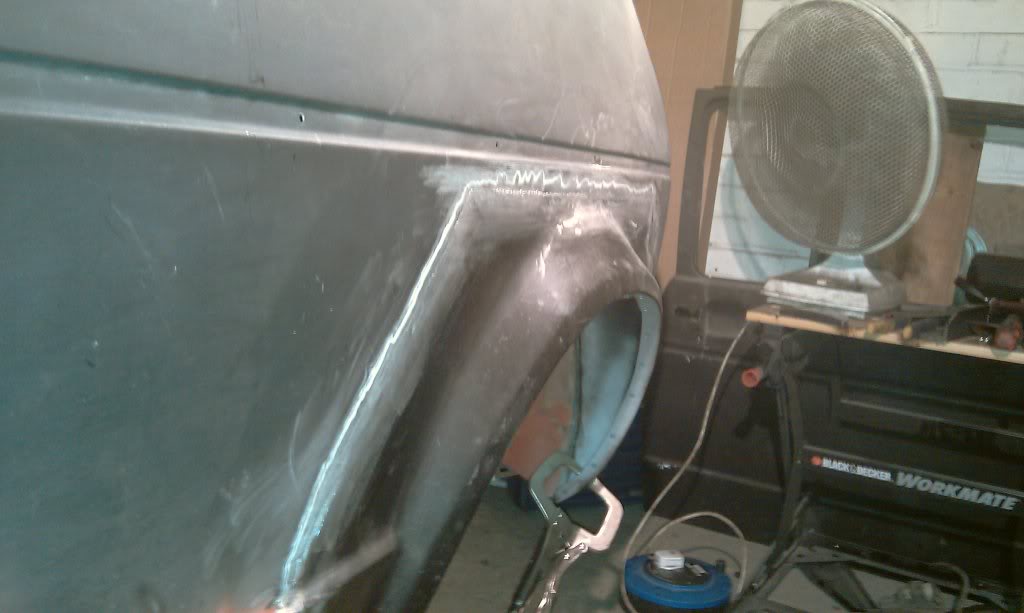
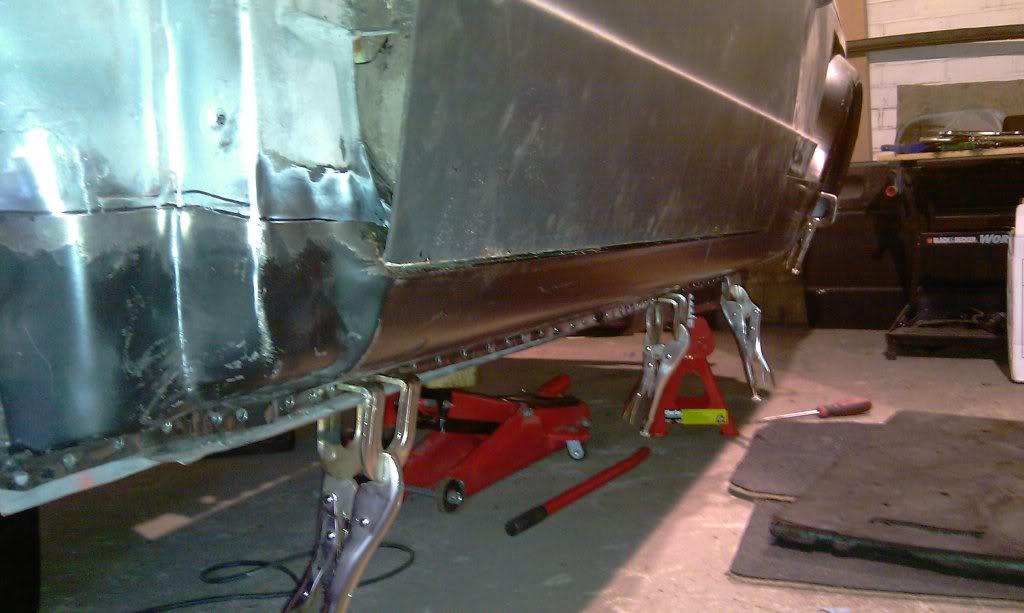
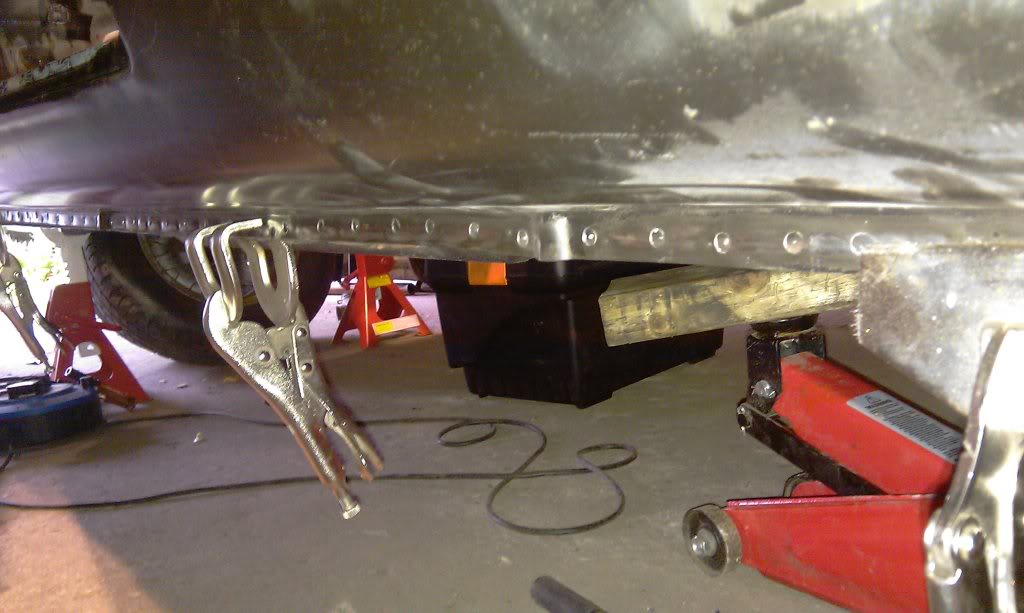
i put her back on the jig an flipped her up so i could do all the pug welding from easy workin height. did some whilst it was on stands but plug welds dont like gravity.
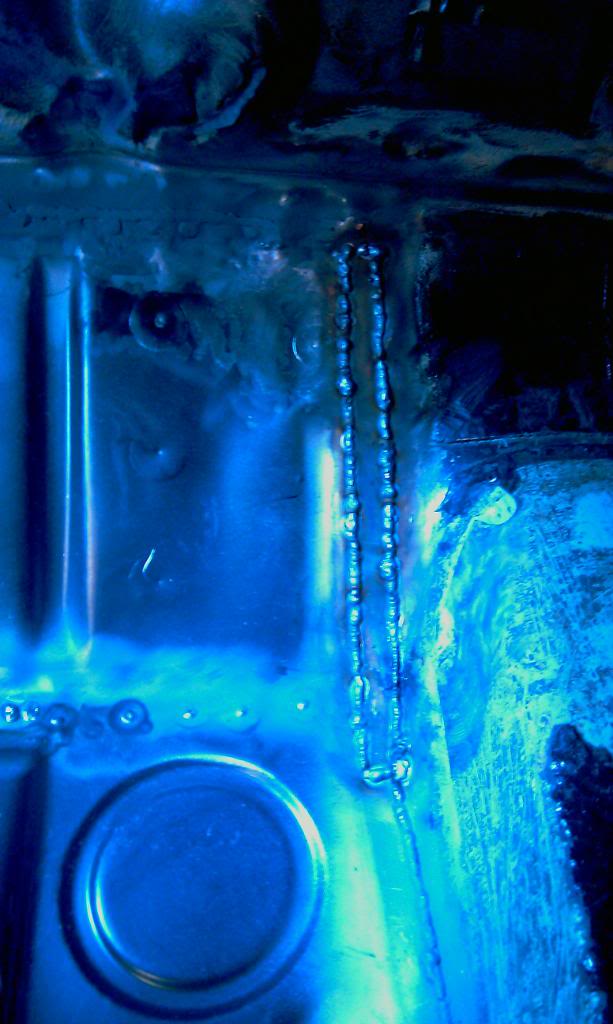
thats a hole load of plug welds!!
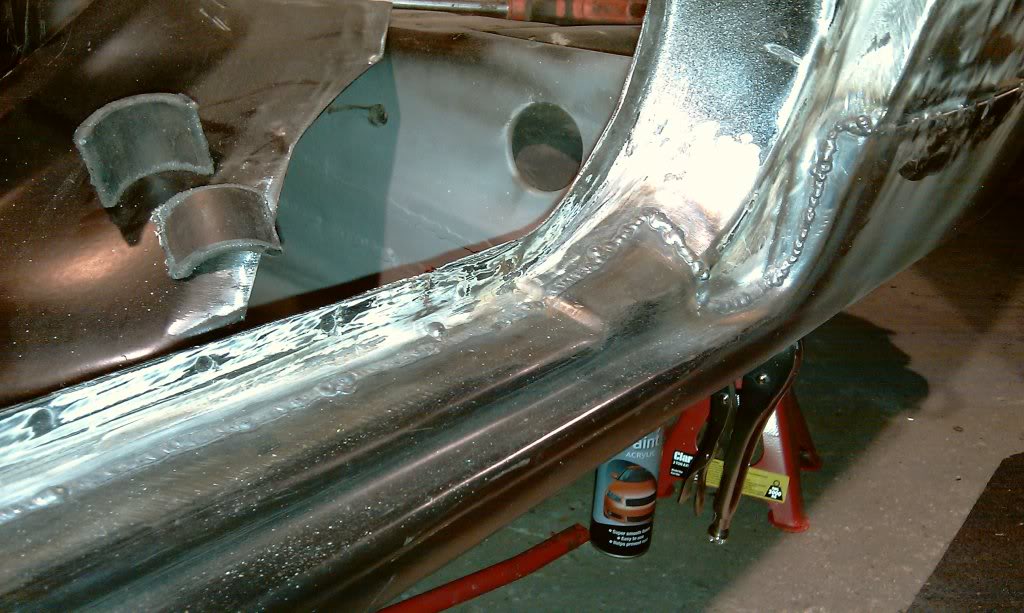
i also fineshed welding the outer arch to the inner with a series of plug welds along the joinin lip. i also added big seam weldsalong the joins in the tub for extra strengthening. weldin in t shirts is not a good idea for that amount of time. my right arm looked like i had a rash due to all the spark burns onit lol.
still got all that lot to gring down an make look pretty but had a bbq to go to. burgers over grinders anyday!!
mk1 golf - resto
mk3 polo breadie - daily banger
mk3 polo breadie - daily banger
0 guests and 0 members have just viewed this: None.