


Mars Red 81 - undoing of trackcar

Posted
Local Hero

Mars Red 81 - undoing of trackcar
You also shouldn't have needed to run that cable yourself either as the bottom of the boss should have a brass ring that touches the spring contact at "6 O'Clock".
Sounds like the boss is for the wrong car, but luckily had the right size spline fitting!
My Build Thread
All My Build Photos - https://www.flickr.com/photos/pix-al/albums/72157622794406840
My other hobby - www.pix-al.co.uk
All My Build Photos - https://www.flickr.com/photos/pix-al/albums/72157622794406840
My other hobby - www.pix-al.co.uk
Posted
Settled In

Posted
Settled In

After thinking i'd get the MOT done this week as all seat belts were fitted and interior put in, i've gone and done something stupid.
One of these is now in the drive! :mrgreen:


I've wanted to learn more of the mechanics side, as swapping a bit of interior is easy enough for anyone really. I have only ever changed spark plugs, air filters, rotor arms and batteries before, never even tried to change the oil on a car.
So i've gone and bought a MK3 16v Golf.
I thought this would be the best way as i can take my time removing the ABF lump, giving it a lick of paint, changing gaskets and general overhaul. Then take the 1.8 out of the Mk1 and go from there. I can also break/sell the other bits of the Mk3 and hopefully get some money back from it. Engine prices were about �300 ish and i got the whole car for �100 more.
I have the basics already. The Mk1 has the correct driveshafts as it has a MK2 020 gearbox. I'll keep the Digifant management and try to splice the Mk3 loom into the Mk1 loom which is a later 83 cabriolet one i think.
For the exhaust manifold i think i've decided to do the custom job with the top part of the Mk3 manifold chopped and welded to the existing Mk1 system, i'll get the lambda put in at the same time.
The power steering pulley will be going as i've seen mentioned on other threads and i'll also get a Mk3 8v alternator with the spring to avoid chassis leg problems.
Have i forgot anything?
Except all rationallity
Trying to do an engine swap, give me strength! :redfaced:
Posted
Settled In
Here's how it stands at the moment:
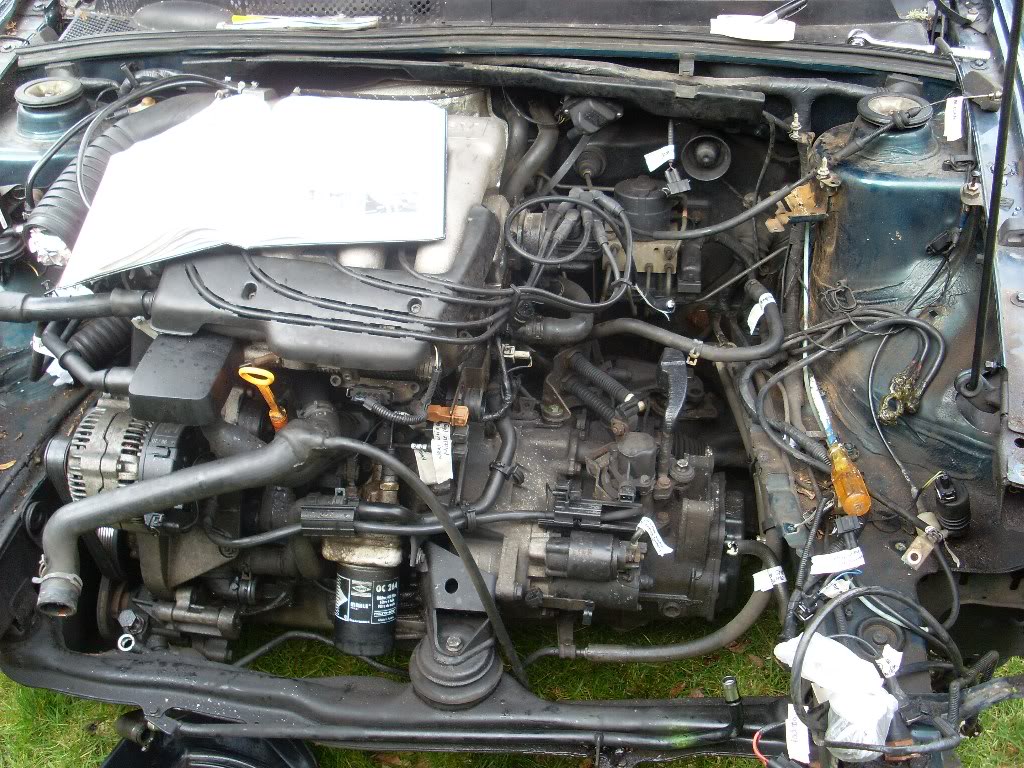
I've managed to label everything, whether i think i need it or not.
Haven't found any problems with nuts/bolts snapping rounding off, but there's always time
I think
i've just got the exhaust and driveshafts to detach from the engine and box. Next weekend i'll push the car into the garage and i'll use my diy hoist setup to lift the engine and box out.
Posted

Local Hero
keep it up :clap:
1983 Golf 1.3 Driver:

Posted
Settled In
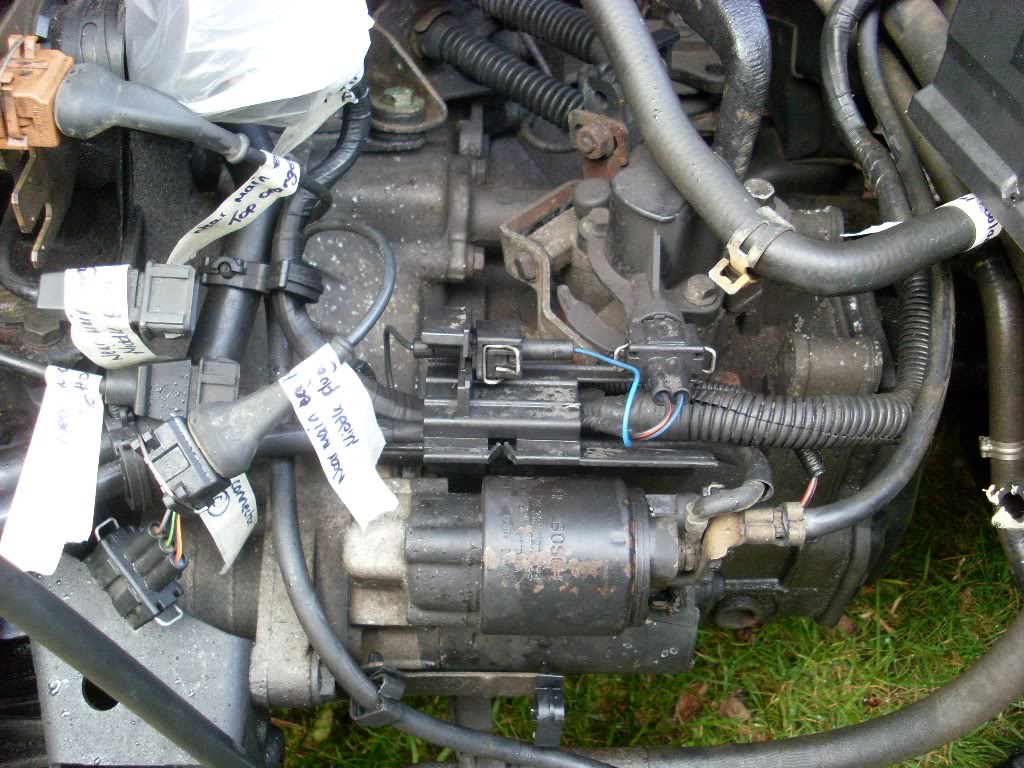
Because i haven't the foggiest what i'm doing i am having to label everything and taking my time over it, reading and then re-reading the Haynes manual.
One thing i need to ask someone, what is this? Googled it
and found it's the vacuum solenoid valve. Where is the best place to disconnect it? The clips look like right buggers to undo and then finally redo when re-installed in the Mk1 if i need to. There is the connection to the throttle body and then the ones on the valve and then ones to the cylinderical bit in the offside wing. Which is best?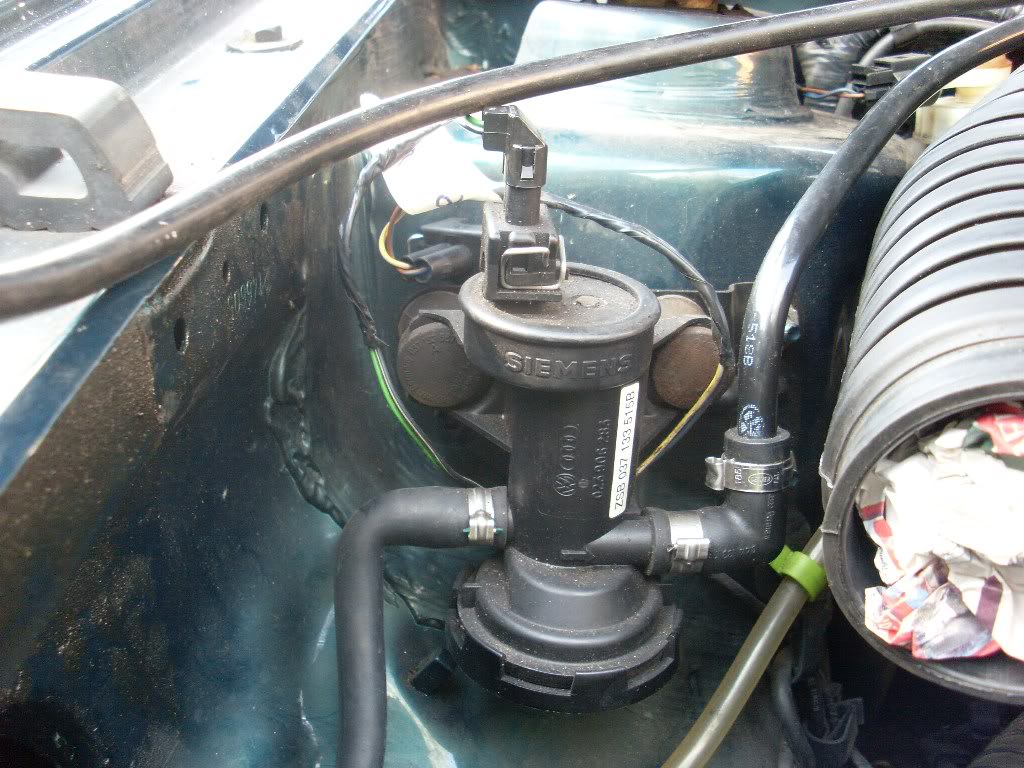
Posted
Settled In
The drivers side is a right bugger to get to. I tried from underneath but couldn't manage it, so i ended up disconnecting it at the hub. This took all day, one socket wrench and a few choice swear words
The only other thing stopping me removing the engine was the exhaust. I tried undoing the 3 bolts that attach the system to the downpipe but they were nicely rusty and rounded.
I then thought i'd angle grind the exhaust just past the lambda probe and then deal with it once out of the car. Unfortunately the angle grinder disc was too small and i couldn't chop through all the exhaust and then it disintegrated
 so i had to make a quick trip to B&Q and get a fresh disc.
 I ended up angle gringing one bolt and hacksawing the other 2 so i now the exhaust is free
but my shoulders ache Tomorrow could be the day i remove the engine, i have to decide how to store it as i don't have an engine stand and don't want it sitting on the sump, any suggestions?
Posted
Settled In

Dad i managed to get the drivers side driveshaft off today then luckily all other nuts and bolts were not corroded. We used a wooden frame to support the chain and block. We positioned the uprights so that we were able to move the ABF between them to adjust where the hook sat in relation to the engine. Then just lifted the engine straight out, no hassles whatsoever.
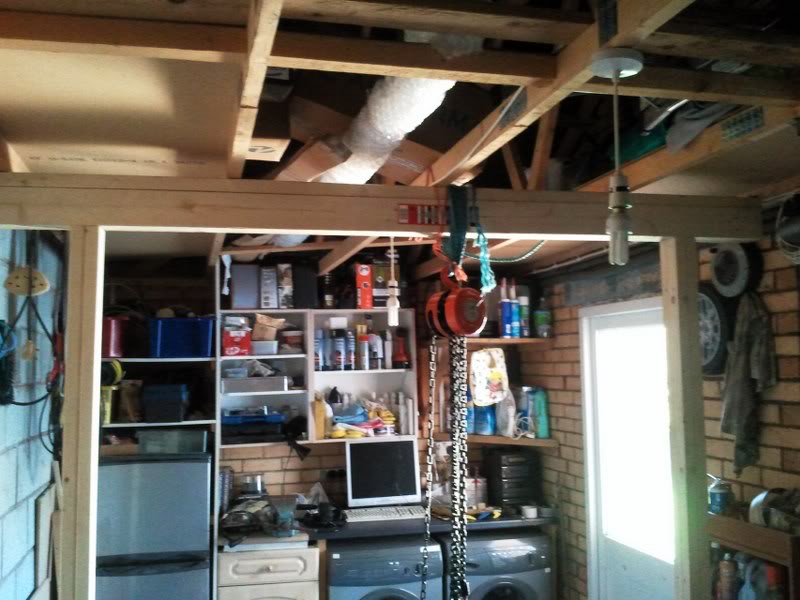
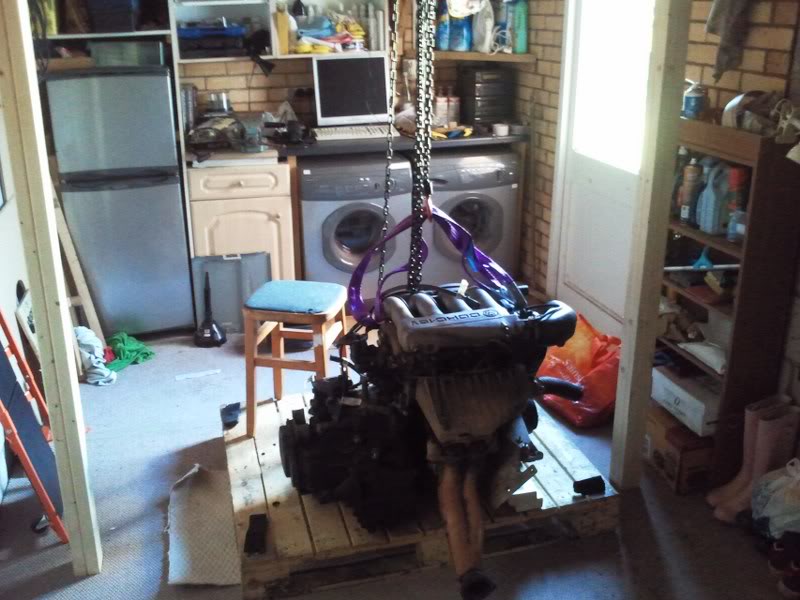
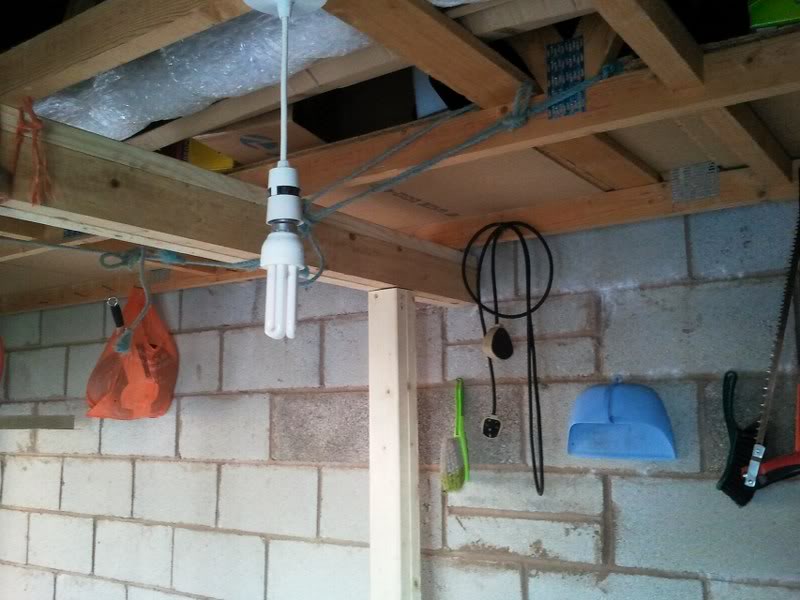
There was no weight going through the garage roof at all, the ropes were just there to stop any movement of the frame, although it was pretty solid anyway.
Going to keep the Mk3 shell for another week and try and sell as many bits and bobs of it then i'll get it scrapped.
Now i have to get some big wheeled castors for my pallet so i can move it outside and give the engine a good degrease and possible paint. I have some Autoglym engine and machine cleaner so is it best to leave all ancillaries on and pressure wash it or …. take everything off cover all holes and wash from a distance to prevent any water ingress? What about the electrical connections and connectors on the engine?
Looking forward to the long weekend next week to hopefully do similar on the Mk1, but on my own 8O
Posted
Local Hero
That is a good idea and the wood will be re-useable when you have finished!
My Build Thread
All My Build Photos - https://www.flickr.com/photos/pix-al/albums/72157622794406840
My other hobby - www.pix-al.co.uk
All My Build Photos - https://www.flickr.com/photos/pix-al/albums/72157622794406840
My other hobby - www.pix-al.co.uk
Posted
Settled In
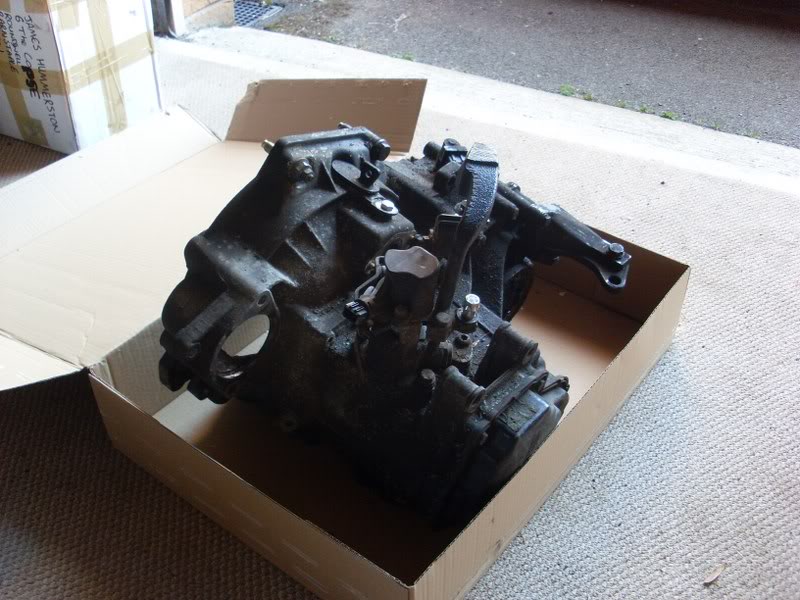
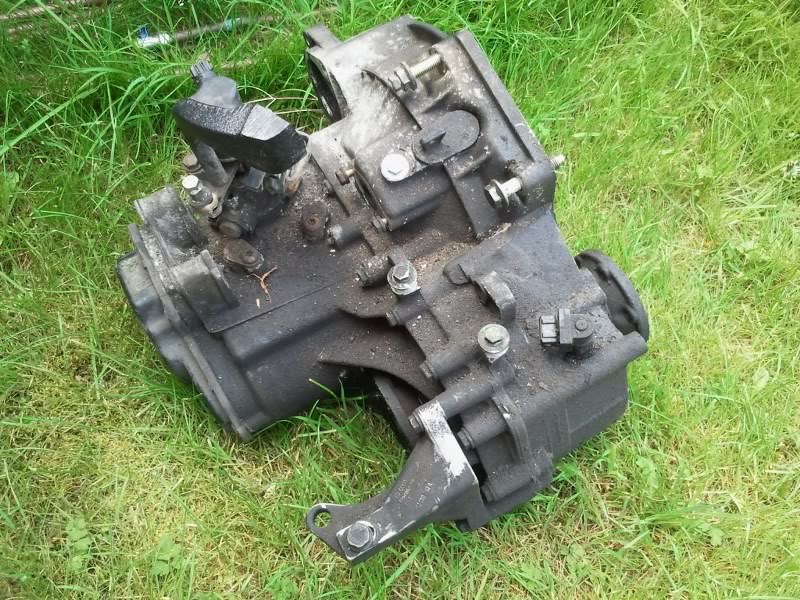
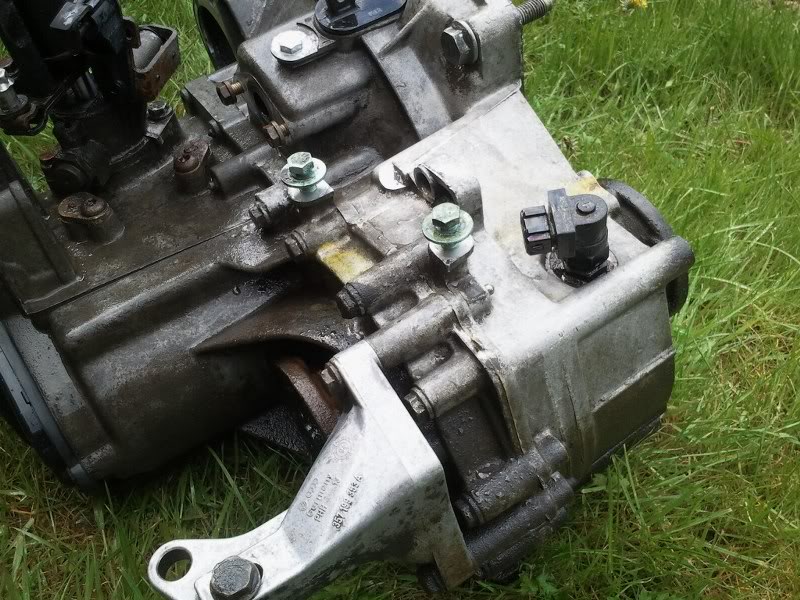
I had a go at getting the gearbox off and ended up like this after having to buy a new 1/2" socket set to fit the breaker bar. The 1/2 " adapters you get from Egay really are bad, i've now snapped 2 in as many weeks

I now have a 02A gearbox that will be for sale on various forums
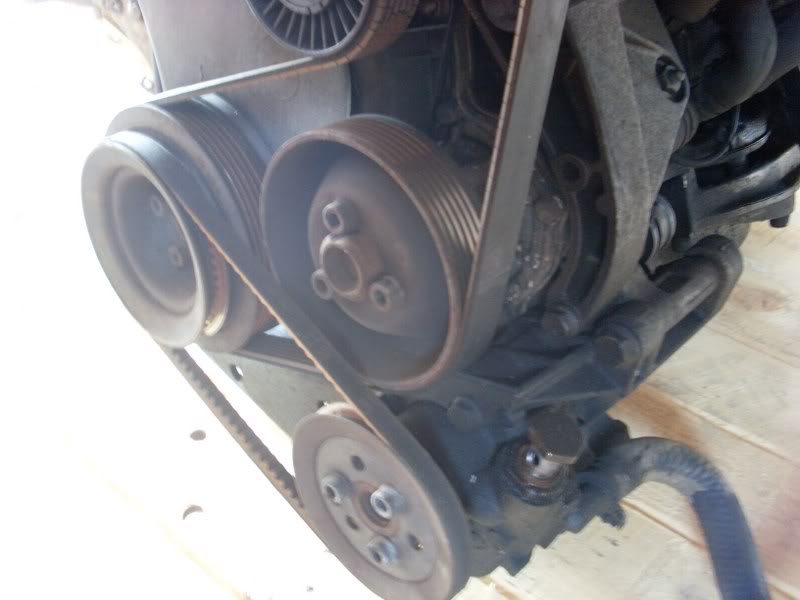
I then started trying to remove the alternator and starter motor. This photos just for reference really:
I managed to get a 8v alternator with the spring and bracket from one of the forums which turned up today, so that can be fitted once the engine block has been cleaned and given a quick paint.
Hopefully tomorrow i can strip the rest of the ancillaries off the engine and give it a clean. I also want to remove the engine loom from the MK3.
If all goes to plan (which it never does) i can start disconnecting stuff on the MK1 at the weekend
Posted
Settled In
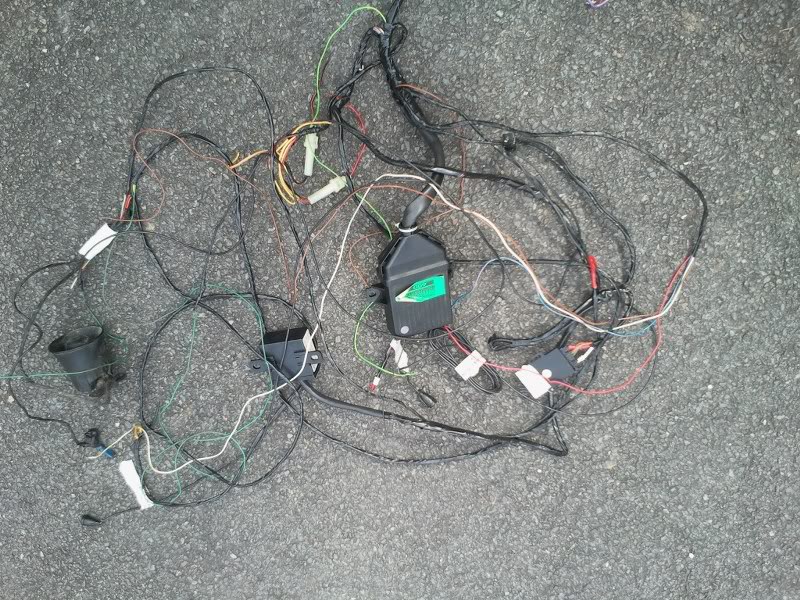
I also managed to remove the main engine loom from the car all labelled up. This was easy enough until i had to pass the headlight part of the loom behind the brake servo
Getting at the nuts securing the servo behind the pedals nearly drove me barmy :evil: I then gave the gearbox a clean with the Autoglym engine and machine cleaner i had on the shelf but not used.
Before:
After:
I finally bit the butllet and ordered an engine stand today as well. The pallet i have on castors isn't working
Can't wait for that to arrive so i can move the ABF out of the garage. I can then move the MK1 in to disconnect everything to remove the DX engine in that one
Posted
Settled In
Just in time for the long weekend so hopefully with a bit of luck the ABF will be cleaned, painted and all ancillaries re-bolted to it ready to put in. 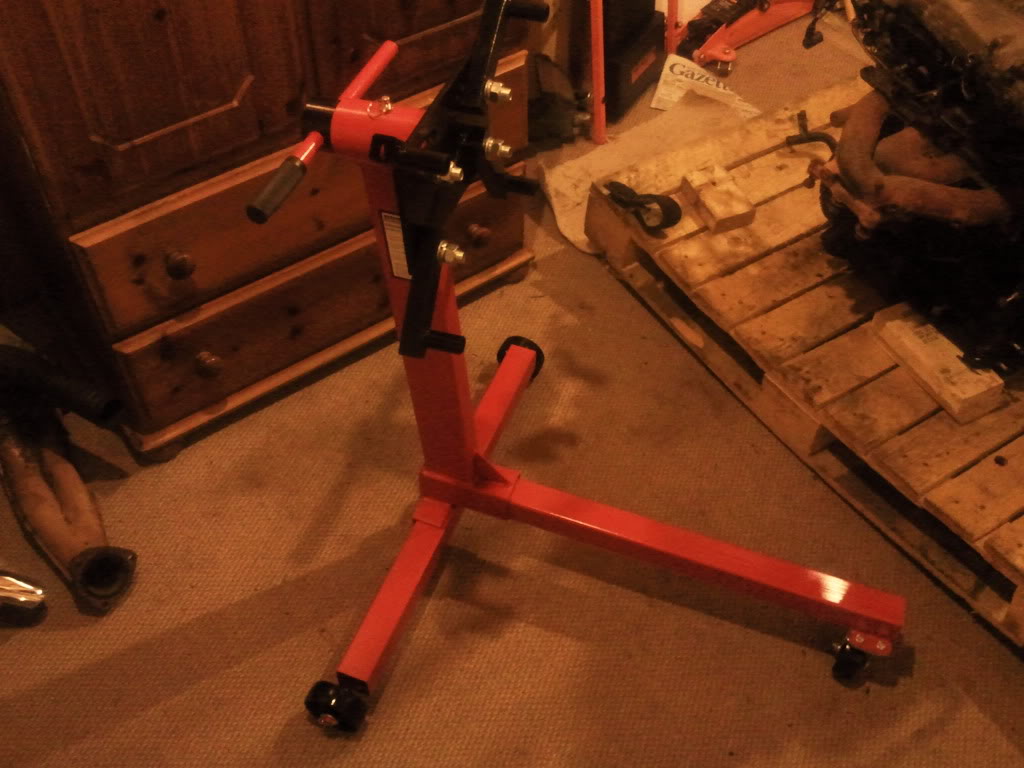
Also hoping to remove the 1.8 DX engine in the MK1 at the moment.
I also got my hands on a Milltek exhaust manifold today for the 16v conversion. I'm unsure whether it will fit as from all the searching i have done it looks like they only did MK2 16v ones, but it was destined for a caddy (but plans changed) and was described as being for a Mk1 Golf. I'll wait until it arrives and then if it isn't any good i'll sell it on. Pictures will follow when i receive it.
Posted
Settled In
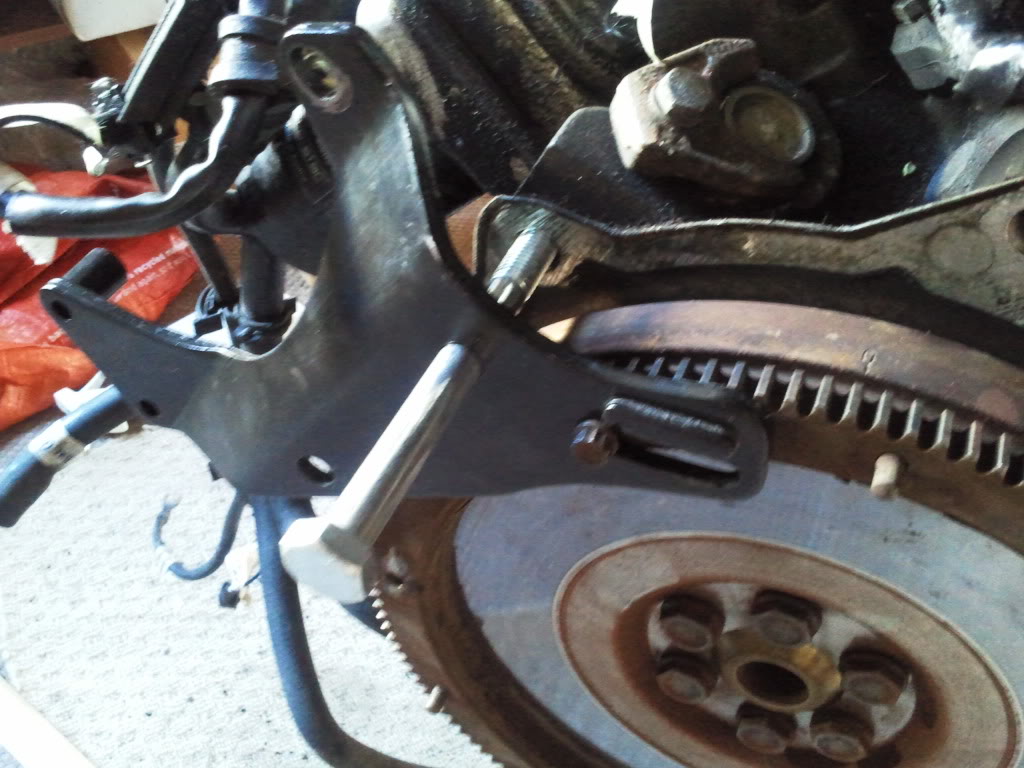
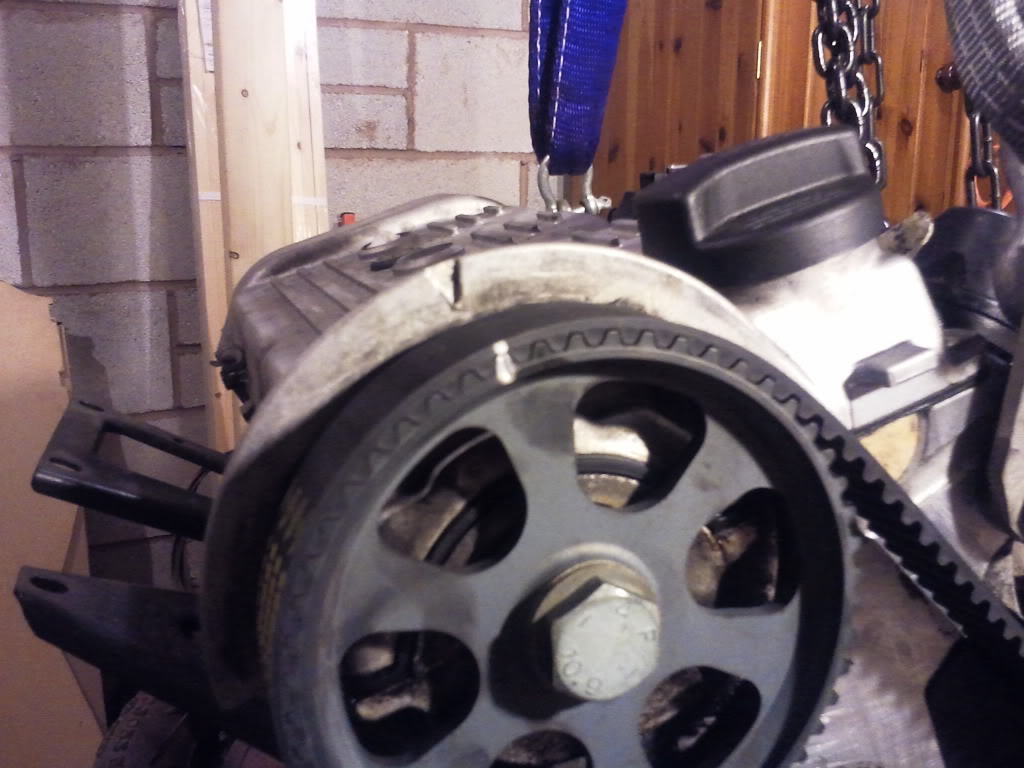
Tonight i've managed to get the flywheel off. I marked where the indicator on the flywheel when the pulley lined up with the lower cambelt cover so i can put the new one on all lined up.
As I've said before i've never even changed the oil on a car, so to fabricate a bracket to hold the flywheel to undo the bolts holding it on was a bit of a worry for me.
However, i did get round it by using the bracket for the power steering tension
Posted
Settled In
I removed all wiring and labelled it up and then got the driveshafts unbolted. The downpipe was a real pain to get off the exhaust manifold as it had the C type clips, but i used the exhaust clamp trick to prise the C clip open enough to seperate the downpipe.
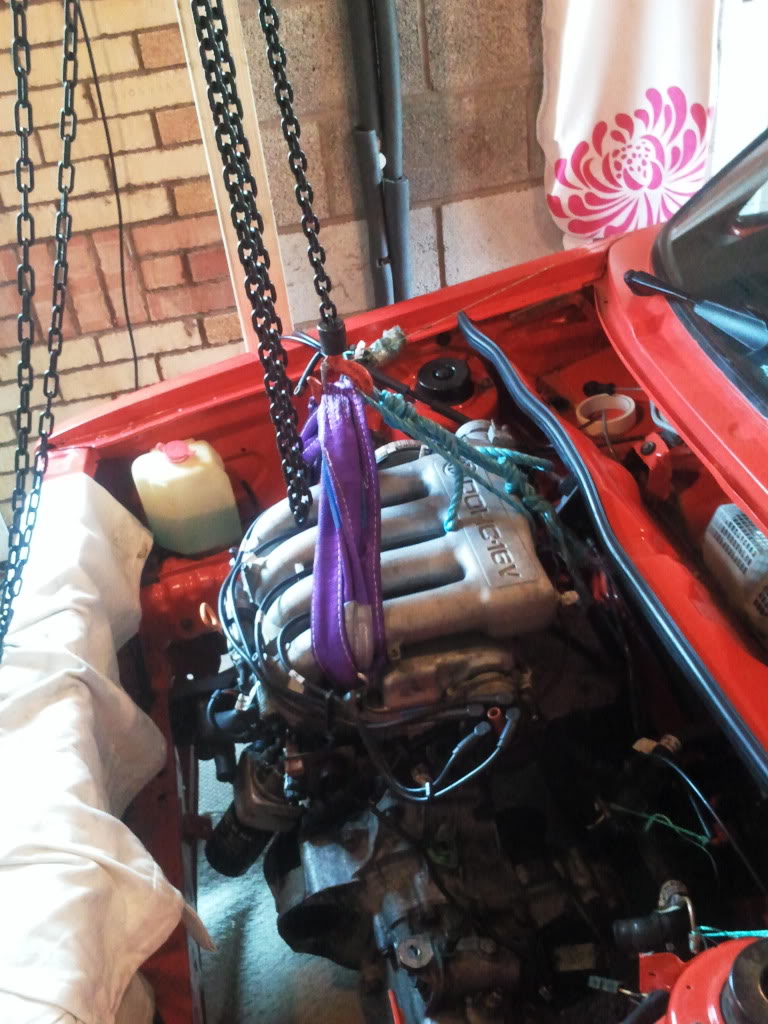
I then took the weight of the engine using the hoist and undid all the mounts, but the driveshafts wouldn't fully come out of the gearbox. After a few choice words i decided to jack the car up so i could unbolt the gearbox from the engine and take it out from below. As i did this one of the driveshafts fell to the floor so then i could get the other one out, phew!

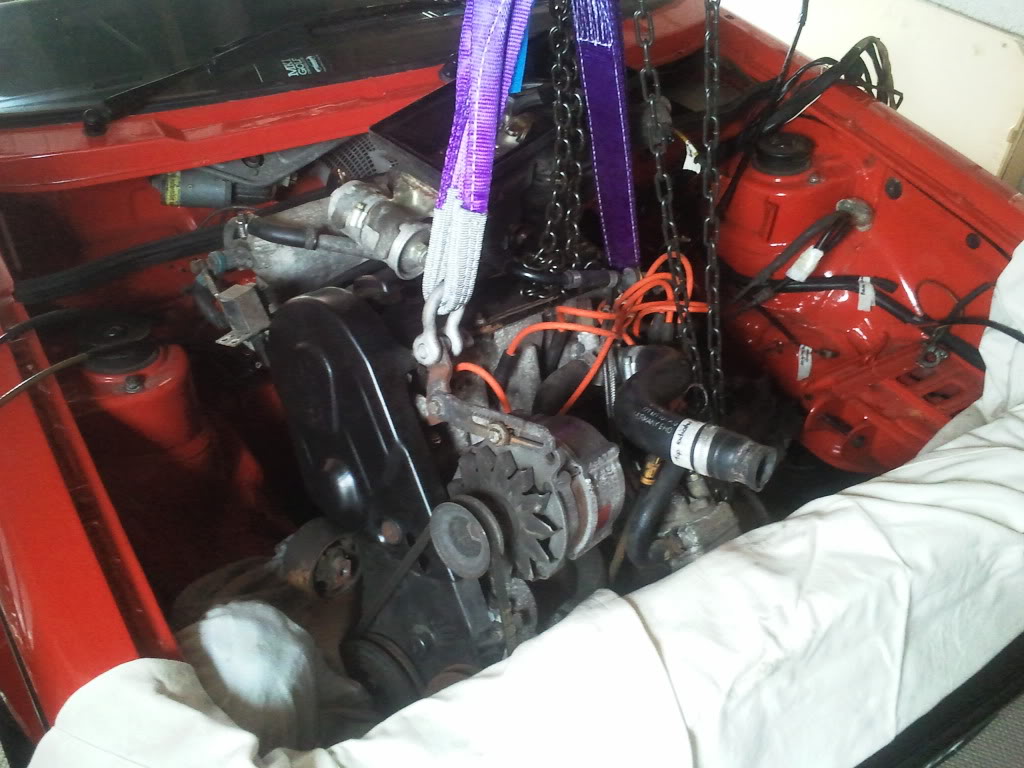
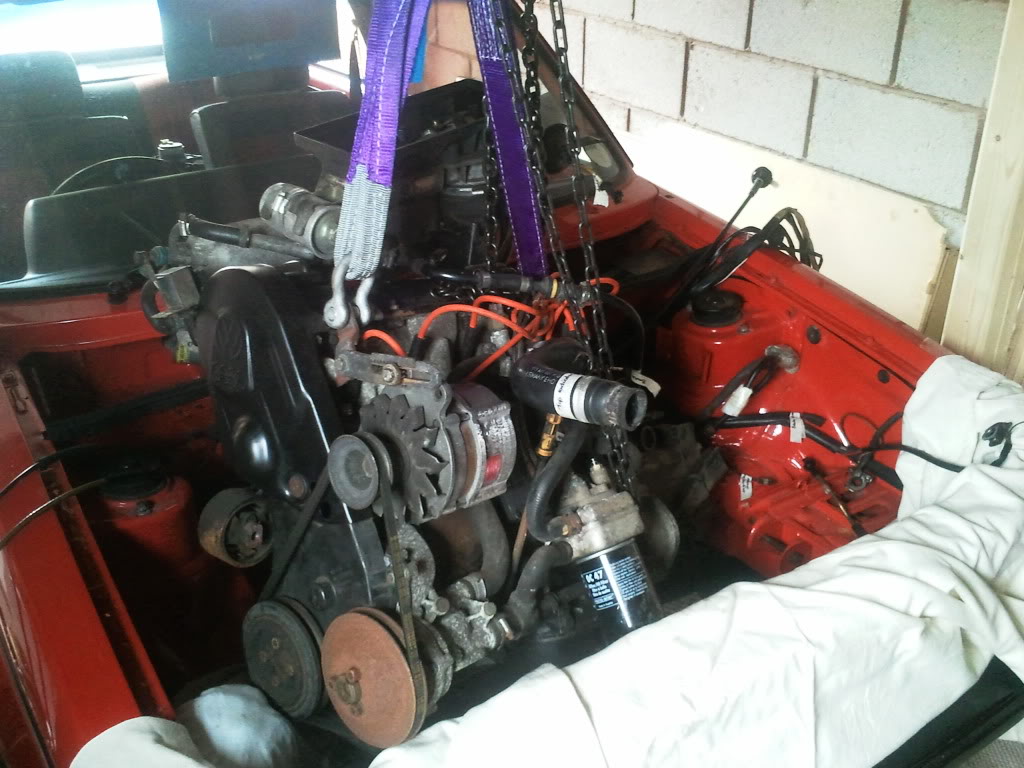

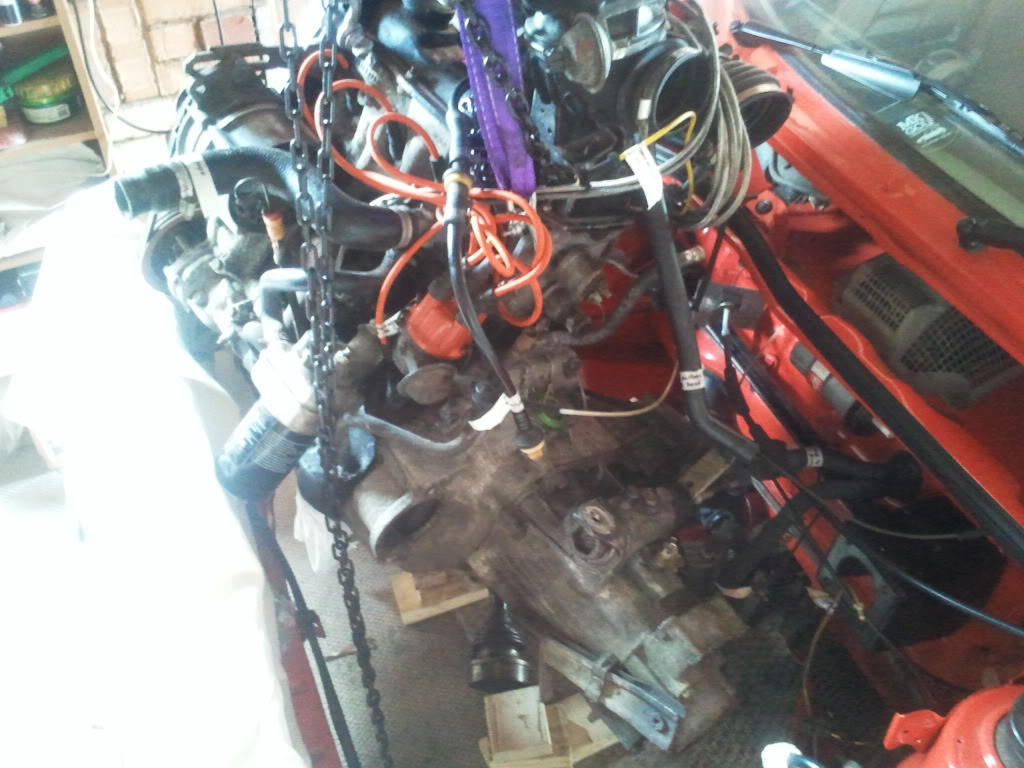
Eventually i had this
I was quite pleased with myself as one month ago i hadn't changed a spark plug let alone take an engine out on my own without damaging anything or bringing the garage down 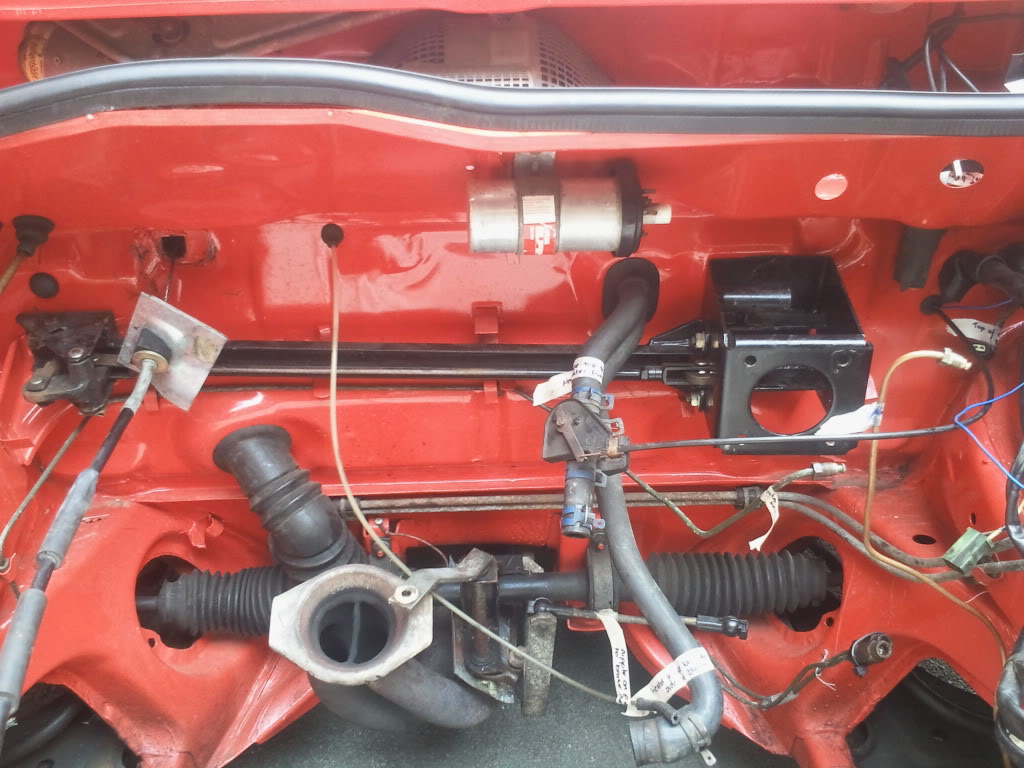

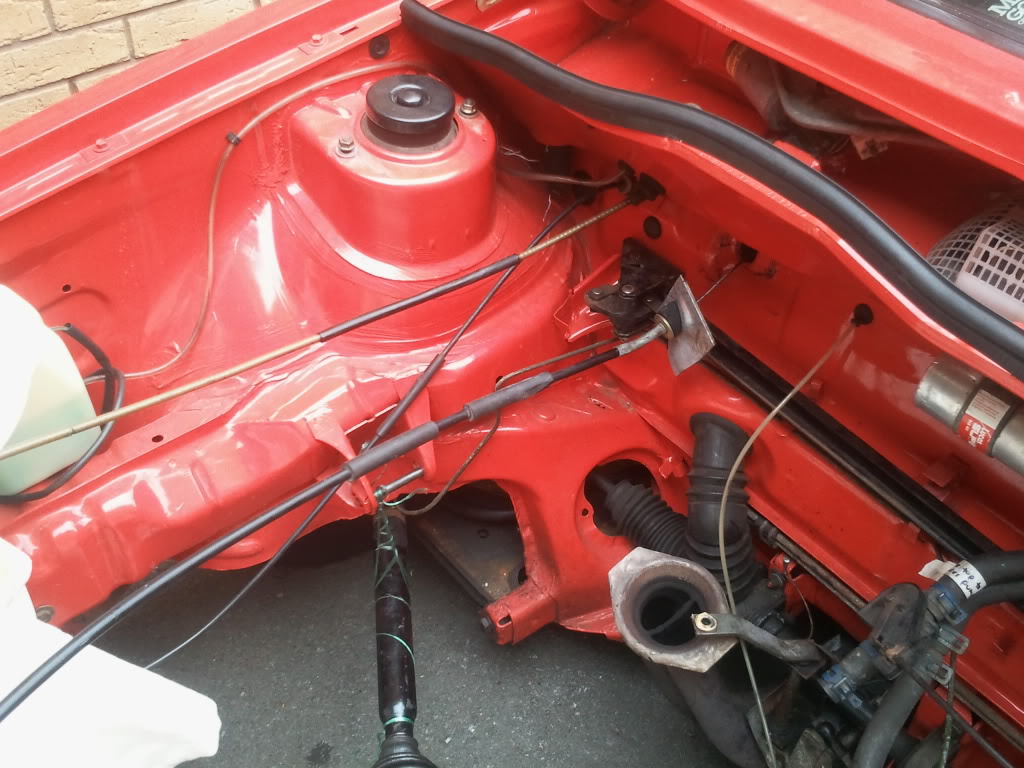
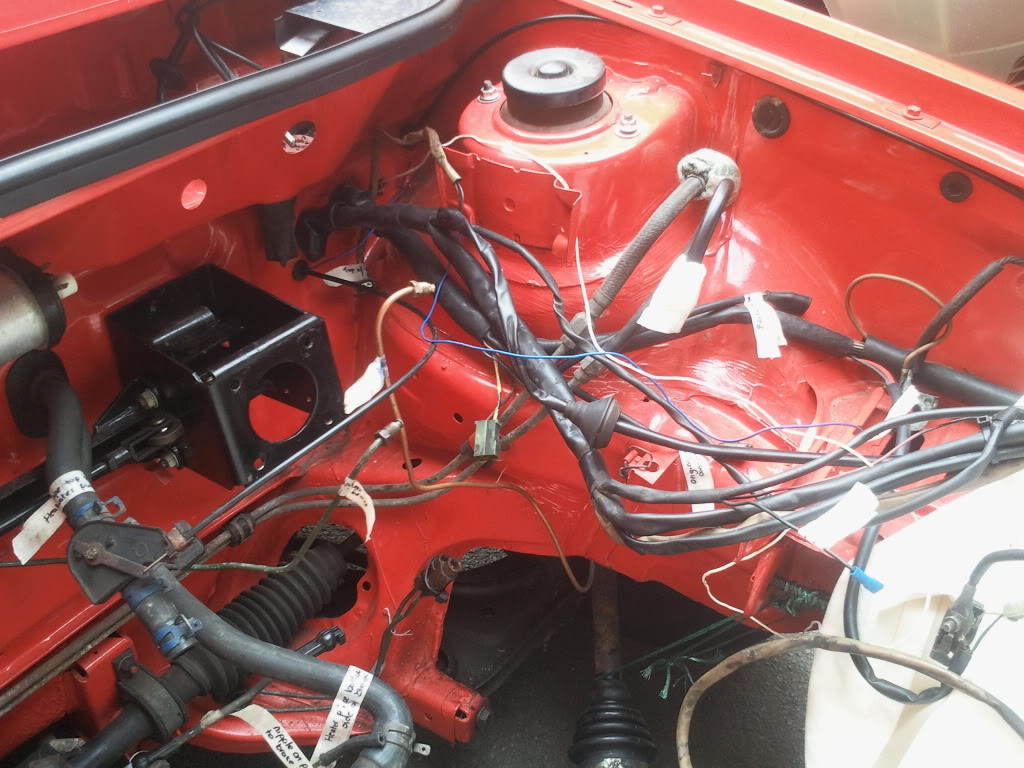
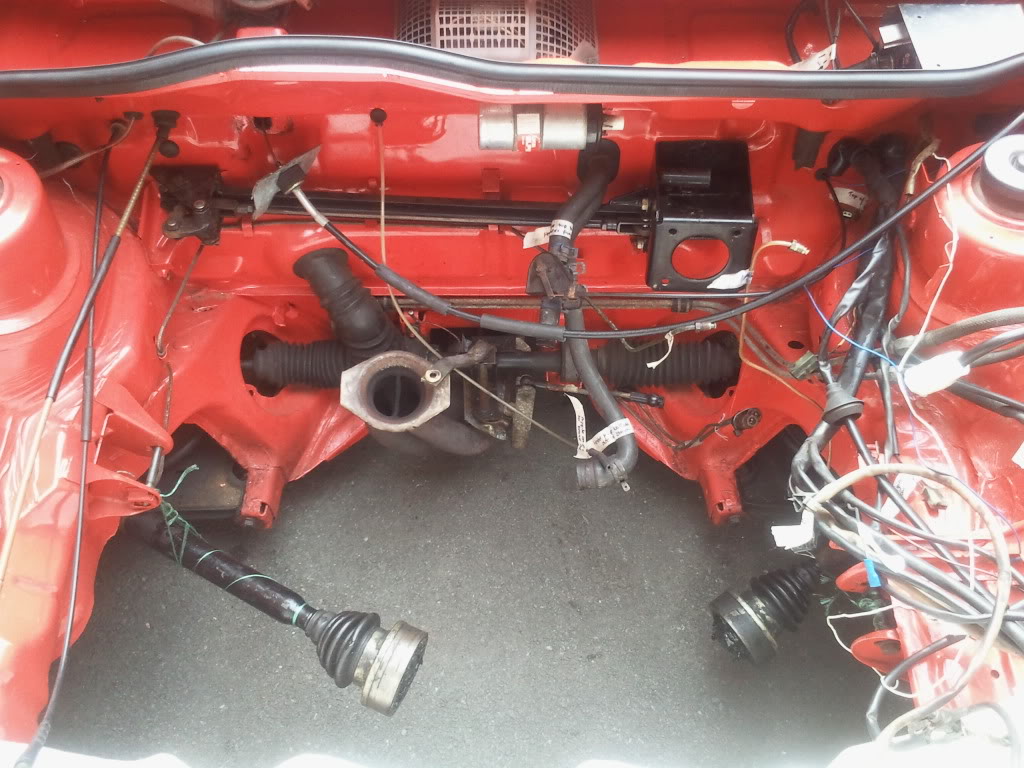
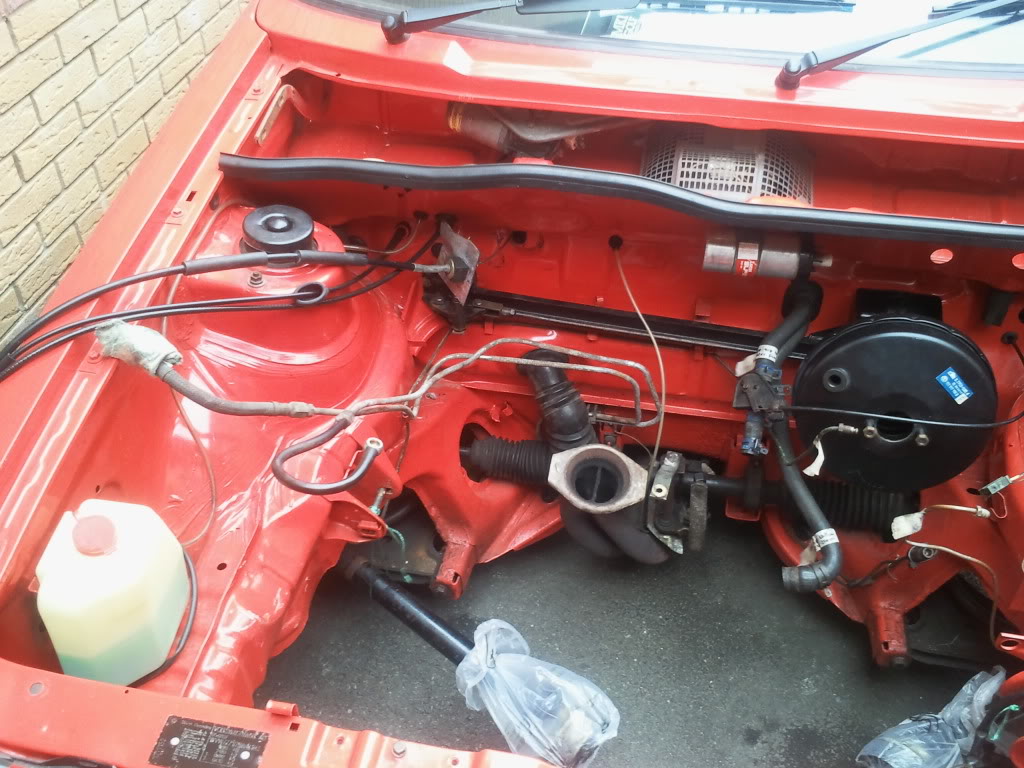
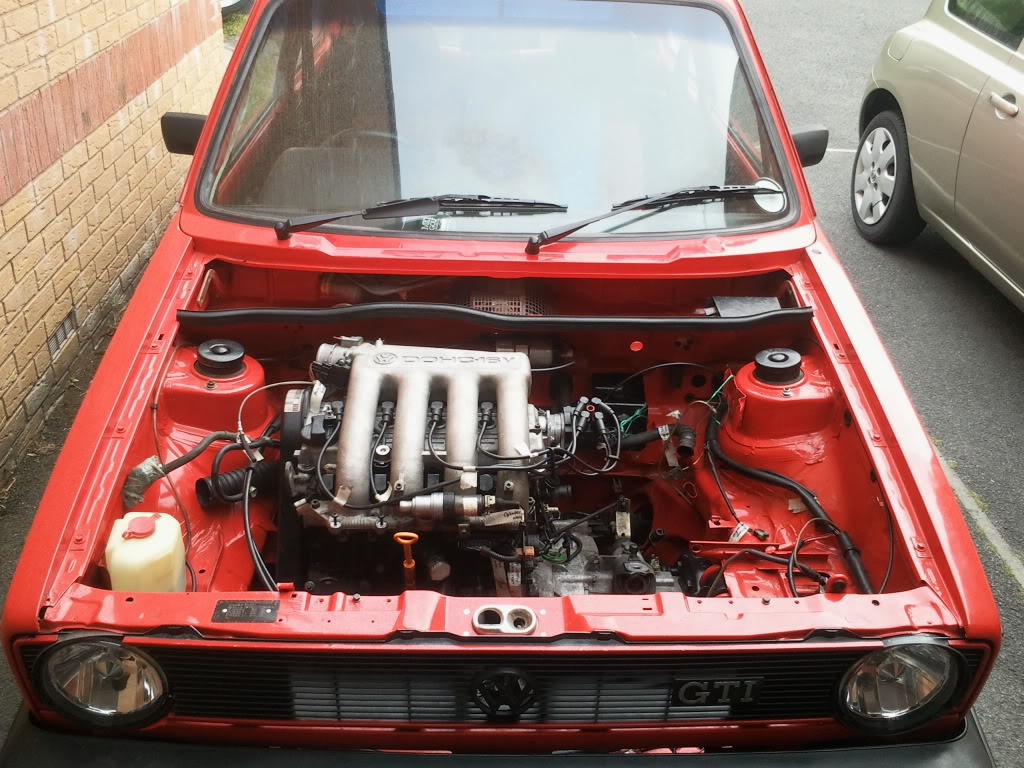
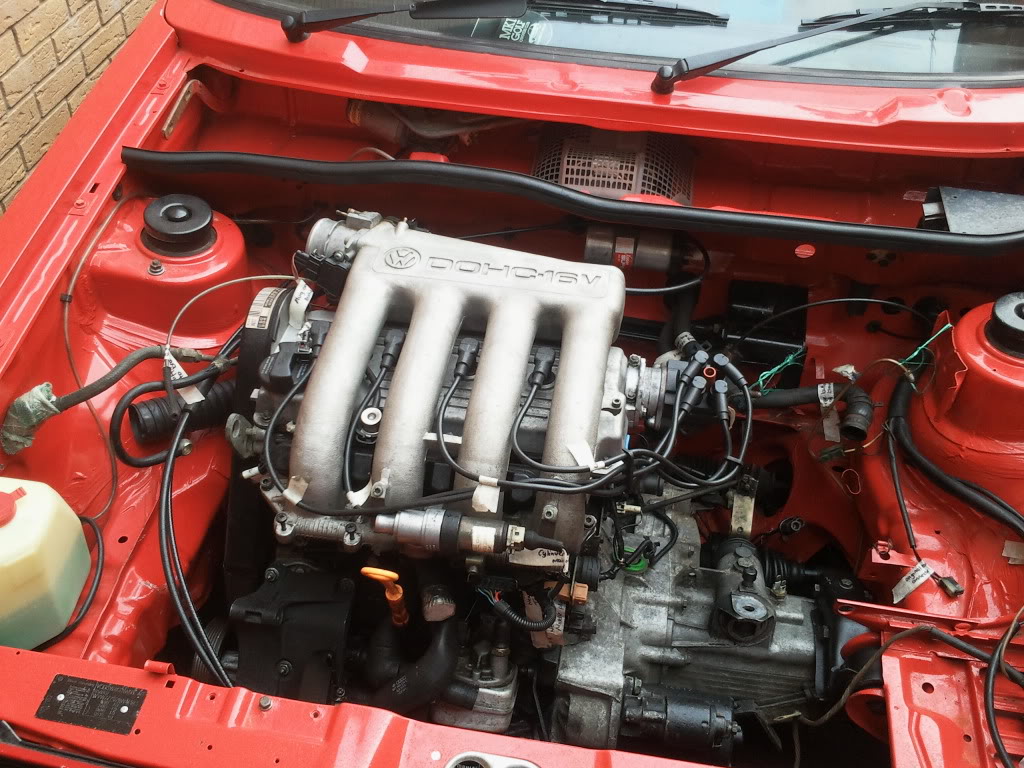
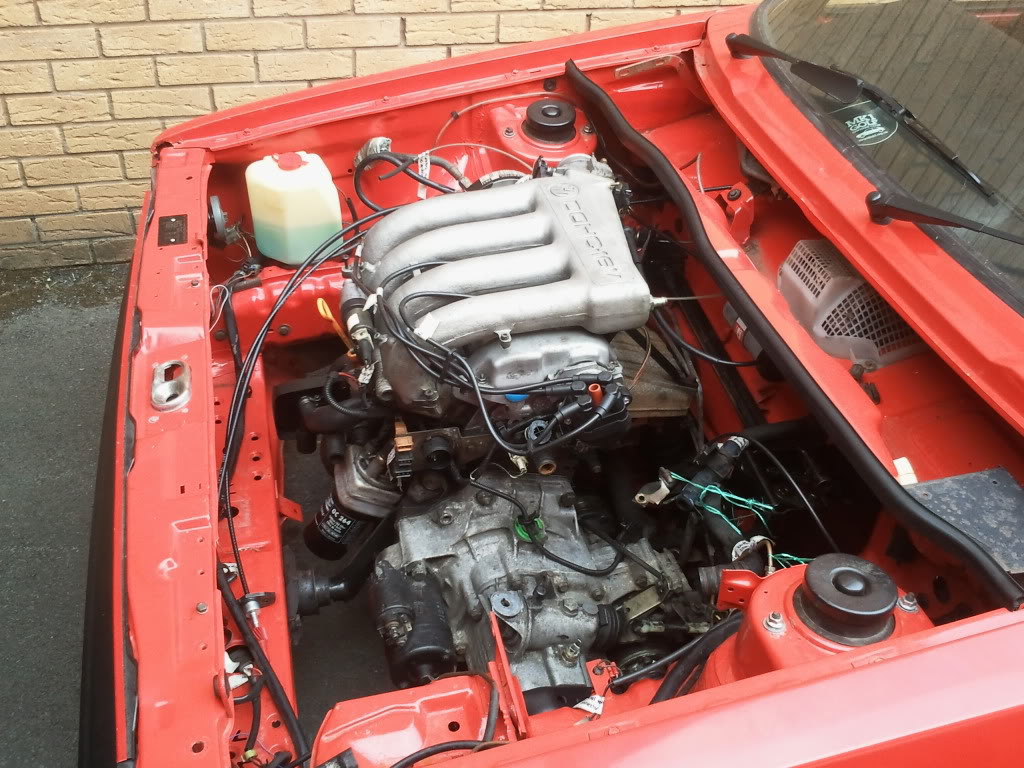
The condition of the engine bay is very good really as the respray was only a few years ago i think. Evertything looks ok, no signs of rust so will just give it a quick clean and then sort the wiring out during this week.
I've got a load of stuff on order for the ABF engine. Gaskets, spark plugs, dizzy cap, rotor arm, cambelt and tensioner, oil filter and sump gasket
Once that lot comes i can put it all on and try to fit the new MK2 16v Sachs clutch kit that has already arrived and put the gearbox on the ABF.
Posted
Newbie

Posted
Settled In
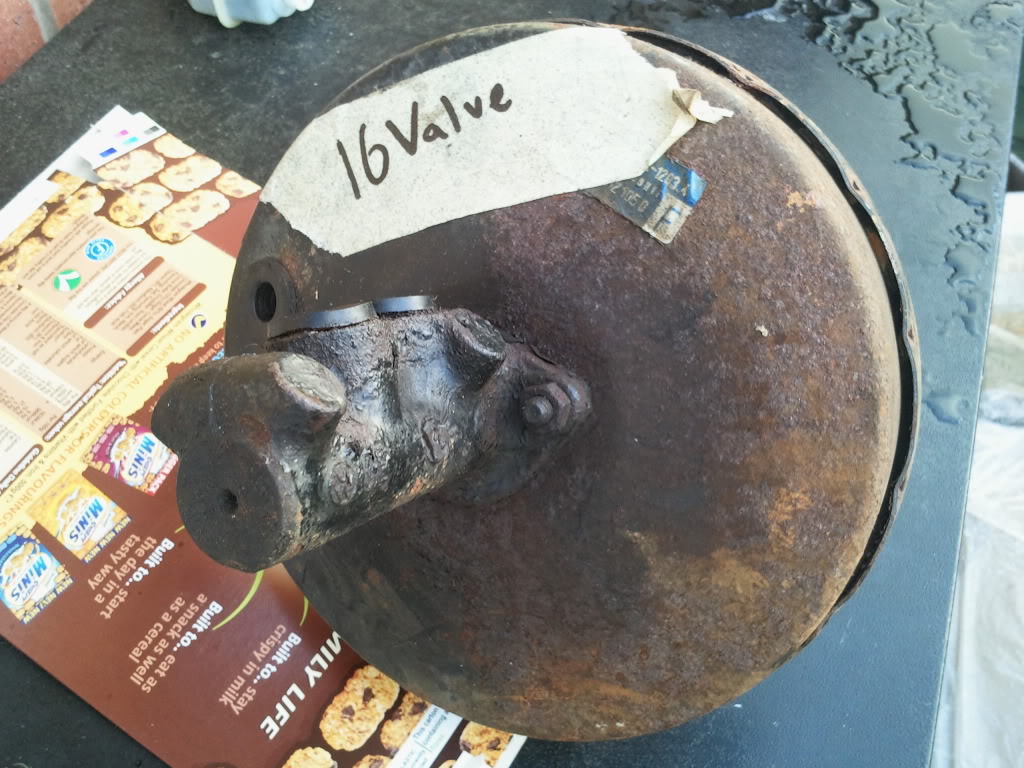
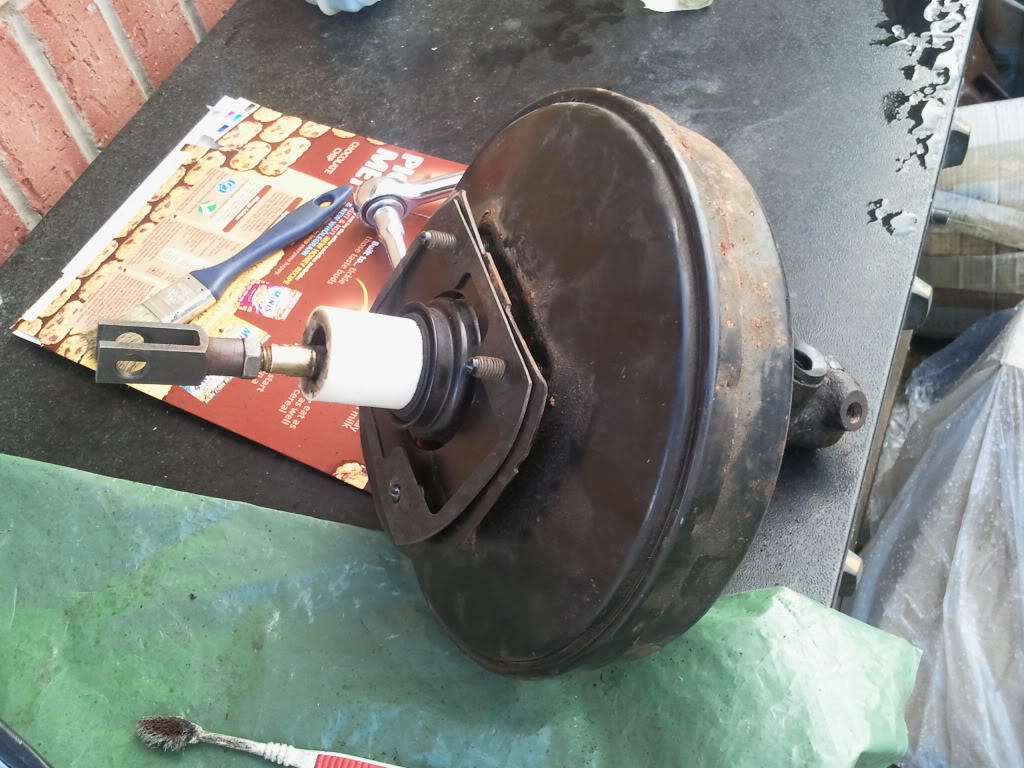
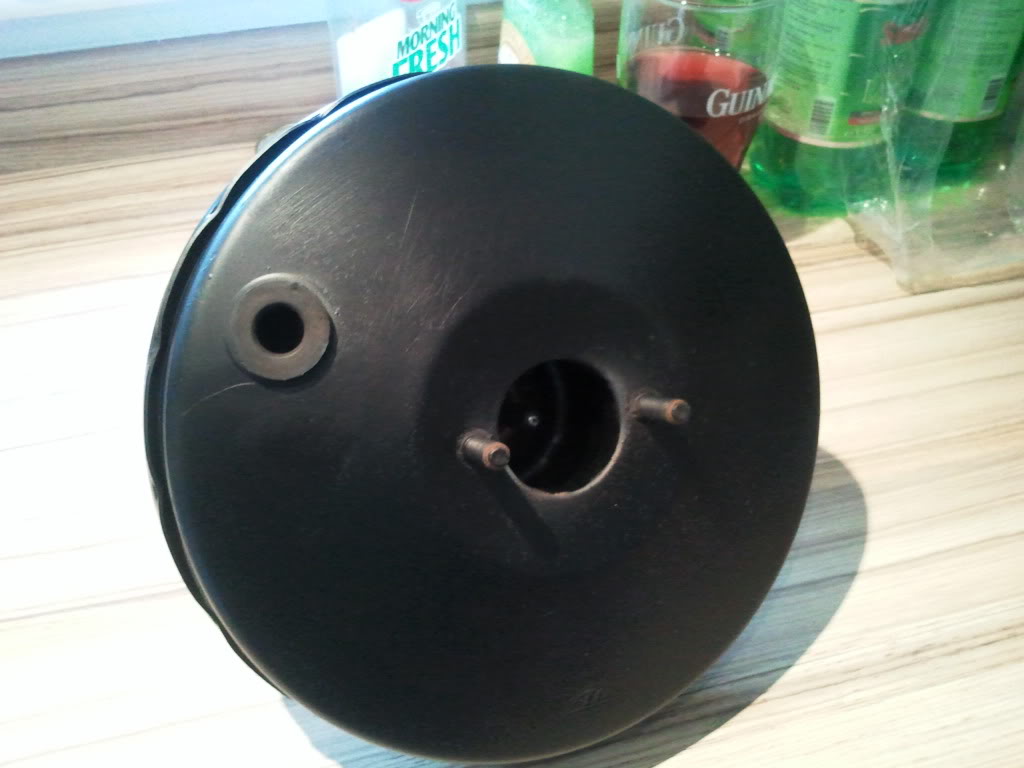
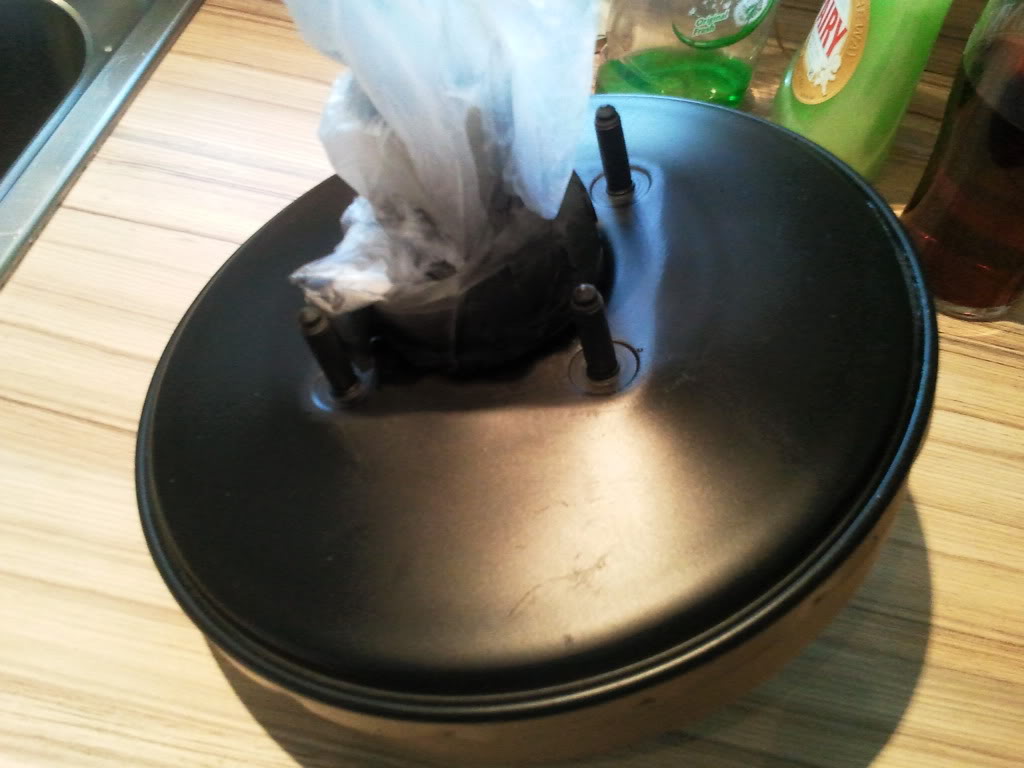
I got a MK2 16v servo and m/c off a forum. It had a bit of surface rust so i had a go at getting it looking a bit better and also protecting it from any further corrosion.
Before and after photos:
I also had a delivery from AVS parts
Got my new Sachs 16v clutch kit, mk2 1.3 throttle cable (1360mm long), cambelt, tensioner, alternator belt, distributor cap, rotor arm, gaskets, spark plugs, oil filter, sump plug and seal and thermostat.
Going to go and have a play now to see if i can work out how to fit the cambelt and tensioner. I opted to get the old tensioner (non-auto tensioning one) and then got the new stud, washer and nut from my local steelers.

Posted
Settled In
Today was the day that me and my dad had a go at getting the engine in. Last night i managed to bend the fuel lines with some pipe benders to the drivers side. They aren't secured yet as i wasn't sure they were in right without the engine being in. I'll also need to sort the ends out to secure to the ABF fuel rail. I have the original hoses that connected to the undercar fuel lines.

Then today the engine went in
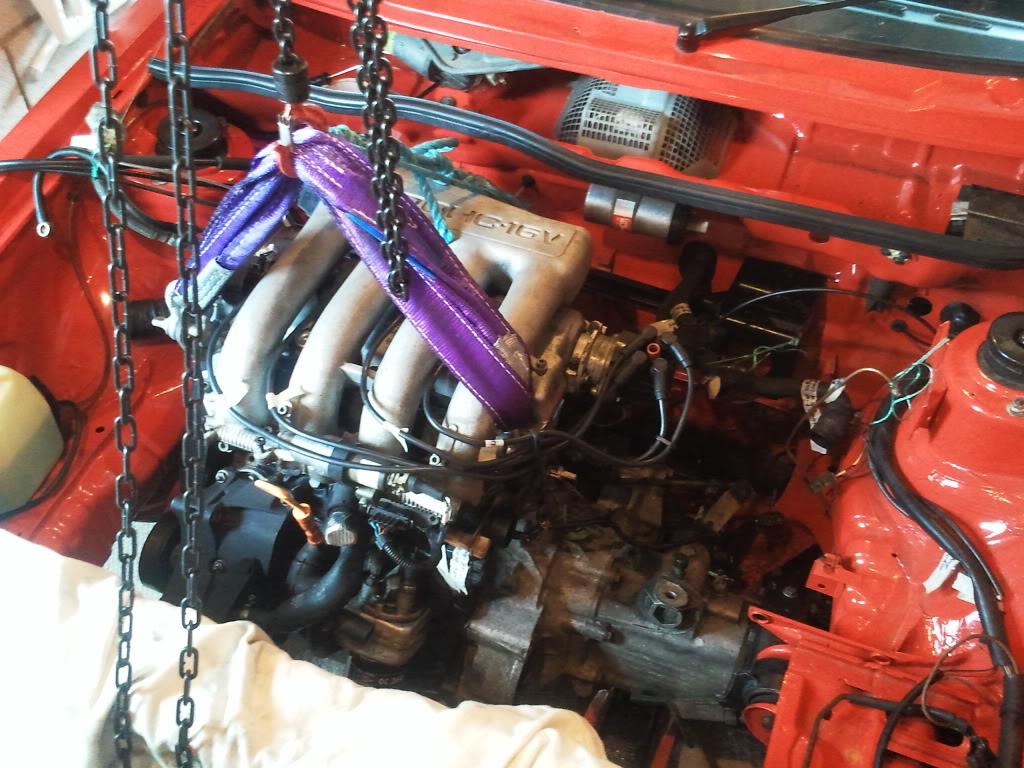
We got the engine in but the driveshaft didn't want to go into the gearbox, so we had to undo the side engine and gearbox mount to be able to swing the engine slightly from one side to the other to get the driveshafts in.
Finally we arrived at this point. The engine is fully bolted in with all 4 mounts secure. The driveshafts are on and tightened so now i can start the job of wiring, radiator, brake servo and alternator. The exhaust will be done by a garage as i can't or haven't got access to a welder. Not bad though as this will be the only thing i won't have done myself
Posted
Settled In
Posted
Settled In
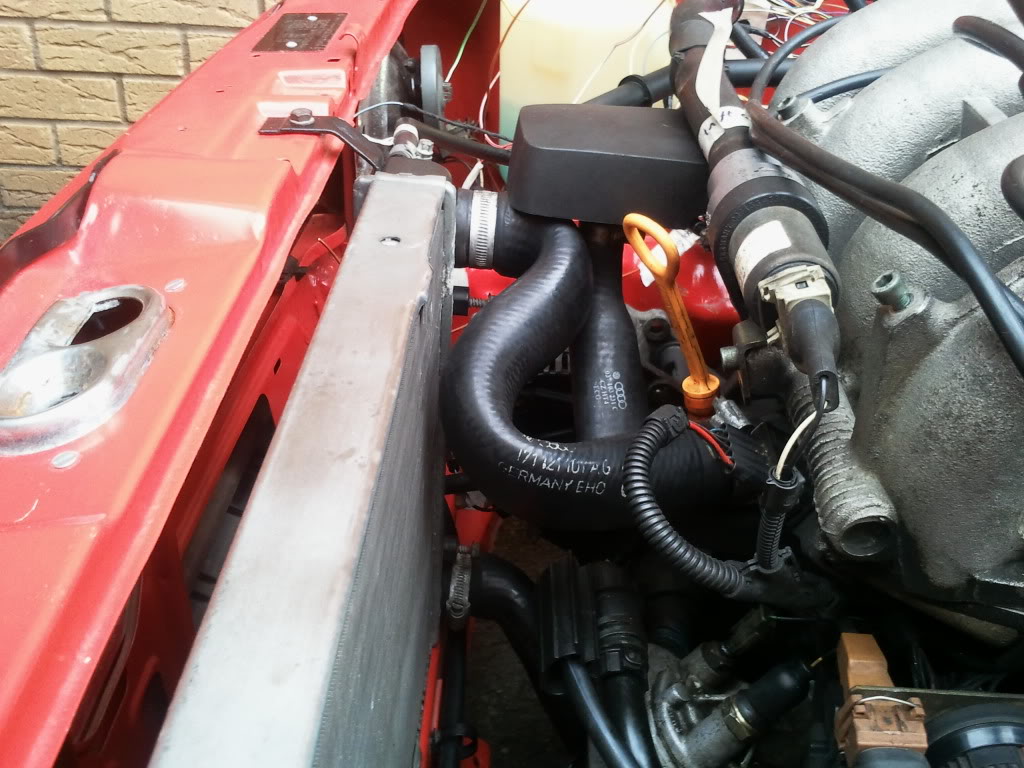
I put the radiator in as well but I'm not sure about the top pipe, is it ok to cut it as it has rubber inners at the ends to keep water tight, but not further down the pipe. I haven't even put the cowling on yet!
I also found a good spot for the ecu wedged in by the tci bracket.


Posted
Old Timer

0 guests and 0 members have just viewed this: None.